Xero Data Integration Tools That Fix the Finance & Data Workflows

Most Xero users hit the same wall. The accounting is clean, the bank feeds work, invoices go out on time. Then someone asks for a cash flow forecast by entity, or a dashboard that combines Xero revenue with Salesforce pipeline, or an automated weekly P&L to six clients. Xero’s native reporting cannot do it. Over 170 G2 reviews flag limited reporting as the platform’s biggest frustration – not because Xero is broken, but because it was built to record financial data, not analyse it across systems. These seven Xero data integration tools solve that gap. They cover spreadsheet reporting, workflow automation, and data warehouse pipelines, with real user feedback and current pricing for each.

At a Glance
Xero’s reporting limitations are well-documented. These seven tools cover the three most common ways teams work around them.

For spreadsheet reporting: Coefficient connects Xero to Google Sheets and Excel alongside 150-plus other sources — best for finance teams that need Xero data blended with Salesforce, Shopify, or HubSpot in one place. G-Accon is the Xero specialist — deeper accounting templates, stronger multi-entity consolidation, and bulk two-way sync — best for accounting firms and bookkeepers who live entirely in Xero.

For workflow automation: Zapier handles simple trigger-based automation between Xero and apps like Shopify, Stripe, PayPal, and Gusto. Fast to set up, free plan available. Workato handles more complex enterprise workflows — conditional logic, error handling, Salesforce and NetSuite integration — at a higher price point.

For data warehouse pipelines: Fivetran is the fully managed option — zero maintenance, automatic schema management, but expensive under the March 2025 per-connector pricing model. Airbyte is the open-source alternative — lower cost, no enforced Xero connection limits, but requires engineering resources to run. Skyvia rounds out the list as the affordable no-code option for small businesses that need basic Xero sync without engineering overhead.

Why Xero Users Turn to Third-Party Integration Tools

Xero earns consistent praise for ease of use, clean invoicing, and bank reconciliation. On G2, it holds a strong rating with 851-plus mentions of intuitive interface. But the same platform generates 173-plus mentions of limited reporting options and 134-plus mentions of reporting limitations that require manual workarounds.

The gap is not a flaw in Xero’s design. It is a deliberate architectural choice. Xero is built to be the system of record for financial data, not the analysis layer on top of it. It handles bank transactions, purchase orders, accounts payable, accounts receivable, and payroll well. What it does not handle well is flexible financial reporting, cash flow forecasting, cross-system dashboards that blend Xero data with sales pipeline or ecommerce metrics, or bulk data operations that finance teams and bookkeepers need for month-end processes.

The tools in this guide each solve a different slice of that gap. Spreadsheet connectors give finance teams live Xero data in the environment where analysis already happens. Workflow automation tools remove manual data entry between Xero and apps like Shopify, Stripe, and Salesforce. Data pipeline tools move Xero financial data into a warehouse for broader analytics. The right choice depends on which gap you are actually trying to close.

Xero API Constraints Worth Knowing Before You Evaluate Tools

Rate limits. The Xero API enforces 60 calls per minute per connected app. Tools that run large data syncs need to batch requests and handle throttling gracefully. Poorly designed connectors hit this limit and fail silently, which is harder to detect than an outright error.

OAuth token expiry. Xero’s OAuth 2.0 tokens expire after 30 minutes of inactivity. Connectors that run on scheduled automation rather than active sessions need to handle token refresh automatically. This is a non-issue with well-built tools but a recurring problem with DIY implementations.

25-connection limit for uncertified apps. Fivetran’s own documentation notes this explicitly: uncertified apps are limited to 25 active Xero connections. For accounting firms managing large client portfolios, this matters. Certified Xero partners – including G-Accon (Premium Partner) – have higher connection limits and deeper API access.

Per-organisation data scoping. Xero’s API returns data scoped to a single organisation per connection. Multi-entity consolidation – the critical use case for group reporting – requires a separate API connection per Xero organisation. Tools that handle this cleanly (G-Accon, Coefficient) handle the connection management automatically. Tools that do not require manual per-organisation setup.

Xero Data Integration Tools for Financial Reporting and Spreadsheet Analysis

Finance teams and bookkeepers who need to build financial reports, cash flow forecasts, KPI dashboards, and budget models on top of Xero data belong in this category. The goal is replacing the manual export cycle – downloading a Xero report as CSV, pasting it into a spreadsheet, reformatting it – with a live connection that updates automatically on a schedule you set.

Two genuinely different tools serve this use case. Coefficient connects Xero alongside 150-plus other data sources. G-Accon connects Xero, QuickBooks, FreshBooks, and Sage with deeper accounting-specific functionality. The right choice depends on whether your reporting needs stop at the accounting system or extend into CRM, ecommerce, and operational data.
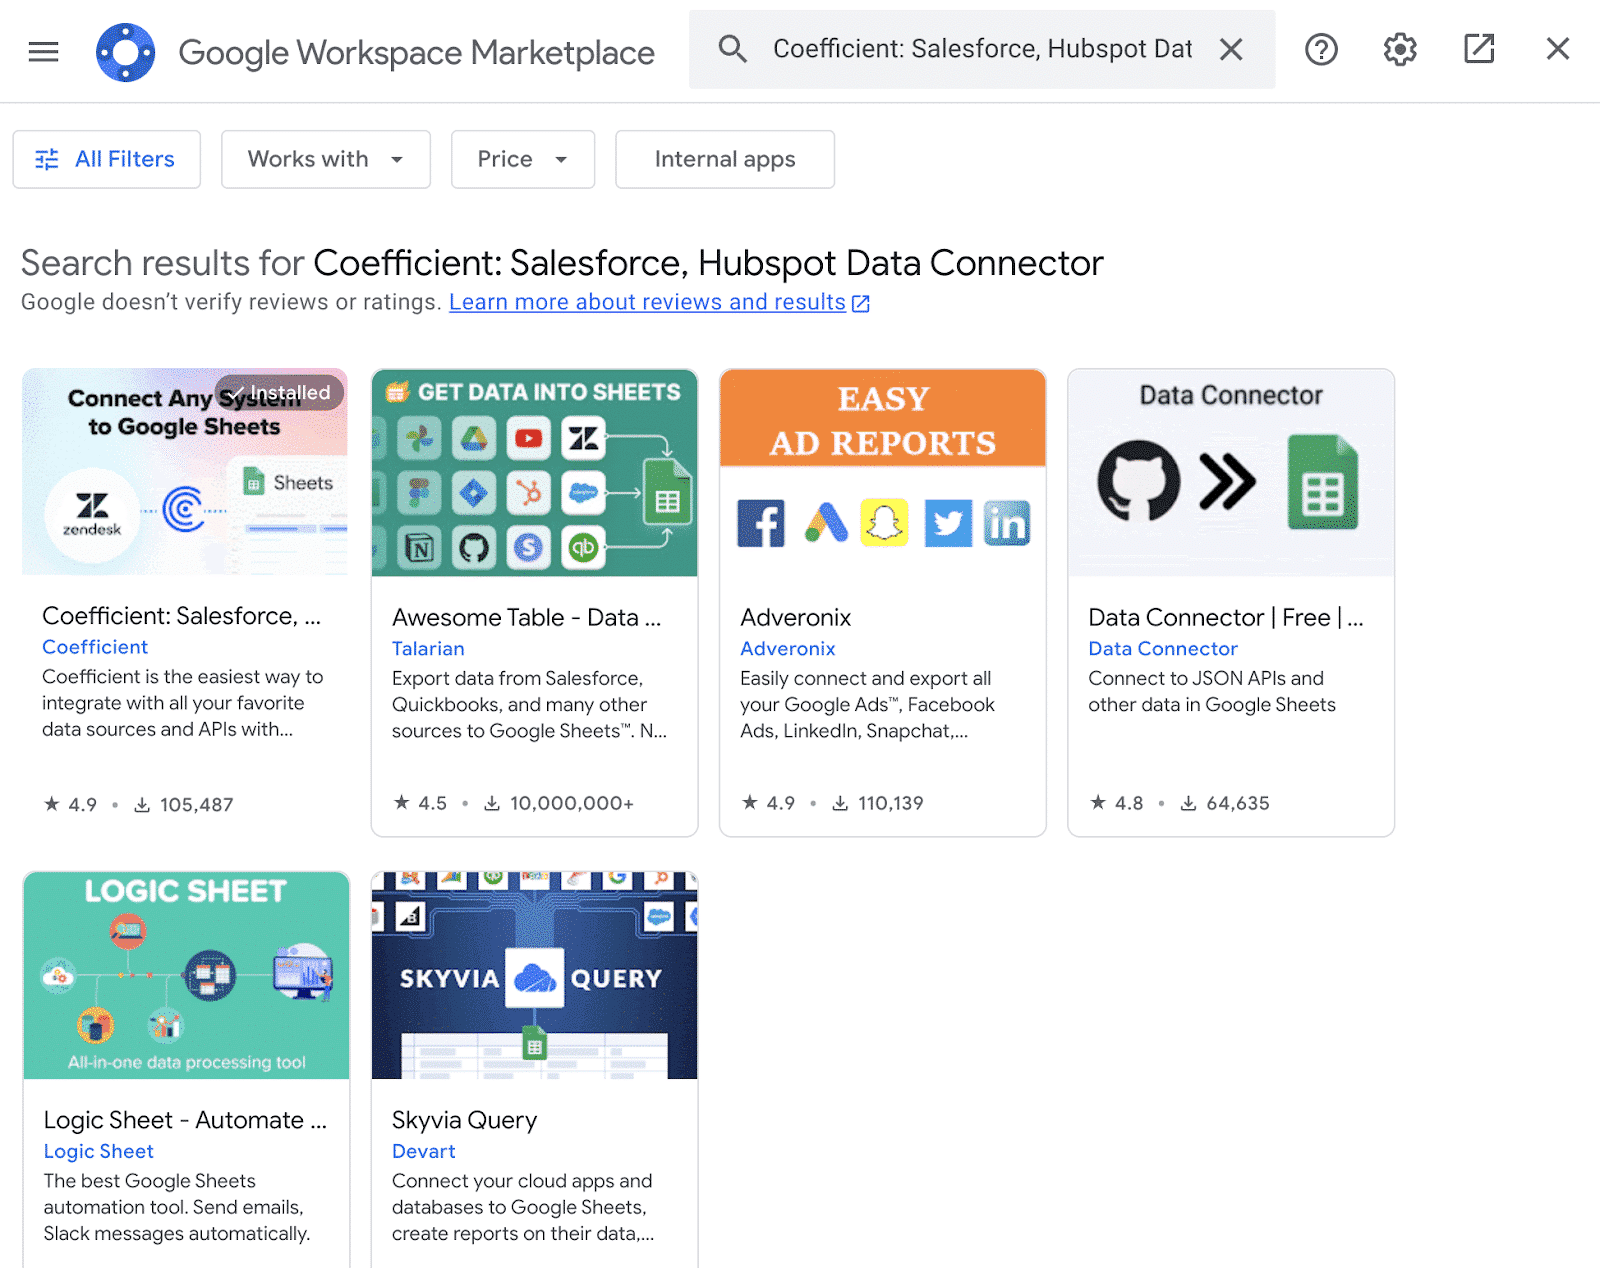
1. Coefficient

xero data integration with google sheets and excel - coefficient

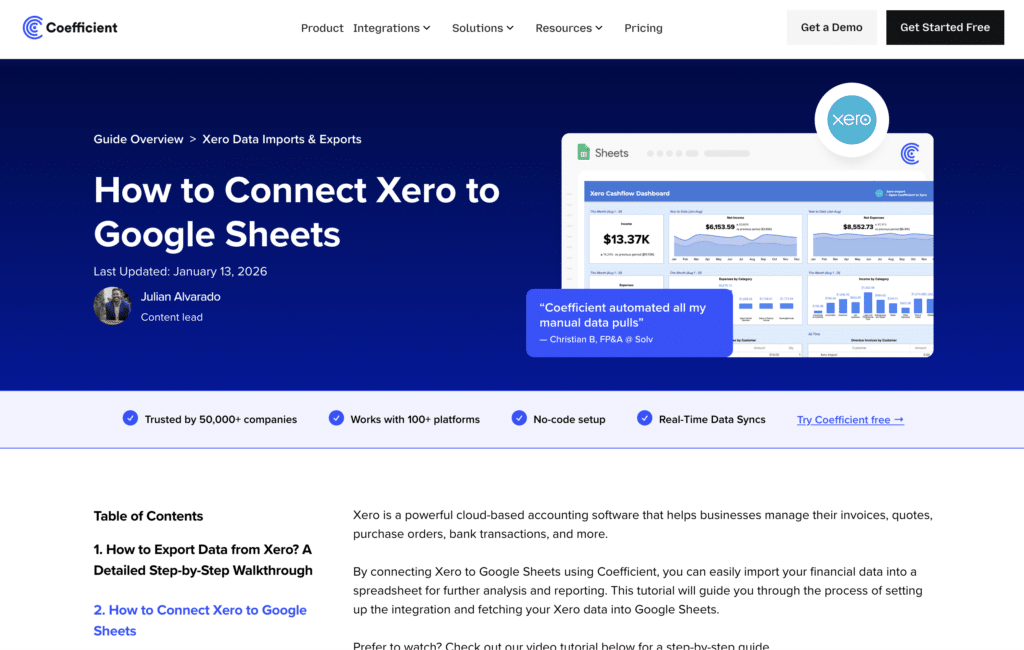
Best for: Finance teams, FP&A analysts, and RevOps teams who need live Xero financial data in Google Sheets or Excel alongside data from Salesforce, HubSpot, Shopify, Snowflake, and 145-plus other sources.

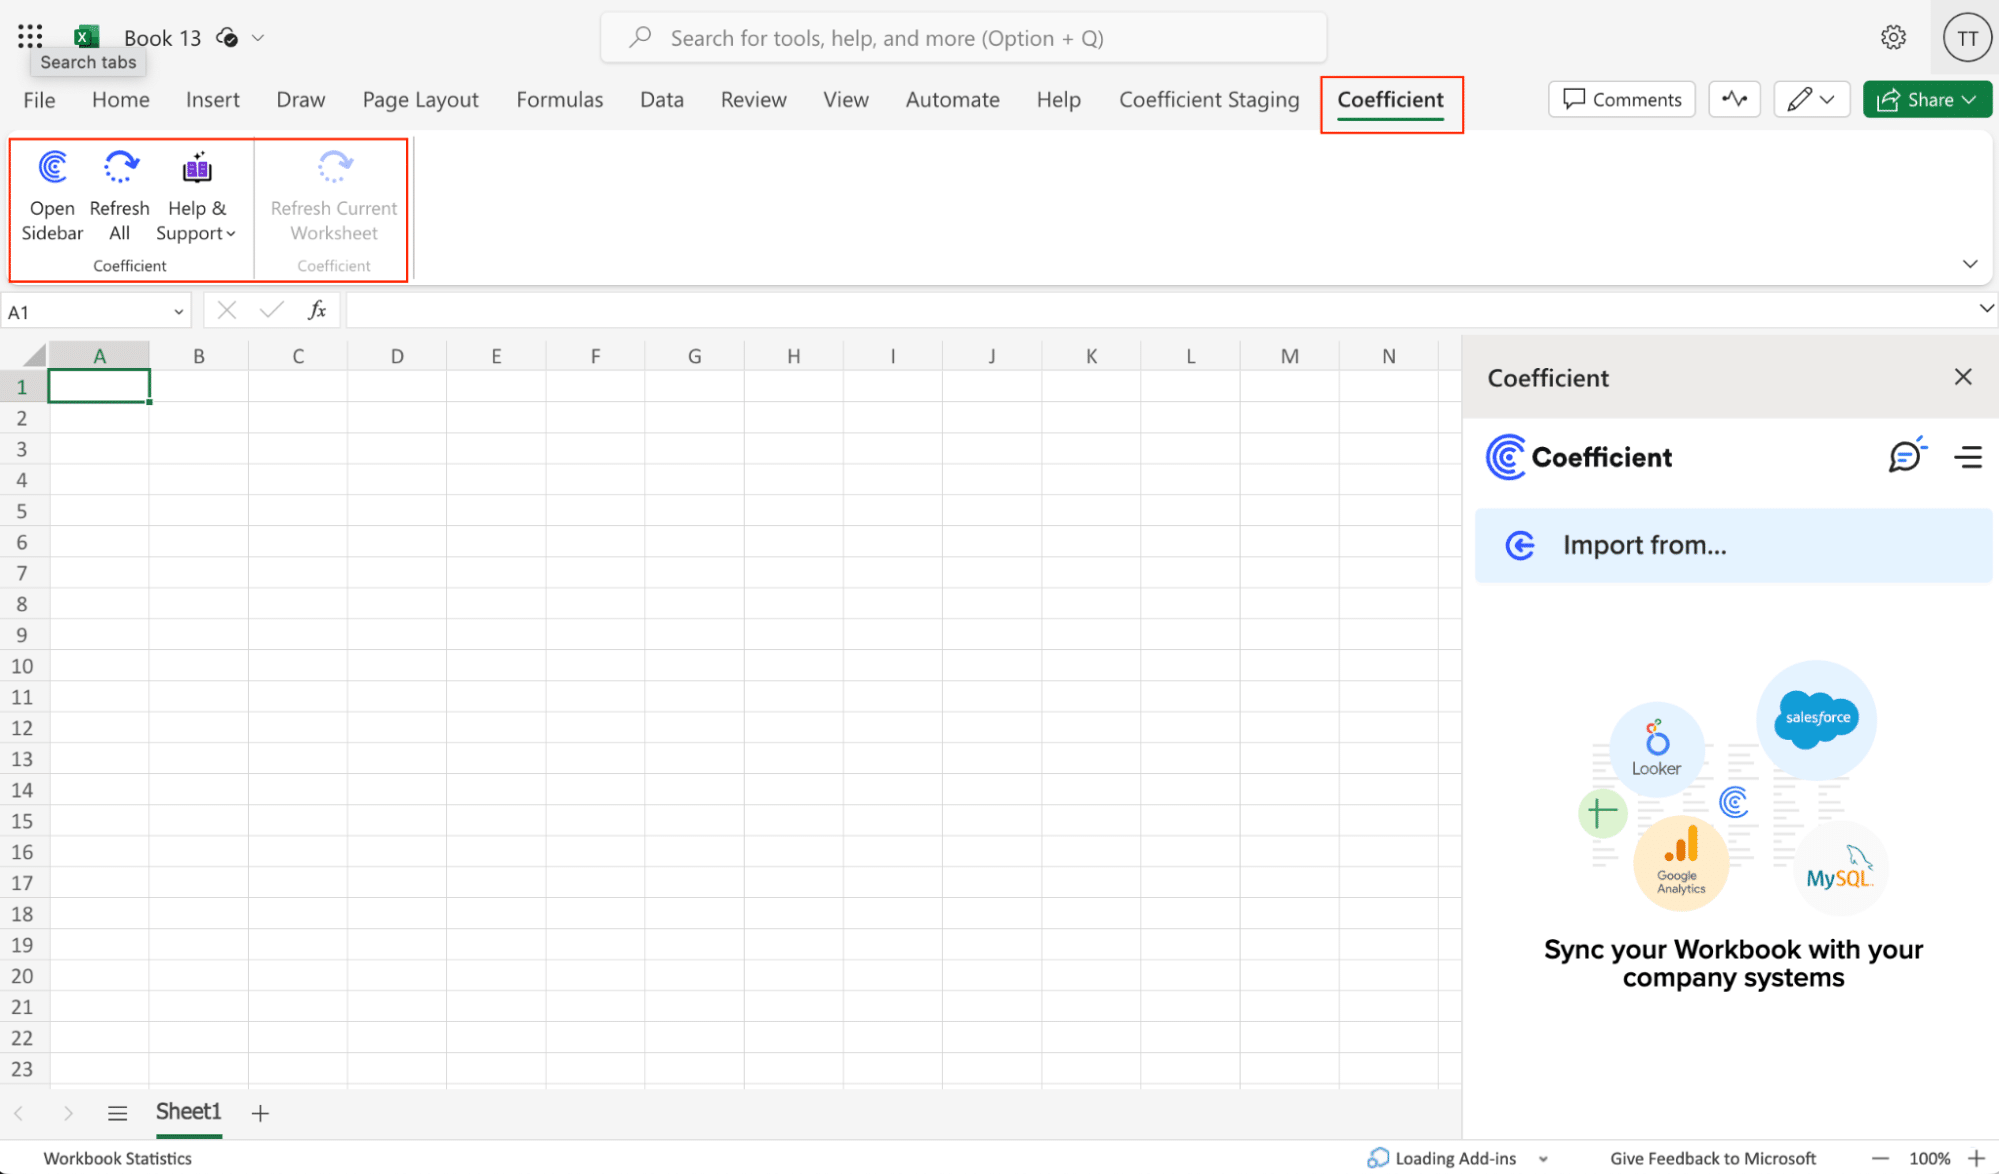
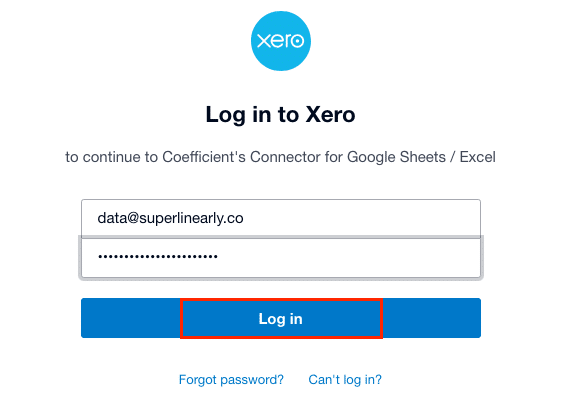
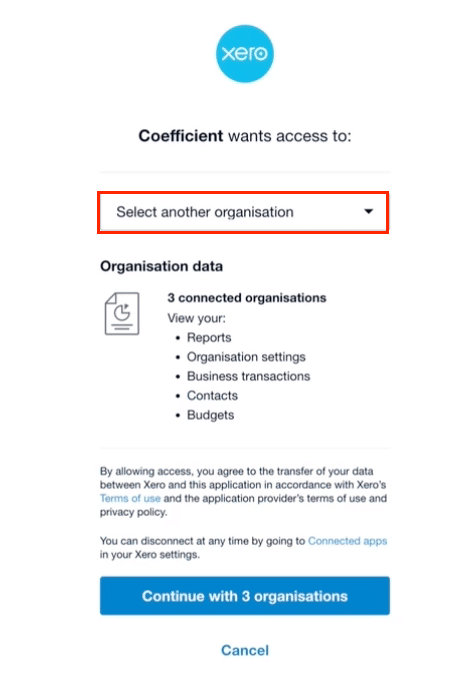
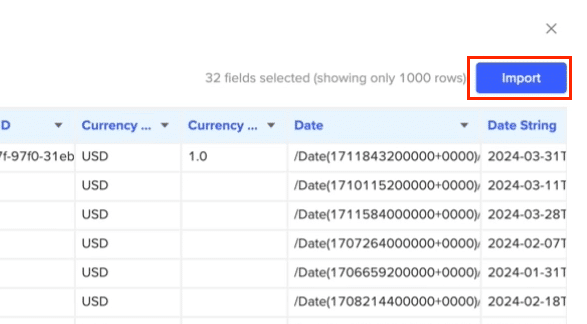
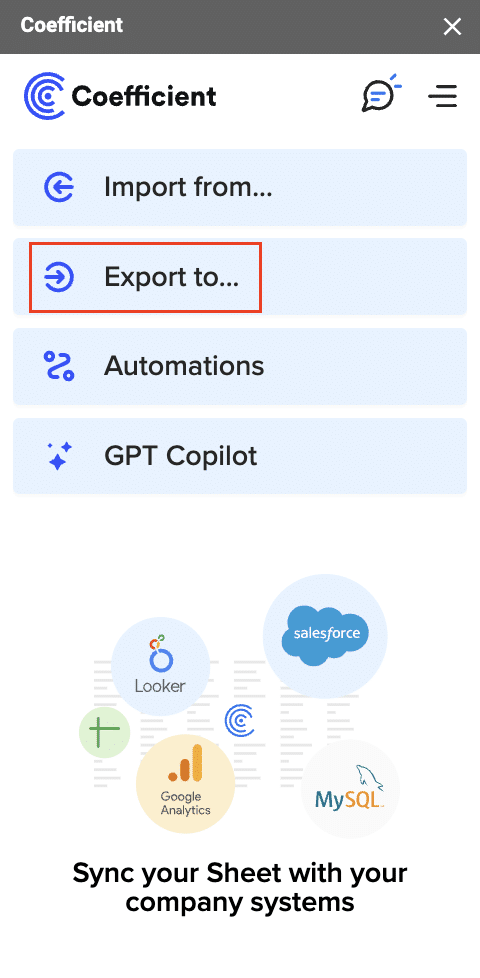
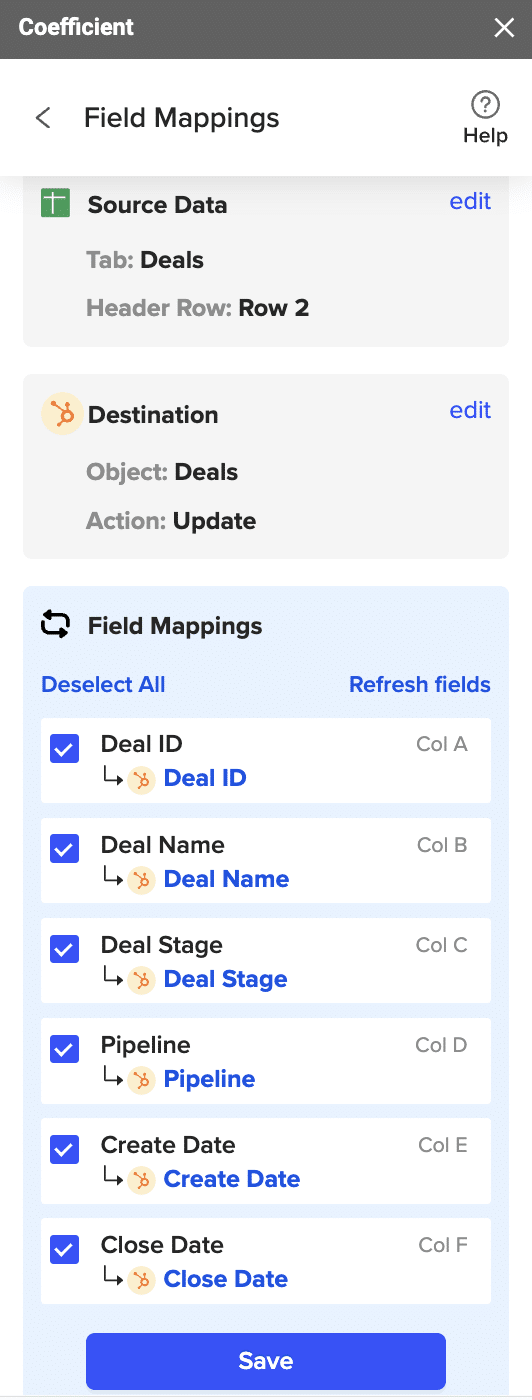
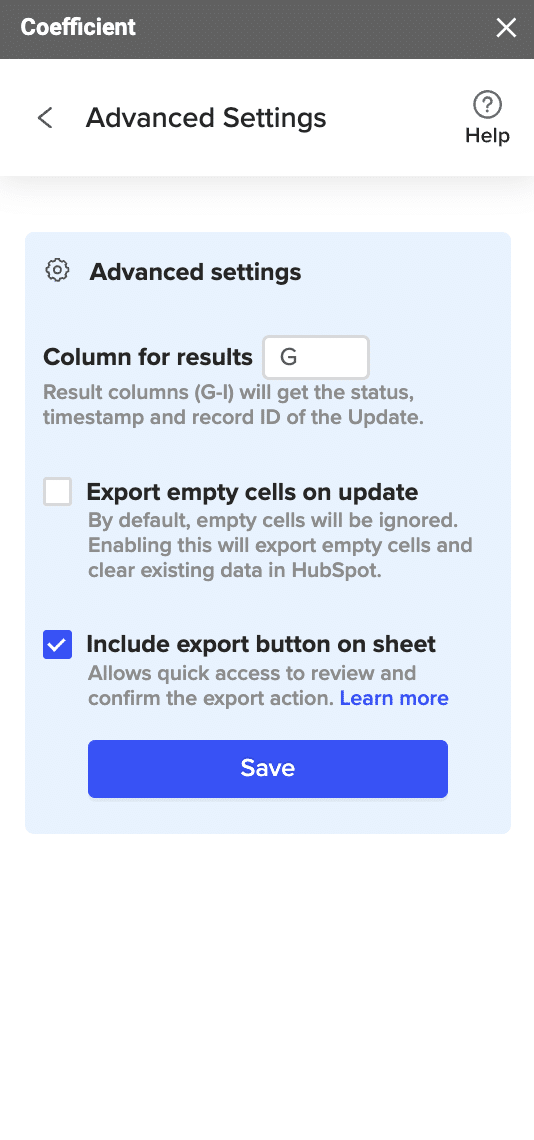
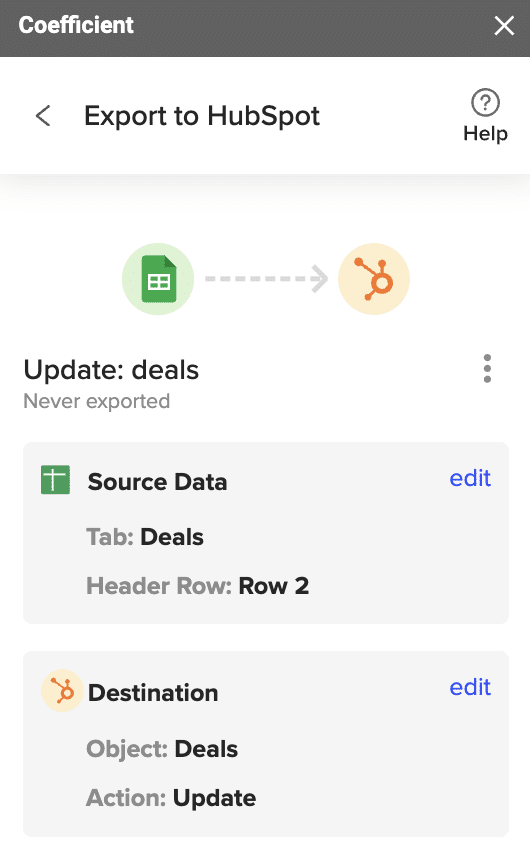
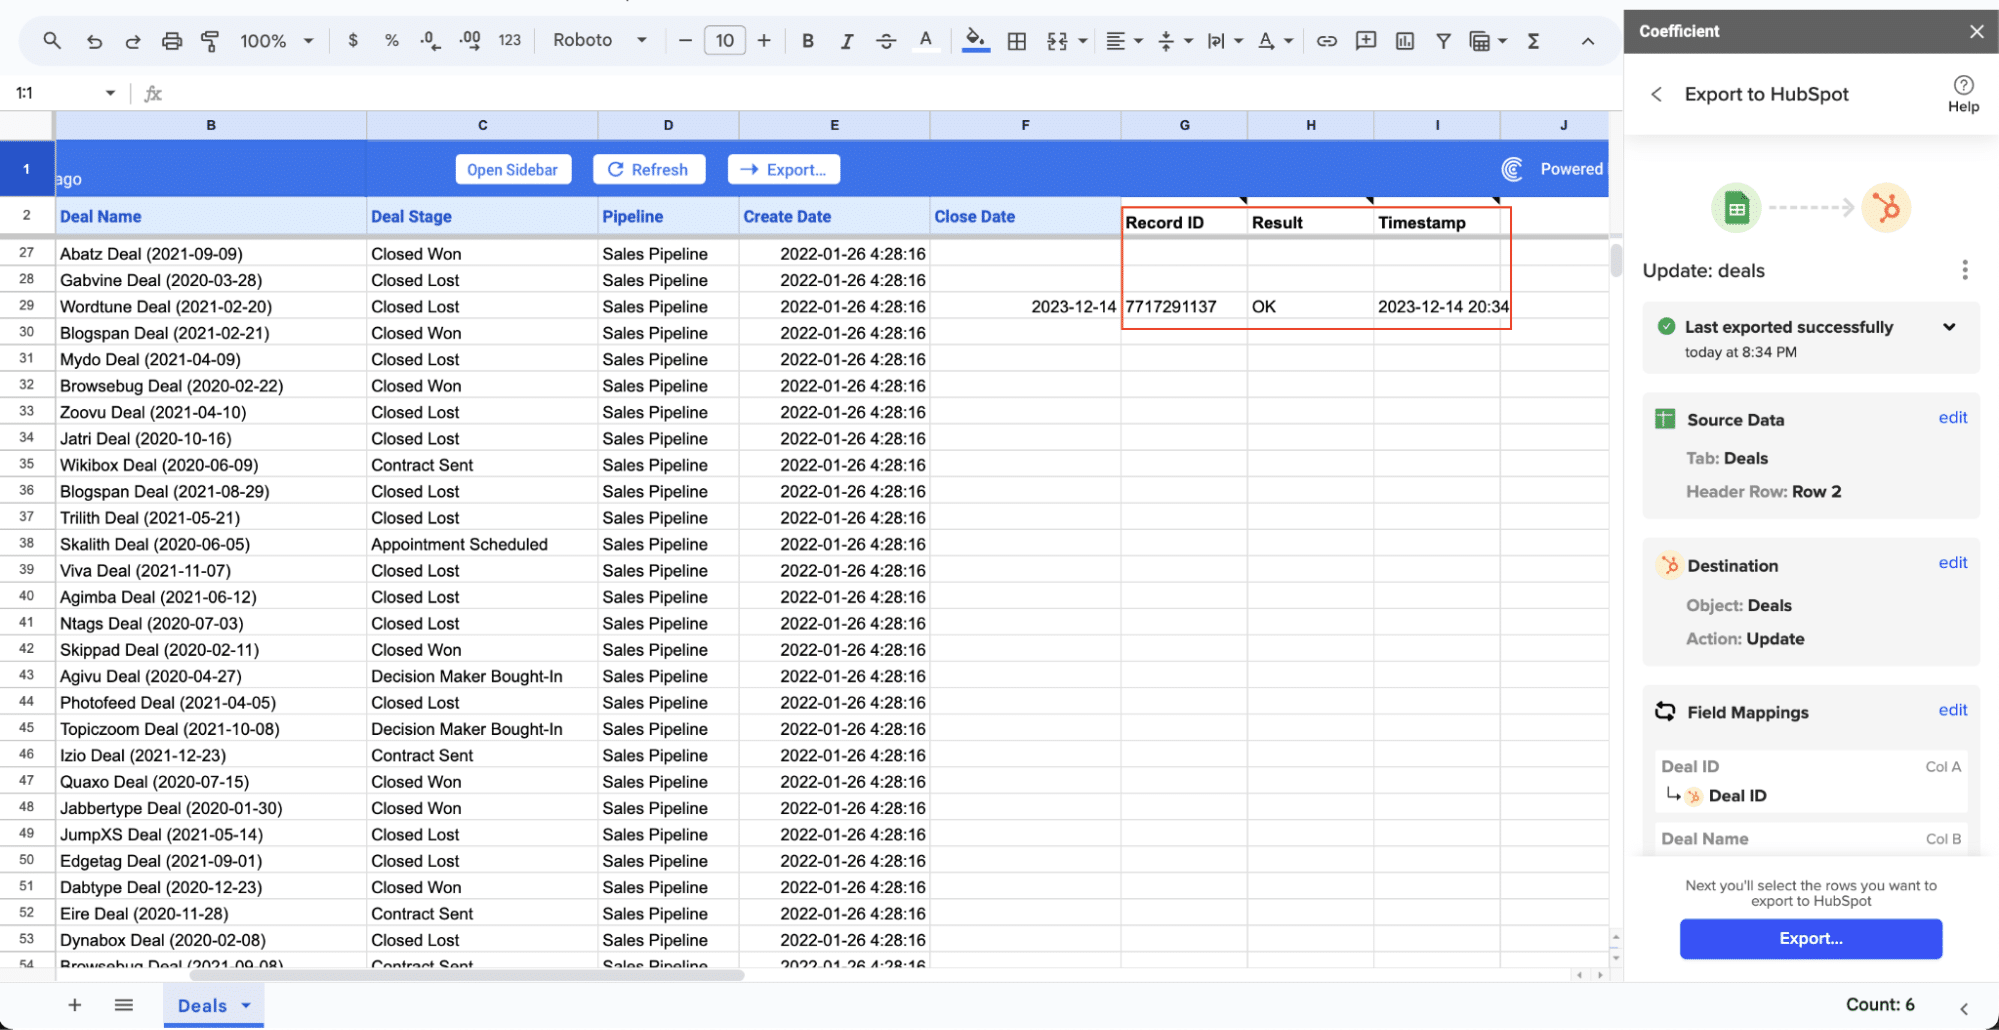
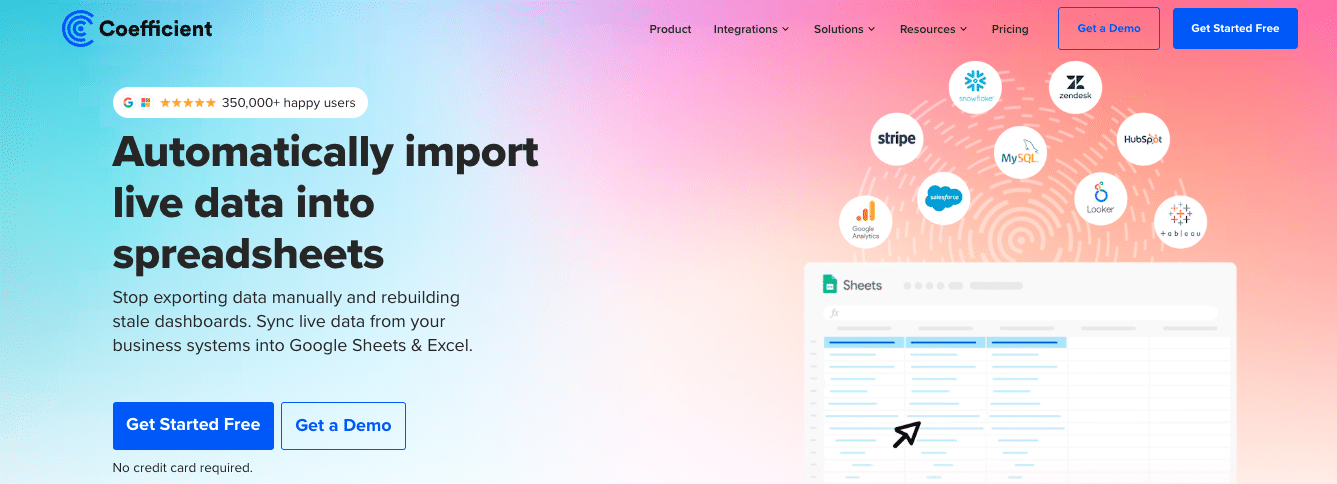
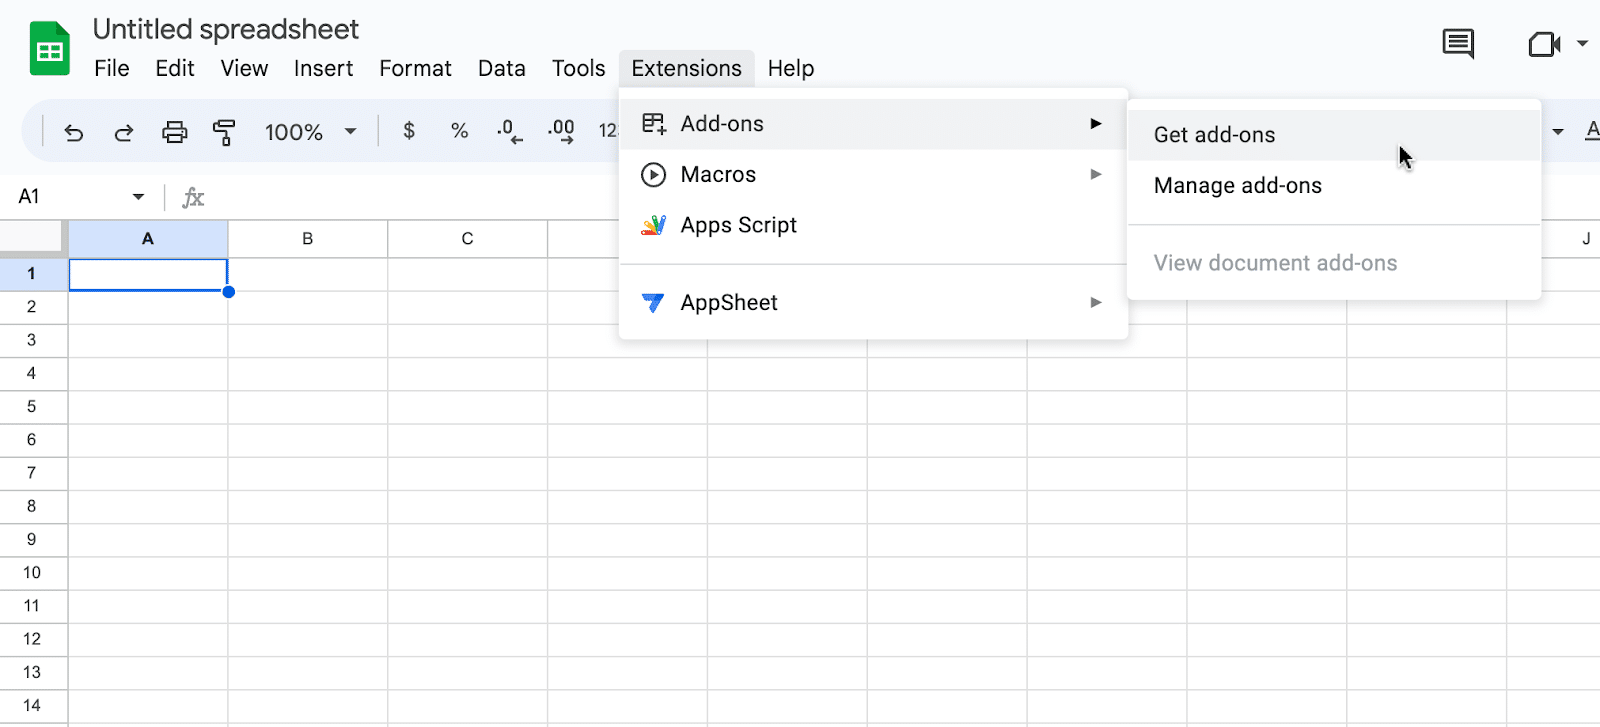
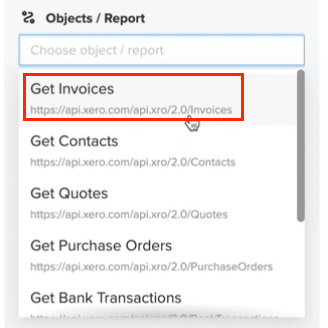
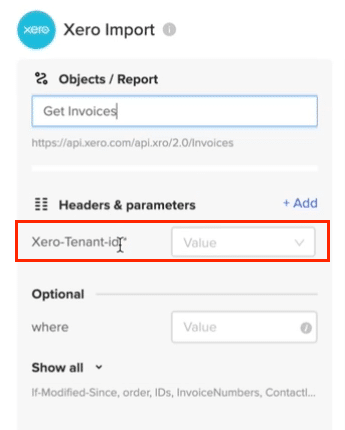
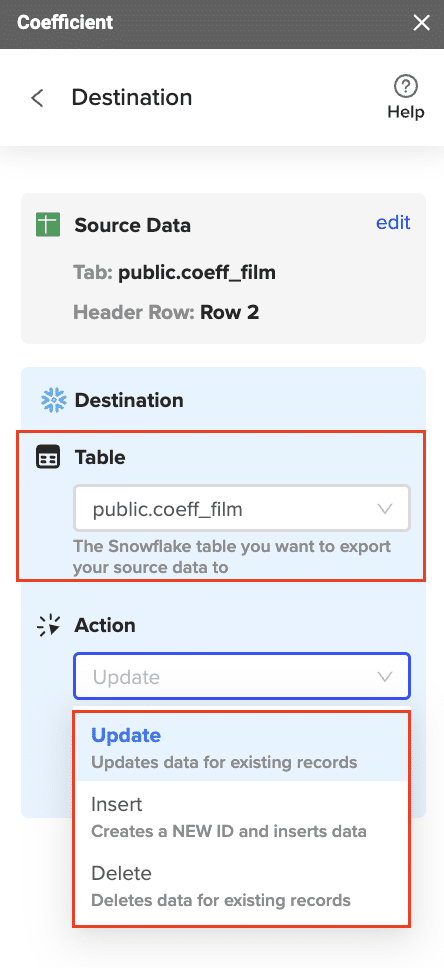
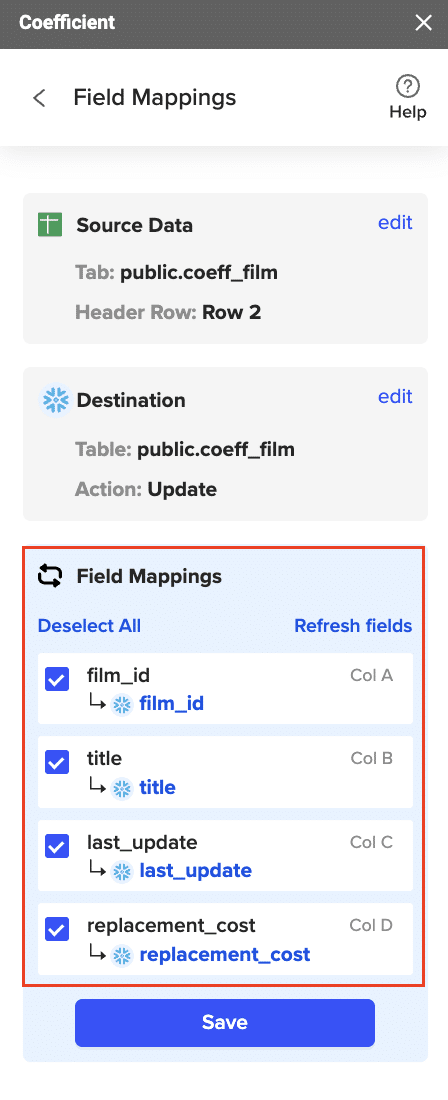
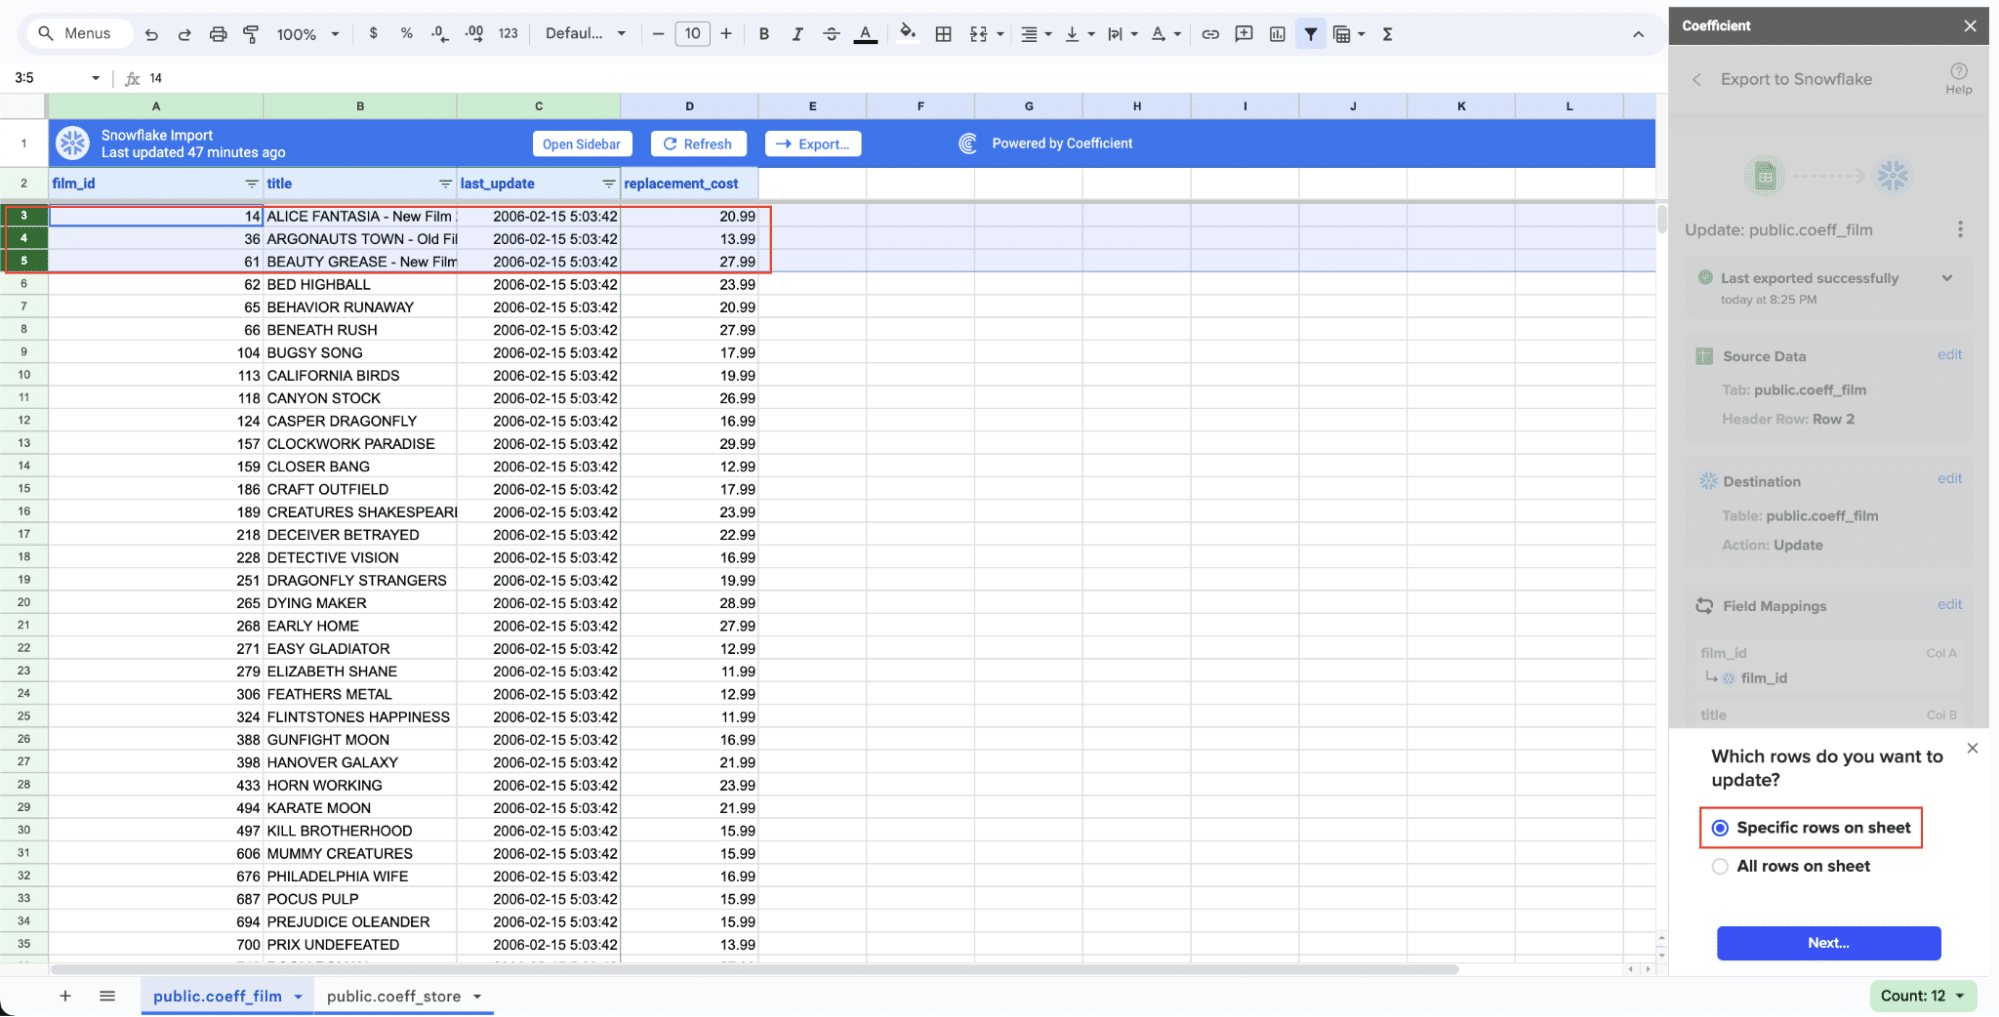
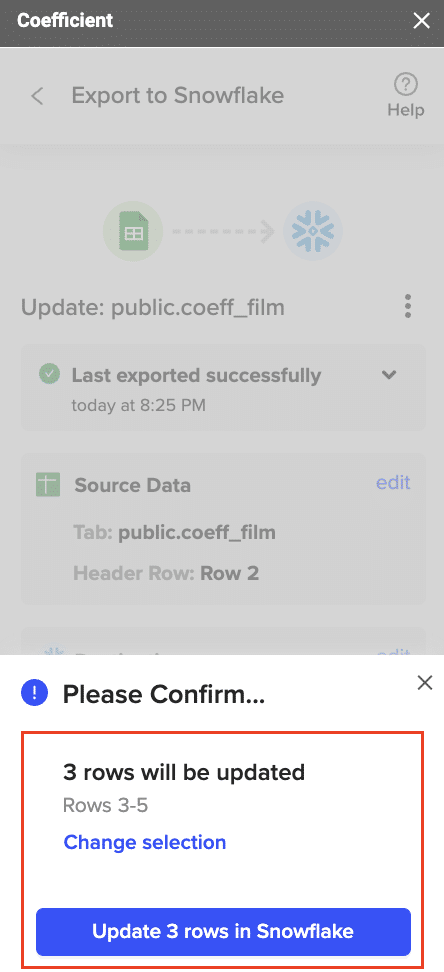
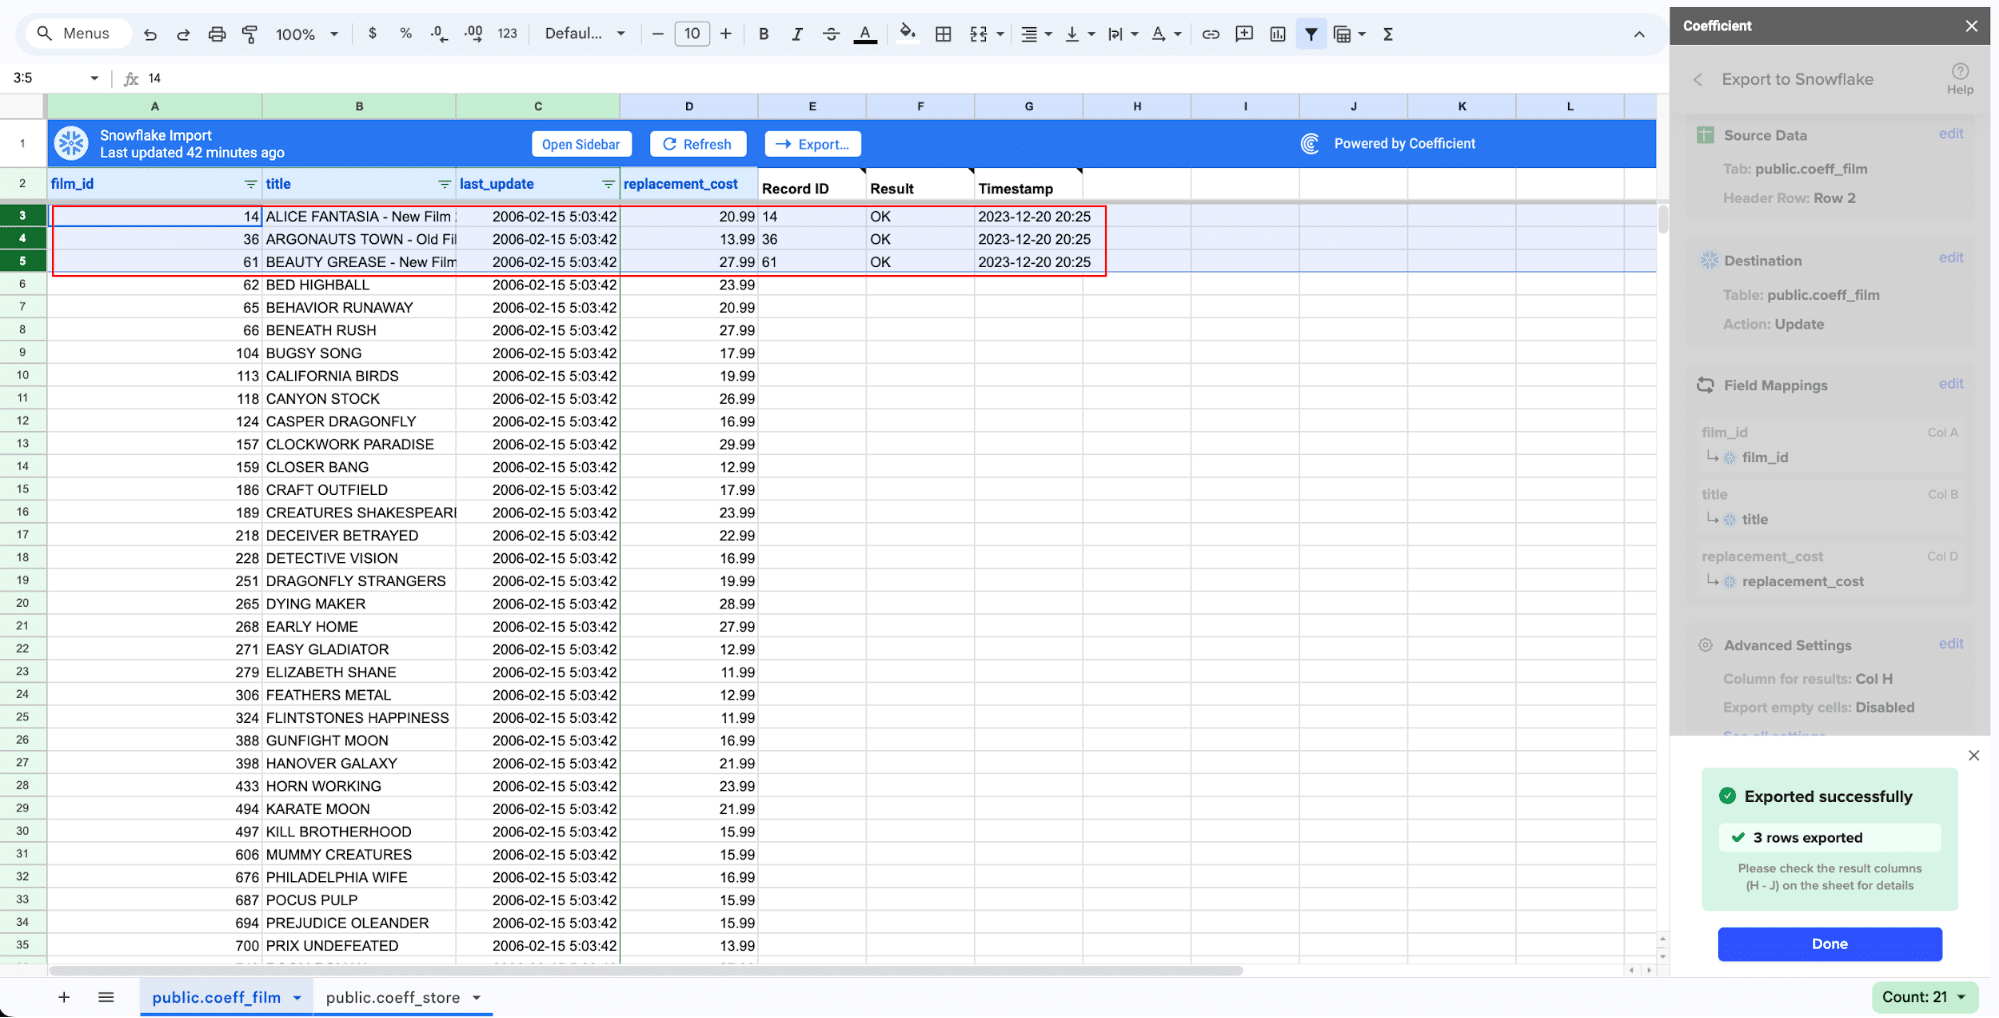
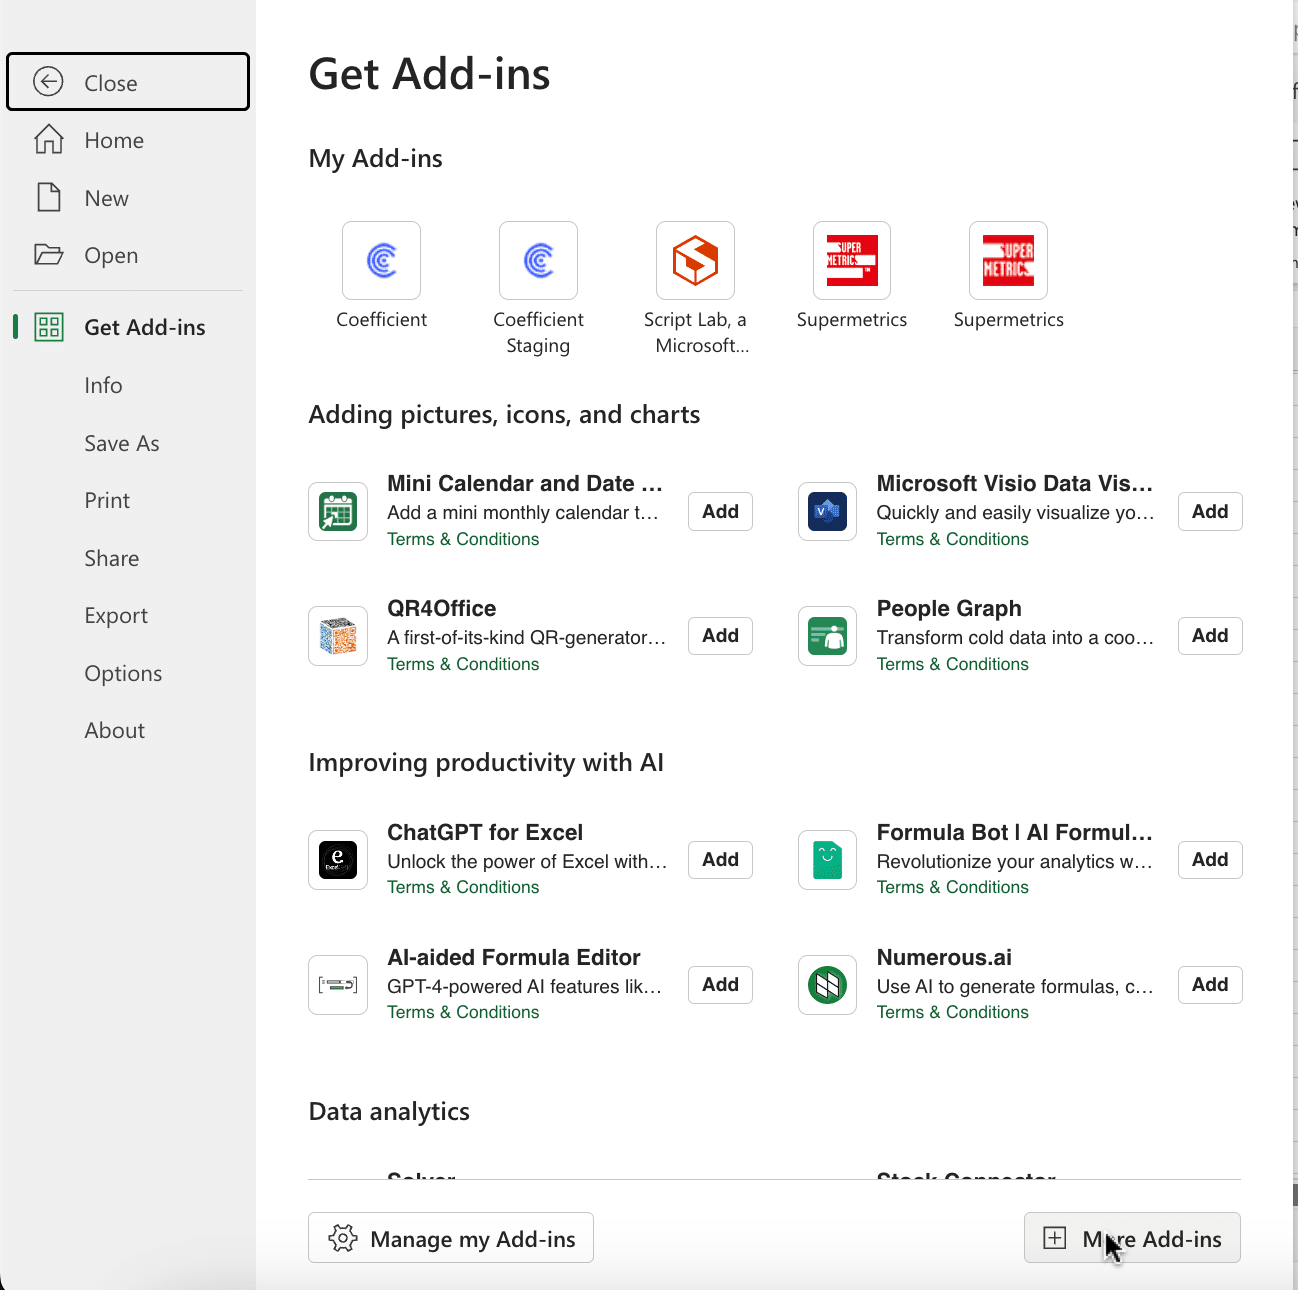
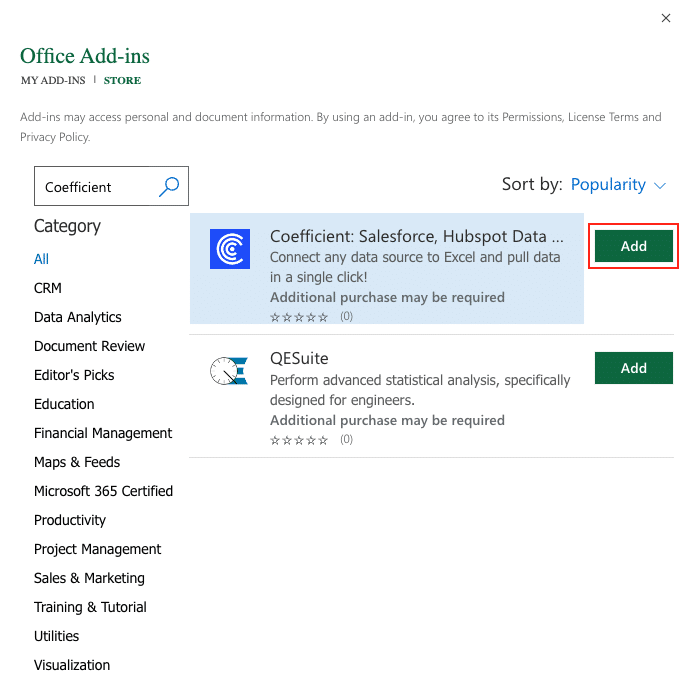
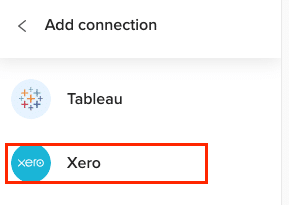
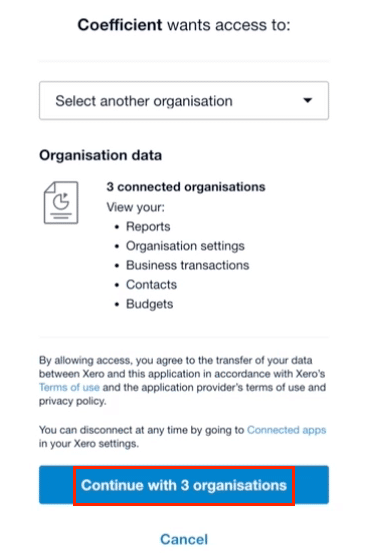
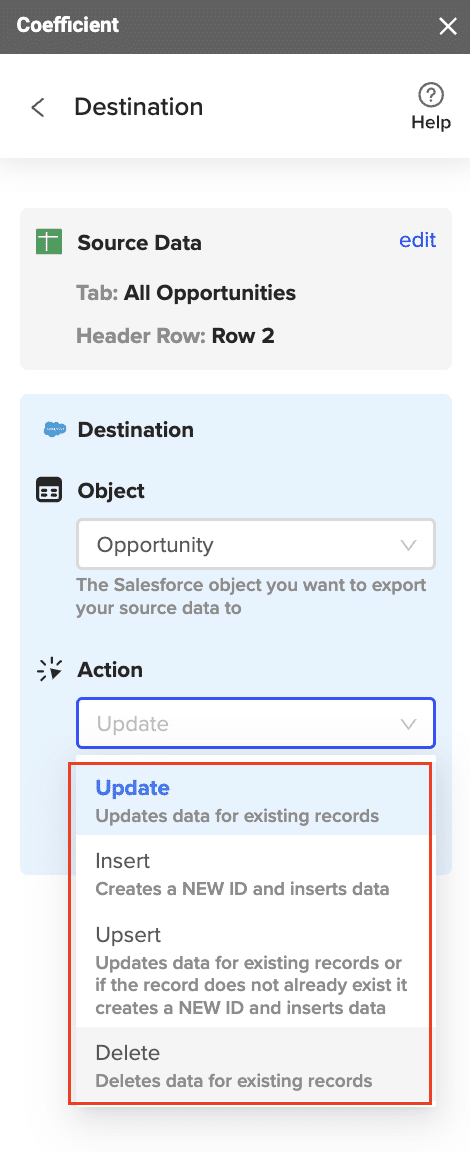
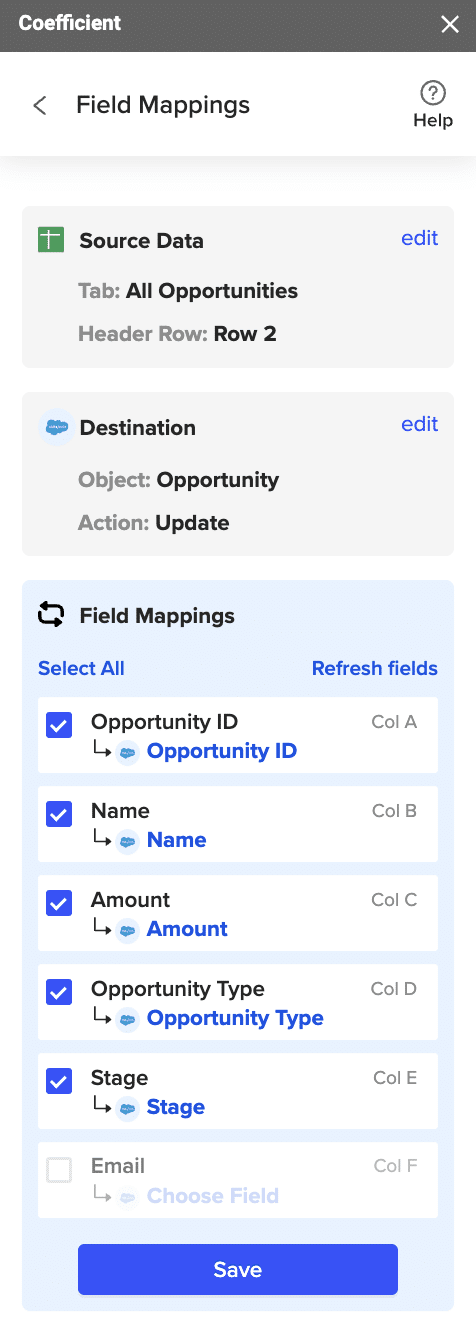
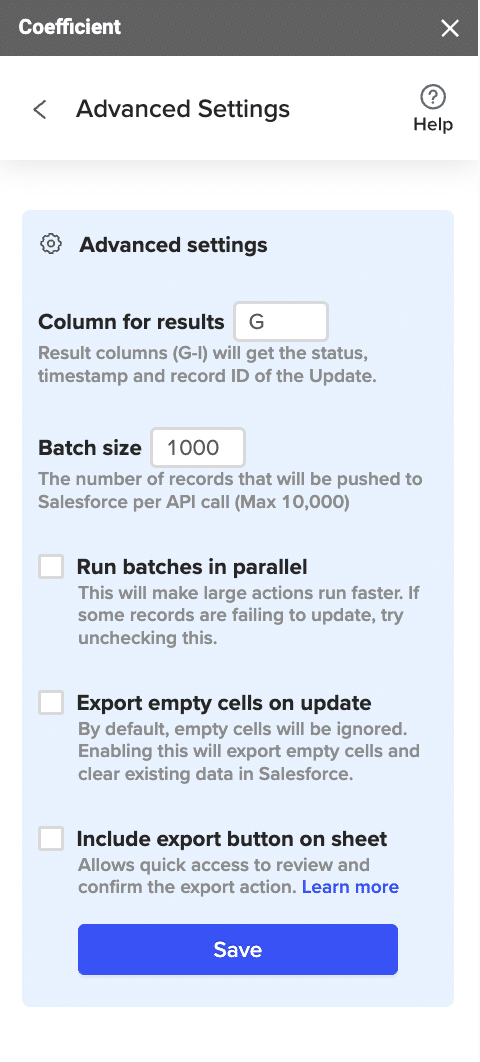
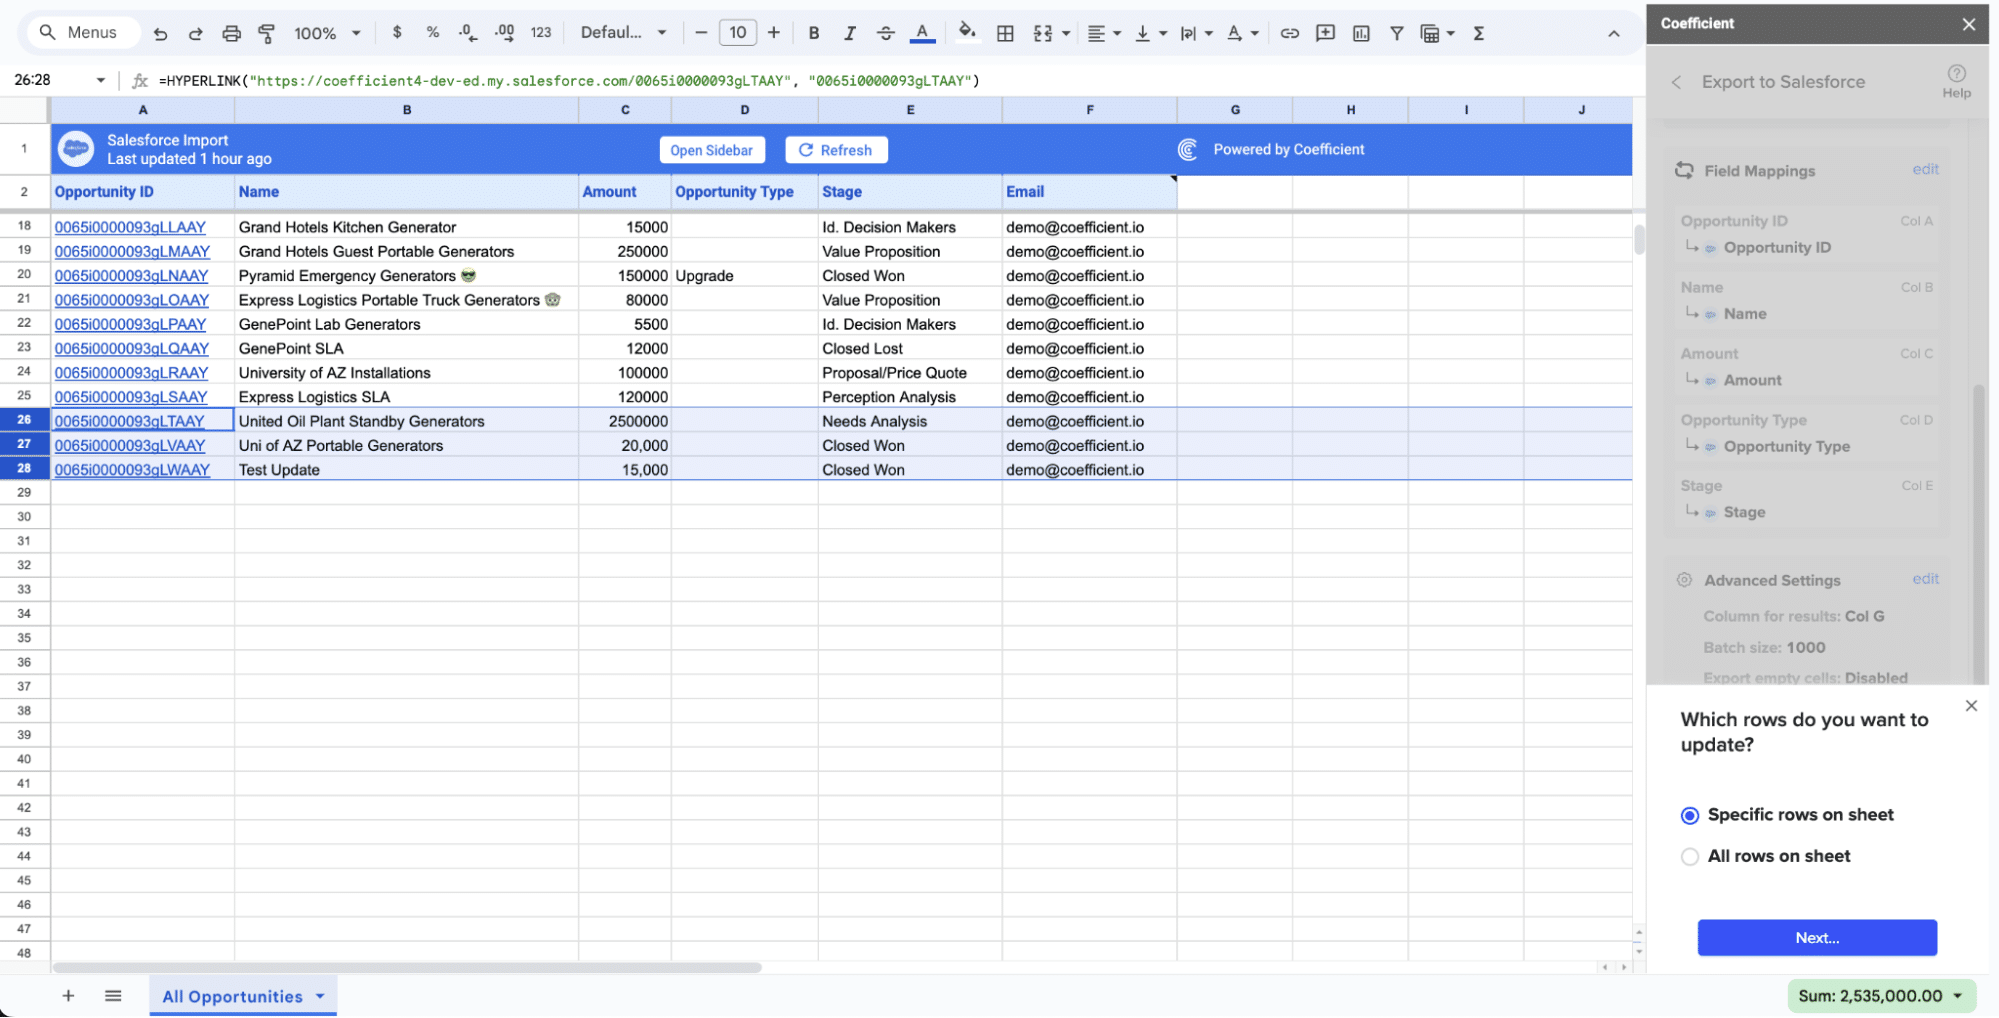
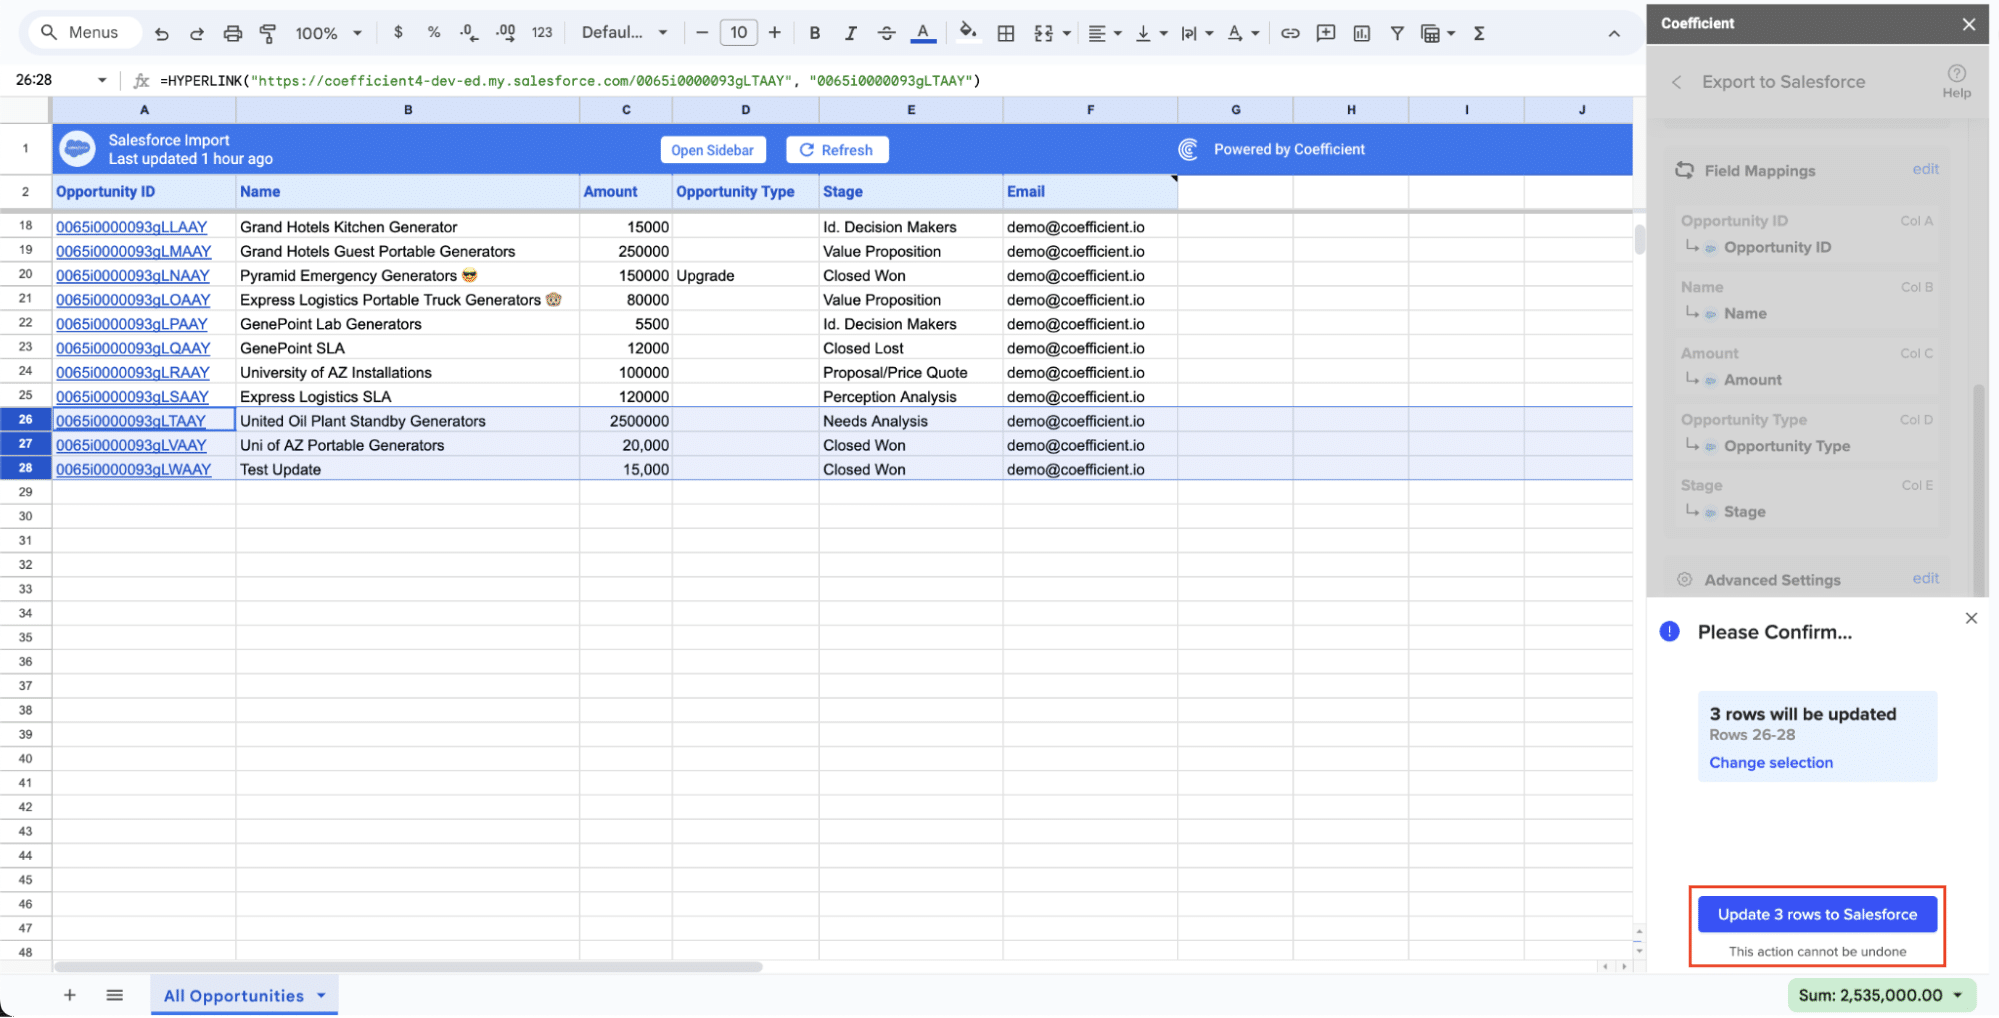
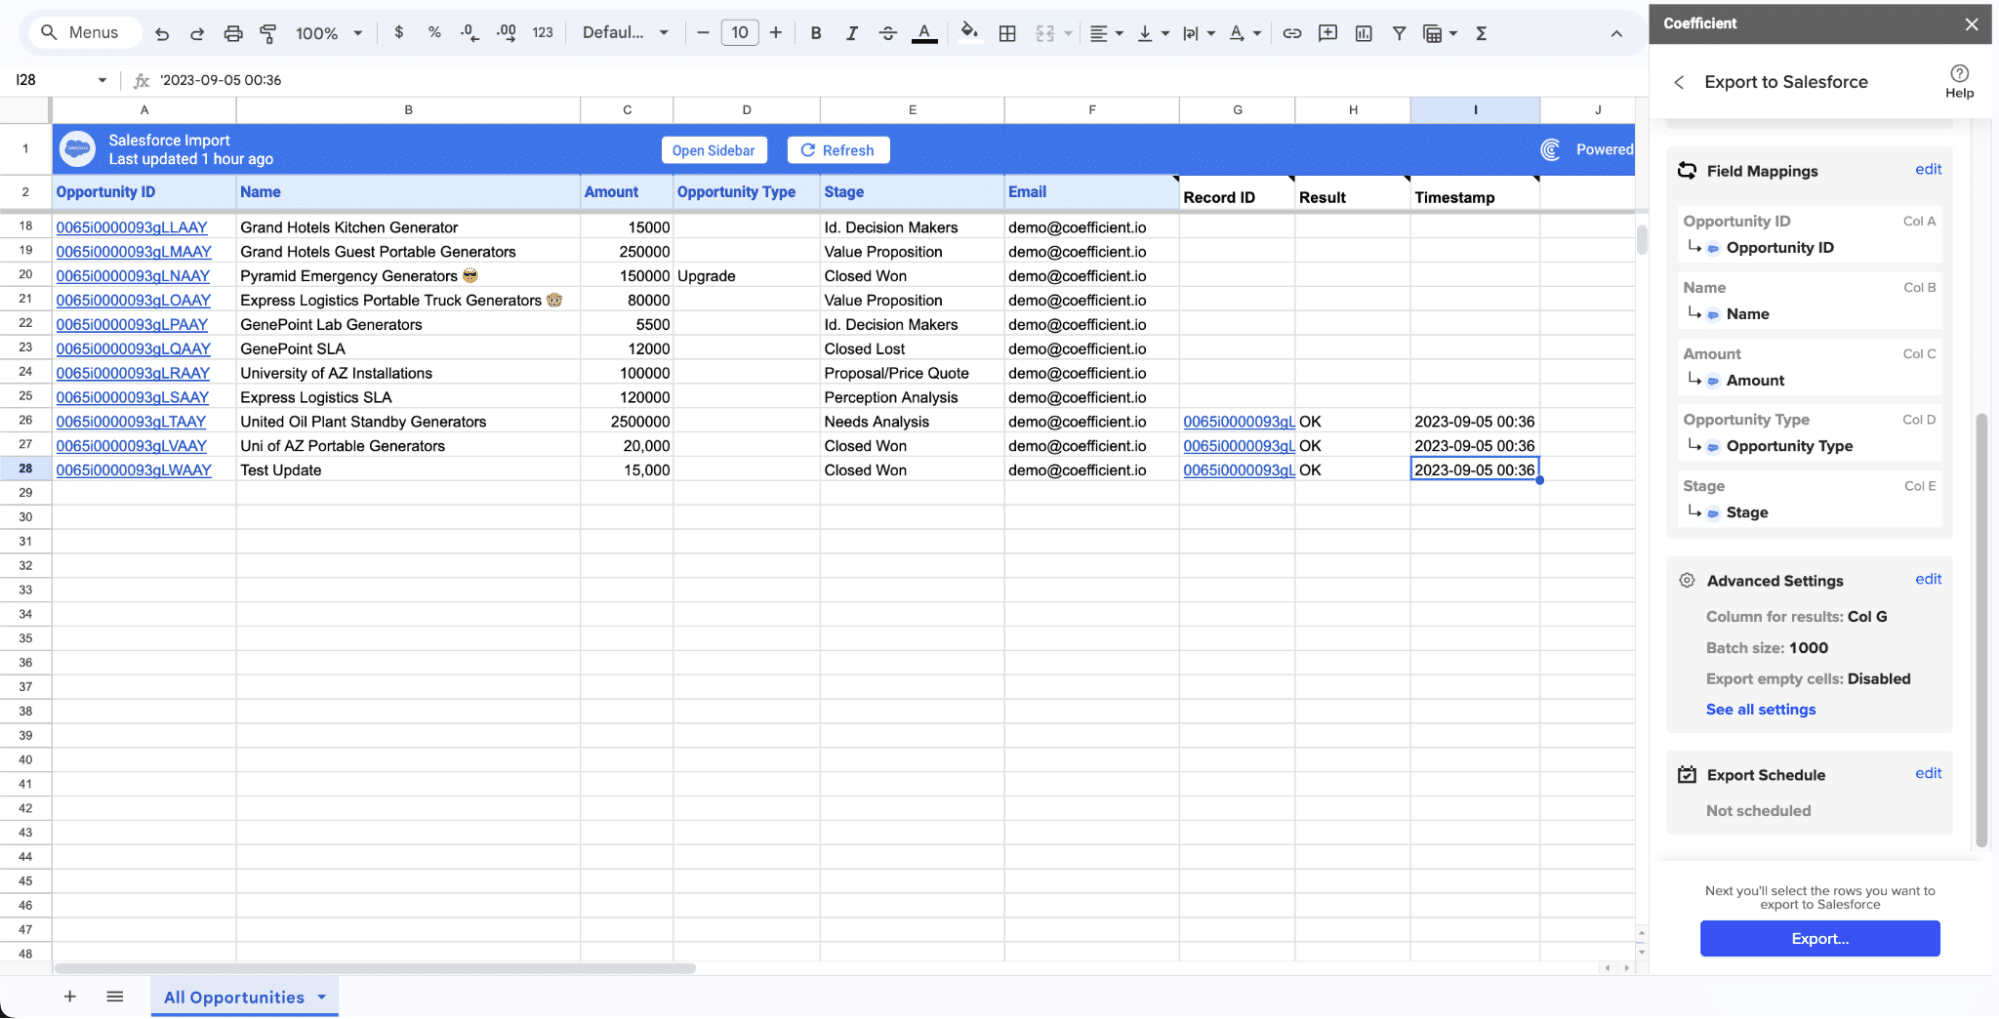
Coefficient connects Xero directly to Google Sheets and Excel with no-code setup. Finance teams import P&L statements, balance sheets, cash flow data, invoices, bank transactions, contacts, and accounts payable from Xero with point-and-click configuration – no SQL, no engineering support required. Imports refresh on automated schedules, hourly through to weekly, so dashboards stay current without manual exports.

The differentiator versus accounting-only connectors is breadth. Coefficient connects 150-plus data sources across finance, CRM, marketing, databases, and ecommerce. A finance team using Coefficient can pull Xero P&L data alongside Salesforce pipeline forecasts, Shopify revenue, and Google Ads spend – all in a single spreadsheet, all refreshing automatically. This is the use case the Coefficient vs G-Accon comparison documents clearly: when the CFO needs a dashboard combining financial data with sales and operational metrics, Coefficient provides it without additional tooling.

The Solv case study demonstrates the compounding impact. Christian Budnik’s FP&A team needed to combine QuickBooks financial data with Salesforce pipeline metrics and Looker analytics. Coefficient connected all three systems to Google Sheets with automatic refreshes. The result: 364 hours saved per year across seven team members – 52 hours per analyst – by eliminating manual exports and rebuilding stale dashboards.

Pros

  • Connects 150-plus data sources alongside Xero. Finance teams can blend Xero financial data with Salesforce, HubSpot, Shopify, Stripe, Snowflake, and 145-plus other sources in a single Google Sheets or Excel workbook.
  • Genuine no-code setup. Import Xero invoices, bank transactions, accounts receivable, accounts payable, and financial reports from a point-and-click sidebar. No SQL or API knowledge required for business users.
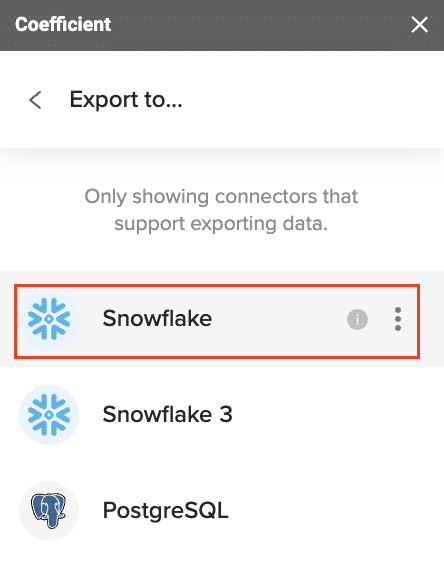
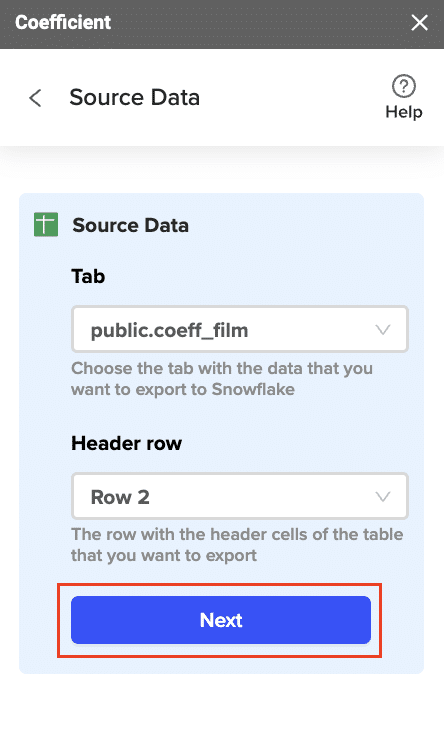
  • Works in both Google Sheets and Excel. Automated refresh scheduling keeps Xero financial data current without manual data entry.
  • Free plan available. No per-user fees on paid plans.

Source: Coefficient G2 reviews

Cons

  • Not an accounting-specialist tool. Coefficient’s Xero integration is comprehensive but not as deeply customised for multi-entity consolidation and accounting-specific workflows.
  • Two-way write-back to Xero is not available.

Source: Coefficient Xero integration page

Pricing

Free plan available. Paid plans start from $49/month with no per-user fees. See Coefficient pricing for current plan details.

Setup guide: How to connect Xero to Google Sheets with Coefficient. For Excel: Coefficient Excel Xero connector.

2. G-Accon

g-accon xero quickbooks sage data integration

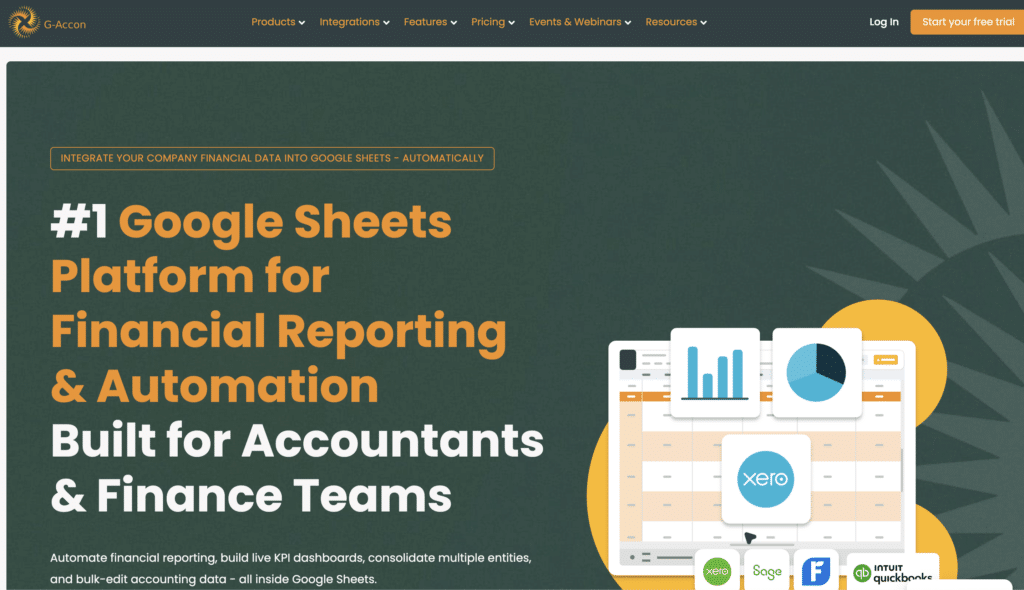
Best for: Accounting firms, bookkeepers, and finance teams whose reporting needs centre entirely on Xero (and other accounting platforms), and who need deep multi-entity consolidation, Xero-native reporting templates, and bulk transaction editing in Google Sheets.

G-Accon is the specialist Xero connector for Google Sheets. It holds Premium Xero Partner status – the highest certification level Xero awards – reflecting the depth and reliability of its integration. Where Coefficient is broad, G-Accon is deep: every Xero object, every accounting report type, and every financial nuance comes through with high fidelity. The platform is purpose-built for the workflows accounting professionals run daily: multi-entity group consolidations, scheduled financial report delivery to clients, bulk invoice imports, and cash flow dashboards built from live Xero data.

The multi-entity consolidation capability is where G-Accon earns its market position. It handles chart of account mapping across entities, currency conversion for 170-plus currencies, and intercompany eliminations automatically. For accounting firms managing client portfolios across multiple Xero organisations, this is difficult to replicate elsewhere at a comparable price point. Michael King, CFO at KFE Solutions, describes G-Accon as ‘the most valuable, the most effective, the highest ROI we have on any of our tech platforms,’ with the tool saving their team 40 hours per month on financial reporting.

The two-way sync is also notably deeper than most competitors. Teams can bulk-edit thousands of Xero transactions directly in Google Sheets and push the changes back to Xero in a single operation – a critical capability for bookkeepers handling data cleanup, journal entry corrections, and bulk invoice management. G-Accon holds Platinum Intuit Partner status alongside its Xero Premium Partnership, meaning it covers QuickBooks with the same depth for firms managing clients across both platforms.

Pros

  • Premium Xero Partner with deeper API access and higher connection limits than uncertified connectors. Handles Xero-specific data objects – purchase orders, accounts payable, accounts receivable, bank transactions – with comprehensive fidelity.
  • Multi-entity consolidation with automatic chart of accounts mapping, 170-plus currency support, and intercompany eliminations. The right tool for accounting firms managing group reporting across multiple Xero organisations.
  • Bulk two-way sync. Edit thousands of Xero transactions in Google Sheets and push changes back to Xero in one operation – a capability that matters specifically for bookkeepers running month-end processes.
  • 100-plus pre-built accounting templates for P&L, balance sheet, cash flow, KPI dashboards, and revenue recognition. 4.8/5 on G2 with 44 badges in G2’s Spring 2025 reports including Leader in Financial Analysis.

Source: G-Accon G2 reviews

Cons

  • Connects to accounting software only: Xero, QuickBooks, FreshBooks, and Sage. No CRM, ecommerce, marketing, or database connectors. Finance teams that need Xero data blended with Salesforce pipeline or Shopify ecommerce metrics need a separate tool.
  • Per-product pricing means teams using both Xero and QuickBooks pay separately for each accounting software connection. This multiplies costs for firms managing clients across different accounting platforms.
  • Some users report slow refresh times on large datasets. G2 reviewers note that initial setup has a learning curve compared to simpler connectors.

Source: G-Accon Capterra reviews

Pricing

Business plan at $60/month (or $50/month billed annually) per accounting software product, covering up to 3 companies. Higher tiers scale the number of entities and users. All plans include two-way sync, reporting templates, and multi-entity consolidation. Pricing is per product – Xero and QuickBooks connections are billed separately. See G-Accon pricing for current plan details.

Xero Data Integration Tools for Workflow Automation

If your goal is automating data flows and business processes between Xero and other operational apps – ecommerce platforms like Shopify and Amazon, payment processors like Stripe and PayPal, payroll tools like Gusto, CRM systems like Salesforce and HubSpot, or project management tools – you need a workflow automation platform. These tools handle the operational side of Xero integration: creating invoices from Shopify orders, syncing customer data, automating payment reconciliation, and eliminating manual data entry between Xero and the rest of your business stack.

3. Zapier

Zapier custom Xero-HubSpot workflows

Best for: Small businesses and business owners who need simple, trigger-based automation between Xero and everyday apps, without a large budget or technical resources.

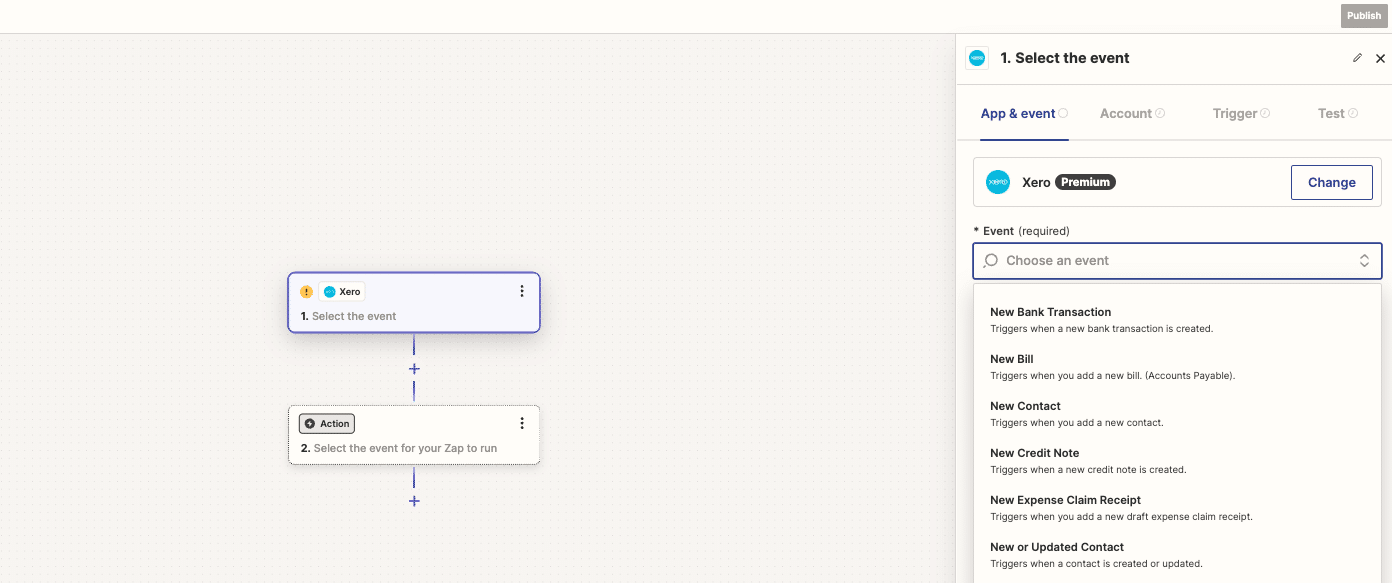
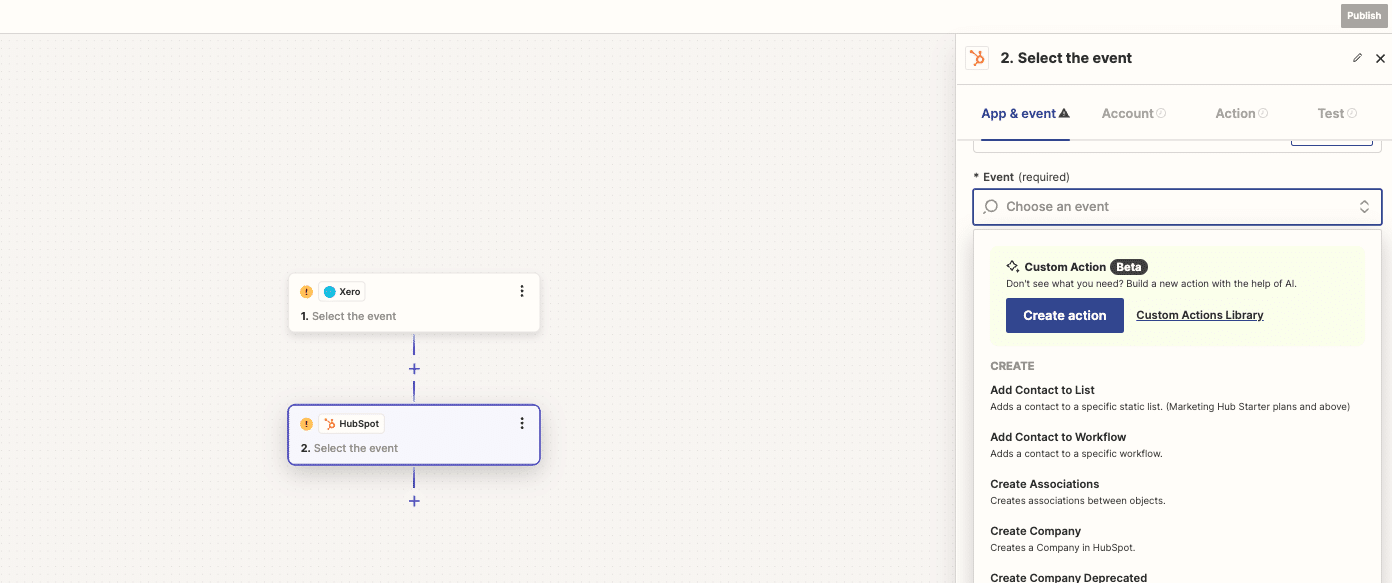
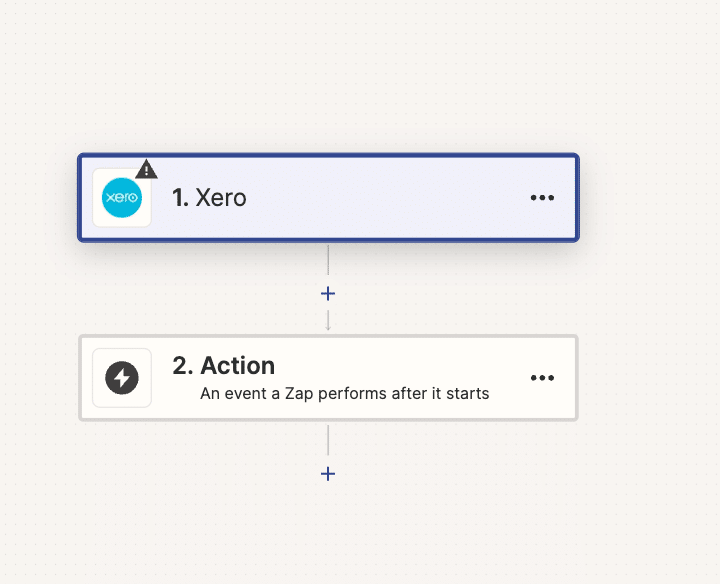
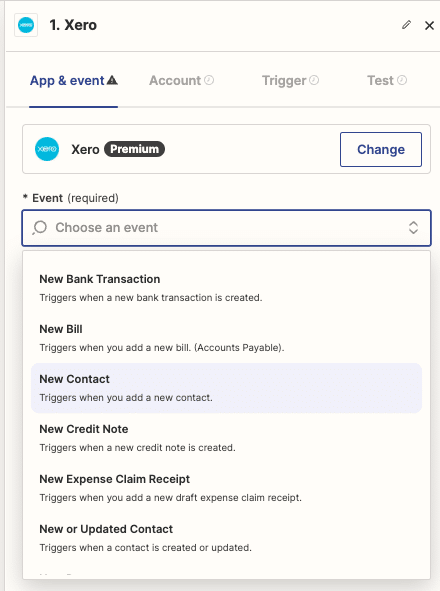
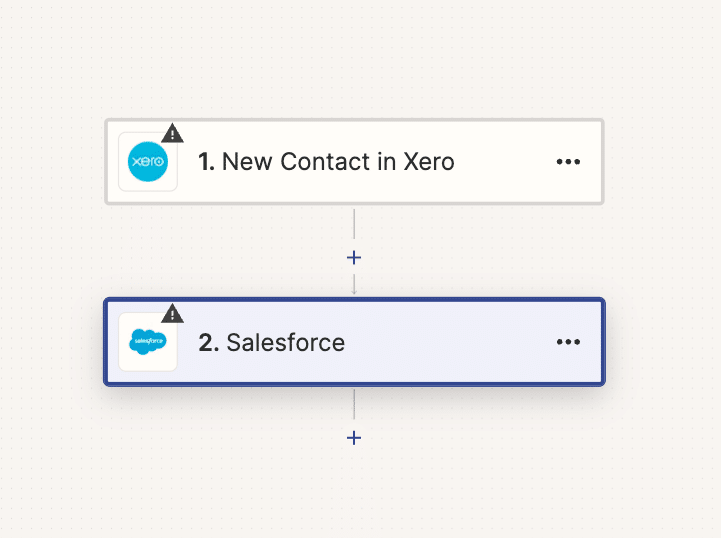
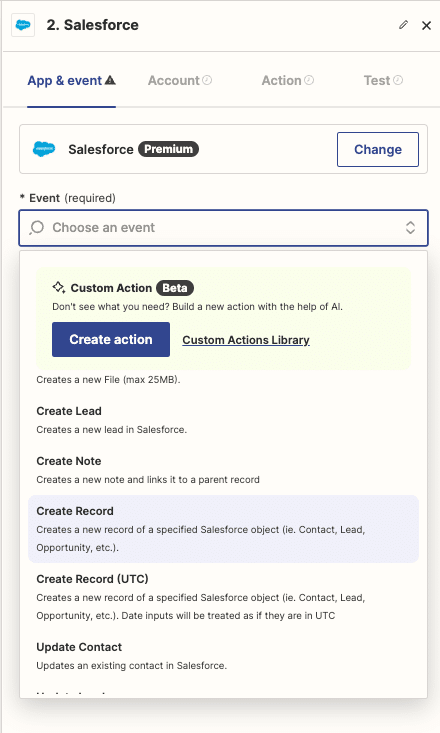
Zapier is the most accessible Xero workflow automation tool. Its trigger-action model makes it easy for non-technical teams to automate common Xero integration workflows without code. When a new payment arrives in Stripe, create a Xero invoice. When a Shopify order is fulfilled, record the transaction in Xero. When a new customer is added in Salesforce, create the corresponding contact in your Xero account. When a Gusto payroll run completes, post the journal entry to Xero.

Zapier’s Xero integration covers a broad range of triggers and actions across invoices, contacts, bank transactions, purchase orders, and payments. Its pre-built Zap templates for common Xero connections – Shopify, Stripe, PayPal, HubSpot, and Gusto – mean most small businesses are up and running with their first automated workflow in under an hour. Zapier does not support Xero on Desktop; it connects to Xero’s cloud API only.

Pros

  • Fast setup with pre-built Zap templates for the most common Xero workflows. Shopify to Xero, Stripe to Xero, Gusto to Xero, and Salesforce to Xero automations are available without custom configuration.
  • Free plan for basic use. Large library of Xero connectors covering invoices, contacts, bank transactions, purchase orders, and payment records.
  • No technical skills required. Small business owners and bookkeepers can configure Xero workflow automation without developer support.

Source: Zapier Xero integrations page

Cons

  • Transaction caps on paid plans. Businesses with high Xero automation volume can hit monthly task limits and face unexpected cost increases.
  • Limited for complex, multi-step workflows with conditional logic. For enterprise Xero integrations that involve branching logic, error handling, and data transformation, Workato handles these better.
  • Zapier takes users out of Xero’s interface and adds a third-party dependency. For simple, well-supported use cases this is fine; for critical financial workflows, the additional failure point warrants evaluation.

Pricing

Free plan available. Paid plans start at $19.99/month for the Starter tier. Professional and Team plans add higher task volumes, multi-step Zaps, and premium Xero connectors. See Zapier pricing for current plan details.

4. Workato

workato data integrations including xero salesforce and more

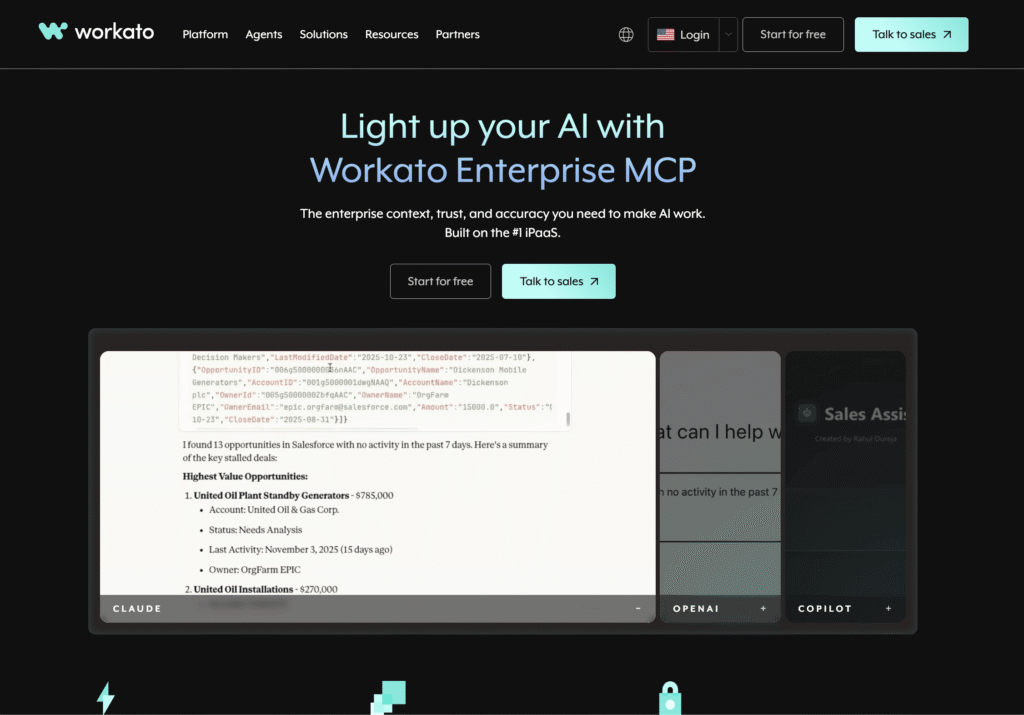
Best for: Mid-market and enterprise teams that need reliable, complex workflow automation between Xero and mission-critical systems like Salesforce, NetSuite, HubSpot, or internal ERP platforms.

Workato handles the Xero integration scenarios that Zapier cannot: multi-step workflows with conditional logic, error handling, data transformation, and enterprise governance. A common Workato use case for Xero involves syncing closed-won Salesforce opportunities to Xero as invoices, transforming field data in the process and routing exceptions to an approval workflow before the invoice is created. Another is syncing Xero financial data into NetSuite for group consolidation, handling currency conversion and account mapping automatically.

Workato holds Gartner Leader status for iPaaS for eight consecutive years through 2026. Its 14,000-plus pre-built connectors include deep Xero integration alongside Salesforce, NetSuite, HubSpot, Shopify, and every major ecommerce and CRM platform. One Capterra reviewer notes using Workato to sync Salesforce and Xero, with ‘hands-free automation’ that ‘simply outperformed all other integration solutions tested.’ Workato’s enterprise governance layer – role-based access control, audit logs, environment separation – makes it suitable for finance teams with compliance requirements.

Pros

  • Handles complex, multi-step Xero workflows with conditional logic, error handling, and data transformation. More reliable than Zapier for mission-critical financial automation workflows.
  • 14,000-plus pre-built connectors covering every major CRM, ecommerce, ERP, and database system alongside Xero. Strong for Xero integrations with Salesforce, NetSuite, and HubSpot.
  • Enterprise governance: RBAC, audit logs, and environment separation make it viable for regulated businesses and finance compliance requirements.

Source: Workato G2 reviews – pros and cons

Cons

  • Expensive. Custom enterprise pricing typically starts around $10,000/year, putting it out of reach for most small businesses and individual bookkeepers.
  • Steep learning curve for advanced workflows. Building complex Workato recipes with custom connectors requires meaningful time investment.
  • Not suited for spreadsheet-based financial reporting or data warehouse pipelines. Workato is a workflow automation tool, not a Xero-to-Sheets connector or ETL platform.

Source: Workato Capterra verified reviews

Pricing

Custom enterprise pricing. Typically starts around $10,000/year for entry-level plans. See Workato pricing for current details.

Xero Data Integration Tools for Data Warehouse Pipelines

If your goal is loading Xero financial data – invoices, bank transactions, accounts payable, contacts, and chart of accounts – into Snowflake, BigQuery, Redshift, or another cloud data warehouse for cross-system analytics, these ELT tools are the right category. They extract Xero data via the API, handle schema management automatically, and load it into your warehouse where it can be joined with data from other sources for financial dashboards, forecasting models, and business intelligence.

5. Fivetran

fivetran move data pipelines for xero salesforce and more

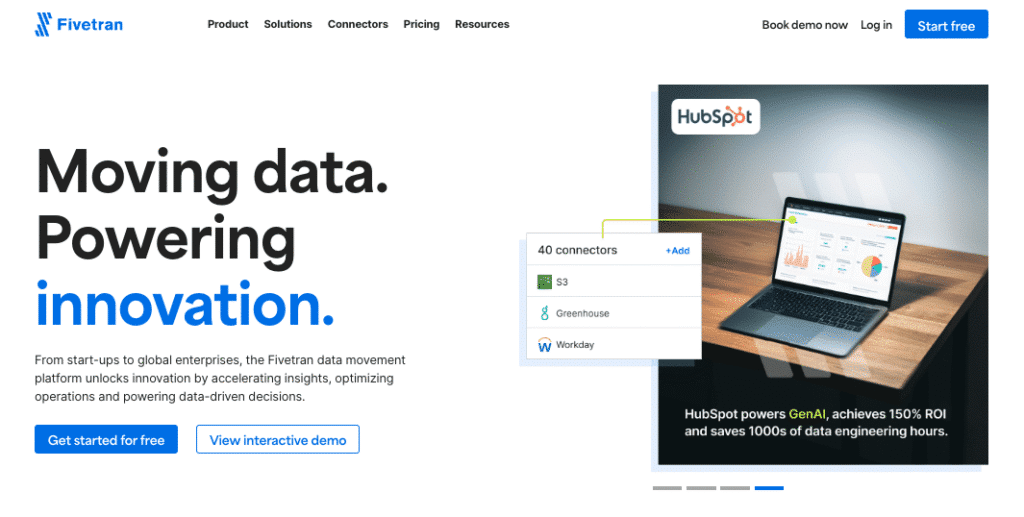
Best for: Data engineering teams that want a fully managed, zero-maintenance ELT pipeline from Xero into a cloud data warehouse.

Fivetran’s Xero connector is a managed ELT integration that extracts all major Xero data objects – invoices, bank transactions, accounts, contacts, purchase orders, accounts payable, accounts receivable, and tax rates – and loads them into your data warehouse in a normalised schema. Schema management is handled automatically. If Xero adds new fields, Fivetran updates the destination schema without manual intervention.

One operational note: Fivetran’s own documentation flags that Xero limits uncertified apps to 25 active connections. For data teams running Xero integrations for multiple business units or clients, this is a real constraint. Fivetran’s pricing changed in March 2025 to a per-connector Monthly Active Rows model. Users on r/dataengineering report 4-8x cost increases under the new model for multi-connector setups.

Pros

  • Fully managed ELT pipeline. No ongoing engineering effort for schema changes, API updates, or rate limit handling.
  • Comprehensive Xero object coverage: invoices, bank transactions, contacts, accounts payable, accounts receivable, purchase orders, and chart of accounts all load cleanly.
  • Wide destination support: Snowflake, BigQuery, Redshift, Databricks, and more.

Source: Fivetran G2 reviews – pros and cons

Cons

  • Per-connector MAR pricing introduced March 2025 has driven significant cost increases for many users. Annual contracts start at $12,000/year minimum.
  • 25 active Xero connections per uncertified app. A genuine operational limit for data teams managing many Xero organisations.
  • Extraction only. No transformation and no write-back to Xero.

Source: Fivetran Capterra verified reviews

Pricing

Per-connector Monthly Active Rows (MAR) model. Free plan covers up to 500,000 MAR. Standard plan syncs every 15 minutes. Enterprise adds high-volume connectors and 5-minute sync frequency. Annual contracts start at $12,000/year. See Fivetran pricing for current plan details.

6. Airbyte

Airbyte homepage

Best for: Data engineering teams that want open-source ELT flexibility, full control over the Xero connector, and lower infrastructure costs than fully managed alternatives.

Airbyte’s Xero connector is open-source, meaning teams can inspect, modify, and extend it. The connector covers the main Xero data objects – accounts, bank transactions, contacts, invoices, purchase orders, and tax rates – and loads them into major warehouse destinations. Unlike Fivetran, Airbyte’s self-hosted version has no enforced connection limits, which sidesteps the 25-connection Xero constraint for data teams managing many organisations.

The trade-off is operational complexity. Self-hosted Airbyte requires Kubernetes infrastructure and DevOps resources. Airbyte Cloud removes the infrastructure burden but reintroduces cost scaling at higher data volumes. For data teams with the engineering capacity to manage self-hosted infrastructure, Airbyte offers the most cost-flexible Xero ELT option available.

Pros

  • Open-source with full source code access. When the Xero connector has edge cases or breaks after an API change, your team can diagnose and fix it without waiting on vendor support.
  • No enforced 25-connection limit on self-hosted deployments. Practical for data teams managing many Xero organisations in parallel.
  • Significant cost savings versus Fivetran for teams with engineering resources to manage self-hosted infrastructure.

Source: Airbyte G2 reviews – pros and cons

Cons

  • Self-hosted Airbyte requires Kubernetes expertise and ongoing DevOps investment. Not a viable option for teams without dedicated data engineering resources.
  • Airbyte Cloud costs escalate at higher Xero data volumes. Validate cost projections against your specific Xero organisation count and sync frequency before committing.
  • No pre-load transformation. Complex Xero data modeling requires dbt or downstream SQL after data lands in the warehouse.

Source: Airbyte Xero ETL connector overview

Pricing

Open-source self-hosted version is free. Airbyte Cloud offers a free tier for low-volume use. The Flex plan uses capacity-based pricing scaling with data volume rather than per-connector. See Airbyte pricing for current Cloud and team plan rates.

7. Skyvia

a screenshot of skyvia's homepage

Best for: Small businesses and accounting teams that need affordable, no-code Xero data synchronisation without engineering overhead.

Skyvia is a no-code cloud data integration platform with a Xero connector that supports ETL, ELT, bidirectional sync, and data replication. Its drag-and-drop interface is accessible to bookkeepers and small business owners who do not have engineering resources. The Xero connector covers invoices, contacts, bank transactions, accounts, purchase orders, and items, with support for loading Xero data into common cloud databases and warehouses or syncing it to other SaaS apps.

Skyvia uses scheduled polling rather than streaming, which means it is not suited for real-time Xero data requirements. But for small businesses that need Xero data to sync to another database or SaaS tool on a daily or hourly schedule, Skyvia offers the most accessible and affordable entry point in this list.

Pros

  • No-code drag-and-drop interface accessible to bookkeepers and small business owners without SQL or API knowledge.
  • Affordable pricing with a meaningful free tier. Starts at $19/month for paid plans – the most accessible option for small businesses in this list.
  • 200-plus connectors alongside Xero covering common SaaS apps, databases, and cloud storage.

Source: Skyvia Xero integration page

Cons

  • No real-time streaming. Skyvia uses scheduled polling – suitable for daily or hourly Xero sync, not sub-minute data freshness.
  • Less suited to high-volume Xero data or enterprise-scale reporting. Designed for SMB data volumes.
  • Limited transformation capability relative to Integrate.io or dbt for complex Xero data modeling requirements.

Pricing

Free plan available. Paid plans start at $19/month for the Basic tier. Standard and Professional plans add higher data volumes and sync frequency options. See Skyvia pricing for current plan details.

How to Choose the Right Xero Data Integration Tool

Finance team or bookkeeper needing live Xero financial data in Google Sheets or Excel, blended with Salesforce, Shopify, or other sources: Coefficient. No-code setup, 150+ connectors, automated refresh, free plan available.

Accounting firm or bookkeeper needing deep Xero reporting, multi-entity consolidation, or bulk transaction editing in Google Sheets: G-Accon. Premium Xero Partner, 170+ currency support, 100-plus accounting templates, two-way sync optimised for accounting workflows.

Small business automating workflows between Xero and Shopify, Stripe, PayPal, Gusto, or HubSpot: Zapier. Pre-built Zap templates, fast setup, free plan available.

Mid-market or enterprise team running complex multi-step workflows between Xero and Salesforce, NetSuite, or other critical systems: Workato. More reliable than Zapier for mission-critical financial automation with conditional logic and error handling.

Data engineering team loading Xero data into a cloud data warehouse: Fivetran for a fully managed, zero-maintenance ELT pipeline. Airbyte if your team has engineering capacity and wants open-source flexibility with no enforced connection limits.

Small business or SMB needing affordable no-code Xero sync to a database or cloud app: Skyvia. Free tier available, drag-and-drop setup, $19/month entry-level paid plan.

Get Started with Coefficient for Xero

If your finance team needs live Xero financial data in Google Sheets or Excel – alongside Salesforce, Shopify, HubSpot, or any of 150-plus other sources – try Coefficient for free. Connect your Xero account, import your first report or dataset, and set a refresh schedule that eliminates manual exports entirely.See Coefficient pricing for plan details, pre-built Xero dashboard templates for ready-to-use financial reporting setups, and the Coefficient vs G-Accon comparison for a detailed side-by-side of the two spreadsheet connectors.

7 Best Xero Integrations in 2026: Boost Your Productivity

Xero’s ecosystem is vast. But which integrations truly deliver value? As a finance professional, you need tools that streamline processes and provide actionable insights.

We’ve done the legwork.

Here are the 7 best Xero integrations for 2026, each vetted for their ability to transform your financial workflows.

Why the Right Xero Integrations Matter

Xero is a solid accounting platform, but it really shines when paired with the right add-ons. Good integrations can:

  • Save Time: By automating tedious tasks like data entry and reconciliations, you’ll spend less time on paperwork and more on growing your business. Imagine your invoices, bills, and bank transactions all syncing automatically – that’s the power of smart integrations.
  • Provide Better Insights: Connecting Xero to your other business tools (like your online store or CRM) gives you a clearer picture of your finances. You’ll see how sales impact cash flow in real time, making it easier to spot trends and make informed decisions.
  • Tailor to Your Needs: Every business is different. Integrations let you add features Xero might be missing, whether that’s detailed inventory tracking or industry-specific tax reports. It’s like customizing Xero to fit your business perfectly.

Choosing integrations can be overwhelming, but focus on tools that solve your biggest headaches and align with how you work. The right combo can turn Xero into a financial powerhouse for your business.

Comparison Table of Top Xero Integrations

Integration

Primary Function

Key Feature

Pricing

Best For

Coefficient

Data Integration & Reporting

Real-time data sync from 50+ sources

Free tier available. Paid starts at $49/month

Businesses needing advanced reporting and data integration

Gusto

Payroll Management

Automated tax filings

$40/mo + $6/person

SMBs looking for comprehensive payroll solution

Stripe

Payment Processing

Automatic reconciliation

2.9% + $0.30/transaction

Online businesses with high transaction volumes

Hubdoc

Document Management

Automated data extraction

Included with Xero

Businesses struggling with document organization

Shopify

E-commerce

Automated order-to-invoice

From $29/mo

Online retailers seeking seamless accounting

Fathom

Financial Reporting

Customizable KPI dashboards

From $39/mo

Businesses needing in-depth financial analysis

ApprovalMax

Approval Workflows

Multi-level approval chains

From $36/mo

Organizations with complex approval processes

Now, let’s dive deeper into each integration, exploring how they can transform your financial processes.

1. Coefficient: Supercharge Your Reporting with Live Data

Coefficient is a data integration and reporting tool that connects Xero with 50+ other business systems. It allows real-time syncing of financial data into Excel and Google Sheets, enabling automated, customizable reporting and analysis.

Coefficient eliminates manual data entry and provides up-to-the-minute financial insights for improved decision-making.

Key Features:

  • Builds and refreshes reports using real-time data
  • Pushes spreadsheet data back to source systems
  • Automates report distribution via Slack and email

How it integrates with Xero: Coefficient acts as a bridge between Xero and your spreadsheets. It pulls financial data directly from Xero into Excel or Google Sheets, allowing you to create live, auto-updating reports. This means no more manual data exports or outdated financial snapshots.

Pros:

Cons:

  • Advanced features may require some initial setup time
  • Custom pricing might be a barrier for very small businesses

Pricing:

  • Free Plan: Includes basic features such as data imports for up to 5,000 rows and 10,000 OpenAI API calls
  • Starter Plan: $49 per user per month, with features like daily automatic refreshes and limited bulk write-backs
  • Pro Plan: $99 per user per month, offering unlimited import size, hourly refreshes, and unlimited bulk write-backs
  • Enterprise Plan: Custom pricing based on specific needs

2. Gusto: Simplify Payroll and HR Management

Gusto is a comprehensive payroll and HR management system that integrates seamlessly with Xero. It automates payroll calculations, tax filings, and benefits administration for U.S.-based businesses. Gusto syncs payroll data directly with Xero, creating accurate journal entries without manual intervention.

Key Features:

  • Automates payroll calculations and tax filings
  • Manages benefits administration
  • Provides employee self-service portal
  • Offers time tracking and PTO management

How it integrates with Xero: Gusto automatically syncs payroll data with Xero after each pay run. It creates journal entries for wages, taxes, and deductions, ensuring your books are always up-to-date without manual intervention.

Pros:

  • Simplifies complex payroll processes
  • Ensures tax compliance with automatic filings
  • Improves employee experience with self-service options
  • Reduces payroll processing time significantly

Cons:

  • Primarily focused on U.S. businesses
  • May have more features than necessary for very small teams

Pricing: Starts at $40/month + $6/person.

3. Stripe: Streamline Payment Processing and Reconciliation

Stripe is a payment processing platform that integrates with Xero to automate online payment handling and reconciliation. It accepts various payment methods, automatically creates and matches invoices in Xero, and provides detailed transaction reporting.

Key Features:

  • Processes online payments securely
  • Automatically reconciles transactions in Xero
  • Provides detailed reporting on payment trends
  • Supports multiple currencies and payment methods

How it integrates with Xero: Stripe automatically creates and matches invoices in Xero for each payment received. This means your books are always up-to-date, with minimal manual intervention required.

Pros:

  • Seamless payment processing reduces friction for customers
  • Automatic reconciliation saves hours of manual work
  • Detailed reporting provides valuable insights into cash flow
  • Supports global transactions with multiple currency options

Cons:

  • Transaction fees can add up for high-volume, low-value transactions
  • Advanced features may require some technical setup

Pricing: 2.9% + $0.30 per transaction for most online card payments. While this can seem high, the time saved on reconciliation often offsets the cost.

4. Hubdoc: Automate Document Collection and Data Entry

Hubdoc is a document collection and data extraction tool designed to work with Xero. It automatically fetches bills and receipts from hundreds of vendors, extracts key data using OCR technology, and pushes this information directly into Xero.

Hubdoc simplifies document organization, reduces manual data entry, and aids in audit preparation.

Key Features:

  • Automatically fetches bills and receipts from over 700 vendors
  • Extracts key data using OCR technology
  • Provides secure document storage and organization
  • Syncs data and documents directly to Xero

How it integrates with Xero: Hubdoc pushes documents and their extracted data directly into Xero, creating transactions and attaching source documents automatically. This ensures your books are always up-to-date and audit-ready.

Pros:

  • Drastically reduces manual data entry time
  • Improves accuracy of financial records
  • Simplifies document storage and retrieval for audits
  • Enhances expense tracking and reporting

Cons:

  • May require initial setup time to connect all relevant accounts
  • Some users report occasional issues with data extraction accuracy

Pricing: Included with Xero subscriptions, providing excellent value for Xero users.

5. Shopify: Seamless E-commerce Accounting

Shopify is an e-commerce platform that offers seamless integration with Xero for online retailers. It automatically syncs orders, payments, refunds, and inventory data with Xero, creating matching transactions for easy reconciliation.

This integration eliminates manual data entry for online sales and provides real-time visibility into store performance.

Key Features:

  • Syncs orders, payments, and refunds automatically
  • Creates and matches invoices in Xero
  • Tracks inventory levels across platforms
  • Provides detailed sales tax reporting

How it integrates with Xero: Shopify automatically sends sales data, fees, and payouts to Xero, creating matching transactions for easy reconciliation. This ensures your financial records always reflect your latest sales data.

Pros:

  • Eliminates manual data entry for online sales
  • Improves accuracy of financial records
  • Simplifies tax compliance with detailed reporting
  • Provides real-time visibility into online store performance

Cons:

  • Can be complex to set up for stores with many product variations
  • May require additional apps for very specific needs

Pricing: Shopify plans start at $29/month. The Xero integration itself is free, providing excellent value for e-commerce businesses.

6. Fathom: Advanced Financial Reporting and Analysis

Fathom is a financial reporting and analysis tool that enhances Xero’s native capabilities. It pulls data directly from Xero to create customizable, visually appealing reports and dashboards.

Fathom offers in-depth financial analysis, benchmarking, and forecasting features, allowing businesses to gain deeper insights from their Xero data.

Key Features:

  • Creates customizable, visually appealing reports
  • Offers in-depth financial analysis and forecasting
  • Provides benchmarking capabilities
  • Allows for consolidation of multiple Xero companies

How it integrates with Xero: Fathom pulls data directly from Xero, allowing for real-time reporting and analysis. This means your reports are always up-to-date, reflecting the latest data in Xero.

Pros:

  • Produces professional-quality reports quickly
  • Offers deeper insights than Xero’s native reporting
  • Simplifies group reporting for multiple entities
  • Improves decision-making with clear financial visualizations

Cons:

  • Learning curve for advanced features
  • May be more than needed for very small businesses

Pricing: Starts at $39/month, with plans varying based on the number of companies and users.

7. ApprovalMax: Streamline Approval Workflows

ApprovalMax is an approval automation tool that integrates with Xero to enhance financial control and governance. It allows businesses to create customizable, multi-step approval workflows for bills and purchase orders before they enter Xero.

ApprovalMax provides a detailed audit trail and helps organizations reduce approval bottlenecks while improving spending visibility.

Key Features:

  • Creates customizable approval workflows
  • Integrates with bills and purchase orders in Xero
  • Provides a clear audit trail for all approvals
  • Offers mobile app for on-the-go approvals

How it integrates with Xero: ApprovalMax sits between the document capture stage and Xero, ensuring all documents go through proper approval before entering Xero. This adds a crucial layer of control to your financial processes.

Pros:

  • Reduces approval bottlenecks significantly
  • Enhances financial compliance and control
  • Improves visibility into spending patterns
  • Allows for complex, multi-level approval workflows

Cons:

  • May be unnecessary for very small teams or simple approval processes
  • Some users report a learning curve in initial setup

Pricing: Starts at $36/month, with plans varying based on the number of approvers and documents.

Transform Your Financial Processes with the Right Integrations

The right Xero add-ons can significantly improve financial processes, making them faster and more insightful. Coefficient connects Xero with various business systems, offering real-time data and improved reporting.

When choosing integrations, consider specific business needs and take advantage of free trials. The right tools can streamline processes and provide a fresh perspective on financial management.

Ready to take your Xero experience to the next level?

Try Coefficient today and experience the power of seamless data integration and real-time financial insights.

How to Connect Xero to HubSpot? Top Methods and Tutorials

Need to connect Xero to HubSpot? You’re in the right place.

By linking Xero and HubSpot, you’ll sync financial data with customer information, enabling faster invoicing and more accurate sales forecasts.

This guide covers three proven methods to integrate these platforms, from simple native connections to powerful custom solutions. We’ll walk you through each option, helping you choose the best fit for your needs.

Let’s dive in!

Advantages of Connecting Xero to HubSpot

Before we dive into the how-to, let’s explore why integrating Xero with HubSpot is essential for your business:

  1. Accelerated Invoice-to-Cash Cycle: Reduce days sales outstanding by personalizing payment reminders based on customer data. Get paid faster, improving cash flow and financial stability.
  2. More Accurate Revenue Forecasting: Create precise revenue projections by combining financial data with sales pipeline information. Make confident decisions on investments and communicate financial outlook more effectively.
  3. Streamlined Financial Reporting: Eliminate hours of manual data entry and reconciliation each week. Gain a comprehensive view of business performance by blending financial metrics with customer acquisition costs and lifetime value data.

Top 3 Methods to Connect Xero to HubSpot

Let’s explore the three best ways to integrate Xero with HubSpot, each catering to different needs and levels of complexity:

let’s create a 2×3 table for the “Best For” section:

SolutionBest For
CoefficientNon-technical users who want to sync Xero financial data with HubSpot CRM data in spreadsheets for custom reporting and analysis.
Native IntegrationSmall to medium-sized businesses looking for a straightforward, out-of-the-box solution to connect Xero and HubSpot without extensive customization.
ZapierUsers who need to automate specific workflows between Xero and HubSpot, such as creating contacts in HubSpot when new invoices are added in Xero.

#1 Coefficient: The Powerful Data Integration Solution

a screenshot of coefficients homescreen

Coefficient syncs live data from various business systems, like Xero, directly into Excel and Google Sheets. For Xero users, this means you can build real-time financial reports, automate data updates, and streamline your accounting workflows without leaving your spreadsheet.

Step-by-step walkthrough:

Step 1. Install Coefficient for your spreadsheet of choice

For Google Sheets

  • Open a new or existing Google Sheet, navigate to the Extensions tab, and select Add-ons > Get add-ons.
  • In the Google Workspace Marketplace, search for “Coefficient.”
  • Follow the prompts to grant necessary permissions.
  • Launch Coefficient from Extensions > Coefficient > Launch.
  • Coefficient will open on the right-hand side of your spreadsheet.
 Installing Coefficient for Google Sheets

For Microsoft Excel

  • Open Excel from your desktop or in Office Online. Click ‘File’ > ‘Get Add-ins’ > ‘More Add-Ins.’
  • Type “Coefficient” in the search bar and click ‘Add.’
  • Follow the prompts in the pop-up to complete the installation.
  • Once finished, you will see a “Coefficient” tab in the top navigation bar. Click ‘Open Sidebar’ to launch Coefficient.
 Installing Coefficient for Excel

Step 2. Import Xero Data into Your Spreadsheet

In the Coefficient sidebar, click ‘Import From.’  Select “Xero” from the list of available data sources.

Selecting Xero import

Enter your Xero demo credentials and click ‘Login.’

Entering Xero demo credentials

Select one or more of the available organizations to connect to Coefficient. Click “Continue” to proceed with the selected organization(s).

Selecting Xero organizations

Choose an endpoint from the available options, such as Invoices, Contacts, or Users.

Continuing with selected organization

For this example, select “Get Invoices” to fetch invoice data from Xero.

Choosing endpoint option

Enter the Tenant ID (organization ID) for the selected Xero organization.

Selecting Get Invoices

Optionally, select additional fields to include in the data import.

Entering Tenant ID

Click “Import” to fetch the invoice data into your spreadsheet.

Selecting additional fields

Step 3. Export Data from Your Spreadsheet to HubSpot

Before starting, make sure you’ve connected to HubSpot.

Then, navigate to Coefficient’s menu >Click “Export to…”

 Importing invoice data

Select HubSpot.

Connecting to HubSpot

Select the tab and header row in your spreadsheet. The header row should contain the HubSpot field headers.

Selecting spreadsheet tab

Choose the HubSpot property you are exporting the data to.

Choosing HubSpot property

Then, select the action you want to perform (Update, Insert, or Delete).

Setting export action

Map the fields in your spreadsheet to the corresponding HubSpot fields. If your data came from a HubSpot import using Coefficient, the fields will be automatically mapped. Otherwise, you will need to map them manually.

Mapping fields to HubSpot

Configure any advanced settings such as the column for results. Coefficient will write back information to your spreadsheet related to the update, including the HubSpot record ID, status of the export, and timestamp.

Configuring advanced settings

Review your settings and click “Export”.

Reviewing export settings

Select the rows in your sheet that you want to export to HubSpot. You can update a single row or all rows in your sheet.

Selecting rows for export

Coefficient will confirm the rows that have been updated in your HubSpot instance. The records will have the record ID, result status, and timestamp of the update.

Confirming updated rows

Pros and Cons of Coefficeint

  • Pros:
    • Consolidate financial data from multiple systems into Excel and Google Sheets
    • Create real-time dashboards for cash flow monitoring and forecasting
    • Automate financial reporting and data refreshes, reducing manual work
  • Cons:
    • Some advanced features, such as scheduled automations, are only available on paid plans. However, Coefficient’s pricing is still very competitive compared to other solutions.

#2 Native HubSpot-Xero Integration

Native HubSpot-Xero integration

For those looking for a straightforward, basic integration, the native HubSpot-Xero integration is a good starting point.

Step-by-step guide to setting up the native integration:

  1. Log in to your HubSpot account and navigate to the App Marketplace.
  2. Search for “Xero” and select the official Xero integration.
  3. Click “Install app” and follow the prompts to connect your Xero account.
  4. Grant the necessary permissions for data sharing between HubSpot and Xero.
  5. Configure the basic sync settings for contacts and invoices.

Pros:

  • Easy setup process
  • Basic functionality included at no additional cost
  • Official support from both HubSpot and Xero

Cons:

  • Limited customization options
  • Basic data syncing only, lacking advanced features

#3 Zapier for Custom Xero-HubSpot Workflows

Zapier custom Xero-HubSpot workflows

Zapier is an excellent option for creating custom automation workflows between Xero and HubSpot.

Steps to create Zaps for Xero and HubSpot integration:

  1. Sign up for a Zapier account at zapier.com.
  2. Create a new Zap and select Xero as the trigger app.
Creating new Zap
  1. Choose a trigger event (e.g., “New Invoice Created”).
  2. Connect your Xero account to Zapier.
  3. Select HubSpot as the action app and choose an action (e.g., “Create or Update Contact”).
 Selecting HubSpot action
  1. Connect your HubSpot account to Zapier.
  2. Map the fields between Xero and HubSpot.
  3. Test your Zap and activate it.

Pros:

  • Highly customizable automation options
  • Wide range of possible integrations beyond just Xero and HubSpot
  • No coding required for basic automations

Cons:

  • Automations can break for complex workflows
  • Xero is only available for premium plans

Xero to HubSpot? Do it in Seconds with Coefficient

Connecting Xero to HubSpot is a powerful way to streamline your revenue operations, improve forecasting accuracy, and gain a comprehensive view of your customers. While the native integration and Zapier offer viable options for basic needs, Coefficient stands out as the superior choice for revenue operations professionals seeking advanced data integration, analysis, and reporting capabilities.

By choosing the right integration method and following best practices, you can unlock the full potential of your financial and customer data, driving growth and efficiency across your organization.

Ready to take your Xero-HubSpot integration to the next level? Try Coefficient today and experience the power of advanced data integration for your revenue operations.

How to Connect Xero to Snowflake

In today’s data-driven business landscape, integrating financial data from Xero with a powerful data warehousing solution like Snowflake can unlock valuable insights and streamline reporting. This guide will walk you through the advantages of connecting Xero to Snowflake and provide step-by-step instructions for three methods to achieve this integration.

Advantages of Connecting Xero to Snowflake

Integrating Xero with Snowflake offers several key benefits:

  • Real-Time Cash Flow Visibility: Sync invoice statuses and payment data from Xero to Salesforce, allowing sales reps to see real-time cash flow impacts of their deals. This empowers them to prioritize collections or adjust payment terms for at-risk accounts, improving overall financial health.
  • Automated Quote-to-Cash Process: By connecting Salesforce opportunities to Xero invoices, you can automate the entire quote-to-cash cycle. This reduces processing time, minimizes errors, and accelerates revenue recognition, particularly beneficial for businesses with complex pricing or high transaction volumes.
  • Data-Driven Sales Forecasting: Combine historical sales data from Salesforce with actual financial performance from Xero to create more accurate sales forecasts. This integration allows you to factor in seasonality, payment patterns, and customer profitability, leading to more realistic projections and better resource allocation.

Connecting Xero and Snowflake: 3 Methods

There are several methods to connect Xero and Snowflake, each with their own advantages and use cases. Here’s a high-level comparison:

SolutionBest For
CoefficientSmall to medium-sized businesses with limited IT resources but a strong need for data analysis. Ideal for finance teams or sales operations who frequently work in spreadsheets and need to combine Xero financial data with Salesforce CRM data for custom reporting.
ZapierMarketing and sales teams in organizations with diverse software ecosystems beyond just Xero and Salesforce. Best for companies that need to create multi-step workflows involving additional apps (e.g., triggering a Slack notification when a high-value invoice is paid in Xero and updating the corresponding Salesforce opportunity).
Dataloader.ioEnterprise-level organizations or those dealing with high data volumes and complex data structures. Optimal for IT teams or data administrators who need granular control over large-scale data migrations or regular bulk updates between Xero and Salesforce.

Let’s dive into each method in more detail, including step-by-step setup guides.

Method 1: Coefficient – No-Code, User-Friendly

a screenshot of the coefficient.io homepage

Coefficient is an analytics and automation platform that allows you to easily connect data sources like Xero to destinations like Snowflake without any coding required. It’s an excellent choice for quick integration setup.

Features:

  • Intuitive, no-code interface: Simplifies the setup process for users without technical expertise.
  • Automated data syncs in real-time: Keeps your Snowflake data up-to-date with the latest from Xero.
  • Ability to define custom data workflows: Allows for flexible data management tailored to your needs.
  • Affordable pricing plans for businesses of all sizes: Makes it accessible to small and medium-sized businesses.

Pros:

  • Simple setup process with no technical skills needed: Enables quick and easy integration.
  • Real-time data sync keeps Snowflake always up-to-date: Ensures you have the latest data for analysis.
  • Customizable automation fits your unique data needs: Offers flexibility in data management.

Cons:

  • Less flexibility compared to code-based solutions: Limited customization for complex data transformations.
  • Some advanced features limited to higher-tier plans: Full functionality requires a premium subscription.

How to Connect Xero to Snowflake with Coefficient

Step 1: Install the Coefficient

For Google Sheets

Open a new or existing Google Sheet, navigate to the Extensions tab, and select Add-ons > Get add-ons.

Going to Add-ons > Get add-ons in the Extensions tab of Google Sheets.

In the Google Workspace Marketplace, search for “Coefficient.”

Typing “Coefficient” in the search bar of the Google Workspace Marketplace.

Follow the prompts to grant necessary permissions.

Providing necessary permissions for Coefficient in Google Sheets.

Launch Coefficient from Extensions > Coefficient > Launch.

Launching Coefficient from Extensions > Coefficient > Launch in Google Sheets.

Coefficient will open on the right-hand side of your spreadsheet.

Coefficient appearing on the right-hand side of the Google Sheets.

For Microsoft Excel

Open Excel from your desktop or in Office Online. Click ‘File’ > ‘Get Add-ins’ > ‘More Add-Ins.’

Choosing ‘More Add-Ins’ from the ‘Get Add-ins’ menu in Excel.

Type “Coefficient” in the search bar and click ‘Add.’

Searching for “Coefficient” in the search bar and clicking ‘Add’ in the Excel add-ins menu.

Follow the prompts in the pop-up to complete the installation.

Once finished, you will see a “Coefficient” tab in the top navigation bar. Click ‘Open Sidebar’ to launch Coefficient.

Clicking ‘Open Sidebar’ to activate Coefficient from the Excel navigation bar.

Step 2. Import Xero Data into Your Spreadsheet

In the Coefficient sidebar, click ‘Import From.’

Select “Xero” from the list of available data sources.

Selecting “Xero” from the list of available data sources in Coefficient.

Enter your Xero demo credentials and click ‘Login.’

Entering your Xero demo credentials and clicking ‘Login.’

Select one or more of the available organizations to connect to Coefficient.

Selecting one or more of the available organizations to connect to Coefficient.

Click “Continue” to proceed with the selected organization(s).

Clicking “Continue” to proceed with the selected organization(s).

Choose an endpoint from the available options, such as Invoices, Contacts, or Users.

Choosing an endpoint from the available options, such as Invoices, Contacts, or Users.

For this example, select “Get Invoices” to fetch invoice data from Xero.

Selecting “Get Invoices” to fetch invoice data from Xero.

Enter the Tenant ID (organization ID) for the selected Xero organization.

Entering the Tenant ID (organization ID) for the selected Xero organization.

Optionally, select additional fields to include in the data import.

Optionally selecting additional fields to include in the data import.

Click “Import” to fetch the invoice data into your spreadsheet.

Clicking “Import” to fetch the invoice data into your spreadsheet.

Step 3. Export Data Snowflake

Before starting, make sure you’ve connected to Snowflake.

https://www.youtube.com/watch?v=Zjym92WHgLM

Then, navigate to Coefficient’s menu. Click “Export to…”

Clicking “Export to…” in the Coefficient menu.

Choose Snowflake from the list of available data sources.

Selecting the tab and header rows in your spreadsheet that contain the data you want to export.

Select the tab and header rows in your spreadsheet that contains the data you want to export.

Selecting the type of action you want to perform—Update, Insert, Upsert, or Delete.

Click “Next” to continue.

Select the table in your Snowflake database that you want to update. Then, select the type of action you want to perform—Update, Insert, Upsert, or Delete.

Mapping the fields from your spreadsheet to the corresponding Snowflake fields.

Map the fields from your spreadsheet to the corresponding Snowflake fields.

 Specifying additional settings such as batch size, whether to export empty cells on an update, and the column for results.

Note: Primary Keys (ID fields) are required for Update and Delete actions. For Insert actions, the Primary Key field can be set to auto populate if it’s configured in Snowflake.

Specify additional settings such as batch size, whether to export empty cells on an update, and the column for results.

Confirming your settings and clicking “Export” to proceed.

Confirm your settings.

Highlighting the rows you want to update or export. You can choose to export all rows or specific rows.

Then, highlight the rows you want to update or export. You can choose to export all rows or specific rows.

Following the prompts to confirm your changes.

After you’re finished, review your settings and click “Export.”

Follow the prompts to confirm your changes.

Data from your spreadsheet pushing to Salesforce in a few seconds.

In a few seconds, data from your spreadsheet will push to Salesforce.

Screenshot 2023-12-20 at 8.26.03 PM.png

Review your settings and click “Export” to push your data from the spreadsheet to Snowflake.

Coefficient will then update the records in Snowflake, displaying the status, record ID, and timestamp of the updates in your spreadsheet.

Method 2: Hevo Data

Hevo Data is a fully managed, no-code data pipeline platform.

Hevo Data is a fully managed, no-code data pipeline platform. It enables automated, real-time data replication from 150+ sources including Xero to destinations like Snowflake, without the need for any coding.

Features:

  • Fully automated, codeless data pipelines: Eliminates the need for manual data handling and maintenance.
  • Real-time data replication from source to destination: Ensures your data is always current.
  • Pre-built integrations with 150+ data sources: Provides extensive connectivity options.
  • Automatic schema mapping and evolution: Handles changes in data structure seamlessly.
  • Secure and compliant with enterprise-grade security: Ensures data integrity and compliance with regulations.

Pros:

  • Completely automated pipeline, no coding or maintenance needed: Simplifies the data integration process.
  • Supports a wide variety of data sources out-of-the-box: Offers flexibility and connectivity.
  • Handles schema changes seamlessly: Adapts to changes in data structure without manual intervention.
  • Robust security and compliance features: Ensures data protection and regulatory compliance.

Cons:

  • Higher pricing compared to some alternatives: May be a consideration for small businesses.
  • Initial setup and data mapping can take some time: Requires careful configuration to ensure accuracy.

How to Connect Xero to Snowflake with Hevo

Step 1. Create a Hevo Account:

  • Go to the Hevo website and sign up for an account.
  • Log in to the Hevo dashboard.

Step 2. Add Xero as a Data Source:

  • Click on “Add Pipeline” and select Xero as the data source.
  • Provide your Xero account credentials and grant Hevo access.

Step 3. Configure Data Ingestion Settings:

  • Select the Xero objects and fields to replicate.
  • Configure the data ingestion settings according to your needs.

Step 4. Add Snowflake as a Data Destination:

  • Select Snowflake as the data destination and enter your account details.
  • Provide the necessary Snowflake account information, including the account URL, username, password, and the database and schema where you want to load the data.

Step 5. Map Fields and Configure Replication:

  • Map the Xero fields to the desired Snowflake table and columns.
  • Choose your replication frequency and other relevant settings.

Step 6. Save and Run the Pipeline:

  • Click “Save and Run” to create the data pipeline.
  • Hevo will automatically begin replicating data from Xero to Snowflake in real-time.

Method 3: Fivetran

Fivetran is a fully-managed, enterprise-grade ETL solution.

Fivetran is a fully-managed, enterprise-grade ETL solution. It provides reliable, secure data pipelines to replicate data from Xero and 150+ other sources into destinations like Snowflake.

Features:

  • Fully-managed, zero-maintenance data pipelines: Simplifies data integration without the need for manual intervention.
  • Pre-built, analyst-ready data schemas: Provides ready-to-use data structures for analysis.
  • Automated in-warehouse transformations: Supports data transformations directly within Snowflake using DBT integration.
  • Advanced security and compliance certifications: Ensures data protection and regulatory compliance.
  • Extensive performance monitoring and logging: Offers comprehensive insights into data pipeline performance.

Pros:

  • Fully managed service, no pipeline maintenance required: Simplifies data management.
  • Highly scalable to handle large data volumes: Suitable for enterprises with extensive data needs.
  • Automated in-warehouse transformations via DBT integration: Enhances data processing capabilities.
  • Enterprise-grade security and compliance: Ensures data integrity and regulatory compliance.

Cons:

  • More expensive than other solutions: Higher cost may be a consideration for smaller businesses.
  • Initial setup can be complex for non-technical users: Requires careful configuration and setup.

How to Connect Xero to Snowflake with Fivetran

Step 1. Sign Up for Fivetran:

  • Go to the Fivetran website and sign up for an account.
  • Complete the onboarding process and log into your dashboard.

Step 2. Add Xero as a Connector:

  • Click “Add Connector” and select Xero from the list of sources.        
  • Authenticate with Xero and grant Fivetran access to your data.

Step 3. Configure Sync Settings:

  • Choose the Xero objects and fields to replicate.
  • Configure your sync settings, including the replication frequency and other relevant options.

Step 4. Add Snowflake as a Destination:

  • Add Snowflake as your destination and provide your account details.
  • Enter the necessary Snowflake account information, including the account URL, username, password, and the database and schema where you want to load the data.

Step 5. Map Fields and Save Configuration:

  • Map the Xero data to the appropriate Snowflake tables and columns.
  • Review your configuration to ensure all settings are correct.
  • Click “Save & Run” to initiate the data pipeline.

Step 6. Monitor and Manage Data Pipeline:

  • Fivetran will initiate a historical data sync and then continuously replicate new data from Xero to Snowflake.
  • Monitor the status of your data pipeline from the Fivetran dashboard.
  • Verify that data is being synced correctly by checking the tables in your Snowflake database.
  • Address any errors or issues by following Fivetran’s troubleshooting guides.
  • Set up email alerts for pipeline issues to stay informed of any problems.

Connect Xero to Snowflake Without a Line of Code

Connecting Xero to Snowflake empowers businesses to centralize their financial data, enabling richer insights and streamlined reporting. The three methods outlined in this guide – Coefficient, Hevo Data, and Fivetran – provide flexible options for replicating Xero data into Snowflake, catering to different business needs and technical capabilities.

Ready to get started? Coefficient offers a user-friendly, no-code platform for quickly connecting Xero to Snowflake. Sign up today to begin syncing your financial data and unlocking valuable insights.

How to Connect Xero to Salesforce

Are you looking to streamline your accounting and customer relationship management (CRM) processes?

Integrating Xero, a powerful accounting platform, with Salesforce, the world’s leading CRM, can help you achieve just that. In this blog post, we’ll explore the benefits of connecting Xero to Salesforce and provide step-by-step guides for three integration methods: Coefficient, Zapier, and Dataloader.io.

Advantages of Connecting Xero to Salesforce

Integrating Xero and Salesforce offers several key benefits:

  • Real-Time Cash Flow Visibility: Sync invoice statuses and payment data from Xero to Salesforce, allowing sales reps to see real-time cash flow impacts of their deals. This empowers them to prioritize collections or adjust payment terms for at-risk accounts, improving overall financial health.
  • Automated Quote-to-Cash Process: By connecting Salesforce opportunities to Xero invoices, you can automate the entire quote-to-cash cycle. This reduces processing time, minimizes errors, and accelerates revenue recognition, particularly beneficial for businesses with complex pricing or high transaction volumes.
  • Data-Driven Sales Forecasting: Combine historical sales data from Salesforce with actual financial performance from Xero to create more accurate sales forecasts. This integration allows you to factor in seasonality, payment patterns, and customer profitability, leading to more realistic projections and better resource allocation.

Connecting Xero and Salesforce: 3 Methods

SolutionBest For
CoefficientSmall to medium-sized businesses with limited IT resources but a strong need for data analysis. Ideal for finance teams or sales operations who frequently work in spreadsheets and need to combine Xero financial data with Salesforce CRM data for custom reporting. Coefficient’s familiar spreadsheet interface allows for quick ad-hoc analysis without SQL knowledge, making it perfect for organizations that need agility in their reporting process.
ZapierMarketing and sales teams in organizations with diverse software ecosystems beyond just Xero and Salesforce. Best for companies that need to create multi-step workflows involving additional apps (e.g., triggering a Slack notification when a high-value invoice is paid in Xero and updating the corresponding Salesforce opportunity). Zapier’s visual workflow builder is user-friendly, but may become costly for high-volume, complex integrations.
Dataloader.ioEnterprise-level organizations or those dealing with high data volumes and complex data structures. Optimal for IT teams or data administrators who need granular control over large-scale data migrations or regular bulk updates between Xero and Salesforce. Its advanced scheduling and error handling capabilities make it suitable for maintaining data integrity in complex, high-stakes financial environments, but it requires more technical expertise to set up and maintain.

How to Connect Xero to Salesforce

Method 1: Coefficient – No-Code, User-Friendly

a screenshot of a web page with the words automatedly important live data into

Coefficient is a no-code tool that allows you to connect your accounting and CRM data without any technical knowledge. It offers a user-friendly interface, automatic data updates, and affordable pricing plans, making it an excellent choice for small to medium-sized businesses.

Features

  • Simple, drag-and-drop interface: The user-friendly design allows users to set up integrations with minimal effort, making it accessible for users of all technical levels.
  • Automatic data sync in real-time: Data between Xero and Salesforce is updated instantly, ensuring that you always have the most current information available.
  • Affordable pricing plans: Coefficient provides cost-effective solutions that cater to small businesses and larger enterprises alike, ensuring you get value for your investment.

Pros and Cons

Pros:

  • Simple, no-code setup: Get your integration up and running in no time with Coefficient’s straightforward installation process.
  • Automatic, real-time data updates: Always have the latest data at your fingertips, enabling timely and informed decision-making.
  • Cost-effective for small businesses: Budget-friendly plans make it accessible for smaller companies looking to enhance their data capabilities.

Cons:

  • Scheduled automations are only available on paid plans: Access to advanced scheduling functionalities may require upgrading to a premium plan, which might be cost-prohibitive for some users.

How to Connect Xero to Salesforce with Coefficient

Step 1: Install the Coefficient

For Google Sheets

Open a new or existing Google Sheet, navigate to the Extensions tab, and select Add-ons > Get add-ons.

oing to Add-ons > Get add-ons in the Extensions tab of Google Sheets.

In the Google Workspace Marketplace, search for “Coefficient.”

Typing “Coefficient” in the search bar of the Google Workspace Marketplace.

Follow the prompts to grant necessary permissions.

Providing necessary permissions for Coefficient in Google Sheets.

Launch Coefficient from Extensions > Coefficient > Launch.

 Launching Coefficient from Extensions > Coefficient > Launch in Google Sheets.

Coefficient will open on the right-hand side of your spreadsheet.

Coefficient appearing on the right-hand side of the Google Sheets.

For Microsoft Excel

Open Excel from your desktop or in Office Online. Click ‘File’ > ‘Get Add-ins’ > ‘More Add-Ins.’

hoosing ‘More Add-Ins’ from the ‘Get Add-ins’ menu in Excel.

Type “Coefficient” in the search bar and click ‘Add.’

Search-Coefficient-Add-Excel

Follow the prompts in the pop-up to complete the installation.

Once finished, you will see a “Coefficient” tab in the top navigation bar. Click ‘Open Sidebar’ to launch Coefficient.

Search-Coefficient-Add-Excel

Step 2: Import Data from Xero

With Coefficient installed, you can now import your Xero accounting data into your spreadsheet:

In the Coefficient sidebar, click ‘Import From.’

Select “Xero” from the list of available data sources.

Selecting “Xero” from the list of available data sources in Coefficient.

Enter your Xero demo credentials and click ‘Login.’

Entering your Xero demo credentials and clicking ‘Login.’

Select one or more of the available organizations to connect to Coefficient.

Selecting one or more of the available organizations to connect to Coefficient.

Click “Continue” to proceed with the selected organization(s).

Clicking “Continue” to proceed with the selected organization(s).

Choose an endpoint from the available options, such as Invoices, Contacts, or Users.

Choosing an endpoint from the available options, such as Invoices, Contacts, or Users.

For this example, select “Get Invoices” to fetch invoice data from Xero.

Selecting “Get Invoices” to fetch invoice data from Xero.

Enter the Tenant ID (organization ID) for the selected Xero organization.

Select-Get-Invoices-Xero

Optionally, select additional fields to include in the data import.

Optionally selecting additional fields to include in the data import.

Click “Import” to fetch the invoice data into your spreadsheet.

Clicking “Import” to fetch the invoice data into your spreadsheet.

Step 3. Export Data from Your Spreadsheet to Salesforce

Before starting, make sure you’ve connected to Salesforce.

https://www.youtube.com/watch?v=B5qUY5zs-vc 

Then, navigate to Coefficient’s menu. Click “Export to…”

Click-Import-Invoice-Data-Xero

Choose Salesforce from the list of available data sources.

Choosing Salesforce from the list of available data sources in Coefficient.

Select the tab and header rows in your spreadsheet that contain the data you want to export.

Define your tab and header row.

Selecting the tab and header rows in your spreadsheet that contain the data you want to export.

Note: Coefficient will automatically map the fields for you if the data in the sheet came from an import from Salesforce using Coefficient.

Next, select the Salesforce Object you want to export data to, e.g., “Opportunity”, “Contacts”, etc.

Defining your tab and header row for the export to Salesforce.

Then, select the type of action you want to perform—Update, Insert, Upsert, or Delete.

Map the fields from your spreadsheet to the corresponding Salesforce fields.

Selecting the Salesforce Object you want to export data to, e.g., “Opportunity”, “Contacts”, etc.

Note: If you imported data from Salesforce into your spreadsheet previously, Coefficient will auto-detect and map these fields.

(Optional) Specify additional settings such as batch size, whether to export empty cells on an update, and the column for results.

Mapping the fields from your spreadsheet to the corresponding Salesforce fields.

Note: Batch size is capped at 10,000 rows due to Salesforce API limitations.

Confirm your settings and click “Export”.

Confirming your settings and clicking “Export” to proceed.

Then, highlight the rows you want to update or export. You can choose to export all rows or specific rows.

Highlighting the rows you want to update or export to Salesforce.

After you’re finished, review your settings and click “Export.”

Follow the prompts to confirm your changes.

Following the prompts to confirm your changes in Salesforce.

In a few seconds, data from your spreadsheet will push to Salesforce.

Data from your spreadsheet pushing to Salesforce in a few seconds.

Your spreadsheet will display updated records, along with their export status and the date/time stamp of the update.

Method 2: Zapier

Zapier is a no-code platform enabling automated workflows between Xero and Salesforce.

Zapier is another no-code platform that enables you to create automated workflows between Xero and Salesforce. While it offers great flexibility, setting up complex workflows can be time-consuming, and costs can add up quickly with higher usage.

Features

  • Wide range of triggers and actions: Supports numerous triggers and actions to create custom workflows tailored to your specific needs.
  • Customizable workflows: Allows you to automate complex tasks by linking multiple apps and defining detailed workflows.
  • No coding required: Accessible to non-technical users who need to set up integrations without writing code.

Pros and Cons

Pros:

  • No coding required: Easy for non-technical users to set up and manage.
  • Supports a wide range of triggers and actions: Flexible enough to handle various integration scenarios.
  • Allows for customizable workflows: Tailor your integrations to match your exact business needs.

Cons:

  • Can become expensive with extensive use: Costs can quickly add up if you need multiple complex Zaps.
  • Requires more configuration for complex Zaps: Setting up detailed workflows can be time-consuming and may require careful planning.

How to Connect Xero to Salesforce with Zapier

Step 1: Sign up for a Zapier account

  • Go to Zapier’s website and sign up for an account if you haven’t already.
  • After signing up, log in to your Zapier account.

Step 2: Create a New Zap

  • Click the “+ Create” > “Zaps” button at the top right corner of the dashboard.
Clicking “+ Create” > “Zaps” button at the top right corner of the Zapier dashboard.
  • Enter a name for your Zap to keep your workflows organized.

Step 3: Set Xero as the Trigger App

  • Search for and select Xero as your trigger app.
Searching for and selecting Xero as your trigger app in Zapier.
  • Choose a trigger event from the list, such as “New Invoice” or “New Contact.”
Choosing a trigger event from the list, such as “New Invoice” or “New Contact.”
  • Click “Continue.”

Step 4: Connect Your Xero Account

  • Click “Sign in to Xero.”
  • Clicking “Sign in to Xero” in Zapier.
  • Follow the prompts to log in to your Xero account and authorize Zapier to access your data.
  • Once connected, click “Continue.”

Step 5: Configure the Trigger

  • Set up the trigger by selecting the appropriate options, such as which organization to pull data from if you have multiple Xero organizations.
  • Click “Continue” and test the trigger to ensure Zapier can pull in the correct data from Xero.

Step 6: Set Salesforce as the Action App

  • Search for and select Salesforce as your action app.
Searching for and selecting Salesforce as your action app in Zapier.
  • Choose an action event, such as “Create Record” or “Update Record.”
  • Choosing an action event, such as “Create Record” or “Update Record” in Zapier.
  • Click “Continue.”

Step 7: Connect Your Salesforce Account

  • Click “Sign in to Salesforce.”
  • Clicking “Sign in to Salesforce” in Zapier.
  • Follow the prompts to log in to your Salesforce account and authorize Zapier to access your data.
  • Once connected, click “Continue.”

Step 8: Configure the Action

  • Set up the action by mapping the fields from Xero to the corresponding fields in Salesforce.
  • For example, map the Xero invoice number to the Salesforce Opportunity ID, Xero contact name to Salesforce Contact Name, etc.
  • Click “Continue” and test the action to ensure data is being sent correctly from Xero to Salesforce.

Step 9: Activate Your Zap

  • After successfully testing your Zap, click “Turn on Zap” to activate the workflow.
  • Your Zap is now live, and data will automatically sync between Xero and Salesforce based on the trigger you set up.

Method 3: Dataloader.io

a computer screen with a video on it

Dataloader.io is an ETL (extract, transform, load) tool designed for handling large data transfers between systems like Xero and Salesforce. While it offers robust performance and scheduling capabilities, it may require more technical knowledge to set up and maintain.

 Features

  • Handles large data volumes efficiently: Designed to manage and transfer large datasets quickly and reliably.
  • Provides scheduling options for automated data loads: Set up scheduled tasks to automate data synchronization at specified intervals.
  • Offers fast performance for bulk transfers: Optimized for high-speed data transfers, ensuring efficient and timely data movement.

Pros and Cons

Pros:

  • Handles large data volumes efficiently: Capable of managing extensive datasets without compromising performance.
  • Provides scheduling options for automated data loads: Automate your data synchronization with customizable schedules.
  • Offers fast performance for bulk transfers: Ensure rapid and reliable data transfers for large-scale operations.

Cons:

  • Requires manual field mapping and data preparation: Setting up tasks may require significant manual effort and data configuration.
  • Not ideal for real-time, continuous data syncing: Better suited for batch processing rather than real-time updates.

How to Connect Xero to Salesforce with Dataloader

Step 1: Sign up for a Dataloader.io account

  1. Go to Dataloader.io’s website and sign up for an account if you haven’t already.
  2. After signing up, log in to your Dataloader.io account.

Step 2: Connect Your Xero Account

  1. On the Dataloader.io dashboard, click “New Task” and select “Import.”
  2. Select Xero as the source system.
  3. Click “Connect to Xero” and follow the prompts to log in to your Xero account and authorize Dataloader.io to access your data.

Step 3: Connect Your Salesforce Account

  1. Select Salesforce as the target system.
  2. Click “Connect to Salesforce” and follow the prompts to log in to your Salesforce account and authorize Dataloader.io to access your data.

Step 4: Create a New Data Mapping Task

  1. Choose the type of task you want to create, such as “Insert,” “Update,” or “Upsert.”
  2. Select the Xero object you want to import data from, such as “Invoices” or “Contacts.”
  3. Select the Salesforce object you want to export data to, such as “Opportunity” or “Contacts.”

Step 5: Map the Fields

  1. Dataloader.io will display a list of fields from the Xero object and the corresponding fields in the Salesforce object.
  2. Manually map each field from Xero to the appropriate field in Salesforce. For example, map the Xero invoice number to the Salesforce Opportunity ID, Xero contact name to Salesforce Contact Name, etc.
  3. Click “Next” after mapping all the fields.

Step 6: Configure Scheduling Settings

  1. Set up the schedule for your data load task. Choose whether you want to run the task immediately, or set up a recurring schedule (e.g., daily, weekly).
  2. Specify the time and frequency for the scheduled task if you choose to automate it.

Step 7: Run the Task

  1. Review all the settings and mappings to ensure everything is correct.
  2. Click “Run” to start the data load task.
  3. Monitor the progress of the task in the Dataloader.io dashboard.

Step 8: Monitor and Troubleshoot

  1. After the task is complete, review the results for any errors or discrepancies.
  2. If there are errors, Dataloader.io will provide detailed logs that can help you troubleshoot and resolve any issues.
  3. Make necessary adjustments to the mappings or configurations if needed and re-run the task.

Connect Xero to Salesforce: No Code Required

Integrating Xero with Salesforce can revolutionize your business processes by streamlining data management, enhancing reporting capabilities, improving accuracy, and increasing overall efficiency.

Ready to experience the benefits of connecting Xero to Salesforce?

Get started with Coefficient today and enjoy a user-friendly, no-code solution that offers real-time data syncing at an affordable price. With Coefficient, you can seamlessly integrate your accounting and CRM data, empowering your teams to make better decisions and drive business growth.

NetSuite vs Xero: Quick Guide for 2025

As your company grows, so do your accounting needs. Two popular options stand out in the market: NetSuite and Xero. 

But which one is the perfect fit for your evolving business? 

Let’s dive into a comprehensive comparison to help you make an informed decision.

The Contenders: NetSuite and Xero at a Glance

NetSuite: The All-in-One Powerhouse

NetSuite isn’t just accounting software; it’s a comprehensive Enterprise Resource Planning (ERP) solution. It brings together Customer Relationship Management (CRM), accounting, operations, and more under one digital roo. This unified approach makes NetSuite a powerhouse for businesses with complex needs and ambitious growth plans.

Xero: The Small Business Champion

Xero, on the other hand, zeroes in on what small businesses need most: straightforward, cloud-based accounting and bookkeeping. It’s designed to simplify financial management for entrepreneurs and small business owners who want powerful features without the complexity.

CategoryNetSuiteXero
Target Business SizeMid-size to large enterprisesSmall to medium-sized businesses
Core FunctionalityComprehensive ERP (including CRM, HR, and more)Cloud-based accounting and bookkeeping
ScalabilityHighly scalable, supports complex multi-entity operationsScalable for small business growth, may have limitations for very large operations
Ease of UseSteeper learning curve, more complex interfaceUser-friendly, intuitive interface
Pricing ModelCustom quotes, typically annual contractsTransparent tiered pricing, monthly subscriptions
Mobile CapabilitiesBasic mobile app, focuses on approvals and reportingComprehensive mobile app with full feature parity

Feature Face-Off: What Can Each Platform Do?

Crunching the Numbers: Accounting and Financial Management

Both NetSuite and Xero offer the essentials: general ledger, accounts payable and receivable, and financial reporting. But that’s where the similarities end.

NetSuite takes financial management to the next level with:

  • Multi-entity consolidation for businesses with complex structures
  • Advanced revenue recognition
  • Comprehensive fixed asset management

Xero keeps it simpler but still powerful:

  • Bank reconciliation
  • Inventory tracking
  • Basic project costing

For businesses juggling multiple entities or dealing with complex financial scenarios, NetSuite’s advanced capabilities give it a clear edge. But for small businesses focused on core accounting tasks, Xero’s streamlined approach might be just right.

Room to Grow: Scalability and Expansion Support

As your business expands, your software needs to keep pace. Here’s how our contenders stack up:

NetSuite:

  • Supports multi-national, multi-currency operations
  • Offers industry-specific solutions
  • Scales from small business to enterprise-level without changing platforms

Xero:

  • Handles basic multi-currency transactions
  • Supports growing businesses with additional users and features
  • May require migration to more robust systems for very large or complex operations

NetSuite clearly has the advantage for businesses with aggressive growth plans or complex organizational structures. Xero, while capable of supporting growth, may hit limitations for rapidly expanding or highly complex businesses.

Playing Well with Others: Integration and Ecosystem

In today’s interconnected business world, your accounting software can’t exist in isolation. Let’s see how NetSuite and Xero connect with other tools:

NetSuite:

  • Offers a vast array of built-in applications covering most business needs
  • Provides APIs for custom integrations
  • Has a smaller but more enterprise-focused third-party app marketplace

Xero:

  • Boasts a large ecosystem of third-party integrations
  • Offers open APIs for developers
  • Particularly strong in integrations for small business tools

While both platforms offer robust integration options, Xero’s extensive marketplace of small business apps gives it an edge for smaller operations. NetSuite’s built-in applications and enterprise-focused integrations make it more suitable for larger, more complex businesses.

User Experience: Navigating the Software Seas

Finding Your Way: Interface and Navigation

The best features in the world don’t matter if you can’t figure out how to use them. Let’s compare the user experience of NetSuite and Xero:

NetSuite:

  • Comprehensive interface with many options and customization possibilities
  • Steeper learning curve due to its extensive feature set
  • Highly customizable dashboards and reports

Xero:

  • Clean, intuitive interface designed for non-accountants
  • Shorter learning curve for basic functions
  • User-friendly dashboard with key financial metrics at a glance

[Insert Screenshot: Side-by-side comparison of NetSuite and Xero dashboards] This visual should highlight the differences in complexity and layout between the two platforms.

For small business owners who want to dive in quickly, Xero’s intuitive interface is a major plus. However, for businesses that need deep customization and don’t mind investing time in learning the system, NetSuite’s powerful interface can offer significant long-term benefits.

On the Go: Mobile Accessibility

In our increasingly mobile world, the ability to manage finances on the go is crucial. Here’s how NetSuite and Xero perform on mobile devices:

NetSuite:

  • Offers a mobile app with access to key features
  • Provides a responsive web interface for tablet users
  • Mobile functionality focuses on approvals, expense management, and basic reporting

Xero:

  • Features a highly rated mobile app for iOS and Android
  • Allows for invoice creation, expense tracking, and bank reconciliation on mobile devices
  • Offers a consistent experience between mobile and desktop versions

While both platforms offer mobile solutions, Xero’s mobile app is more comprehensive and user-friendly, making it a better choice for business owners who frequently work on the go.

Dollars and Sense: Pricing and Cost Considerations

Now for the million-dollar question (hopefully not literally): How much will these solutions set you back?

Pricing Models: Transparency vs. Customization

NetSuite pricing:

  • Customized pricing based on business needs and size
  • Requires contacting sales for a quote
  • Often involves a significant upfront investment

Xero pricing:

  • Transparent, tiered pricing structure
  • Plans starting from $12/month for very small businesses
  • Higher tiers available for growing businesses with more complex needs

Key Stat: While specific NetSuite pricing isn’t publicly available, industry reports suggest implementation costs can range from $25,000 to $100,000+ for mid-sized businesses.

Xero’s transparent pricing is appealing for small businesses with straightforward needs. NetSuite’s custom pricing reflects its enterprise-grade capabilities but can be a significant investment.

The Long Game: Total Cost of Ownership

When considering costs, it’s crucial to look beyond the sticker price:

NetSuite additional costs:

  • Implementation and customization fees
  • Staff training and change management
  • Potential need for dedicated IT support

Xero additional considerations:

  • Costs of add-ons for advanced features
  • Potential need for third-party integrations
  • Less extensive training requirements

While Xero may seem more economical upfront, businesses with complex needs might find NetSuite’s comprehensive solution more cost-effective in the long run, despite the higher initial investment.

Support When You Need It: Customer Service and Resources

Even the most user-friendly software can leave you scratching your head sometimes. Let’s compare the support offered by both platforms.

Help is on the Way: Support Options

NetSuite support:

  • 24/7 phone and email support
  • Dedicated account managers for enterprise clients
  • Comprehensive knowledge base and community forums

Xero support:

  • Email support with 24/48 hour response times
  • Live chat during business hours
  • Extensive online help center and community

NetSuite’s support is more comprehensive, reflecting its enterprise focus. Xero’s support, while more limited, is generally sufficient for its target market of small businesses.

Learning the Ropes: Training and Educational Resources

Both platforms recognize the importance of user education:

NetSuite offers:

  • In-depth training programs and certification courses
  • Regular webinars and virtual events
  • A vast library of educational content

Xero provides:

  • Free online courses through Xero Central
  • Regular webinars and video tutorials
  • A network of certified advisors for personalized guidance

While both platforms invest heavily in user education, NetSuite’s resources are more extensive, reflecting the complexity of its system.

Making the Right Choice: Your Business, Your Decision

Now that we’ve compared NetSuite and Xero across key areas, let’s look at which businesses might benefit most from each platform.

When NetSuite Shines

NetSuite is ideal for:

  • Mid to large-sized businesses with complex operations
  • Companies experiencing rapid growth or planning significant expansion
  • Businesses requiring advanced financial management and reporting
  • Organizations needing a unified system for multiple business functions

Xero’s Sweet Spot

Xero is perfect for:

  • Small businesses and startups
  • Solopreneurs and freelancers
  • Companies with straightforward accounting needs
  • Businesses prioritizing user-friendliness and cost-effectiveness

Your Decision Checklist

Consider these factors when making your choice:

  • Current business size and complexity
  • Projected growth and future needs
  • Budget for software and implementation
  • Required features and integrations
  • In-house IT capabilities
  • Importance of mobile accessibility
  • Need for advanced reporting and analytics

Choosing Between NetSuite and Xero

The choice between NetSuite and Xero ultimately depends on your business size, complexity, and growth trajectory. 

Remember, regardless of which platform you choose, the key to maximizing your accounting software’s potential lies in how well you can integrate it with your other business systems and leverage real-time data for decision-making.

Ready to take your financial reporting and analysis to the next level? Get started with Coefficient to seamlessly integrate your accounting data with spreadsheets, enabling real-time updates and powerful insights that drive business growth.