Are you looking to streamline your accounting and customer relationship management (CRM) processes?
Integrating Xero, a powerful accounting platform, with Salesforce, the world’s leading CRM, can help you achieve just that. In this blog post, we’ll explore the benefits of connecting Xero to Salesforce and provide step-by-step guides for three integration methods: Coefficient, Zapier, and Dataloader.io.
Advantages of Connecting Xero to Salesforce
Integrating Xero and Salesforce offers several key benefits:
- Real-Time Cash Flow Visibility: Sync invoice statuses and payment data from Xero to Salesforce, allowing sales reps to see real-time cash flow impacts of their deals. This empowers them to prioritize collections or adjust payment terms for at-risk accounts, improving overall financial health.
- Automated Quote-to-Cash Process: By connecting Salesforce opportunities to Xero invoices, you can automate the entire quote-to-cash cycle. This reduces processing time, minimizes errors, and accelerates revenue recognition, particularly beneficial for businesses with complex pricing or high transaction volumes.
- Data-Driven Sales Forecasting: Combine historical sales data from Salesforce with actual financial performance from Xero to create more accurate sales forecasts. This integration allows you to factor in seasonality, payment patterns, and customer profitability, leading to more realistic projections and better resource allocation.
Connecting Xero and Salesforce: 3 Methods
| Solution | Best For |
| Coefficient | Small to medium-sized businesses with limited IT resources but a strong need for data analysis. Ideal for finance teams or sales operations who frequently work in spreadsheets and need to combine Xero financial data with Salesforce CRM data for custom reporting. Coefficient’s familiar spreadsheet interface allows for quick ad-hoc analysis without SQL knowledge, making it perfect for organizations that need agility in their reporting process. |
| Zapier | Marketing and sales teams in organizations with diverse software ecosystems beyond just Xero and Salesforce. Best for companies that need to create multi-step workflows involving additional apps (e.g., triggering a Slack notification when a high-value invoice is paid in Xero and updating the corresponding Salesforce opportunity). Zapier’s visual workflow builder is user-friendly, but may become costly for high-volume, complex integrations. |
| Dataloader.io | Enterprise-level organizations or those dealing with high data volumes and complex data structures. Optimal for IT teams or data administrators who need granular control over large-scale data migrations or regular bulk updates between Xero and Salesforce. Its advanced scheduling and error handling capabilities make it suitable for maintaining data integrity in complex, high-stakes financial environments, but it requires more technical expertise to set up and maintain. |
How to Connect Xero to Salesforce
Method 1: Coefficient – No-Code, User-Friendly
Coefficient is a no-code tool that allows you to connect your accounting and CRM data without any technical knowledge. It offers a user-friendly interface, automatic data updates, and affordable pricing plans, making it an excellent choice for small to medium-sized businesses.
Features
- Simple, drag-and-drop interface: The user-friendly design allows users to set up integrations with minimal effort, making it accessible for users of all technical levels.
- Automatic data sync in real-time: Data between Xero and Salesforce is updated instantly, ensuring that you always have the most current information available.
- Affordable pricing plans: Coefficient provides cost-effective solutions that cater to small businesses and larger enterprises alike, ensuring you get value for your investment.
Pros and Cons
Pros:
- Simple, no-code setup: Get your integration up and running in no time with Coefficient’s straightforward installation process.
- Automatic, real-time data updates: Always have the latest data at your fingertips, enabling timely and informed decision-making.
- Cost-effective for small businesses: Budget-friendly plans make it accessible for smaller companies looking to enhance their data capabilities.
Cons:
- Scheduled automations are only available on paid plans: Access to advanced scheduling functionalities may require upgrading to a premium plan, which might be cost-prohibitive for some users.
How to Connect Xero to Salesforce with Coefficient
Step 1: Install the Coefficient
For Google Sheets
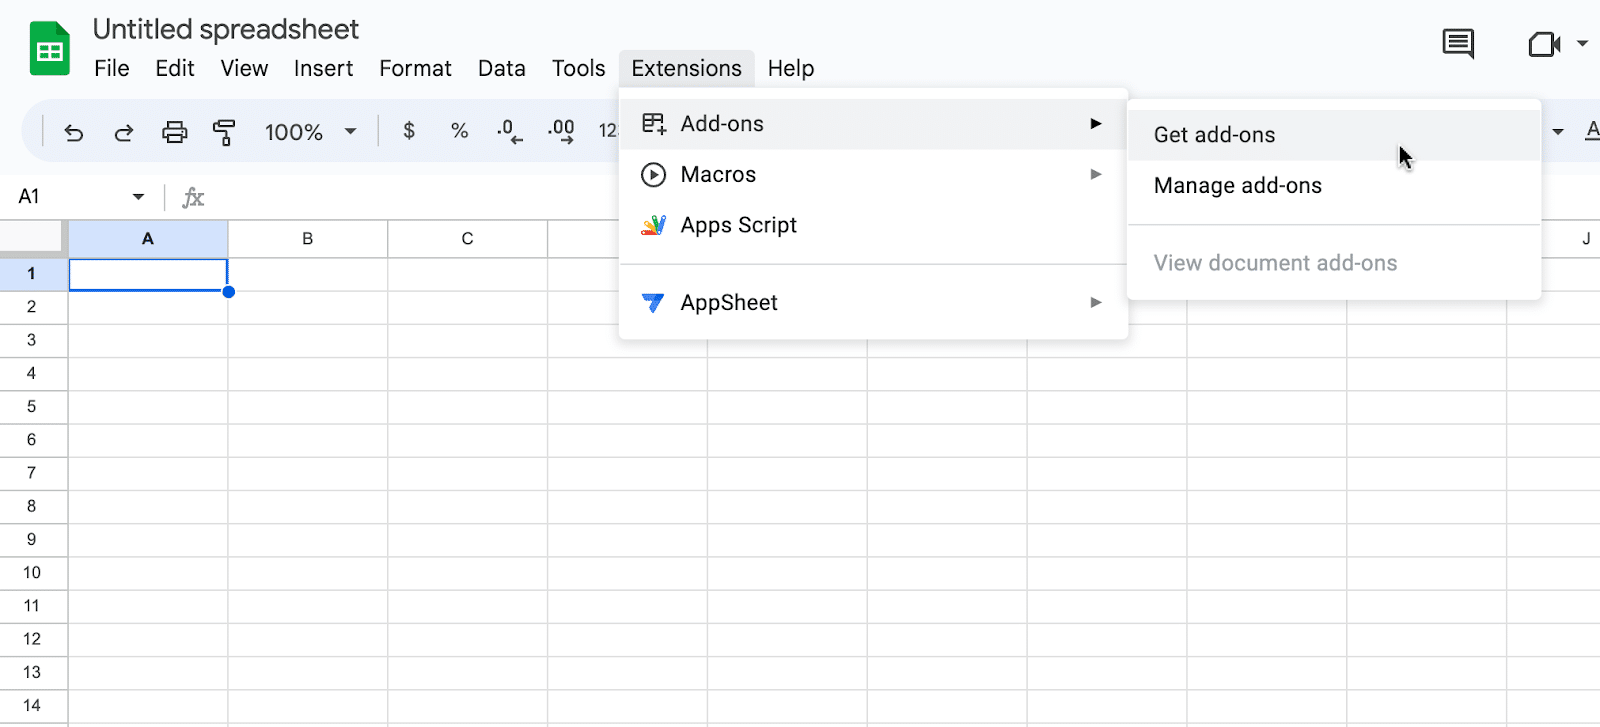
Open a new or existing Google Sheet, navigate to the Extensions tab, and select Add-ons > Get add-ons.
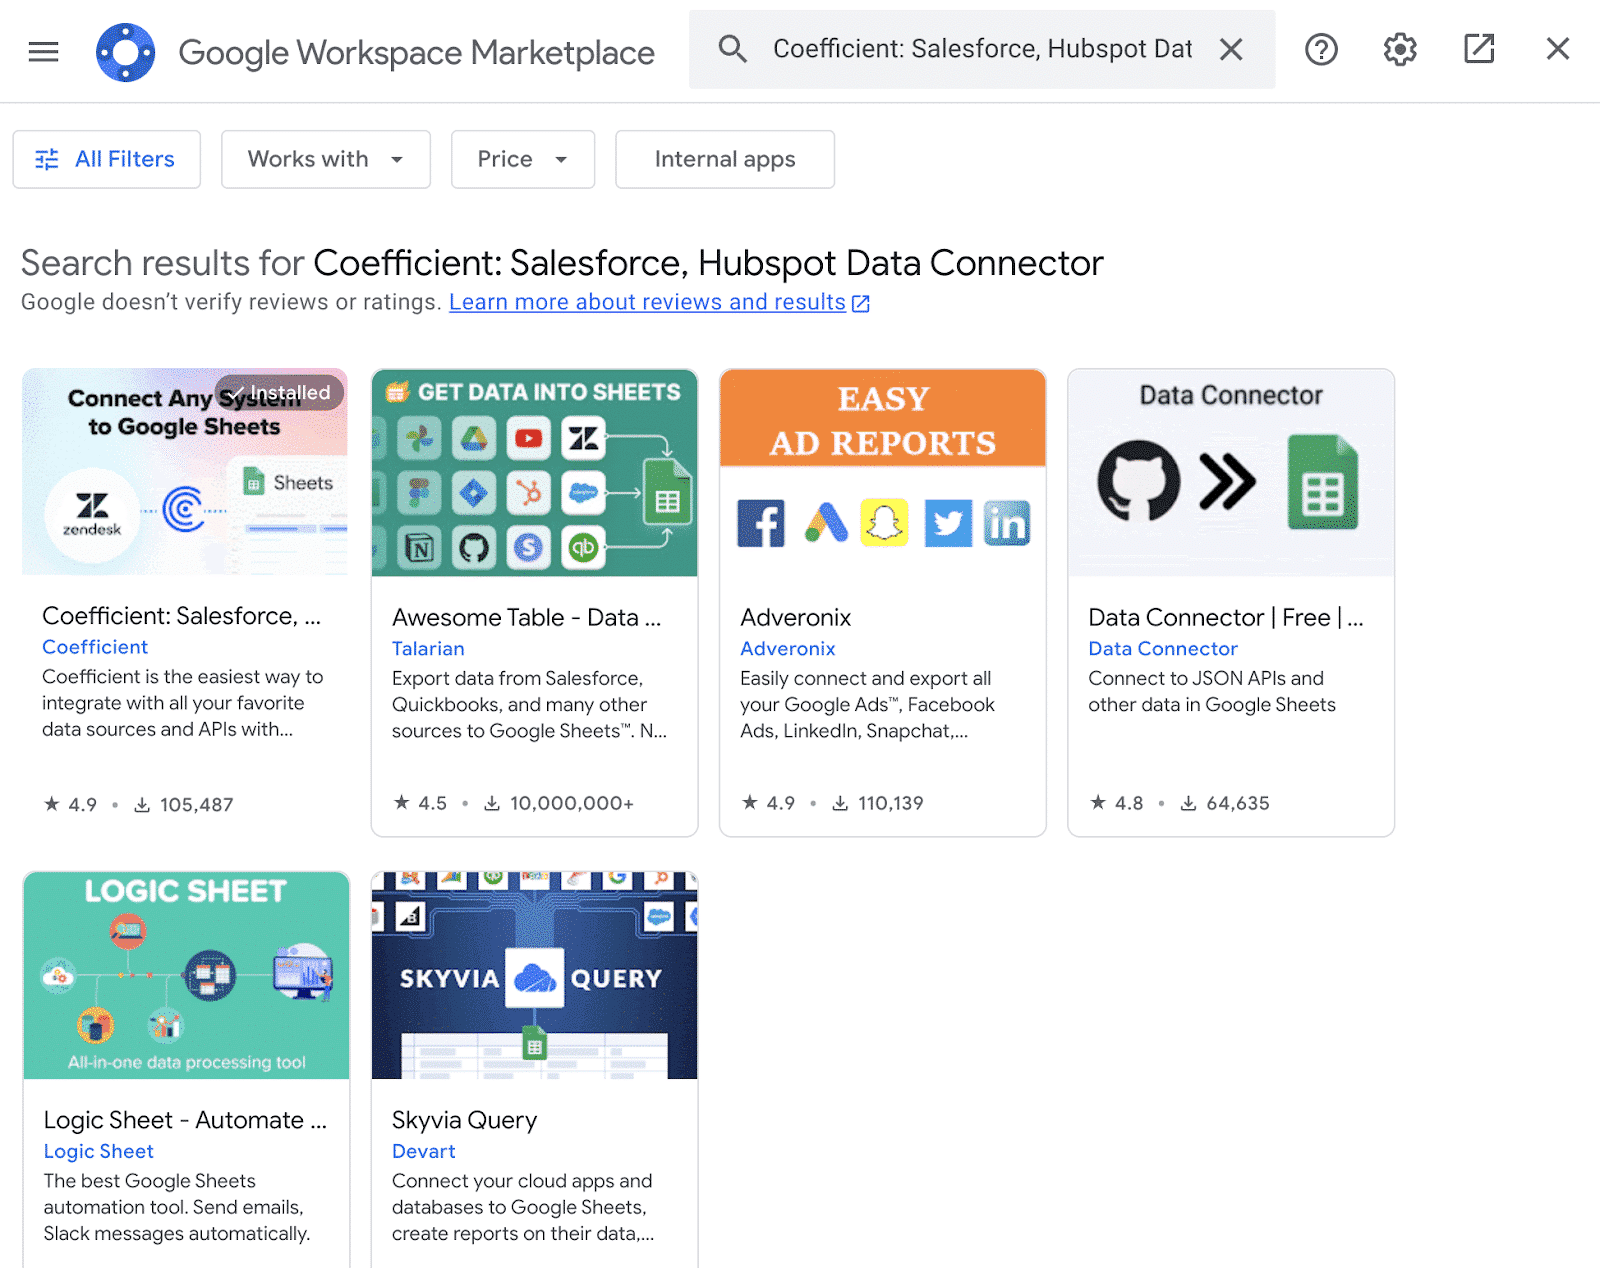
In the Google Workspace Marketplace, search for “Coefficient.”
Follow the prompts to grant necessary permissions.

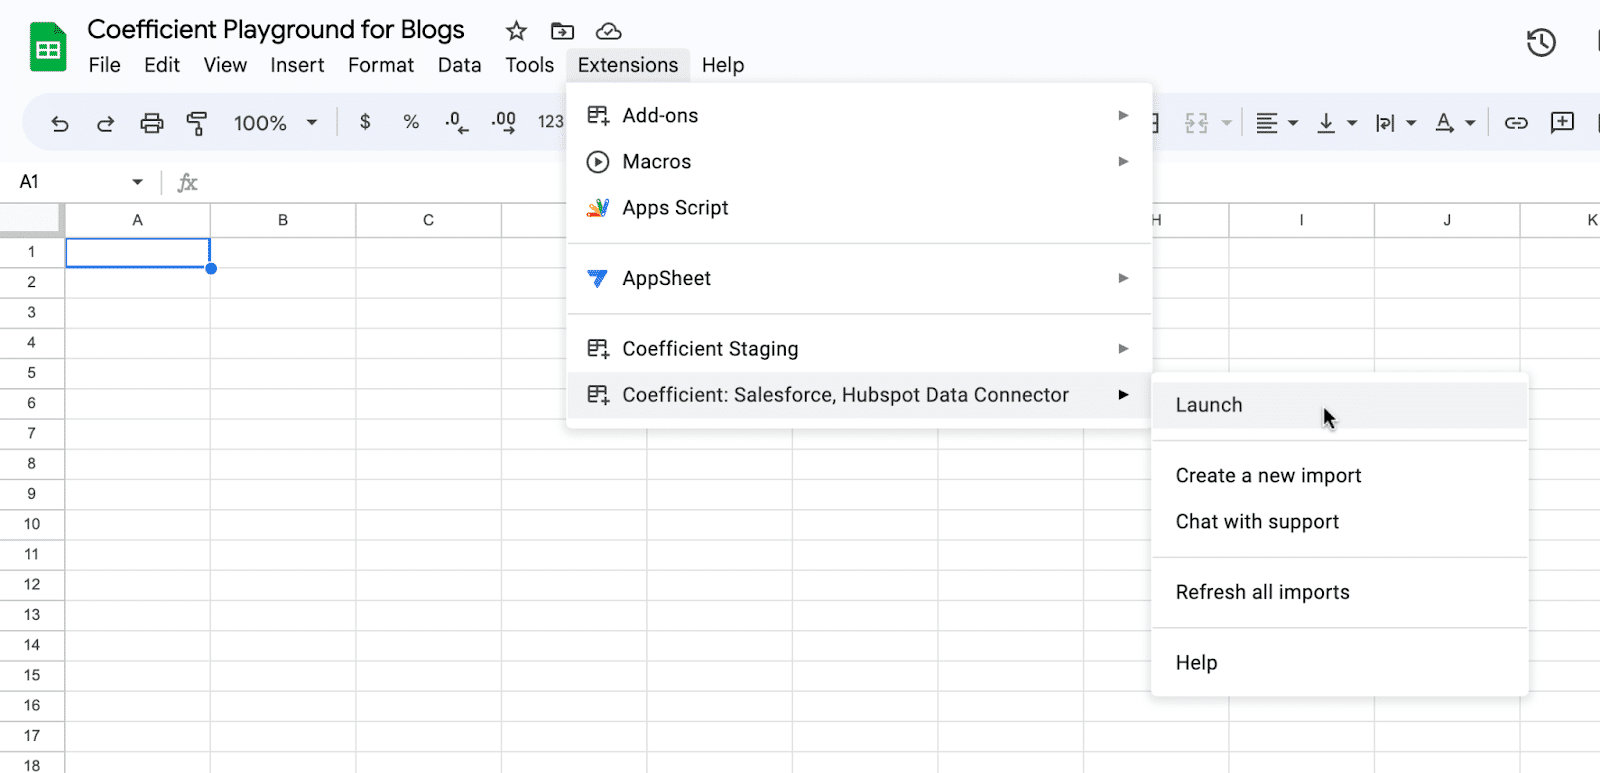
Launch Coefficient from Extensions > Coefficient > Launch.
Coefficient will open on the right-hand side of your spreadsheet.

For Microsoft Excel
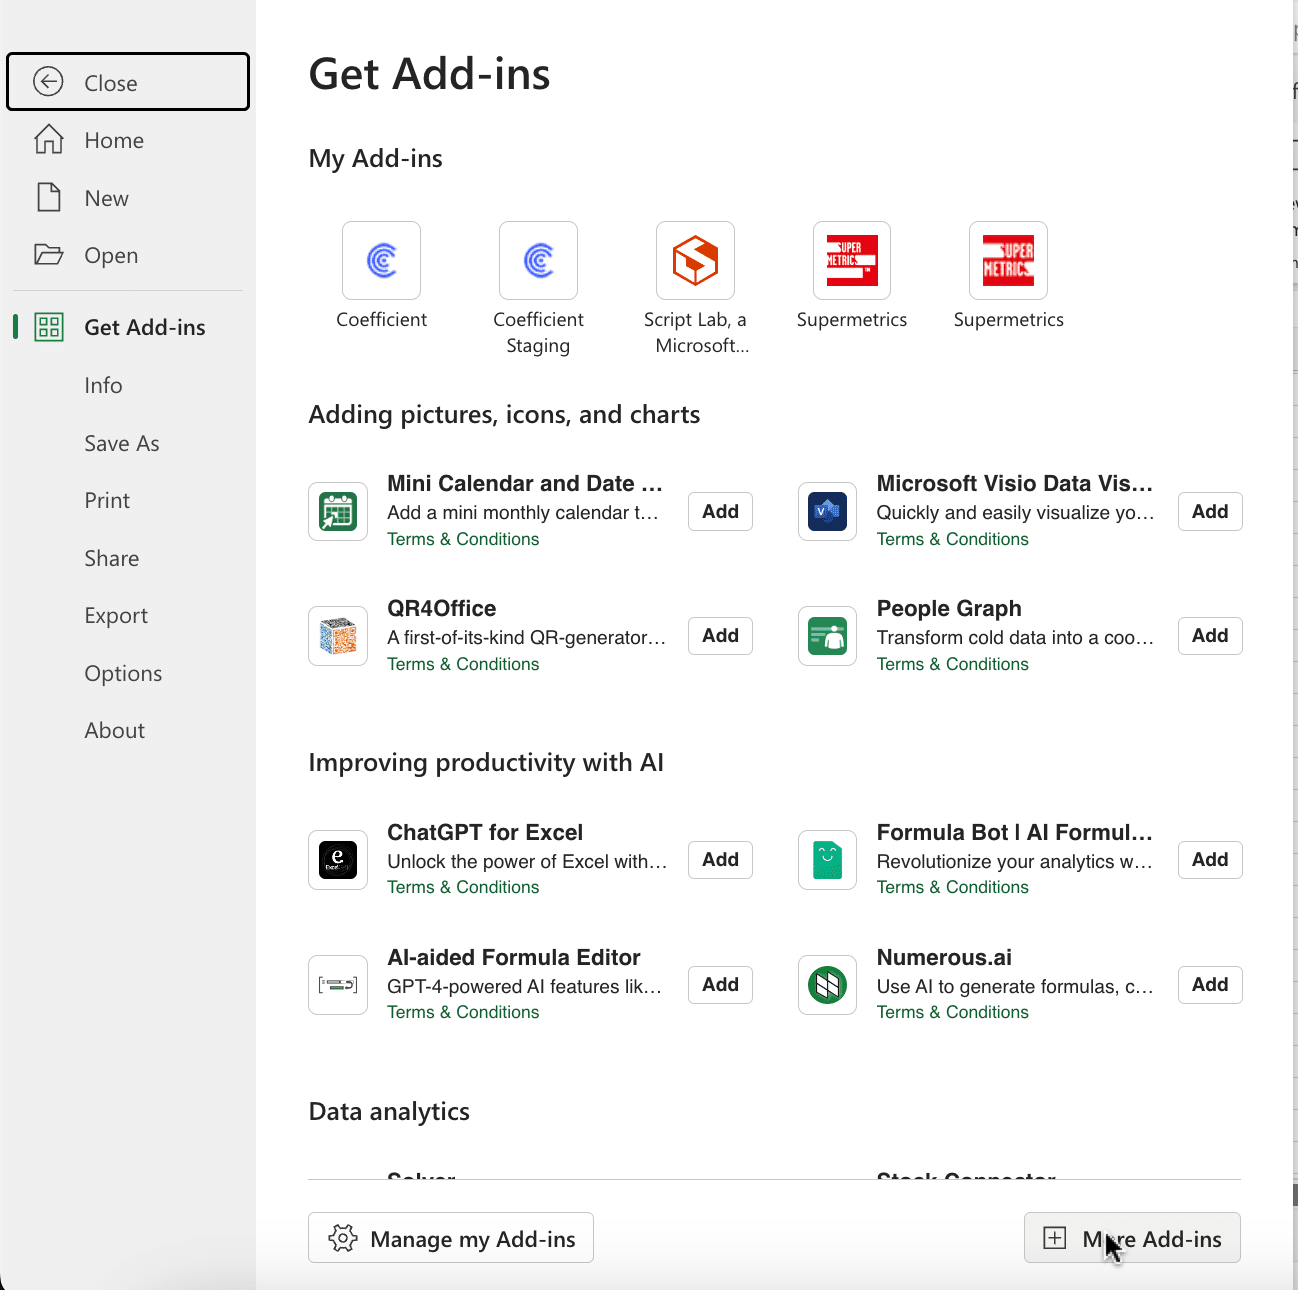
Open Excel from your desktop or in Office Online. Click ‘File’ > ‘Get Add-ins’ > ‘More Add-Ins.’
Type “Coefficient” in the search bar and click ‘Add.’
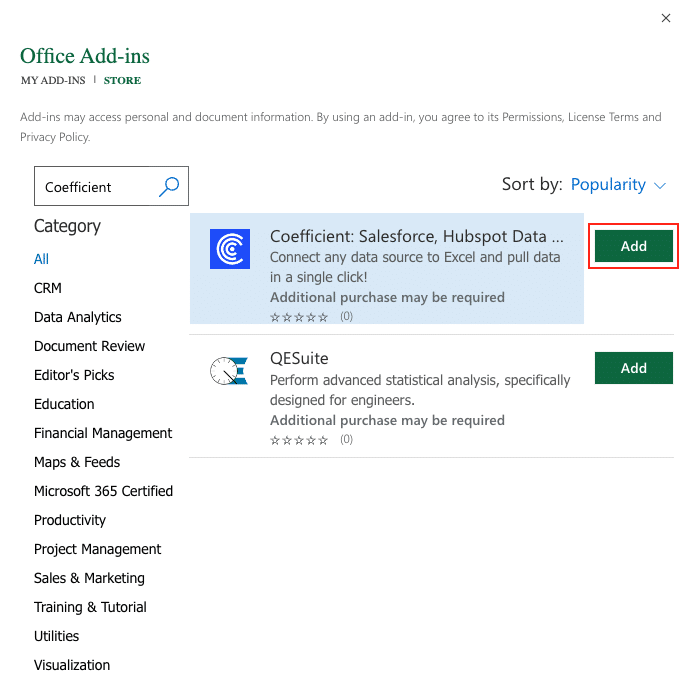
Follow the prompts in the pop-up to complete the installation.
Once finished, you will see a “Coefficient” tab in the top navigation bar. Click ‘Open Sidebar’ to launch Coefficient.

Step 2: Import Data from Xero
With Coefficient installed, you can now import your Xero accounting data into your spreadsheet:
In the Coefficient sidebar, click ‘Import From.’
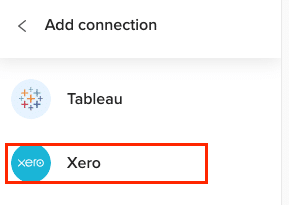
Select “Xero” from the list of available data sources.
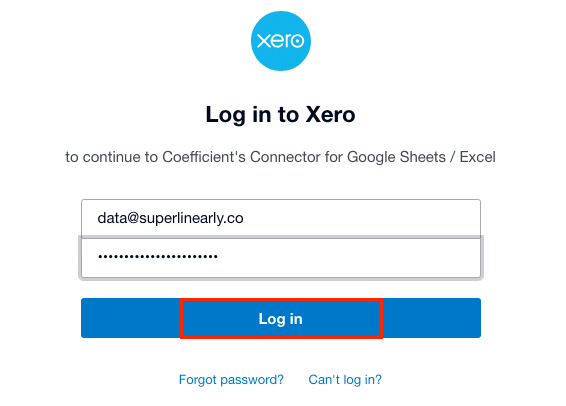
Enter your Xero demo credentials and click ‘Login.’
Select one or more of the available organizations to connect to Coefficient.
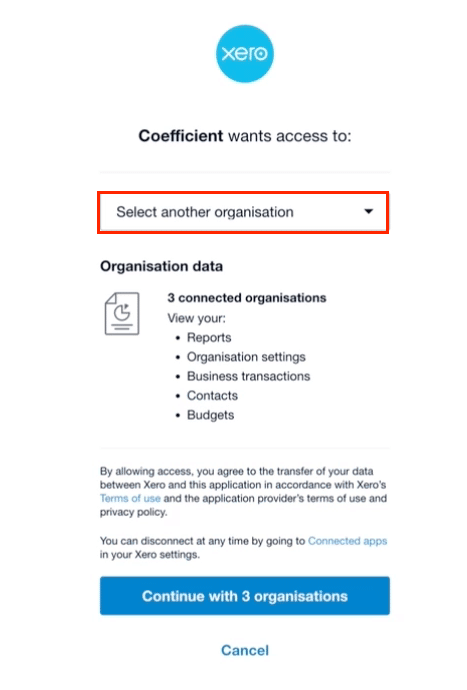
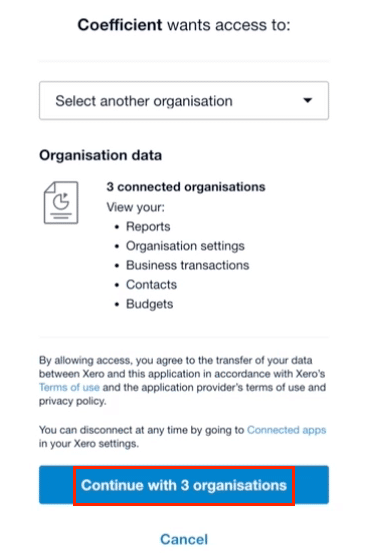
Click “Continue” to proceed with the selected organization(s).
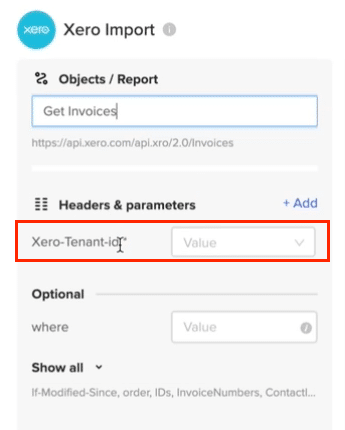
Choose an endpoint from the available options, such as Invoices, Contacts, or Users.
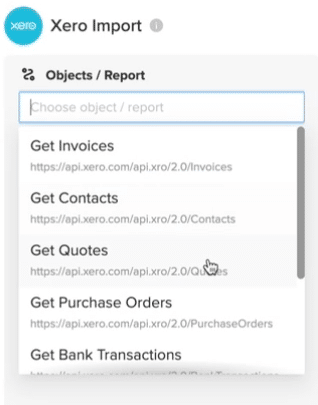
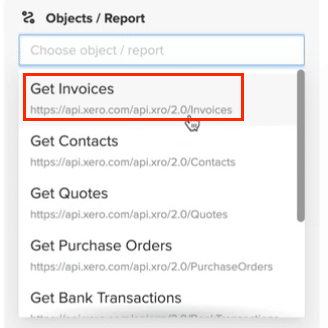
For this example, select “Get Invoices” to fetch invoice data from Xero.
Enter the Tenant ID (organization ID) for the selected Xero organization.
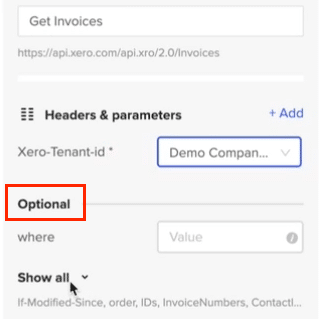
Optionally, select additional fields to include in the data import.
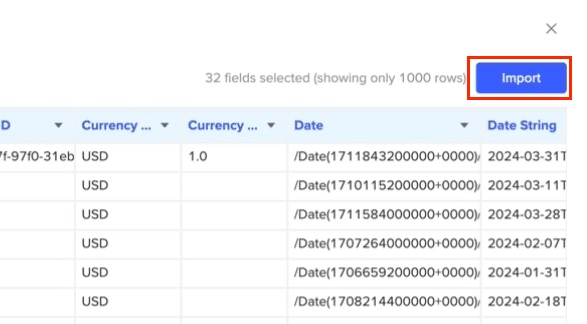
Click “Import” to fetch the invoice data into your spreadsheet.
Step 3. Export Data from Your Spreadsheet to Salesforce
Before starting, make sure you’ve connected to Salesforce.
https://www.youtube.com/watch?v=B5qUY5zs-vc
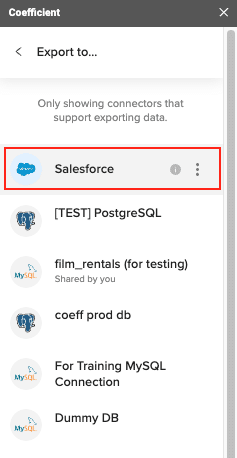
Then, navigate to Coefficient’s menu. Click “Export to…”
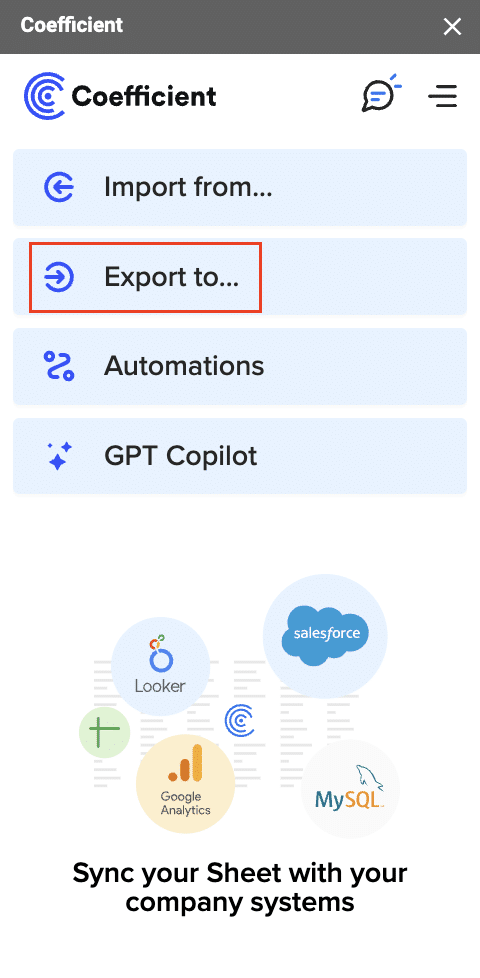
Choose Salesforce from the list of available data sources.
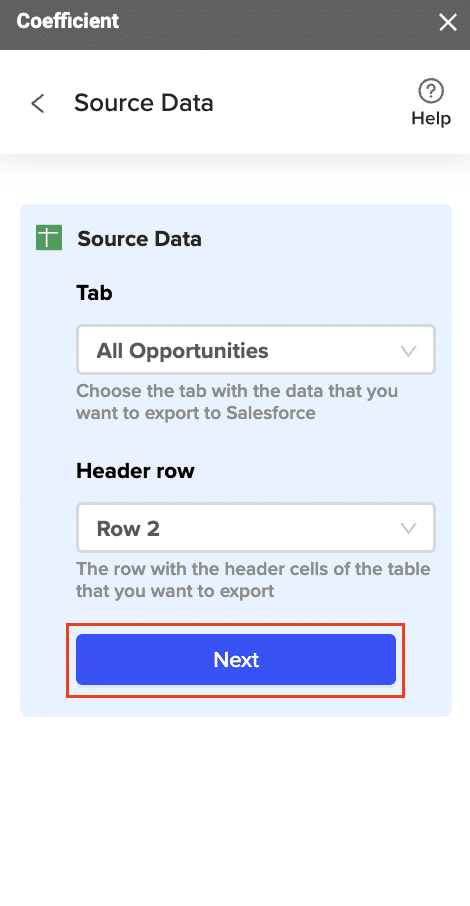
Select the tab and header rows in your spreadsheet that contain the data you want to export.
Define your tab and header row.
Note: Coefficient will automatically map the fields for you if the data in the sheet came from an import from Salesforce using Coefficient.
Next, select the Salesforce Object you want to export data to, e.g., “Opportunity”, “Contacts”, etc.
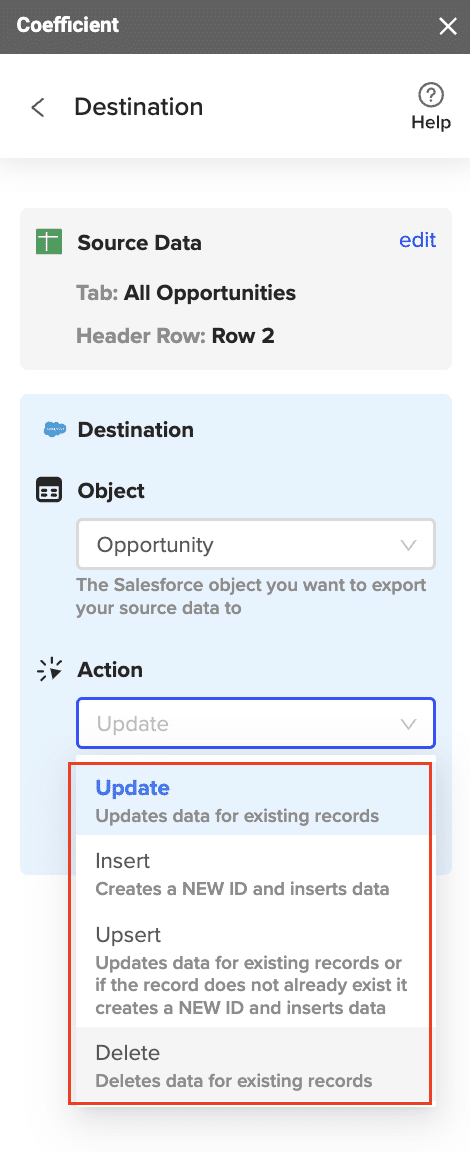
Then, select the type of action you want to perform—Update, Insert, Upsert, or Delete.
Map the fields from your spreadsheet to the corresponding Salesforce fields.
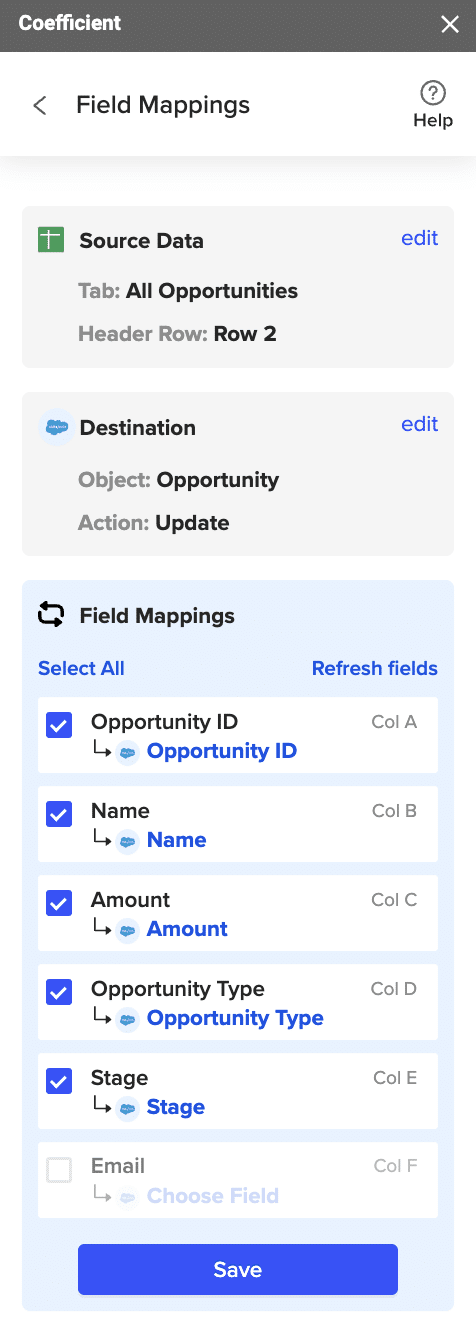
Note: If you imported data from Salesforce into your spreadsheet previously, Coefficient will auto-detect and map these fields.
(Optional) Specify additional settings such as batch size, whether to export empty cells on an update, and the column for results.
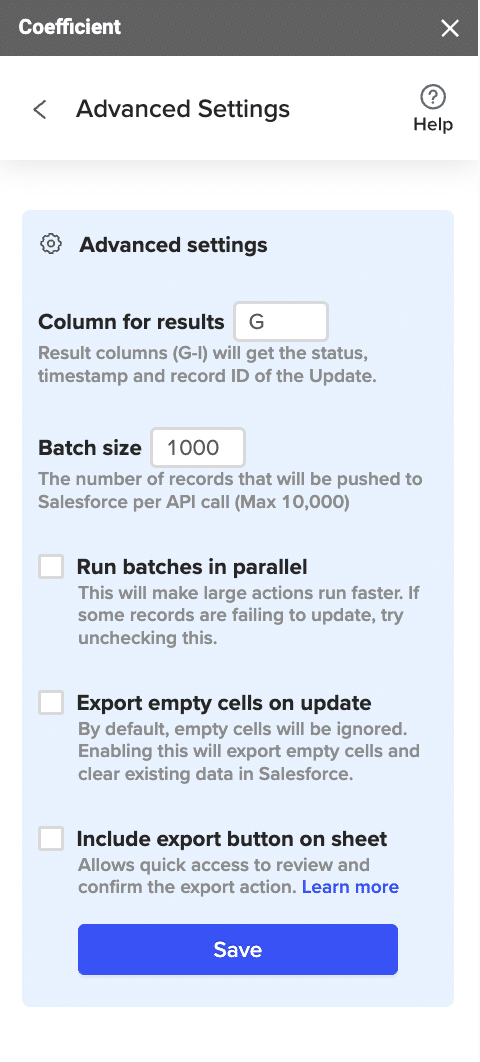
Note: Batch size is capped at 10,000 rows due to Salesforce API limitations.
Confirm your settings and click “Export”.
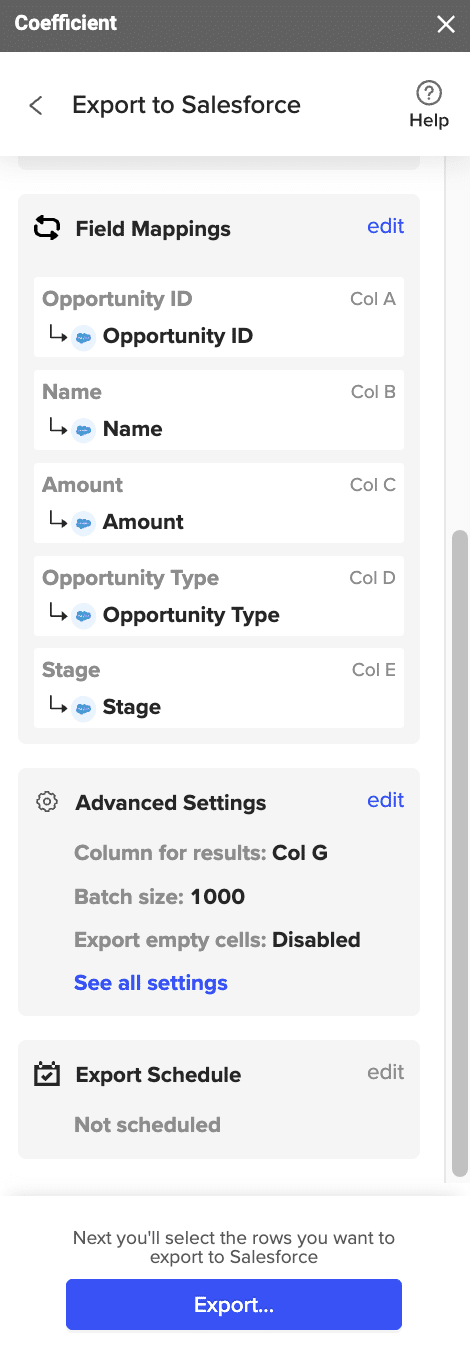
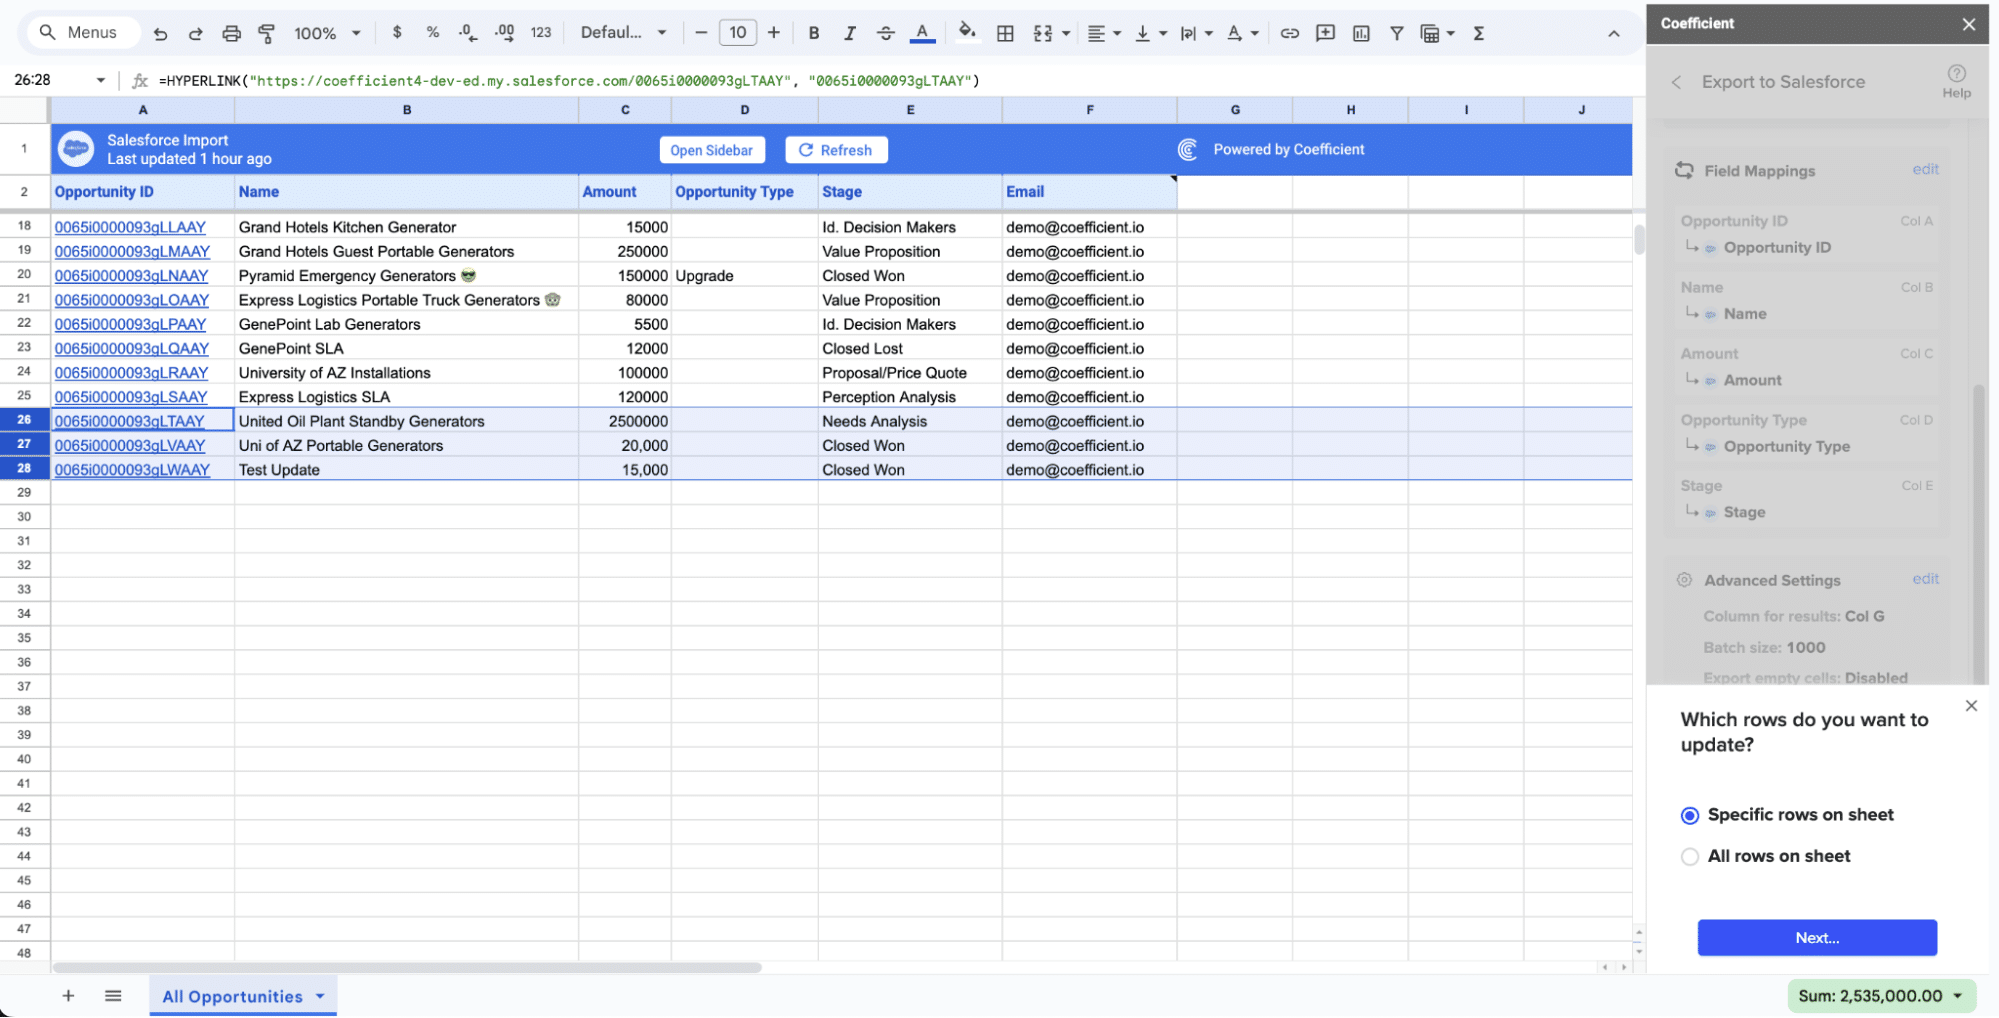
Then, highlight the rows you want to update or export. You can choose to export all rows or specific rows.
After you’re finished, review your settings and click “Export.”
Follow the prompts to confirm your changes.
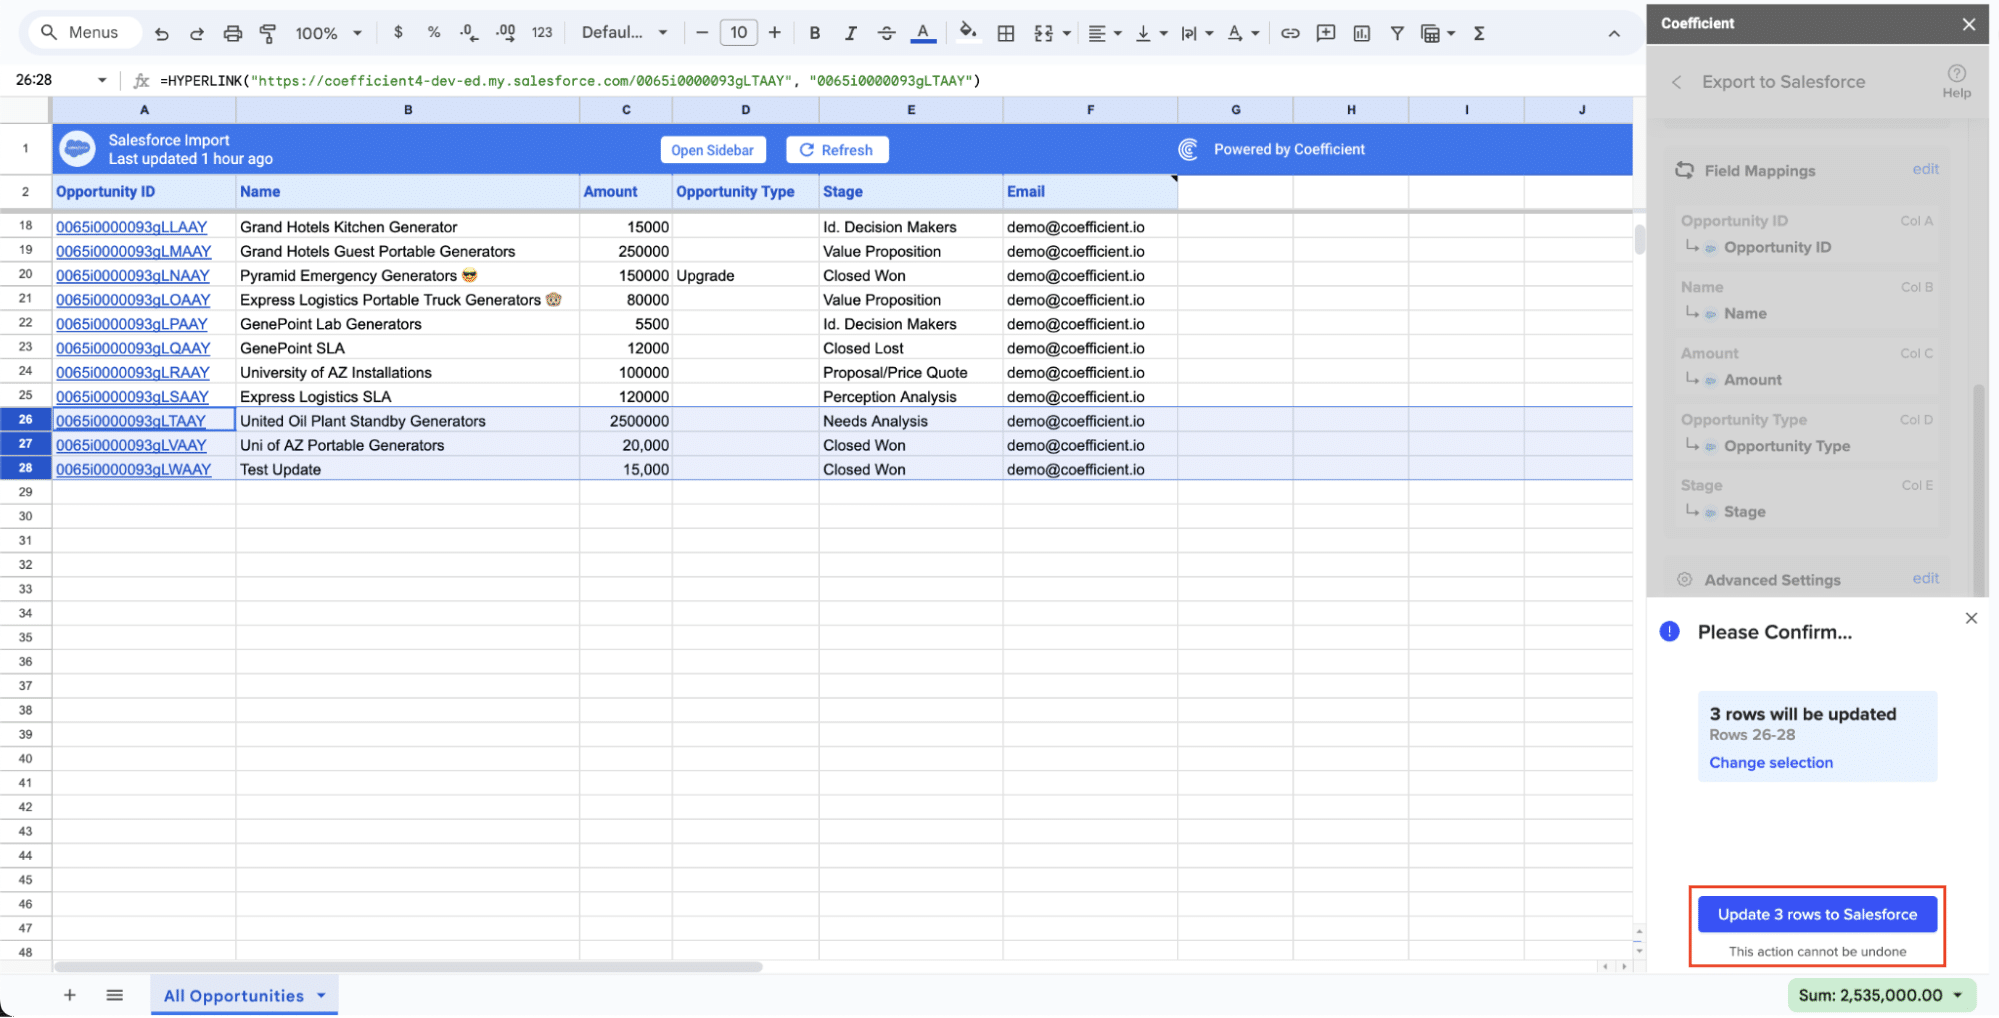
In a few seconds, data from your spreadsheet will push to Salesforce.
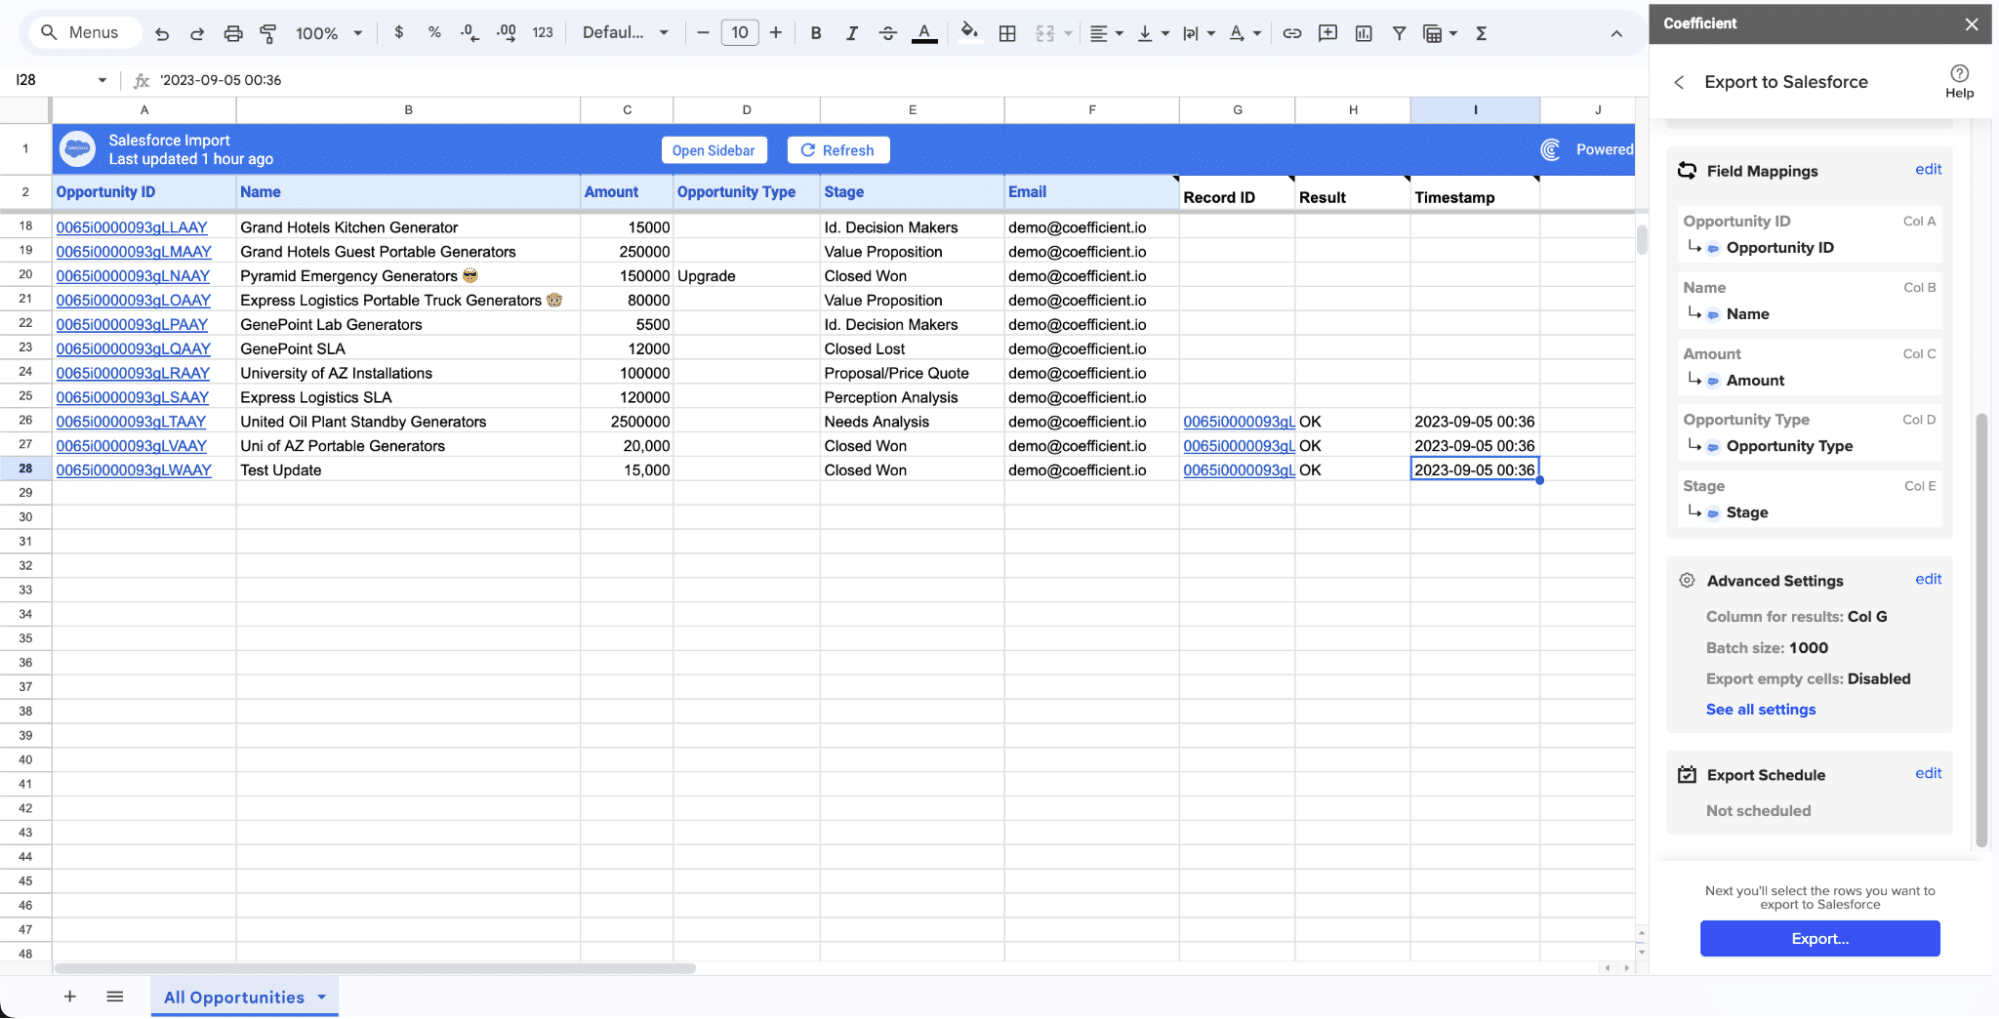
Your spreadsheet will display updated records, along with their export status and the date/time stamp of the update.
Method 2: Zapier

Zapier is another no-code platform that enables you to create automated workflows between Xero and Salesforce. While it offers great flexibility, setting up complex workflows can be time-consuming, and costs can add up quickly with higher usage.
Features
- Wide range of triggers and actions: Supports numerous triggers and actions to create custom workflows tailored to your specific needs.
- Customizable workflows: Allows you to automate complex tasks by linking multiple apps and defining detailed workflows.
- No coding required: Accessible to non-technical users who need to set up integrations without writing code.
Pros and Cons
Pros:
- No coding required: Easy for non-technical users to set up and manage.
- Supports a wide range of triggers and actions: Flexible enough to handle various integration scenarios.
- Allows for customizable workflows: Tailor your integrations to match your exact business needs.
Cons:
- Can become expensive with extensive use: Costs can quickly add up if you need multiple complex Zaps.
- Requires more configuration for complex Zaps: Setting up detailed workflows can be time-consuming and may require careful planning.
How to Connect Xero to Salesforce with Zapier
Step 1: Sign up for a Zapier account
- Go to Zapier’s website and sign up for an account if you haven’t already.
- After signing up, log in to your Zapier account.
Step 2: Create a New Zap
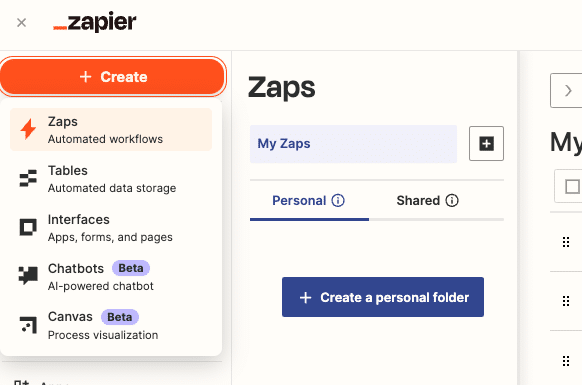
- Click the “+ Create” > “Zaps” button at the top right corner of the dashboard.
- Enter a name for your Zap to keep your workflows organized.
Step 3: Set Xero as the Trigger App
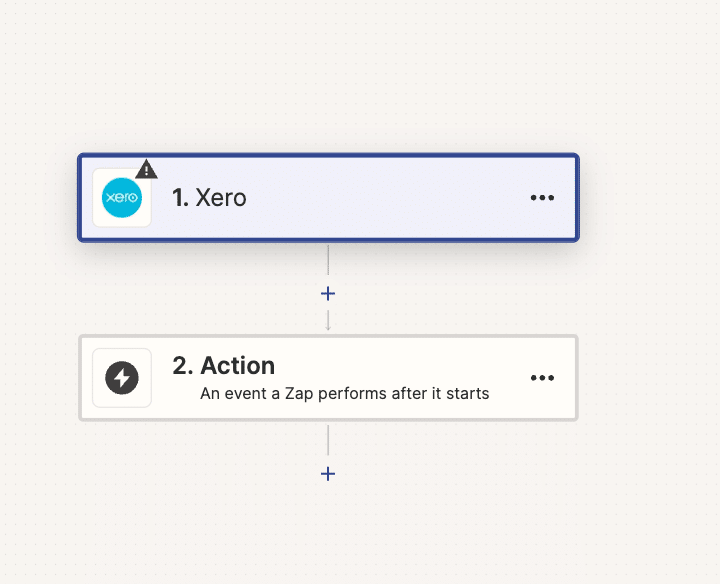
- Search for and select Xero as your trigger app.
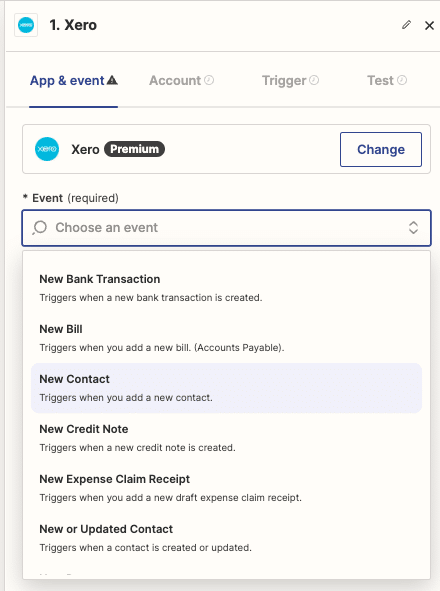
- Choose a trigger event from the list, such as “New Invoice” or “New Contact.”
- Click “Continue.”
Step 4: Connect Your Xero Account
- Click “Sign in to Xero.”
- Follow the prompts to log in to your Xero account and authorize Zapier to access your data.
- Once connected, click “Continue.”

Step 5: Configure the Trigger
- Set up the trigger by selecting the appropriate options, such as which organization to pull data from if you have multiple Xero organizations.
- Click “Continue” and test the trigger to ensure Zapier can pull in the correct data from Xero.
Step 6: Set Salesforce as the Action App
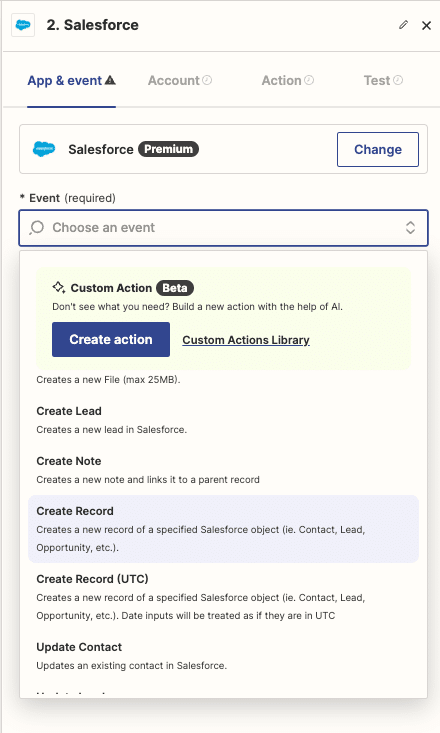
- Search for and select Salesforce as your action app.
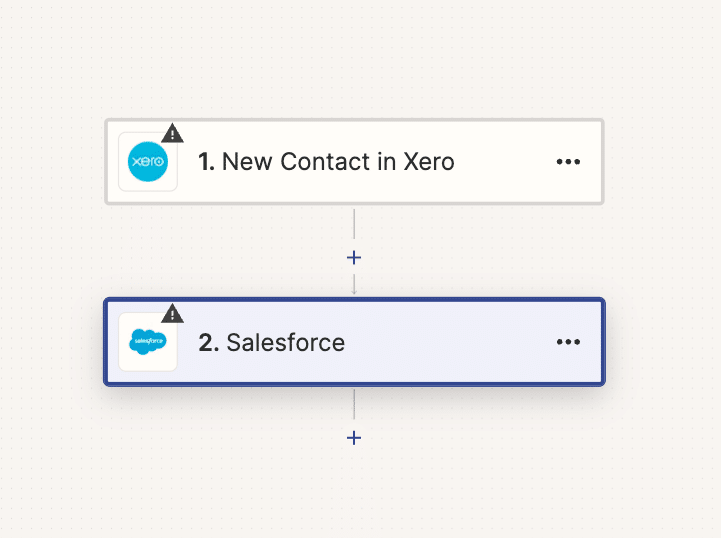
- Choose an action event, such as “Create Record” or “Update Record.”
- Click “Continue.”
Step 7: Connect Your Salesforce Account
- Click “Sign in to Salesforce.”
- Follow the prompts to log in to your Salesforce account and authorize Zapier to access your data.
- Once connected, click “Continue.”

Step 8: Configure the Action
- Set up the action by mapping the fields from Xero to the corresponding fields in Salesforce.
- For example, map the Xero invoice number to the Salesforce Opportunity ID, Xero contact name to Salesforce Contact Name, etc.
- Click “Continue” and test the action to ensure data is being sent correctly from Xero to Salesforce.
Step 9: Activate Your Zap
- After successfully testing your Zap, click “Turn on Zap” to activate the workflow.
- Your Zap is now live, and data will automatically sync between Xero and Salesforce based on the trigger you set up.
Method 3: Dataloader.io
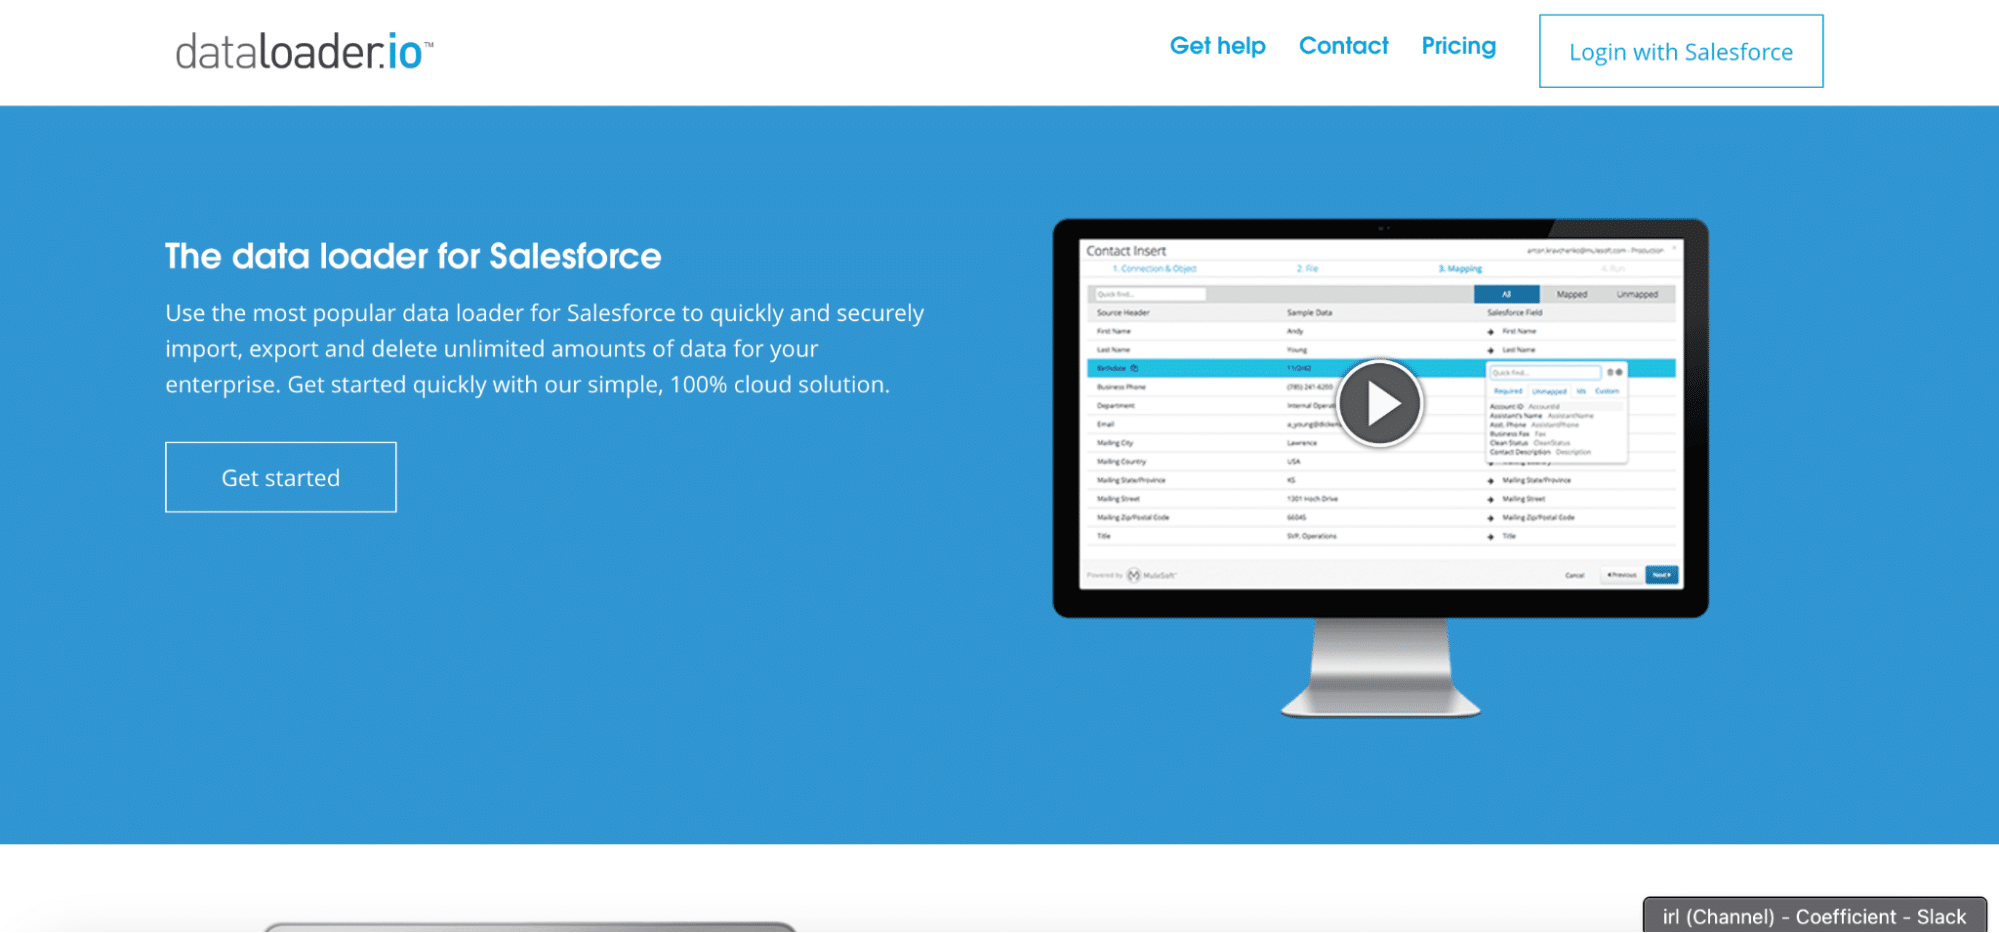
Dataloader.io is an ETL (extract, transform, load) tool designed for handling large data transfers between systems like Xero and Salesforce. While it offers robust performance and scheduling capabilities, it may require more technical knowledge to set up and maintain.
Features
- Handles large data volumes efficiently: Designed to manage and transfer large datasets quickly and reliably.
- Provides scheduling options for automated data loads: Set up scheduled tasks to automate data synchronization at specified intervals.
- Offers fast performance for bulk transfers: Optimized for high-speed data transfers, ensuring efficient and timely data movement.
Pros and Cons
Pros:
- Handles large data volumes efficiently: Capable of managing extensive datasets without compromising performance.
- Provides scheduling options for automated data loads: Automate your data synchronization with customizable schedules.
- Offers fast performance for bulk transfers: Ensure rapid and reliable data transfers for large-scale operations.
Cons:
- Requires manual field mapping and data preparation: Setting up tasks may require significant manual effort and data configuration.
- Not ideal for real-time, continuous data syncing: Better suited for batch processing rather than real-time updates.
How to Connect Xero to Salesforce with Dataloader
Step 1: Sign up for a Dataloader.io account
- Go to Dataloader.io’s website and sign up for an account if you haven’t already.
- After signing up, log in to your Dataloader.io account.
Step 2: Connect Your Xero Account
- On the Dataloader.io dashboard, click “New Task” and select “Import.”
- Select Xero as the source system.
- Click “Connect to Xero” and follow the prompts to log in to your Xero account and authorize Dataloader.io to access your data.
Step 3: Connect Your Salesforce Account
- Select Salesforce as the target system.
- Click “Connect to Salesforce” and follow the prompts to log in to your Salesforce account and authorize Dataloader.io to access your data.
Step 4: Create a New Data Mapping Task
- Choose the type of task you want to create, such as “Insert,” “Update,” or “Upsert.”
- Select the Xero object you want to import data from, such as “Invoices” or “Contacts.”
- Select the Salesforce object you want to export data to, such as “Opportunity” or “Contacts.”
Step 5: Map the Fields
- Dataloader.io will display a list of fields from the Xero object and the corresponding fields in the Salesforce object.
- Manually map each field from Xero to the appropriate field in Salesforce. For example, map the Xero invoice number to the Salesforce Opportunity ID, Xero contact name to Salesforce Contact Name, etc.
- Click “Next” after mapping all the fields.
Step 6: Configure Scheduling Settings
- Set up the schedule for your data load task. Choose whether you want to run the task immediately, or set up a recurring schedule (e.g., daily, weekly).
- Specify the time and frequency for the scheduled task if you choose to automate it.
Step 7: Run the Task
- Review all the settings and mappings to ensure everything is correct.
- Click “Run” to start the data load task.
- Monitor the progress of the task in the Dataloader.io dashboard.
Step 8: Monitor and Troubleshoot
- After the task is complete, review the results for any errors or discrepancies.
- If there are errors, Dataloader.io will provide detailed logs that can help you troubleshoot and resolve any issues.
- Make necessary adjustments to the mappings or configurations if needed and re-run the task.
Connect Xero to Salesforce: No Code Required
Integrating Xero with Salesforce can revolutionize your business processes by streamlining data management, enhancing reporting capabilities, improving accuracy, and increasing overall efficiency.
Ready to experience the benefits of connecting Xero to Salesforce?
Get started with Coefficient today and enjoy a user-friendly, no-code solution that offers real-time data syncing at an affordable price. With Coefficient, you can seamlessly integrate your accounting and CRM data, empowering your teams to make better decisions and drive business growth.


