Are you looking to connect Databricks to SQL Server? You’re in the right place. This guide will walk you through three proven methods to establish a reliable connection between these two powerful platforms. Whether you’re a business user or a technical expert, you’ll find a solution that fits your needs.
Why Connect Databricks to SQL Server?
Before we dive into the how-to, let’s quickly explore why you might want to connect these two systems:
- Real-time Data Synchronization: Keep your SQL Server databases up-to-date with the latest analytics results from Databricks.
- Enhanced Data Processing: Take advantage of Databricks’ distributed computing capabilities while maintaining SQL Server as your system of record.
- Automated Data Pipelines: Create scheduled jobs to move and transform data between platforms for consistent data workflows.
Now, let’s explore the top three methods to connect Databricks to SQL Server.
Top 3 Methods to Connect Databricks to SQL Server
| Solution | Best For |
| Coefficient | Business users who need to sync Databricks data to SQL Server through spreadsheets with no coding required |
| Databricks Native Connector | Technical teams requiring direct connection using JDBC drivers and SQL queries |
| Azure Data Factory | Enterprise organizations needing managed ETL service with visual interface for complex data orchestration |
1. Coefficient: The No-Code Solution
Coefficient provides a user-friendly way to connect Databricks and SQL Server using spreadsheets as an intermediate layer. This method is perfect for business users who want to maintain data accuracy while using familiar tools like Google Sheets and Excel.
Here’s how to set it up:
Step 1. Install Coefficient
For Google Sheets
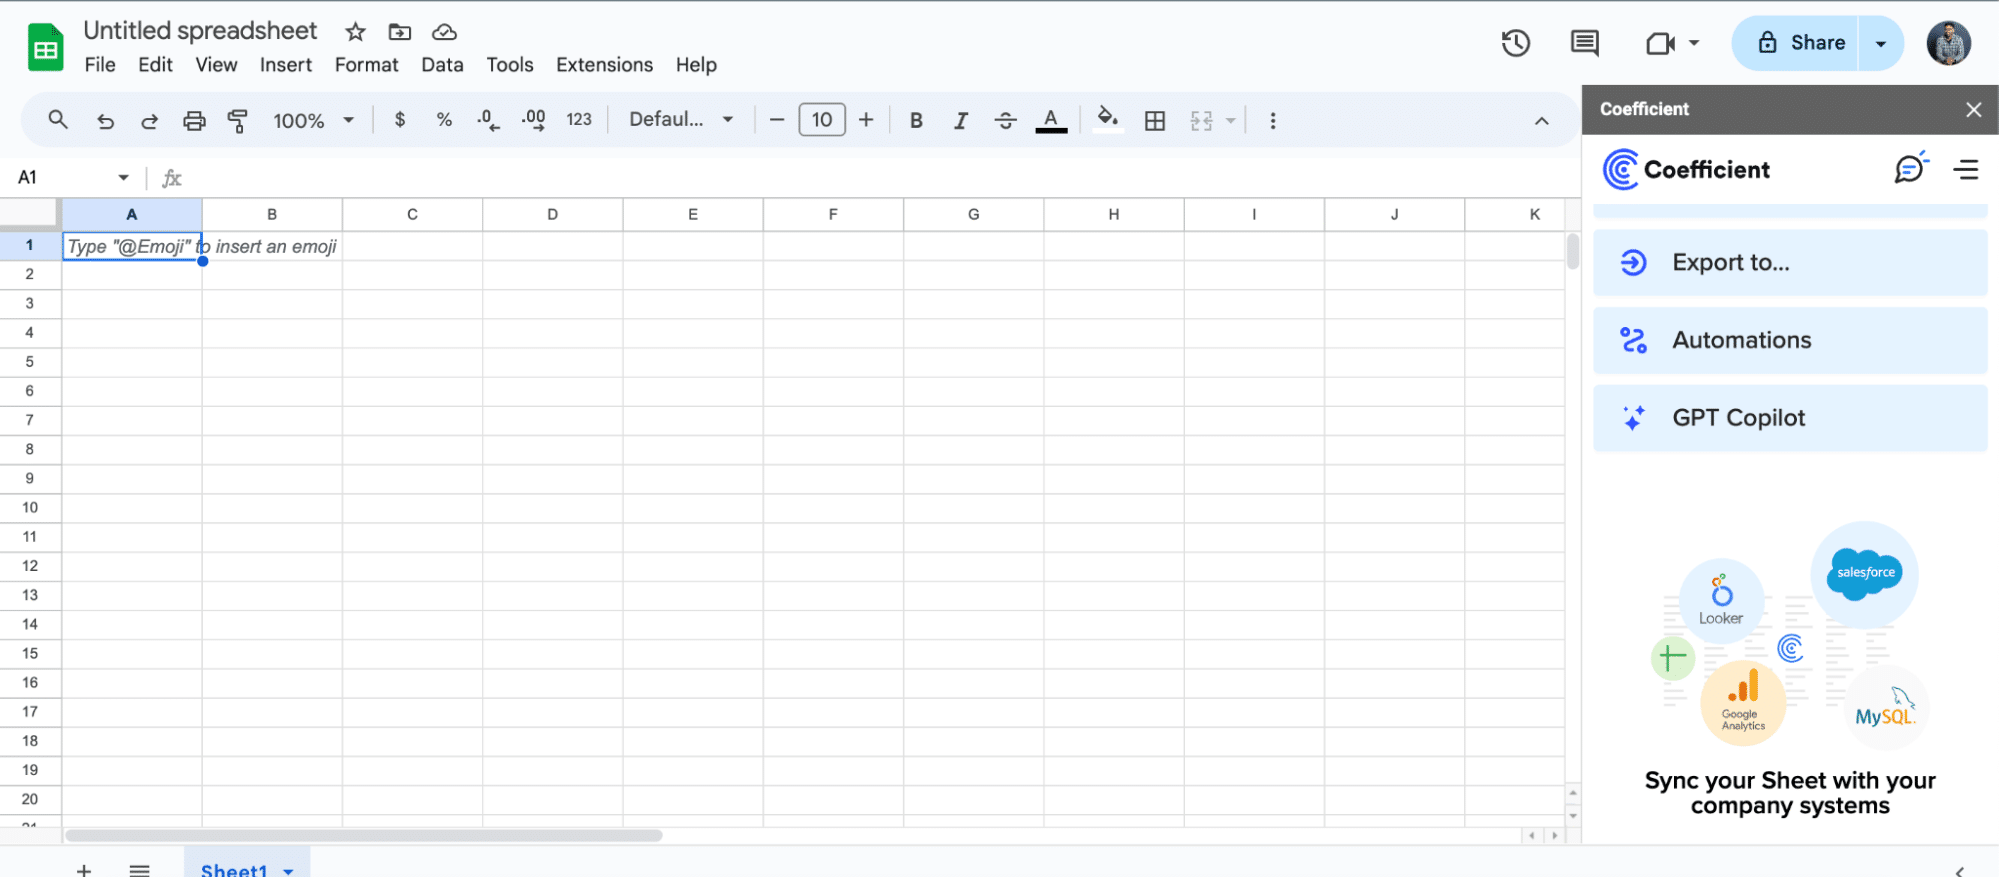
- Open a new or existing Google Sheet, navigate to the Extensions tab, and select Add-ons > Get add-ons.
- In the Google Workspace Marketplace, search for “Coefficient.”
- Follow the prompts to grant necessary permissions.
- Launch Coefficient from Extensions > Coefficient > Launch.
- Coefficient will open on the right-hand side of your spreadsheet.
For Microsoft Excel
- Open Excel from your desktop or in Office Online. Click ‘File’ > ‘Get Add-ins’ > ‘More Add-Ins.’
- Type “Coefficient” in the search bar and click ‘Add.’
- Follow the prompts in the pop-up to complete the installation.
- Once finished, you will see a “Coefficient” tab in the top navigation bar. Click ‘Open Sidebar’ to launch Coefficient.

Step 2. Connect and Import Data from Databricks
Click “Import from…” in the menu and choose “Databricks” from the list of available integrations.
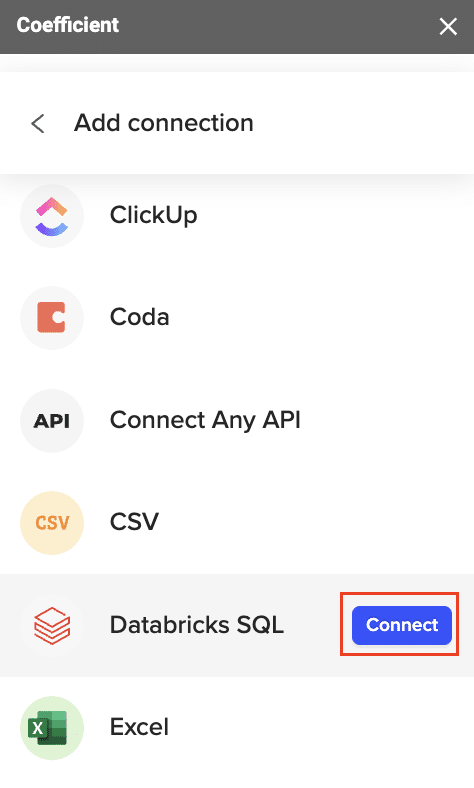
You’ll need to provide your Databricks JDBC URL and access token to authenticate the connection. Enter your information and click “Connect” to finalize the Databricks connection.

Note:
- For help obtaining your JDBC URL and Personal Access Token, click here.
- If you need help finding your “JDBC URL,” click here.
- If you need help generating your Personal Access Token, click here.
Once connected, return to Databricks from the menu and select “From Tables and Columns.”
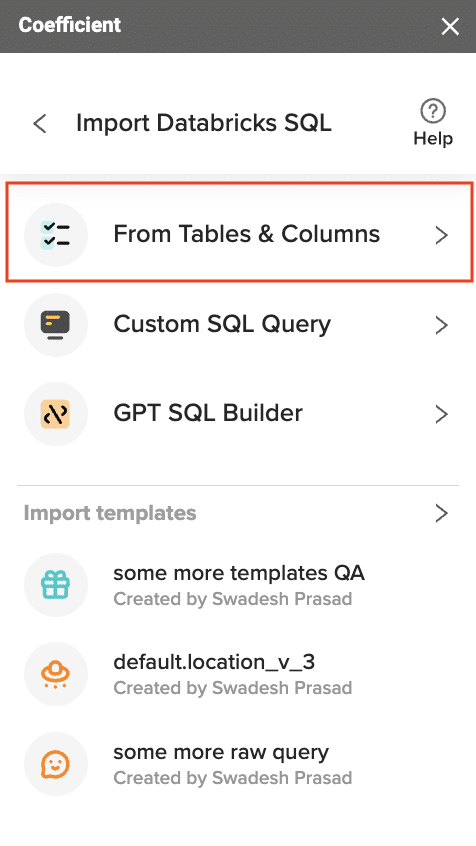
Select the table for your import from the available table schemas.
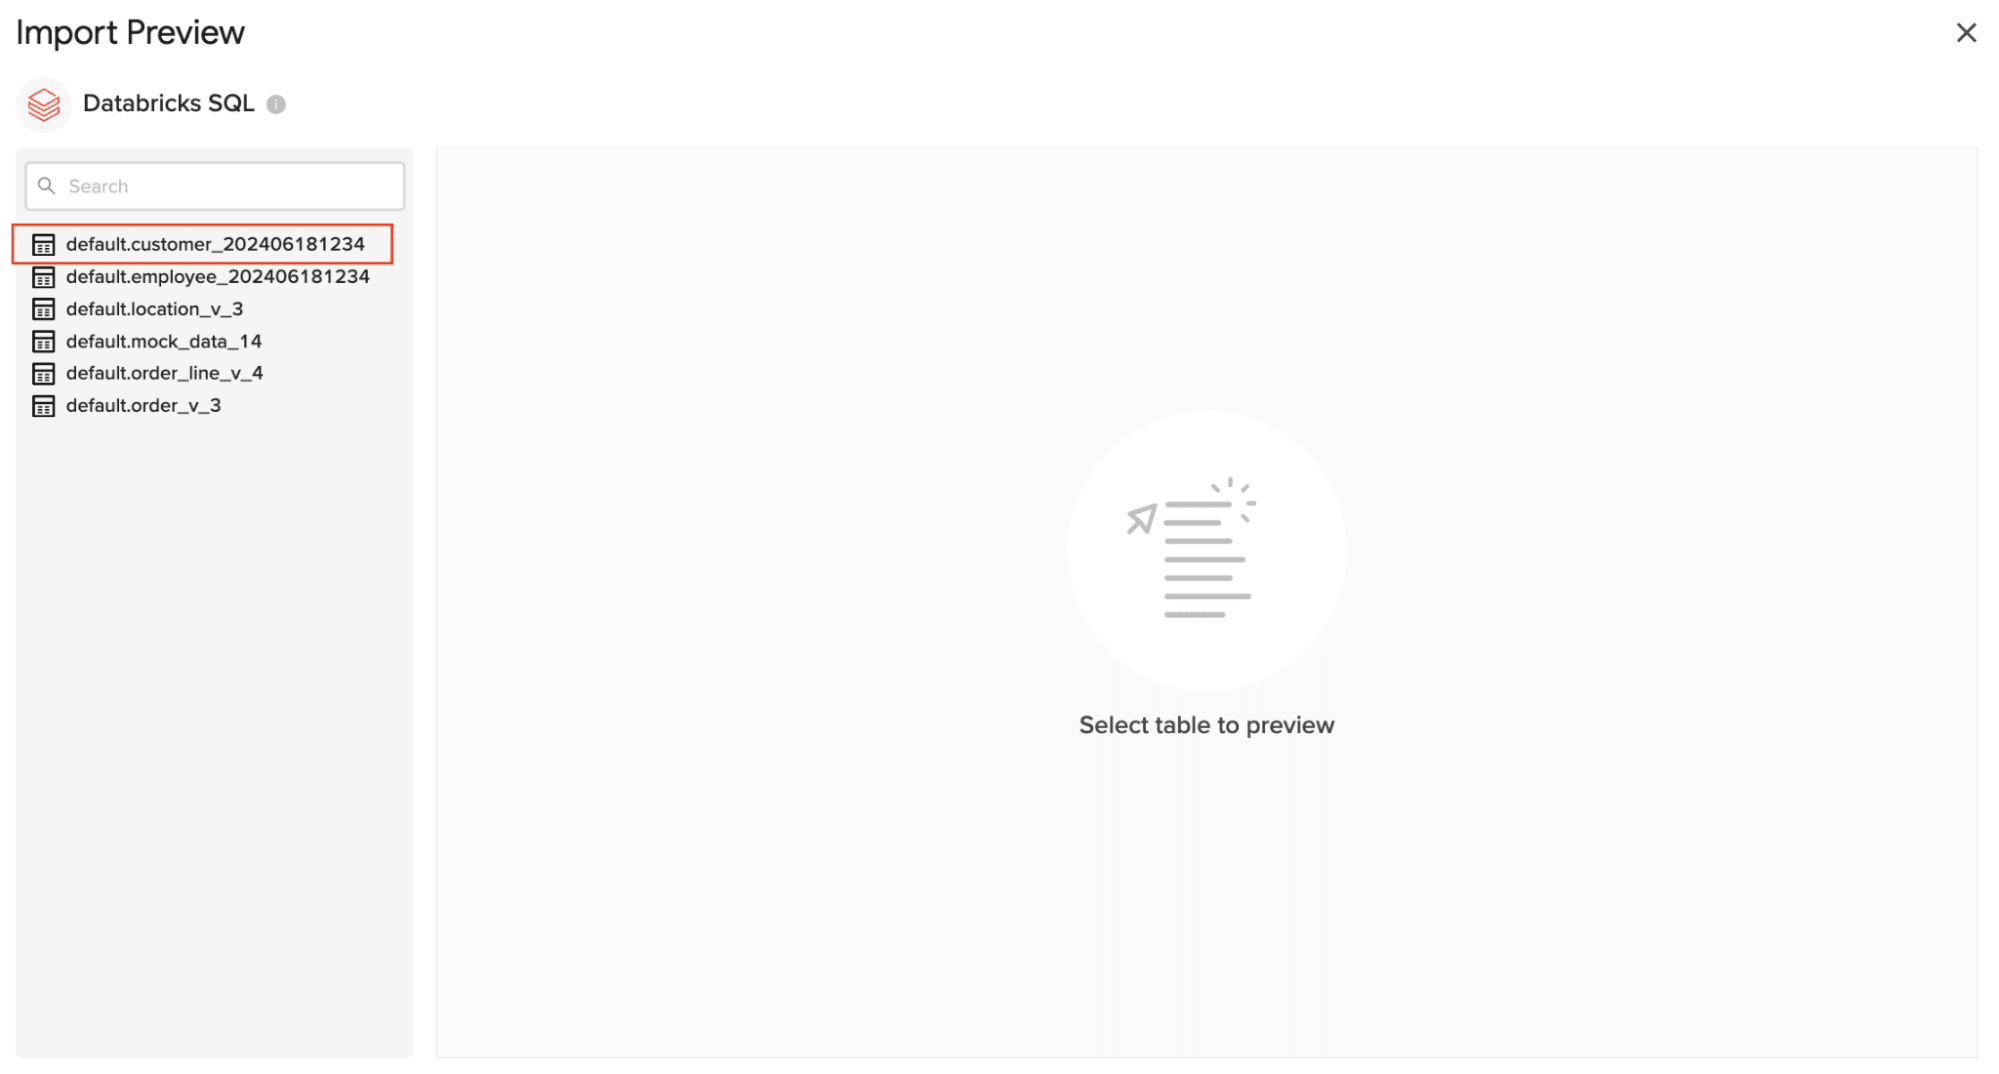
Once the table is selected, the fields within that table will appear in a list on the left side of the Import Preview window. Select the fields you want to include in your import by checking/unchecking the corresponding boxes.
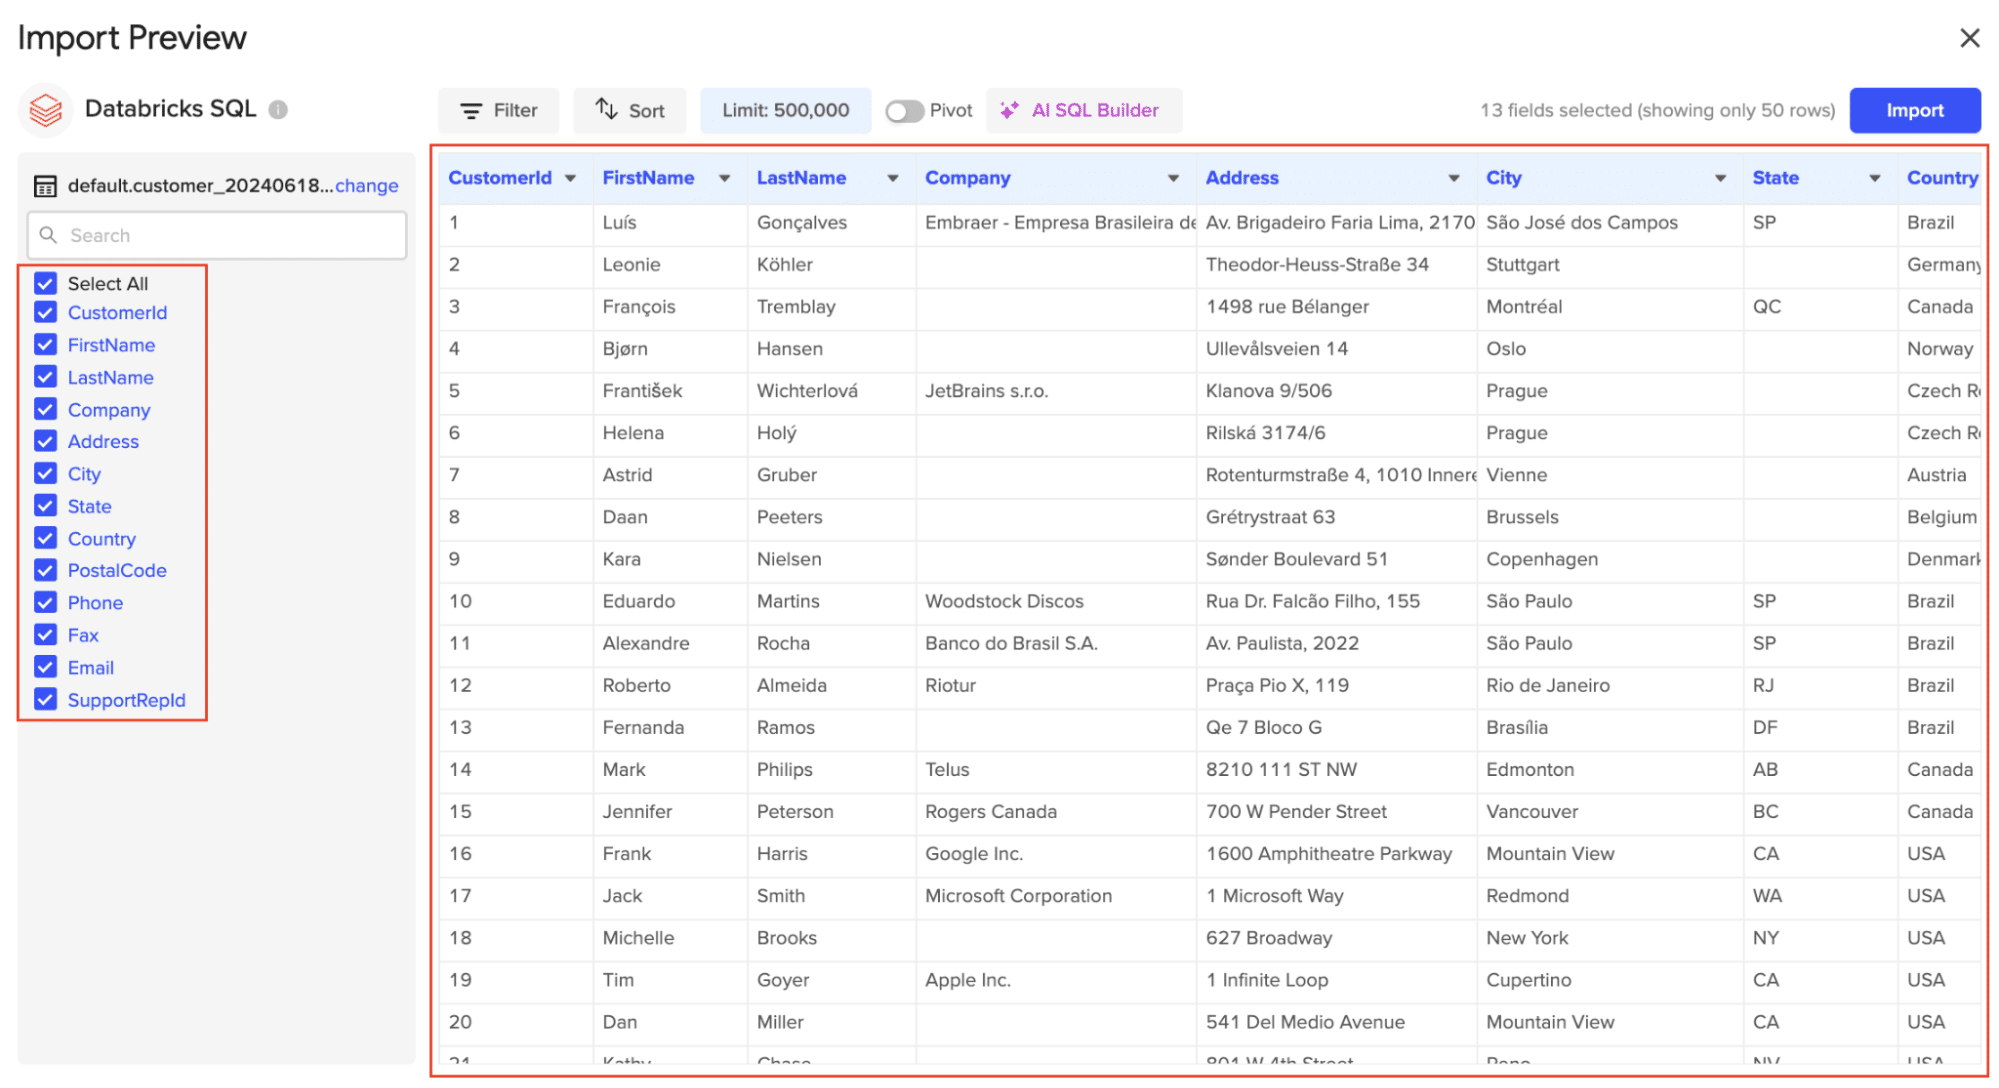
Click “Import” to pull the selected Databricks data into your spreadsheet.
Step 3. Export Data from Your Spreadsheet to MS SQL
Before starting, make sure you’ve connected to MS SQL.
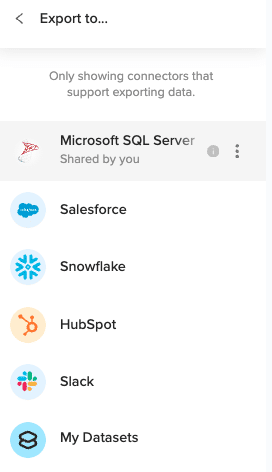
Then, navigate to Coefficient’s menu >Click “Export to…”

Select MS SQL.
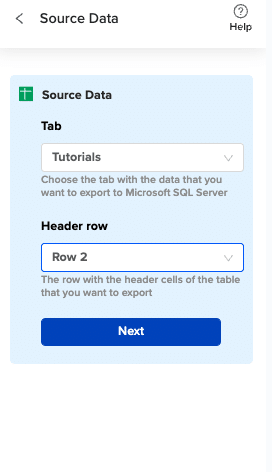
Choose the tab in your workbook that contains the data you want to export and specify the header row that contains the database field headers.
Specify the table in your database where you want to insert the data and choose the appropriate action (Insert, Update, Delete).

Complete the field mappings for the export. Then, confirm your settings and click “Export” to proceed.
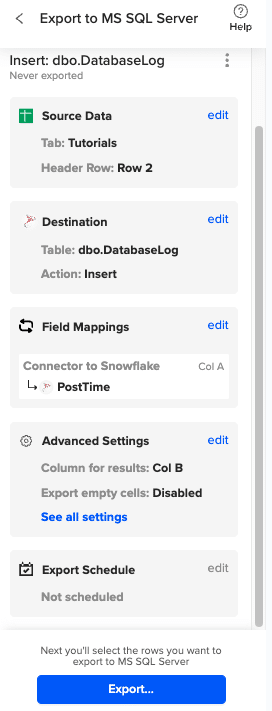
Then, highlight the specific rows in your sheet that you want to export, or choose to export all rows.

Review your settings and follow the prompts to push your data back to MS SQL.
Pros:
- No coding required
- Familiar spreadsheet interface
- Automated scheduling
- Real-time sync capabilities
Cons:
- Requires spreadsheet intermediate layer
- Limited to spreadsheet row limits
For more information on connecting SQL Server to spreadsheets, check out these resources:
2. Databricks Native Connector: For Technical Teams
The native JDBC connector offers direct integration between Databricks and SQL Server. This method provides maximum flexibility for technical teams comfortable with SQL and programming.
Follow these steps to set it up:
- Configure cluster settings
- Launch your Databricks workspace and create a new cluster or select an existing one
- Under Advanced Options, select the Spark Config tab
- Add the following configuration: spark.databricks.delta.preview.enabled true
- Set the Databricks Runtime Version to DBR 12.2 or later for optimal JDBC performance
- Install JDBC driver
- Download the Microsoft JDBC driver for SQL Server from the official Microsoft website
- Upload the JAR file (mssql-jdbc-12.2.0.jre8.jar) to your Databricks workspace using the libraries interface
- Install the library on your cluster by navigating to the Libraries tab and selecting “Install New”
- Choose “Upload JAR” and select the downloaded driver
- Wait for the library installation status to show as “Installed”
- Set up connection parameters Create a configuration file or notebook cell with these parameters:
jdbc_url = “jdbc:sqlserver://<server_name>.database.windows.net:1433;database=<database_name>”
connection_properties = {
“user”: dbutils.secrets.get(scope=”sql-credentials”, key=”username”),
“password”: dbutils.secrets.get(scope=”sql-credentials”, key=”password”),
“driver”: “com.microsoft.sqlserver.jdbc.SQLServerDriver”,
“encrypt”: “true”,
“trustServerCertificate”: “false”,
“hostNameInCertificate”: “*.database.windows.net”
}
- Configure authentication
- Create a Databricks secret scope:
CREATE SECRET SCOPE IF NOT EXISTS sql-credentials
- Store your SQL Server credentials securely:
dbutils.secrets.put(scope=”sql-credentials”, key=”username”, string=”your_username”)
dbutils.secrets.put(scope=”sql-credentials”, key=”password”, string=”your_password”)
- Write connection code Create a function to establish and manage connections:
def get_sql_server_connection():
try:
return spark.read.jdbc(
url=jdbc_url,
table=”(SELECT TOP 1 * FROM your_table) test_query”,
properties=connection_properties
)
except Exception as e:
print(f”Connection failed: {str(e)}”)
raise
- Test connectivity and implement error handling
def test_connection():
try:
df = get_sql_server_connection()
print(“Connection successful!”)
return True
except Exception as e:
print(f”Connection test failed: {str(e)}”)
return False
# Implement connection pooling for better performance
from py4j.protocol import Py4JJavaError
def execute_with_retry(query, max_retries=3):
for attempt in range(max_retries):
try:
return spark.sql(query)
except Py4JJavaError as e:
if attempt == max_retries – 1:
raise
print(f”Attempt {attempt + 1} failed, retrying…”)
time.sleep(2 ** attempt)
Pros:
- Direct connection
- Maximum performance
- Full SQL support
- Native integration
Cons:
- Requires technical expertise
- Manual configuration needed
- Maintenance overhead
3. Azure Data Factory: For Enterprise-Level Integration
Azure Data Factory provides a managed service for ETL operations between Databricks and SQL Server. It offers visual tools for pipeline creation, making it suitable for enterprise organizations.

Stop exporting data manually. Sync data from your business systems into Google Sheets or Excel with Coefficient and set it on a refresh schedule.
Get Started
Here’s how to get started:
- Create Azure Data Factory instance
- Log into Azure Portal
- Click “Create a resource” and search for “Data Factory”
- Fill in basic details:
- Resource group: Create new or select existing
- Version: V2
- Name: Must be globally unique
- Region: Choose nearest region
- Enable Git configuration (recommended for version control)
- Set up Azure DevOps repository connection
- Set up linked services
- Create SQL Server linked service:
{
“name”: “SQLServerLinkedService”,
“properties”: {
“type”: “SqlServer”,
“typeProperties”: {
“connectionString”: {
“type”: “SecureString”,
“value”: “Server=server_name;Database=database_name;User ID=${username};Password=${password}”
}
},
“connectVia”: {
“referenceName”: “AutoResolveIntegrationRuntime”,
“type”: “IntegrationRuntimeReference”
}
}
}
- Create Databricks linked service:
{
“name”: “DatabricksLinkedService”,
“properties”: {
“type”: “AzureDatabricks”,
“typeProperties”: {
“domain”: “https://<workspace-url>”,
“authentication”: “MSI”,
“workspaceResourceId”: “/subscriptions/<subscription-id>/resourceGroups/<resource-group>/providers/Microsoft.Databricks/workspaces/<workspace-name>”,
“existingClusterId”: “<cluster-id>”
}
}
}
- Create datasets
- Define source dataset structure
- Create sink dataset with appropriate schema mapping
- Configure dataset parameters for dynamic execution
- Configure data flows
- Design mapping data flow:
- Add source transformation
- Include data type conversions
- Add derived column transformations
- Configure sink settings
- Set up error handling and logging
- Implement data validation rules
- Set up triggers
- Create schedule-based trigger:
{
“name”: “DailyTrigger”,
“properties”: {
“type”: “ScheduleTrigger”,
“recurrence”: {
“frequency”: “Day”,
“interval”: 1,
“startTime”: “2024-01-01T00:00:00Z”,
“timeZone”: “UTC”
}
}
}
- Configure event-based triggers for real-time processing
- Set up dependency chains between pipelines
- Monitor operations
- Enable diagnostic settings
- Set up Azure Monitor alerts
- Configure custom metrics for pipeline performance
- Implement error notification system
Pros:
- Visual pipeline builder
- Managed service
- Enterprise-grade security
- Comprehensive monitoring
Cons:
- Azure subscription required
- Complex setup process
- Additional costs
Wrapping Up: Start Connecting Databricks to SQL Server Today
Connecting Databricks to SQL Server opens up a world of possibilities for data integration and analysis. Whether you choose the no-code simplicity of Coefficient, the direct control of the native connector, or the managed service of Azure Data Factory, you now have the knowledge to get started.
For business users seeking a straightforward solution, Coefficient offers the easiest path to connect Databricks to SQL Server through familiar spreadsheet tools. Ready to get started? Sign up for Coefficient today and begin syncing your data in minutes.
Frequently Asked Questions
How to load data from Databricks to SQL Server?
While there are multiple methods, Coefficient provides the simplest solution by allowing you to sync Databricks data to SQL Server through spreadsheets with automated scheduling and real-time updates.
Can we connect SQL Server to Databricks?
Yes, you can connect SQL Server to Databricks using various methods including Coefficient’s no-code solution, Databricks’ native JDBC connector, or Azure Data Factory.
How to create a table in SQL Server from Databricks?
Using Coefficient, you can easily create and update SQL Server tables from Databricks data by importing it into a spreadsheet and configuring the SQL Server connection for automated syncing.
Why use Databricks instead of SQL Server?
While both platforms serve different purposes, using them together through Coefficient allows you to leverage Databricks’ analytics capabilities while maintaining SQL Server as your operational database.

