Table of Contents
![]()
- 1. Best 6 HubSpot Connectors in 2025
- 2. Top HubSpot Integrations for RevOps in 2026
- 3. How to Connect Google Ads to HubSpot? No-Code Method for 2025
- 4. How to Connect NetSuite to HubSpot: A Detailed Step-by-Step Guide
- 5. How to Connect Freshdesk to HubSpot
- 6. Connecting LinkedIn Ads to HubSpot: A Comprehensive Guide for 2025
- 7. How to Connect Webflow to HubSpot?

Are you looking to supercharge your web data management and customer relationship efforts? Connecting Webflow, a powerful website design platform, with HubSpot, a leading CRM and marketing automation tool, can help you do just that.
By integrating these two platforms, you can seamlessly transfer data between them, gaining a more holistic view of your customers and website performance. This enables you to make data-driven decisions, personalize customer interactions, and ultimately grow your business.
In this guide, we’ll explore the top three methods for connecting Webflow to HubSpot: Coefficient, Zapier, and Integromat. We’ll dive into the advantages of each approach and provide step-by-step instructions so you can start leveraging this integration right away.
Advantages of Connecting Webflow to HubSpot
- Predictive Content Personalization: By integrating Webflow’s behavioral data with HubSpot’s customer profiles, you can create an AI-driven content recommendation engine. This system can analyze a visitor’s browsing patterns on your Webflow site and automatically suggest relevant content or products within HubSpot-powered email campaigns or chatbots, significantly improving engagement and conversion rates.
- Dynamic Lead Scoring: Combine Webflow interaction metrics (e.g., time on page, scroll depth, video views) with HubSpot’s contact data to build a more sophisticated lead scoring model. This allows you to automatically prioritize leads based on both explicit (form submissions) and implicit (website behavior) signals, enabling your sales team to focus on the most promising prospects and improve overall sales efficiency.
- Automated Customer Journey Mapping: Leverage the integration to create visual customer journey maps that span both platforms. For instance, track how a lead moves from initial blog post views on your Webflow site to email interactions in HubSpot, through to product page visits and eventual conversion. This holistic view enables more accurate attribution modeling and helps identify key touchpoints for optimization.
Connect Webflow and HubSpot: 3 Methods
| Solution | Best For |
| Coefficient | Marketing analysts in small to medium-sized businesses who frequently work with spreadsheets. Ideal for organizations that need to combine Webflow data with other metrics in Google Sheets before pushing to HubSpot. |
| Zapier | Growing businesses with diverse software ecosystems beyond just Webflow and HubSpot. Optimal for marketing operations teams that need to create multi-step workflows involving additional apps (e.g., triggering Slack notifications for high-value form submissions or updating project management tools). |
| Integromat | Tech-savvy marketing teams or organizations with complex data integration needs. Ideal for businesses that require advanced data transformations, error handling, and conditional logic in their Webflow-HubSpot integration. Integromat offers more powerful features and flexibility compared to Zapier, but has a steeper learning curve. |
How to Connect Webflow to HubSpot: Step-by-Step Guides
Method 1: Coefficient – No-Code, User-Friendly Integration

Coefficient is a user-friendly tool that enables you to connect your spreadsheet to your business data without any coding. It’s the perfect solution for non-technical users who want a simple way to link Webflow and HubSpot.
Pros:
- Easy to use for non-technical users
- Automatically syncs data on a schedule
- Straightforward field mapping
Cons:
- Scheduled automations require a paid plan
How to Connect Webflow to HubSpot with Coefficient
Step 1: Install the Coefficient
For Google Sheets
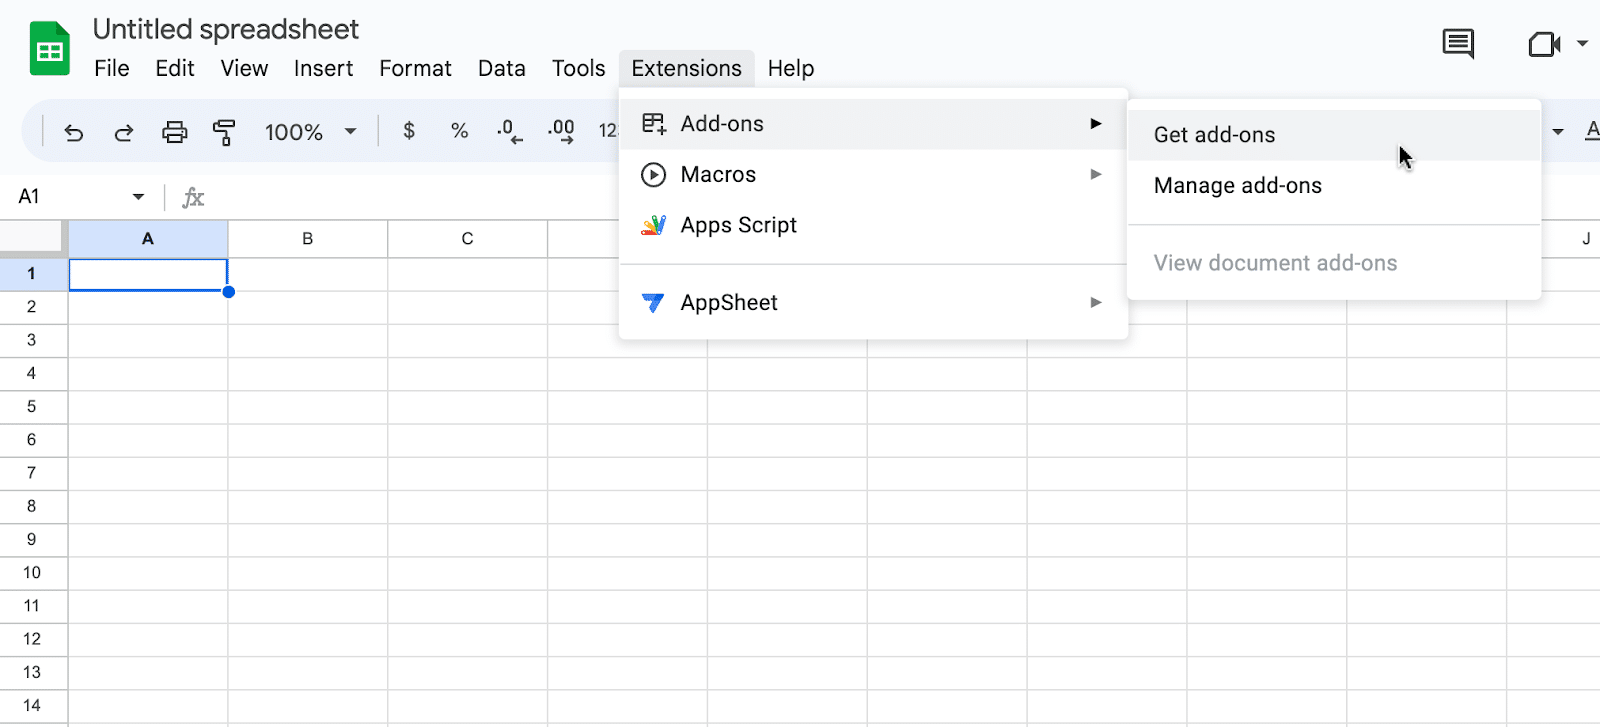
Open a new or existing Google Sheet, navigate to the Extensions tab, and select Add-ons > Get add-ons.
In the Google Workspace Marketplace, search for “Coefficient.”

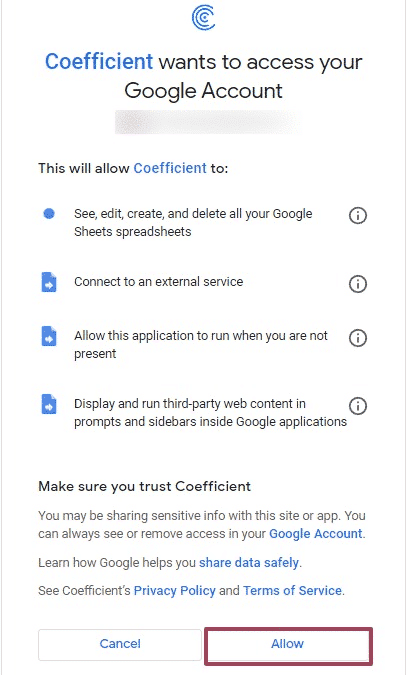
Follow the prompts to grant necessary permissions.
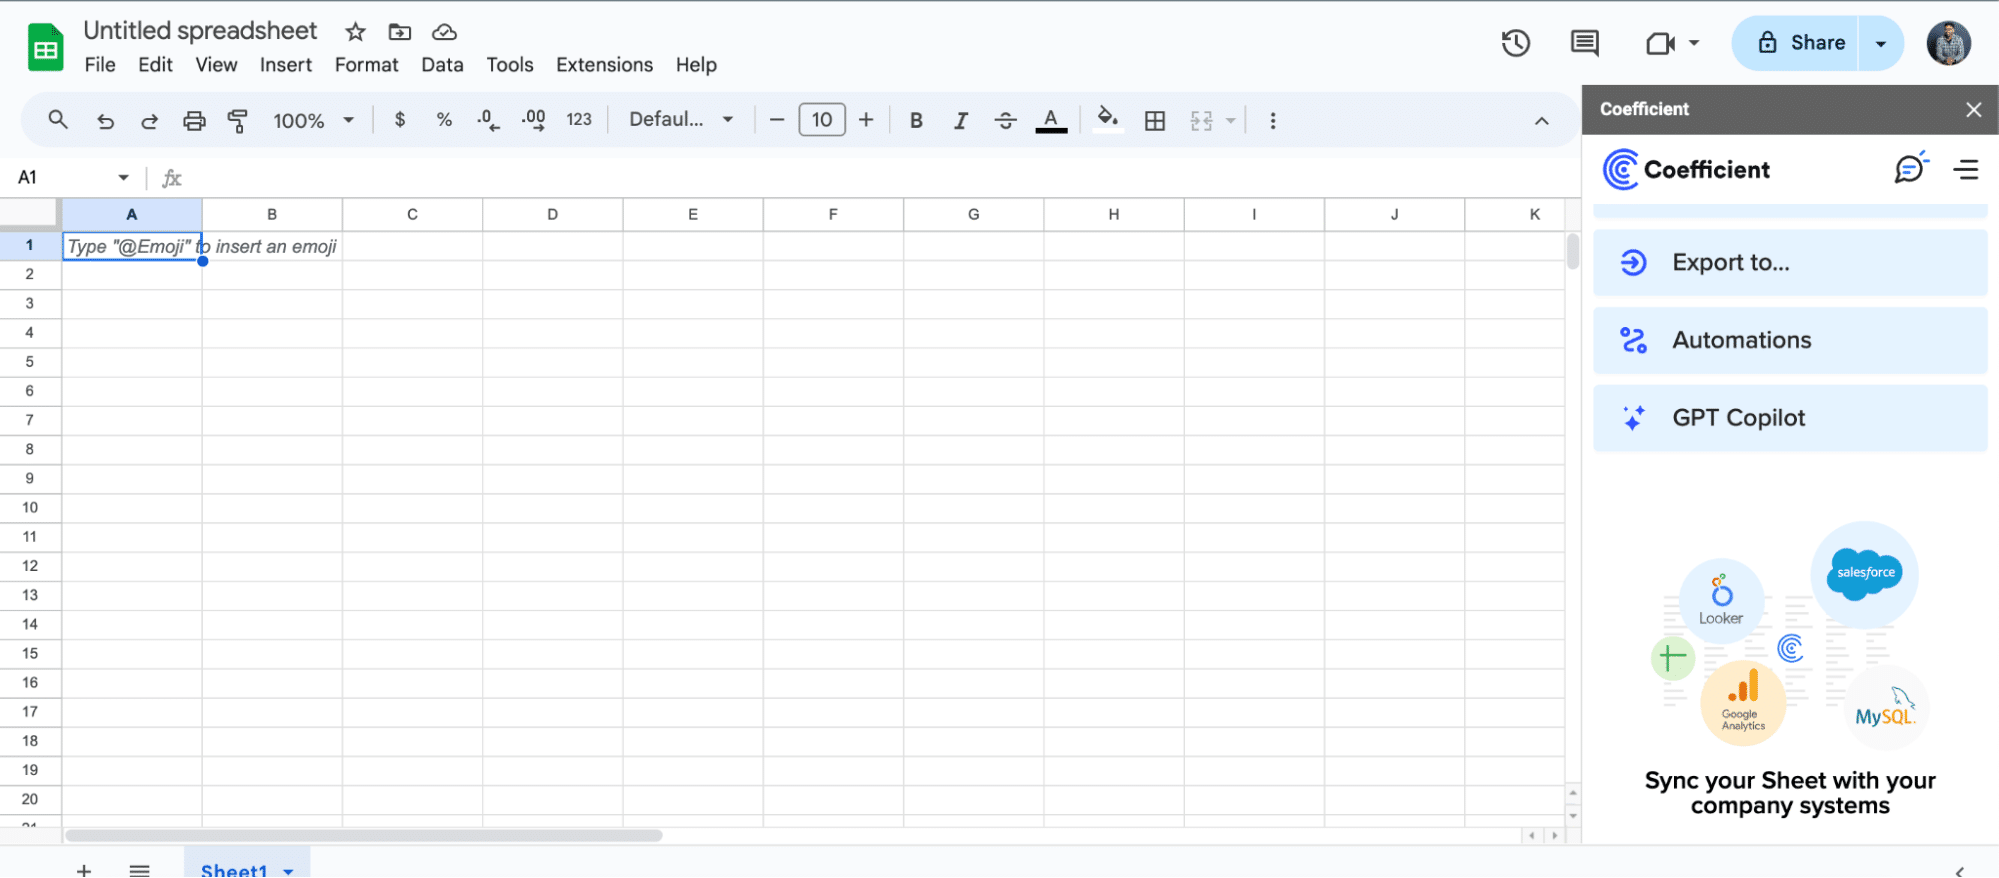
Launch Coefficient from Extensions > Coefficient > Launch.

Coefficient will open on the right-hand side of your spreadsheet.
For Microsoft Excel
Open Excel from your desktop or in Office Online. Click ‘File’ > ‘Get Add-ins’ > ‘More Add-Ins.’
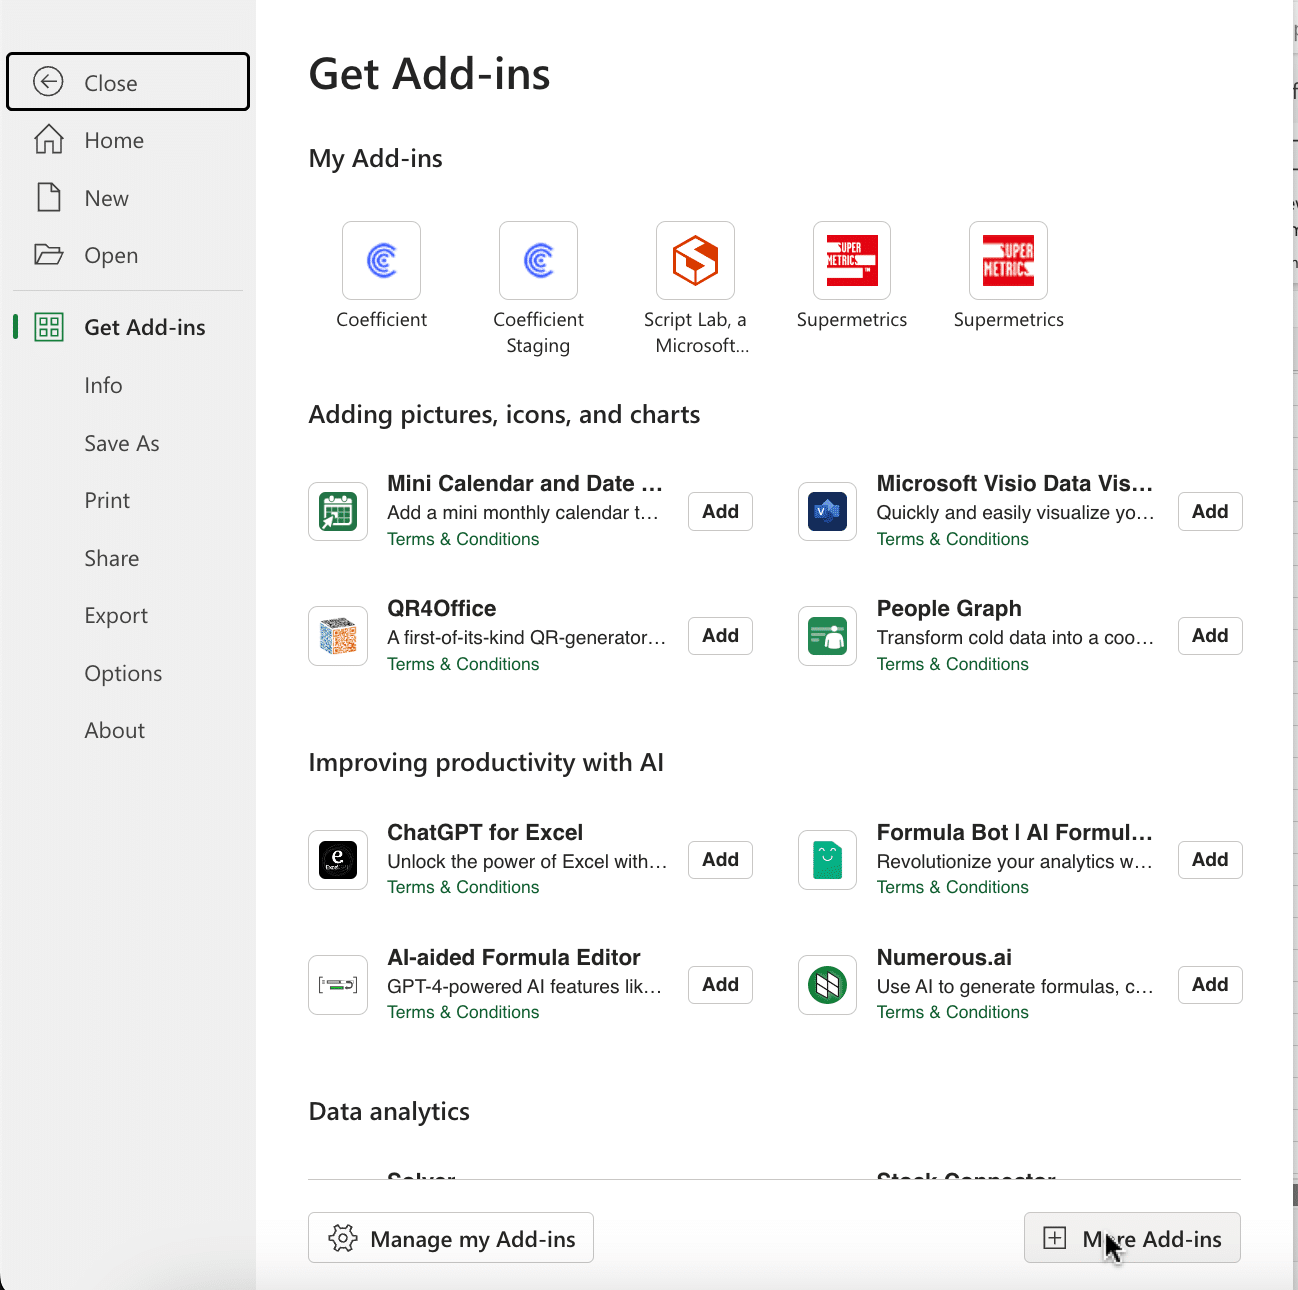
Type “Coefficient” in the search bar and click ‘Add.’
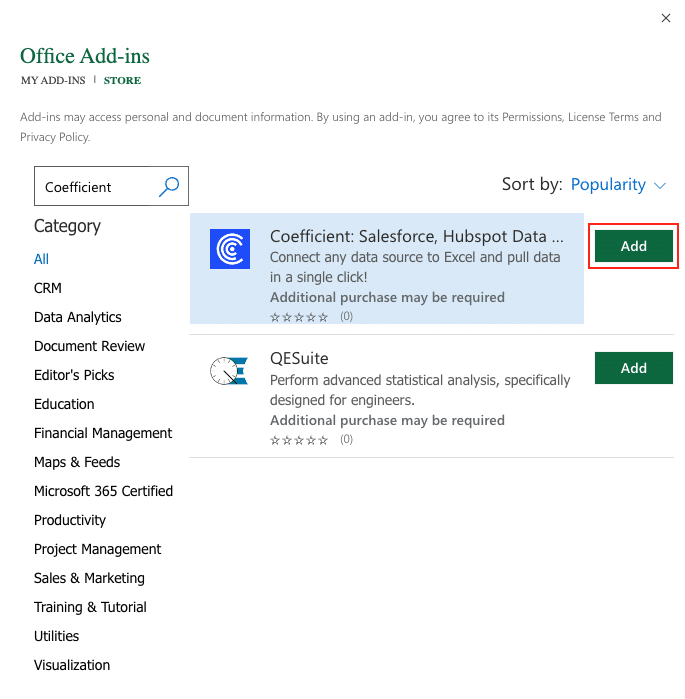
Follow the prompts in the pop-up to complete the installation.
Once finished, you will see a “Coefficient” tab in the top navigation bar. Click ‘Open Sidebar’ to launch Coefficient.

Step 2. Import Data from Webflow to Your Spreadsheet
With Coefficient installed, you’re now ready to import your Webflow data into Excel. Let’s walk through the process step by step:
In the Coefficient sidebar, select “Import From.” Next to “Connected Sources”, click the blue “+” button.
Scroll through the list of available data sources and select “Webflow.”

Follow the prompts to initiate the authorization process.
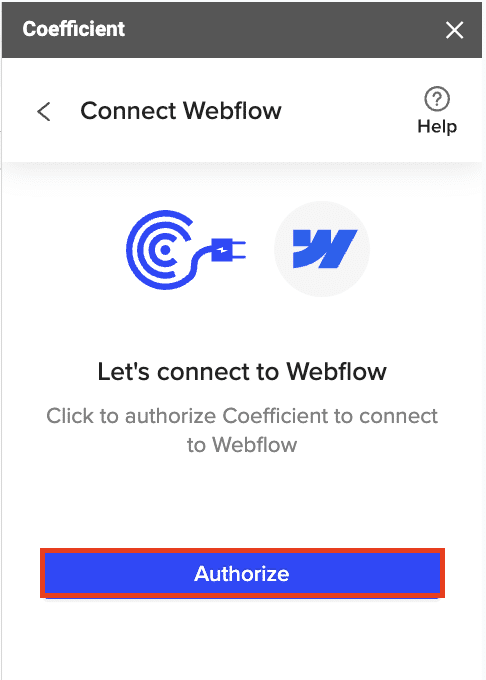
In the new tab that opens, select the sites or workspaces you want to authorize by checking the corresponding boxes.

Click “Authorize App” in the bottom right corner to grant Coefficient access to your selected Webflow sites and workspaces.
After authorizing the app, select “Start from scratch” to open the import preview.
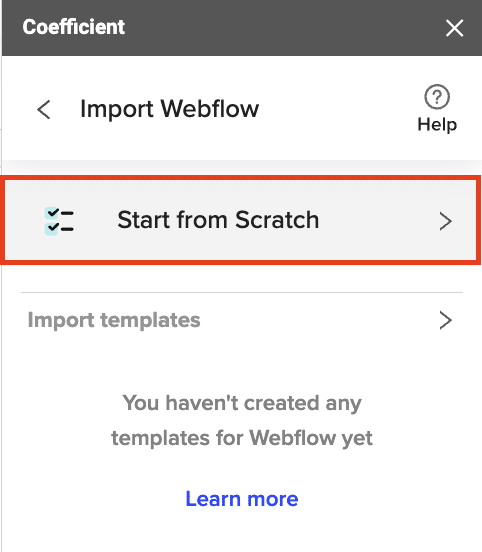
Explore the various objects and reports available for import, such as website data, marketing assets, orders, and more.
For this example, let’s select the “Assets” import.
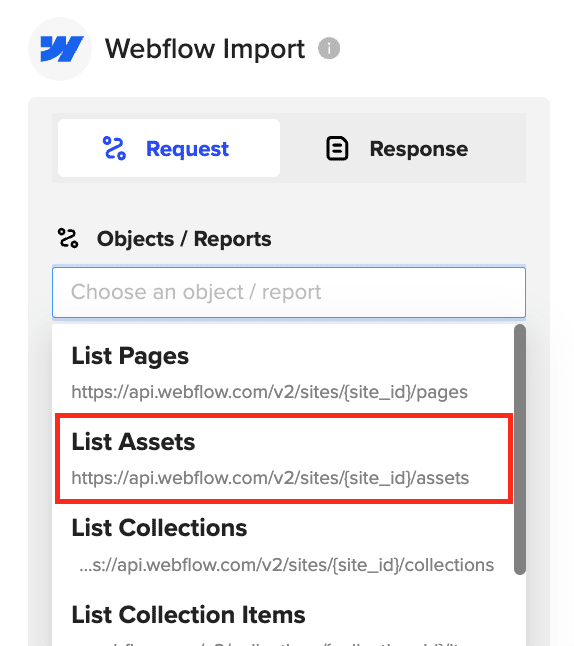
Choose the desired site ID from the dropdown menu.
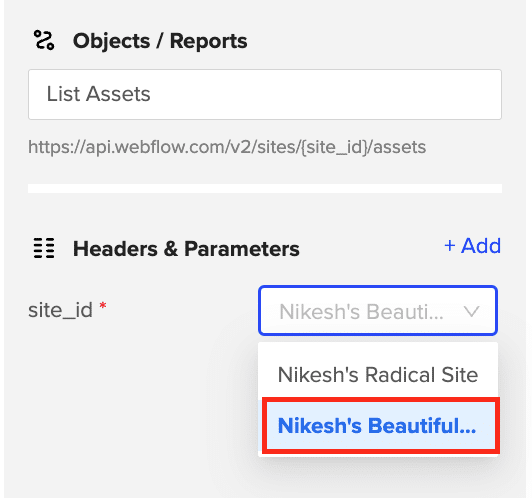
Click “Preview” to see the available data fields.
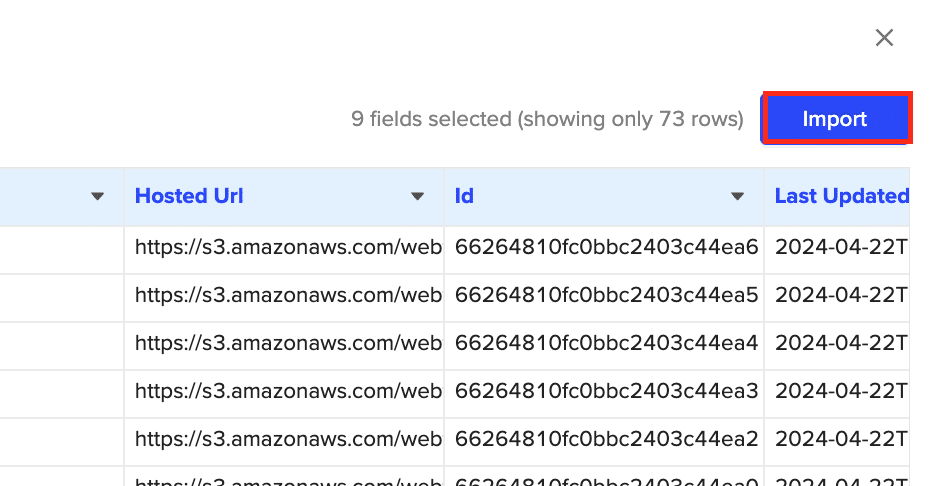
Select the specific data fields you want to include in your import by checking or unchecking the corresponding boxes.
Once you’re satisfied with your field selection and order, click “Import” to fetch the data into your Excel spreadsheet.
Step 3. Export Data from Your Spreadsheet to HubSpot
Before starting, make sure you’ve connected to HubSpot.
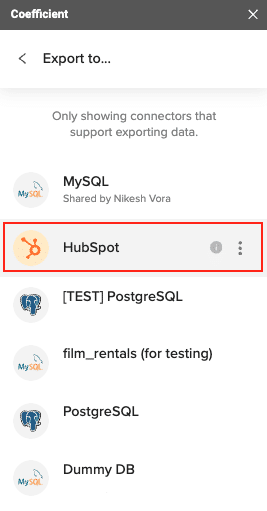
Then, navigate to Coefficient’s menu. Click “Export to…”

Select HubSpot.
Select the tab and header row in your spreadsheet. The header row should contain the HubSpot field headers.

Choose the HubSpot property you are exporting the data to.
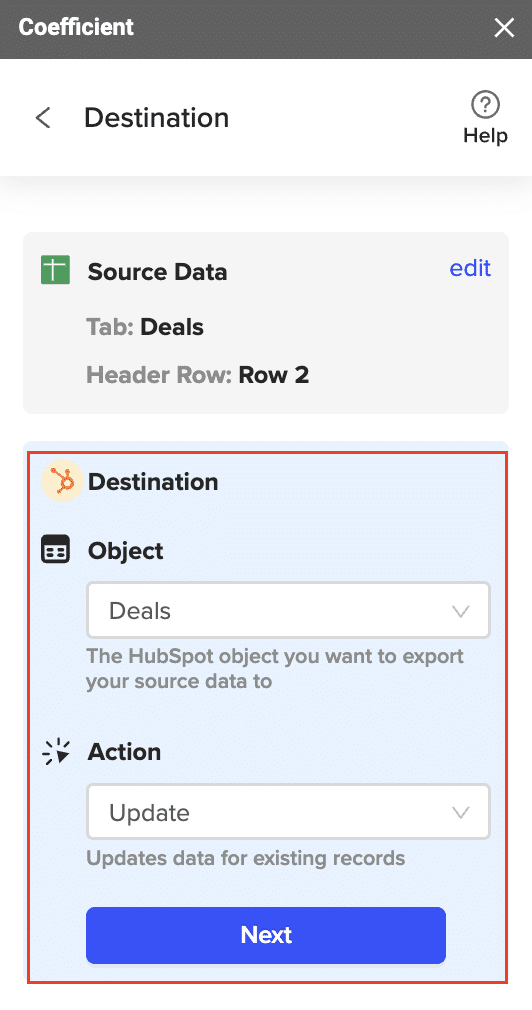
Then, select the action you want to perform (Update, Insert, or Delete).

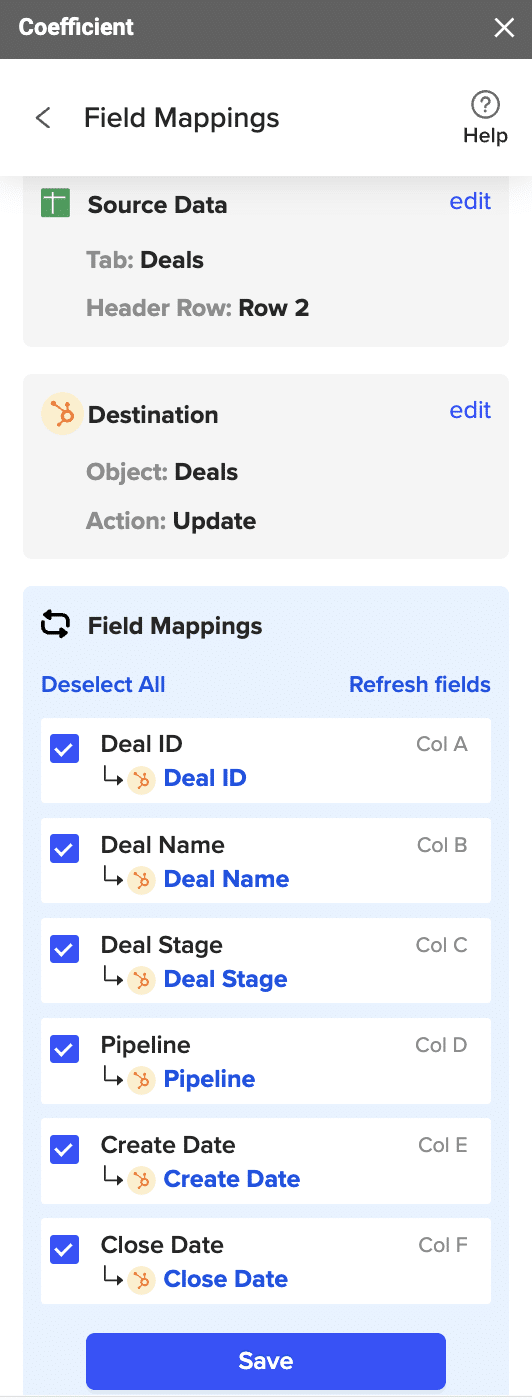
Map the fields in your spreadsheet to the corresponding HubSpot fields. If your data came from a HubSpot import using Coefficient, the fields will be automatically mapped. Otherwise, you will need to map them manually.
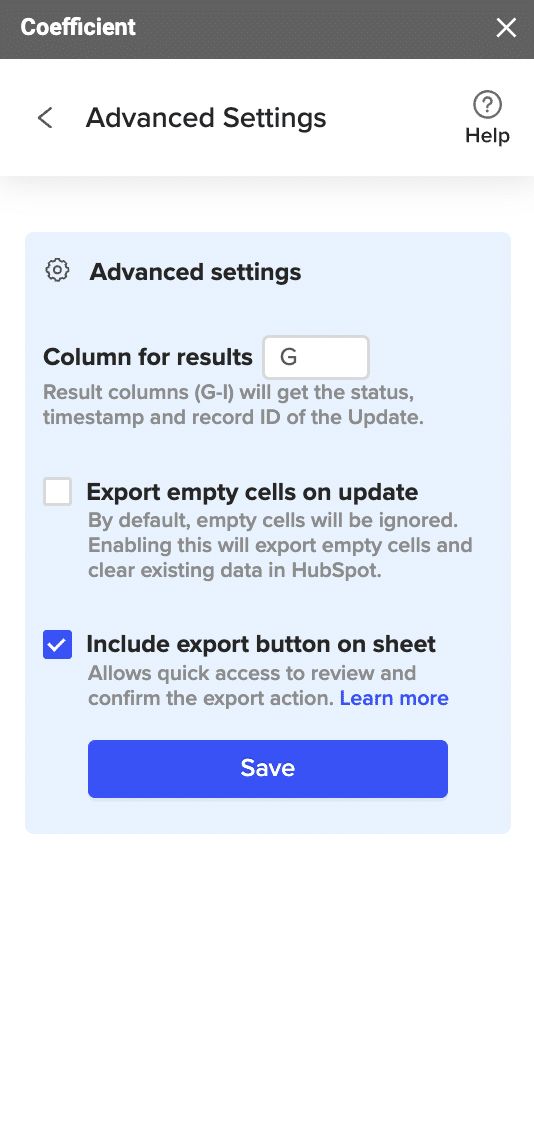
Configure any advanced settings such as the column for results. Coefficient will write back information to your spreadsheet related to the update, including the HubSpot record ID, status of the export, and timestamp.
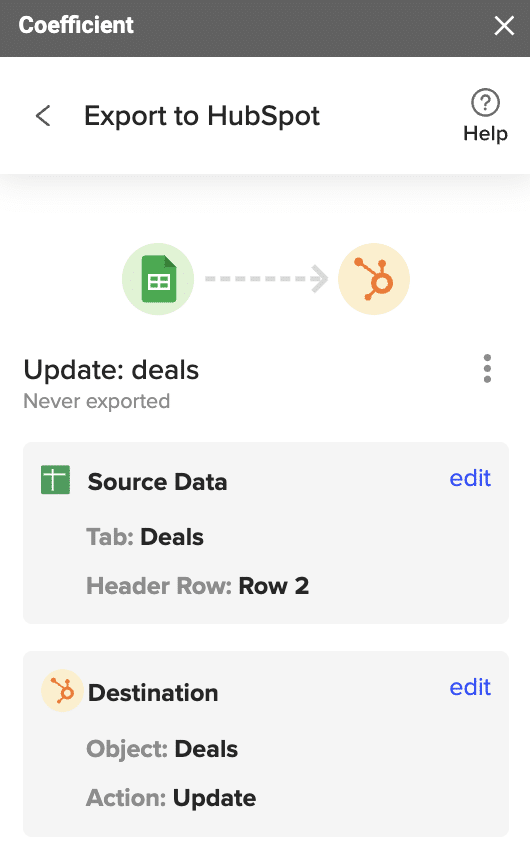
Review your settings and click “Export”.
Select the rows in your sheet that you want to export to HubSpot. You can update a single row or all rows in your sheet.

Coefficient will confirm the rows that have been updated in your HubSpot instance. The records will have the record ID, result status, and timestamp of the update.

That’s it! Your Webflow and HubSpot data should now be synced. Coefficient will keep your data updated automatically based on your chosen settings.
Method 2: Zapier – Codeless Automation

Zapier is a popular automation platform that lets you connect apps and automate workflows without any coding. With Zapier, you can set up “Zaps” that automatically send data from Webflow to HubSpot whenever certain triggers occur.
Pros:
- Easy to set up for simple workflows
- Supports a variety of Webflow and HubSpot triggers/actions
- Allows multi-step Zaps for more complex automations
Cons:
- Can become expensive with high volume or complex workflows
- Limited ability to transform data
How to Connect Webflow to HubSpot with Zapier
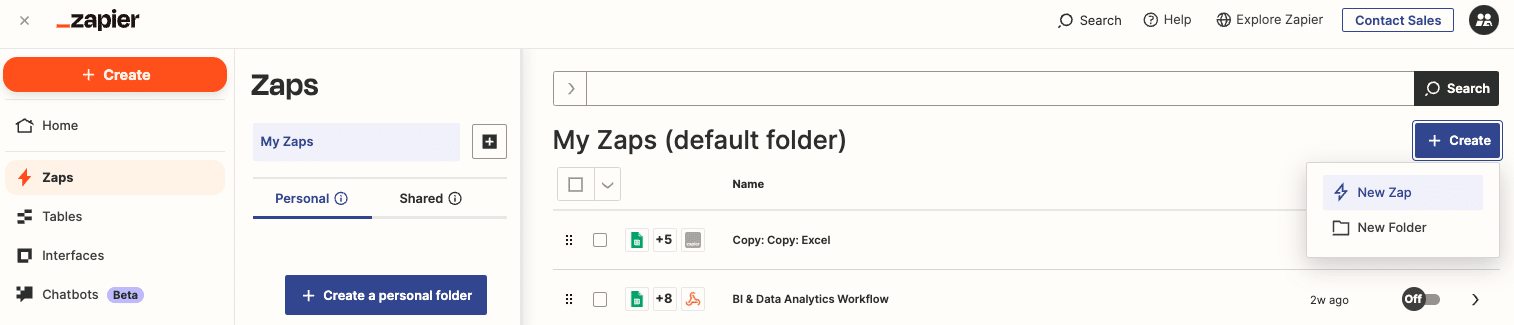
1. Create a new Zap
- Log into your Zapier account and click “+ Create” > “New Zap” to begin creating a new automation.
- Set up your trigger:
- Choose Webflow as the trigger app and select an event (e.g. New Form Submission)

- Connect your Webflow account

- Test the trigger to make sure it’s working
2. Set up the action
- Select HubSpot as the action app

- Choose an action event (e.g. Create Contact)
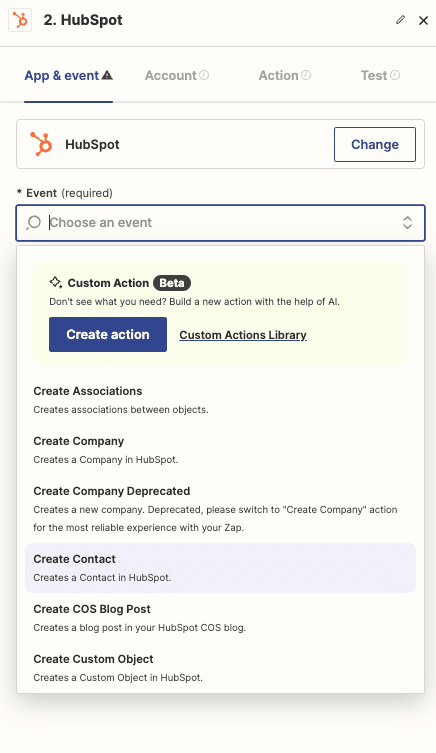
- Map data from Webflow to HubSpot fields
- Test the action and check that the data is passing through correctly
3. Customize and activate
- Add any additional steps, filters, or custom logic to your Zap
- Turn on the Zap so it will run automatically
- Test the integration to make sure everything is working smoothly
Show Image
Now whenever the trigger event occurs in Webflow, Zapier will automatically perform the designated action in HubSpot. You can create multiple Zaps to automate various processes between the two platforms.
Method 3:Integromat (Make)
For those who need more advanced capabilities, Integromat is a powerful integration platform that supports complex workflows, multiple steps, and data transformations. It provides a visual interface for building integrations between Webflow, HubSpot, and hundreds of other apps.
Pros:
- Can handle complex, multi-step workflows
- Allows data manipulation and custom logic
- Pay only for what you use
Cons:
- Steeper learning curve than simpler tools
- Building workflows can be time-consuming
How to Connect Webflow to HubSpot with Integromat
1. Create a new scenario
- Log into Integromat and create a new scenario
- Add Webflow as the trigger module
- Select the trigger event (e.g. Watch Forms) and connect your account
- Set up filters if needed
2. Add HubSpot action module(s)
- Add a HubSpot action module for each desired action
- Choose the action (e.g. Create or Update Contact) and connect your account
- Map fields from previous modules to HubSpot properties
- Add any additional logic, transformations, or filters
3. Set up error handling and activate
- Create an error handler path to catch any issues
- Set the scenario to run on a schedule or in real-time
- Turn the scenario on and test it to ensure proper operation
Show Image
With Integromat, you can build powerful workflows to keep data flowing seamlessly between Webflow and HubSpot. The platform’s flexibility allows you to tailor your integrations to your unique business processes.
Connect Webflow to HubSpot: No Code Required
Connecting Webflow and HubSpot is a game-changer for businesses looking to streamline their data management and customer relationship processes. By integrating these two powerful platforms, you can harness your website data to gain deeper customer insights, personalize your marketing efforts, and drive growth.
The three methods outlined in this guide – Coefficient, Zapier, and Integromat – provide options for every skill level and use case. Whether you’re a non-technical user looking for a simple solution or a data whiz in need of advanced capabilities, there’s a way to make Webflow and HubSpot work together for you.
Ready to take your data integration to the next level? Get started with Coefficient today for a user-friendly, no-code solution. With Coefficient, you can automate data flows between Webflow, HubSpot, and all your other business apps in minutes. Sign up now and supercharge your data management!