Are you looking to link your Shopify store data with MySQL? Whether you need to analyze sales figures, keep inventory in sync, or generate custom reports, this guide will walk you through three proven methods to establish a solid connection between Shopify and MySQL databases.
Why Connect Shopify to MySQL?
Integrating Shopify with MySQL offers several advantages for e-commerce businesses:
- Enhanced Data Analysis: By combining Shopify’s e-commerce data with other business data in MySQL, you can create comprehensive reports and perform in-depth analytics.
- Real-time Inventory Management: Maintain accurate stock levels across multiple sales channels by syncing Shopify inventory data with MySQL.
- Custom Application Development: Build specialized applications and tools using MySQL as a backend database for Shopify data.
Top 3 Methods to Connect Shopify to MySQL
Here’s a quick overview of the three main approaches we’ll cover:
| Solution | Best For |
| Coefficient | Non-technical users who need to sync Shopify data to MySQL through spreadsheets for reporting and analysis |
| Hevo Data | Organizations requiring automated ETL pipelines and real-time data synchronization |
| Custom API Integration | Development teams that need complete control over data flow and custom implementation |
Let’s dive into each method in detail.
#1 Coefficient: No-Code Spreadsheet Solution

Coefficient provides a user-friendly solution to connect Shopify and MySQL using spreadsheets as an intermediate layer. This method is ideal for teams that want to leverage familiar tools like Google Sheets or Excel for data management and transformation.
Steps:
Step 1. Install Coefficient
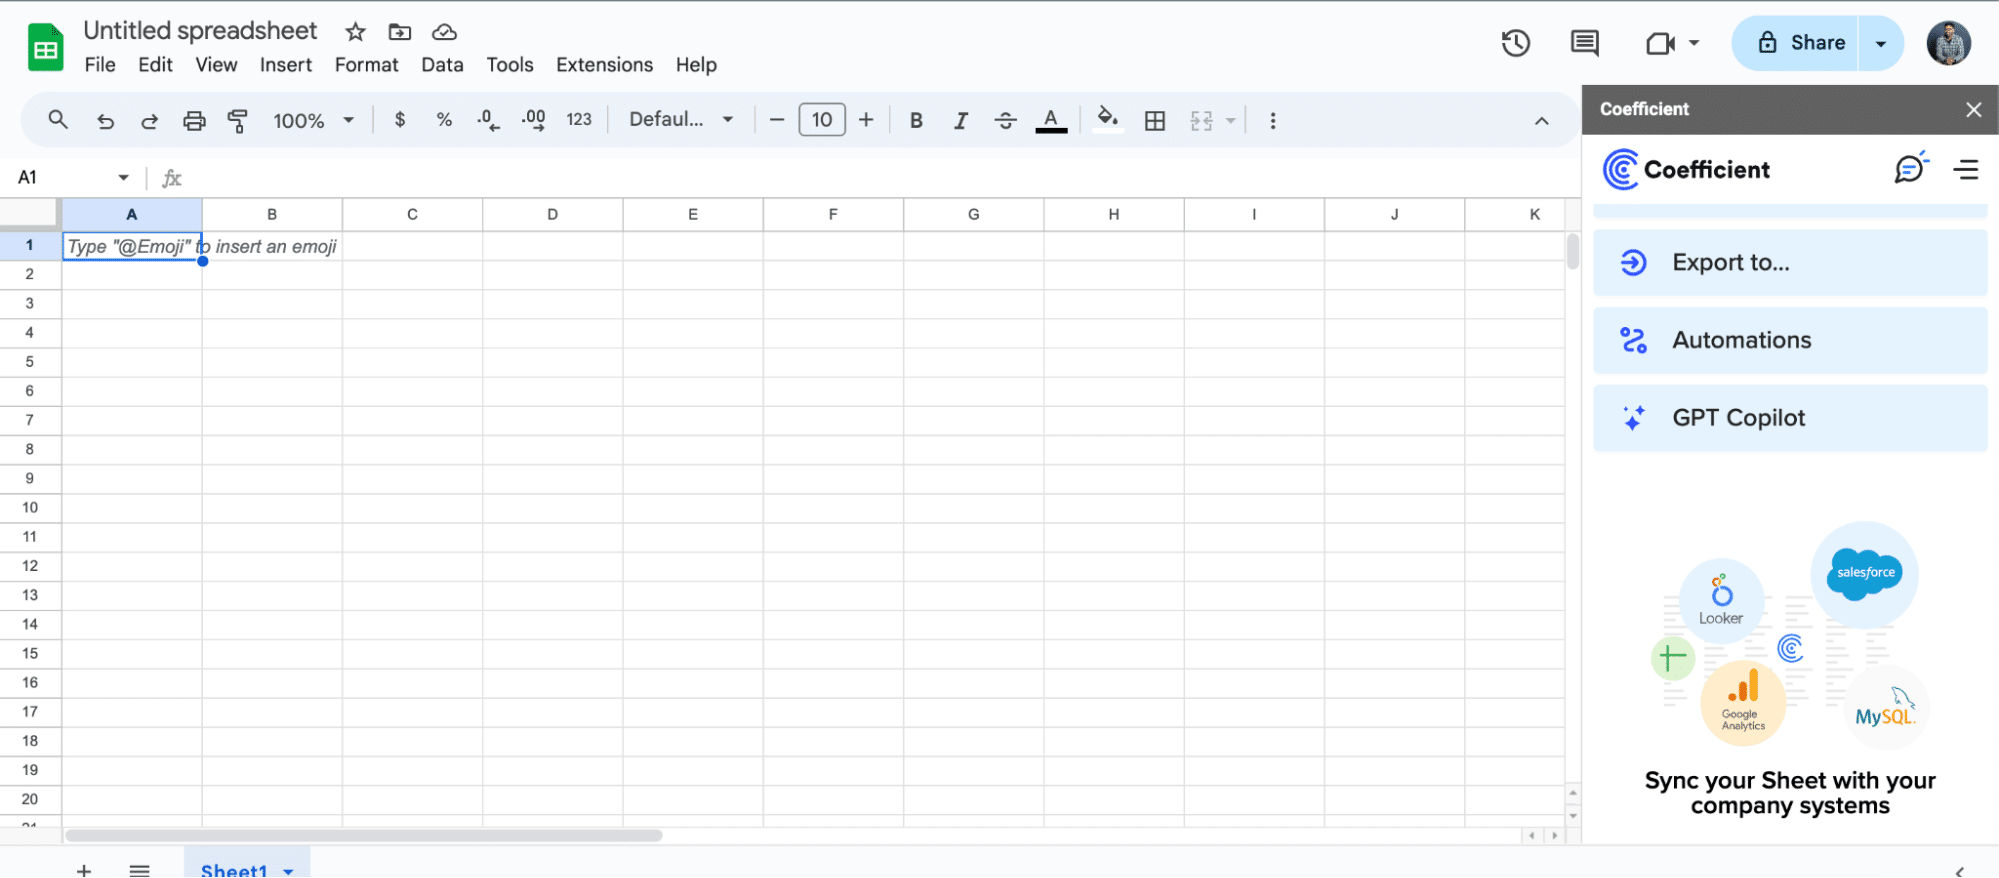
For Google Sheets
- Open a new or existing Google Sheet, navigate to the Extensions tab, and select Add-ons > Get add-ons.
- In the Google Workspace Marketplace, search for “Coefficient.”
- Follow the prompts to grant necessary permissions.
- Launch Coefficient from Extensions > Coefficient > Launch.
- Coefficient will open on the right-hand side of your spreadsheet.
For Microsoft Excel
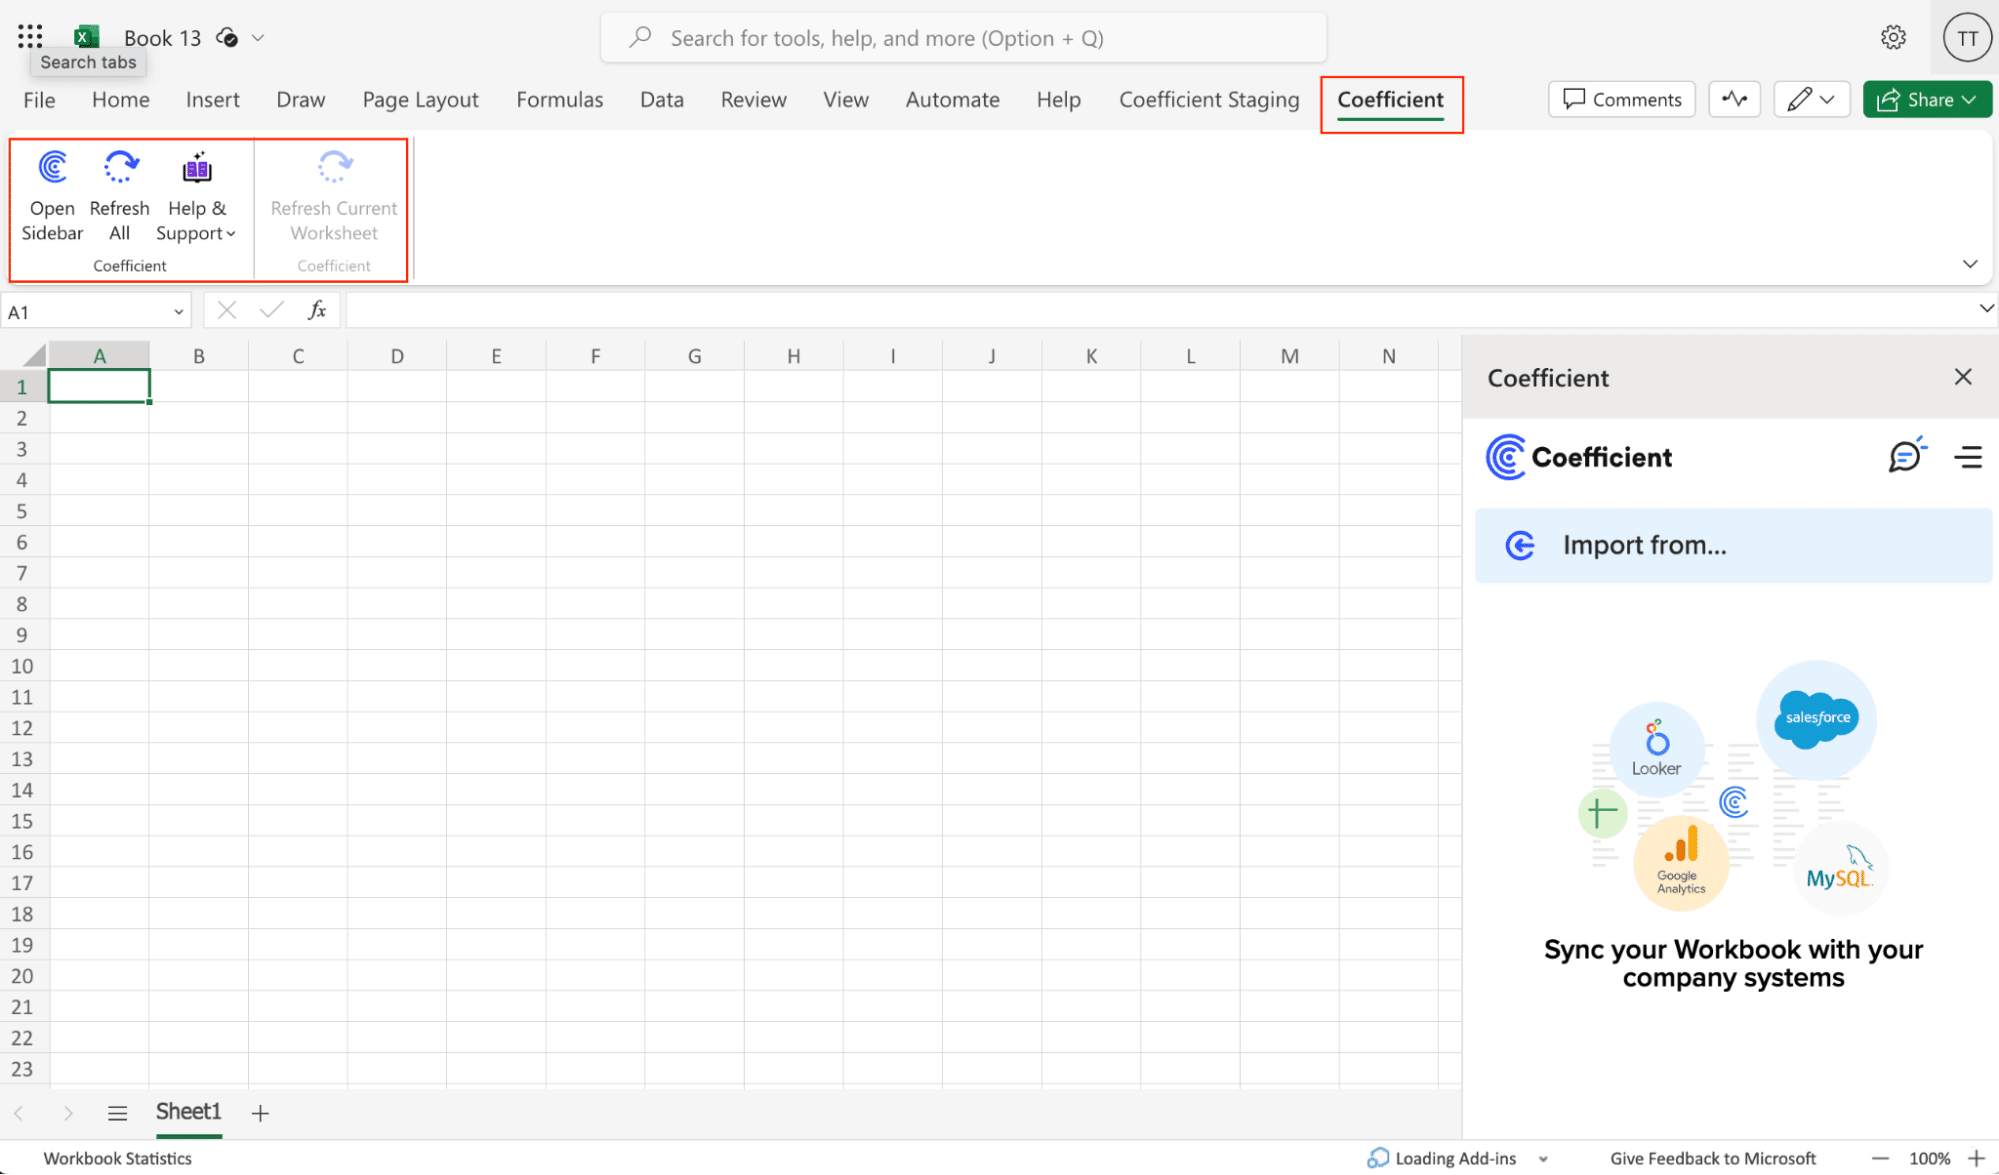
- Open Excel from your desktop or in Office Online. Click ‘File’ > ‘Get Add-ins’ > ‘More Add-Ins.’
- Type “Coefficient” in the search bar and click ‘Add.’
- Follow the prompts in the pop-up to complete the installation.
- Once finished, you will see a “Coefficient” tab in the top navigation bar. Click ‘Open Sidebar’ to launch Coefficient.
Step 2. Connect and Import Data from Shopify
Select ‘Import from…’
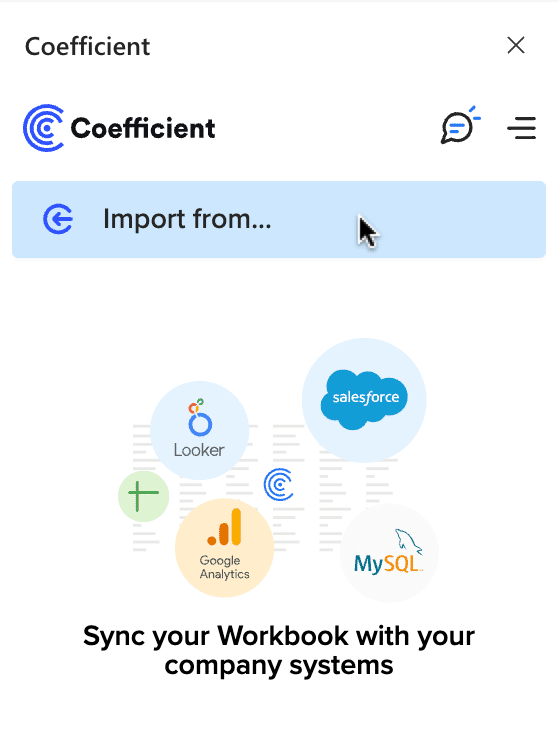
Scroll down until you see Shopify and click ‘Connect.’

Follow the prompts to authorize Coefficient to access your Shopify account.
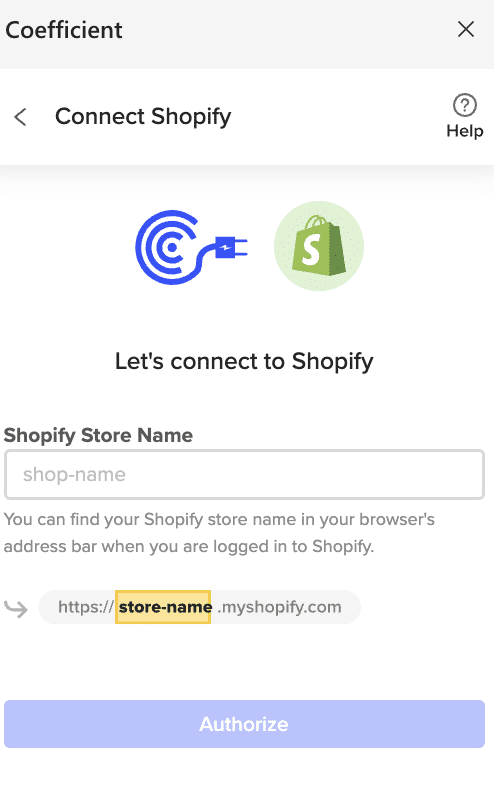
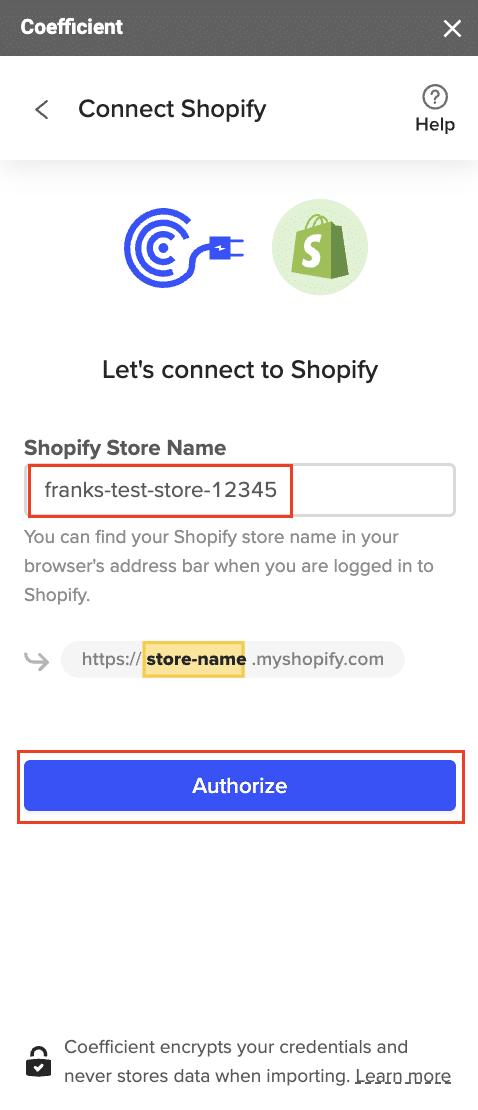
Enter your “Shopify Store Name” and click ‘Authorize.’
You will be taken to this screen in your Shopify instance. Click the ‘Install app’ button to proceed.

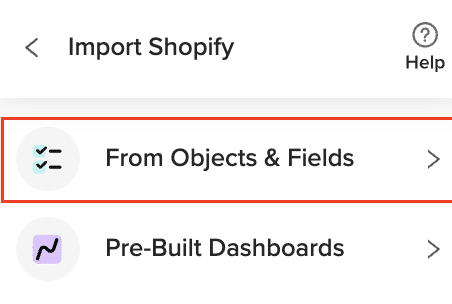
After connecting, return to Shopify from the Coefficient menu ‘Import From…’ > ‘Shopify’ > ‘From Objects & Fields.’
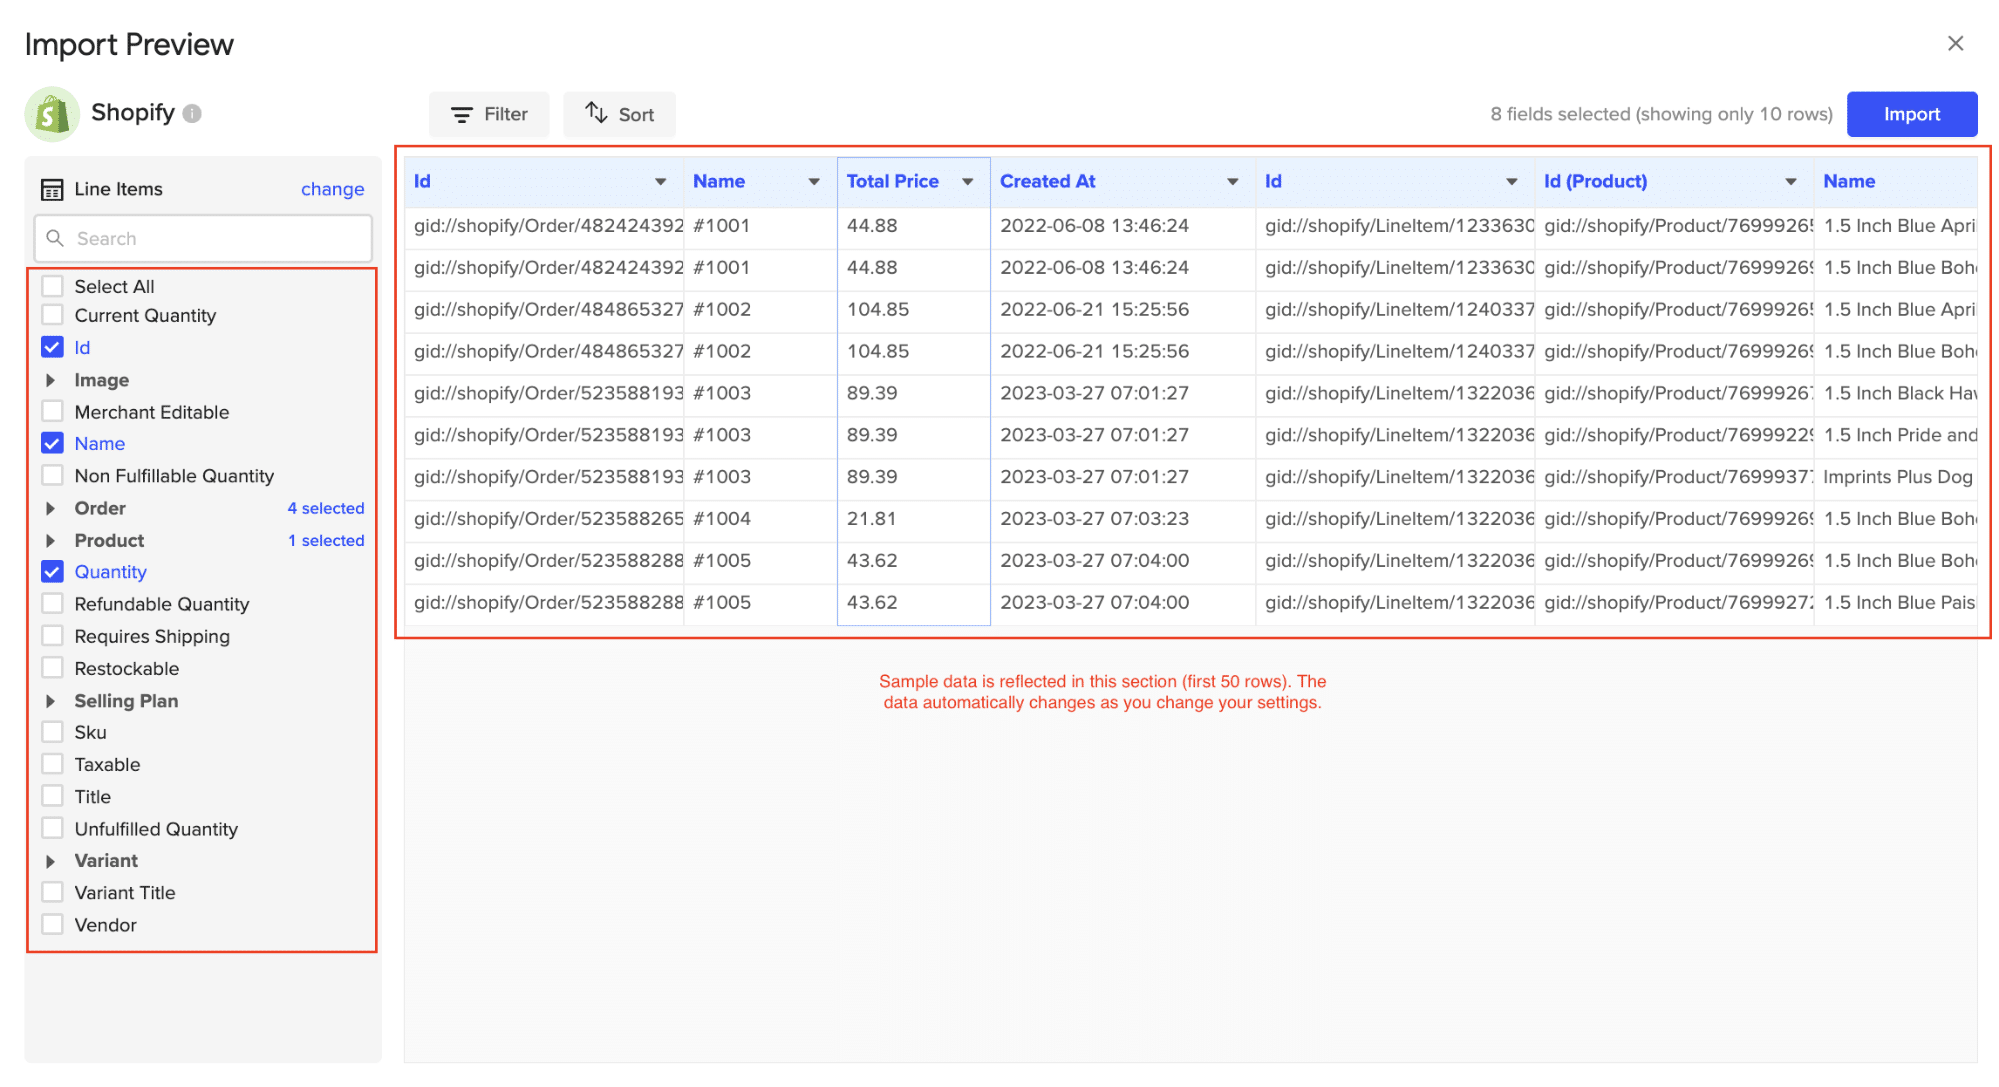
Select the Shopify object you would like to import your data from (eg. Line Items).

Select the desired fields for your import.
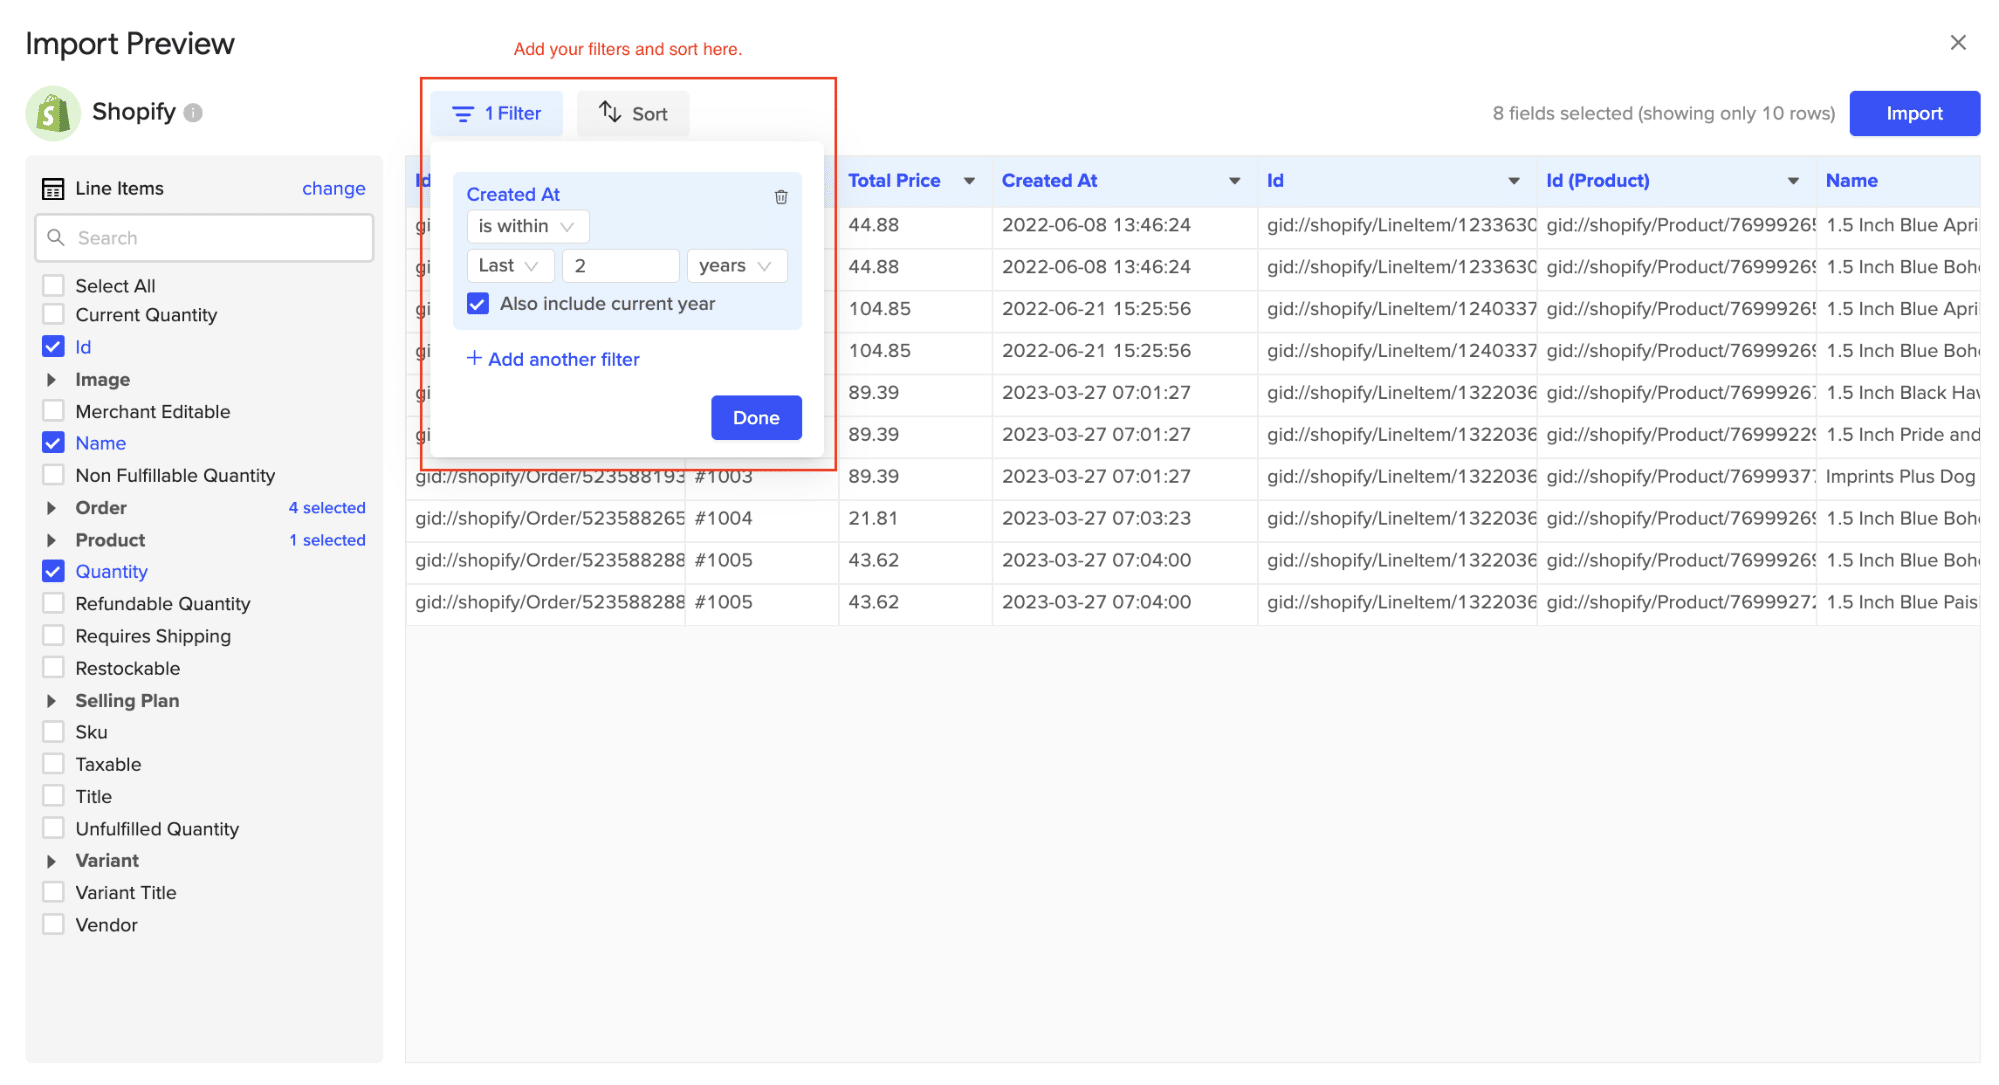
Customize your import by adding filter(s). Click ‘Import’ when you’re finished.
Your Shopify data will automatically populate your Excel spreadsheet in a few seconds!

Step 3. Export Data to MySQL
- Navigate to Export: In Coefficient’s sidebar, click Export to…, then select MySQL.

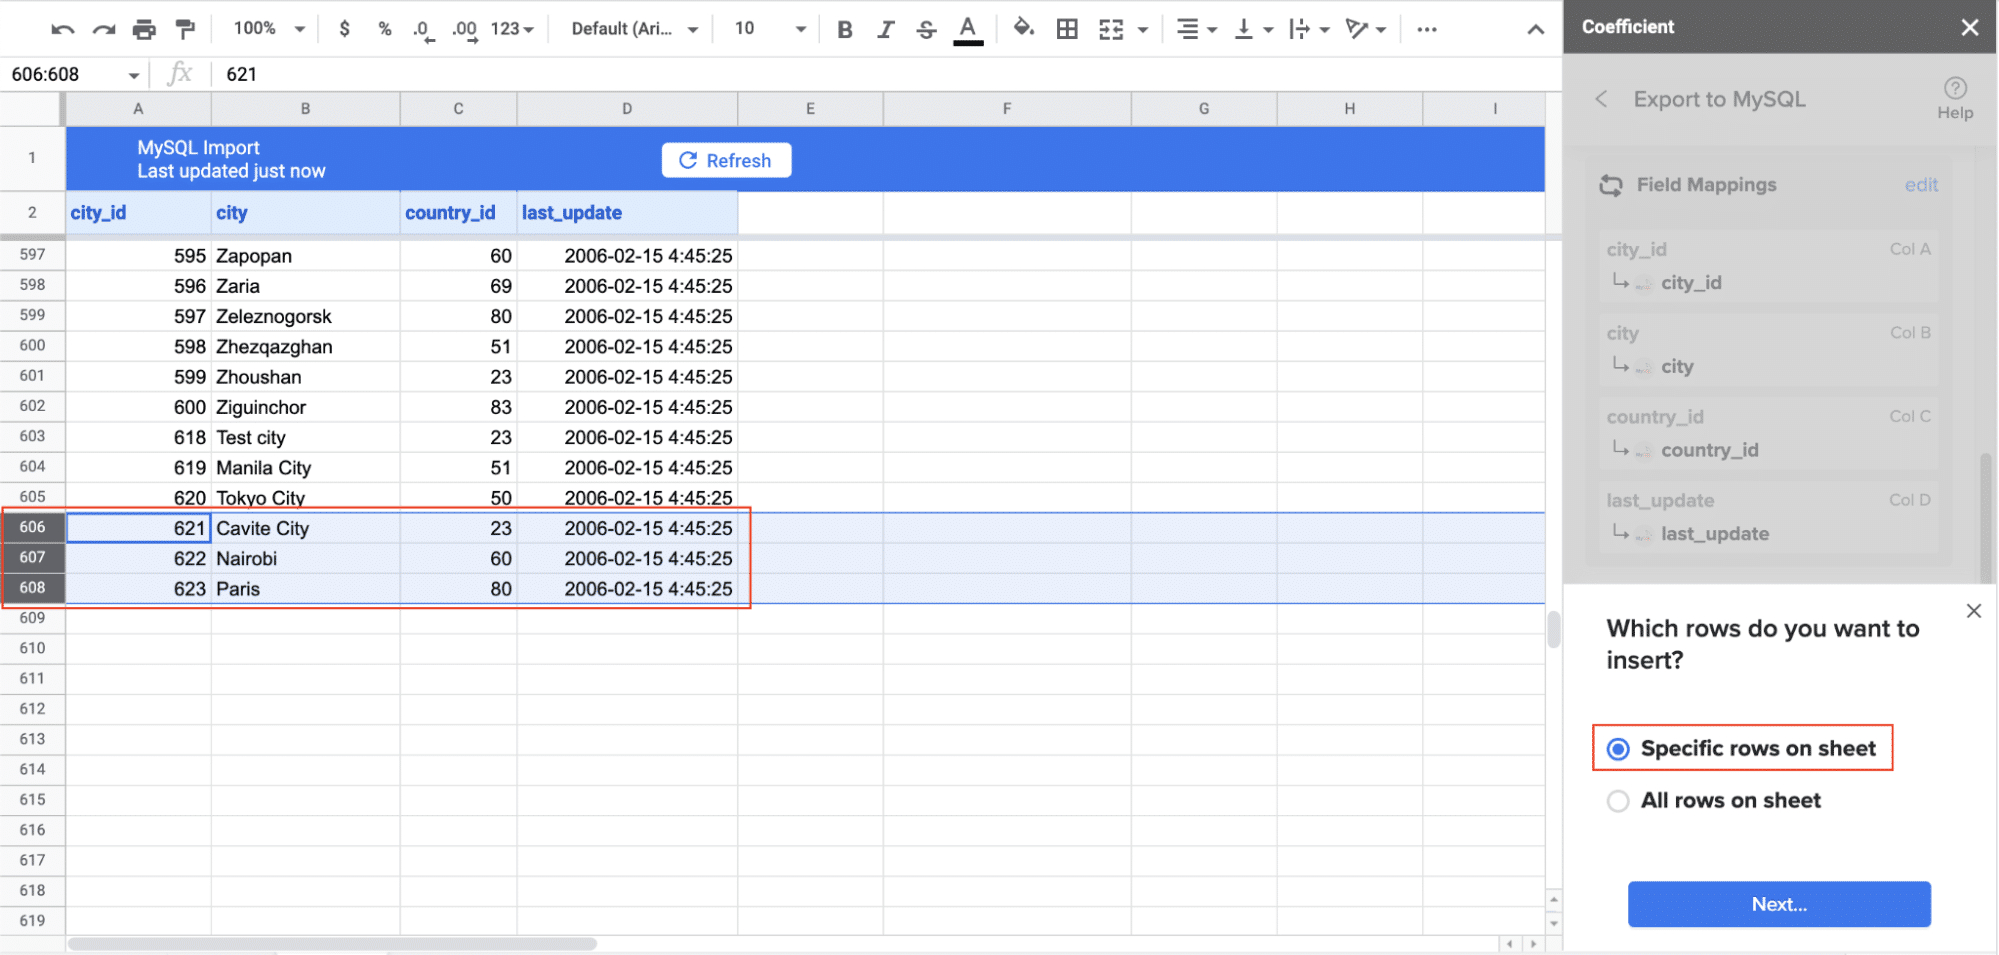
- Select Data and Action: Choose the tab and header row in your sheet that contains the data you want to export. Define your tab and header row. Specify the table in your database where you want to insert the data and choose the action type: Update, Insert, Upsert, or Delete.

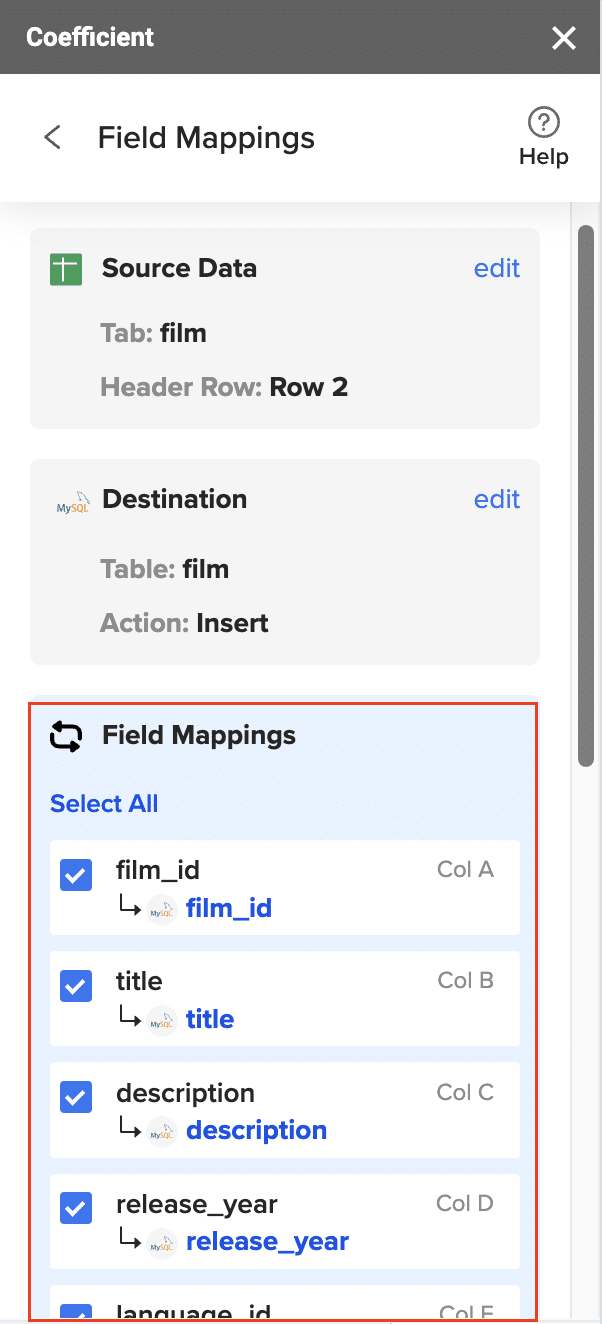
- Map Fields: Map the rows from your spreadsheet to the corresponding fields in MySQL. Manual mapping is required for first-time setups.
- Customize and Export: Specify batch size and any additional settings. Confirm your settings and click Export.
Pros:
- No coding required
- Familiar spreadsheet interface
- Real-time data updates
- Automated scheduling
- Custom transformations possible
Cons:
- Requires spreadsheet as intermediate step
- May not be suitable for very large data volumes
#2 Hevo Data: Automated ETL Platform

Hevo Data is a dedicated ETL platform that enables direct integration between Shopify and MySQL through automated pipelines and pre-built connectors.
Steps:
Step 1. Hevo Account Setup and Configuration
- Sign up for Hevo Data’s platform (they now offer a free trial with up to 1 million events)
- Navigate to the Sources section in the dashboard
- Enable two-factor authentication for enhanced security
Step 2. Shopify Source Configuration
- In Shopify admin, go to Apps → Create App → Create Custom App
- Configure the necessary API scopes: read_products, read_orders, read_customers, read_inventory
- Generate Admin API access token and store it securely
- In Hevo, select Shopify as source and input:
- Store URL (your-store.myshopify.com)
- API token
- Historical sync period (now supports up to 730 days)
Step 3. MySQL Destination Setup
- Choose MySQL as your destination in Hevo
- Input connection details including:
- Host URL
- Port (default 3306)
- Database name
- Username and password
- Configure SSL/TLS encryption (now mandatory for production environments)
- Test connection using Hevo’s built-in validator
Step 5. Data Mapping and Transformation
- Use Hevo’s visual mapper to define relationships
- Set up essential transformations:
- Currency standardization
- Date/time normalization to UTC
- Customer data anonymization for GDPR compliance
- Create custom fields using Hevo’s expression language
- Configure data type mappings (Hevo now supports JSON fields in MySQL 8.0+)
Step 6. Real-time Sync Configuration
- Enable Shopify webhooks for real-time updates
- Configure sync frequency (now supports down to 1-minute intervals)
- Set up failure notification alerts via email/Slack
- Enable Hevo’s new automatic schema migration feature
- Configure retry policies for failed events
Pros:
- Direct integration without intermediaries
- Real-time sync capabilities
- Automated error handling
- Pre-built transformations
Cons:
- Higher cost for small businesses
- Steeper learning curve
- Limited customization options
#3 Custom API Integration: Maximum Flexibility
For teams with development resources, building a custom integration using Shopify’s API and MySQL connectors offers maximum flexibility and control.
Steps:
Step 1. Shopify API Setup
- Create a custom app in Shopify Partners dashboard
- Configure OAuth 2.0 authentication
- Generate access tokens with specific scopes
- Implement token refresh mechanism (tokens now expire after 24 hours)
- Store credentials using environment variables or secrets management
Step 2. MySQL Database Design
— Example schema with modern optimizations
CREATE TABLE products (
id BIGINT PRIMARY KEY,
shopify_id VARCHAR(255) UNIQUE,
title VARCHAR(255),
variant_data JSON,
metadata JSON,
created_at TIMESTAMP DEFAULT CURRENT_TIMESTAMP,
updated_at TIMESTAMP DEFAULT CURRENT_TIMESTAMP ON UPDATE CURRENT_TIMESTAMP,
INDEX idx_shopify_id (shopify_id),
INDEX idx_updated_at (updated_at)
) ENGINE=InnoDB DEFAULT CHARSET=utf8mb4 COLLATE=utf8mb4_unicode_ci;
Step 3. Data Fetching Implementation
import shopify
import mysql.connector
from datetime import datetime
import backoff # For retry mechanism
class ShopifyMySQLSync:
def __init__(self):
self.setup_shopify_connection()
self.setup_mysql_connection()
@backoff.on_exception(backoff.expo, shopify.ShopifyError, max_tries=5)
def fetch_products(self, last_sync_time=None):
# Implementation with rate limiting and pagination
# Now supports up to 250 items per request
Step 4. Error Handling and Monitoring
- Implement circuit breaker pattern for API calls
- Use structured logging (e.g., OpenTelemetry)
- Set up monitoring for:
- API rate limits (new limits)
- Data consistency checks
- Sync performance metrics
- Implement automatic retry with exponential backoff
Step 5. Automation and Scheduling
- Use modern task schedulers (e.g., Apache Airflow)
- Implement event-driven updates using webhooks
- Configure dead letter queues for failed operations
- Set up automated testing for data integrity
Pros:
- Complete control over implementation
- Highly customizable
- No third-party dependencies
Cons:
- Requires technical expertise
- Time-consuming to develop
- Ongoing maintenance needed
Connect Shopify to MySQL with Coefficient
Connecting Shopify to MySQL can significantly improve your data management capabilities, enabling better analysis, reporting, and custom application development. Whether you choose Coefficient’s user-friendly spreadsheet approach, Hevo Data’s automated pipelines, or a custom API integration, each method has its strengths and is suited to different needs and technical capabilities.
For the fastest implementation with minimal technical overhead, Coefficient’s no-code solution offers an excellent starting point. It allows you to quickly set up a data pipeline between Shopify and MySQL, leveraging the familiar interface of spreadsheets.
Ready to start connecting your Shopify store to MySQL? Get started with Coefficient today and take control of your e-commerce data.


