If you’re struggling to sift through complex Salesforce data, cross filters are your solution.
This guide dives straight into how cross filters enable you to apply additional criteria to related objects, simplifying data analysis. You’ll learn the essentials of creating and using cross filters, ensuring you can refine your Salesforce reports for clearer, more actionable insights.
What are Salesforce Cross Filters?
Cross filters on Salesforce are an exceptional feature that allows users to identify records with or without a related record. Users can utilize this functionality to add more criteria to related objects(E.g: Primary object and Secondary object).
Salesforce cross filters help sales reps become better admins as they can access crucial information without creating custom report types or rollup fields. Salesforce training can be provided to learn this essential functionality to help ensure and maintain an organizational structure.
Understanding Relational Data in Salesforce
Relational data in Salesforce embodies the structured relationships between records across various objects, reflecting tangible connections between different business entities. For example:
- Accounts and Contacts: Here, an ‘Account’ represents an organization, housing essential details like name and industry, while ‘Contacts’ are individuals linked to these organizations. Cross filters can reveal accounts based on specific contact-related conditions.
- Opportunities and Accounts: Opportunities symbolize potential sales and are often tied to specific accounts, indicating prospective dealings with an organization. Utilizing cross filters, one can isolate opportunities based on related account attributes.
Creating a Cross Filter in Salesforce
This guide explains how to create a cross-filter using Opportunities without Products as an example.
Step 1: Access Reports
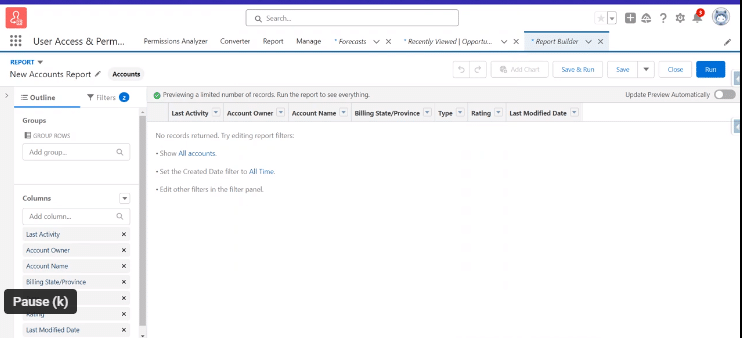
Navigate to the Reports tab from the Salesforce navigation menu to reach the New Account Report page, your starting point for crafting new reports.
Step 2: Apply Initial Filters
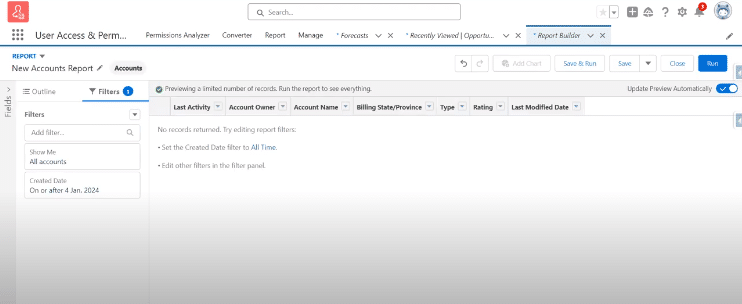
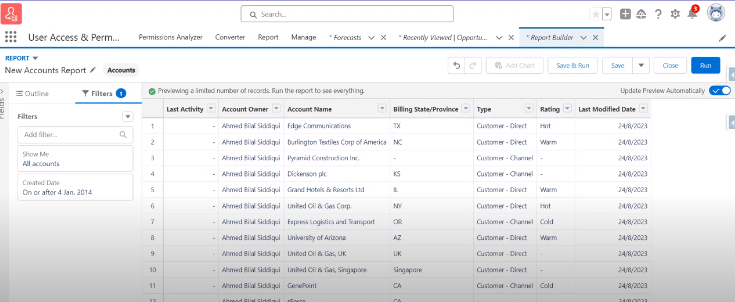
Use the Filters pane to initially filter your report by Created Date, narrowing down the dataset for analysis based on specific time frames.
Step 3: Specify Date Range
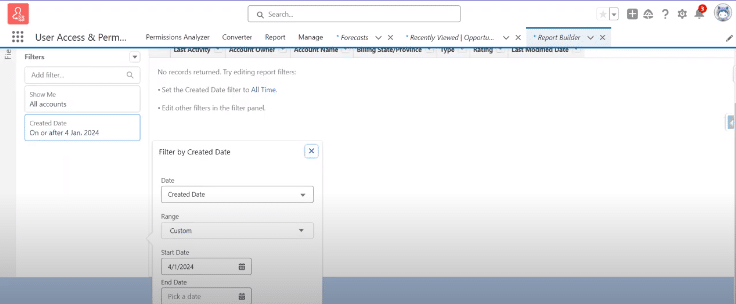
Within the filter settings, fine-tune the Range, Start Date, and End Date to ensure the report encompasses the desired period for your analysis.
Step 4: Review Filtered Accounts
Post date filtering, a list of accounts matching your criteria will appear, showcasing details like Account Owner, Account Name, and Billing State.
Step 5: Add a Cross Filter
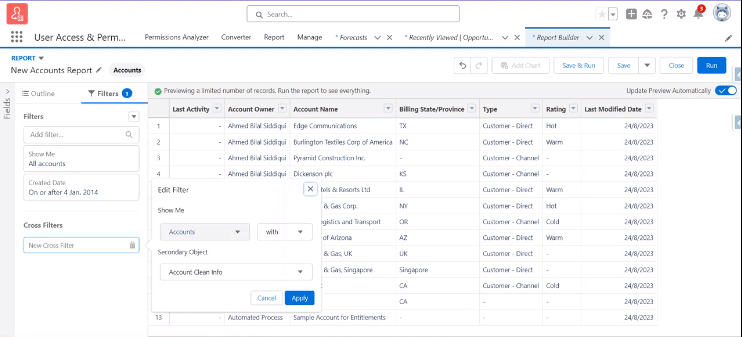
To distinguish accounts lacking contacts, introduce a cross filter by setting ‘Show Me’ to “Accounts without” and choosing “Contacts” as the ‘Secondary Object.’
Step 6: Refine With Additional Filters
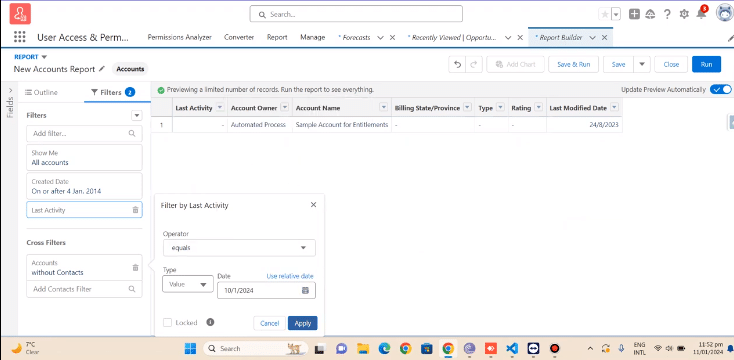
Further refine your report by adding filters for accounts that might still show associated contacts, focusing on Last Activity and adjusting date parameters to exclude accounts with recent interactions.
Advanced Usage: Adding Sub-filters
Incorporating sub-filters into your Salesforce reports can significantly enhance your ability to analyze and act on your Salesforce data, providing targeted insights that can inform strategic decisions and improve outcomes.
Explore 8 cutting-edge techniques that are revolutionizing how Salesforce admins manage their daily tasks. Contribute more significantly to business outcomes and become a key driver of efficiency and innovation.
See the Techniques
Sub-filters work by applying additional criteria to records that have already been filtered by a primary filter or cross filter. This means you can refine your reports even further, focusing on very specific data points or relationships within your Salesforce environment.
Practical Application: Analyzing Opportunities with Sub-filters
Use sub-filters to pinpoint sales opportunities needing further action, like those without products but with demo activities, to uncover and address gaps in the sales cycle efficiently.
Quick Guide to Sub-filters:
- Initiate with a Cross Filter: Start by filtering opportunities without products to set the stage for deeper analysis.
- Deepen Analysis with a Sub-filter: Add a sub-filter for opportunities with “Demo” activities to identify those needing product linkage or follow-up.
- Harness Detailed Insights: Sub-filters provide a detailed view of your data, enabling precise action plans for sales optimization and comprehensive opportunity coverage.
Conclusion
Harnessing the power of Salesforce Cross Filters can significantly elevate your data analysis, enabling a deeper dive into your Salesforce environment.
By identifying records based on their relationship with related objects, cross filters unlock a new dimension of data insight, empowering sales teams to make more informed decisions.
Ready to enhance your Salesforce reporting capabilities? Embark on your journey with Coefficient for seamless data integration and advanced reporting solutions.
