
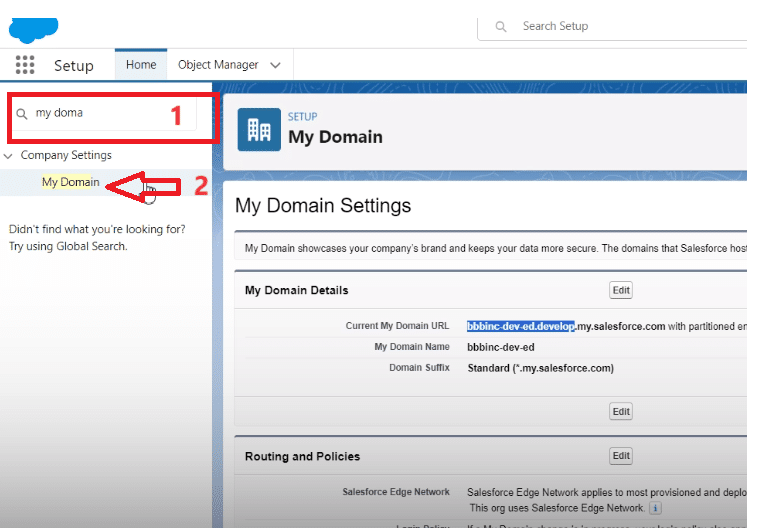
Step 1. Find your custom domain in Salesforce Setup under My Domain.
Step 2. Go to dataloader.io and login with your Salesforce credentials using the custom domain.
Step 3. Select Import, then Insert Records, and choose your Salesforce object.
Step 4. Upload your CSV file and map fields between your data and Salesforce.
Step 5. Run the import using bulk API for datasets under 200 records and verify success in Salesforce.
Salesforce Data Loader enables Salesforce users to manipulate vast amounts of data efficiently.
Whether you’re importing, exporting, updating, or deleting data, the Data Loader streamlines the process, making it accessible for users of all skill levels. This guide will walk you through key operations, provide advanced tips, and help you navigate common pitfalls.
Why Use Salesforce Data Loader?
Data Loader is designed for bulk importing or exporting of data. Let’s break down its primary operations:
- Insert: Create new records in bulk.
- Update: Modify existing records with new values.
- Delete: Bulk remove records.
- Export: Extract data from Salesforce for analysis or backup.
These features are particularly useful in scenarios requiring mass data manipulation, surpassing the limitations of standard import wizards.
Alternatives to Data Loader
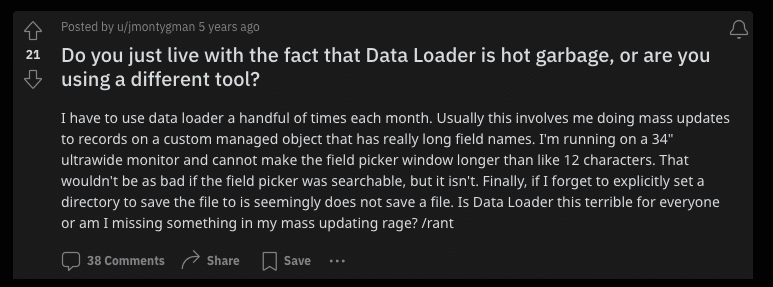
Data Loader has been around for years. However, there are much more intuitive apps out there like Coefficient that offer the ability to upload data into Salesforce in a much simpler way. Data Loader is also prone to failures. You can do a quick search of reviews and find many previous users with this type of sentiment.
With Coefficient:
- You’ll never leave your spreadsheet to take advantage of your bi-directional Salesforce sync
- You’ll have around-the-clock support
- You’ll have the ability to preview your data before making your data upload
- You’ll have the ability to blend in data from over 35 other pre-built connectors for core business systems
Nevertheless, if Data Loader is the right tool for you, let’s get started.
Getting Started with Data Loader
Before you dive into our written tutorial, here’s a video to guide you through the process:
Preparing Your Data
Correctly preparing your CSV file is crucial. Ensure your data matches Salesforce’s field types and that you’ve backed up any critical data. This step helps avoid potential data integrity issues during operations.
Using Data Loader: The Core Operations
Step 1. Navigating to Data Loader from Salesforce:
From your Salesforce homepage, head to Setup and search for My Domain in Setup. This area will display your Salesforce’s custom domain.
Step 2. Accessing Data Loader
Perform a Google search for “how to import opportunities into Salesforce using dataloader.io.”
On the dataloader.io site, click Login with Salesforce.
When prompted, click on I have a custom Salesforce domain at 1:49 and paste your domain.
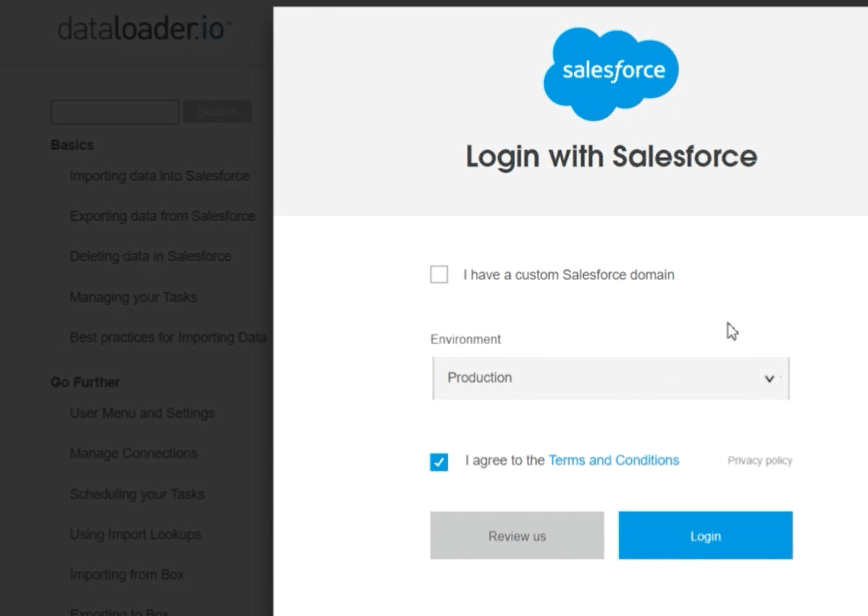
Choose Production environment (unless you’re in a sandbox), agree to the terms, and then Login.
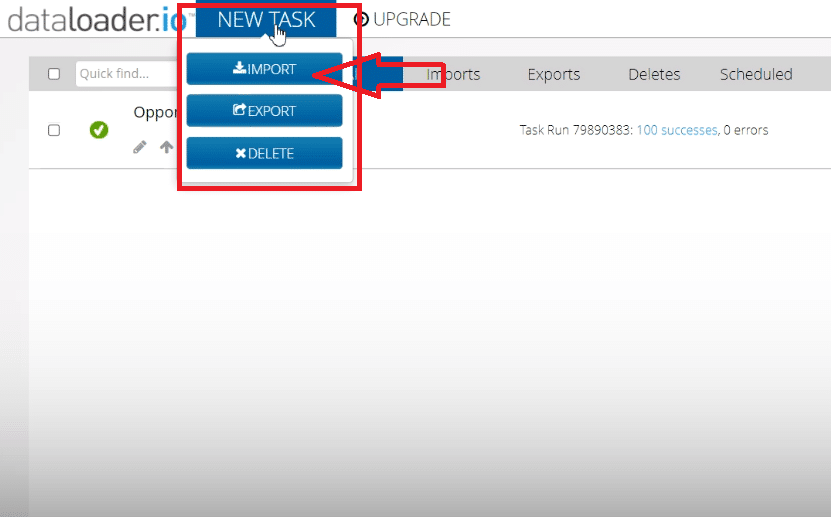
Step 3. Initiating the Import
Within Data Loader, select Import then Insert Records.
Choose the Opportunity object and proceed to Upload CSV File—make sure this file is prepared with all fields necessary to match the Salesforce Opportunity object’s fields.
Explore 8 cutting-edge techniques that are revolutionizing how Salesforce admins manage their daily tasks. Contribute more significantly to business outcomes and become a key driver of efficiency and innovation.
See the Techniques
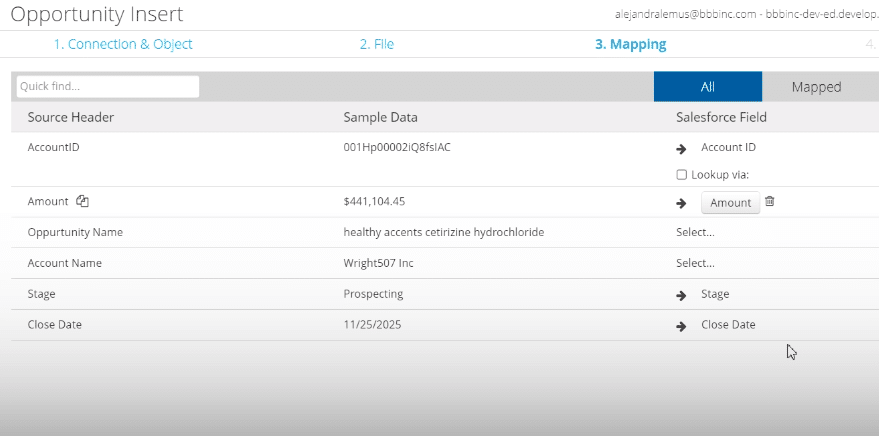
Step 4. Mapping Fields:
Data Loader will auto-map some fields from your CSV to Salesforce. Manually map any fields such as Opportunity Name by selecting the corresponding Salesforce field name.
Step 5. Finalizing the Import
Review the rows for import and choose the import method—bulk API is recommended for less than 200 records.
Confirm the settings and hit Save and Run. This operation could take a couple of minutes, with an update on the success rate provided post-completion.

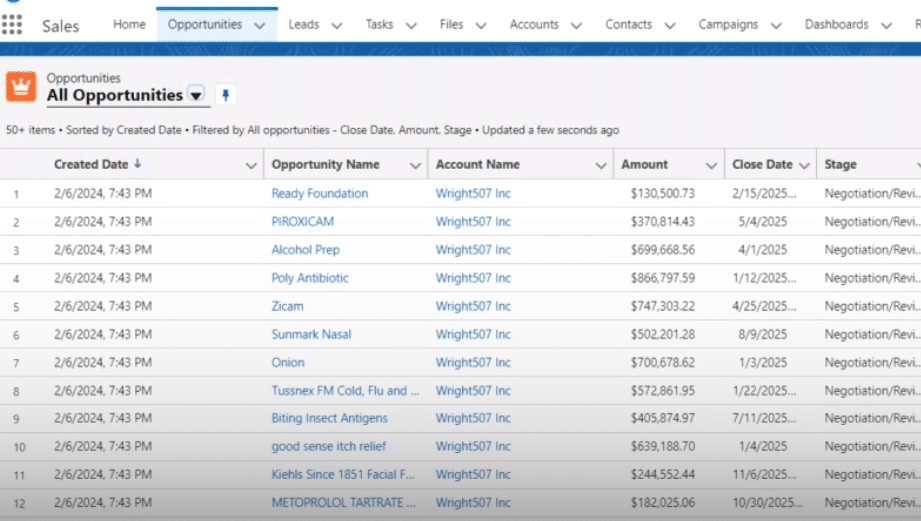
Step 6. Verifying the Import: To confirm the success of your import, head back to Salesforce, and navigate to Opportunities.
Modify the list view to include the Create Date field. The newly created opportunities with today’s date confirm a successful import.
Advanced Tips and Best Practices
- Batch Size Matters: When importing or exporting large datasets, optimizing the batch size can impact performance. Experiment with different sizes to find the sweet spot for your specific needs.
- Thoroughly Test in Sandbox: Always test your import/export operations in a sandbox environment before going live. This helps catch errors or mismatches in a safe environment.
- Keep Your CSV Files Clean: Ensuring that your CSV files are clean and well-formatted before starting the operation can save you from many common errors. This includes removing unnecessary columns and ensuring date formats align with Salesforce standards.
Troubleshooting
However, with awareness and the right strategies, these can be efficiently overcome.
Handling CSV File Formats
A frequent obstacle is managing CSV file formats, particularly ensuring compatibility with Salesforce fields.
Solution: Prior to import, verify the encoding and delimiters in your CSV files match those expected by Salesforce. Utilizing tools like Excel or Google Sheets for review and format adjustments can save significant time.
Accurate Field Mapping
Another challenge involves correctly mapping data fields from your CSV files to Salesforce fields. Solution: Familiarize yourself with Salesforce object fields where data will be imported. The Data Loader mapping tool can assist in auto-matching fields, but always review mappings manually for accuracy, especially custom fields.
Managing Large Volumes of Data
Managing bulk data imports or exports efficiently can be daunting, especially for large datasets. Solution: Leverage the Bulk API feature of Data Loader for handling large datasets. This method is optimally designed for high-volume data operations, ensuring quicker processing and less resource consumption.
Summary and Key Takeaways
Salesforce Data Loader is a robust tool that simplifies data handling. By mastering its core functionalities and employing best practices, you can enhance your Salesforce experience and maintain data integrity.
Elevate Your Salesforce Game
Ready to elevate your Salesforce game? Consider exploring Coefficient. With Coefficient, seamlessly integrate Salesforce data with Google Sheets or Excel and unlock a world of efficiency and insights. Stay ahead with real-time updates and streamline your data management today.
This guide endeavors to arm you with the knowledge to leverage Data Loader’s capabilities fully. Dive in, practice, and transform your Salesforce data management strategy!


