Efficiently managing leads is crucial in Salesforce, and the mass transfer feature plays a vital role. In our guide, we explore Salesforce lead management, emphasizing the significance of mass transferring leads. This process streamlines workflow and enhances CRM optimization.
This guide delves into Salesforce lead management, focusing on the critical role of mass transferring leads to streamline workflows and optimize CRM.
Understanding Bulk Transfer of Leads
Mass transferring in Salesforce involves moving batches of leads from one user to another. It’s essential for reorganization, personnel changes, or aligning with sales hierarchy.
This feature, accessible via a user-friendly interface, streamlines workflow and boosts CRM efficiency.
Preparation for Bulk Transferring Leads
Step 1. Compatibility Check: Ensure your Salesforce version supports mass transfer. Compatibility with data loader, custom objects, and lookup fields is crucial.
Step 2. User Permissions: Users must have permissions to modify records, transfer ownership, and manage custom objects.
Step 3. Checkbox Functionality: Checkboxes are critical. Ensure all users have necessary permissions for these and other custom objects.
Step 4. Utilize Salesforce AppExchange: Explore AppExchange for tools that enhance the mass transfer process.
Bulk Transfer Leads in Salesforce: A Step-by-Step Guide
Efficiently managing lead transfers in Salesforce is crucial for maintaining accurate and up-to-date records. This step-by-step guide will walk you through the process with clarity and precision.
Step 1. Log in to Salesforce: Open your web browser and navigate to the Salesforce login page. Enter your credentials to access your Salesforce account.
Step 2. Access Setup Menu: In the top right corner, click on the gear icon to open the settings menu. From the dropdown, select “Setup” to enter the Salesforce setup menu.
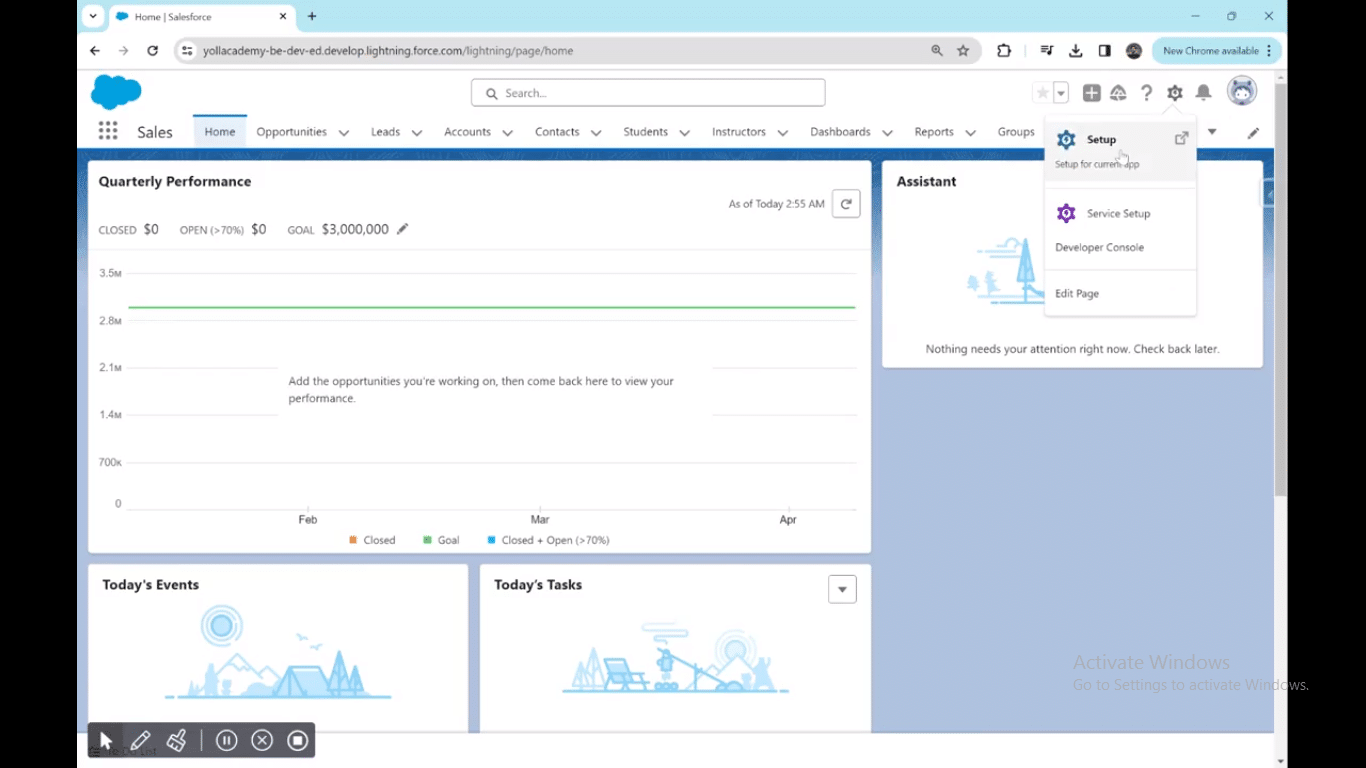
Step 3. Navigate to Mass Transfer: A new tab will open with the Salesforce setup menu. In the top right quick find bar, type “Mass Delete Records” and hit Enter.
Step 4. Use Quick Find Box: Utilize the quick find box in the setup menu to streamline your search. Scroll down on the “Mass Delete Records” menu to find and click on “Transfer Leads.”

Step 5. Choose Accounts: Choose the account from which you want to transfer leads and specify the target account for the transfer.

Explore 8 cutting-edge techniques that are revolutionizing how Salesforce admins manage their daily tasks. Contribute more significantly to business outcomes and become a key driver of efficiency and innovation.
See the Techniques
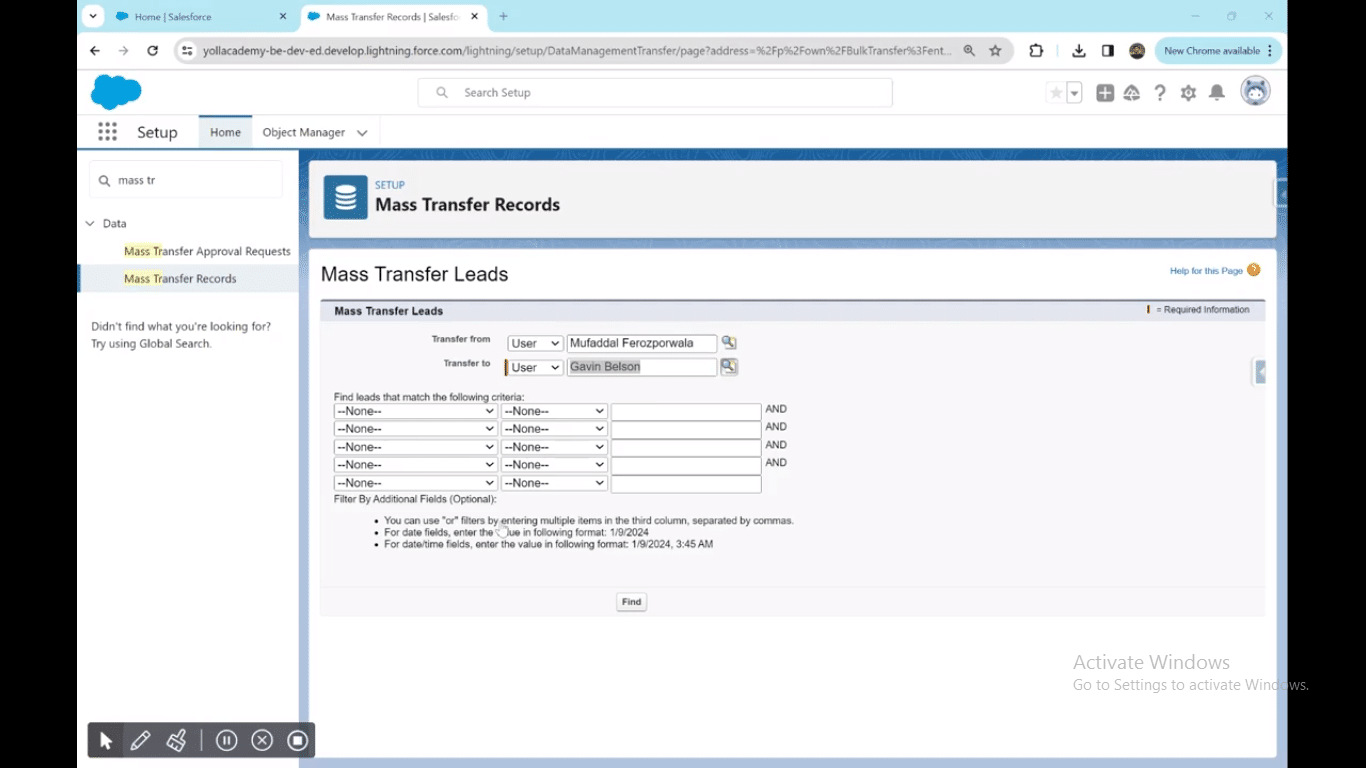
Step 6. Specify Filters and Fields: Define the filters and fields based on which you want to identify and transfer leads. This step ensures precision in the mass transfer process.
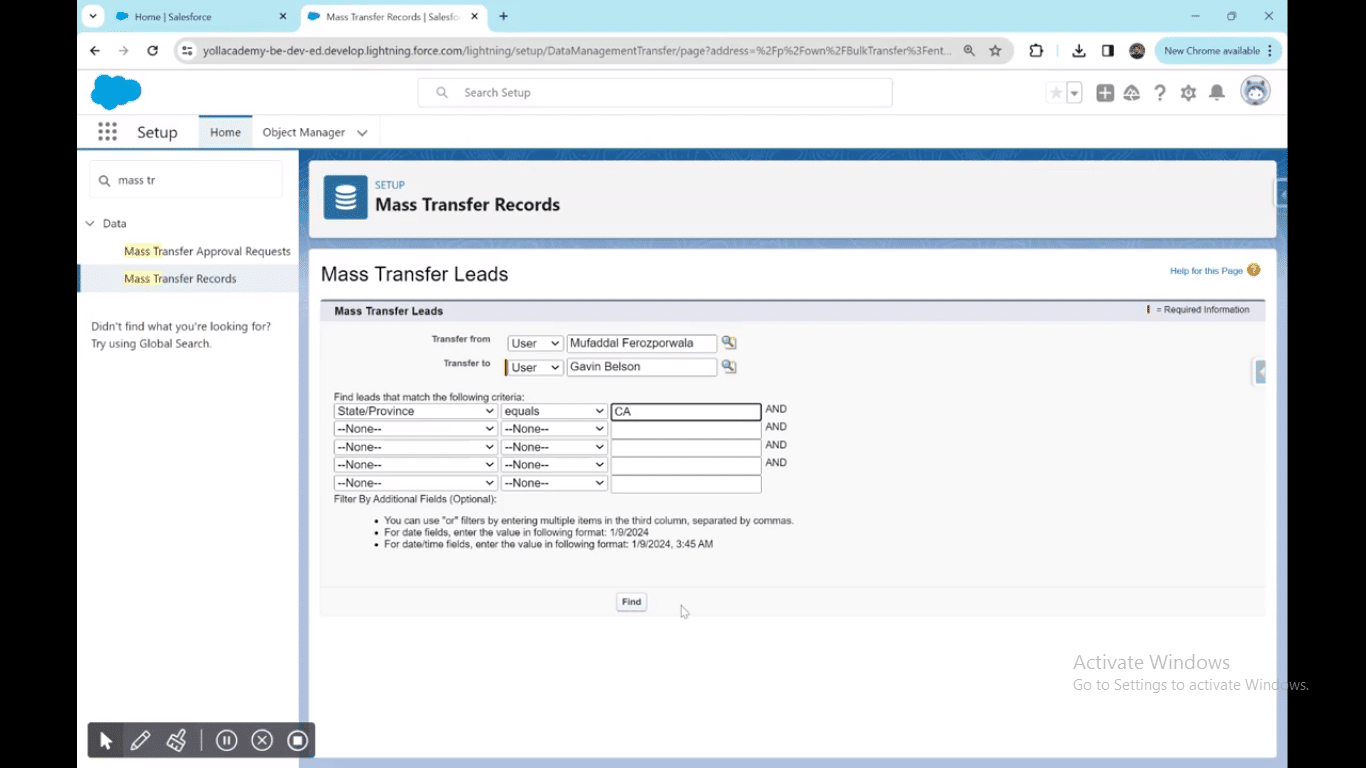
Step 7. Execute the Search: Once filters are specified, click the find button to execute the search. All leads meeting the criteria will be displayed below.
Step 8. Select Leads for Transfer: Review the list of leads and select the ones you want to transfer or choose “Select All” for a bulk transfer.
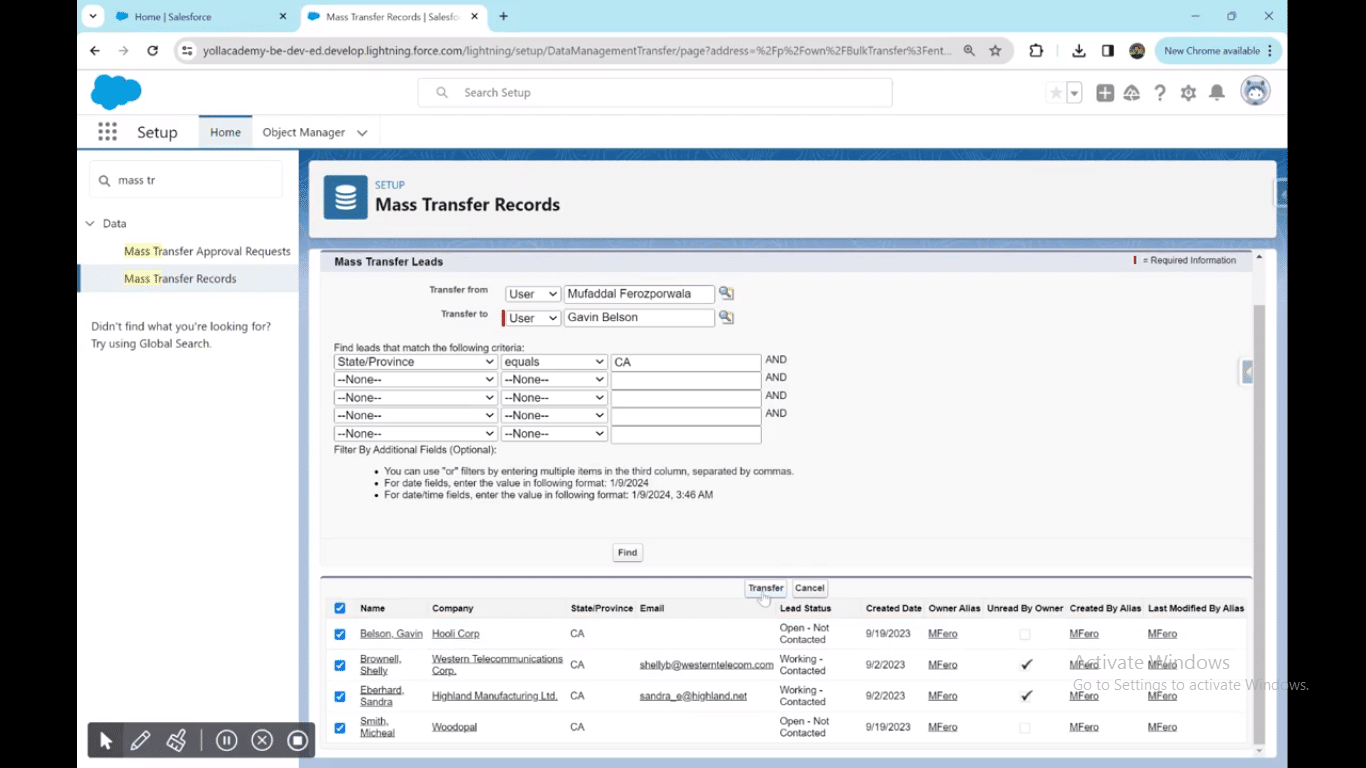
Step 9. Initiate Transfer: Click on the “Transfer” button to initiate the transfer process.
For a detailed video walk-through, check out our YouTube Tutorial.
Best Practices
Efficient mass transfer processes are crucial for seamless Salesforce lead management and overall CRM optimization. Follow these best practices to ensure a smooth transition while avoiding common mistakes.
- Thorough Preparation: Conduct a comprehensive analysis of your data using list views, ensuring that your mass transfer aligns with the intended criteria.
- Use Data Loader for Bulk Operations: Leverage the power of Data Loader for large-scale mass transfers, enhancing efficiency and accuracy in the process.
- Clearly Define Ownership Changes: Clearly specify the new owner during the mass transfer, ensuring that there is no ambiguity in record ownership.
- Checkbox Management: Be mindful of checkbox settings and their impact on record status. Ensure that checkboxes are appropriately configured for the desired outcome.
- Custom Object Considerations: If standard objects are involved, verify that the mass transfer process aligns with the data structure of these objects to maintain data integrity.
- Data Management and Lookup Fields: Pay special attention to lookup fields and data management processes to guarantee accurate and consistent data relationships.
- Utilize List Views for Easy Identification: Leverage list views to identify the records you intend to transfer, streamlining the process and minimizing errors.
- Avoid Overlooking Open Activities: Check and manage open activities associated with the records being transferred to prevent missing crucial follow-ups or engagements.
- Thoroughly Test Mass Transfers: Before executing a mass transfer, conduct thorough testing in a sandbox environment to identify and rectify any potential issues.
- Regularly Update Salesforce Lightning Features: Keep your Salesforce Lightning features up-to-date to benefit from the latest enhancements and improvements in the mass transfer functionality.
- Use Tutorials: Use tutorials or step-by-step guides to be involved in the mass transfer process, ensuring a standardized and error-free execution.
Conclusion
Efficient lead transfer is pivotal for maintaining accurate records and ensuring streamlined operations in Salesforce. It expedites organizational changes, team realignment, and sales strategy shifts. To enhance this process, leveraging Coefficient is highly recommended.
Coefficient’s integration offers advanced functionality, providing a user-friendly interface for seamless mass transfers, ultimately optimizing CRM efficiency. Embrace Coefficient today to elevate your lead management strategy!


