Every Salesforce user knows how crucial the Opportunity table is. It’s your goldmine for sales data, tracking potential revenue and deals in progress.
But how can you efficiently extract this treasure trove of information? Whether you’re aiming for a report, an analysis, or simply backing up your data, we’ve got you covered. Plus, we’ll introduce how Coefficient can elevate your Salesforce experience beyond traditional methods.
Understanding Salesforce Data Loader for Data Retrieval
One of the most effective tools at your disposal for pulling data from the Opportunity table is the Salesforce Data Loader. It’s a client application for the bulk import or export of data, seamlessly connecting to your Salesforce environment.
Retrieving data from the Salesforce Opportunity table is crucial for analysis, reporting, and various data management tasks. Salesforce Data Loader is a powerful tool to export your data efficiently. Here’s how to accomplish this task without needing to follow any video guide:
How to Retrieve Data from a Salesforce Opportunity Table
Step 1: Access the Data Loader and Select Export
To begin, launch the Salesforce Data Loader application on your computer. On the main screen, you’ll find different options for data operations.
Select the ‘Export’ option to initiate the data retrieval process.
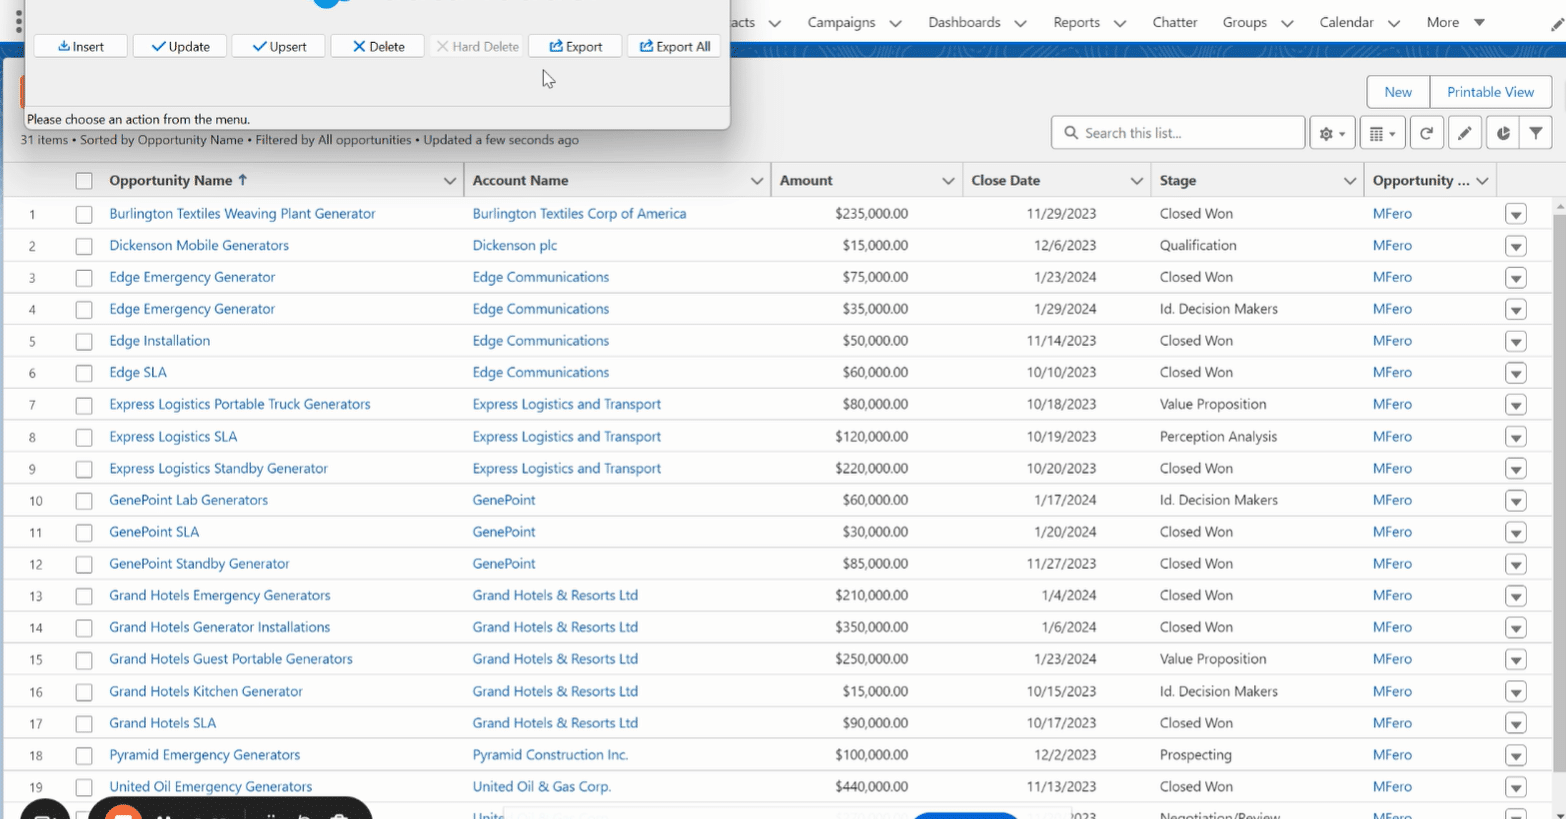
Step 2: Choose Your Salesforce Object
The next step involves specifying which Salesforce object you want to export data from.
Since our focus is on retrieving Opportunity data, select ‘Opportunity’ from the list of available objects in Data Loader. This ensures the Data Loader fetches data only from the Opportunity table.
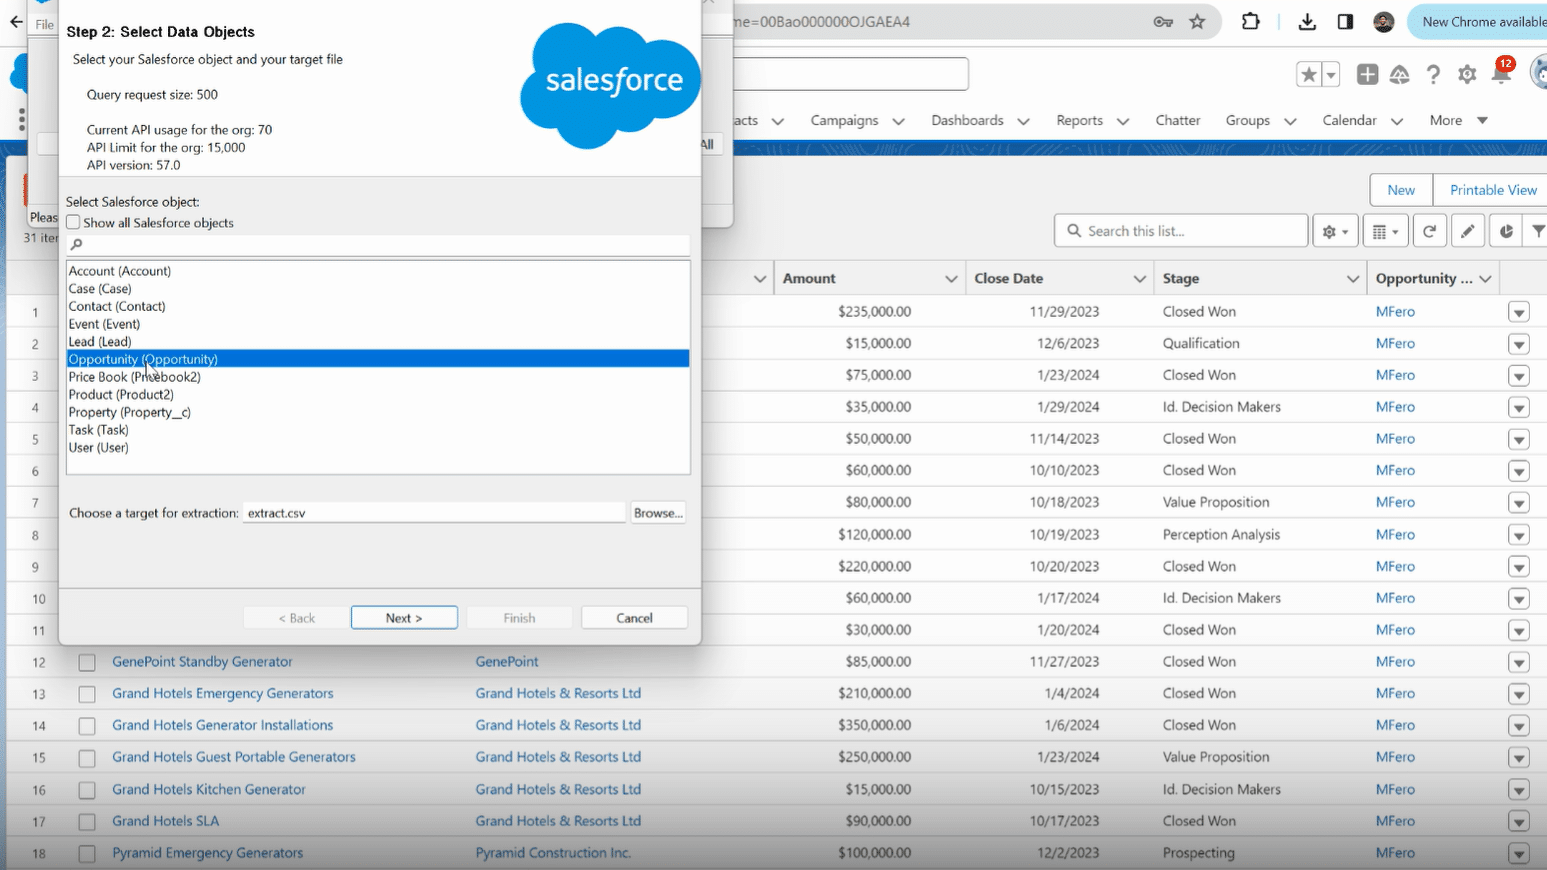
Step 3: Set Your Retrieval Destination
After selecting the Salesforce object, you’ll need to define a location on your computer where the exported data will be saved.
Click the ‘Browse’ button and navigate to the desired folder.

It’s recommended to name your file in a way that makes its content clear at a glance, such as ‘Opportunity_Data_Export’.
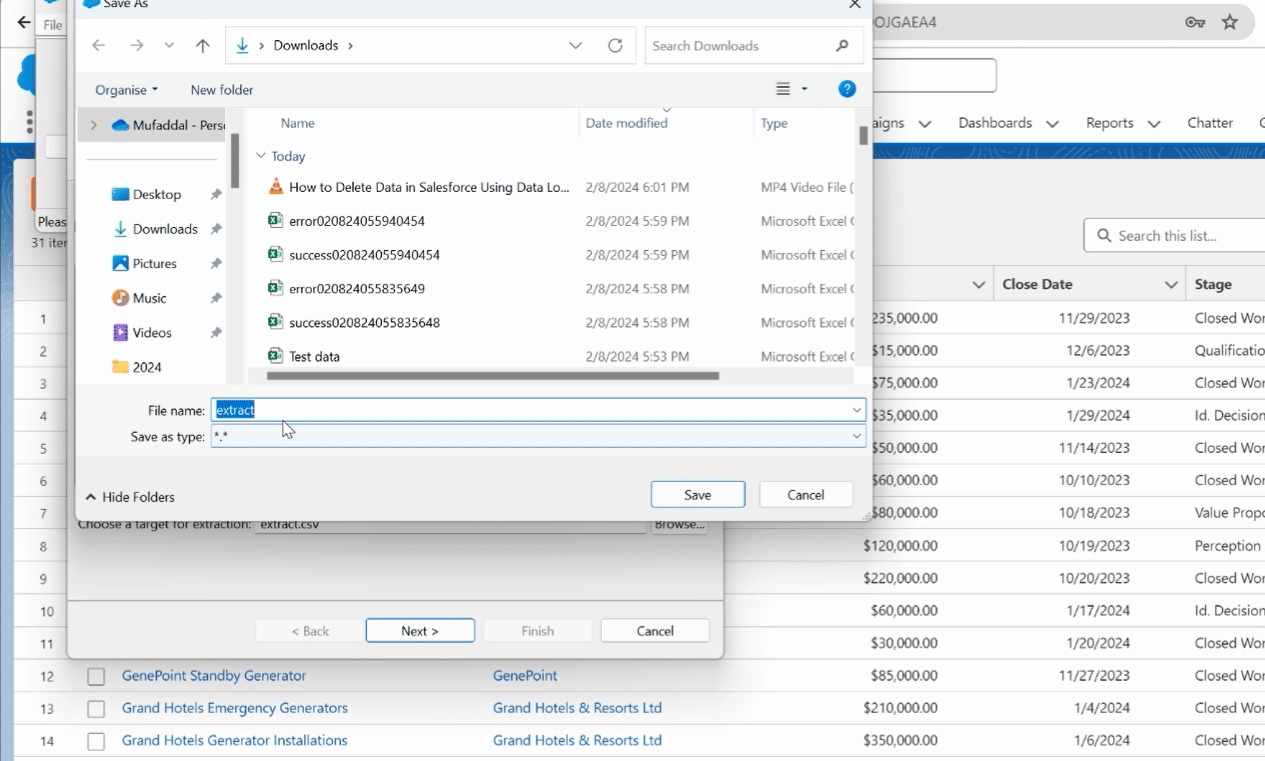
Step 4: Choose Fields for Extraction

Explore 8 cutting-edge techniques that are revolutionizing how Salesforce admins manage their daily tasks. Contribute more significantly to business outcomes and become a key driver of efficiency and innovation.
See the Techniques
Data Loader allows you to specify which fields (columns) of data you want to export. You can opt to export all fields or select specific fields for export.
This feature is particularly useful for extracting only the necessary data. For comprehensive analysis, selecting all fields might be useful. However, for focused tasks, consider only specific fields to streamline your data set.
Step 5: Exporting the Data
With the settings configured, proceed to export the data. Review your selections one last time, then click ‘Finish’ to start the data export process.
Data Loader will confirm once the export is complete. You’ll find the exported data in the specified location on your computer, ready for your analysis or reporting needs.
Note: While Data Loader is a robust tool, Coefficient introduces a more flexible, user-friendly alternative.
Imagine merging Salesforce data with over 30 other connectors, customizing reports with no limits, and ensuring your team is always in the loop with real-time updates. That’s the Coefficient advantage.
Tips and Best Practices
- Regularly review the data fields you’re exporting to ensure relevance.
- Maintain awareness of your Salesforce data limits to avoid unnecessary consumption.
- Consider data security and permission settings when exporting sensitive information.
Conclusion
Retrieving data from the Salesforce Opportunity table doesn’t have to be daunting. With tools like the Salesforce Data Loader and Coefficient, you have powerful options at your fingertips. Dive deeper into your sales data, uncover new insights, and make informed decisions with ease.
Ready to take your Salesforce data management to the next level? Explore Coefficient’s integration solutions and revolutionize your approach. Get started here.
