
Have you ever needed to view two types of opportunities for a single account in Salesforce but weren’t sure how to set it up?
Whether it’s distinguishing between sales and marketing opportunities or another scenario, having the capability to display multiple related lists for the same object can significantly improve your CRM’s data organization and efficiency.
In this guide, we’ll show you how to create multiple related lists from contact to opportunity in Salesforce, making your CRM operations smoother and more intuitive.
Why Create Multiple Related Lists?
- Streamline Data Organization: By having separate lists for different opportunity types, users can quickly navigate and manage relevant data without sifting through a mixed list. This is particularly useful for accounts that engage in diverse activities requiring distinct management strategies.
- Improve Visibility & Accessibility: Multiple related lists enhance the visibility of specific categories of opportunities, making it easier for teams to access the information relevant to their operations. This can lead to more efficient planning, monitoring, and execution of sales and marketing strategies.
- Customize CRM to Business Needs: This customization allows businesses to adapt Salesforce to their unique organizational structures and processes, rather than adjusting their operations to the limitations of a one-size-fits-all CRM configuration.
- Enhanced Reporting and Analytics: By clearly segregating opportunities, businesses can generate more accurate and tailored reports, offering deeper insights into each area’s performance.
How to Create Multiple Related Lists: Step-by-Step Tutorial
Step 1: Create a Second Lookup Field
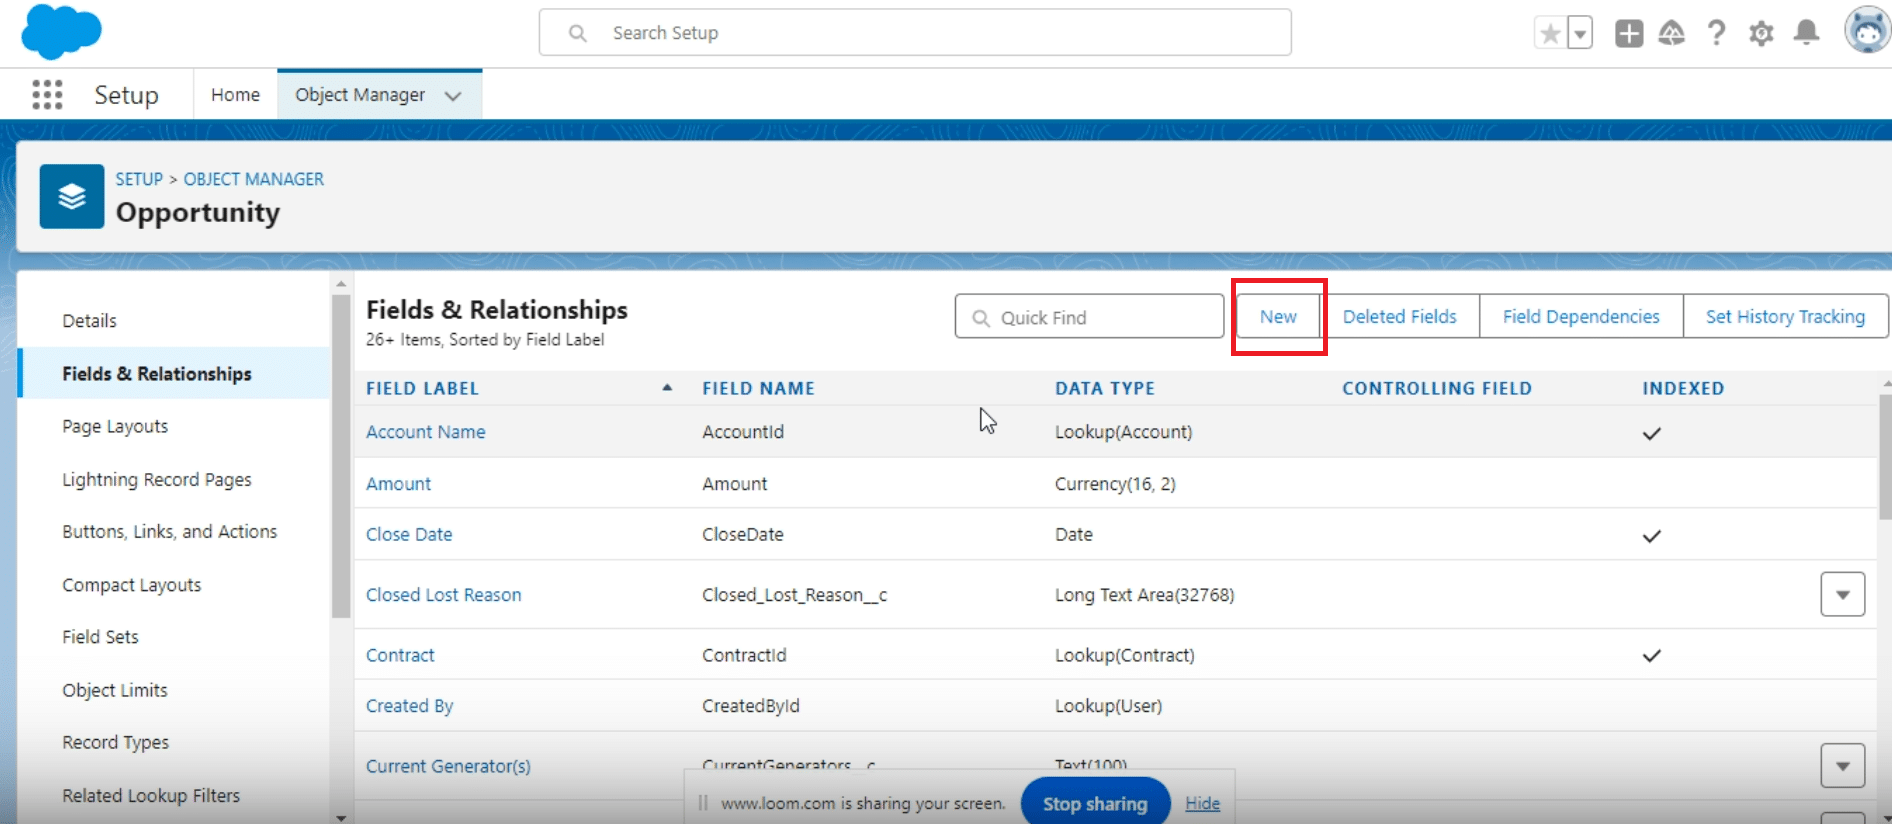
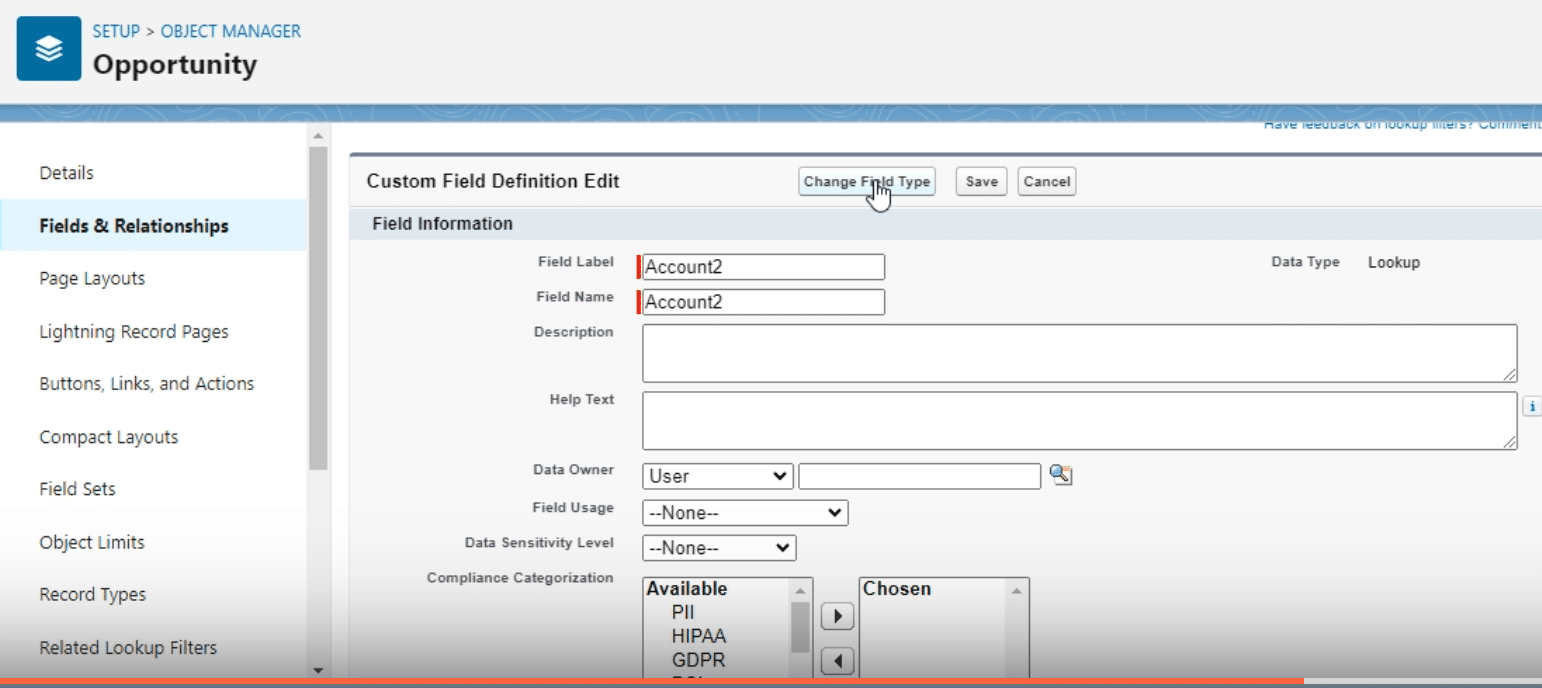
Begin by adding a new lookup field on the Opportunity object. In Salesforce Setup, navigate to the Object Manager and select the “Opportunity” object.
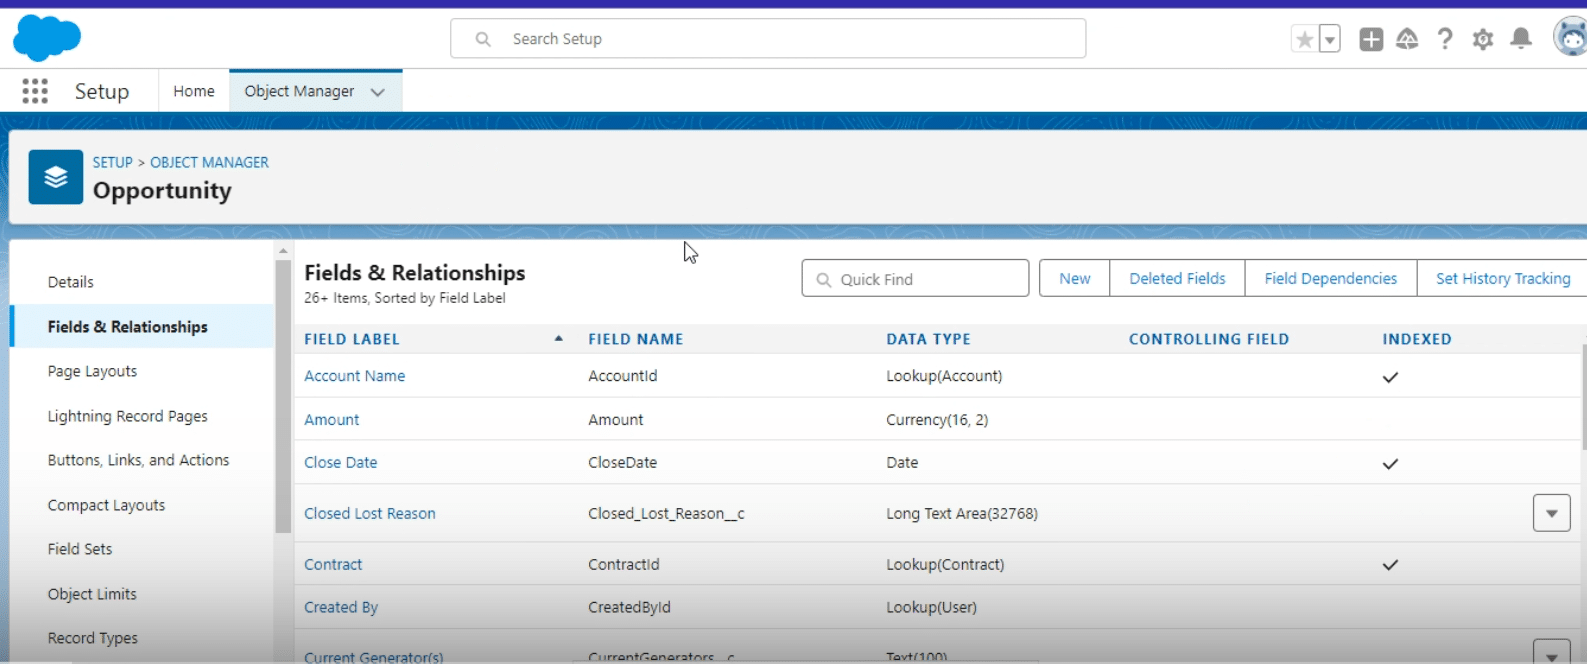
Go to “Fields & Relationships” and click “New”.
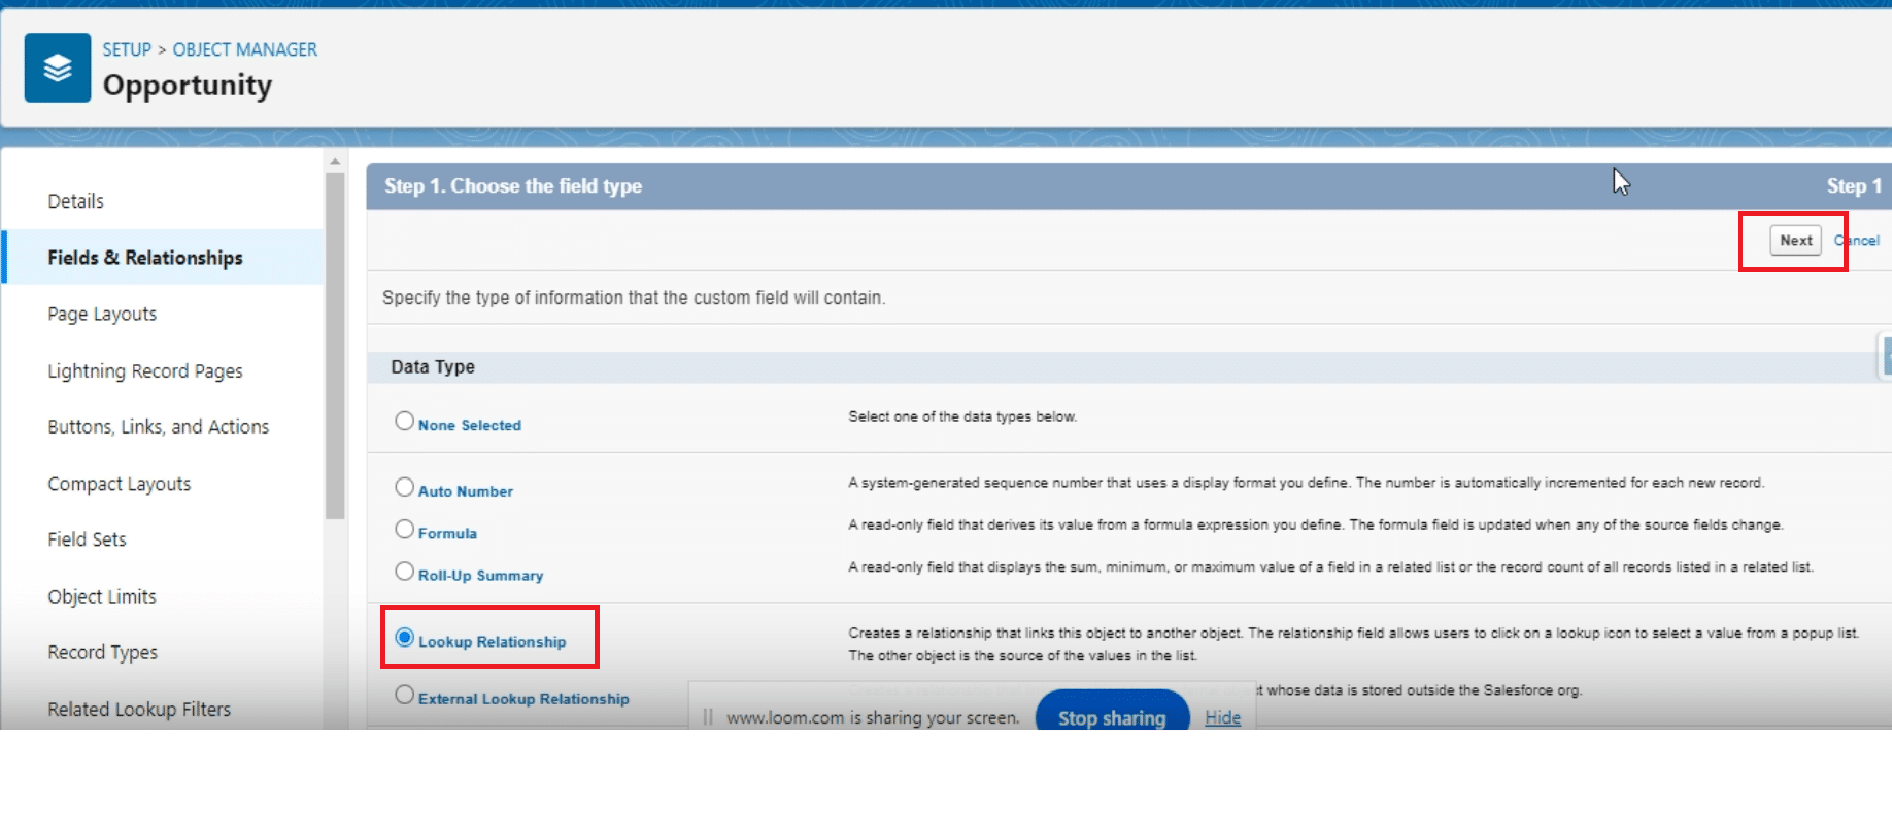
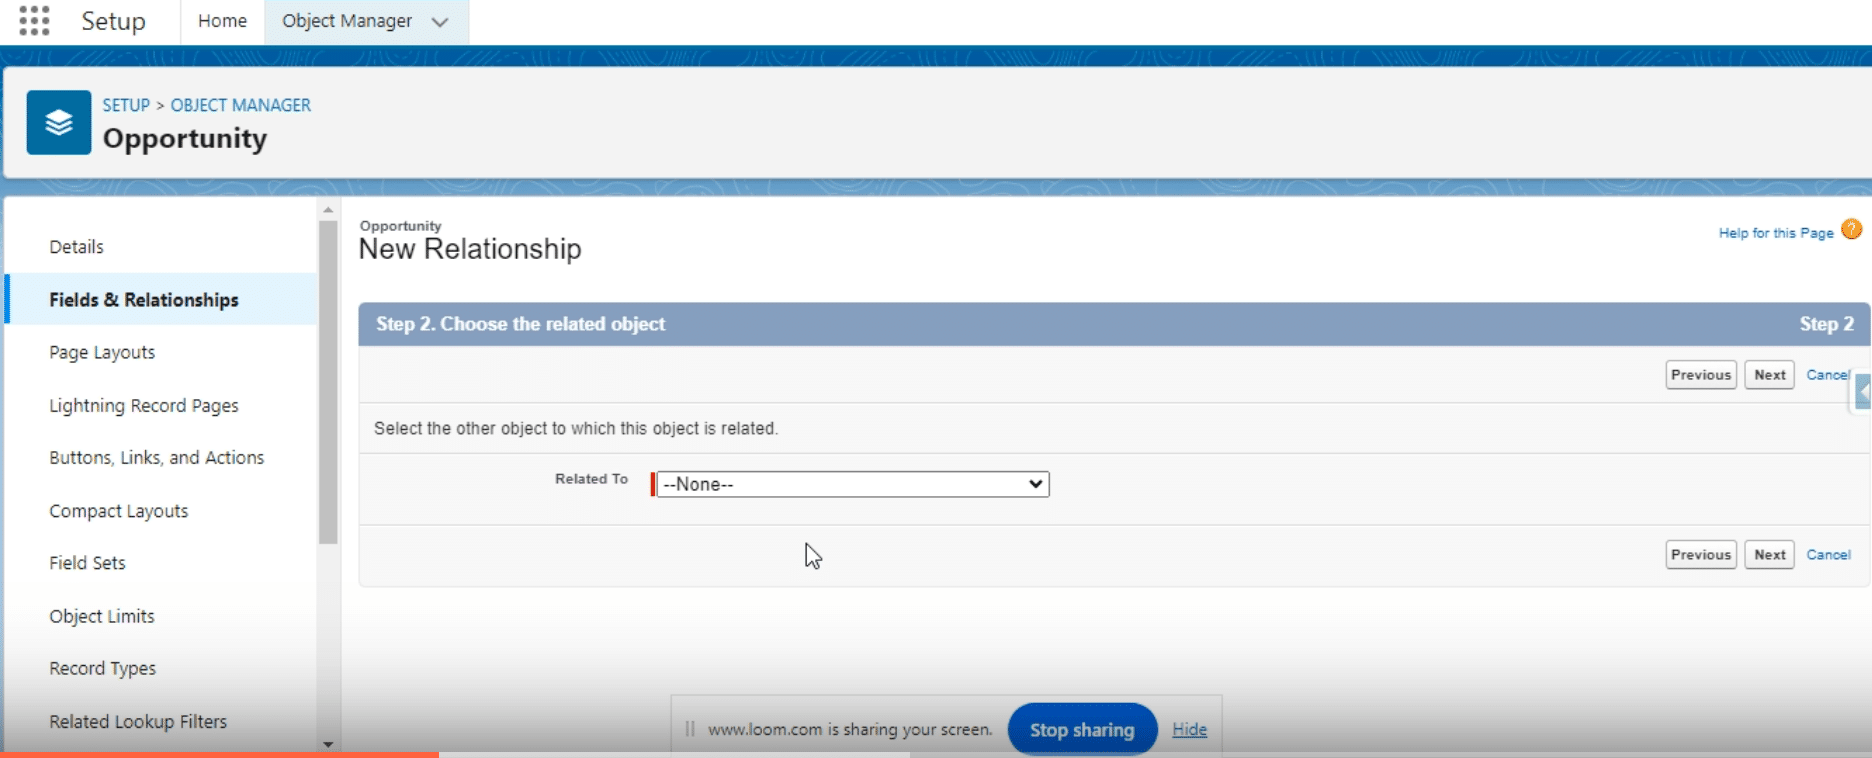
Select “Lookup Relationship” and set it to relate to the “Account” object.
Name this new field “Account 2”. Confirm its visibility across all relevant page layouts.
Step 2: Customize the Salesforce Page to Add Another Opportunity Related List
Next, add a new opportunity-related container for the “Account 2” relationship.
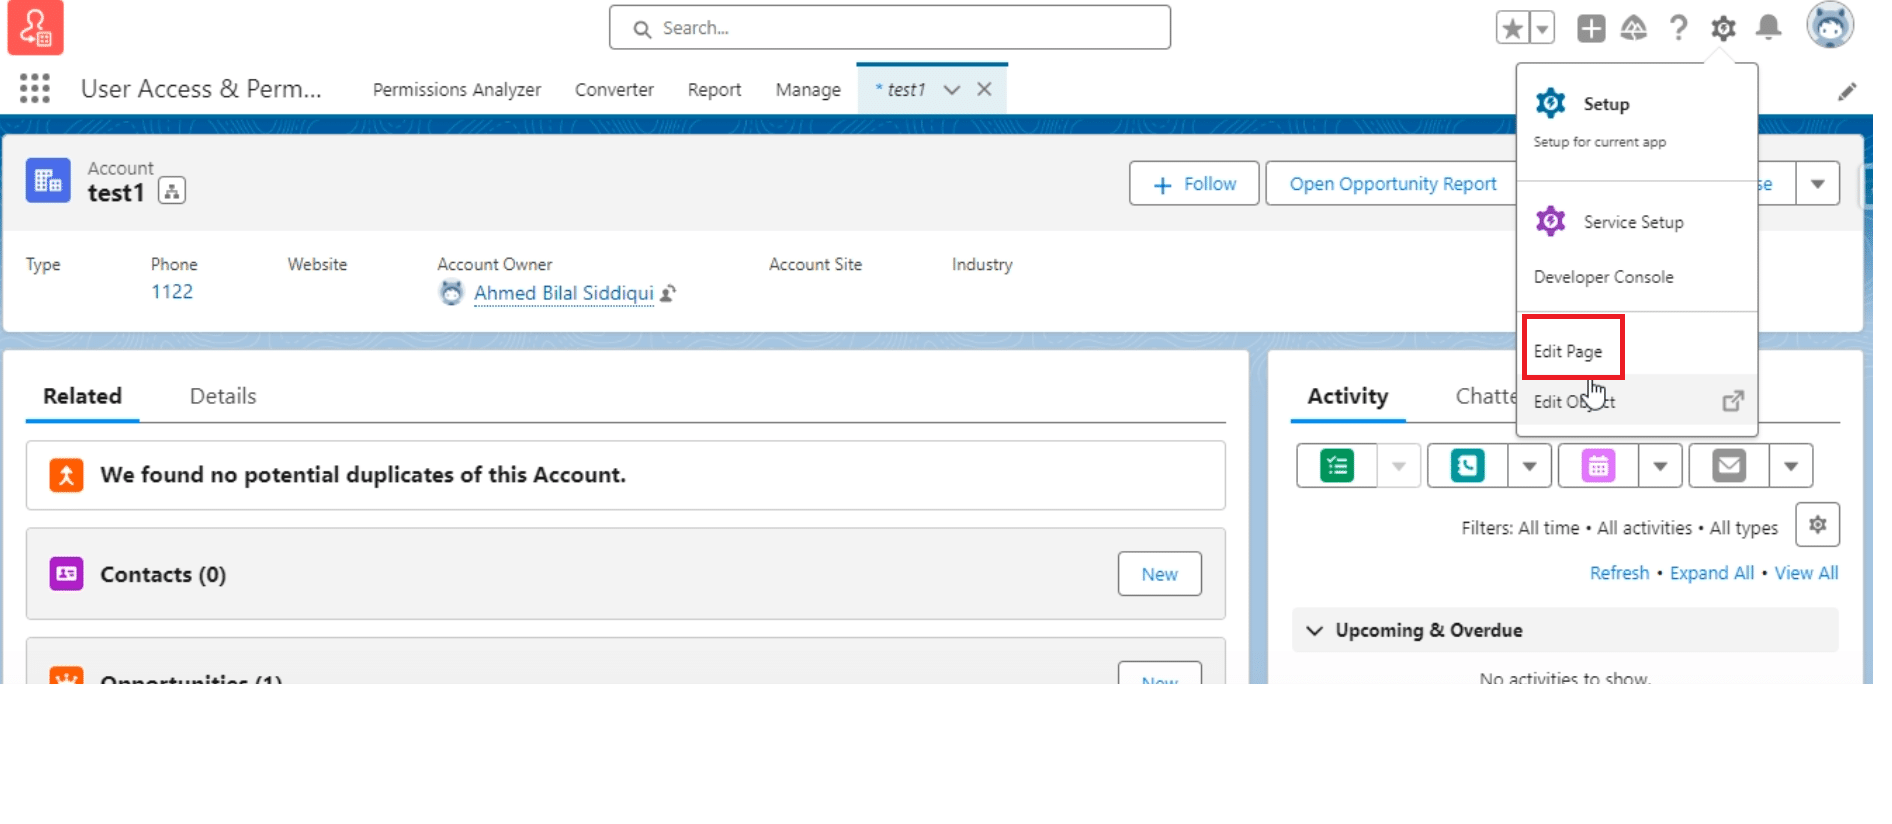
From the account’s Lightning page, choose “Edit Page” to enter the Lightning App Builder.
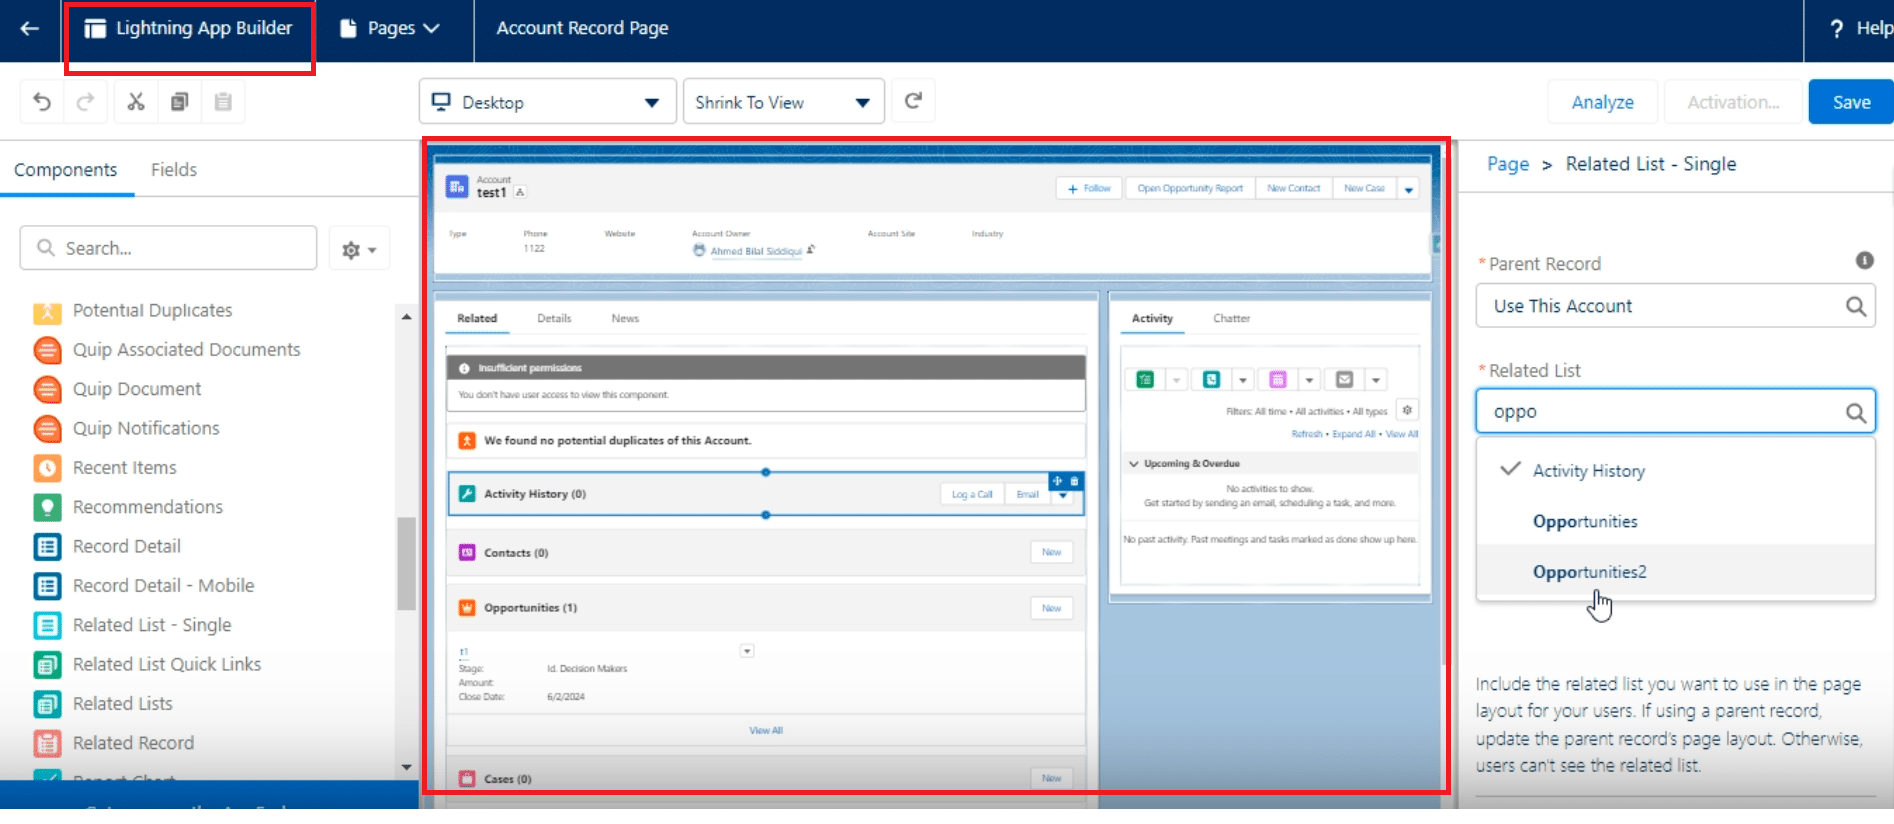
Search for the “Related List – Single” component and drag it to your page.Assign this new component to display opportunities related to “Account 2”.
Step 3: Correct Naming and Add Second Related List
Ensure clarity by naming the related lists to reflect their function clearly (e.g., “Marketing Opportunities” for “Account 2”).
If there were any initial naming errors, now is the time to correct them.
To add a second related list, repeat Step 2. Make sure each list is correctly named to differentiate between sales and marketing opportunities.

Explore 8 cutting-edge techniques that are revolutionizing how Salesforce admins manage their daily tasks. Contribute more significantly to business outcomes and become a key driver of efficiency and innovation.
See the Techniques
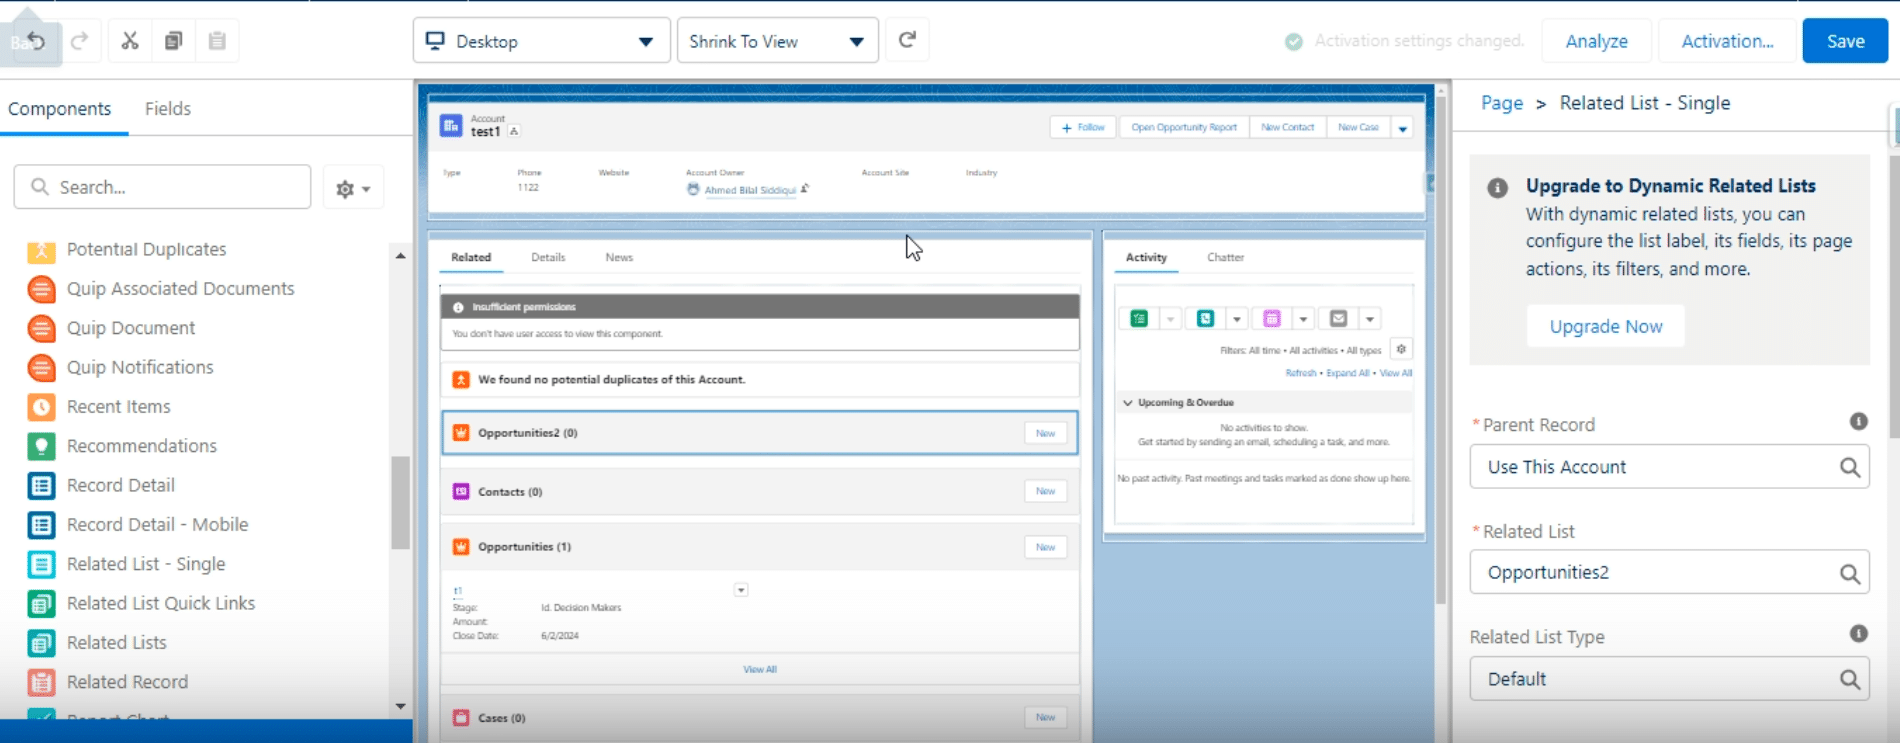
Step 4: Activating the Lightning Page
Once the related lists are correctly set up and named, activate the custom Lightning page.
Save your changes and select “Activate” to apply these changes across your organization. You can choose to make this page layout the default organization-wide or for specific profiles.
Step 5: Reviewing the Final Outcome
Confirm that the opportunities are correctly organized into separate containers — one for sales and another for marketing opportunities. This validation step ensures your setup is functioning as intended.
Best Practices for Implementing Multiple Related Lists
- Plan Your Related Lists Strategically: Before adding multiple related lists, make a comprehensive plan of how these lists will be used and who will need access. This ensures that the lists you create serve a specific purpose and contribute to the efficiency of your CRM.
- Naming Conventions: Use clear and descriptive naming conventions for your related lists. This helps users quickly understand the purpose of each list and improves navigation. The names should reflect the type of opportunities or relationships they represent, such as “Sales Opportunities” vs. “Marketing Opportunities.”
- Set Permission Sets Carefully: Be mindful of the visibility and editability of your newly created lists. Set up permission sets and sharing rules to ensure that the right teams or individuals have the appropriate level of access to each list.
- Train Your Users: After setting up the lists, provide training and resources to users on how to effectively use them. Highlight the benefits and show practical examples of how these lists can streamline their workflow.
- Maintain Data Quality: Multiple related lists increase the complexity of managing data. Implement routines for data quality checks and encourage users to maintain clean and updated records across all lists.
- Regularly Review and Iterate: As your business evolves, so will your needs for how opportunities are segmented and managed. Regularly review the relevance and utility of your related lists. Seek feedback from users and make adjustments as required.
Conclusion and CTA
Successfully creating multiple related lists from contact to opportunity in Salesforce is not only about enhancing data visibility; it’s about making your CRM work smarter for you. With this guide, your Salesforce environment is now more streamlined, providing clearer insights at a glance.
Eager to explore more Salesforce optimizations?
Discover how Coefficient can elevate your Salesforce experience with powerful integrations for Google Sheets and Excel, transforming complex processes into user-friendly operations. Embedding Salesforce data into your daily tools has never been easier.


