Understanding what changes have been made to Salesforce records, such as opportunity records, is key to maintaining accountability, transparency, and data integrity in your CRM processes.
Salesforce provides a powerful feature that allows administrators and authorized users to track changes made to specific fields within an object.
This guide will walk you through the process of setting up Field History Tracking in Salesforce for opportunity records (or any other object), enabling you to audit who made what changes and when.
Step-by-Step Guide: Check What Updated a Record in Salesforce
Step 1: Accessing Object Settings
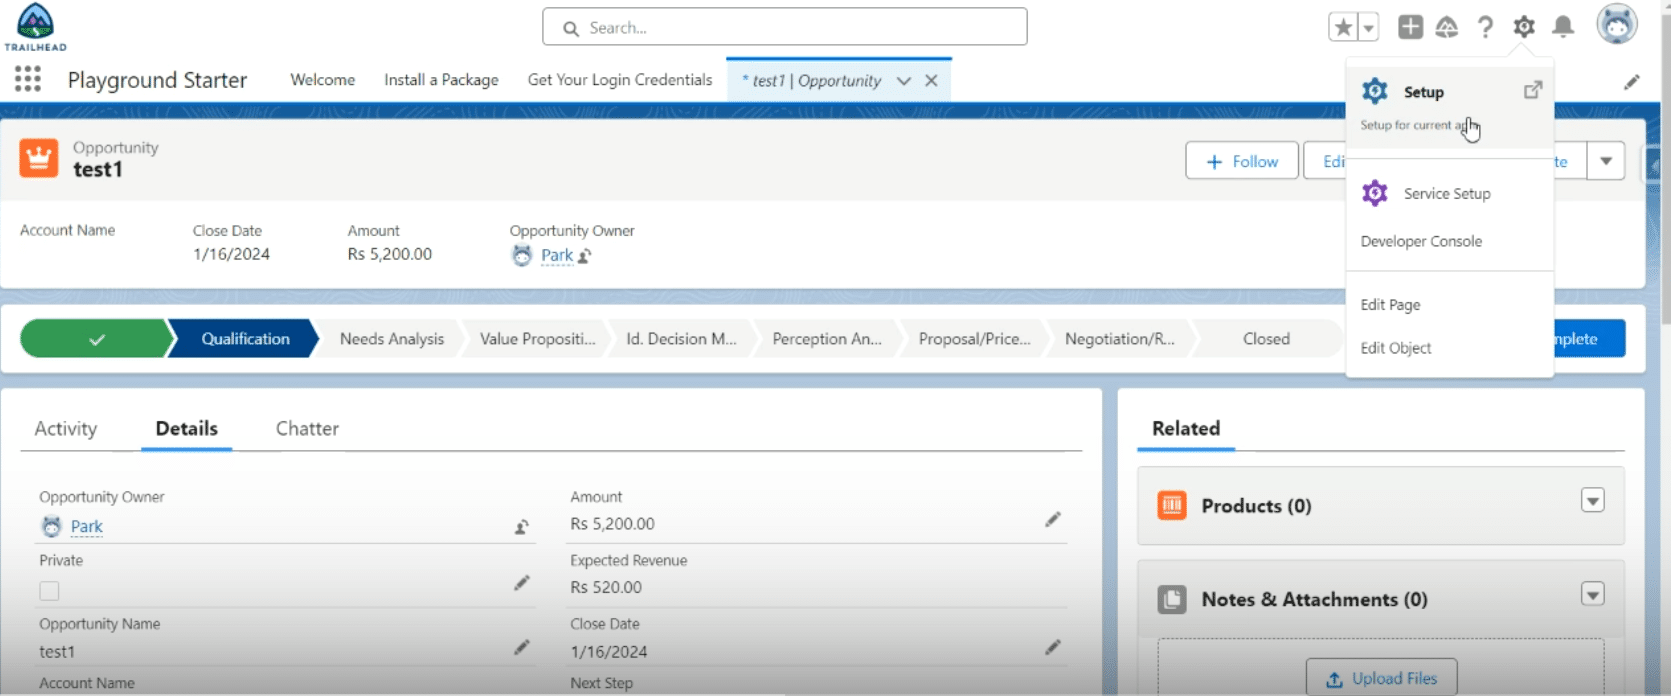
To begin, navigate to the Setup area by clicking on the gear icon in the top right corner of your Salesforce interface, and select “Setup”.

In the Quick Find box, type “Opportunities” (or the object you need to track changes for), then under the Objects and Fields section, select “Object Manager”. Here, you’ll find the “Opportunity” object.
Step 2: Enabling Field History Tracking
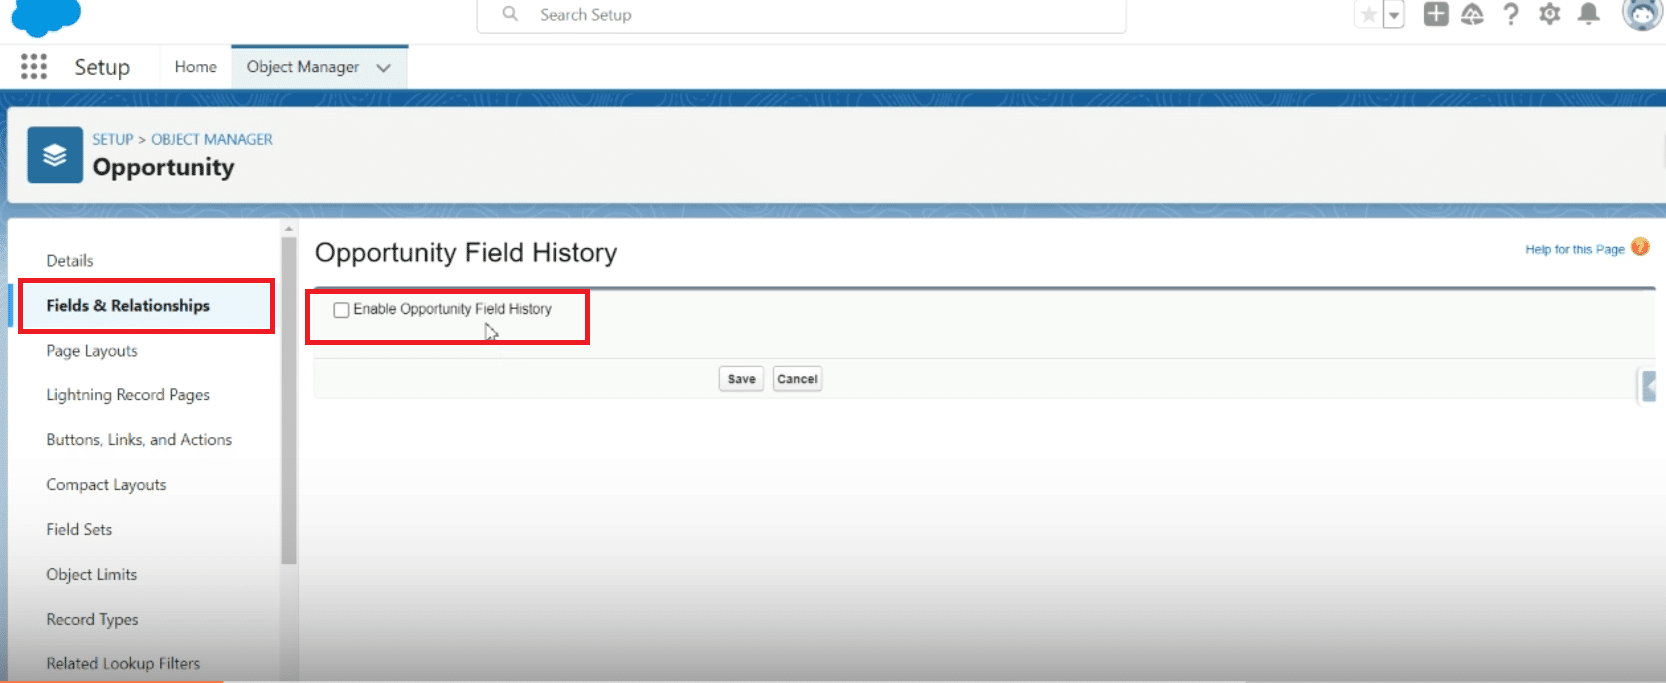
Within the Opportunity object manager, navigate to the “Fields & Relationships” section and look for the “Set History Tracking” option.

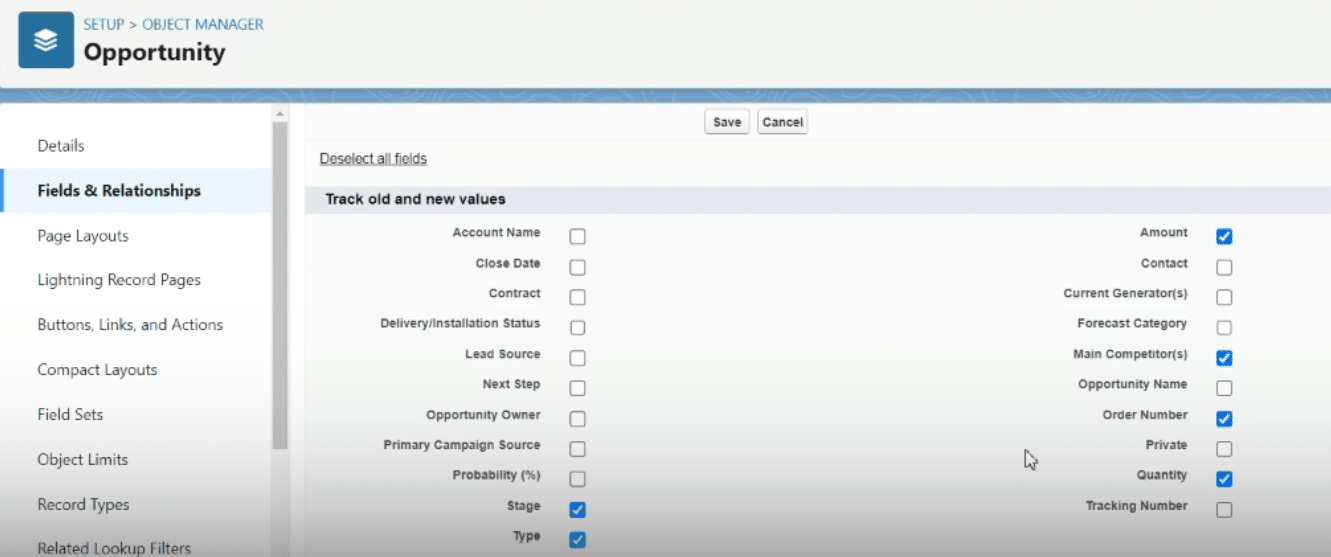
Upon entering the Set History Tracking settings, you can enable it and select up to 20 fields for which you wish to track changes. Salesforce imposes a limit for monitoring up to 20 fields per object, so choose wisely.
Step 3: Adjusting Page Layouts to Display Field History
After enabling field history tracking, it’s time to adjust the object’s page layout to display the field history. Go back to the Opportunity object settings and select “Page Layouts”.
Choose “Opportunity Layout” for editing, and in the “Related Lists” section, add the “Opportunity Field History” list to the layout where it’s easily visible.

Save your layout changes to ensure the tracked history is readily accessible from the opportunity records.
Step 4: Viewing Field History
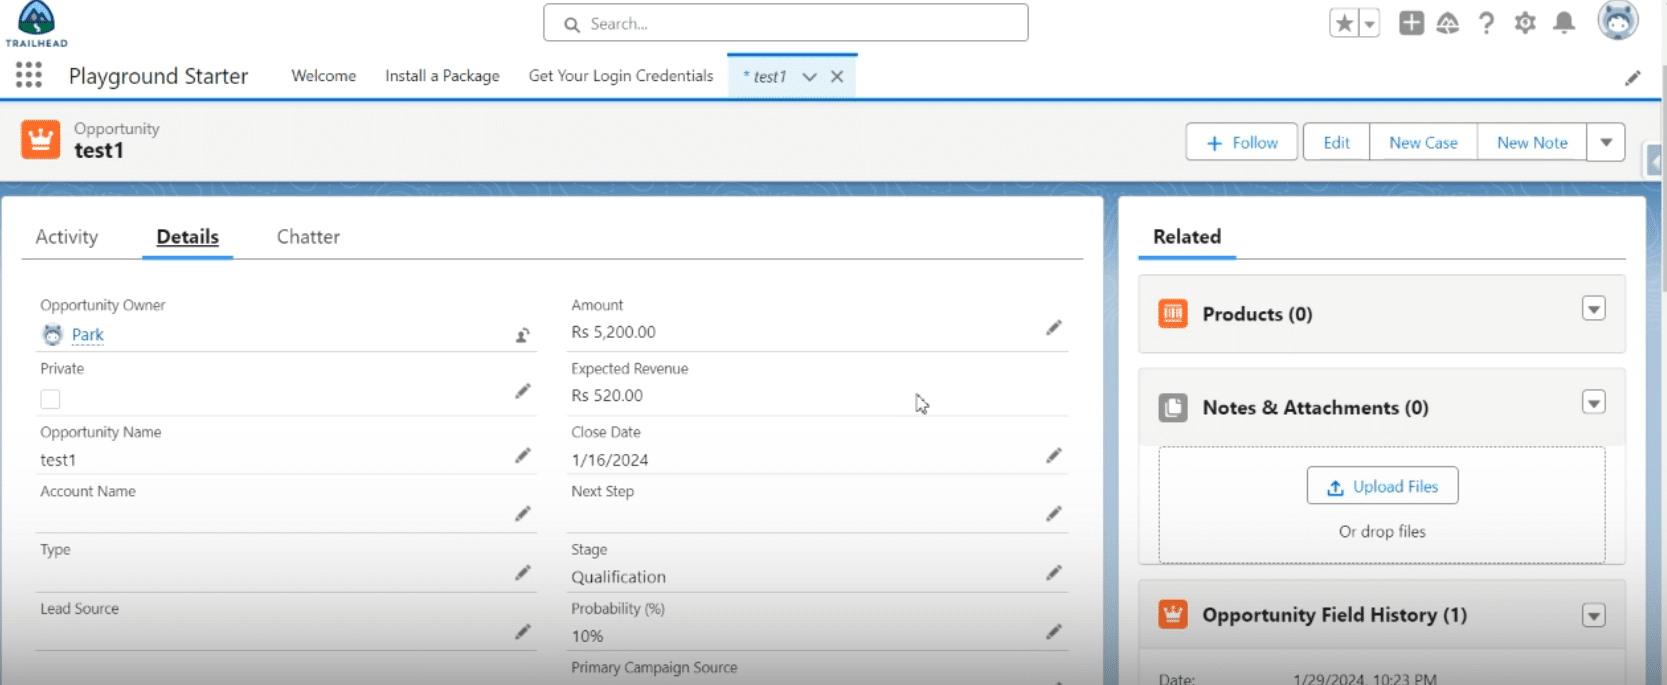
To view the changes tracked, navigate to an Opportunity record and refresh the page to see your newly configured settings in action.
Modify a tracked field in the record as a test, and then navigate to the “Opportunity Field History” section to see the recorded changes, including the old value, new value, the user who made the change, and the timestamp of the change.

Enhancing Your Salesforce Record Tracking: Insights and Best Practices
Troubleshooting Tips:
Encountering issues with not seeing the expected history data is a common challenge.
To address this, make sure that the field you are looking for is included in the 20 fields you have selected for tracking. Additionally, verify that the user trying to view the changes has the necessary permissions to do so. These steps often resolve the majority of issues related to field history tracking visibility.
Field Selection Best Practices:
When choosing which fields to track, prioritize those that are crucial for your business processes, need to comply with specific regulations, or tend to be frequently updated.
Prioritizing fields for tracking helps ensure that you’re capturing the most valuable data for audits, compliance checks, and operational analysis.
Security and Permissions:
It’s essential to understand the roles and permissions required for setting up Field History Tracking and for viewing the tracked changes.
Ensuring that only authorized users can view or change the tracked data helps in maintaining the security and integrity of your data. Regularly review and update these permissions to reflect changes in roles or business processes.

Explore 8 cutting-edge techniques that are revolutionizing how Salesforce admins manage their daily tasks. Contribute more significantly to business outcomes and become a key driver of efficiency and innovation.
See the Techniques
Leveraging Field History Data:
The tracked history data is a goldmine for insights.
You can analyze patterns of changes to identify trends, which can reveal user behavior, highlight potential training needs, or help in improving the overall data integrity of your Salesforce instance. Encourage your team to regularly review this data for actionable insights.
Integrating with Reports:
Creating reports based on the history data allows you to visualize the change patterns over time.
This capability is invaluable for monitoring compliance, auditing changes for accuracy, and identifying data trends. Salesforce’s custom report features can be leveraged to build insightful reports from your field history data.
Limitations and Considerations:
While field history tracking is an incredibly useful feature, be mindful of its limitations. Salesforce imposes a limit of 20 fields per object that can be tracked.
Moreover, consider the data storage implications and the retention period of the history data, as these factors could influence which fields you decide to track.
Conclusion
Implementing Field History Tracking in Salesforce enhances your ability to oversee and audit modifications made to records, ensuring that your data remains accurate and alterations are fully accountable.
Need to take your Salesforce data handling to another level? Coefficient can help. It connects Salesforce with your spreadsheets, making data management and analysis straightforward and intuitive.
With Coefficient, you get real-time updates and easy data management—no complications.
Explore what Coefficient can do for you. Get started here.


