Importing Offers data from Greenhouse into Excel helps recruitment teams track compensation packages, analyze offer acceptance rates, and optimize hiring outcomes. Coefficient makes this process seamless and automatic.
This guide will show you how to import your Greenhouse Offers data into Excel using Coefficient.
TLDR
-
Step 1:
Step 1. Open Excel > Insert tab > Get Add-ins > Install Coefficient from Office Add-ins store.
-
Step 2:
Step 2. Connect your Greenhouse account and select the Offers object to import.
-
Step 3:
Step 3. (Optional) Enable auto-refresh to keep your data updated automatically.

Step 1: Install Coefficient and Connect to Greenhouse
First, you’ll need to install the Coefficient add-in for Excel and connect to your Greenhouse account:
- Open Excel and navigate to the Insert tab.
- Click on Get Add-ins and search for “Coefficient”.
- Install the Coefficient add-in from the Office Add-ins store.
- Once installed, open the Coefficient sidebar and click “Import from…”.
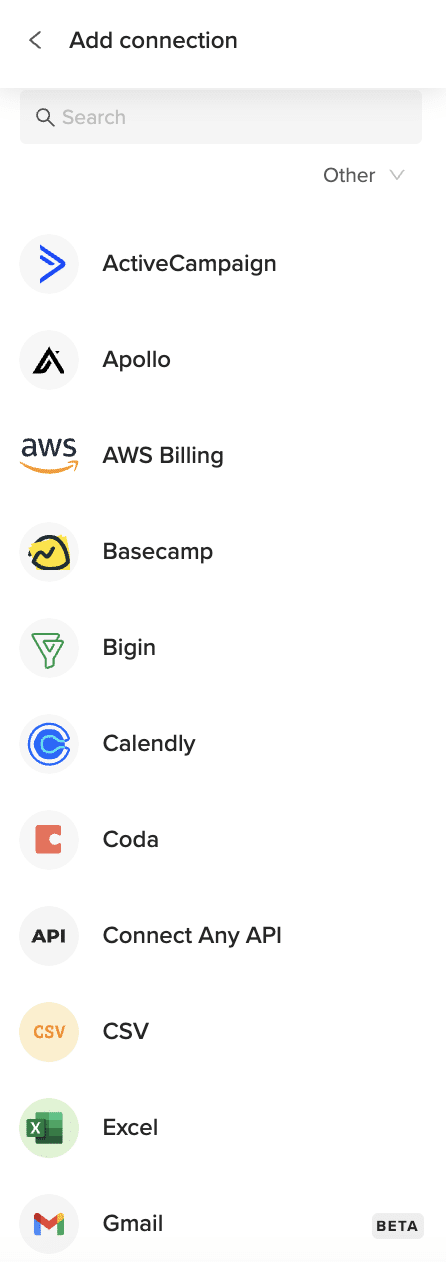
- In the connector selection screen, scroll to the “Other” category.
Step 2: Import Greenhouse Offers Data
Now that you’re connected, you can import your Greenhouse Offers data:
- Select “Greenhouse” from the list of available connectors.
- Enter your Greenhouse API credentials when prompted.
- Choose “Offers” from the list of available objects.
- Select the fields you want to import (e.g., candidate, job, status, created date, sent date).
- Apply any filters if needed to narrow down the data.
- Click “Import” to bring your Offers data into Excel.
Step 3: Set Up Auto-Refresh (Optional)
To keep your Greenhouse Offers data fresh, set up an automatic refresh schedule:
- Click on the refresh icon next to your imported data.
- Select “Schedule refresh” from the dropdown menu.
- Choose your preferred refresh frequency (hourly, daily, or weekly).
- Set the specific time for the refresh to occur.
- Click “Save” to activate the auto-refresh schedule.

Available Greenhouse Objects
- Candidates
- Departments
- Jobs
- Offers
- Offices
- Prospects
- Rejection Reasons
- Scorecards
- Sources
- Stages
- Users
- Interview Plans
How to Import Jobs Data from Greenhouse into Excel
Importing Jobs data from Greenhouse into Excel helps recruitment teams track open positions, analyze hiring needs, and optimize recruitment strategies. Coefficient makes this process seamless and automatic.
This guide will show you how to import your Greenhouse Jobs data into Excel using Coefficient.
TLDR
-
Step 1:
Step 1. Open Excel > Insert tab > Get Add-ins > Install Coefficient from Office Add-ins store.
-
Step 2:
Step 2. Connect your Greenhouse account and select the Jobs object to import.
-
Step 3:
Step 3. (Optional) Enable auto-refresh to keep your data updated automatically.
Step 1: Install Coefficient and Connect to Greenhouse
First, you’ll need to install the Coefficient add-in for Excel and connect to your Greenhouse account:
- Open Excel and navigate to the Insert tab.
- Click on Get Add-ins and search for “Coefficient”.
- Install the Coefficient add-in from the Office Add-ins store.
- Once installed, open the Coefficient sidebar and click “Import from…”.
- In the connector selection screen, scroll to the “Other” category.
Step 2: Import Greenhouse Jobs Data
Now that you’re connected, you can import your Greenhouse Jobs data:
- Select “Greenhouse” from the list of available connectors.
- Enter your Greenhouse API credentials when prompted.
- Choose “Jobs” from the list of available objects.
- Select the fields you want to import (e.g., title, department, office, status, open date).
- Apply any filters if needed to narrow down the data.
- Click “Import” to bring your Jobs data into Excel.
Step 3: Set Up Auto-Refresh (Optional)
To keep your Greenhouse Jobs data fresh, set up an automatic refresh schedule:
- Click on the refresh icon next to your imported data.
- Select “Schedule refresh” from the dropdown menu.
- Choose your preferred refresh frequency (hourly, daily, or weekly).
- Set the specific time for the refresh to occur.
- Click “Save” to activate the auto-refresh schedule.
Available Greenhouse Objects
- Candidates
- Departments
- Jobs
- Offers
- Offices
- Prospects
- Rejection Reasons
- Scorecards
- Sources
- Stages
- Users
- Interview Plans
How to Import Interview Plans Data from Greenhouse into Excel
Importing Interview Plans data from Greenhouse into Excel helps recruitment teams track interview structures, analyze assessment strategies, and optimize candidate evaluation processes. Coefficient makes this process seamless and automatic.
This guide will show you how to import your Greenhouse Interview Plans data into Excel using Coefficient.
TLDR
-
Step 1:
Step 1. Open Excel > Insert tab > Get Add-ins > Install Coefficient from Office Add-ins store.
-
Step 2:
Step 2. Connect your Greenhouse account and select the Interview Plans object to import.
-
Step 3:
Step 3. (Optional) Enable auto-refresh to keep your data updated automatically.
Step 1: Install Coefficient and Connect to Greenhouse
First, you’ll need to install the Coefficient add-in for Excel and connect to your Greenhouse account:
- Open Excel and navigate to the Insert tab.
- Click on Get Add-ins and search for “Coefficient”.
- Install the Coefficient add-in from the Office Add-ins store.
- Once installed, open the Coefficient sidebar and click “Import from…”.
- In the connector selection screen, scroll to the “Other” category.
Step 2: Import Greenhouse Interview Plans Data
Now that you’re connected, you can import your Greenhouse Interview Plans data:
- Select “Greenhouse” from the list of available connectors.
- Enter your Greenhouse API credentials when prompted.
- Choose “Interview Plans” from the list of available objects.
- Select the fields you want to import (e.g., name, job, stages, interview kits, interviewers).
- Apply any filters if needed to narrow down the data.
- Click “Import” to bring your Interview Plans data into Excel.
Step 3: Set Up Auto-Refresh (Optional)
To keep your Greenhouse Interview Plans data fresh, set up an automatic refresh schedule:
- Click on the refresh icon next to your imported data.
- Select “Schedule refresh” from the dropdown menu.
- Choose your preferred refresh frequency (hourly, daily, or weekly).
- Set the specific time for the refresh to occur.
- Click “Save” to activate the auto-refresh schedule.
Available Greenhouse Objects
- Candidates
- Departments
- Jobs
- Offers
- Offices
- Prospects
- Rejection Reasons
- Scorecards
- Sources
- Stages
- Users
- Interview Plans
How to Import Departments Data from Greenhouse into Excel
Importing Departments data from Greenhouse into Excel helps HR teams track organizational structure, analyze hiring distribution, and plan departmental growth. Coefficient makes this process seamless and automatic.
This guide will show you how to import your Greenhouse Departments data into Excel using Coefficient.
TLDR
-
Step 1:
Step 1. Open Excel > Insert tab > Get Add-ins > Install Coefficient from Office Add-ins store.
-
Step 2:
Step 2. Connect your Greenhouse account and select the Departments object to import.
-
Step 3:
Step 3. (Optional) Enable auto-refresh to keep your data updated automatically.
Step 1: Install Coefficient and Connect to Greenhouse
First, you’ll need to install the Coefficient add-in for Excel and connect to your Greenhouse account:
- Open Excel and navigate to the Insert tab.
- Click on Get Add-ins and search for “Coefficient”.
- Install the Coefficient add-in from the Office Add-ins store.
- Once installed, open the Coefficient sidebar and click “Import from…”.
- In the connector selection screen, scroll to the “Other” category.
Step 2: Import Greenhouse Departments Data
Now that you’re connected, you can import your Greenhouse Departments data:
- Select “Greenhouse” from the list of available connectors.
- Enter your Greenhouse API credentials when prompted.
- Choose “Departments” from the list of available objects.
- Select the fields you want to import (e.g., name, parent department, external ID, child departments).
- Apply any filters if needed to narrow down the data.
- Click “Import” to bring your Departments data into Excel.
Step 3: Set Up Auto-Refresh (Optional)
To keep your Greenhouse Departments data fresh, set up an automatic refresh schedule:
- Click on the refresh icon next to your imported data.
- Select “Schedule refresh” from the dropdown menu.
- Choose your preferred refresh frequency (hourly, daily, or weekly).
- Set the specific time for the refresh to occur.
- Click “Save” to activate the auto-refresh schedule.
Available Greenhouse Objects
- Candidates
- Departments
- Jobs
- Offers
- Offices
- Prospects
- Rejection Reasons
- Scorecards
- Sources
- Stages
- Users
- Interview Plans
How to Import Applications Data from Greenhouse into Excel
Importing Applications data from Greenhouse into Excel helps recruitment teams track candidate progress, analyze hiring funnels, and optimize application processes. Coefficient makes this process seamless and automatic.
This guide will show you how to import your Greenhouse Applications data into Excel using Coefficient.
TLDR
-
Step 1:
Step 1. Open Excel > Insert tab > Get Add-ins > Install Coefficient from Office Add-ins store.
-
Step 2:
Step 2. Connect your Greenhouse account and select the Applications object to import.
-
Step 3:
Step 3. (Optional) Enable auto-refresh to keep your data updated automatically.
Step 1: Install Coefficient and Connect to Greenhouse
First, you’ll need to install the Coefficient add-in for Excel and connect to your Greenhouse account:
- Open Excel and navigate to the Insert tab.
- Click on Get Add-ins and search for “Coefficient”.
- Install the Coefficient add-in from the Office Add-ins store.
- Once installed, open the Coefficient sidebar and click “Import from…”.
- In the connector selection screen, scroll to the “Other” category.
Step 2: Import Greenhouse Applications Data
Now that you’re connected, you can import your Greenhouse Applications data:
- Select “Greenhouse” from the list of available connectors.
- Enter your Greenhouse API credentials when prompted.
- Choose “Applications” from the list of available objects.
- Select the fields you want to import (e.g., candidate ID, job ID, status, stage, applied date).
- Apply any filters if needed to narrow down the data.
- Click “Import” to bring your Applications data into Excel.
Step 3: Set Up Auto-Refresh (Optional)
To keep your Greenhouse Applications data fresh, set up an automatic refresh schedule:
- Click on the refresh icon next to your imported data.
- Select “Schedule refresh” from the dropdown menu.
- Choose your preferred refresh frequency (hourly, daily, or weekly).
- Set the specific time for the refresh to occur.
- Click “Save” to activate the auto-refresh schedule.
Available Greenhouse Objects
- Candidates
- Departments
- Jobs
- Offers
- Offices
- Prospects
- Rejection Reasons
- Scorecards
- Sources
- Stages
- Users
- Interview Plans
How to Import Candidates Data from Greenhouse into Excel
Importing Candidates data from Greenhouse into Excel helps recruitment teams track talent profiles, analyze candidate pools, and optimize hiring decisions. Coefficient makes this process seamless and automatic.
This guide will show you how to import your Greenhouse Candidates data into Excel using Coefficient.
TLDR
-
Step 1:
Step 1. Open Excel > Insert tab > Get Add-ins > Install Coefficient from Office Add-ins store.
-
Step 2:
Step 2. Connect your Greenhouse account and select the Candidates object to import.
-
Step 3:
Step 3. (Optional) Enable auto-refresh to keep your data updated automatically.
Step 1: Install Coefficient and Connect to Greenhouse
First, you’ll need to install the Coefficient add-in for Excel and connect to your Greenhouse account:
- Open Excel and navigate to the Insert tab.
- Click on Get Add-ins and search for “Coefficient”.
- Install the Coefficient add-in from the Office Add-ins store.
- Once installed, open the Coefficient sidebar and click “Import from…”.
- In the connector selection screen, scroll to the “Other” category.
Step 2: Import Greenhouse Candidates Data
Now that you’re connected, you can import your Greenhouse Candidates data:
- Select “Greenhouse” from the list of available connectors.
- Enter your Greenhouse API credentials when prompted.
- Choose “Candidates” from the list of available objects.
- Select the fields you want to import (e.g., name, email, phone, education, experience, tags).
- Apply any filters if needed to narrow down the data.
- Click “Import” to bring your Candidates data into Excel.
Step 3: Set Up Auto-Refresh (Optional)
To keep your Greenhouse Candidates data fresh, set up an automatic refresh schedule:
- Click on the refresh icon next to your imported data.
- Select “Schedule refresh” from the dropdown menu.
- Choose your preferred refresh frequency (hourly, daily, or weekly).
- Set the specific time for the refresh to occur.
- Click “Save” to activate the auto-refresh schedule.
Available Greenhouse Objects
- Candidates
- Departments
- Jobs
- Offers
- Offices
- Prospects
- Rejection Reasons
- Scorecards
- Sources
- Stages
- Users
- Interview Plans