Importing Departments data from Greenhouse into Google Sheets helps you understand your organizational structure, analyze hiring needs by department, and align recruiting efforts.
Instead of manual data work, create a live connection that stays updated automatically.
This guide shows you exactly how to import your Greenhouse Departments data into Google Sheets with Coefficient.
TLDR
-
Step 1:
Step 1. Install the Coefficient Google Sheets add-on and connect your Greenhouse account.
-
Step 2:
Step 2. Choose Import from Objects and select the Departments object.
-
Step 3:
Step 3. Pick the fields you need, add filters if you want, and import the data into your Sheet.
-
Step 4:
Step 4. Set up auto-refresh to keep your Departments data updated automatically.
block:tutorial
Step-by-Step Guide: Importing Your Greenhouse Data
Getting your Greenhouse Departments data into Google Sheets is simple with Coefficient. Just follow these steps:
step:1
step-title:Install and Connect Coefficient
First, add Coefficient to your Google Sheet.
Open Google Sheets. Go to Extensions > Add-ons > Get add-ons. Search for “Coefficient” and install it from the Google Workspace Marketplace.
After installing, open Coefficient from Extensions > Coefficient > Launch.
In the Coefficient sidebar, find and click on the Greenhouse connector to start the connection. Log into your Greenhouse account when prompted to authorize Coefficient.

step:2
step-title:Import Your Departments Data
Once connected, you can pull your data.
In the Coefficient sidebar, click the “Import from” button and select “Greenhouse Objects”. Choose “Departments” from the list of available data objects.
step:3
step-title:Configure and Import
Now, decide exactly what data you want.
Select the specific fields (columns) you need for your analysis. You can also apply filters or sort the data directly in Coefficient before you import.
When everything is set, click the “Import” button. Your Greenhouse Departments data will load straight into your Google Sheet.

step:4
step-title:Set Up Auto-Refresh (Optional)
Keep your Departments data current automatically.
Find your import in the Coefficient sidebar. Click the refresh icon’s dropdown menu and choose “Schedule”.
Pick how often you want the data to update – for example, daily or hourly. This keeps your spreadsheet fresh without manual work.
Available Greenhouse Objects
- Candidates
- Departments
- Jobs
- Offers
- Offices
- Prospects
- Rejection Reasons
- Scorecards
- Sources
- Stages
- Users
- Interview Plans
How to Import Candidates Data from Greenhouse into Google Sheets
Importing Candidates data from Greenhouse into Google Sheets helps you track applicants, manage recruitment workflows, and analyze candidate sources effectively.
Instead of manual data copy-pasting, you can set up a live connection that updates automatically.
This guide shows you exactly how to import your Greenhouse Candidates data into Google Sheets with Coefficient.
TLDR
-
Step 1:
Step 1. Install the Coefficient Google Sheets add-on and connect your Greenhouse account.
-
Step 2:
Step 2. Choose Import from Objects and select the Candidates object.
-
Step 3:
Step 3. Pick the fields you need, add filters if you want, and import the data into your Sheet.
-
Step 4:
Step 4. Set up auto-refresh to keep your Candidates data updated automatically.
block:tutorial
Step-by-Step Guide: Importing Your Greenhouse Data
Getting your Greenhouse Candidates data into Google Sheets is simple with Coefficient. Just follow these steps:
step:1
step-title:Install and Connect Coefficient
First, add Coefficient to your Google Sheet.
Open Google Sheets. Go to Extensions > Add-ons > Get add-ons. Search for “Coefficient” and install it from the Google Workspace Marketplace.
After installing, open Coefficient from Extensions > Coefficient > Launch.
In the Coefficient sidebar, find and click on the Greenhouse connector to start the connection. Log into your Greenhouse account when prompted to authorize Coefficient.
step:2
step-title:Import Your Candidates Data
Once connected, you can pull your data.
In the Coefficient sidebar, click the “Import from” button and select “Greenhouse Objects”. Choose “Candidates” from the list of available data objects.
step:3
step-title:Configure and Import
Now, decide exactly what data you want.
Select the specific fields (columns) you need for your analysis. You can also apply filters or sort the data directly in Coefficient before you import.
When everything is set, click the “Import” button. Your Greenhouse Candidates data will load straight into your Google Sheet.
step:4
step-title:Set Up Auto-Refresh (Optional)
Keep your Candidates data current automatically.
Find your import in the Coefficient sidebar. Click the refresh icon’s dropdown menu and choose “Schedule”.
Pick how often you want the data to update – for example, daily or hourly. This keeps your spreadsheet fresh without manual work.
Available Greenhouse Objects
- Candidates
- Departments
- Jobs
- Offers
- Offices
- Prospects
- Rejection Reasons
- Scorecards
- Sources
- Stages
- Users
- Interview Plans
How to Import Applications Data from Greenhouse into Google Sheets
Bringing your Greenhouse Applications data into Google Sheets helps you track candidate progress, analyze recruiting pipelines, and share key hiring metrics with your team.
Forget manual exports that go out of date fast. You can create a live link for real-time data.
This guide shows you exactly how to import your Greenhouse Applications data into Google Sheets with Coefficient.
TLDR
-
Step 1:
Step 1. Install the Coefficient Google Sheets add-on and connect your Greenhouse account.
-
Step 2:
Step 2. Choose Import from Objects and select the Applications object.
-
Step 3:
Step 3. Pick the fields you need, add filters if you want, and import the data into your Sheet.
-
Step 4:
Step 4. Set up auto-refresh to keep your Applications data updated automatically.
block:tutorial
Step-by-Step Guide: Importing Your Greenhouse Data
Getting your Greenhouse Applications data into Google Sheets is simple with Coefficient. Just follow these steps:
step:1
step-title:Install and Connect Coefficient
First, add Coefficient to your Google Sheet.
Open Google Sheets. Go to Extensions > Add-ons > Get add-ons. Search for “Coefficient” and install it from the Google Workspace Marketplace.
After installing, open Coefficient from Extensions > Coefficient > Launch.
In the Coefficient sidebar, find and click on the Greenhouse connector to start the connection. Log into your Greenhouse account when prompted to authorize Coefficient.
step:2
step-title:Import Your Applications Data
Once connected, you can pull your data.
In the Coefficient sidebar, click the “Import from” button and select “Greenhouse Objects”. Choose “Applications” from the list of available data objects.
step:3
step-title:Configure and Import
Now, decide exactly what data you want.
Select the specific fields (columns) you need for your analysis. You can also apply filters or sort the data directly in Coefficient before you import.
When everything is set, click the “Import” button. Your Greenhouse Applications data will load straight into your Google Sheet.
step:4
step-title:Set Up Auto-Refresh (Optional)
Keep your Applications data current automatically.
Find your import in the Coefficient sidebar. Click the refresh icon’s dropdown menu and choose “Schedule”.
Pick how often you want the data to update – for example, daily or hourly. This keeps your spreadsheet fresh without manual work.
Available Greenhouse Objects
- Candidates
- Departments
- Jobs
- Offers
- Offices
- Prospects
- Rejection Reasons
- Scorecards
- Sources
- Stages
- Users
- Interview Plans
How to Import Users Data from Greenhouse into Excel
Importing Users data from Greenhouse into Excel helps HR teams track recruiter performance, analyze team activities, and optimize hiring responsibilities. Coefficient makes this process seamless and automatic.
This guide will show you how to import your Greenhouse Users data into Excel using Coefficient.
TLDR
-
Step 1:
Step 1. Open Excel > Insert tab > Get Add-ins > Install Coefficient from Office Add-ins store.
-
Step 2:
Step 2. Connect your Greenhouse account and select the Users object to import.
-
Step 3:
Step 3. (Optional) Enable auto-refresh to keep your data updated automatically.
Step 1: Install Coefficient and Connect to Greenhouse
First, you’ll need to install the Coefficient add-in for Excel and connect to your Greenhouse account:
- Open Excel and navigate to the Insert tab.
- Click on Get Add-ins and search for “Coefficient”.
- Install the Coefficient add-in from the Office Add-ins store.
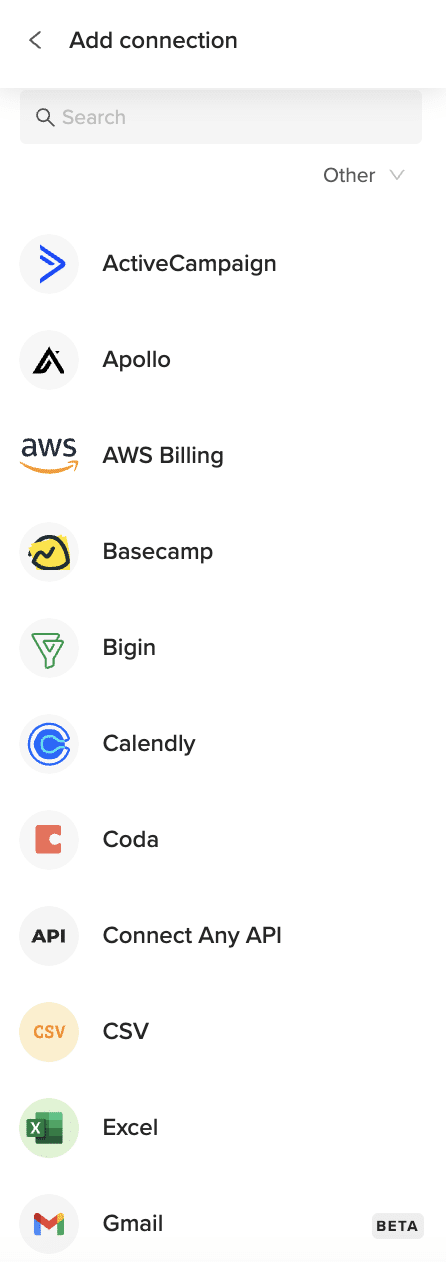
- Once installed, open the Coefficient sidebar and click “Import from…”.
- In the connector selection screen, scroll to the “Other” category.
Step 2: Import Greenhouse Users Data
Now that you’re connected, you can import your Greenhouse Users data:
- Select “Greenhouse” from the list of available connectors.
- Enter your Greenhouse API credentials when prompted.
- Choose “Users” from the list of available objects.
- Select the fields you want to import (e.g., name, email, role, permissions, department).
- Apply any filters if needed to narrow down the data.
- Click “Import” to bring your Users data into Excel.
Step 3: Set Up Auto-Refresh (Optional)
To keep your Greenhouse Users data fresh, set up an automatic refresh schedule:
- Click on the refresh icon next to your imported data.
- Select “Schedule refresh” from the dropdown menu.
- Choose your preferred refresh frequency (hourly, daily, or weekly).
- Set the specific time for the refresh to occur.
- Click “Save” to activate the auto-refresh schedule.
Available Greenhouse Objects
- Candidates
- Departments
- Jobs
- Offers
- Offices
- Prospects
- Rejection Reasons
- Scorecards
- Sources
- Stages
- Users
- Interview Plans
How to Import Stages Data from Greenhouse into Excel
Importing Stages data from Greenhouse into Excel helps recruitment teams track hiring workflows, analyze bottlenecks, and optimize candidate progression. Coefficient makes this process seamless and automatic.
This guide will show you how to import your Greenhouse Stages data into Excel using Coefficient.
TLDR
-
Step 1:
Step 1. Open Excel > Insert tab > Get Add-ins > Install Coefficient from Office Add-ins store.
-
Step 2:
Step 2. Connect your Greenhouse account and select the Stages object to import.
-
Step 3:
Step 3. (Optional) Enable auto-refresh to keep your data updated automatically.
Step 1: Install Coefficient and Connect to Greenhouse
First, you’ll need to install the Coefficient add-in for Excel and connect to your Greenhouse account:
- Open Excel and navigate to the Insert tab.
- Click on Get Add-ins and search for “Coefficient”.
- Install the Coefficient add-in from the Office Add-ins store.
- Once installed, open the Coefficient sidebar and click “Import from…”.
- In the connector selection screen, scroll to the “Other” category.
Step 2: Import Greenhouse Stages Data
Now that you’re connected, you can import your Greenhouse Stages data:
- Select “Greenhouse” from the list of available connectors.
- Enter your Greenhouse API credentials when prompted.
- Choose “Stages” from the list of available objects.
- Select the fields you want to import (e.g., name, job, order, active status).
- Apply any filters if needed to narrow down the data.
- Click “Import” to bring your Stages data into Excel.
Step 3: Set Up Auto-Refresh (Optional)
To keep your Greenhouse Stages data fresh, set up an automatic refresh schedule:
- Click on the refresh icon next to your imported data.
- Select “Schedule refresh” from the dropdown menu.
- Choose your preferred refresh frequency (hourly, daily, or weekly).
- Set the specific time for the refresh to occur.
- Click “Save” to activate the auto-refresh schedule.
Available Greenhouse Objects
- Candidates
- Departments
- Jobs
- Offers
- Offices
- Prospects
- Rejection Reasons
- Scorecards
- Sources
- Stages
- Users
- Interview Plans
How to Import Sources Data from Greenhouse into Excel
Importing Sources data from Greenhouse into Excel helps recruitment teams track where candidates come from, analyze channel effectiveness, and optimize sourcing strategies. Coefficient makes this process seamless and automatic.
This guide will show you how to import your Greenhouse Sources data into Excel using Coefficient.
TLDR
-
Step 1:
Step 1. Open Excel > Insert tab > Get Add-ins > Install Coefficient from Office Add-ins store.
-
Step 2:
Step 2. Connect your Greenhouse account and select the Sources object to import.
-
Step 3:
Step 3. (Optional) Enable auto-refresh to keep your data updated automatically.
Step 1: Install Coefficient and Connect to Greenhouse
First, you’ll need to install the Coefficient add-in for Excel and connect to your Greenhouse account:
- Open Excel and navigate to the Insert tab.
- Click on Get Add-ins and search for “Coefficient”.
- Install the Coefficient add-in from the Office Add-ins store.
- Once installed, open the Coefficient sidebar and click “Import from…”.
- In the connector selection screen, scroll to the “Other” category.
Step 2: Import Greenhouse Sources Data
Now that you’re connected, you can import your Greenhouse Sources data:
- Select “Greenhouse” from the list of available connectors.
- Enter your Greenhouse API credentials when prompted.
- Choose “Sources” from the list of available objects.
- Select the fields you want to import (e.g., name, type, source group, candidate count).
- Apply any filters if needed to narrow down the data.
- Click “Import” to bring your Sources data into Excel.
Step 3: Set Up Auto-Refresh (Optional)
To keep your Greenhouse Sources data fresh, set up an automatic refresh schedule:
- Click on the refresh icon next to your imported data.
- Select “Schedule refresh” from the dropdown menu.
- Choose your preferred refresh frequency (hourly, daily, or weekly).
- Set the specific time for the refresh to occur.
- Click “Save” to activate the auto-refresh schedule.
Available Greenhouse Objects
- Candidates
- Departments
- Jobs
- Offers
- Offices
- Prospects
- Rejection Reasons
- Scorecards
- Sources
- Stages
- Users
- Interview Plans
How to Import Scorecards Data from Greenhouse into Excel
Importing Scorecards data from Greenhouse into Excel helps recruitment teams analyze interview feedback, track evaluation metrics, and improve candidate assessment processes. Coefficient makes this process seamless and automatic.
This guide will show you how to import your Greenhouse Scorecards data into Excel using Coefficient.
TLDR
-
Step 1:
Step 1. Open Excel > Insert tab > Get Add-ins > Install Coefficient from Office Add-ins store.
-
Step 2:
Step 2. Connect your Greenhouse account and select the Scorecards object to import.
-
Step 3:
Step 3. (Optional) Enable auto-refresh to keep your data updated automatically.
Step 1: Install Coefficient and Connect to Greenhouse
First, you’ll need to install the Coefficient add-in for Excel and connect to your Greenhouse account:
- Open Excel and navigate to the Insert tab.
- Click on Get Add-ins and search for “Coefficient”.
- Install the Coefficient add-in from the Office Add-ins store.
- Once installed, open the Coefficient sidebar and click “Import from…”.
- In the connector selection screen, scroll to the “Other” category.
Step 2: Import Greenhouse Scorecards Data
Now that you’re connected, you can import your Greenhouse Scorecards data:
- Select “Greenhouse” from the list of available connectors.
- Enter your Greenhouse API credentials when prompted.
- Choose “Scorecards” from the list of available objects.
- Select the fields you want to import (e.g., interviewer, candidate, job, ratings, feedback, submitted date).
- Apply any filters if needed to narrow down the data.
- Click “Import” to bring your Scorecards data into Excel.
Step 3: Set Up Auto-Refresh (Optional)
To keep your Greenhouse Scorecards data fresh, set up an automatic refresh schedule:
- Click on the refresh icon next to your imported data.
- Select “Schedule refresh” from the dropdown menu.
- Choose your preferred refresh frequency (hourly, daily, or weekly).
- Set the specific time for the refresh to occur.
- Click “Save” to activate the auto-refresh schedule.
Available Greenhouse Objects
- Candidates
- Departments
- Jobs
- Offers
- Offices
- Prospects
- Rejection Reasons
- Scorecards
- Sources
- Stages
- Users
- Interview Plans
How to Import Rejection Reasons Data from Greenhouse into Excel
Importing Rejection Reasons data from Greenhouse into Excel helps recruitment teams analyze candidate feedback, identify hiring bottlenecks, and improve recruitment processes. Coefficient makes this process seamless and automatic.
This guide will show you how to import your Greenhouse Rejection Reasons data into Excel using Coefficient.
TLDR
-
Step 1:
Step 1. Open Excel > Insert tab > Get Add-ins > Install Coefficient from Office Add-ins store.
-
Step 2:
Step 2. Connect your Greenhouse account and select the Rejection Reasons object to import.
-
Step 3:
Step 3. (Optional) Enable auto-refresh to keep your data updated automatically.
Step 1: Install Coefficient and Connect to Greenhouse
First, you’ll need to install the Coefficient add-in for Excel and connect to your Greenhouse account:
- Open Excel and navigate to the Insert tab.
- Click on Get Add-ins and search for “Coefficient”.
- Install the Coefficient add-in from the Office Add-ins store.
- Once installed, open the Coefficient sidebar and click “Import from…”.
- In the connector selection screen, scroll to the “Other” category.
Step 2: Import Greenhouse Rejection Reasons Data
Now that you’re connected, you can import your Greenhouse Rejection Reasons data:
- Select “Greenhouse” from the list of available connectors.
- Enter your Greenhouse API credentials when prompted.
- Choose “Rejection Reasons” from the list of available objects.
- Select the fields you want to import (e.g., name, type, active status, usage count).
- Apply any filters if needed to narrow down the data.
- Click “Import” to bring your Rejection Reasons data into Excel.
Step 3: Set Up Auto-Refresh (Optional)
To keep your Greenhouse Rejection Reasons data fresh, set up an automatic refresh schedule:
- Click on the refresh icon next to your imported data.
- Select “Schedule refresh” from the dropdown menu.
- Choose your preferred refresh frequency (hourly, daily, or weekly).
- Set the specific time for the refresh to occur.
- Click “Save” to activate the auto-refresh schedule.
Available Greenhouse Objects
- Candidates
- Departments
- Jobs
- Offers
- Offices
- Prospects
- Rejection Reasons
- Scorecards
- Sources
- Stages
- Users
- Interview Plans
How to Import Prospects Data from Greenhouse into Excel
Importing Prospects data from Greenhouse into Excel helps recruitment teams track potential talent, analyze sourcing effectiveness, and optimize early-stage recruitment. Coefficient makes this process seamless and automatic.
This guide will show you how to import your Greenhouse Prospects data into Excel using Coefficient.
TLDR
-
Step 1:
Step 1. Open Excel > Insert tab > Get Add-ins > Install Coefficient from Office Add-ins store.
-
Step 2:
Step 2. Connect your Greenhouse account and select the Prospects object to import.
-
Step 3:
Step 3. (Optional) Enable auto-refresh to keep your data updated automatically.
Step 1: Install Coefficient and Connect to Greenhouse
First, you’ll need to install the Coefficient add-in for Excel and connect to your Greenhouse account:
- Open Excel and navigate to the Insert tab.
- Click on Get Add-ins and search for “Coefficient”.
- Install the Coefficient add-in from the Office Add-ins store.
- Once installed, open the Coefficient sidebar and click “Import from…”.
- In the connector selection screen, scroll to the “Other” category.
Step 2: Import Greenhouse Prospects Data
Now that you’re connected, you can import your Greenhouse Prospects data:
- Select “Greenhouse” from the list of available connectors.
- Enter your Greenhouse API credentials when prompted.
- Choose “Prospects” from the list of available objects.
- Select the fields you want to import (e.g., name, email, job, source, stage, created date).
- Apply any filters if needed to narrow down the data.
- Click “Import” to bring your Prospects data into Excel.
Step 3: Set Up Auto-Refresh (Optional)
To keep your Greenhouse Prospects data fresh, set up an automatic refresh schedule:
- Click on the refresh icon next to your imported data.
- Select “Schedule refresh” from the dropdown menu.
- Choose your preferred refresh frequency (hourly, daily, or weekly).
- Set the specific time for the refresh to occur.
- Click “Save” to activate the auto-refresh schedule.
Available Greenhouse Objects
- Candidates
- Departments
- Jobs
- Offers
- Offices
- Prospects
- Rejection Reasons
- Scorecards
- Sources
- Stages
- Users
- Interview Plans
How to Import Offices Data from Greenhouse into Excel
Importing Offices data from Greenhouse into Excel helps HR teams track location-based recruitment, analyze hiring distribution, and plan geographical expansion. Coefficient makes this process seamless and automatic.
This guide will show you how to import your Greenhouse Offices data into Excel using Coefficient.
TLDR
-
Step 1:
Step 1. Open Excel > Insert tab > Get Add-ins > Install Coefficient from Office Add-ins store.
-
Step 2:
Step 2. Connect your Greenhouse account and select the Offices object to import.
-
Step 3:
Step 3. (Optional) Enable auto-refresh to keep your data updated automatically.
Step 1: Install Coefficient and Connect to Greenhouse
First, you’ll need to install the Coefficient add-in for Excel and connect to your Greenhouse account:
- Open Excel and navigate to the Insert tab.
- Click on Get Add-ins and search for “Coefficient”.
- Install the Coefficient add-in from the Office Add-ins store.
- Once installed, open the Coefficient sidebar and click “Import from…”.
- In the connector selection screen, scroll to the “Other” category.
Step 2: Import Greenhouse Offices Data
Now that you’re connected, you can import your Greenhouse Offices data:
- Select “Greenhouse” from the list of available connectors.
- Enter your Greenhouse API credentials when prompted.
- Choose “Offices” from the list of available objects.
- Select the fields you want to import (e.g., name, location, primary contact, address).
- Apply any filters if needed to narrow down the data.
- Click “Import” to bring your Offices data into Excel.
Step 3: Set Up Auto-Refresh (Optional)
To keep your Greenhouse Offices data fresh, set up an automatic refresh schedule:
- Click on the refresh icon next to your imported data.
- Select “Schedule refresh” from the dropdown menu.
- Choose your preferred refresh frequency (hourly, daily, or weekly).
- Set the specific time for the refresh to occur.
- Click “Save” to activate the auto-refresh schedule.
Available Greenhouse Objects
- Candidates
- Departments
- Jobs
- Offers
- Offices
- Prospects
- Rejection Reasons
- Scorecards
- Sources
- Stages
- Users
- Interview Plans