Fetch live Inventory Total Details from Sage Intacct into Excel to value your inventory accurately. In this guide, you’ll install Coefficient, import total detail records, and set up auto-refresh.
TLDR
-
Step 1:
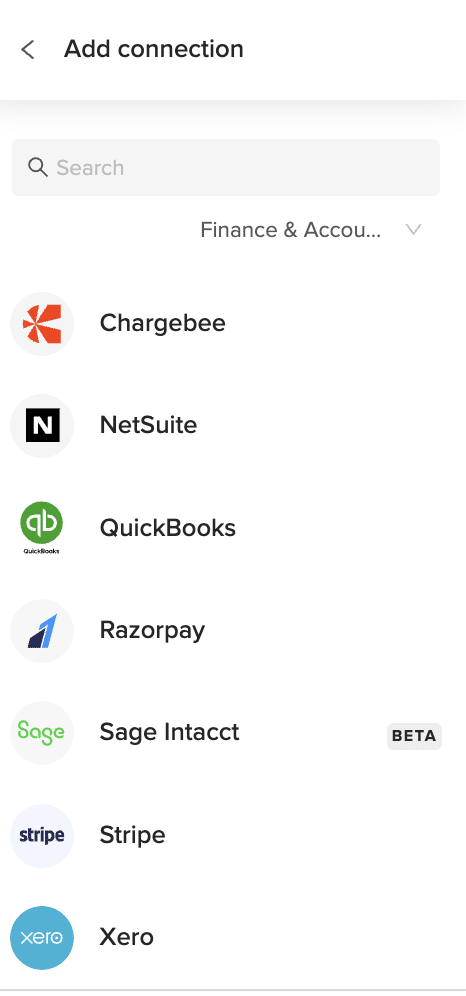
Install the Coefficient add-in and connect to Sage Intacct.
-
Step 2:
Choose “Import from Objects” > “Inventory Total Details” > Import.
-
Step 3:
Apply filters if needed, then confirm.
-
Step 4:
Enable auto-refresh to keep data updated automatically.
Step-by-Step Guide


What Sage Intacct Data Is Imported?
Rate Table Timesheet Entries
- Rate Table Credit Card Entries
- Rate Table Employee Expense Entries
- Rate Table Accounts Payable Entries
- Rate Table General Ledger Entries
- Standard Tasks
- Contract Expenses
- Contracts
- Employees
- Expense Adjustments
- Adjustment Lines
- Expense Payment Types
- Expense Reports
How to Import Item GL Groups Data from Sage Intacct into Excel
Pull live Item GL Groups from Sage Intacct into Excel to analyze your groupings for reporting and budgeting. In this guide, you’ll install Coefficient, import GL groups, and set up automatic refresh.
TLDR
-
Step 1:
Install the Coefficient add-in and connect to Sage Intacct.
-
Step 2:
Choose “Import from Objects” > “Item GL Groups” > Import.
-
Step 3:
Apply filters if needed, then confirm.
-
Step 4:
Enable auto-refresh to keep data updated automatically.
Step-by-Step Guide
What Sage Intacct Data Is Imported?
Rate Table Timesheet Entries
- Rate Table Credit Card Entries
- Rate Table Employee Expense Entries
- Rate Table Accounts Payable Entries
- Rate Table General Ledger Entries
- Standard Tasks
- Contract Expenses
- Contracts
- Employees
- Expense Adjustments
- Adjustment Lines
- Expense Payment Types
- Expense Reports
How to Import Items Data from Sage Intacct into Excel
Pull live Items from Sage Intacct into Excel to see your full catalog of products and services. In this guide, you’ll install Coefficient, import item records, and enable automatic refresh.
TLDR
-
Step 1:
Install the Coefficient add-in and connect to Sage Intacct.
-
Step 2:
Choose “Import from Objects” > “Items” > Import.
-
Step 3:
Apply filters if needed, then confirm.
-
Step 4:
Enable auto-refresh to keep data updated automatically.
Step-by-Step Guide
What Sage Intacct Data Is Imported?
Rate Table Timesheet Entries
- Rate Table Credit Card Entries
- Rate Table Employee Expense Entries
- Rate Table Accounts Payable Entries
- Rate Table General Ledger Entries
- Standard Tasks
- Contract Expenses
- Contracts
- Employees
- Expense Adjustments
- Adjustment Lines
- Expense Payment Types
- Expense Reports
How to Import Journal Entries Data from Sage Intacct into Excel
Import live journal entries from Sage Intacct into Excel to audit transactions and uncover trends. This guide covers installing Coefficient, importing entries, and setting up auto-refresh.
TLDR
-
Step 1:
Install the Coefficient add-in and connect to Sage Intacct.
-
Step 2:
Choose “Import from Objects” > “Journal Entries” > Import.
-
Step 3:
Apply filters if needed, then confirm.
-
Step 4:
Enable auto-refresh to keep data updated automatically.
Step-by-Step Guide
What Sage Intacct Data Is Imported?
Rate Table Timesheet Entries
- Rate Table Credit Card Entries
- Rate Table Employee Expense Entries
- Rate Table Accounts Payable Entries
- Rate Table General Ledger Entries
- Standard Tasks
- Contract Expenses
- Contracts
- Employees
- Expense Adjustments
- Adjustment Lines
- Expense Payment Types
- Expense Reports
How to Import Journal Entry Lines Data from Sage Intacct into Excel
Import live Journal Entry Lines from Sage Intacct into Excel to audit every transaction detail. In this guide, you’ll install Coefficient, fetch line items, and set up automatic refresh.
TLDR
-
Step 1:
Install the Coefficient add-in and connect to Sage Intacct.
-
Step 2:
Choose “Import from Objects” > “Journal Entry Lines” > Import.
-
Step 3:
Apply filters if needed, then confirm.
-
Step 4:
Enable auto-refresh to keep data updated automatically.
Step-by-Step Guide
What Sage Intacct Data Is Imported?
Rate Table Timesheet Entries
- Rate Table Credit Card Entries
- Rate Table Employee Expense Entries
- Rate Table Accounts Payable Entries
- Rate Table General Ledger Entries
- Standard Tasks
- Contract Expenses
- Contracts
- Employees
- Expense Adjustments
- Adjustment Lines
- Expense Payment Types
- Expense Reports
How to Import Keyword Performance Data from Microsoft Ads into Excel
Analyzing keyword performance from Microsoft Ads in Excel allows marketers to identify which terms drive traffic, conversions, and ROI, enabling smarter bidding decisions and budget allocation.
Rather than manually exporting keyword data that quickly becomes outdated, you can establish a live connection for always-current insights.
TLDR
-
Step 1:
Install Coefficient from the Office Add-ins store in Excel
-
Step 2:
Connect your Microsoft Ads account to Coefficient
-
Step 3:
Import Keyword Performance data with customizable metrics
-
Step 4:
Set up auto-refresh to keep your keyword data current
Step 1: Install Coefficient and Connect Your Microsoft Ads Account
Start by installing the Coefficient add-in in your Excel workbook and connecting to your Microsoft Ads account.
- Open Excel and navigate to the Insert tab
- Click Get Add-ins and search for “Coefficient”
- Install the Coefficient add-in from the Office Add-ins store
- Once installed, open the Coefficient sidebar and click “Import”
- Select “Microsoft Ads” from the list of available connectors
- Follow the authentication prompts to connect your Microsoft Ads account
Step 2: Import Keyword Performance Data
After connecting your Microsoft Ads account, you can import your Keyword Performance data:
- In the Coefficient sidebar, click “Import from Microsoft Ads”
- Select “Keyword Performance” from the list of available objects
- Choose which metrics you want to include (impressions, clicks, CTR, cost, etc.)
- Apply any filters to focus on specific campaigns or date ranges
- Click “Import” to bring the data into your Excel spreadsheet

Step 3: Set Up Auto-Refresh for Your Data
Keep your Microsoft Ads keyword data fresh by setting up automatic refreshes:
- Select any cell in your imported data range
- Open the Coefficient sidebar and click “Refresh”
- Click “Schedule Refresh” to set up automated updates
- Choose your preferred refresh frequency (hourly, daily, or weekly)
- Confirm your settings to activate the auto-refresh schedule
Analyze Your Keyword Performance
With your Keyword Performance data now in Excel, you can identify your highest-performing and underperforming keywords. Create pivot tables to analyze performance by match type, or build charts that visualize keyword trends over time.
Use Excel’s conditional formatting to highlight keywords with high costs but low conversions, or identify opportunities where increasing bids could yield better results based on current performance metrics.
Microsoft Ads Data Available in Coefficient
Available Objects
- Campaign Performance
- Conversion Performance
- Keyword Performance
- Search Query Performance
- Account Performance
- Ad Dynamic Text Performance
- Ad Extension By Ad
- Ad Extension By Keyword
- Ad Extension Detail
- Ad Performance
- Age Gender Audience
- Audience Performance
How to Import List of Audiences Data from Mailchimp into Excel
Importing your Mailchimp List of Audiences into Excel lets you view and manage every audience at once. This tutorial shows how to connect Coefficient and import all lists.
TLDR
-
Step 1:
Install Coefficient in Excel and authenticate Mailchimp.
-
Step 2:
Import “List of Audiences” via “Import from Objects.”
-
Step 3:
Optionally schedule auto-refresh for up-to-date lists.
Step 1: Installation and Connection
In Excel, go to Insert › Get Add-ins › search “Coefficient” › Install. Open the Coefficient sidebar and sign in to Mailchimp.
Step 2: Import List of Audiences Data
Select “Import from Objects,” choose “List of Audiences,” then click “Import.” All audience names and IDs will load into your sheet.
Step 3: (Optional) Set Up Auto-Refresh
Click “Refresh” › “Schedule” in Coefficient. Choose daily or custom cadence—Coefficient will refresh your list of audiences automatically.
Available Mailchimp Objects
- Audience
- Campaigns
- Audience Activity
- Audience Growth History
- Audience Locations
- Audience Segments
- List of Audiences
- Conversations
- Contact List
- Reports
- Audience Clients
- Audience Interest Categories
- Audience Webhooks
- Automations
- Connected Sites
How to Import Meta Ads Ad Creatives Data into Excel
Analyzing Ad Creatives data from Meta Ads in Excel helps marketing teams understand which images, videos, and copy are most effective at capturing attention and driving conversions across Facebook, Instagram, and Meta’s advertising network.
Instead of manually exporting data that quickly becomes outdated, you can create a live connection that refreshes automatically with the latest creative performance metrics.
TLDR
-
Step 1:
Install Coefficient from the Office Add-ins store
-
Step 2:
Connect to your Meta Ads account
-
Step 3:
Select Ad Creatives as your data object
-
Step 4:
Configure the creative elements you want to analyze
-
Step 5:
Import into Excel and set up auto-refresh
Step 1: Install Coefficient and Connect to Meta Ads
Begin by installing the Coefficient add-in and connecting it to your Meta Ads account:
- Open Excel and navigate to the Insert tab
- Click on Get Add-ins
- Search for “Coefficient” in the Office Add-ins store
- Click Add to install the Coefficient add-in
- Once installed, the Coefficient sidebar will appear
- Click “Import” to begin connecting data sources
- Select “Meta Ads” from the marketing integrations
- Log in with your Meta account and authorize Coefficient to access your ads data
Step 2: Select and Configure Meta Ads Ad Creatives Data
After connecting your Meta Ads account, configure your Ad Creatives data import:
- Choose your Meta Ads account from the dropdown menu
- Select “Ad Creatives” as your data object
-
- Creative type (image, video, carousel, etc.)
- Creative dimensions and specifications
- Ad copy and headlines
- Call-to-action buttons
- Platform placement (Facebook, Instagram, Messenger)
- Apply filters if you want to focus on specific creatives or formats
- Preview your selection to ensure it provides the insights you need
Step 3: Import and Set Up Auto-Refresh
Once you’ve configured your Meta Ads Ad Creatives data selection, import it into Excel and set up automatic refreshes:
- Click “Import” to bring the Ad Creatives data into your Excel worksheet
- Choose where you want the data to be placed in your spreadsheet
-
- Navigate to the “Automations” tab in the Coefficient sidebar
- Select “Schedule Refresh” for your imported creatives data
- Choose your preferred refresh frequency (hourly, daily, weekly)
- Optionally, cross-reference with performance data to analyze creative effectiveness
Available Meta Ads Data
Data Objects
- Ad Sets
- Ads
- Ad Creatives
Analyzing Meta Ads Ad Creatives Data in Excel
With your Meta Ads Ad Creatives data now in Excel, you can create valuable analyses like:
- Creative asset inventory and organization by platform
- Comparison of different creative formats and approaches
- Cross-referencing creatives with performance metrics across platforms
- Identifying which visual elements and copy drive engagement on different Meta platforms
- Custom dashboards that show creative effectiveness trends
Related Resources
For more information about working with Meta Ads data in your spreadsheets:
Start importing your Meta Ads Ad Creatives data into Excel today with Coefficient and transform how your team manages and analyzes creative assets across Meta’s platforms.
How to Import Messaging Insights Data from Facebook Insights into Excel
Understanding your Messenger performance is essential for customer service and engagement strategies. With Coefficient, you can bring all your Facebook Messaging Insights directly into Excel for better analysis.
This guide shows you how to import Facebook Messaging Insights data into Excel quickly and efficiently.
TLDR
-
Step 1:
Install the Coefficient add-in for Excel from the Office Add-ins store
-
Step 2:
Connect your Facebook Insights account through Coefficient
-
Step 3:
Import Messaging Insights data using Coefficients import tool
-
Step 4:
Set up auto-refresh to keep your messaging data updated automatically
How to Import Facebook Messaging Insights into Excel
Step 1: Install Coefficient and Connect Your Facebook Insights Account
First, you’ll need to install the Coefficient add-in and connect it to your Facebook account:
- Open Excel
- Go to the Insert tab
- Click Get Add-ins
- Search for “Coefficient” and install it from the Office Add-ins store
- Once installed, open the Coefficient sidebar
- Click “Import from…” to see available data sources
Step 2: Select Facebook Insights as Your Data Source
Now you’ll need to select Facebook Insights and authenticate your account:
- In the Coefficient sidebar, select “Marketing” from the categories
- Choose “Facebook Insights” from the available marketing integrations
- Click “Connect” and follow the authentication prompts to link your Facebook account
- Once connected, you’ll see the available data objects from Facebook Insights
Step 3: Import Facebook Messaging Insights Data
After connecting your account, you can import your Messaging Insights data:
- Select “Messaging Insights” from the list of available objects
- Choose the specific metrics you want to import (conversation volume, response time, etc.)
- Apply any filters needed (date range, message types, etc.)
- Select where to import the data in your spreadsheet
- Click “Import” to bring the messaging data into Excel
With your messaging insights in Excel, you can track response times, message volume, and conversation trends to improve your customer communication strategy on Facebook.
What Facebook Insights Data Can You Import?
Objects
- Engagement Metrics
- Campaign Metrics
- Post Insights
- Page Insights
- Messaging Insights
- Audience Insights
How to Import Meta Ads Ad Sets Data into Excel
Analyzing Meta Ads Ad Sets data in Excel helps marketing teams evaluate targeting strategies, budget allocation, and audience performance across Facebook, Instagram, and other Meta platforms.
Instead of manually exporting data that quickly becomes outdated, you can create a live connection that refreshes automatically with the latest ad set metrics.
TLDR
-
Step 1:
Install Coefficient from the Office Add-ins store
-
Step 2:
Connect to your Meta Ads account
-
Step 3:
Select Ad Sets as your data object
-
Step 4:
Choose metrics to analyze by ad set
-
Step 5:
Import into Excel and set up auto-refresh
Step 1: Install Coefficient and Connect to Meta Ads
Begin by installing the Coefficient add-in and connecting it to your Meta Ads account:
- Open Excel and navigate to the Insert tab
- Click on Get Add-ins
- Search for “Coefficient” in the Office Add-ins store
- Click Add to install the Coefficient add-in
- Once installed, the Coefficient sidebar will appear
- Click “Import” to begin connecting data sources
- Select “Meta Ads” from the marketing integrations
- Log in with your Meta account and authorize Coefficient to access your ads data
Step 2: Select and Configure Meta Ads Ad Sets Data
After connecting your Meta Ads account, configure your Ad Sets data import:
- Choose your Meta Ads account from the dropdown menu
- Set your desired date range (last 7 days, last 30 days, custom range, etc.)
- Select “Ad Sets” as your data object
-
- Daily budget to track spending limits
- Reach and frequency to measure audience exposure
- Cost per result to assess efficiency
- Conversion metrics to evaluate effectiveness by audience
- Apply filters if you want to focus on specific ad sets or campaigns
- Preview your selection to ensure it provides the insights you need
Step 3: Import and Set Up Auto-Refresh
Once you’ve configured your Meta Ads Ad Sets data selection, import it into Excel and set up automatic refreshes:
- Click “Import” to bring the Ad Sets data into your Excel worksheet
- Choose where you want the data to be placed in your spreadsheet
-
- Navigate to the “Automations” tab in the Coefficient sidebar
- Select “Schedule Refresh” for your imported ad sets data
- Choose your preferred refresh frequency (hourly, daily, weekly)
- Optionally, set up alerts for significant changes in ad set performance
Available Meta Ads Data
Data Objects
- Ad Sets
- Ads
- Ad Creatives
Analyzing Meta Ads Ad Sets Data in Excel
With your Meta Ads Ad Sets data now in Excel, you can create valuable analyses like:
- Audience performance comparison across different platforms and targeting parameters
- Budget allocation effectiveness by ad set and platform
- Performance trends over time by target audience
- Custom visualizations highlighting your most efficient audience segments
- Automated reports that track audience performance in real-time
Related Resources
For more information about working with Meta Ads data in your spreadsheets:
Start importing your Meta Ads Ad Sets data into Excel today with Coefficient and transform how your team analyzes audience targeting effectiveness across Meta’s platforms.