Bringing your Paymo Files data into Google Sheets helps you track project files, manage attachments related to tasks and projects, and organize your project assets.
Get this file data into your Sheet automatically, simplifying file management.
This guide shows you exactly how to import your Paymo Files data into Google Sheets with Coefficient.
TLDR
-
Step 1:
Step 1. Install the Coefficient Google Sheets add-on and connect your Paymo account.
-
Step 2:
Step 2. Choose Import from Objects and select the Files object.
-
Step 3:
Step 3. Pick the fields you need, add filters if you want, and import the data into your Sheet.
-
Step 4:
Step 4. Set up auto-refresh to keep your Files data updated automatically.
block:tutorial
Step-by-Step Guide: Importing Your Paymo Data
Getting your Paymo Files data into Google Sheets is simple with Coefficient. Just follow these steps:
step:1
step-title:Install and Connect Coefficient
First, add Coefficient to your Google Sheet.
Open Google Sheets. Go to Extensions > Add-ons > Get add-ons. Search for “Coefficient” and install it from the Google Workspace Marketplace.
After installing, open Coefficient from Extensions > Coefficient > Launch.
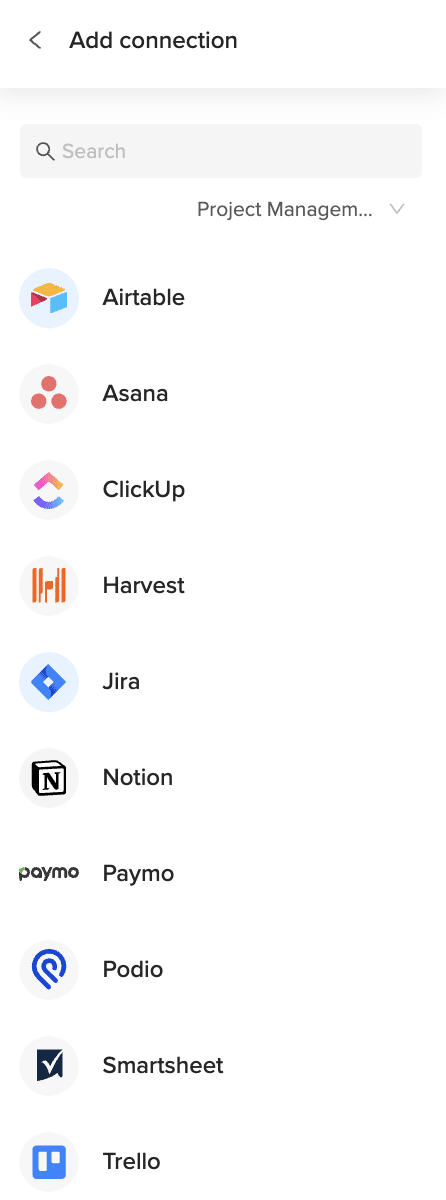
In the Coefficient sidebar, find and click on the Paymo connector to start the connection. Log into your Paymo account when prompted to authorize Coefficient.

step:2
step-title:Import Your Files Data
Once connected, you can pull your data.
In the Coefficient sidebar, click the “Import from” button and select “Paymo Objects”. Choose “Files” from the list of available data objects.
step:3
step-title:Configure and Import
Now, decide exactly what data you want.
Select the specific fields (columns) you need for your analysis. You can also apply filters or sort the data directly in Coefficient before you import.
When everything is set, click the “Import” button. Your Paymo Files data will load straight into your Google Sheet.

step:4
step-title:Set Up Auto-Refresh (Optional)
Keep your Files data current automatically.
Find your import in the Coefficient sidebar. Click the refresh icon’s dropdown menu and choose “Schedule”.
Pick how often you want the data to update – for example, daily or hourly. This keeps your spreadsheet fresh without manual work.
Available Paymo Objects
- Client Contacts
- Users
- Projects
- Project Statuses
- Workflows
- Task Lists
- Tasks
- Time Entries
- Invoices
- Invoice Templates
- Invoice Payments
- Estimates
How to Import Client Contacts Data from Paymo into Google Sheets
Bringing your Paymo Client Contacts data into Google Sheets helps you manage client information, track communication details, and ensure you have the right contact information readily available.
Instead of manual data entry, create a live link that automatically updates.
This guide shows you exactly how to import your Paymo Client Contacts data into Google Sheets with Coefficient.
TLDR
-
Step 1:
Step 1. Install the Coefficient Google Sheets add-on and connect your Paymo account.
-
Step 2:
Step 2. Choose Import from Objects and select the Client Contacts object.
-
Step 3:
Step 3. Pick the fields you need, add filters if you want, and import the data into your Sheet.
-
Step 4:
Step 4. Set up auto-refresh to keep your Client Contacts data updated automatically.
block:tutorial
Step-by-Step Guide: Importing Your Paymo Data
Getting your Paymo Client Contacts data into Google Sheets is simple with Coefficient. Just follow these steps:
step:1
step-title:Install and Connect Coefficient
First, add Coefficient to your Google Sheet.
Open Google Sheets. Go to Extensions > Add-ons > Get add-ons. Search for “Coefficient” and install it from the Google Workspace Marketplace.
After installing, open Coefficient from Extensions > Coefficient > Launch.
In the Coefficient sidebar, find and click on the Paymo connector to start the connection. Log into your Paymo account when prompted to authorize Coefficient.
step:2
step-title:Import Your Client Contacts Data
Once connected, you can pull your data.
In the Coefficient sidebar, click the “Import from” button and select “Paymo Objects”. Choose “Client Contacts” from the list of available data objects.
step:3
step-title:Configure and Import
Now, decide exactly what data you want.
Select the specific fields (columns) you need for your analysis. You can also apply filters or sort the data directly in Coefficient before you import.
When everything is set, click the “Import” button. Your Paymo Client Contacts data will load straight into your Google Sheet.
step:4
step-title:Set Up Auto-Refresh (Optional)
Keep your Client Contacts data current automatically.
Find your import in the Coefficient sidebar. Click the refresh icon’s dropdown menu and choose “Schedule”.
Pick how often you want the data to update – for example, daily or hourly. This keeps your spreadsheet fresh without manual work.
Available Paymo Objects
- Client Contacts
- Users
- Projects
- Project Statuses
- Workflows
- Task Lists
- Tasks
- Time Entries
- Invoices
- Invoice Templates
- Invoice Payments
- Estimates
How to Import Discussions Data from Paymo into Google Sheets
Bringing your Paymo Discussions data into Google Sheets helps you track project communication, monitor conversations related to tasks and projects, and keep records of team discussions.
Get this communication data into your Sheet automatically, simplifying discussion tracking.
This guide shows you exactly how to import your Paymo Discussions data into Google Sheets with Coefficient.
TLDR
-
Step 1:
Step 1. Install the Coefficient Google Sheets add-on and connect your Paymo account.
-
Step 2:
Step 2. Choose Import from Objects and select the Discussions object.
-
Step 3:
Step 3. Pick the fields you need, add filters if you want, and import the data into your Sheet.
-
Step 4:
Step 4. Set up auto-refresh to keep your Discussions data updated automatically.
block:tutorial
Step-by-Step Guide: Importing Your Paymo Data
Getting your Paymo Discussions data into Google Sheets is simple with Coefficient. Just follow these steps:
step:1
step-title:Install and Connect Coefficient
First, add Coefficient to your Google Sheet.
Open Google Sheets. Go to Extensions > Add-ons > Get add-ons. Search for “Coefficient” and install it from the Google Workspace Marketplace.
After installing, open Coefficient from Extensions > Coefficient > Launch.
In the Coefficient sidebar, find and click on the Paymo connector to start the connection. Log into your Paymo account when prompted to authorize Coefficient.
step:2
step-title:Import Your Discussions Data
Once connected, you can pull your data.
In the Coefficient sidebar, click the “Import from” button and select “Paymo Objects”. Choose “Discussions” from the list of available data objects.
step:3
step-title:Configure and Import
Now, decide exactly what data you want.
Select the specific fields (columns) you need for your analysis. You can also apply filters or sort the data directly in Coefficient before you import.
When everything is set, click the “Import” button. Your Paymo Discussions data will load straight into your Google Sheet.
step:4
step-title:Set Up Auto-Refresh (Optional)
Keep your Discussions data current automatically.
Find your import in the Coefficient sidebar. Click the refresh icon’s dropdown menu and choose “Schedule”.
Pick how often you want the data to update – for example, daily or hourly. This keeps your spreadsheet fresh without manual work.
Available Paymo Objects
- Client Contacts
- Users
- Projects
- Project Statuses
- Workflows
- Task Lists
- Tasks
- Time Entries
- Invoices
- Invoice Templates
- Invoice Payments
- Estimates
How to Import Estimate Templates Data from Paymo into Google Sheets
Bringing your Paymo Estimate Templates data into Google Sheets helps you manage your quoting template structures, track design elements, and ensure consistency in client estimates.
Get this template data into your Sheet automatically, simplifying template management.
This guide shows you exactly how to import your Paymo Estimate Templates data into Google Sheets with Coefficient.
TLDR
-
Step 1:
Step 1. Install the Coefficient Google Sheets add-on and connect your Paymo account.
-
Step 2:
Step 2. Choose Import from Objects and select the Estimate Templates object.
-
Step 3:
Step 3. Pick the fields you need, add filters if you want, and import the data into your Sheet.
-
Step 4:
Step 4. Set up auto-refresh to keep your Estimate Templates data updated automatically.
block:tutorial
Step-by-Step Guide: Importing Your Paymo Data
Getting your Paymo Estimate Templates data into Google Sheets is simple with Coefficient. Just follow these steps:
step:1
step-title:Install and Connect Coefficient
First, add Coefficient to your Google Sheet.
Open Google Sheets. Go to Extensions > Add-ons > Get add-ons. Search for “Coefficient” and install it from the Google Workspace Marketplace.
After installing, open Coefficient from Extensions > Coefficient > Launch.
In the Coefficient sidebar, find and click on the Paymo connector to start the connection. Log into your Paymo account when prompted to authorize Coefficient.
step:2
step-title:Import Your Estimate Templates Data
Once connected, you can pull your data.
In the Coefficient sidebar, click the “Import from” button and select “Paymo Objects”. Choose “Estimate Templates” from the list of available data objects.
step:3
step-title:Configure and Import
Now, decide exactly what data you want.
Select the specific fields (columns) you need for your analysis. You can also apply filters or sort the data directly in Coefficient before you import.
When everything is set, click the “Import” button. Your Paymo Estimate Templates data will load straight into your Google Sheet.
step:4
step-title:Set Up Auto-Refresh (Optional)
Keep your Estimate Templates data current automatically.
Find your import in the Coefficient sidebar. Click the refresh icon’s dropdown menu and choose “Schedule”.
Pick how often you want the data to update – for example, daily or hourly. This keeps your spreadsheet fresh without manual work.
Available Paymo Objects
- Client Contacts
- Users
- Projects
- Project Statuses
- Workflows
- Task Lists
- Tasks
- Time Entries
- Invoices
- Invoice Templates
- Invoice Payments
- Estimates
How to Import Estimates Data from Paymo into Google Sheets
Bringing your Paymo Estimates data into Google Sheets helps you manage project quotes, track estimate status (sent, accepted, rejected), and analyze your sales pipeline.
Get this estimate data into your Sheet automatically, simplifying quote tracking.
This guide shows you exactly how to import your Paymo Estimates data into Google Sheets with Coefficient.
TLDR
-
Step 1:
Step 1. Install the Coefficient Google Sheets add-on and connect your Paymo account.
-
Step 2:
Step 2. Choose Import from Objects and select the Estimates object.
-
Step 3:
Step 3. Pick the fields you need, add filters if you want, and import the data into your Sheet.
-
Step 4:
Step 4. Set up auto-refresh to keep your Estimates data updated automatically.
block:tutorial
Step-by-Step Guide: Importing Your Paymo Data
Getting your Paymo Estimates data into Google Sheets is simple with Coefficient. Just follow these steps:
step:1
step-title:Install and Connect Coefficient
First, add Coefficient to your Google Sheet.
Open Google Sheets. Go to Extensions > Add-ons > Get add-ons. Search for “Coefficient” and install it from the Google Workspace Marketplace.
After installing, open Coefficient from Extensions > Coefficient > Launch.
In the Coefficient sidebar, find and click on the Paymo connector to start the connection. Log into your Paymo account when prompted to authorize Coefficient.
step:2
step-title:Import Your Estimates Data
Once connected, you can pull your data.
In the Coefficient sidebar, click the “Import from” button and select “Paymo Objects”. Choose “Estimates” from the list of available data objects.
step:3
step-title:Configure and Import
Now, decide exactly what data you want.
Select the specific fields (columns) you need for your analysis. You can also apply filters or sort the data directly in Coefficient before you import.
When everything is set, click the “Import” button. Your Paymo Estimates data will load straight into your Google Sheet.
step:4
step-title:Set Up Auto-Refresh (Optional)
Keep your Estimates data current automatically.
Find your import in the Coefficient sidebar. Click the refresh icon’s dropdown menu and choose “Schedule”.
Pick how often you want the data to update – for example, daily or hourly. This keeps your spreadsheet fresh without manual work.
Available Paymo Objects
- Client Contacts
- Users
- Projects
- Project Statuses
- Workflows
- Task Lists
- Tasks
- Time Entries
- Invoices
- Invoice Templates
- Invoice Payments
- Estimates
How to Import Workflows Data from Paymo into Google Sheets
Bringing your Paymo Workflows data into Google Sheets helps you manage your project process structures, track workflow definitions, and ensure consistency across different projects.
Get this structural data into your Sheet automatically, simplifying process management.
This guide shows you exactly how to import your Paymo Workflows data into Google Sheets with Coefficient.
TLDR
-
Step 1:
Step 1. Install the Coefficient Google Sheets add-on and connect your Paymo account.
-
Step 2:
Step 2. Choose Import from Objects and select the Workflows object.
-
Step 3:
Step 3. Pick the fields you need, add filters if you want, and import the data into your Sheet.
-
Step 4:
Step 4. Set up auto-refresh to keep your Workflows data updated automatically.
block:tutorial
Step-by-Step Guide: Importing Your Paymo Data
Getting your Paymo Workflows data into Google Sheets is simple with Coefficient. Just follow these steps:
step:1
step-title:Install and Connect Coefficient
First, add Coefficient to your Google Sheet.
Open Google Sheets. Go to Extensions > Add-ons > Get add-ons. Search for “Coefficient” and install it from the Google Workspace Marketplace.
After installing, open Coefficient from Extensions > Coefficient > Launch.
In the Coefficient sidebar, find and click on the Paymo connector to start the connection. Log into your Paymo account when prompted to authorize Coefficient.
step:2
step-title:Import Your Workflows Data
Once connected, you can pull your data.
In the Coefficient sidebar, click the “Import from” button and select “Paymo Objects”. Choose “Workflows” from the list of available data objects.
step:3
step-title:Configure and Import
Now, decide exactly what data you want.
Select the specific fields (columns) you need for your analysis. You can also apply filters or sort the data directly in Coefficient before you import.
When everything is set, click the “Import” button. Your Paymo Workflows data will load straight into your Google Sheet.
step:4
step-title:Set Up Auto-Refresh (Optional)
Keep your Workflows data current automatically.
Find your import in the Coefficient sidebar. Click the refresh icon’s dropdown menu and choose “Schedule”.
Pick how often you want the data to update – for example, daily or hourly. This keeps your spreadsheet fresh without manual work.
Available Paymo Objects
- Client Contacts
- Users
- Projects
- Project Statuses
- Workflows
- Task Lists
- Tasks
- Time Entries
- Invoices
- Invoice Templates
- Invoice Payments
- Estimates
How to Import Users Data from Paymo into Google Sheets
Bringing your Paymo Users data into Google Sheets helps you manage team member information, track user roles, and analyze workload distribution across your team.
Get this user data into your Sheet automatically, saving time on manual tracking.
This guide shows you exactly how to import your Paymo Users data into Google Sheets with Coefficient.
TLDR
-
Step 1:
Step 1. Install the Coefficient Google Sheets add-on and connect your Paymo account.
-
Step 2:
Step 2. Choose Import from Objects and select the Users object.
-
Step 3:
Step 3. Pick the fields you need, add filters if you want, and import the data into your Sheet.
-
Step 4:
Step 4. Set up auto-refresh to keep your Users data updated automatically.
block:tutorial
Step-by-Step Guide: Importing Your Paymo Data
Getting your Paymo Users data into Google Sheets is simple with Coefficient. Just follow these steps:
step:1
step-title:Install and Connect Coefficient
First, add Coefficient to your Google Sheet.
Open Google Sheets. Go to Extensions > Add-ons > Get add-ons. Search for “Coefficient” and install it from the Google Workspace Marketplace.
After installing, open Coefficient from Extensions > Coefficient > Launch.
In the Coefficient sidebar, find and click on the Paymo connector to start the connection. Log into your Paymo account when prompted to authorize Coefficient.
step:2
step-title:Import Your Users Data
Once connected, you can pull your data.
In the Coefficient sidebar, click the “Import from” button and select “Paymo Objects”. Choose “Users” from the list of available data objects.
step:3
step-title:Configure and Import
Now, decide exactly what data you want.
Select the specific fields (columns) you need for your analysis. You can also apply filters or sort the data directly in Coefficient before you import.
When everything is set, click the “Import” button. Your Paymo Users data will load straight into your Google Sheet.
step:4
step-title:Set Up Auto-Refresh (Optional)
Keep your Users data current automatically.
Find your import in the Coefficient sidebar. Click the refresh icon’s dropdown menu and choose “Schedule”.
Pick how often you want the data to update – for example, daily or hourly. This keeps your spreadsheet fresh without manual work.
Available Paymo Objects
- Client Contacts
- Users
- Projects
- Project Statuses
- Workflows
- Task Lists
- Tasks
- Time Entries
- Invoices
- Invoice Templates
- Invoice Payments
- Estimates
How to Import Time Entries Data from Paymo into Google Sheets
Bringing your Paymo Time Entries data into Google Sheets helps you track billable hours, monitor time spent on tasks and projects, and analyze project costs accurately.
Get this time data into your Sheet automatically, simplifying time tracking analysis.
This guide shows you exactly how to import your Paymo Time Entries data into Google Sheets with Coefficient.
TLDR
-
Step 1:
Step 1. Install the Coefficient Google Sheets add-on and connect your Paymo account.
-
Step 2:
Step 2. Choose Import from Objects and select the Time Entries object.
-
Step 3:
Step 3. Pick the fields you need, add filters if you want, and import the data into your Sheet.
-
Step 4:
Step 4. Set up auto-refresh to keep your Time Entries data updated automatically.
block:tutorial
Step-by-Step Guide: Importing Your Paymo Data
Getting your Paymo Time Entries data into Google Sheets is simple with Coefficient. Just follow these steps:
step:1
step-title:Install and Connect Coefficient
First, add Coefficient to your Google Sheet.
Open Google Sheets. Go to Extensions > Add-ons > Get add-ons. Search for “Coefficient” and install it from the Google Workspace Marketplace.
After installing, open Coefficient from Extensions > Coefficient > Launch.
In the Coefficient sidebar, find and click on the Paymo connector to start the connection. Log into your Paymo account when prompted to authorize Coefficient.
step:2
step-title:Import Your Time Entries Data
Once connected, you can pull your data.
In the Coefficient sidebar, click the “Import from” button and select “Paymo Objects”. Choose “Time Entries” from the list of available data objects.
step:3
step-title:Configure and Import
Now, decide exactly what data you want.
Select the specific fields (columns) you need for your analysis. You can also apply filters or sort the data directly in Coefficient before you import.
When everything is set, click the “Import” button. Your Paymo Time Entries data will load straight into your Google Sheet.
How to Import Tasks Data from Paymo into Google Sheets
Bringing your Paymo Tasks data into Google Sheets helps you manage individual project tasks, track their status, assignees, and deadlines, and get a detailed view of project work.
Get this task data into your Sheet automatically, simplifying task tracking.
This guide shows you exactly how to import your Paymo Tasks data into Google Sheets with Coefficient.
TLDR
-
Step 1:
Step 1. Install the Coefficient Google Sheets add-on and connect your Paymo account.
-
Step 2:
Step 2. Choose Import from Objects and select the Tasks object.
-
Step 3:
Step 3. Pick the fields you need, add filters if you want, and import the data into your Sheet.
-
Step 4:
Step 4. Set up auto-refresh to keep your Tasks data updated automatically.
block:tutorial
Step-by-Step Guide: Importing Your Paymo Data
Getting your Paymo Tasks data into Google Sheets is simple with Coefficient. Just follow these steps:
step:1
step-title:Install and Connect Coefficient
First, add Coefficient to your Google Sheet.
Open Google Sheets. Go to Extensions > Add-ons > Get add-ons. Search for “Coefficient” and install it from the Google Workspace Marketplace.
After installing, open Coefficient from Extensions > Coefficient > Launch.
In the Coefficient sidebar, find and click on the Paymo connector to start the connection. Log into your Paymo account when prompted to authorize Coefficient.
step:2
step-title:Import Your Tasks Data
Once connected, you can pull your data.
In the Coefficient sidebar, click the “Import from” button and select “Paymo Objects”. Choose “Tasks” from the list of available data objects.
step:3
step-title:Configure and Import
Now, decide exactly what data you want.
Select the specific fields (columns) you need for your analysis. You can also apply filters or sort the data directly in Coefficient before you import.
When everything is set, click the “Import” button. Your Paymo Tasks data will load straight into your Google Sheet.
step:4
step-title:Set Up Auto-Refresh (Optional)
Keep your Tasks data current automatically.
Find your import in the Coefficient sidebar. Click the refresh icon’s dropdown menu and choose “Schedule”.
Pick how often you want the data to update – for example, daily or hourly. This keeps your spreadsheet fresh without manual work.
Available Paymo Objects
- Client Contacts
- Users
- Projects
- Project Statuses
- Workflows
- Task Lists
- Tasks
- Time Entries
- Invoices
- Invoice Templates
- Invoice Payments
- Estimates
How to Import Task Lists Data from Paymo into Google Sheets
Bringing your Paymo Task Lists data into Google Sheets helps you organize project tasks, manage task groups, and get an overview of how tasks are structured within your projects.
Get this organizational data into your Sheet automatically, simplifying task management.
This guide shows you exactly how to import your Paymo Task Lists data into Google Sheets with Coefficient.
TLDR
-
Step 1:
Step 1. Install the Coefficient Google Sheets add-on and connect your Paymo account.
-
Step 2:
Step 2. Choose Import from Objects and select the Task Lists object.
-
Step 3:
Step 3. Pick the fields you need, add filters if you want, and import the data into your Sheet.
-
Step 4:
Step 4. Set up auto-refresh to keep your Task Lists data updated automatically.
block:tutorial
Step-by-Step Guide: Importing Your Paymo Data
Getting your Paymo Task Lists data into Google Sheets is simple with Coefficient. Just follow these steps:
step:1
step-title:Install and Connect Coefficient
First, add Coefficient to your Google Sheet.
Open Google Sheets. Go to Extensions > Add-ons > Get add-ons. Search for “Coefficient” and install it from the Google Workspace Marketplace.
After installing, open Coefficient from Extensions > Coefficient > Launch.
In the Coefficient sidebar, find and click on the Paymo connector to start the connection. Log into your Paymo account when prompted to authorize Coefficient.
step:2
step-title:Import Your Task Lists Data
Once connected, you can pull your data.
In the Coefficient sidebar, click the “Import from” button and select “Paymo Objects”. Choose “Task Lists” from the list of available data objects.
step:3
step-title:Configure and Import
Now, decide exactly what data you want.
Select the specific fields (columns) you need for your analysis. You can also apply filters or sort the data directly in Coefficient before you import.
When everything is set, click the “Import” button. Your Paymo Task Lists data will load straight into your Google Sheet.
step:4
step-title:Set Up Auto-Refresh (Optional)
Keep your Task Lists data current automatically.
Find your import in the Coefficient sidebar. Click the refresh icon’s dropdown menu and choose “Schedule”.
Pick how often you want the data to update – for example, daily or hourly. This keeps your spreadsheet fresh without manual work.
Available Paymo Objects
- Client Contacts
- Users
- Projects
- Project Statuses
- Workflows
- Task Lists
- Tasks
- Time Entries
- Invoices
- Invoice Templates
- Invoice Payments
- Estimates