Accessing your Chargebee Transactions data directly in Google Sheets is essential for flexible analysis, custom reporting, and sharing insights with your finance team.
Instead of manual exports, you can set up a live connection that keeps your spreadsheet updated automatically.
This guide shows you how to import your Chargebee Transactions data into Google Sheets using Coefficient.
TLDR
-
Step 1:
Step 1. Install Coefficient from the Google Workspace Marketplace and connect to your Chargebee account.
-
Step 2:
Step 2. Select Import from… and choose Chargebee, then select the Transactions object.
-
Step 3:
Step 3. Configure your import settings and pull the data into your Google Sheet.
-
Step 4:
Step 4. Set up auto-refresh to keep your Transactions data updated automatically on your preferred schedule.

Step 1: Install and Connect Coefficient
First, you need to get Coefficient for Google Sheets.
- Open Google Sheets.
- Go to Extensions > Add-ons > Get add-ons.
- Search for “Coefficient” and install it from the Google Workspace Marketplace.
Once installed, open the Coefficient add-on from Extensions > Coefficient > Launch.
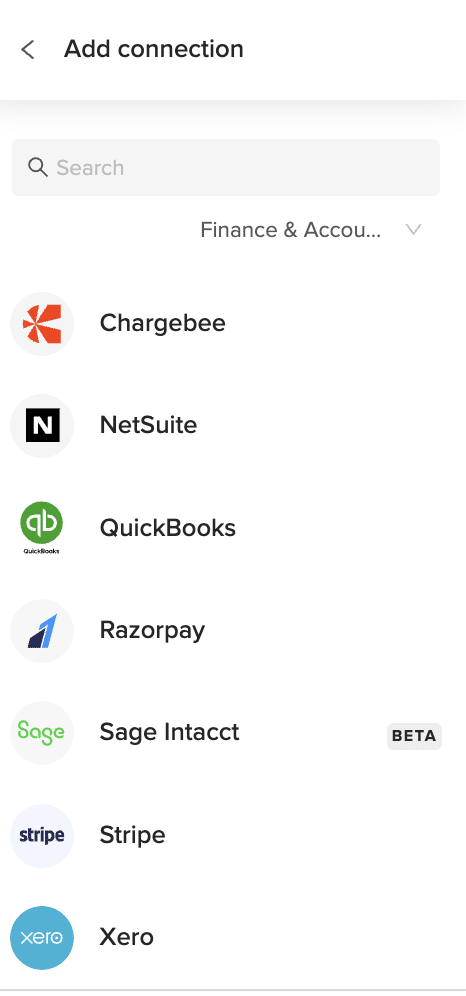
In the Coefficient sidebar, click “Import from…” and find Chargebee in the list of connectors. You’ll be guided to connect your Chargebee account securely.
Step 2: Import Chargebee Transactions Data
After connecting, you’ll see options for importing data from Chargebee.
- Select the “Transactions” object from the available options.
- Choose the specific transactions you want to import.
- You can apply filters, select specific columns, and preview the data before importing.
- Click “Import” to pull the data into your active Google Sheet tab.

Step 3: Set Up Auto-Refresh (Optional)
To keep your Chargebee Transactions data current, set up an automatic refresh schedule.
In the Coefficient sidebar, find your imported data.
- Click the “Refresh” button or the three-dot menu next to your import.
- Select “Schedule Refresh”.
- Choose your desired frequency (e.g., daily, hourly, weekly) and time.
Coefficient will now automatically update your sheet with the latest data from Chargebee based on your schedule.
Available Chargebee Objects
- Subscriptions
- Invoices
- Credit Notes
- Gifts
- Hosted Pages
- Orders
- Payment Sources
- Promotional Credits
- Quotes
- Transactions
- Unbilled Charges
How to Import Unbilled Charges Data from Chargebee into Google Sheets
Accessing your Chargebee Unbilled Charges data directly in Google Sheets is essential for flexible analysis, custom reporting, and sharing insights with your finance team.
Instead of manual exports, you can set up a live connection that keeps your spreadsheet updated automatically.
This guide shows you how to import your Chargebee Unbilled Charges data into Google Sheets using Coefficient.
TLDR
-
Step 1:
Step 1. Install Coefficient from the Google Workspace Marketplace and connect to your Chargebee account.
-
Step 2:
Step 2. Select Import from… and choose Chargebee, then select the Unbilled Charges object.
-
Step 3:
Step 3. Configure your import settings and pull the data into your Google Sheet.
-
Step 4:
Step 4. Set up auto-refresh to keep your Unbilled Charges data updated automatically on your preferred schedule.
Step 1: Install and Connect Coefficient
First, you need to get Coefficient for Google Sheets.
- Open Google Sheets.
- Go to Extensions > Add-ons > Get add-ons.
- Search for “Coefficient” and install it from the Google Workspace Marketplace.
Once installed, open the Coefficient add-on from Extensions > Coefficient > Launch.
In the Coefficient sidebar, click “Import from…” and find Chargebee in the list of connectors. You’ll be guided to connect your Chargebee account securely.
Step 2: Import Chargebee Unbilled Charges Data
After connecting, you’ll see options for importing data from Chargebee.
- Select the “Unbilled Charges” object from the available options.
- Choose the specific unbilled charges you want to import.
- You can apply filters, select specific columns, and preview the data before importing.
- Click “Import” to pull the data into your active Google Sheet tab.
Step 3: Set Up Auto-Refresh (Optional)
To keep your Chargebee Unbilled Charges data current, set up an automatic refresh schedule.
In the Coefficient sidebar, find your imported data.
- Click the “Refresh” button or the three-dot menu next to your import.
- Select “Schedule Refresh”.
- Choose your desired frequency (e.g., daily, hourly, weekly) and time.
Coefficient will now automatically update your sheet with the latest data from Chargebee based on your schedule.
Available Chargebee Objects
- Subscriptions
- Invoices
- Credit Notes
- Gifts
- Hosted Pages
- Orders
- Payment Sources
- Promotional Credits
- Quotes
- Transactions
- Unbilled Charges
How to Import Customers Data from Chargebee into Excel
Importing your Chargebee Customers data into Excel enables deeper analysis of your subscriber base, spending patterns, and customer segments beyond what Chargebee’s standard reporting offers.
With Coefficient, you can establish a live connection that keeps your customer data current in Excel without manual exports, ensuring you always have the latest information for decision-making.
TLDR
-
Step 1:
Install Coefficient from the Office Add-ins store
-
Step 2:
Connect to your Chargebee account
-
Step 3:
Select and import Customers data
-
Step 4:
Set up auto-refresh to keep data current
Step-by-Step Guide to Importing Chargebee Customers into Excel
Step 1: Install Coefficient in Excel
First, add the Coefficient add-in to Excel:
- Open Excel
- Click on the “Insert” tab in the ribbon
- Select “Get Add-ins”
- Search for “Coefficient” in the Office Add-ins store
- Click “Add” to install the Coefficient add-in
Step 2: Connect to Chargebee and Import Customers Data
After installing Coefficient, follow these steps to import your Customers data:
- Open the Coefficient sidebar in Excel
- Click “Import” to see available data sources
- Select “Chargebee” from the finance connectors list
- Log in with your Chargebee credentials when prompted
- From the object list, select “Customers”
- Choose which customer fields you want to import (e.g., name, email, created date, billing info)
- Apply any filters if needed (e.g., active customers only)
- Click “Import” to bring the data into your spreadsheet

Step 3: Set Up Auto-Refresh (Optional)
To ensure your Customers data remains up-to-date:
- Select your imported Customers data in Excel
- In the Coefficient sidebar, click “Refresh”
- Choose “Set up auto-refresh”
- Select your preferred refresh schedule (hourly, daily, or weekly)
- Configure any notification settings
- Click “Save” to enable automatic updates
Available Chargebee Data
Available Objects
- Customers
- Subscriptions
- Invoices
- Credit Notes
- Gifts
- Hosted Pages
- Orders
- Payment Sources
- Promotional Credits
- Quotes
- Transactions
- Unbilled Charges
How to Import Credit Notes Data from Chargebee into Excel
Importing your Chargebee Credit Notes data into Excel enables more detailed analysis of refunds, credits, and revenue adjustments beyond what Chargebee’s standard reporting provides.
With Coefficient, you can create a live connection that keeps your credit notes data current in Excel without manual exports, ensuring accurate financial reporting and reconciliation.
TLDR
-
Step 1:
Install Coefficient from the Office Add-ins store
-
Step 2:
Connect to your Chargebee account
-
Step 3:
Select and import Credit Notes data
-
Step 4:
Set up auto-refresh to keep data current
Step-by-Step Guide to Importing Chargebee Credit Notes into Excel
Step 1: Install Coefficient in Excel
First, add the Coefficient add-in to Excel:
- Open Excel
- Click on the “Insert” tab in the ribbon
- Select “Get Add-ins”
- Search for “Coefficient” in the Office Add-ins store
- Click “Add” to install the Coefficient add-in
Step 2: Connect to Chargebee and Import Credit Notes Data
After installing Coefficient, follow these steps to import your Credit Notes data:
- Open the Coefficient sidebar in Excel
- Click “Import” to see available data sources
- Select “Chargebee” from the finance connectors list
- Log in with your Chargebee credentials when prompted
- From the object list, select “Credit Notes”
- Choose which credit note fields you want to import (e.g., amount, reason, date, customer)
- Apply any filters if needed (e.g., date range, credit type)
- Click “Import” to bring the data into your spreadsheet
Step 3: Set Up Auto-Refresh (Optional)
To ensure your Credit Notes data remains up-to-date:
- Select your imported Credit Notes data in Excel
- In the Coefficient sidebar, click “Refresh”
- Choose “Set up auto-refresh”
- Select your preferred refresh schedule (hourly, daily, or weekly)
- Configure any notification settings
- Click “Save” to enable automatic updates
Available Chargebee Data
Available Objects
- Customers
- Subscriptions
- Invoices
- Credit Notes
- Gifts
- Hosted Pages
- Orders
- Payment Sources
- Promotional Credits
- Quotes
- Transactions
- Unbilled Charges
How to Import Gifts Data from Chargebee into Excel
Importing your Chargebee Gifts data into Excel enables more detailed analysis of gift subscriptions, referral programs, and promotional campaigns beyond what Chargebee’s standard reporting provides.
With Coefficient, you can establish a live connection that keeps your gifts data current in Excel without manual exports, helping you track campaign effectiveness and customer acquisition strategies.
TLDR
-
Step 1:
Install Coefficient from the Office Add-ins store
-
Step 2:
Connect to your Chargebee account
-
Step 3:
Select and import Gifts data
-
Step 4:
Set up auto-refresh to keep data current
Step-by-Step Guide to Importing Chargebee Gifts into Excel
Step 1: Install Coefficient in Excel
First, add the Coefficient add-in to Excel:
- Open Excel
- Click on the “Insert” tab in the ribbon
- Select “Get Add-ins”
- Search for “Coefficient” in the Office Add-ins store
- Click “Add” to install the Coefficient add-in
Step 2: Connect to Chargebee and Import Gifts Data
After installing Coefficient, follow these steps to import your Gifts data:
- Open the Coefficient sidebar in Excel
- Click “Import” to see available data sources
- Select “Chargebee” from the finance connectors list
- Log in with your Chargebee credentials when prompted
- From the object list, select “Gifts”
- Choose which gift fields you want to import (e.g., status, sender, recipient, gift plan)
- Apply any filters if needed (e.g., date range, gift status)
- Click “Import” to bring the data into your spreadsheet
Step 3: Set Up Auto-Refresh (Optional)
To ensure your Gifts data remains up-to-date:
- Select your imported Gifts data in Excel
- In the Coefficient sidebar, click “Refresh”
- Choose “Set up auto-refresh”
- Select your preferred refresh schedule (hourly, daily, or weekly)
- Configure any notification settings
- Click “Save” to enable automatic updates
Available Chargebee Data
Available Objects
- Customers
- Subscriptions
- Invoices
- Credit Notes
- Gifts
- Hosted Pages
- Orders
- Payment Sources
- Promotional Credits
- Quotes
- Transactions
- Unbilled Charges
How to Import Hosted Pages Data from Chargebee into Excel
Importing your Chargebee Hosted Pages data into Excel enables deeper analysis of checkout form performance, conversion rates, and customer acquisition funnels beyond what Chargebee’s standard reporting provides.
With Coefficient, you can create a live connection that keeps your hosted pages data current in Excel without manual exports, helping you optimize your payment forms and subscription pages.
TLDR
-
Step 1:
Install Coefficient from the Office Add-ins store
-
Step 2:
Connect to your Chargebee account
-
Step 3:
Select and import Hosted Pages data
-
Step 4:
Set up auto-refresh to keep data current
Step-by-Step Guide to Importing Chargebee Hosted Pages into Excel
Step 1: Install Coefficient in Excel
First, add the Coefficient add-in to Excel:
- Open Excel
- Click on the “Insert” tab in the ribbon
- Select “Get Add-ins”
- Search for “Coefficient” in the Office Add-ins store
- Click “Add” to install the Coefficient add-in
Step 2: Connect to Chargebee and Import Hosted Pages Data
After installing Coefficient, follow these steps to import your Hosted Pages data:
- Open the Coefficient sidebar in Excel
- Click “Import” to see available data sources
- Select “Chargebee” from the finance connectors list
- Log in with your Chargebee credentials when prompted
- From the object list, select “Hosted Pages”
- Choose which hosted page fields you want to import (e.g., type, status, created time, URL)
- Apply any filters if needed (e.g., page type, date range)
- Click “Import” to bring the data into your spreadsheet
Step 3: Set Up Auto-Refresh (Optional)
To ensure your Hosted Pages data remains up-to-date:
- Select your imported Hosted Pages data in Excel
- In the Coefficient sidebar, click “Refresh”
- Choose “Set up auto-refresh”
- Select your preferred refresh schedule (hourly, daily, or weekly)
- Configure any notification settings
- Click “Save” to enable automatic updates
Available Chargebee Data
Available Objects
- Customers
- Subscriptions
- Invoices
- Credit Notes
- Gifts
- Hosted Pages
- Orders
- Payment Sources
- Promotional Credits
- Quotes
- Transactions
- Unbilled Charges
How to Import Orders Data from Chargebee into Excel
Importing your Chargebee Orders data into Excel enables more comprehensive analysis of purchase patterns, order values, and product combinations beyond what Chargebee’s standard reporting provides.
With Coefficient, you can establish a live connection that keeps your orders data current in Excel without manual exports, giving you deeper insights into your sales and revenue streams.
TLDR
-
Step 1:
Install Coefficient from the Office Add-ins store
-
Step 2:
Connect to your Chargebee account
-
Step 3:
Select and import Orders data
-
Step 4:
Set up auto-refresh to keep data current
Step-by-Step Guide to Importing Chargebee Orders into Excel
Step 1: Install Coefficient in Excel
First, add the Coefficient add-in to Excel:
- Open Excel
- Click on the “Insert” tab in the ribbon
- Select “Get Add-ins”
- Search for “Coefficient” in the Office Add-ins store
- Click “Add” to install the Coefficient add-in
Step 2: Connect to Chargebee and Import Orders Data
After installing Coefficient, follow these steps to import your Orders data:
- Open the Coefficient sidebar in Excel
- Click “Import” to see available data sources
- Select “Chargebee” from the finance connectors list
- Log in with your Chargebee credentials when prompted
- From the object list, select “Orders”
- Choose which order fields you want to import (e.g., amount, status, date, customer)
- Apply any filters if needed (e.g., date range, order status)
- Click “Import” to bring the data into your spreadsheet
Step 3: Set Up Auto-Refresh (Optional)
To ensure your Orders data remains up-to-date:
- Select your imported Orders data in Excel
- In the Coefficient sidebar, click “Refresh”
- Choose “Set up auto-refresh”
- Select your preferred refresh schedule (hourly, daily, or weekly)
- Configure any notification settings
- Click “Save” to enable automatic updates
Available Chargebee Data
Available Objects
- Customers
- Subscriptions
- Invoices
- Credit Notes
- Gifts
- Hosted Pages
- Orders
- Payment Sources
- Promotional Credits
- Quotes
- Transactions
- Unbilled Charges
How to Import Invoices Data from Chargebee into Excel
Importing your Chargebee Invoices data into Excel enables more comprehensive financial reporting, revenue recognition, and payment tracking beyond what Chargebee’s standard reports provide.
With Coefficient, you can establish a live connection that keeps your invoice data current in Excel without manual exports, ensuring you always have accurate financial information.
TLDR
-
Step 1:
Install Coefficient from the Office Add-ins store
-
Step 2:
Connect to your Chargebee account
-
Step 3:
Select and import Invoices data
-
Step 4:
Set up auto-refresh to keep data current
Step-by-Step Guide to Importing Chargebee Invoices into Excel
Step 1: Install Coefficient in Excel
First, add the Coefficient add-in to Excel:
- Open Excel
- Click on the “Insert” tab in the ribbon
- Select “Get Add-ins”
- Search for “Coefficient” in the Office Add-ins store
- Click “Add” to install the Coefficient add-in
Step 2: Connect to Chargebee and Import Invoices Data
After installing Coefficient, follow these steps to import your Invoices data:
- Open the Coefficient sidebar in Excel
- Click “Import” to see available data sources
- Select “Chargebee” from the finance connectors list
- Log in with your Chargebee credentials when prompted
- From the object list, select “Invoices”
- Choose which invoice fields you want to import (e.g., amount, status, due date, customer)
- Apply any filters if needed (e.g., date range, payment status)
- Click “Import” to bring the data into your spreadsheet
Step 3: Set Up Auto-Refresh (Optional)
To ensure your Invoices data remains up-to-date:
- Select your imported Invoices data in Excel
- In the Coefficient sidebar, click “Refresh”
- Choose “Set up auto-refresh”
- Select your preferred refresh schedule (hourly, daily, or weekly)
- Configure any notification settings
- Click “Save” to enable automatic updates
Available Chargebee Data
Available Objects
- Customers
- Subscriptions
- Invoices
- Credit Notes
- Gifts
- Hosted Pages
- Orders
- Payment Sources
- Promotional Credits
- Quotes
- Transactions
- Unbilled Charges
How to Import Payment Sources Data from Chargebee into Excel
Importing your Chargebee Payment Sources data into Excel enables deeper analysis of payment methods, card types, and expiration patterns beyond what Chargebee’s standard reporting provides.
With Coefficient, you can create a live connection that keeps your payment source data current in Excel without manual exports, helping you optimize payment processing and reduce failed charges.
TLDR
-
Step 1:
Install Coefficient from the Office Add-ins store
-
Step 2:
Connect to your Chargebee account
-
Step 3:
Select and import Payment Sources data
-
Step 4:
Set up auto-refresh to keep data current
Step-by-Step Guide to Importing Chargebee Payment Sources into Excel
Step 1: Install Coefficient in Excel
First, add the Coefficient add-in to Excel:
- Open Excel
- Click on the “Insert” tab in the ribbon
- Select “Get Add-ins”
- Search for “Coefficient” in the Office Add-ins store
- Click “Add” to install the Coefficient add-in
Step 2: Connect to Chargebee and Import Payment Sources Data
After installing Coefficient, follow these steps to import your Payment Sources data:
- Open the Coefficient sidebar in Excel
- Click “Import” to see available data sources
- Select “Chargebee” from the finance connectors list
- Log in with your Chargebee credentials when prompted
- From the object list, select “Payment Sources”
- Choose which payment source fields you want to import (e.g., type, status, card type, expiry)
- Apply any filters if needed (e.g., payment method type, status)
- Click “Import” to bring the data into your spreadsheet
Step 3: Set Up Auto-Refresh (Optional)
To ensure your Payment Sources data remains up-to-date:
- Select your imported Payment Sources data in Excel
- In the Coefficient sidebar, click “Refresh”
- Choose “Set up auto-refresh”
- Select your preferred refresh schedule (hourly, daily, or weekly)
- Configure any notification settings
- Click “Save” to enable automatic updates
Available Chargebee Data
Available Objects
- Customers
- Subscriptions
- Invoices
- Credit Notes
- Gifts
- Hosted Pages
- Orders
- Payment Sources
- Promotional Credits
- Quotes
- Transactions
- Unbilled Charges
How to Import Promotional Credits Data from Chargebee into Excel
Importing your Chargebee Promotional Credits data into Excel enables more comprehensive analysis of promotion effectiveness, discount usage, and customer incentive patterns beyond what Chargebee’s standard reporting provides.
With Coefficient, you can establish a live connection that keeps your promotional credits data current in Excel without manual exports, helping you optimize your marketing campaigns and discount strategies.
TLDR
-
Step 1:
Install Coefficient from the Office Add-ins store
-
Step 2:
Connect to your Chargebee account
-
Step 3:
Select and import Promotional Credits data
-
Step 4:
Set up auto-refresh to keep data current
Step-by-Step Guide to Importing Chargebee Promotional Credits into Excel
Step 1: Install Coefficient in Excel
First, add the Coefficient add-in to Excel:
- Open Excel
- Click on the “Insert” tab in the ribbon
- Select “Get Add-ins”
- Search for “Coefficient” in the Office Add-ins store
- Click “Add” to install the Coefficient add-in
Step 2: Connect to Chargebee and Import Promotional Credits Data
After installing Coefficient, follow these steps to import your Promotional Credits data:
- Open the Coefficient sidebar in Excel
- Click “Import” to see available data sources
- Select “Chargebee” from the finance connectors list
- Log in with your Chargebee credentials when prompted
- From the object list, select “Promotional Credits”
- Choose which promotional credit fields you want to import (e.g., amount, description, created date, customer)
- Apply any filters if needed (e.g., date range, credit type)
- Click “Import” to bring the data into your spreadsheet
Step 3: Set Up Auto-Refresh (Optional)
To ensure your Promotional Credits data remains up-to-date:
- Select your imported Promotional Credits data in Excel
- In the Coefficient sidebar, click “Refresh”
- Choose “Set up auto-refresh”
- Select your preferred refresh schedule (hourly, daily, or weekly)
- Configure any notification settings
- Click “Save” to enable automatic updates
Available Chargebee Data
Available Objects
- Customers
- Subscriptions
- Invoices
- Credit Notes
- Gifts
- Hosted Pages
- Orders
- Payment Sources
- Promotional Credits
- Quotes
- Transactions
- Unbilled Charges