Transferring data from MongoDB to SQL Server presents unique challenges due to the fundamental differences between NoSQL and relational databases.
This guide explores three proven methods to connect MongoDB to SQL Server, helping you select the most suitable approach for your specific requirements. Whether you’re a non-technical user, a developer, or part of an enterprise organization, you’ll find a solution that fits your needs.
Why Connect MongoDB to SQL Server?
Combine Flexible Storage with Powerful Analytics
By linking MongoDB’s document-based storage to SQL Server’s robust analytical capabilities, you can generate comprehensive business insights. This combination allows you to leverage the strengths of both database systems, enabling more effective data analysis and decision-making.
Ensure Compatibility with Existing Systems
Connecting MongoDB to SQL Server facilitates seamless data flow between modern MongoDB applications and established SQL Server-based enterprise systems. This integration ensures that your organization can adopt new technologies while maintaining compatibility with legacy infrastructure.
Enhance Data Backup and Redundancy
Creating a connection between MongoDB and SQL Server allows you to maintain synchronized copies of your data across both platforms. This approach provides an additional layer of data protection, ensuring that your critical information is backed up and easily recoverable.
Top 3 Methods to Connect MongoDB to SQL Server
| Solution | Best For |
| Coefficient | Non-technical users who need to transform and migrate MongoDB data to SQL Server using spreadsheets |
| Studio 3T | Developers and database administrators requiring direct migration with advanced field mapping capabilities |
| Apache Kafka | Enterprise organizations needing real-time data streaming and continuous synchronization |
1. Coefficient: No-Code MongoDB to SQL Server in Your Spreadsheet

Coefficient offers a user-friendly solution for connecting MongoDB to SQL Server through spreadsheets. This method is particularly useful for teams that need to transform and clean data during the migration process while maintaining accuracy.
Step-by-Step Guide:
Step 1. Install Coefficient
For Google Sheets
- Open a new or existing Google Sheet, navigate to the Extensions tab, and select Add-ons > Get add-ons.
- In the Google Workspace Marketplace, search for “Coefficient.”
- Follow the prompts to grant necessary permissions.
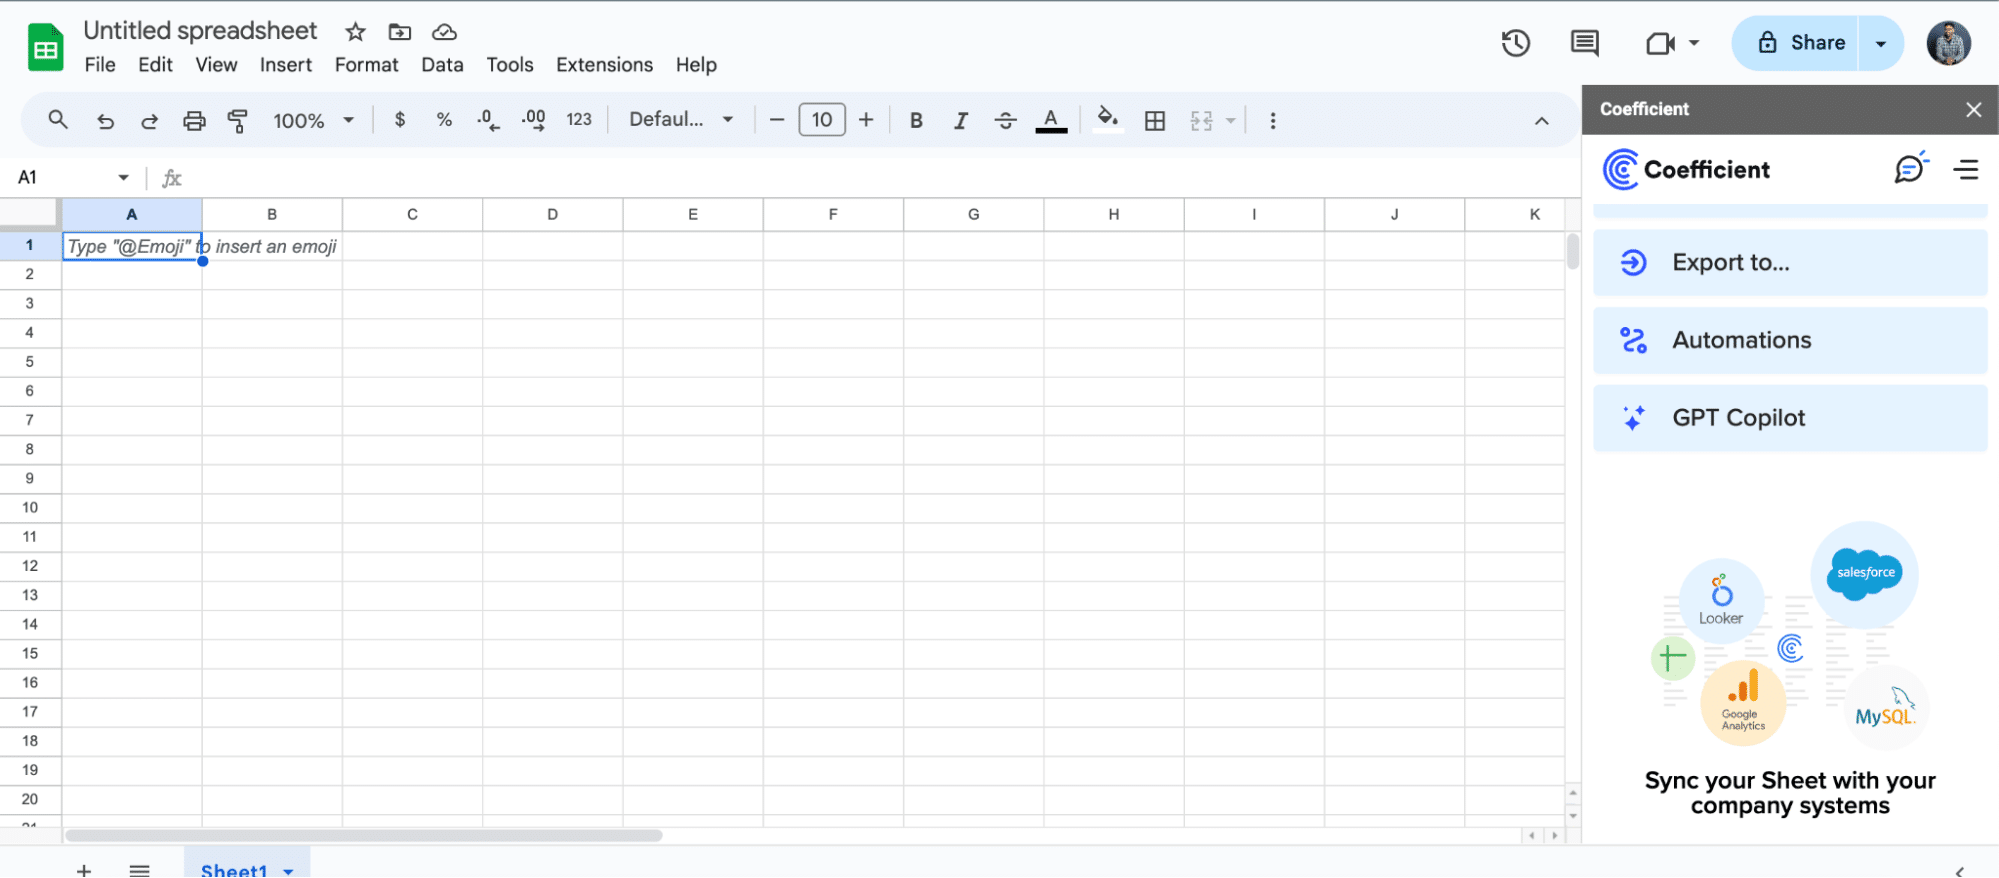
- Launch Coefficient from Extensions > Coefficient > Launch.
- Coefficient will open on the right-hand side of your spreadsheet.
For Microsoft Excel
- Open Excel from your desktop or in Office Online. Click ‘File’ > ‘Get Add-ins’ > ‘More Add-Ins.’
- Type “Coefficient” in the search bar and click ‘Add.’
- Follow the prompts in the pop-up to complete the installation.
- Once finished, you will see a “Coefficient” tab in the top navigation bar. Click ‘Open Sidebar’ to launch Coefficient.

Step 2. Connect and Import Data from MongoDB
Launch Coefficient from your spreadsheet.
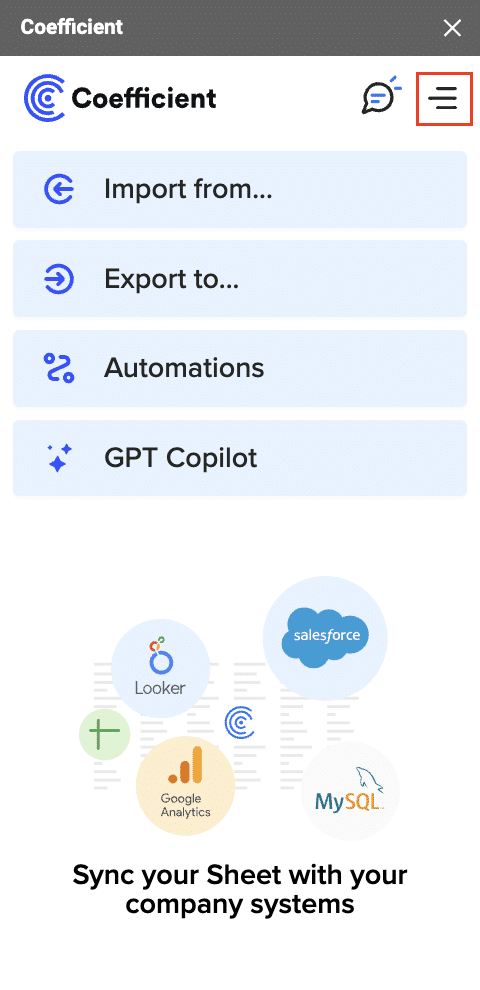
Select “Import from” and choose “MongoDB.”

Enter your MongoDB credentials (Host, Port, Database Name, Username, Password) or use a connection string.
Import the desired collections into Google Sheets. Customize your import by selecting fields and applying filters if needed.

Step 3. Export Data from Your Spreadsheet to MS SQL
Before starting, make sure you’ve connected to MS SQL.
Then, navigate to Coefficient’s menu >Click “Export to…”
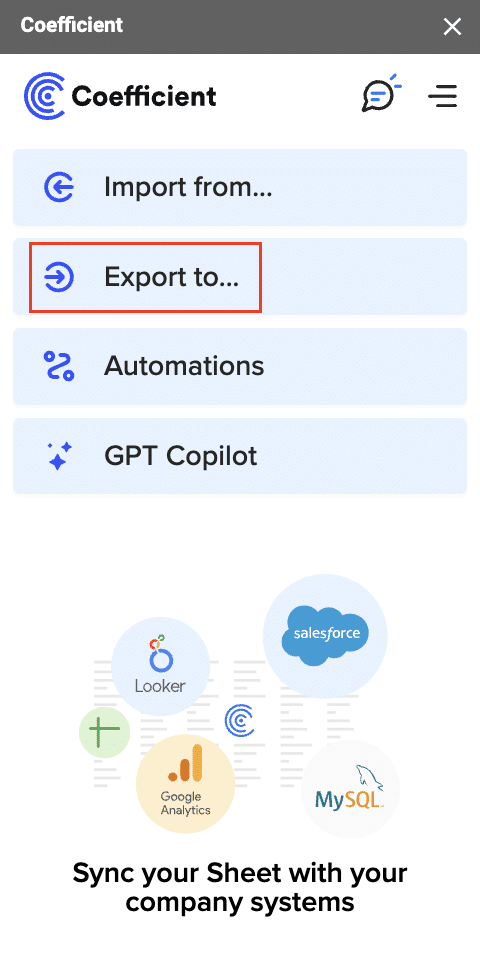
Select MS SQL.

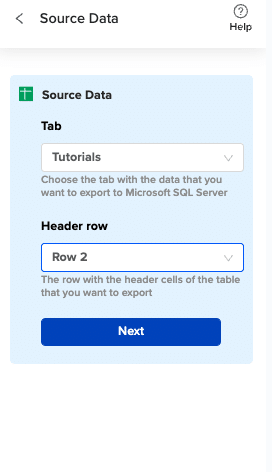
Choose the tab in your workbook that contains the data you want to export and specify the header row that contains the database field headers.
Specify the table in your database where you want to insert the data and choose the appropriate action (Insert, Update, Delete).
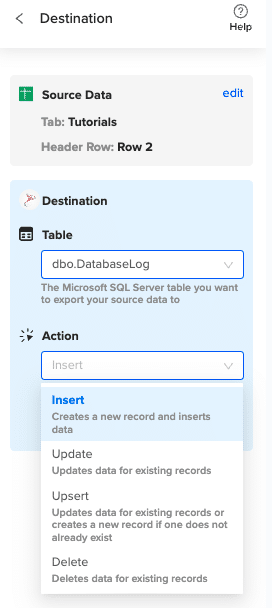
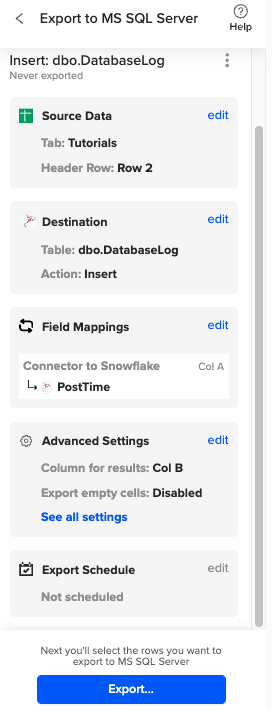
Complete the field mappings for the export. Then, confirm your settings and click “Export” to proceed.
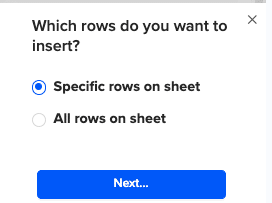
Then, highlight the specific rows in your sheet that you want to export, or choose to export all rows.
Review your settings and follow the prompts to push your data back to MS SQL.
Advantages:
- No coding required
- Familiar spreadsheet interface
- Real-time data synchronization
- Automated scheduling options
Limitations:
- Requires spreadsheet as intermediary
- May not be suitable for very large datasets
- Limited to spreadsheet transformation capabilities
2. Studio 3T: Direct Migration for Technical Users
Studio 3T is a specialized MongoDB tool that offers direct migration capabilities to SQL Server, with robust field mapping and transformation features.
Step-by-Step Guide:
Step 1: Install Studio 3T and Configure MongoDB Source
Installation Settings:
Version: Latest Studio 3T Enterprise
Platform: Windows/Linux/MacOS
Memory Allocation: Minimum 8GB recommended
MongoDB Connection:
URI: mongodb://username:password@host:port/database
Authentication: SCRAM-SHA-256
SSL/TLS: Enabled
Connection Options:
maxPoolSize: 100
connectTimeoutMS: 30000
socketTimeoutMS: 360000
Step 2: Configure SQL Server Connection
— Create target database and schema
CREATE DATABASE MongoMigration;
GO
USE MongoMigration;
GO
— Create dedicated SQL login for migration
CREATE LOGIN mongo_migration
WITH PASSWORD = ‘StrongPassword123!’;
— Create database user and grant permissions
CREATE USER mongo_migration FOR LOGIN mongo_migration;
GRANT CREATE TABLE TO mongo_migration;
GRANT ALTER ON SCHEMA::dbo TO mongo_migration;
Step 3: Define Field Mappings and Transformations
{
“collectionMappings”: {
“customers”: {
“targetTable”: “dbo.Customers”,
“fields”: {
“_id”: {
“targetColumn”: “CustomerID”,
“dataType”: “uniqueidentifier”
},
“name”: {
“targetColumn”: “FullName”,
“dataType”: “nvarchar(100)”
},
“contact.email”: {
“targetColumn”: “EmailAddress”,
“dataType”: “varchar(255)”
},
“address”: {
“targetColumn”: “AddressJSON”,
“dataType”: “nvarchar(max)”
}
}
}
}
}
Step 4: Execute Migration Process
// Migration configuration script
const migrationConfig = {
batchSize: 1000,
parallelCollections: 4,
validateData: true,
errorHandling: {
continueOnError: true,
maxErrors: 100,
logErrors: true
},
transformations: {
applyNullHandling: true,
convertDatetime: true,
trimStrings: true
}
};
Step 5: Verify Data Integrity
— Create verification stored procedure
CREATE PROCEDURE dbo.VerifyMigration
AS
BEGIN
— Check record counts
SELECT
‘Customers’ as TableName,
COUNT(*) as RecordCount,
MIN(CreatedDate) as OldestRecord,
MAX(CreatedDate) as NewestRecord
FROM dbo.Customers;
— Validate data quality
SELECT
COUNT(*) as InvalidEmails
FROM dbo.Customers
WHERE EmailAddress NOT LIKE ‘%_@_%.__%’;
END;
Advantages:
- Direct migration without intermediary
- Advanced field mapping capabilities
- Support for complex data structures
Limitations:
- Paid enterprise solution
- Requires technical expertise
- One-time migration focus
3. Apache Kafka: Real-Time Data Streaming
Apache Kafka provides a robust streaming platform for real-time data synchronization between MongoDB and SQL Server using connectors.
Step-by-Step Guide:
tep 1: Set Up Kafka Cluster
Kafka Configuration:
Version: 3.5 or later
Brokers: Minimum 3 nodes
Zookeeper Ensemble: 3 nodes
Topics:
mongo.source.customers:
Partitions: 6
Replication Factor: 3
sqlserver.destination.customers:
Partitions: 6
Replication Factor: 3

Stop exporting data manually. Sync data from your business systems into Google Sheets or Excel with Coefficient and set it on a refresh schedule.
Get Started
Step 2: Configure MongoDB Source Connector
{
“name”: “mongodb-source”,
“config”: {
“connector.class”: “com.mongodb.kafka.connect.MongoSourceConnector”,
“connection.uri”: “mongodb://username:password@host:port/database”,
“database”: “sourceDB”,
“collection”: “customers”,
“pipeline”: [
{
“$match”: {
“lastModified”: {
“$gt”: {
“$date”: “2024-01-01T00:00:00Z”
}
}
}
}
],
“batch.size”: 1000,
“poll.await.time.ms”: 5000
}
}
Step 3: Configure SQL Server Sink Connector
{
“name”: “sqlserver-sink”,
“config”: {
“connector.class”: “io.confluent.connect.jdbc.JdbcSinkConnector”,
“connection.url”: “jdbc:sqlserver://host:1433;databaseName=targetDB”,
“connection.user”: “kafka_user”,
“connection.password”: “StrongPassword123!”,
“auto.create”: true,
“auto.evolve”: true,
“insert.mode”: “upsert”,
“pk.mode”: “record_key”,
“pk.fields”: “id”,
“topics”: “mongo.source.customers”
}
}
Step 4: Define Transformation Rules
// Custom transformation class
public class MongoToSQLTransformer implements Transformation<SourceRecord> {
@Override
public SourceRecord apply(SourceRecord record) {
// Transform MongoDB document to SQL row
Schema schema = SchemaBuilder.struct()
.field(“id”, Schema.STRING_SCHEMA)
.field(“full_name”, Schema.STRING_SCHEMA)
.field(“email”, Schema.STRING_SCHEMA)
.field(“created_date”, Schema.INT64_SCHEMA)
.build();
// Transformation logic here
return newRecord;
}
}
Step 5: Monitor Data Flow
— Create monitoring tables and procedures
CREATE TABLE dbo.KafkaStreamMetrics (
MetricID INT IDENTITY(1,1) PRIMARY KEY,
TopicName VARCHAR(100),
MessagesProcessed INT,
BytesProcessed BIGINT,
LastProcessedTimestamp DATETIME2,
ProcessingLatencyMS INT
);
— Create monitoring procedure
CREATE PROCEDURE dbo.MonitorKafkaStreams
AS
BEGIN
SELECT
TopicName,
SUM(MessagesProcessed) as TotalMessages,
AVG(ProcessingLatencyMS) as AvgLatency
FROM dbo.KafkaStreamMetrics
WHERE LastProcessedTimestamp >= DATEADD(HOUR, -1, GETDATE())
GROUP BY TopicName;
END;
Advantages:
- Real-time streaming capability
- Scalable architecture
- Supports complex data pipelines
Limitations:
- Complex setup and maintenance
- Requires significant technical expertise
- Resource-intensive
Connect MongoDB to SQL Server with Coefficient
Connecting MongoDB to SQL Server doesn’t have to be a daunting task. With the right approach and tools, you can successfully integrate these two powerful database systems to leverage their combined strengths.
For most users, Coefficient offers the ideal balance of functionality and ease of use. Its no-code approach and familiar spreadsheet interface make it accessible to a wide range of users, while still providing powerful data transformation and synchronization capabilities.
Ready to start connecting your MongoDB data to SQL Server? Begin your free trial of Coefficient today and experience seamless database integration for yourself.
Frequently Asked Questions
Can we use MongoDB with SQL Server simultaneously?
Yes, using tools like Coefficient, you can maintain synchronized data between MongoDB and SQL Server, enabling you to leverage the benefits of both databases.
How do I convert MongoDB queries to SQL?
Coefficient’s spreadsheet interface allows you to transform MongoDB data using familiar formulas before pushing to SQL Server, eliminating the need for complex query conversion.
How to connect MongoDB database to server?
The easiest method is using Coefficient’s no-code platform, which handles connection management automatically. Alternatively, you can use native MongoDB drivers or specialized tools like Studio 3T.

