Connecting your Klaviyo marketing platform to your Salesforce CRM can supercharge your ability to manage customer data and streamline operations. By integrating these two powerful tools, you can sync marketing and sales data, gain deeper customer insights, and automate key processes.
In this guide, we’ll dive into the benefits of connecting Klaviyo to Salesforce and walk through three methods to make it happen—using Coefficient, Zapier, and Integromat. Whether you’re a marketer, sales rep, or operations manager, you’ll learn how to set up this game-changing integration in no time.
Advantages of Connecting Klaviyo to Salesforce
Integrating Klaviyo and Salesforce unlocks a host of benefits that can transform your marketing, sales, and operations:
- Predictive Customer Lifetime Value (CLV) Modeling: By merging Klaviyo’s email engagement metrics with Salesforce’s purchase history data, you can build a sophisticated CLV prediction model. This allows you to identify high-value customers early in their lifecycle, enabling proactive nurturing and personalized retention strategies to maximize long-term revenue.
- Automated Churn Prevention Workflows: Leverage the integration to create an early warning system for at-risk customers. For example, when Klaviyo detects a drop in email engagement combined with Salesforce data showing a decline in purchase frequency, it can trigger a personalized re-engagement campaign or alert the account manager for timely intervention.
- Advanced Segmentation for Hyper-Personalization: Combine Klaviyo’s behavioral data (email opens, clicks, product views) with Salesforce’s customer profile information to create highly targeted segments. This enables you to craft ultra-personalized email campaigns and sales approaches, tailoring product recommendations, content, and offers to each customer’s specific interests and purchase history, significantly improving conversion rates and customer satisfaction.
Connecting Klaviyo and Salesforce: 3 Methods
Now that you know the “why”, let’s get into the “how”. Here are three ways to connect Klaviyo to Salesforce, with options for every team size, technical skill level, and use case:
Connecting Klaviyo and Salesforce: 3 Methods
| Solution | Best For |
| Coefficient | Marketing analysts in SMBs who frequently work with spreadsheets and need to combine Klaviyo data with other metrics before pushing to Salesforce. Ideal for teams that require flexible data manipulation without coding skills. May not be suitable for real-time integrations or handling very large data volumes needed by enterprise-level companies. |
| Zapier | Growing e-commerce businesses with diverse software ecosystems beyond just Klaviyo and Salesforce. Best for marketing operations teams that need to create multi-step workflows involving additional apps (e.g., updating inventory systems or triggering SMS notifications based on specific Klaviyo-Salesforce data combinations). While user-friendly, it may become costly for high-volume, complex integrations. |
| Integromat | Tech-savvy marketing teams or organizations with complex data integration requirements. Optimal for businesses that need advanced data transformations, error handling, and conditional logic in their Klaviyo-Salesforce integration. While more powerful than Zapier, it has a steeper learning curve and may require some technical expertise to fully utilize. |
How to Connect Klaviyo to Salesforce: Step-by-Step Tutorial
Method 1: Coefficient – No-Code, User-Friendly
Coefficient is an intuitive no-code tool that connects your spreadsheets to your business apps, making it easy to import data from Klaviyo and export it to Salesforce. It’s perfect for users who want to sync data without dealing with complex setup or APIs.
Pros
- Easiest setup with guided workflow
- Syncs data automatically on your schedule
- Familiar spreadsheet interface for managing data
Cons
- Doesn’t support real-time syncing
- Some field mapping limitations
Follow these steps to connect Klaviyo to Salesforce using Coefficient:
Step 1: Install the Coefficient
For Google Sheets
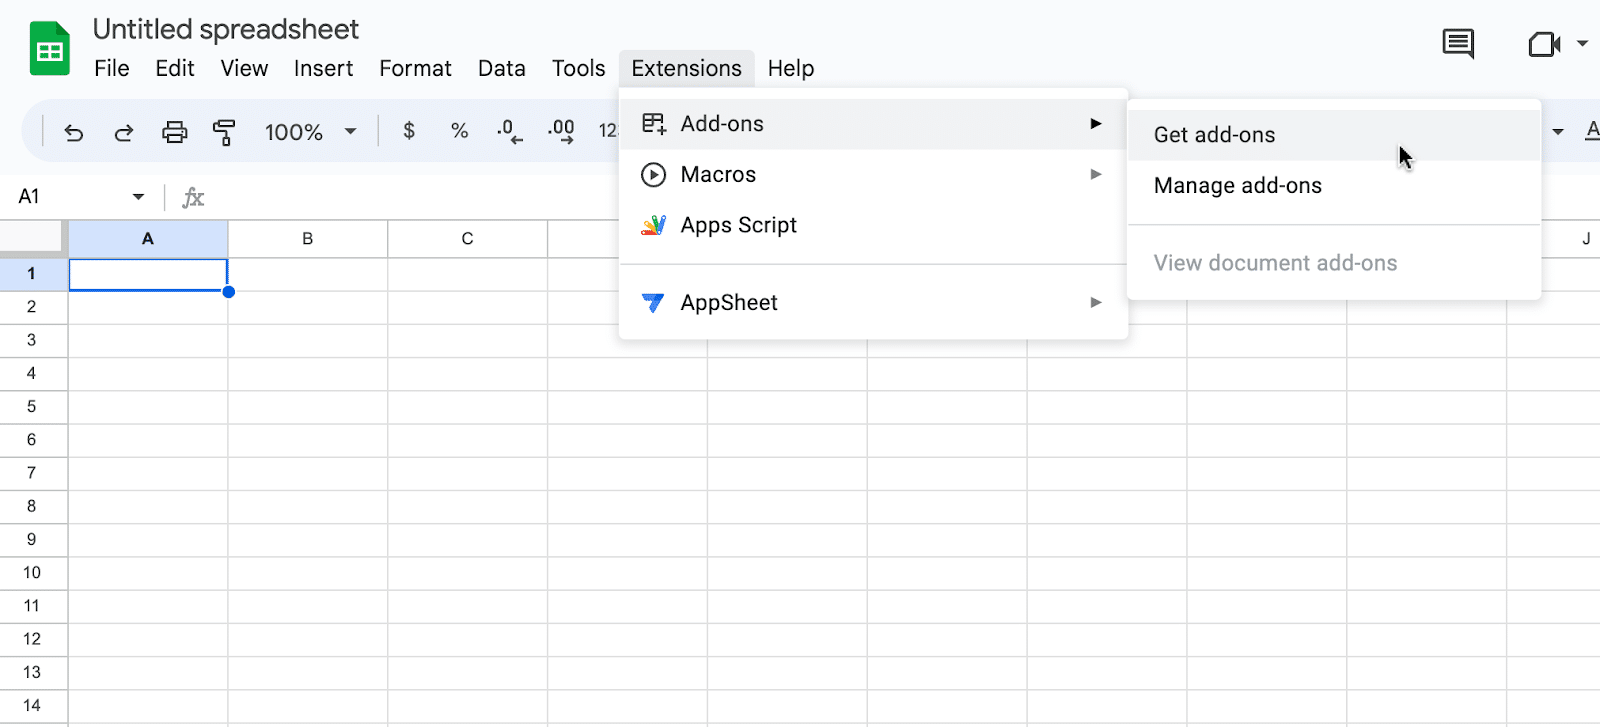
Open a new or existing Google Sheet, navigate to the Extensions tab, and select Add-ons > Get add-ons.
In the Google Workspace Marketplace, search for “Coefficient.”

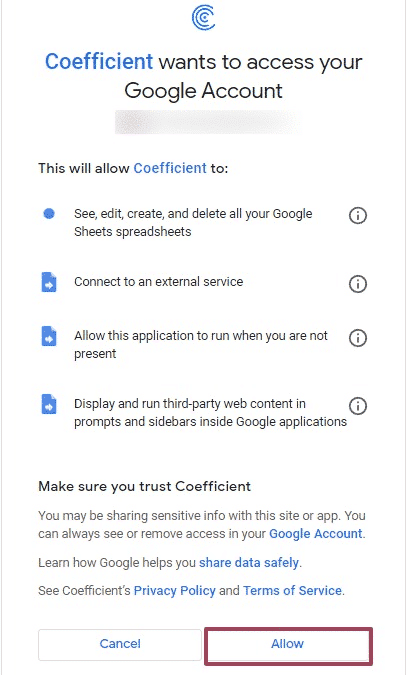
Follow the prompts to grant necessary permissions.
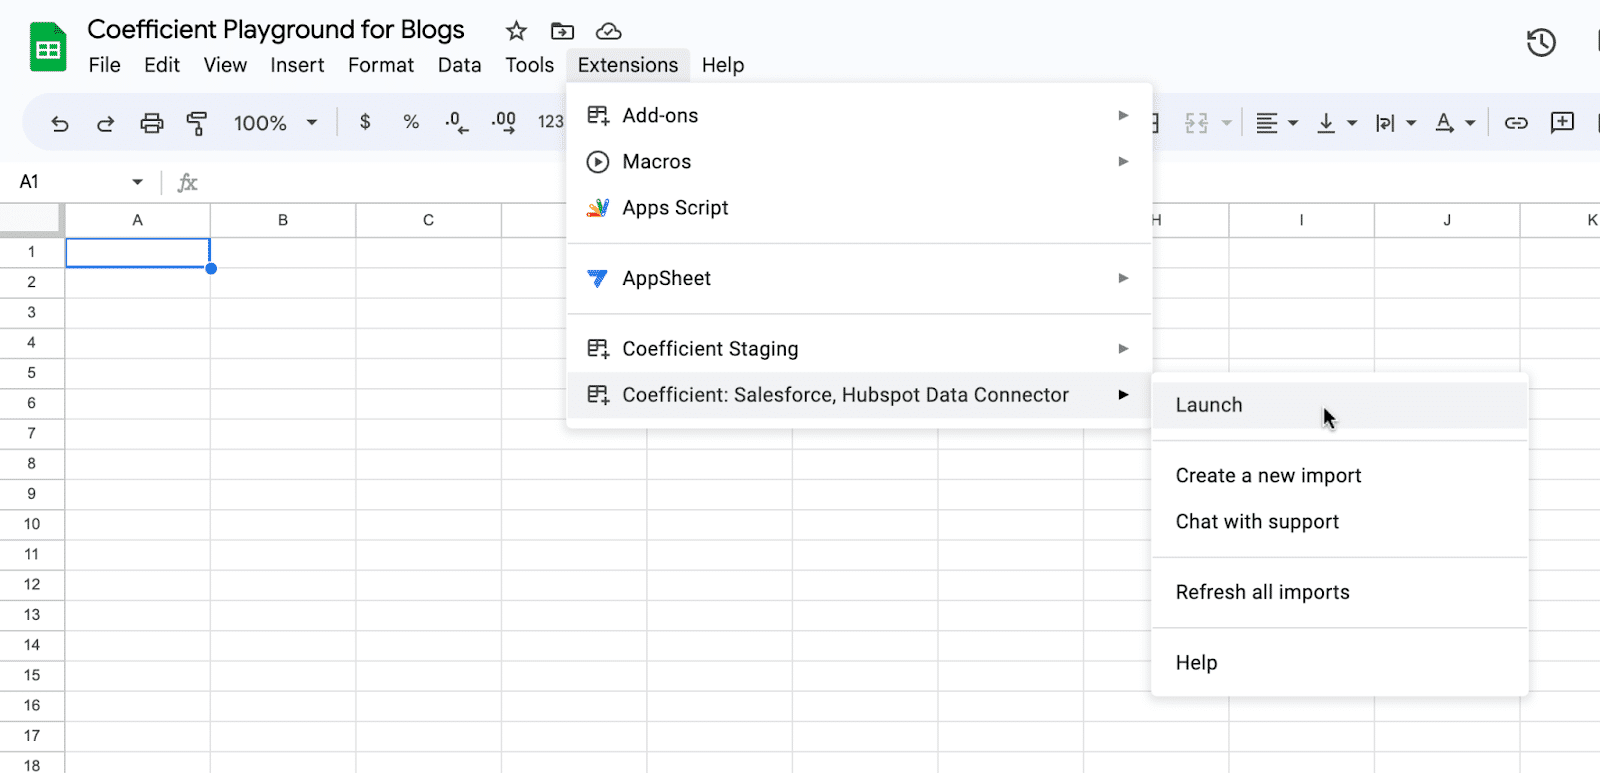
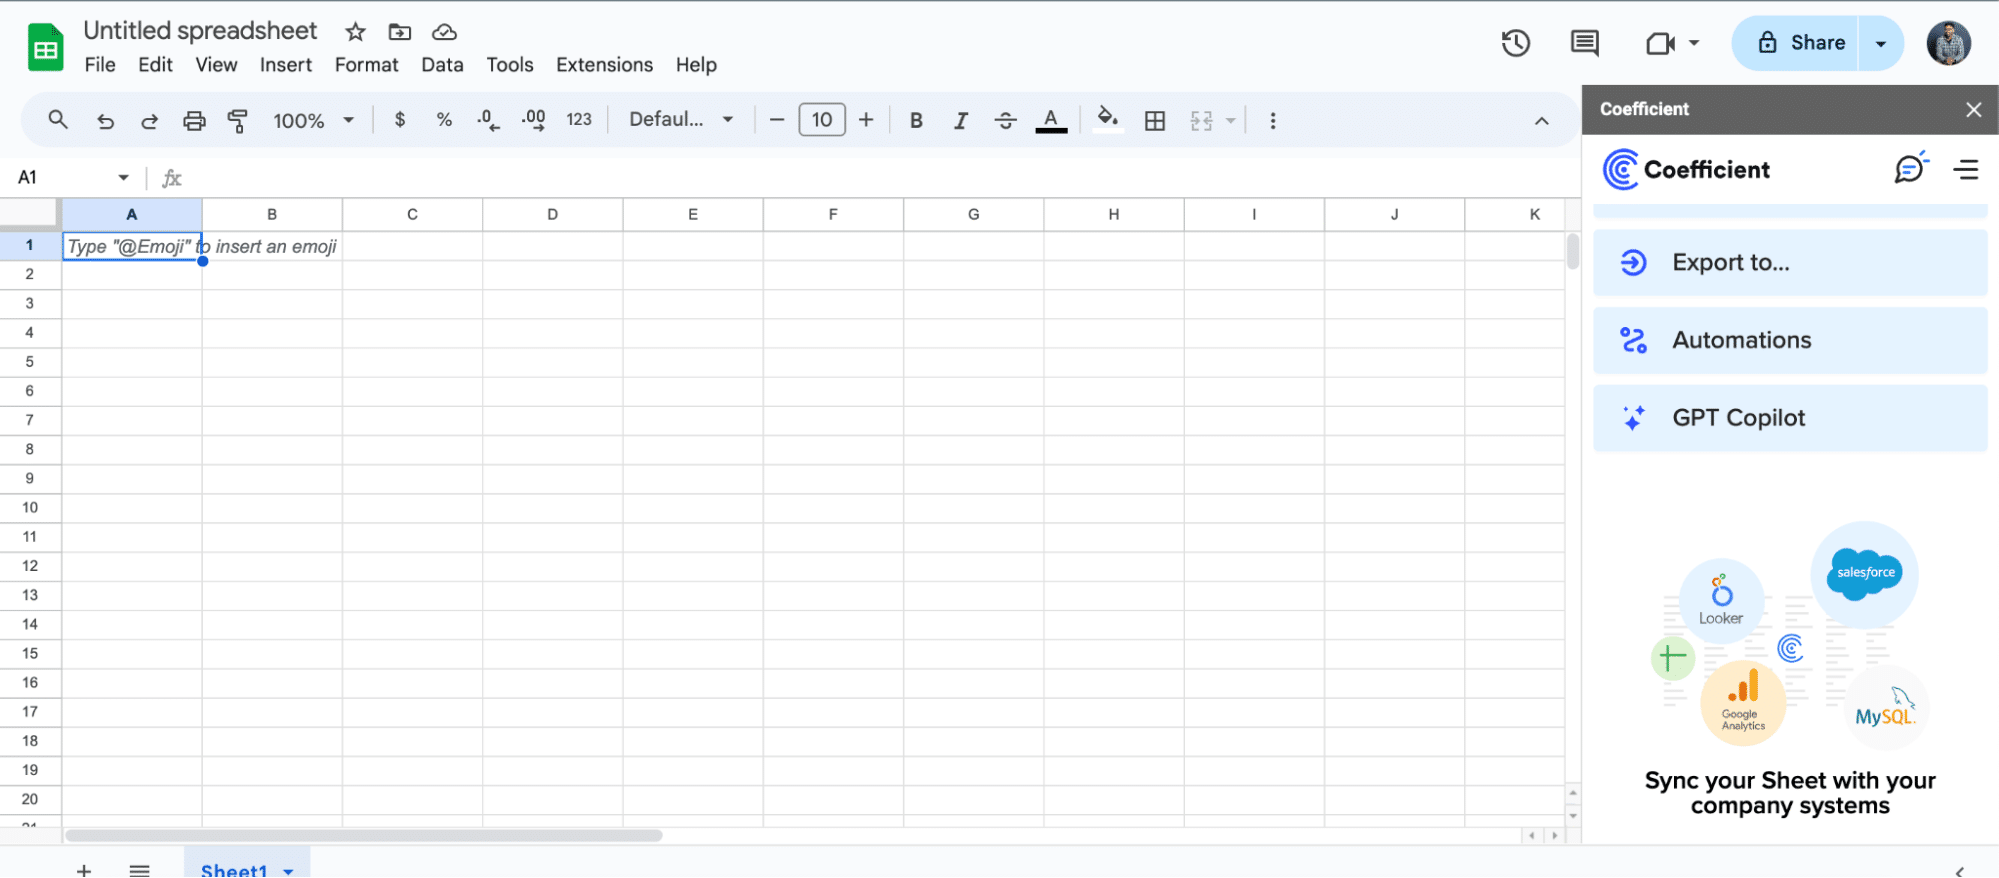
Launch Coefficient from Extensions > Coefficient > Launch.
Coefficient will open on the right-hand side of your spreadsheet.
For Microsoft Excel
Open Excel from your desktop or in Office Online. Click ‘File’ > ‘Get Add-ins’ > ‘More Add-Ins.’
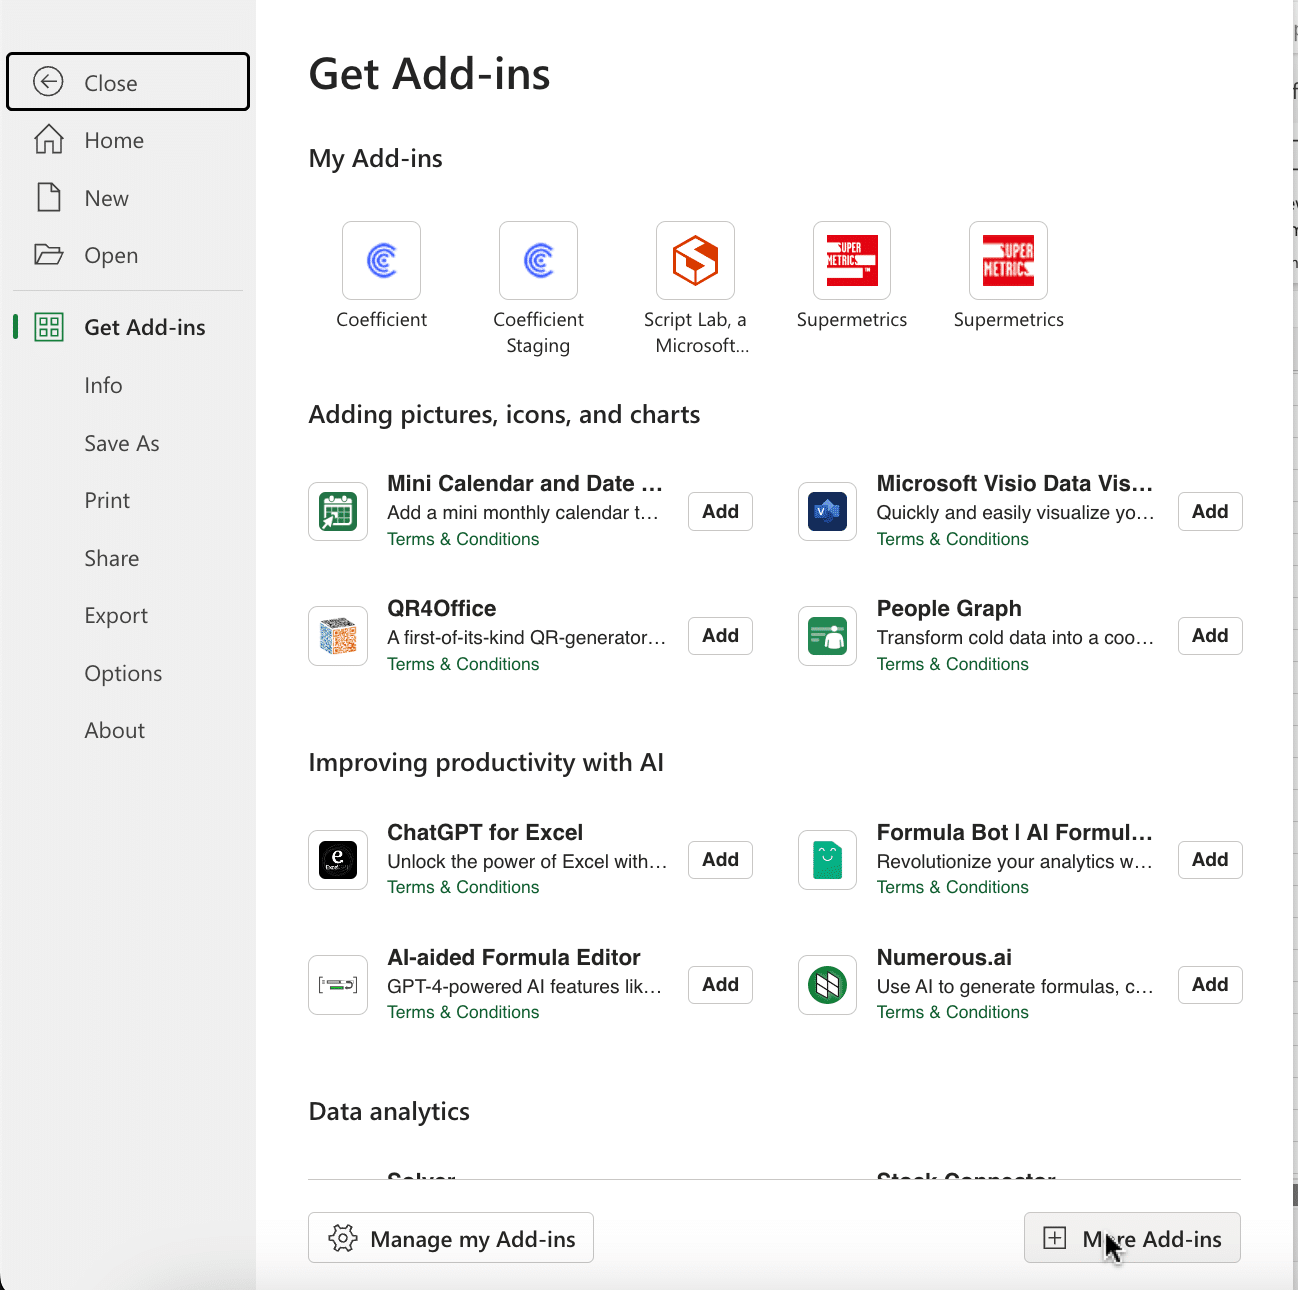
Type “Coefficient” in the search bar and click ‘Add.’

Follow the prompts in the pop-up to complete the installation.
Once finished, you will see a “Coefficient” tab in the top navigation bar. Click ‘Open Sidebar’ to launch Coefficient.

Step 2: Import Data from Klaviyo
With Coefficient installed, you’re now ready to import your Klaviyo data into Excel. Let’s walk through the process step by step:
In the Coefficient sidebar, click on “Add a Data Source.” Select “Klaviyo” from the list of available data sources.
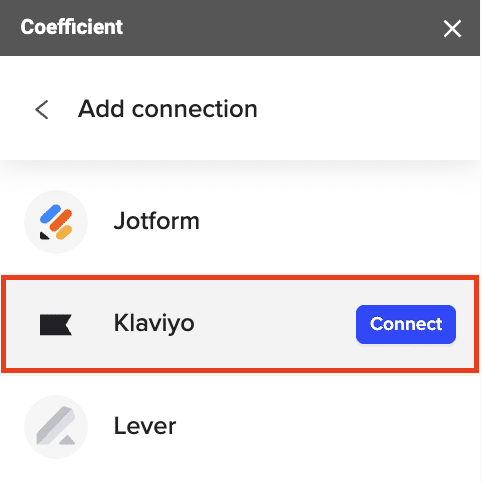
Follow the prompts to continue.
Select either “Email Campaigns” or “SMS Campaigns” from the available options.
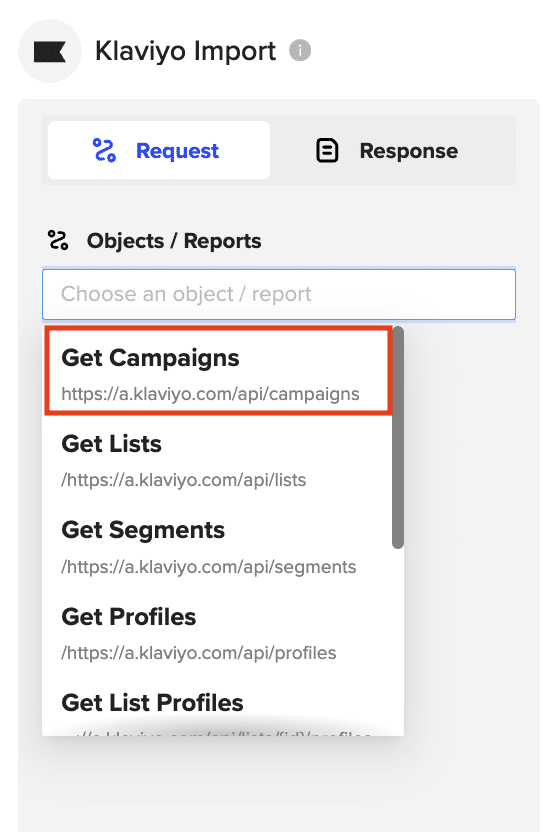
Configure the fields you want to include in the import, such as the campaign name, creation date, status, and audience.
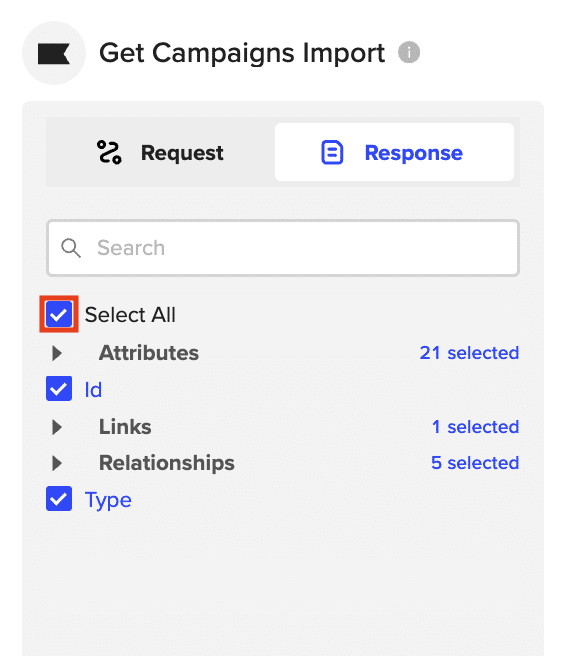
Click “Import” to fetch the selected campaign data into your Google Sheets spreadsheet.

Step 3. Export Data from Your Spreadsheet to Salesforce
Before starting, make sure you’ve connected to Salesforce.
https://www.youtube.com/watch?v=B5qUY5zs-vc
Then, navigate to Coefficient’s menu. Click “Export to…”
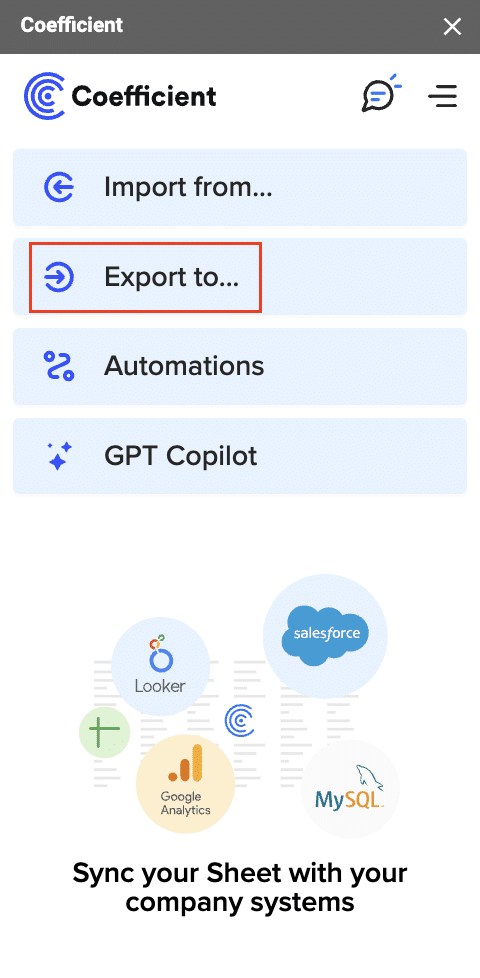
Choose Salesforce from the list of available data sources.

Select the tab and header rows in your spreadsheet that contain the data you want to export.
Define your tab and header row.
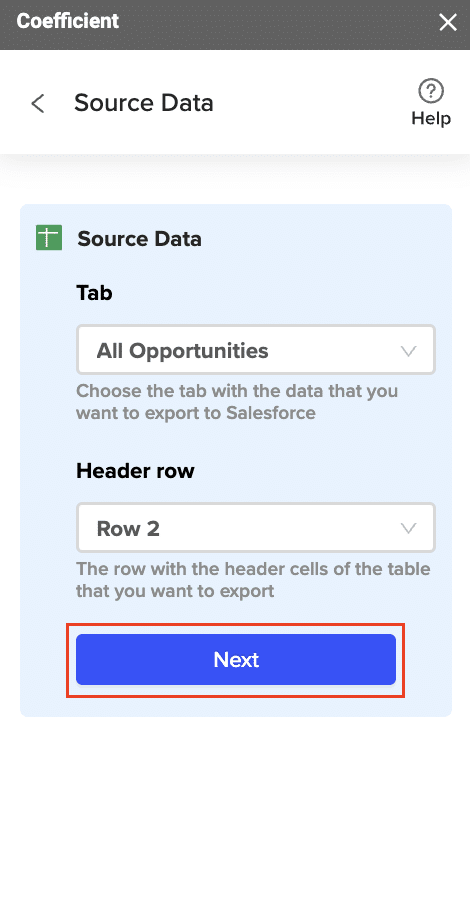
Note: Coefficient will automatically map the fields for you if the data in the sheet came from an import from Salesforce using Coefficient.
Next, select the Salesforce Object you want to export data to, e.g., “Opportunity”, “Contacts”, etc.
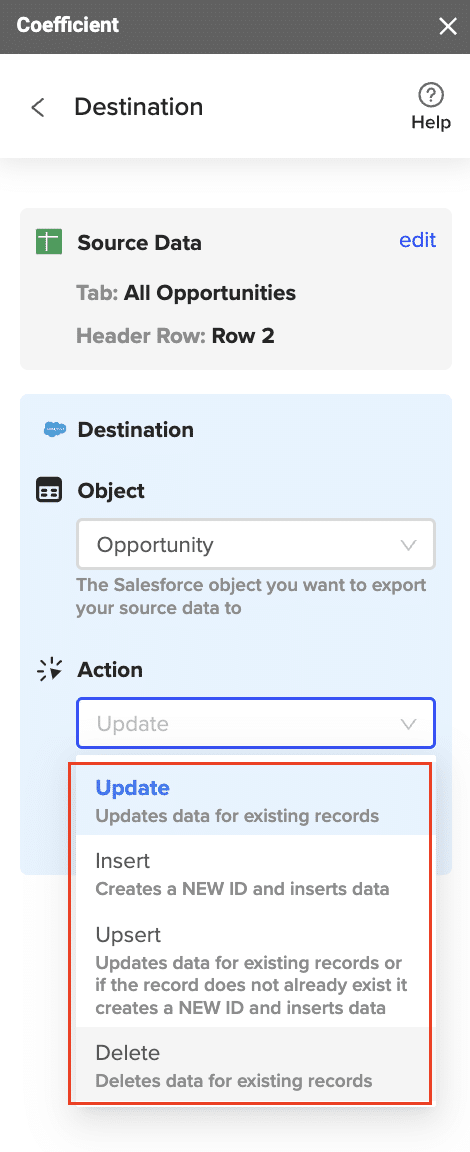
Then, select the type of action you want to perform—Update, Insert, Upsert, or Delete.
Map the fields from your spreadsheet to the corresponding Salesforce fields.
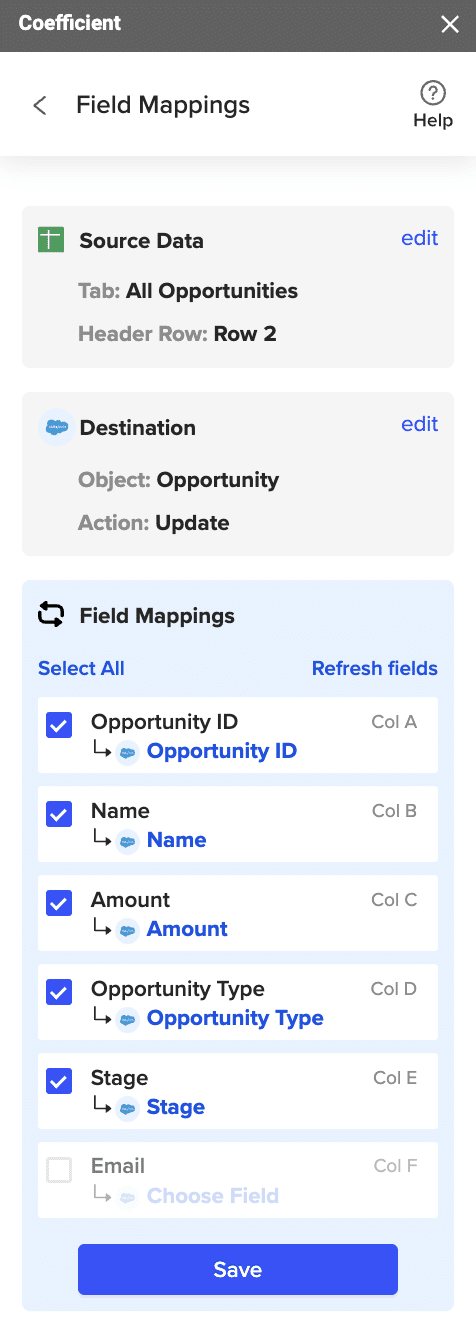
Note: If you imported data from Salesforce into your spreadsheet previously, Coefficient will auto-detect and map these fields.
(Optional) Specify additional settings such as batch size, whether to export empty cells on an update, and the column for results.

Stop exporting data manually. Sync data from your business systems into Google Sheets or Excel with Coefficient and set it on a refresh schedule.
Get Started

Note: Batch size is capped at 10,000 rows due to Salesforce API limitations.
Confirm your settings and click “Export”.
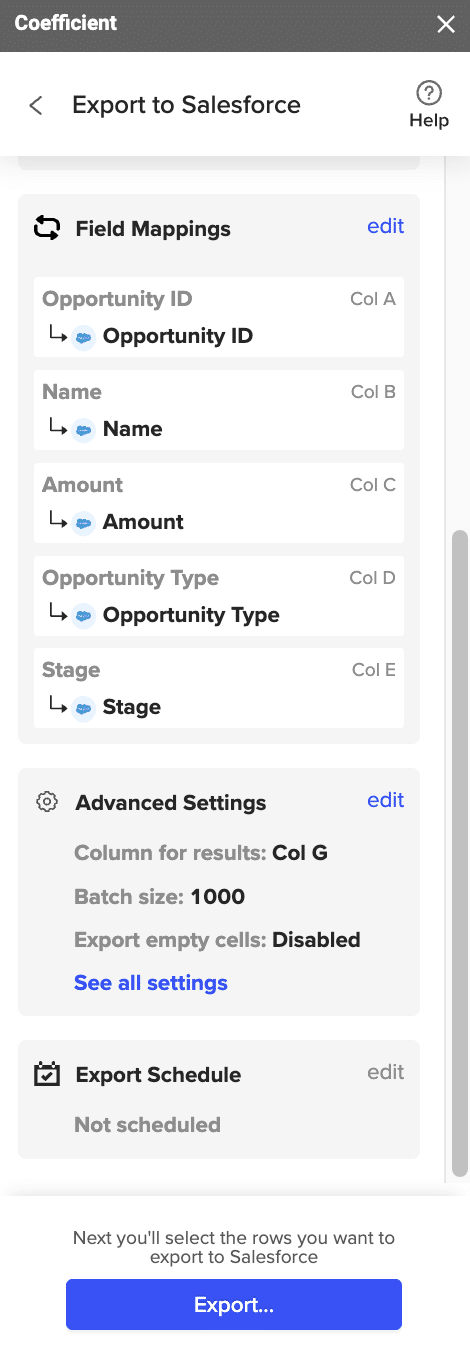
Then, highlight the rows you want to update or export. You can choose to export all rows or specific rows.

After you’re finished, review your settings and click “Export.”
Follow the prompts to confirm your changes.

In a few seconds, data from your spreadsheet will push to Salesforce.
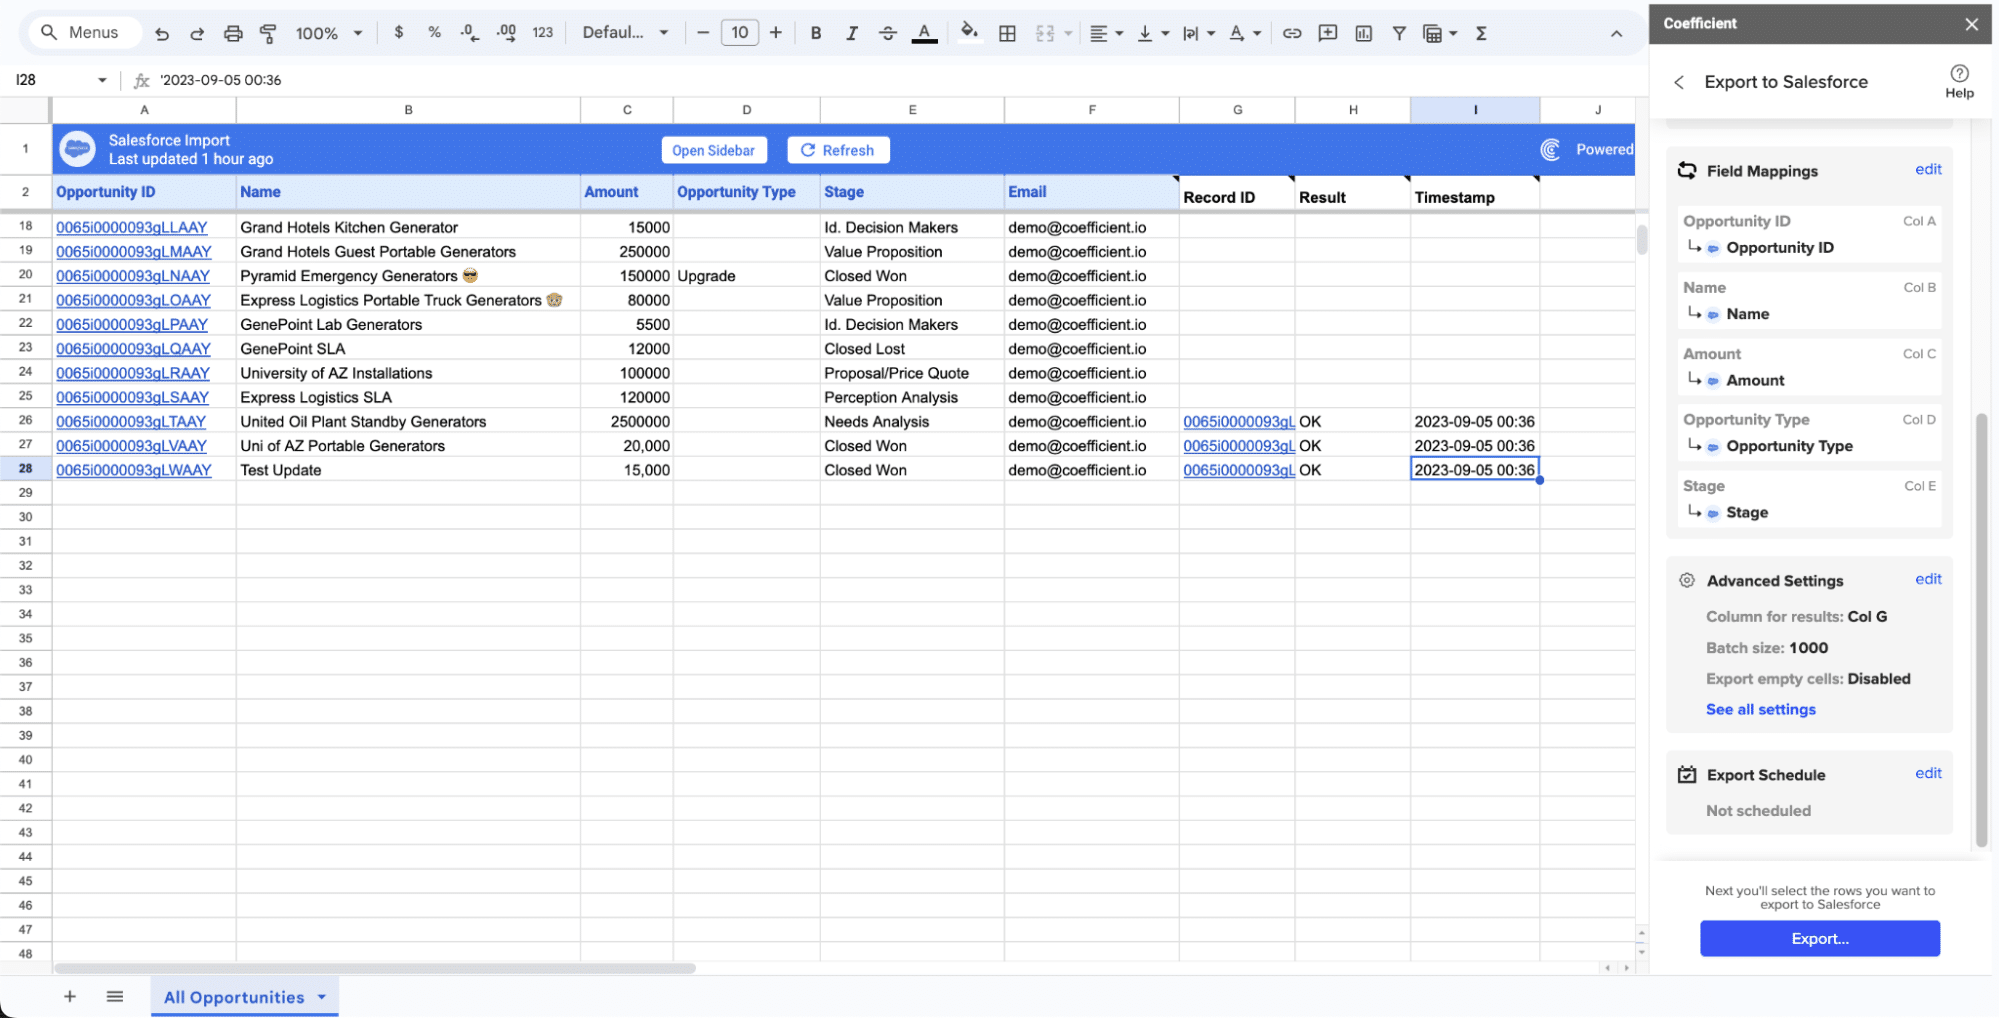
Your spreadsheet will display updated records, along with their export status and the date/time stamp of the update.
Method 2: Zapier – Codeless Automations

Zapier is a popular online automation tool that lets you create custom workflows called “Zaps” that connect Klaviyo and Salesforce. With a variety of triggers and actions, you can automate many common use cases without writing any code.
Pros
- Many pre-built Zap templates for common use cases
- Can combine multiple steps and apps in one Zap
- Supports data formatting and custom logic
Cons
- Free plan limited to basic Zaps; premium needed for full features
- Zaps can get complex to build and manage over time
Follow these steps to connect Klaviyo to Salesforce using Zapier:
Step 1: Log into Your a Zapier Account
Step 2: Make a New Zap
- Click “+ Create” > “New Zap” to begin creating a new automation.

- Name your Zap and select Klaviyo as the trigger app
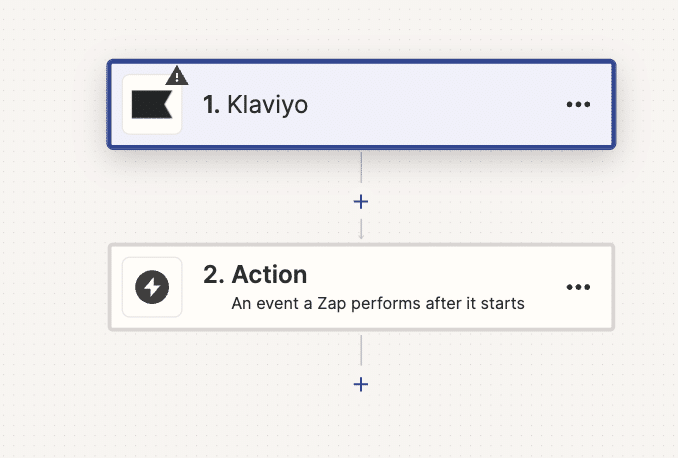
- Choose your Klaviyo trigger event, e.g. “New Event”
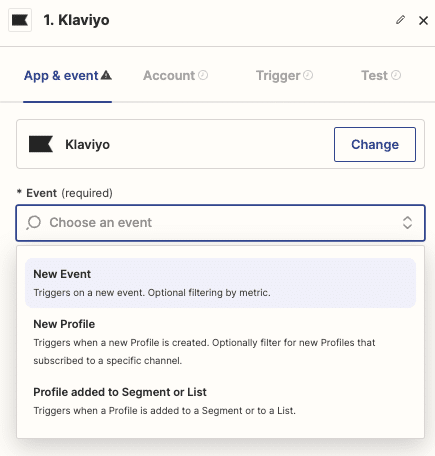
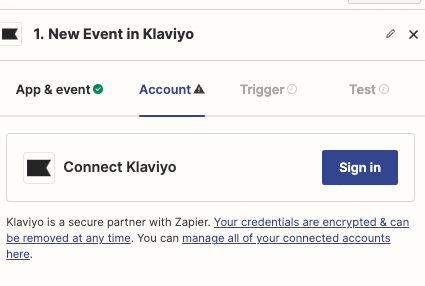
- Click “Continue” and sign into your Klaviyo account
- Set up your Klaviyo trigger options and test it
Step 3: Set Up Your Salesforce Action
- Select Salesforce as your Zap’s action app
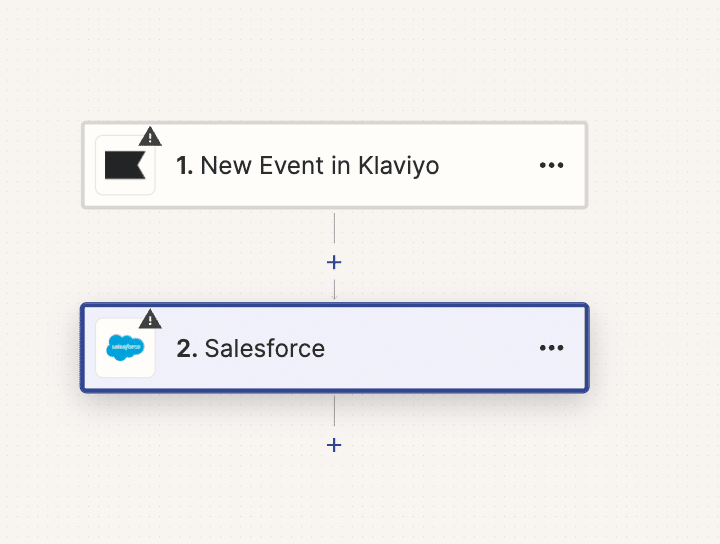
- Choose your Salesforce action event, e.g. “Create Record”
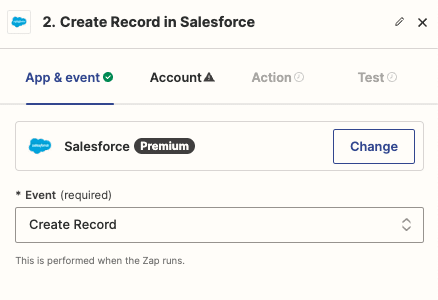
- Click “Continue” and sign into your Salesforce account
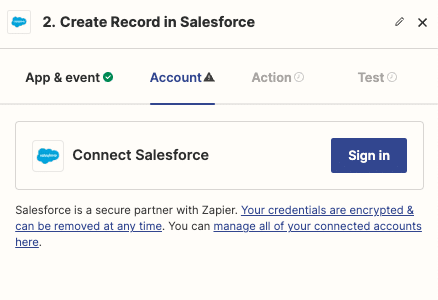
- Set up your Salesforce action, mapping Klaviyo fields to Salesforce
- Test your Salesforce action and review the results
Step 4: Customize and Activate
- Add any additional steps to your Zap, like filters, delays, or multiple actions
- Give your Zap a name and description
- Turn your Zap on so it will run automatically
- Monitor your Zap’s activity and results in your Zapier dashboard
Method 3: Integromat (Make)
For organizations with more complex data syncing and transformation needs, Integromat offers a robust low-code platform. Beyond basic triggers and actions, it supports multi-step scenarios, data filtering and mapping, error handling, and API integration.
Pros
- Can handle high-volume data and enterprise workloads
- Allows data flows between many steps and apps
- Granular field mapping and data transformation options
Cons
- Higher learning curve than simpler tools
- Requires planning to design and optimize scenarios
Follow these steps to connect Klaviyo to Salesforce using Integromat:
Step 1: Create an Integromat Account
- Go to integromat.com and click “Sign Up Free”
- Enter your email, name, and password
- Respond to the account setup prompts
- You’ll land in the Integromat dashboard
Step 2: Create a New Scenario
- Click “Create a new scenario” in the dashboard
- Name your scenario and select Klaviyo as the trigger app
- Choose your Klaviyo trigger, e.g. “Watch Subscribed”
- Authorize Integromat to access your Klaviyo account
- Set your trigger options, like list ID and polling interval
Step 3: Add Your Salesforce Action
- Click the plus icon to add a new module after your trigger
- Select the Salesforce app and choose your action (e.g. Create a Record)
- Connect your Salesforce account to Integromat
- Configure your action settings, like the Salesforce object and mapped fields
- Click “OK” to save your Salesforce action module
Step 4: Customize and Run
- Add any additional modules for data filtering, mapping, or multiple steps
- Click the gear icon to configure error handling and scheduling
- Run a test of your scenario and check the results
- Turn on scheduling so your scenario will run automatically
- Monitor your scenario’s activity and results in the dashboard
Connect Klayviyo to Salesforce: No Code Required
Integrating Klaviyo and Salesforce supercharges your marketing and sales operations. By leveraging connected data and automations, you can streamline processes, surface smarter insights, and drive more efficient growth.
The three methods we covered—Coefficient, Zapier, and Integromat—make it easy to build this integration. Coefficient is perfect for spreadsheet lovers who want simple, codeless data syncing. Zapier allows custom multi-step workflows without code. And Integromat can handle the most advanced data routing and transformation cases.
Whichever tool you choose, you’ll be well on your way to unleashing the power of Klaviyo and Salesforce. To get started, we recommend trying Coefficient for free. Get started with Coefficient here and see how easy it is to connect your data and automate your work.

