Importing invoices into QuickBooks can save you hours of manual data entry and streamline your accounting process.
In this comprehensive guide, we’ll walk you through the top three methods for importing invoices into QuickBooks Online, including using Coefficient for seamless spreadsheet integration, QuickBooks’ native import tool, and SaasAnt Transactions for advanced import capabilities.
By the end, you’ll have a clear understanding of which approach works best for your business needs.
Method 1: Import Invoices with Coefficient
Coefficient is a powerful Google Sheets and Excel add-on that enables you to import invoices directly from your spreadsheets into QuickBooks Online. With Coefficient, you can:
- Sync live data from 50+ business systems in real-time
- Automate report distribution and alerts via Slack and email
- Ensure data accuracy with direct connections to source systems
- Push data back to QuickBooks with two-way sync
Step-by-Step Guide: Import Invoices into QuickBooks with Coefficient
- Install the Coefficient add-on in your Google Sheet or Excel workbook from coefficient.io.
- Open your spreadsheet containing the invoice data.
- Go to Extensions > Coefficient

- Click Export to > QuickBooks

- Confirm the sheet tab you want to export from (e.g., “Invoices“).

- Select the “Invoice” object as the destination and choose “Insert” as the action.

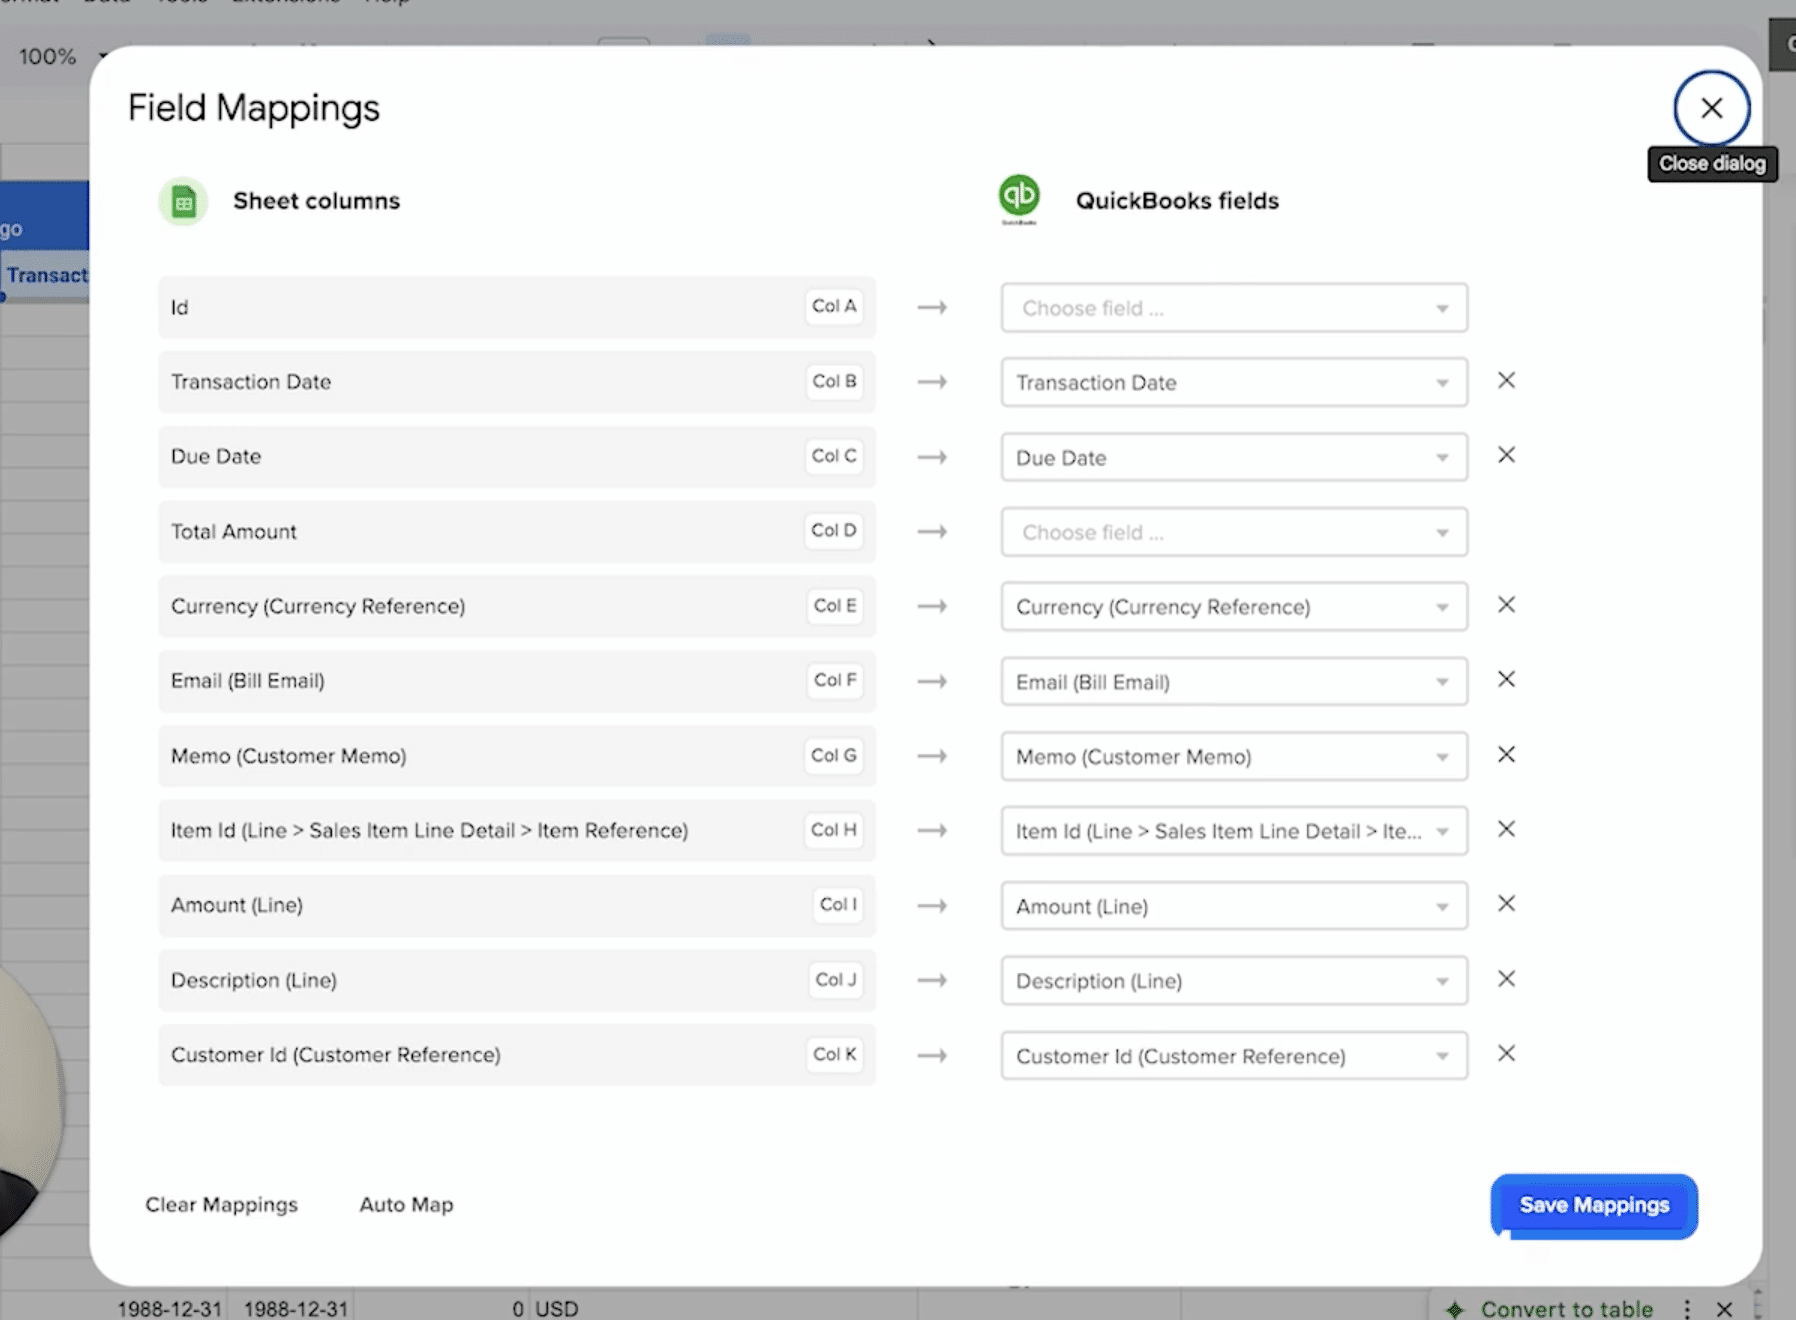
- Map your spreadsheet columns to the corresponding QuickBooks fields. Make sure to include both the Customer ID and Customer Name.
- Fill in your invoice details in the spreadsheet, including date, amount, item ID, description, and customer ID.
- Click “Export” and select the specific row(s) you want to import.

- Preview the changes and click “Insert” to create the invoice(s) in QuickBooks.

- Verify the newly created invoice in QuickBooks by clicking the hyperlinked Record ID in your spreadsheet.
Note: When creating an invoice through Coefficient, you can only add one line item per export. If you have multiple line items for a single invoice, first create the invoice, then add the additional line items in a separate export.
Check out this video demo of importing invoices into QuickBooks with Coefficient.
Benefits of Using Coefficient for Invoice Imports
- Seamless integration between your spreadsheets and QuickBooks Online
- Real-time data syncing ensures your invoices are always up-to-date
- Automate repetitive tasks like report distribution and alerts
- Two-way sync allows you to push data back to QuickBooks
Method 2: QuickBooks Native Import Tool
QuickBooks Online offers a built-in import tool for bringing invoice data directly into the system. This method is best suited for small to medium-sized businesses with straightforward invoice data and users comfortable with the QuickBooks interface.
Step-by-Step Guide: Import Invoices with QuickBooks Native Tool
- In QuickBooks Online, click the gear icon in the upper right corner and select “Import data” under Tools.

- Click the “Invoices” square.

- (Optional) Select the checkbox to add new customers.
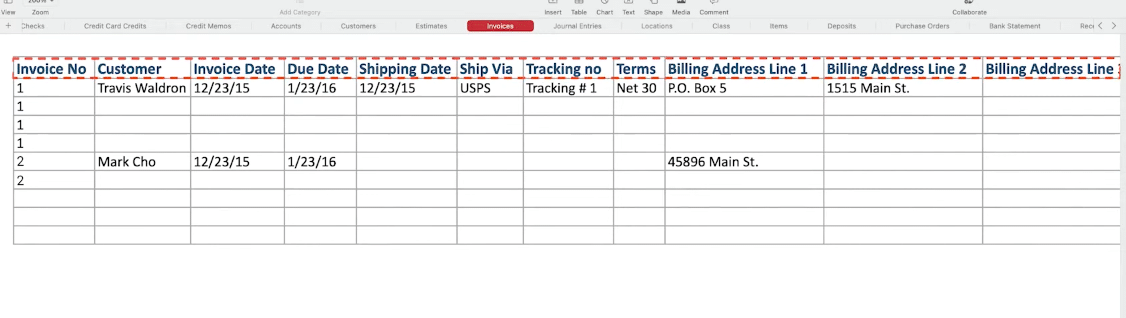
- Prepare your spreadsheet according to QuickBooks requirements, ensuring all required fields are included.
- Browse to your CSV file and click “Next.”

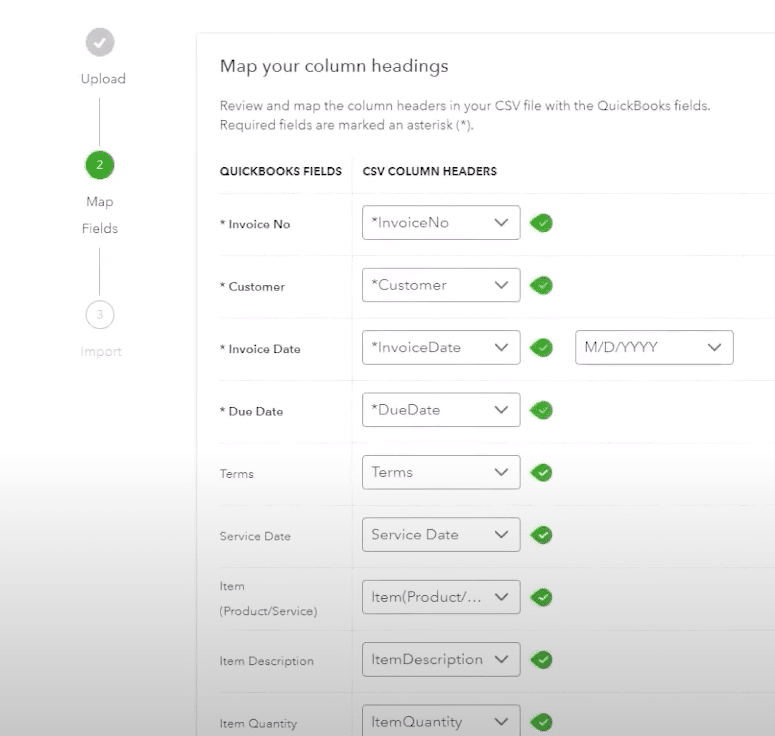
- Map the columns from your spreadsheet to the corresponding QuickBooks fields.
- Click “Next” and then “Complete import.”
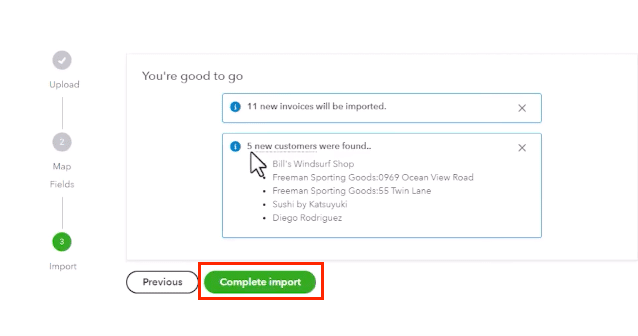
- Review the imported data in QuickBooks to ensure accuracy.
Note: QuickBooks’ native import tool has some limitations. You can import a maximum of 100 invoices at a time with a 1,000 row limit per spreadsheet. While you can import invoices with single or multiple line items, you can’t add discounts, credit memos, or negative amounts.
Method 3: SaasAnt Transactions
SaasAnt Transactions is a third-party tool that offers advanced import capabilities for QuickBooks users. It supports various file formats, handles large volume imports, and provides automation options like email, Zapier, and FTP.

Stop exporting data manually. Sync data from your business systems into Google Sheets or Excel with Coefficient and set it on a refresh schedule.
Get Started
Step-by-Step Guide: Import Invoices with SaasAnt Transactions
- Sign up for a SaasAnt Transactions account at saasant.com.

- Connect your QuickBooks Online account to SaasAnt.
- Prepare your invoice data in a supported format (Excel, CSV, IIF). Ensure you format the invoice in a Saasant acceptable format.
- Click the “New Import” to upload your file to SaasAnt Transactions.

- Map the fields from your file to the corresponding QuickBooks fields and configure import settings.

- Review the import and click “Process” to start the import.
- Verify the imported invoices in QuickBooks to ensure accuracy.
Advantages of SaasAnt Transactions
- Supports a variety of file formats for invoice imports
- Can handle large volume imports efficiently
- Offers automation options like email, Zapier, and FTP for scheduled imports
However, keep in mind that SaasAnt Transactions is an additional paid service, and there may be a learning curve for new users.
Streamline Your QuickBooks Invoice Import Process Today
Importing invoices into QuickBooks doesn’t have to be a time-consuming or error-prone task. By choosing the right method for your business needs—whether it’s Coefficient for seamless spreadsheet integration, QuickBooks’ native import tool for straightforward imports, or SaasAnt Transactions for advanced capabilities—you can significantly improve your accounting workflow and save valuable time.
Ready to revolutionize your invoice management? Get started with Coefficient today and experience the power of automated data syncing between your spreadsheets and QuickBooks Online.
Frequently Asked Questions
Can I import invoices into QuickBooks?
Yes, you can import invoices into QuickBooks. However, there are some limitations: you can import a maximum of 100 invoices at a time with a 1,000 row limit per spreadsheet. While you can import invoices with single or multiple line items, you can’t add discounts, credit memos, or negative amounts in general. For more flexible import options, consider using Coefficient to streamline your data import process.
How do I upload bulk invoices in QuickBooks Online?
To upload bulk invoices in QuickBooks Online:
- Click the gear icon in the upper right corner
- Under Tools, click “Import data”
- Click the “Invoices” square
- Browse to your CSV file and click Next
- Map the columns and click Next
- Click “Complete import“
For a more efficient bulk upload process with real-time syncing and automated updates, try Coefficient’s QuickBooks integration.
How do I import billing from Excel to QuickBooks?
To import billing from Excel to QuickBooks:
- Select the type of data you want to import
- Use a formatted Excel spreadsheet that matches QuickBooks requirements
- Enter the information and save your file
- Upload the file to QuickBooks and review the results
- Select Close when done
For a seamless Excel to QuickBooks integration with automated data syncing, consider using Coefficient’s Excel connector.
Can you import PDF invoices into QuickBooks?
Yes, you can import PDF invoices into QuickBooks using third-party tools like SaasAnt Transactions. The process can be automated using email, Zapier, or FTP for scheduled imports. However, for a more comprehensive solution that allows you to work with various data formats and automate your entire reporting process, Coefficient offers robust integration capabilities with QuickBooks.


