Adjusting margins in your Google Sheets documents is a key step in creating organized, easy-to-read financial reports, sales analyses, or any business-related document.
This guide walks you through the process of changing margins in Google Sheets, ensuring your reports look professional and are formatted to perfection.
Understanding Google Sheets Interface
Google Sheets, a go-to tool for business data organization and analysis, offers an intuitive interface ideal for various business operations tasks.
Let’s start by getting familiar with its interface to efficiently navigate the tools needed for adjusting page settings like margins.
Locating Toolbars
The Google Sheets interface has a clean design that is easy to navigate. At the top of the screen, you will find various toolbars that contain important options and functions.

Some commonly used toolbars include:
- File: This menu provides options for creating, opening, saving, and printing documents.
- Edit: Contains options for undoing, redoing, copying, and pasting actions.
- Insert: Allows you to add elements such as rows, columns, and charts to your spreadsheet.
- Format: Provides tools for formatting cells, text, and numbers.
- Data: Offers options for sorting and filtering data.
Finding Page Setup Option
When working with Google Sheets, you may need to adjust the margins to customize the printing or viewing of your spreadsheet.
Note: The Page Setup options in Google Sheets are actually accessed through the Print setup window, rather than directly from the File menu.
To find the page setup options:
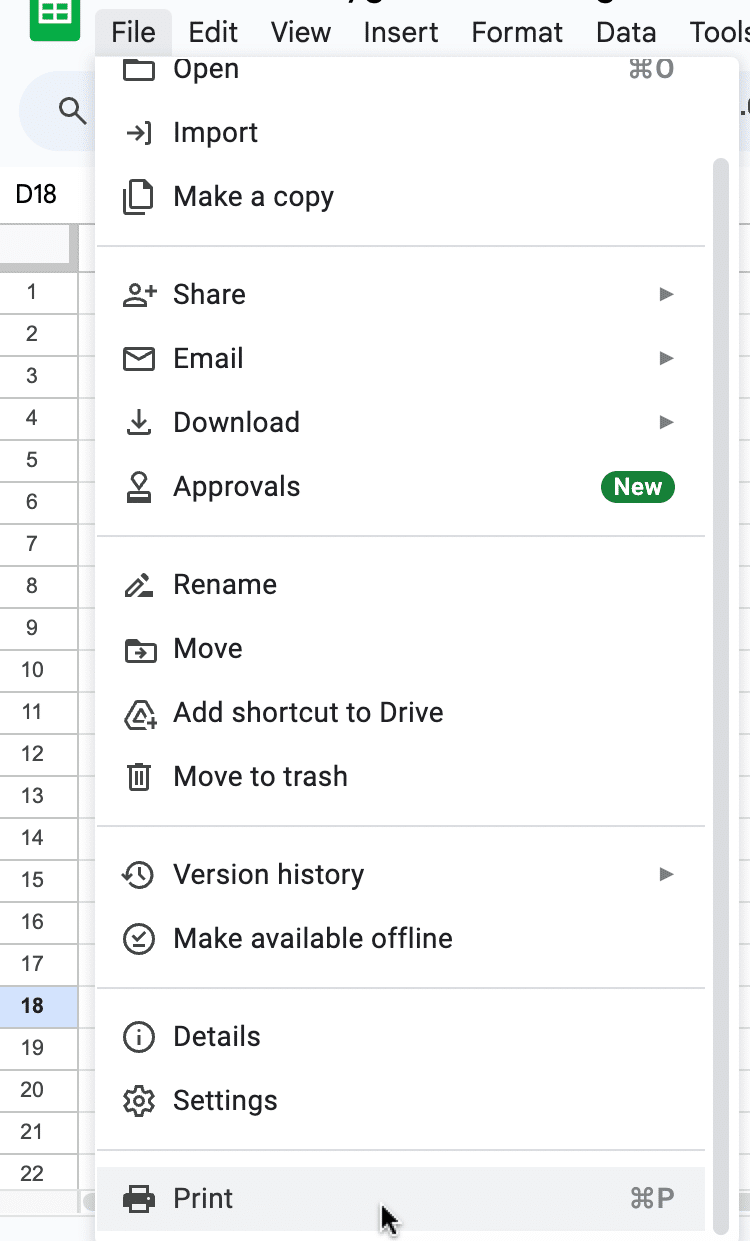
- Click on the File menu in the top toolbar.
- Select Print from the drop-down menu.

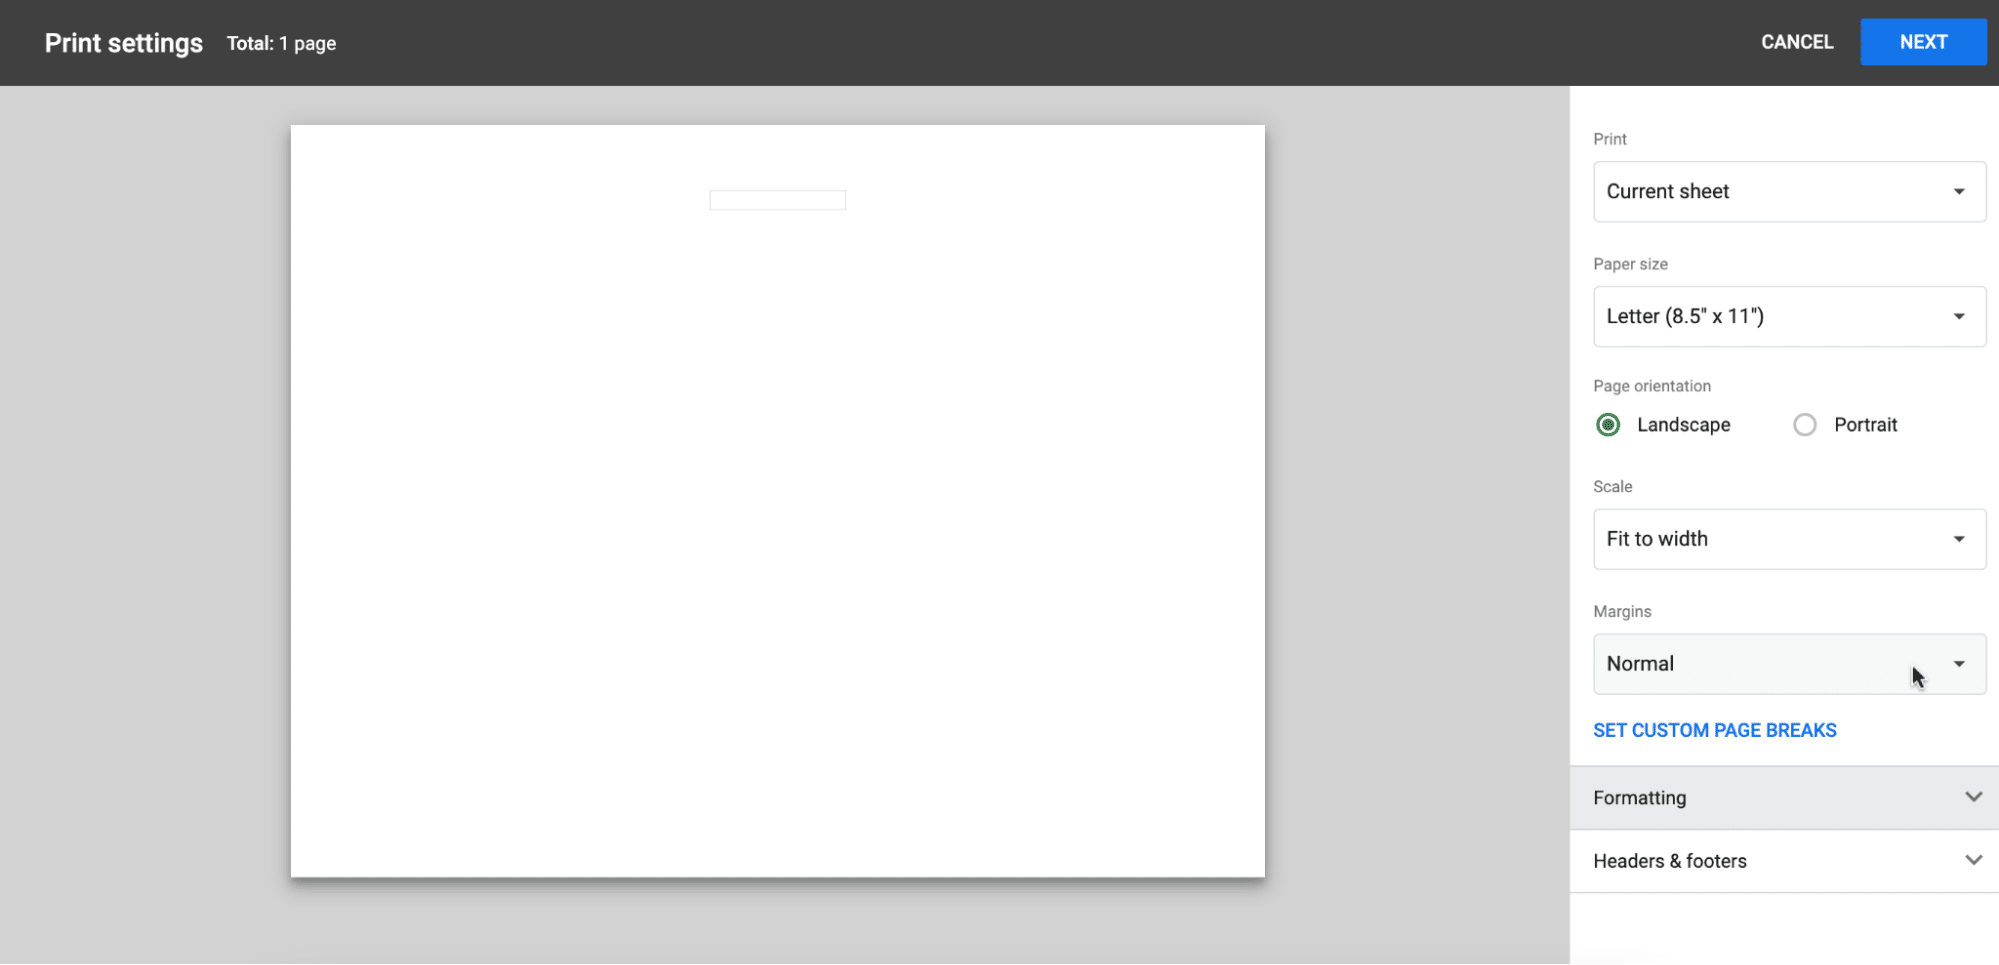
This will open a new window where you can adjust the settings of the document, including page size, orientation, and margins.

Altering Margins in Google Sheets
Accessing Custom Margins Setting
To change the margins in Google Sheets, one should first access the print settings. This can be done by clicking on File in the top menu and then selecting Print.
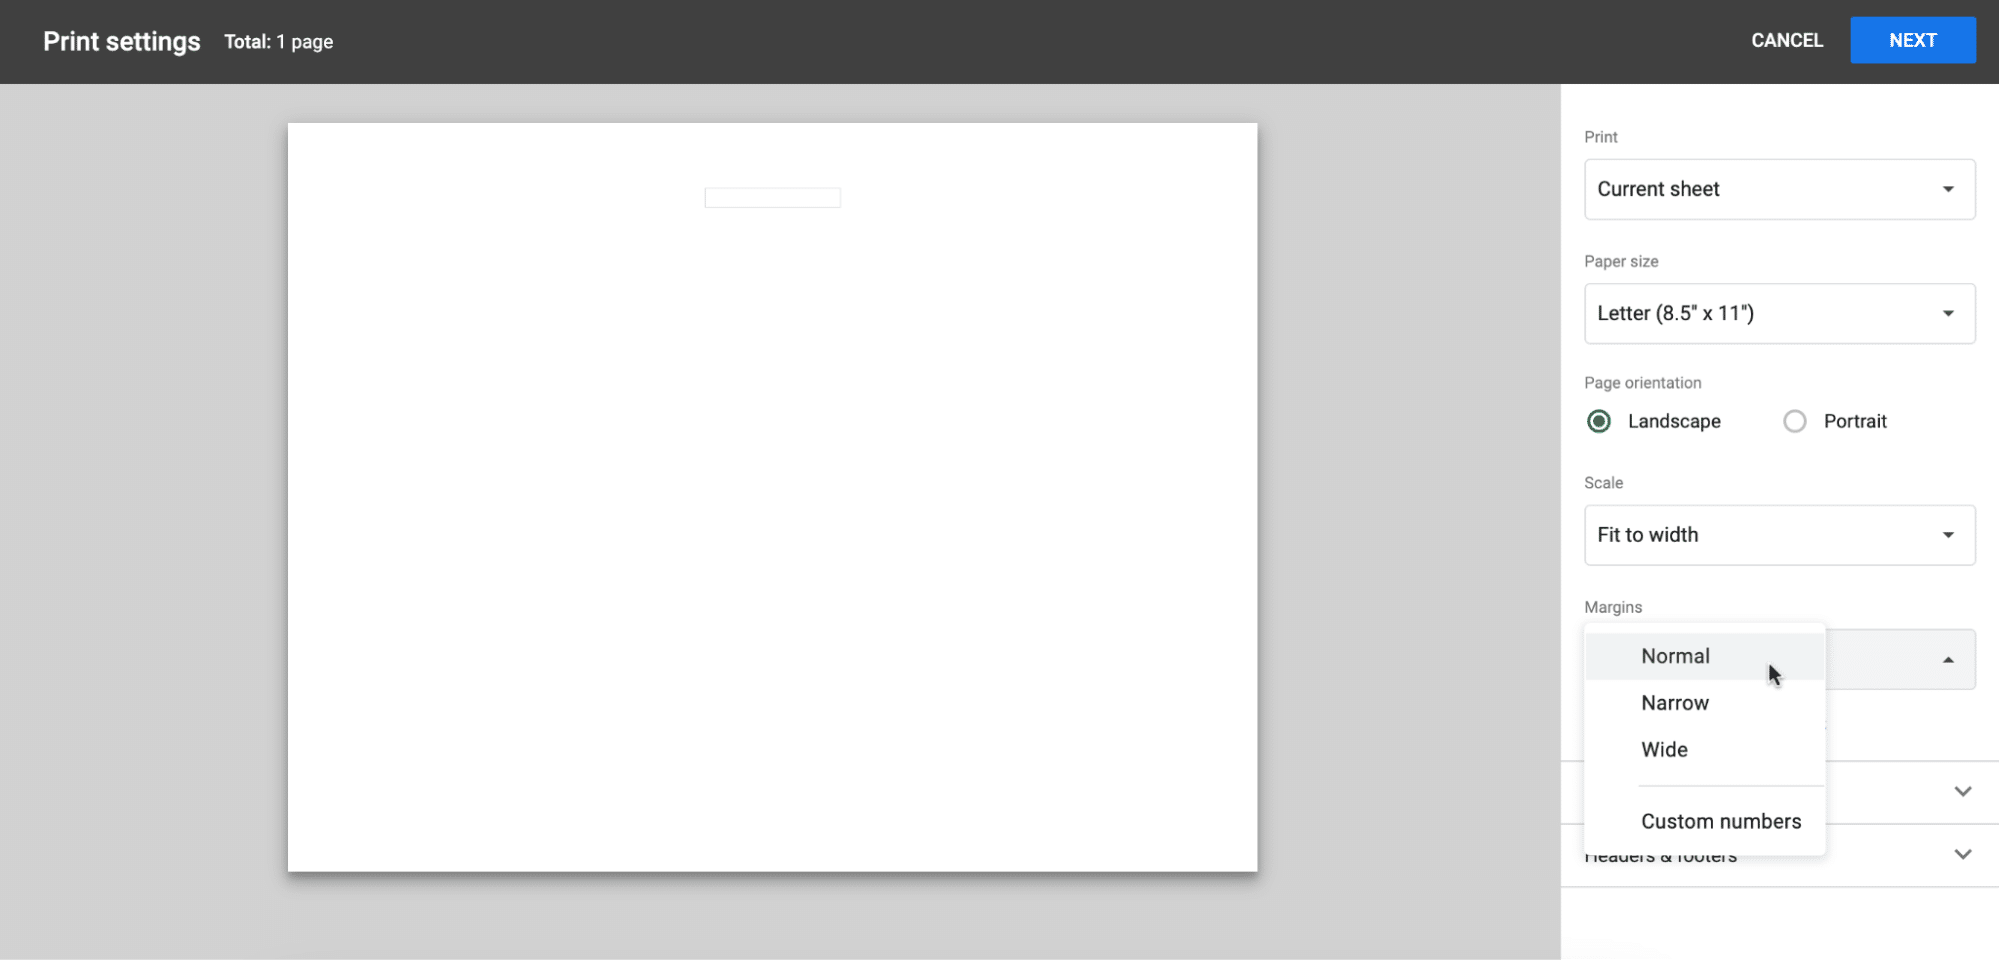
In the print settings panel, locate the Margins dropdown menu and choose the Custom Numbers option source.

Supercharge your spreadsheets with GPT-powered AI tools for building formulas, charts, pivots, SQL and more. Simple prompts for automatic generation.

By doing this, an overlay will appear on the document preview, displaying separate fields for each of the four margins (top, bottom, left, right).
Adjusting Margin Values
Once the custom margins settings are accessed, it is time to edit the values.
To do this, click on each margin field that needs to be adjusted and type in the new value.

It’s essential to understand the role of margins while modifying them.
Margins help determine the layout and appearance of a document, directly impacting the amount of space for headers, footers, and the document body source.
Here’s a brief overview of the effects of modifying each margin:
- Top Margin: Adjusting the top margin affects the space reserved for headers in the document.
- Bottom Margin: Changing the bottom margin can influence the space reserved for footers in the document.
- Left Margin: Modifying the left margin will impact the space available for the document body on the left side of the page.
- Right Margin: Adjusting the right margin will affect the space available for the document body on the right side of the page.
Conclusion
Adjusting margins in Google Sheets is a simple yet powerful way to enhance the readability and professionalism of your business documents. Whether it’s a financial report or a sales analysis, the right margins can make your data stand out.
Enhance your business operations with Coefficient for seamless data integration in spreadsheets. Get started with Coefficient.


