Integrating your customer support and CRM platforms can be a game-changer for your business. In this comprehensive guide, we’ll walk you through the top methods to connect Freshdesk to HubSpot, including using Coefficient and other notable tools. By the end, you’ll be equipped to streamline your customer data operations for maximum efficiency and success.
Advantages of Connecting Freshdesk to HubSpot
Before we dive into the “how”, let’s look at the key benefits of integrating these two powerful platforms:
- Proactive Issue Resolution By analyzing support ticket trends from Freshdesk alongside customer lifecycle stages in HubSpot, you can anticipate common problems at each stage. This allows you to create targeted educational content or implement product improvements, reducing support volume and increasing customer satisfaction.
- Personalized Upsell Opportunities Combine support interaction history from Freshdesk with customer purchase data in HubSpot to identify ideal upsell moments. For example, if a customer frequently seeks help with a feature limitation, your sales team can be automatically notified to offer an upgrade to a more suitable plan.
- Churn Prediction and Prevention Merge support ticket frequency and severity from Freshdesk with engagement metrics from HubSpot to create an early warning system for at-risk customers. This enables your customer success team to intervene proactively, potentially saving valuable accounts before they churn.
Connecting Freshdesk to HubSpot: 3 Methods
Now that you’re sold on the “why”, let’s explore three ways to build this integration, depending on your technical skills and business needs:
| Solution | Best For |
| Coefficient | Ideal for data analysts and business intelligence teams who need to pull Freshdesk data into spreadsheets for ad-hoc analysis alongside HubSpot data. Perfect for organizations that heavily rely on Excel or Google Sheets for reporting and want to automate data refreshes without building a complex data pipeline. |
| Zapier | Best for marketing and customer service teams who need to quickly set up simple, trigger-based automations between Freshdesk and HubSpot. Excellent for companies that want to experiment with different workflows without committing to a complex integration. However, it may not be cost-effective for high-volume data syncs or complex multi-step processes. |
| Integromat | Optimal for IT teams or tech-savvy business users who need to create sophisticated, multi-step workflows involving Freshdesk, HubSpot, and other apps. Great for organizations that require granular control over their integration logic, including error handling and conditional branching. While it has a steeper learning curve, it offers more flexibility and can be more cost-effective for complex, high-volume integrations. |
Method 1: Coefficient – No-Code, User-Friendly
Coefficient is an add-on that allows you to connect data from Freshdesk to HubSpot using only a spreadsheet – no coding required. It’s an ideal solution for small-to-medium businesses looking for an affordable way to automate their data workflows.
Features:
- Automatic data updates between your sheet and HubSpot: Ensures your data is always current without manual intervention.
- User-friendly, intuitive interface: Makes it easy for anyone to set up and manage data integrations.
Pros:
- Quick and easy to set up: No technical skills needed to get started.
- No technical skills needed: Accessible to non-technical users.
- Reasonable pricing for SMBs: Affordable plans that cater to small and medium-sized businesses.
Cons:
- Some advanced features limited to higher priced tiers: Full functionality requires a premium subscription.
Step-by-Step Walkthrough
Follow these steps to integrate Freshdesk and HubSpot using Coefficient:
Step 1: Install the Coefficient
For Google Sheets
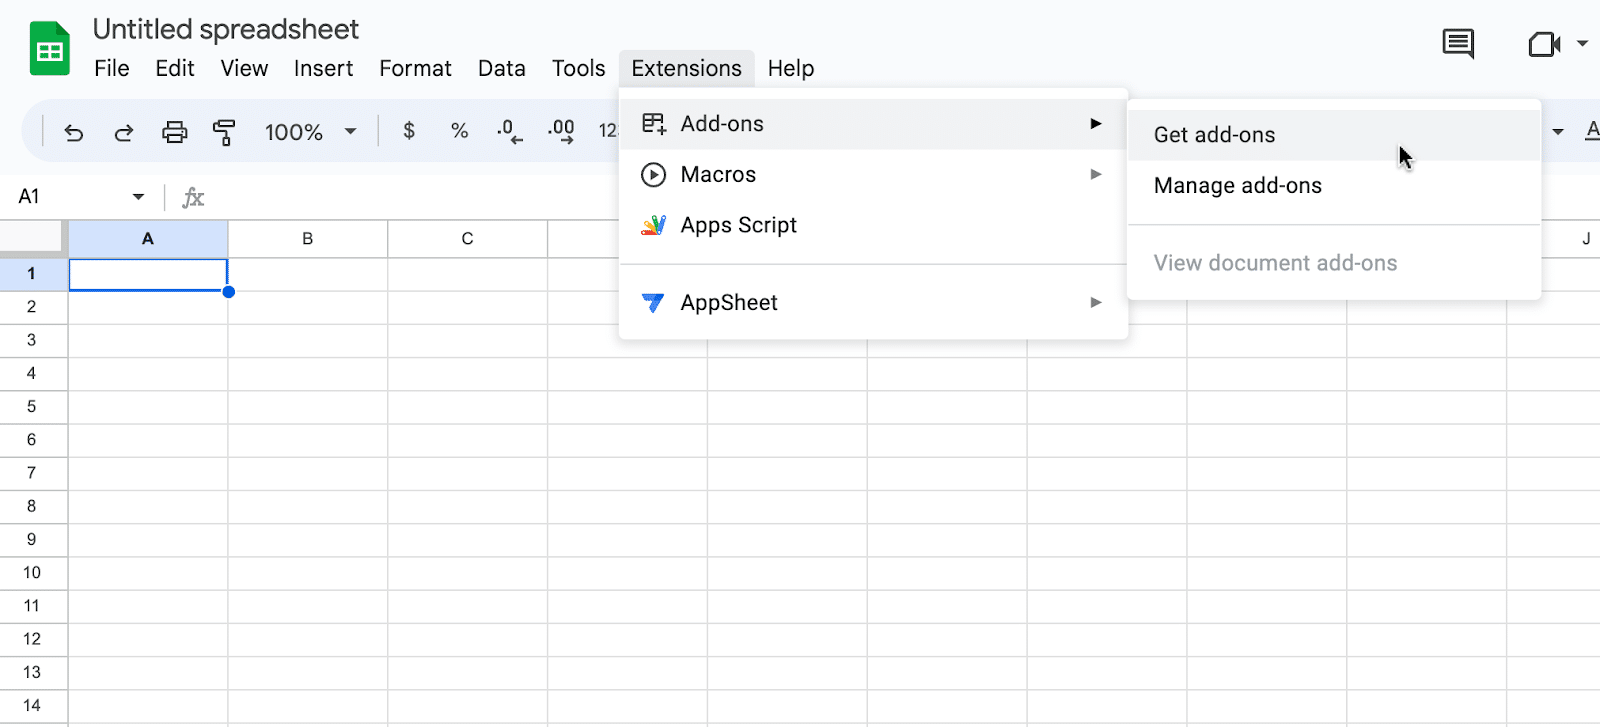
Open a new or existing Google Sheet, navigate to the Extensions tab, and select Add-ons > Get add-ons.
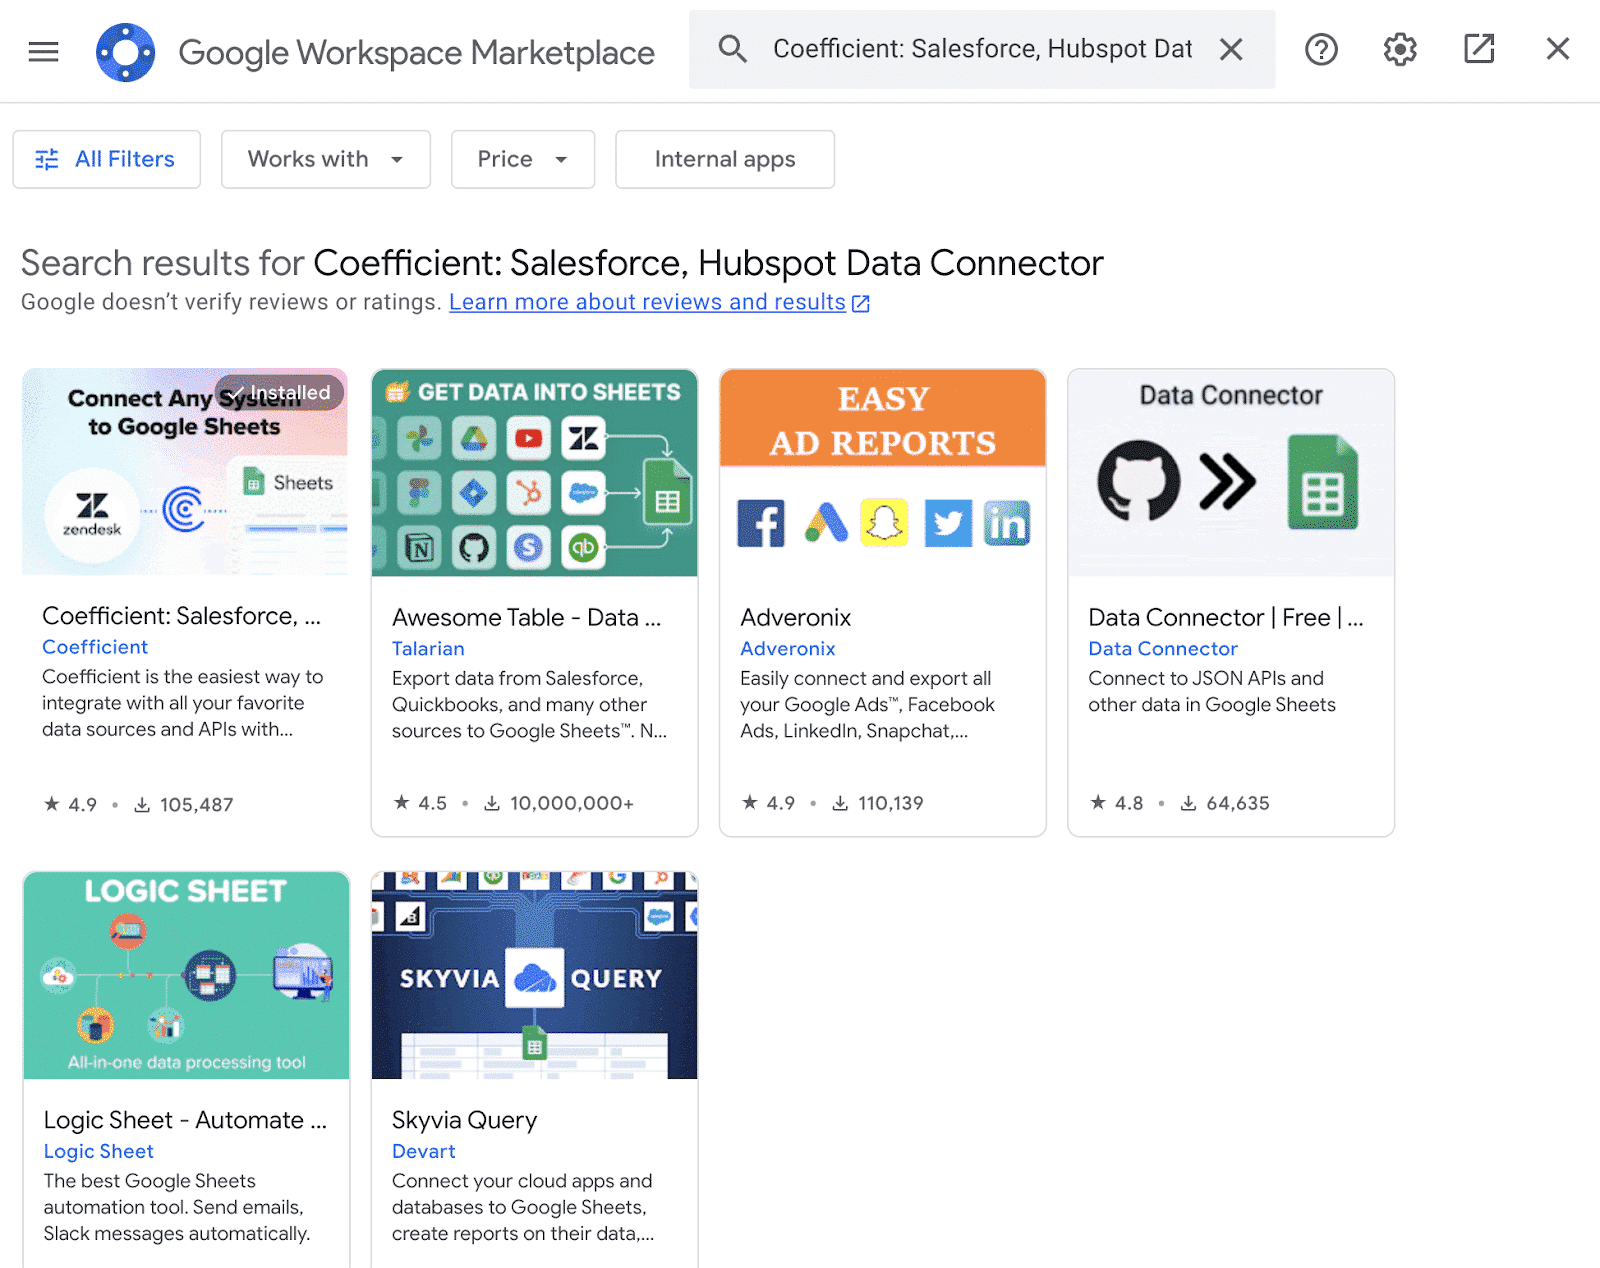
In the Google Workspace Marketplace, search for “Coefficient.”
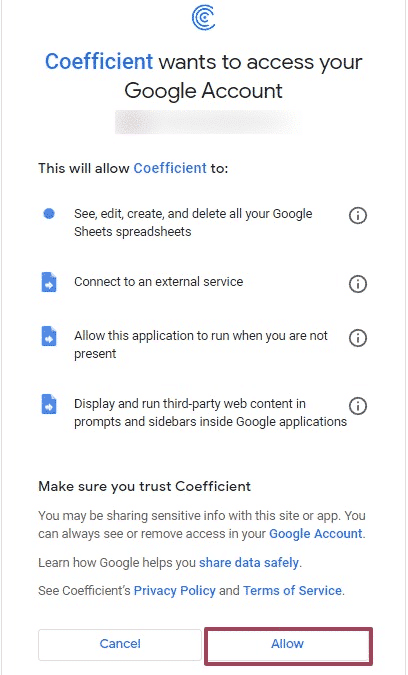
Follow the prompts to grant necessary permissions.
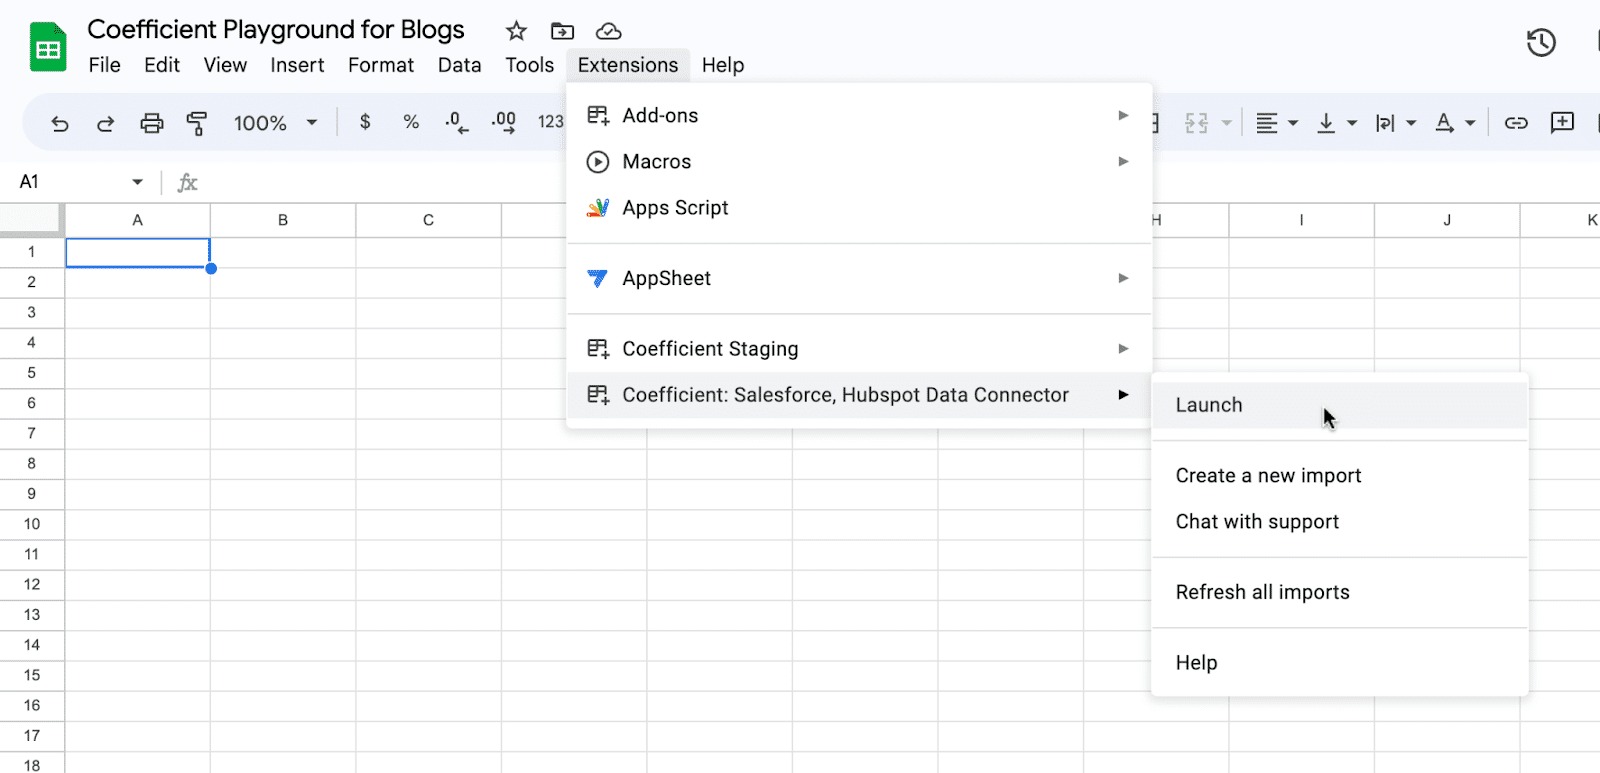
Launch Coefficient from Extensions > Coefficient > Launch.
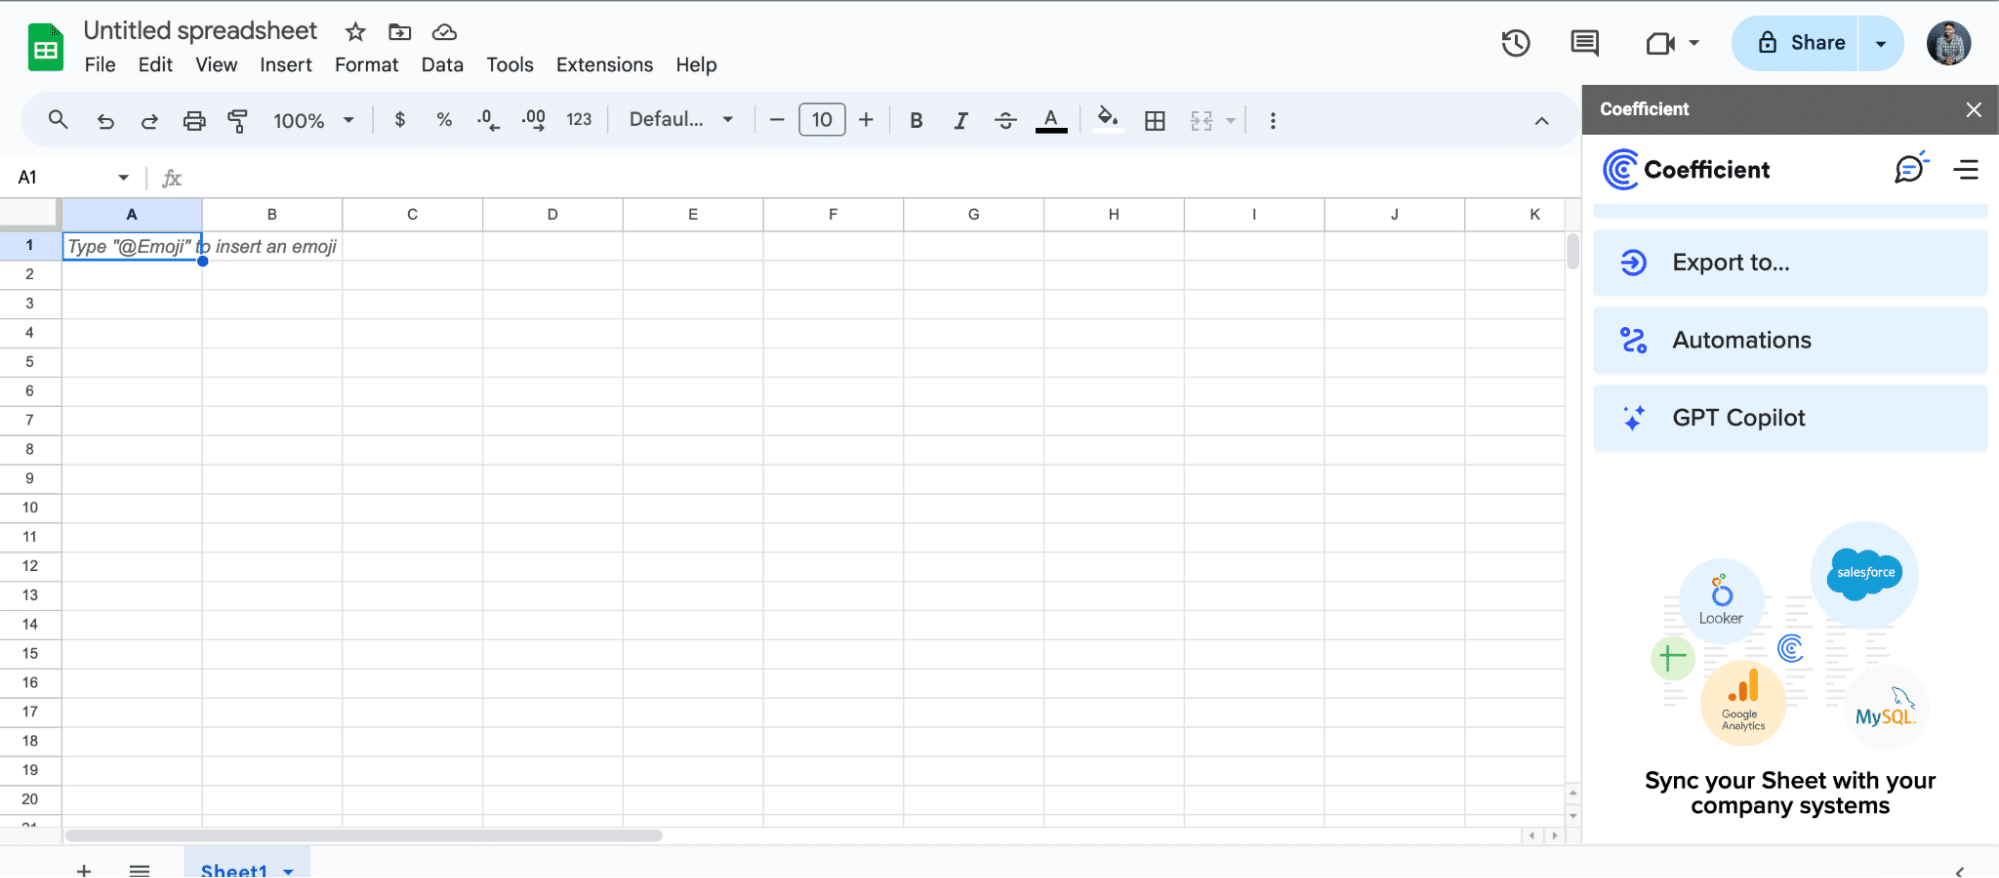
Coefficient will open on the right-hand side of your spreadsheet.
For Microsoft Excel
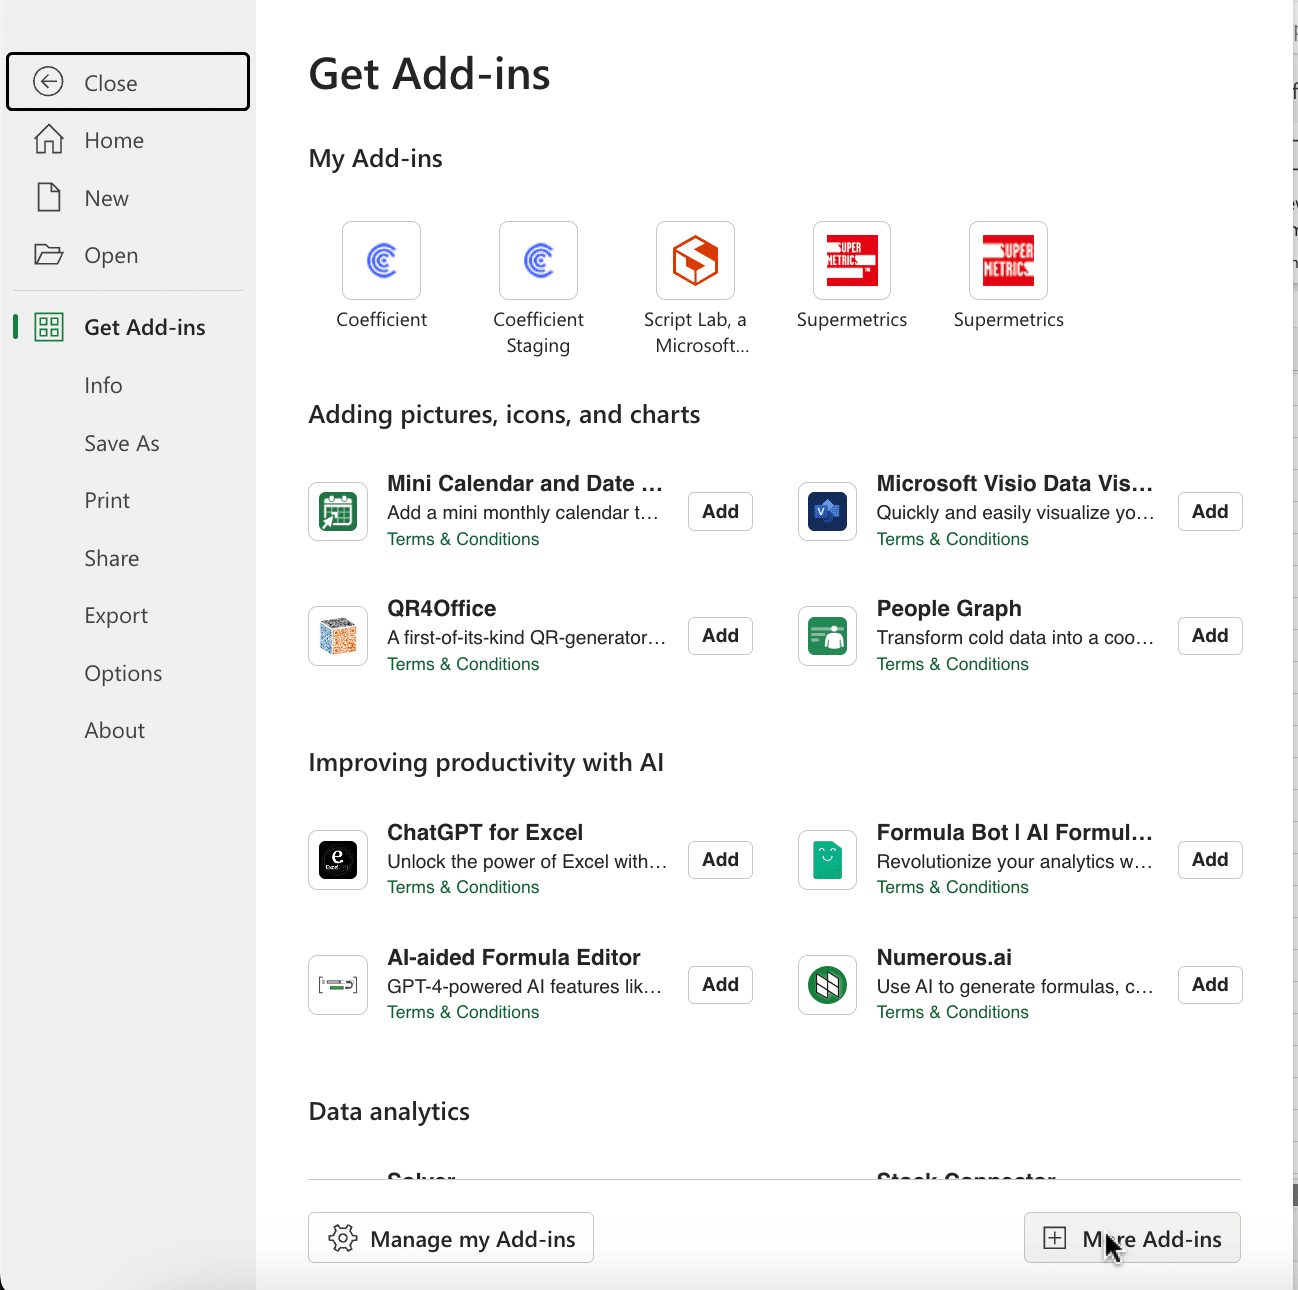
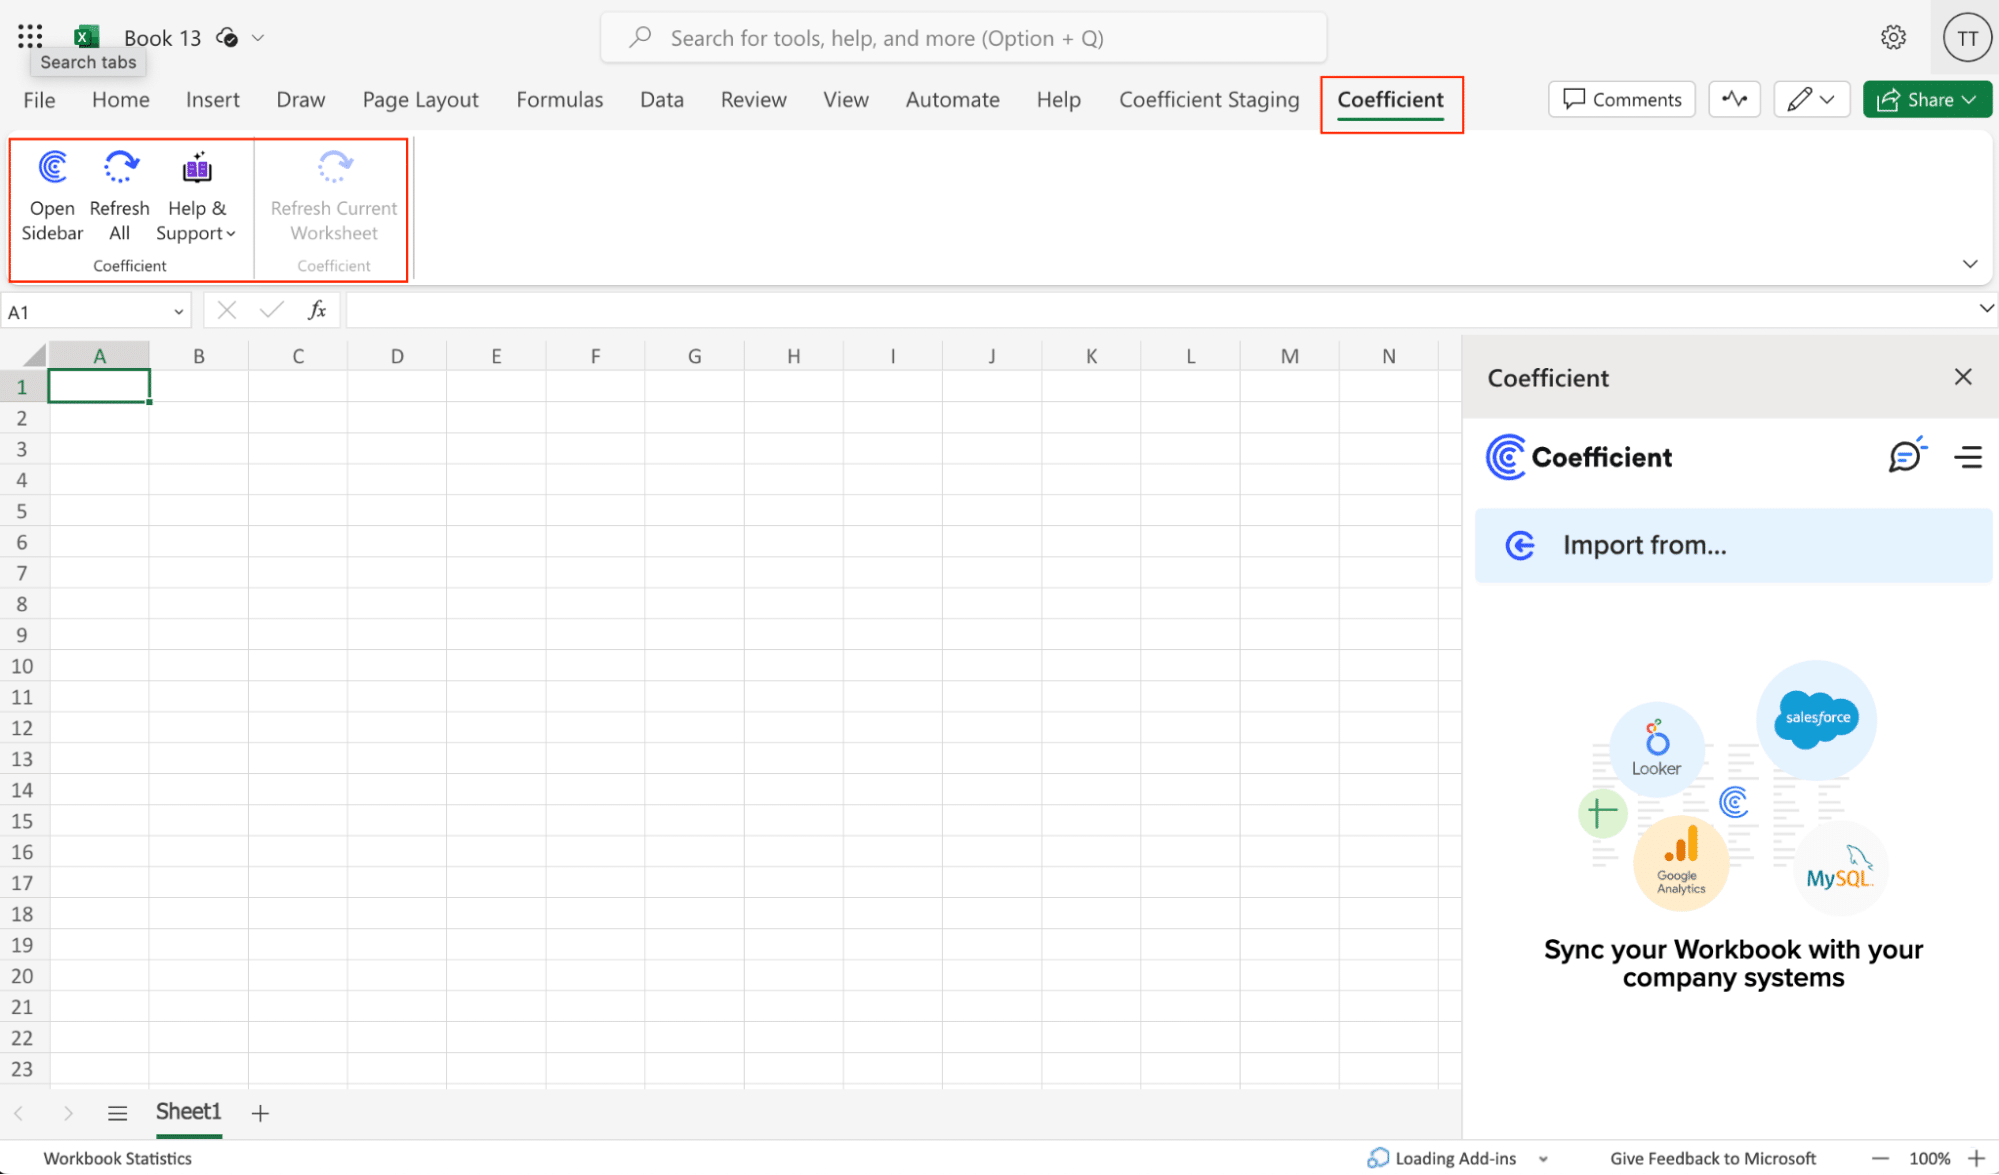
Open Excel from your desktop or in Office Online. Click ‘File’ > ‘Get Add-ins’ > ‘More Add-Ins.’
Type “Coefficient” in the search bar and click ‘Add.’
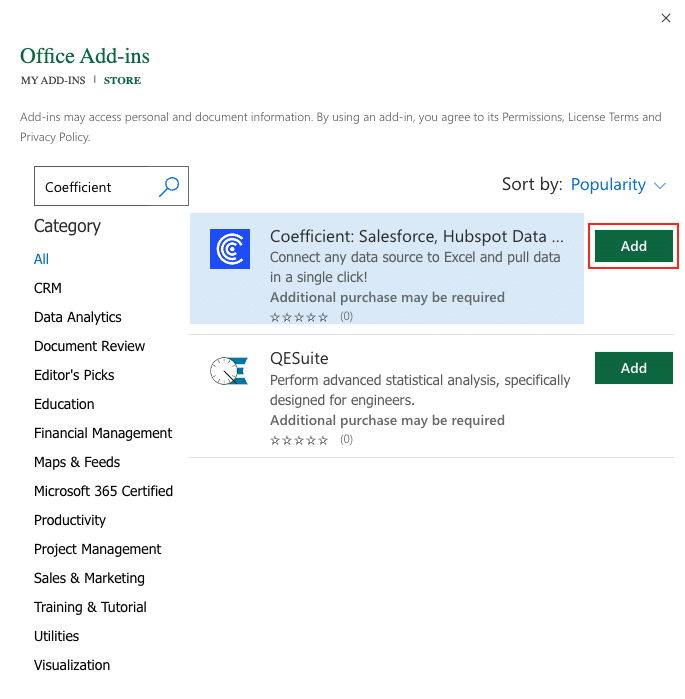
Follow the prompts in the pop-up to complete the installation.
Once finished, you will see a “Coefficient” tab in the top navigation bar. Click ‘Open Sidebar’ to launch Coefficient.
Step 2: Import Data from Freshdesk into Your Spreadsheet
With Coefficient installed, you’re now ready to import your Freshdesk data into your spreadsheet. Let’s walk through the process step by step:
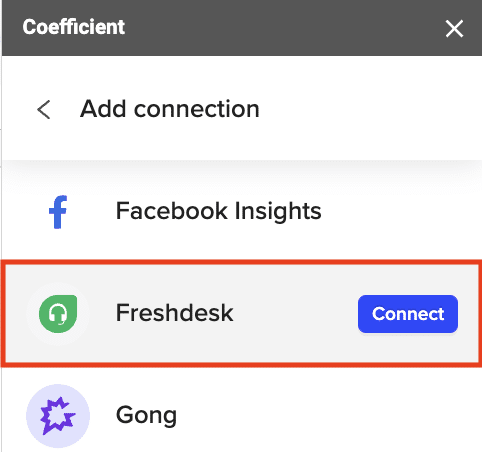
In the Coefficient sidebar, click on “Import From” > “Add a Connection.” Select “Freshdesk” from the list of available data sources.
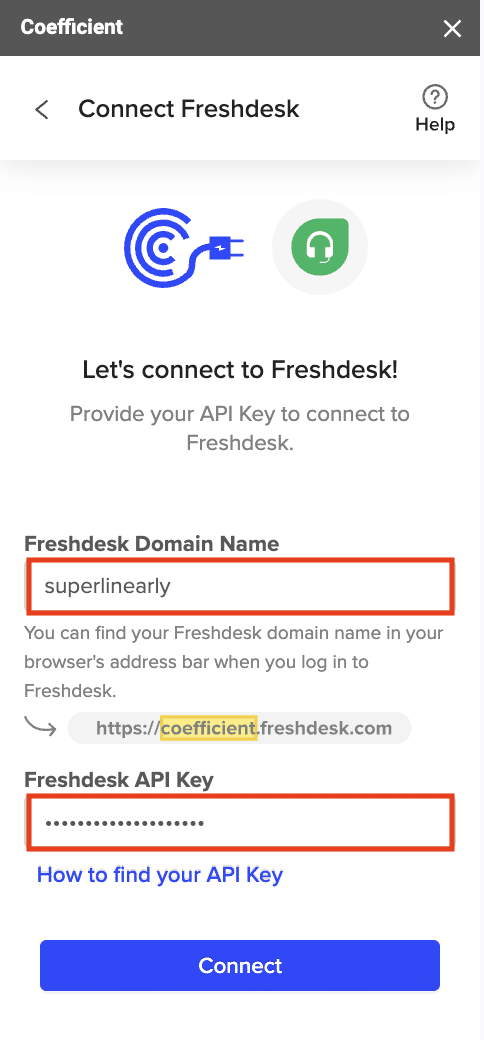
Add your Freshdesk domain name, which can be found in the URL when logged into Freshdesk (e.g., “Coefficient” in “coefficient.freshdesk.com”).
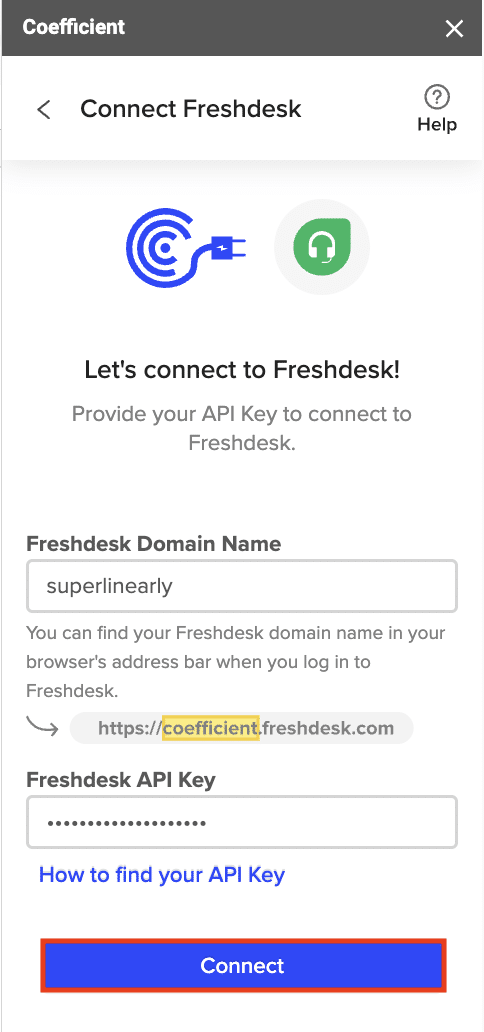
Enter your Freshdesk API key and click “Connect.”
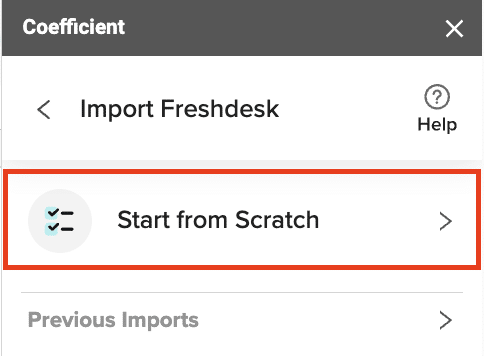
In the next screen, select “Start from Scratch.”
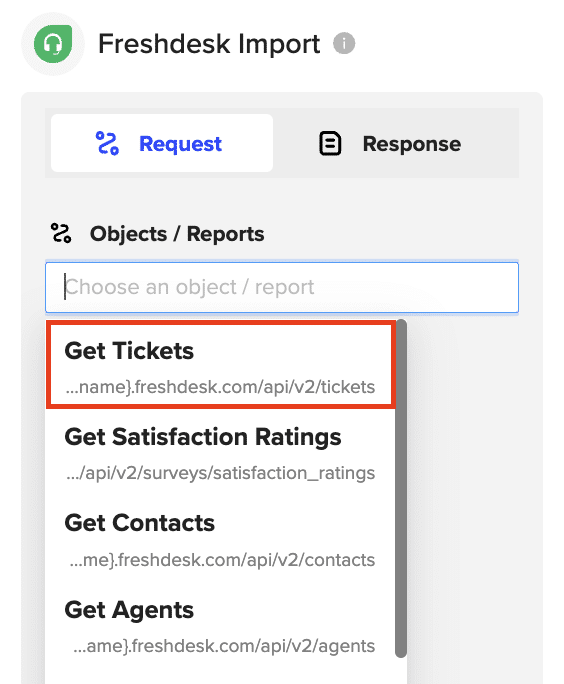
Select an endpoint, such as “Get Tickets”, to fetch data from.
Optionally, add filters to refine your data import, such as searching for a specific requester’s email.

Click “Preview” to continue.
Choose the data fields you want to include in your import, such as subject, status, requester, priority, creation date, due date, ticket ID, and tags.
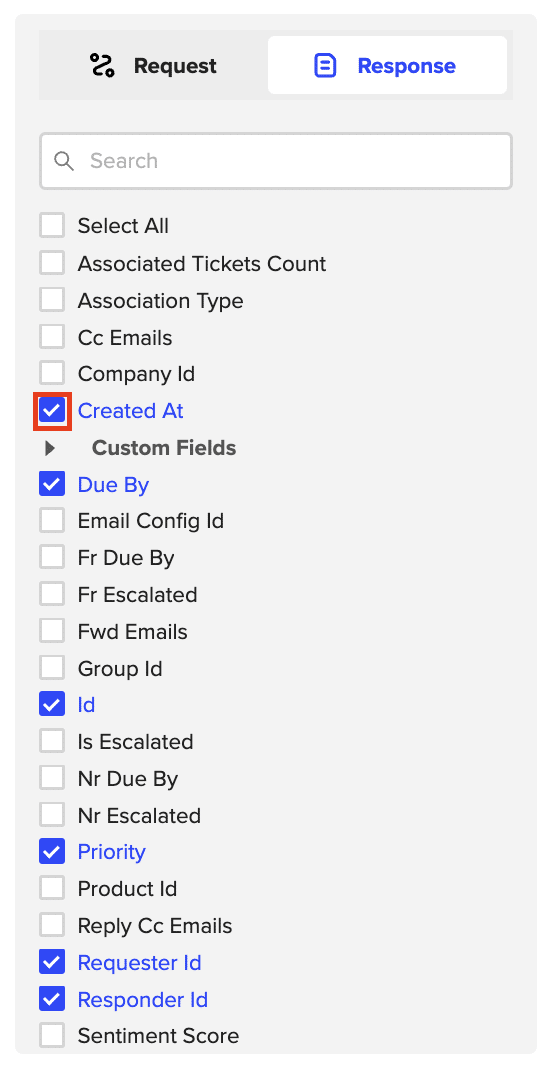
When you’re finished, click “Import” to fetch the selected data into your spreadsheet.

Step 3. Export Data from Your Spreadsheet to HubSpot
Before starting, make sure you’ve connected to HubSpot.
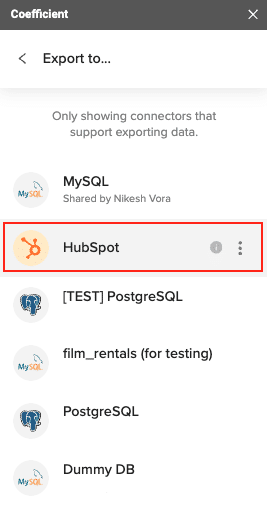
Then, navigate to Coefficient’s menu. Click “Export to…”
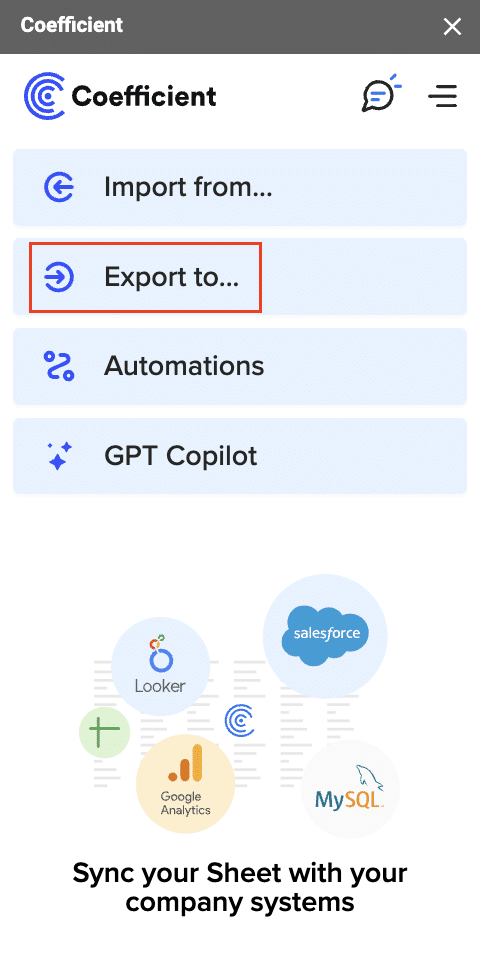
Select HubSpot.
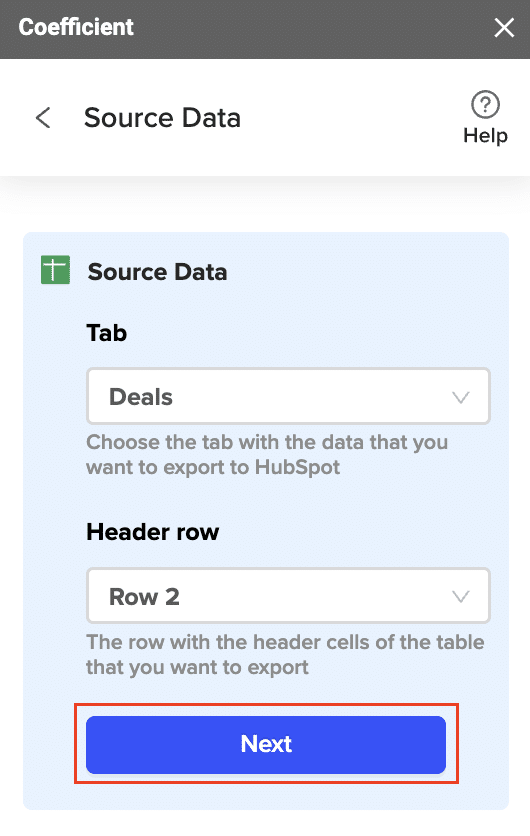
Select the tab and header row in your spreadsheet. The header row should contain the HubSpot field headers.
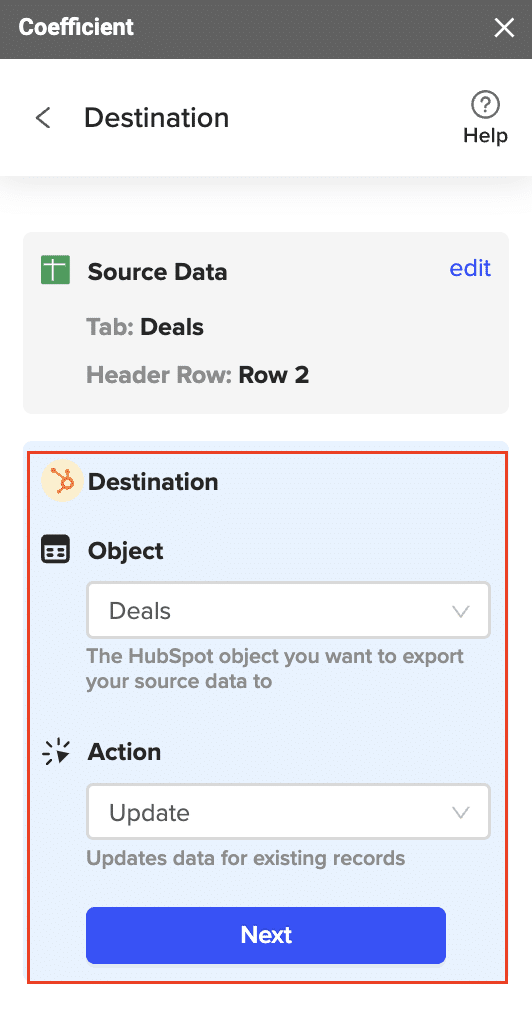
Choose the HubSpot property you are exporting the data to.
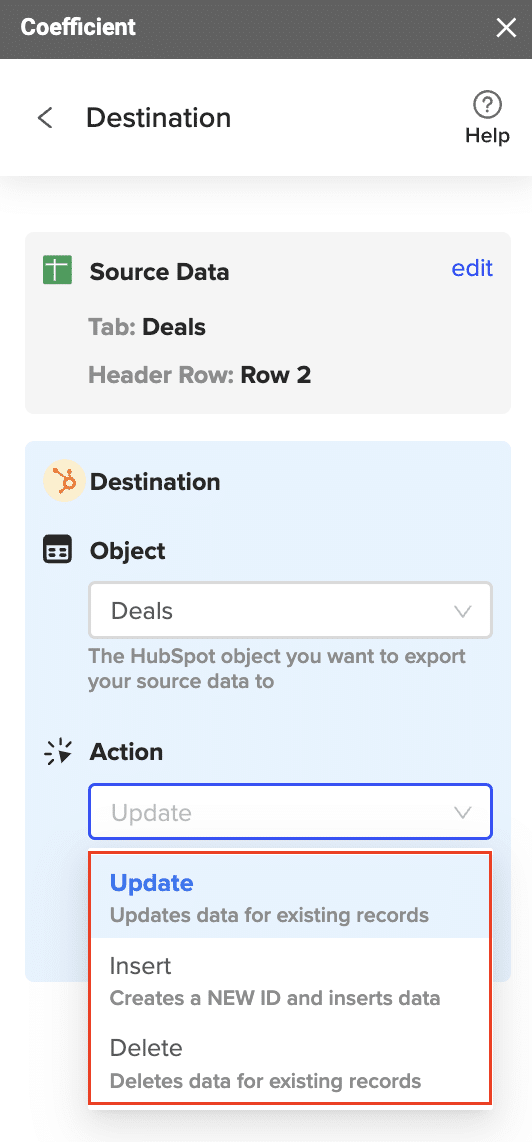
Then, select the action you want to perform (Update, Insert, or Delete).
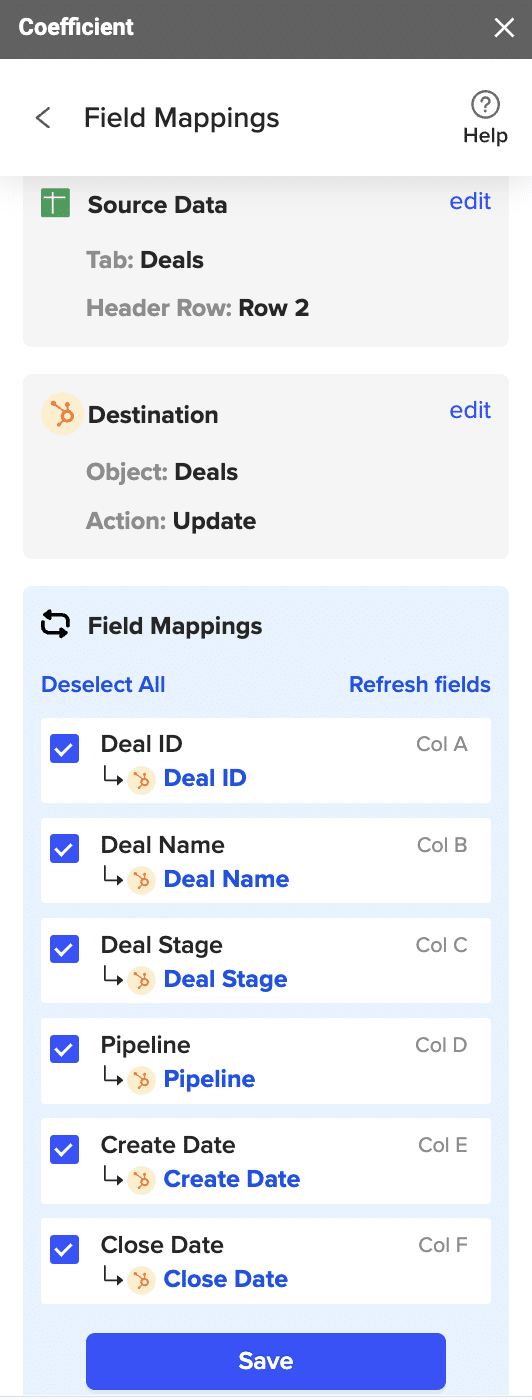
Map the fields in your spreadsheet to the corresponding HubSpot fields. If your data came from a HubSpot import using Coefficient, the fields will be automatically mapped. Otherwise, you will need to map them manually.
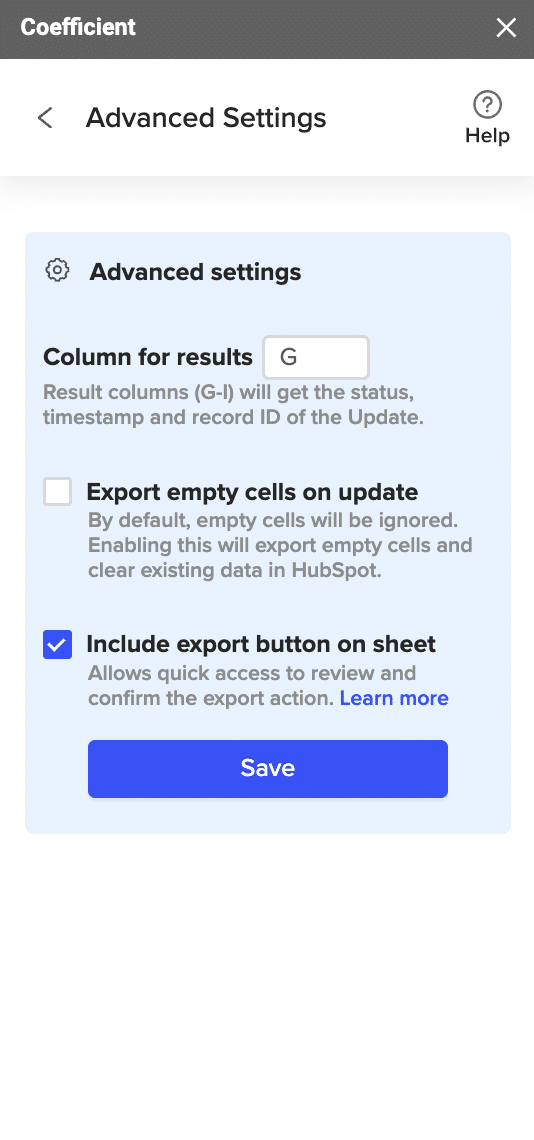
Configure any advanced settings such as the column for results. Coefficient will write back information to your spreadsheet related to the update, including the HubSpot record ID, status of the export, and timestamp.
Review your settings and click “Export”.
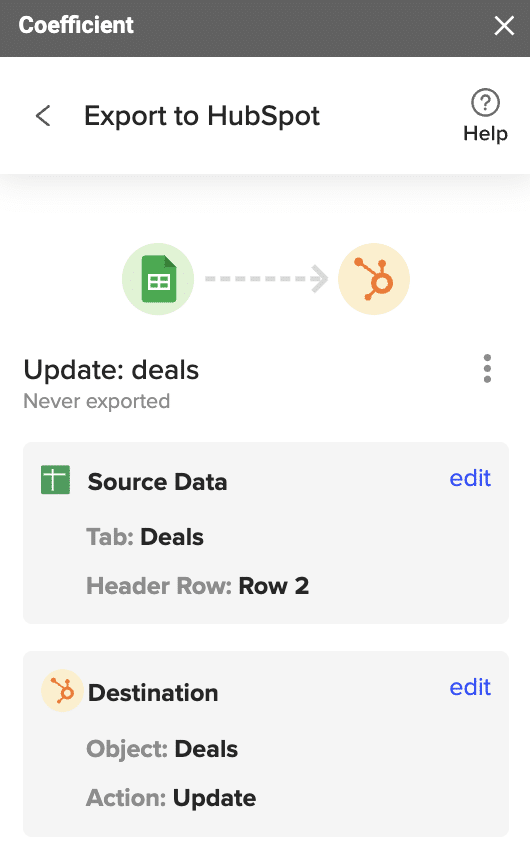
Select the rows in your sheet that you want to export to HubSpot. You can update a single row or all rows in your sheet.

Coefficient will confirm the rows that have been updated in your HubSpot instance. The records will have the record ID, result status, and timestamp of the update.

That’s it! You’ve successfully connected Freshdesk and HubSpot using Coefficient. Your data will continue to automatically update on the schedule you set.
Method 2: Zapier

Zapier is a popular automation tool that lets you connect apps and automate workflows without any coding. While a bit pricier than Coefficient, it offers a wide range of pre-built templates and supports many business apps.
Features:
- Hundreds of pre-built integrations with business apps: Provides extensive connectivity options.
- Easy drag-and-drop zap editor: Simplifies the creation of automated workflows.
- Automates simple tasks like record creation and updating: Saves time and reduces manual effort.
Pros:
- Large library of app integrations: Supports a wide range of business applications.
- Quick setup with pre-made templates: Enables rapid deployment of integrations.
- Intuitive for non-technical users: Easy to use without needing coding skills.
Cons:
- Gets expensive quickly with higher usage: Costs can add up with increased usage and complexity.
- Debugging complex zaps can be difficult: Troubleshooting can be challenging for advanced workflows.
How to Connect Freshdesk to HubSpot with Zapier
Step 1. Sign Up for Zapier:
- Go to the Zapier website and sign up for an account at zapier.com.
- Complete the onboarding process and log into your dashboard.
Step 2. Create a New Zap:
- Click “+ Create” > “New Zap” to start a new automation.

- Select Freshdesk as the trigger app.
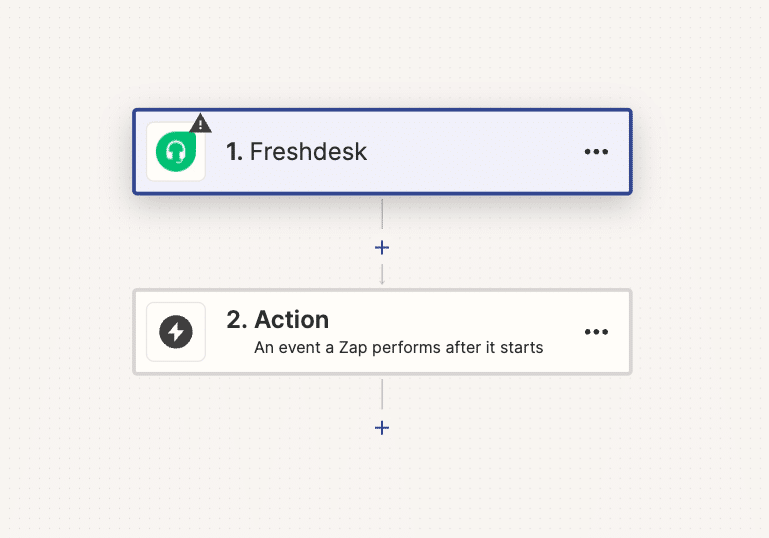
- Choose the event that will kick off the automation, such as “New Ticket.”
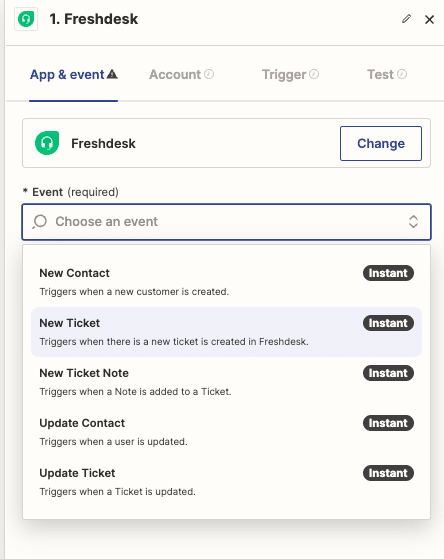
- Authenticate your Freshdesk account by providing your Freshdesk domain and API key.
Step 3. Set Up the Trigger:
- Configure the trigger settings, specifying any filters or conditions for the new ticket event.
- Test the trigger to ensure it’s working correctly.
Step 4. Add HubSpot as the Action App:
- Select HubSpot as the action app.

- Choose the event that will occur in HubSpot, such as “Create Contact.”
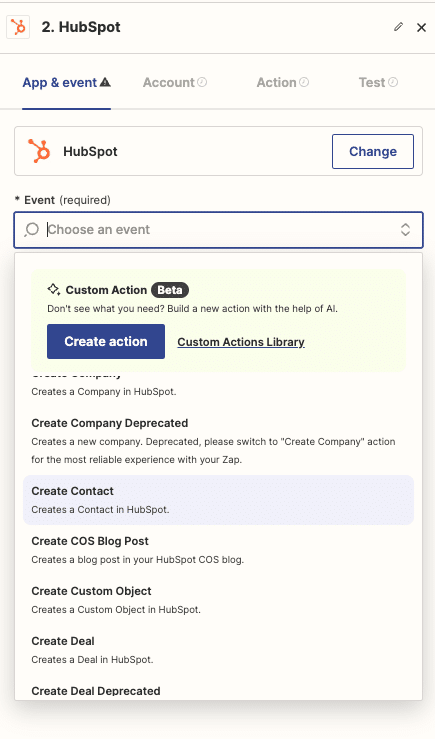
- Authenticate your HubSpot account by providing your HubSpot API key.
Step 5. Map the Fields:
- Map the Freshdesk ticket fields to the corresponding HubSpot contact properties.
- Configure any additional settings for the action event.
Step 6. Test and Activate the Zap:
- Test the zap to ensure it works as expected.
- Turn on the zap to activate the automation.
Method 3: Integromat (Make)
For organizations with more sophisticated data needs, Integromat is a robust platform for building advanced integrations and automations. It boasts a visual designer, conditional logic, and error handling features.
Features:
- Powerful scenario editor to map out multi-step workflows: Allows for detailed and complex automation setups.
- Supports complex data operations and transformations: Enables advanced data manipulation and processing.
- Error handling and conditional logic for greater reliability: Ensures robust and reliable integrations.
Pros:
- Handles complicated, logic-heavy integrations: Suitable for complex and detailed workflows.
- High level of customization: Offers extensive flexibility and control over data processes.
- Enterprise-grade performance: Delivers reliable and scalable automation solutions.
Cons:
- Significant technical skill required: Requires knowledge and expertise to set up and manage.
- Higher learning curve than no-code tools: Takes more time to learn and use effectively.
How to Connect Freshdesk to HubSpot with Inegromat
Step 1. Create an Integromat Account:
- Go to the Integromat website and sign up for an account.
- Log in to the Integromat dashboard.
Step 2. Start a New Scenario:
- Click “Create a new scenario.”
- Select Freshdesk as the trigger app.
- Choose the trigger event, such as “Watch Tickets.”
Step 3. Configure the Trigger:
- Authenticate your Freshdesk account by providing your Freshdesk domain and API key.
- Configure the trigger settings, specifying any filters or conditions for the event.
Step 4. Add HubSpot as the Action App:
- Add a HubSpot action module to the scenario.
- Choose the action event, such as “Create or Update Contact.”
- Authenticate your HubSpot account by providing your HubSpot API key.
Step 5. Map the Fields:
- Map the Freshdesk ticket data to the corresponding HubSpot contact properties using Integromat’s expression editor.
- Configure any additional settings for the action event.
Step 6. Add Conditional Paths and Error Handlers:
- Use Integromat’s tools to add conditional paths and error handlers as needed for more complex workflows.
Step 7. Activate the Scenario:
- Save and turn on the scenario to activate the integration.
- Monitor the scenario to ensure it runs correctly and handles errors appropriately.
Connect Freshdesk to HubSpot Without a Line of Code
Connecting Freshdesk with HubSpot supercharges your customer operations, no matter which integration method you choose. To recap:
- Coefficient is best for simple, no-code setups that are affordable for small businesses
- Zapier supports easy automations and offers many pre-built templates
- Integromat allows you to build complex, customized workflows
Consider your budget, use case, and technical expertise when selecting a tool. The right Freshdesk HubSpot integration will save you time, reduce data errors, and help you deliver top-notch customer experiences.
Try Coefficient Today
Ready to integrate Freshdesk and HubSpot the easy way? With Coefficient, you can sync data between these apps in minutes using tools you already know – spreadsheets!
Say goodbye to CSV exports and manual entry. Get started with Coefficient today for free and see how simple connecting your apps can be.


