Are you tired of manually pulling data from Xero for your financial reports? Struggling to keep your spreadsheets up-to-date with the latest numbers? You’re not alone. Many finance professionals waste hours each week on tedious data exports. But there’s a better way.
In this comprehensive guide, we’ll explore three methods to export Xero data, with a focus on streamlining your reporting process. Whether you’re a CFO, financial analyst, or accounting manager, you’ll discover how to save time, improve accuracy, and gain deeper insights from your Xero data.
Export Data from Xero: Top 3 Options
| Solution | Best For |
| Coefficient | Finance professionals seeking efficient, automated workflows with real-time data updates, custom reporting, and integration with Excel or Google Sheets. |
| Exporting Manually | Users who need occasional exports of specific data sets and are comfortable with Xero’s native interface. Suitable for ad-hoc reporting needs. |
| Using Xero API | Technical users or organizations with IT resources who need to integrate Xero data into custom applications or perform complex, automated data operations. |
Method 1: Exporting Xero Data with Coefficient (Recommended)
Coefficient syncs live data from various business systems, like Xero, directly into Excel and Google Sheets. For Xero users, this means you can build real-time financial reports, automate data updates, and streamline your accounting workflows without leaving your spreadsheet.
Benefits of using Coefficient for Xero data export:
- Real-time data sync: Always work with the latest numbers
- Automated refresh: Set it and forget it – your reports update automatically
- Customizable exports: Pull exactly the data you need
- Advanced filtering and pivoting: Slice and dice your data effortlessly
- Seamless integration with Excel and Google Sheets: Work in your preferred environment
Step-by-step guide to export Xero data using Coefficient:
Step 1: Set Up Coefficient For Google Sheets Users
- In your Google Sheet, go to Extensions > Add-ons > Get add-ons.
- Search for “Coefficient” in the Google Workspace Marketplace.
- Grant the required permissions when prompted.
- Access Coefficient via Extensions > Coefficient > Launch.
- You’ll see Coefficient appear on the right side of your sheet.

For Microsoft Excel Users
- Open Excel (desktop or Office Online). Navigate to File > Get Add-ins > More Add-Ins.
- Search for “Coefficient” and click “Add.”
- Complete the installation by following the on-screen instructions.
- Once installed, you’ll find a “Coefficient” tab in the top menu. Click “Open Sidebar” to start using Coefficient.

Step 2: Link Your Xero Account
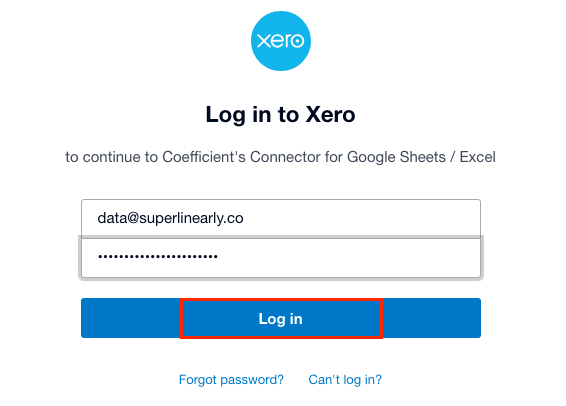
Enter your Xero demo login details and click “Login.”
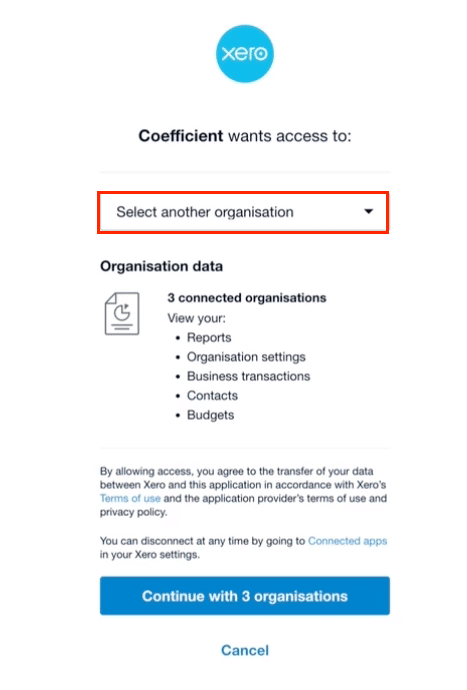
Choose one or more organizations to connect with Coefficient.
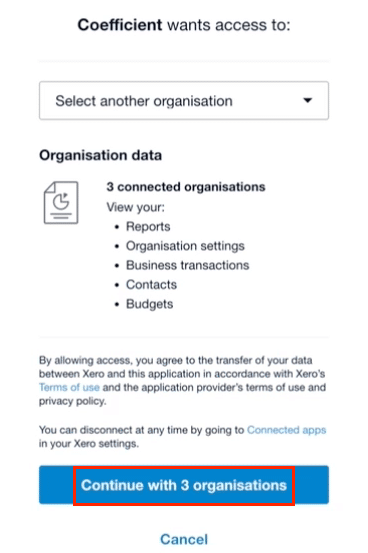
Click “Continue” to proceed.
Step 3: Import Your Xero Data
Select an endpoint from the available options (e.g., Invoices, Contacts, Users).
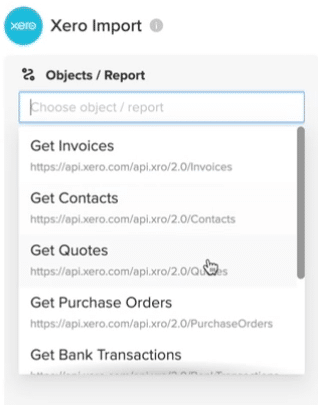
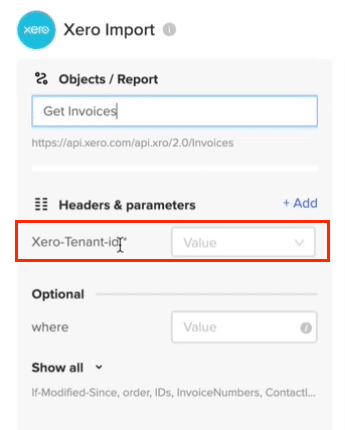
For this walkthrough, we’ll use “Get Invoices” to import invoice data.

Input the Tenant ID (organization ID) for your chosen organization.
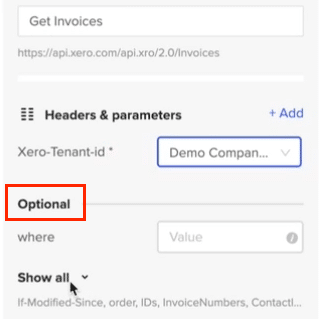
You can select additional fields to include in your data import if needed.
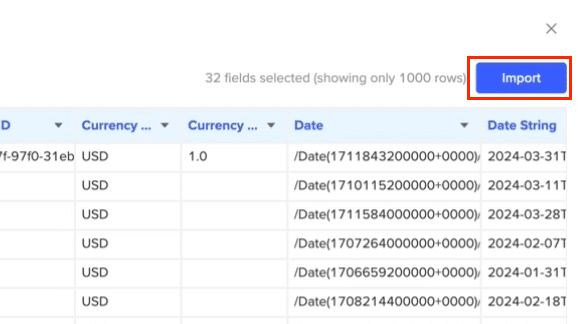
Click “Import” to bring the invoice data into your spreadsheet.
Step 4. Set up automated refresh:
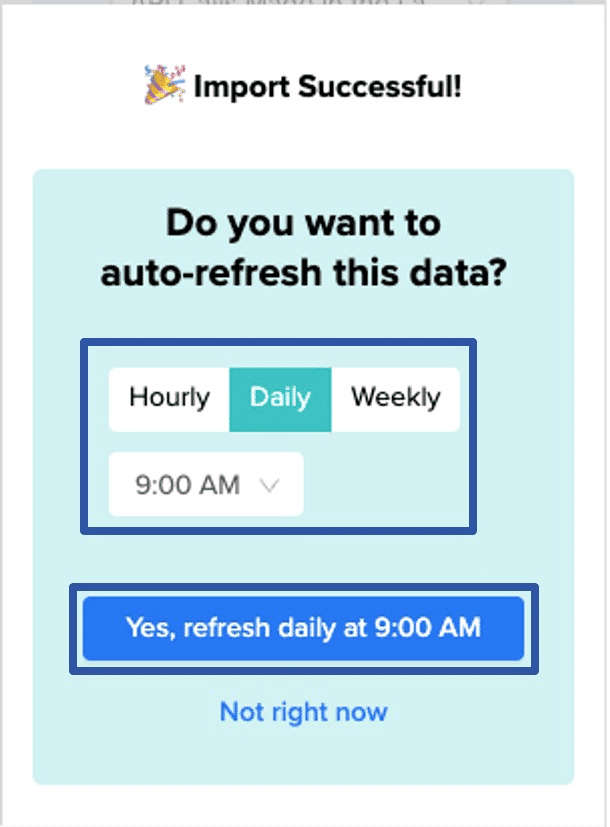
Enable Coefficient’s scheduler for automatic updates:
- Choose update frequency: hourly, daily, or weekly
- Set preferred time
- Coefficient will refresh your data automatically
Pros and Cons of Coefficeint
- Pros:
- Consolidate financial data from multiple systems into Excel and Google Sheets
- Create real-time dashboards for cash flow monitoring and forecasting
- Automate financial reporting and data refreshes, reducing manual work
- Cons:
- Some advanced features, such as scheduled automations, are only available on paid plans. However, Coefficient’s pricing is still very competitive compared to other solutions.
Advanced features for financial reporting and analysis:
- Create dynamic dashboards that update automatically
- Set up alerts for key metrics (e.g., cash balance falling below a threshold)
- Combine Xero data with other sources for comprehensive reporting
- Free templates to sync your live Xero data into, including a Xero Finance Dashboard, a consolidated cashflow report, and Xero finance projections template.
Method 2: Exporting Manually
Exporting data manually from Xero is the simplest way to get your data into a spreadsheet. This method is great for occasional needs and requires no technical skills.
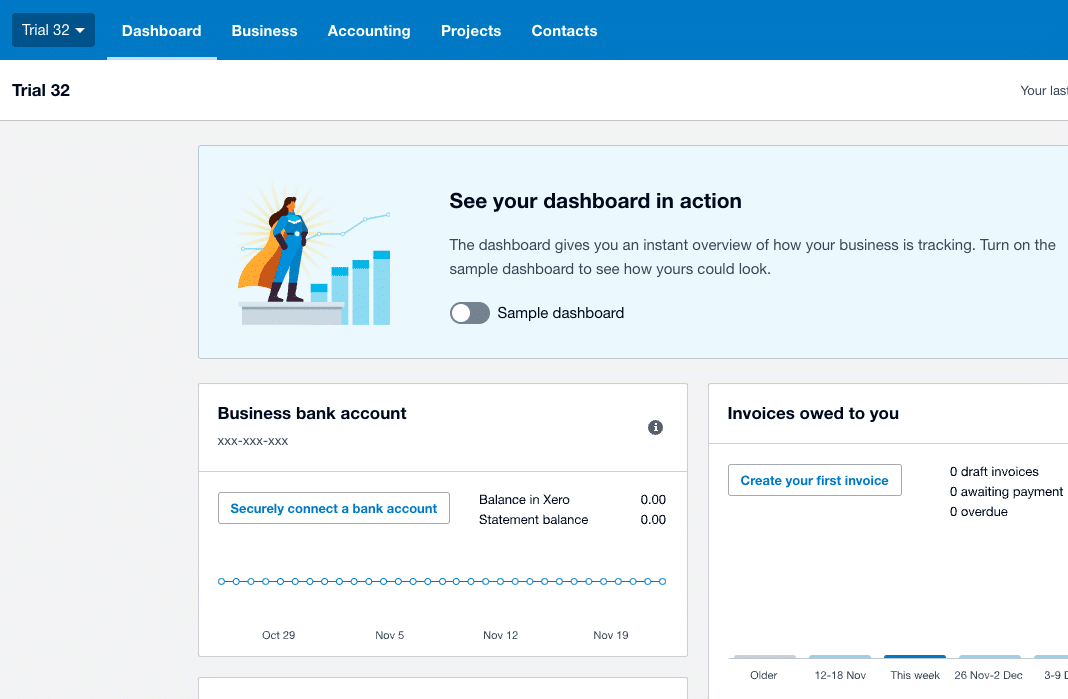
Step-by-Step Guide
- Log in to Xero:
- Go to the Xero login page and enter your credentials.
- Navigate to the Data Section:
- Click on the ‘Business’ tab in the top navigation menu.
- Select the type of data you want to export (e.g., Invoices, Bills, Bank Transactions).
- Filter and Select Data:
- Apply any necessary filters to narrow down the data you need.
- Select the data entries you wish to export.
- Export Data:
- Click on the ‘Export’ button typically located at the top of the list.
- Choose the format for the export (Excel or CSV).
- Download the file and save it to your computer.
Pros and cons of native Xero export features:
Pros:
- Easy to Do: You don’t need any special skills or knowledge to export your data this way.
- No Extra Costs: This feature is included in your Xero subscription, so you won’t need to pay anything extra.
Cons:
- Takes Time: If you have a lot of data or need to do this often, it can take a lot of time to export everything manually.
- No Automation: You have to do it yourself each time you need updated data.
- Risk of Manual Errors: Doing it manually increases the chances of making mistakes.
Method 3: Using Xero API
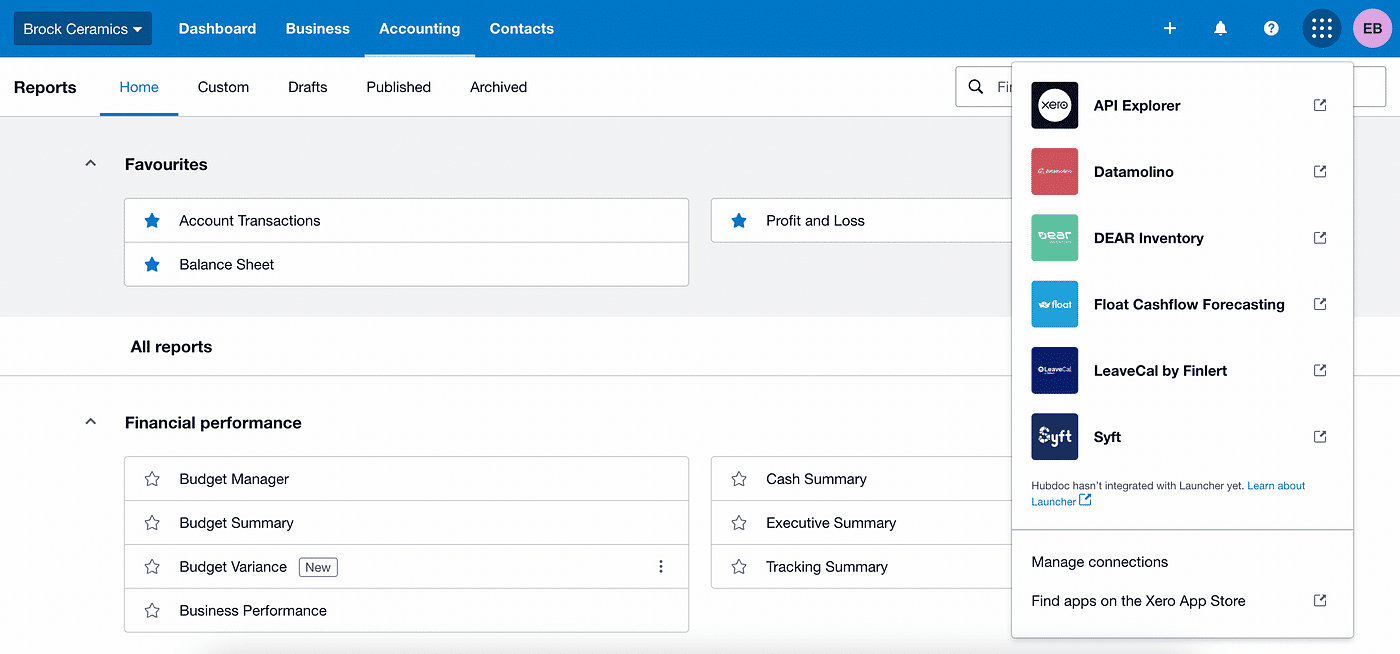
Using the Xero API lets you export your data automatically with a bit of programming. This method is perfect if you’re comfortable with coding and need to handle lots of data regularly.
Step-by-Step Guide
- Set Up API Access:
- Register your application on the Xero Developer Portal to obtain your OAuth2 credentials (client ID and client secret).
- Authenticate with Xero API:
- Use OAuth2 to authenticate and obtain access tokens for your Xero account.
- Write a Script to Export Data:
- Use a programming language like Python to make API requests and export data.
- Example script to export invoices:
from xero_python.accounting import AccountingApi
from xero_python.api_client import ApiClient
from xero_python.api_client.configuration import Configuration
from xero_python.identity import IdentityApi
from xero_python.api_client.oauth2 import OAuth2Token
client_id = ‘YOUR_CLIENT_ID’
client_secret = ‘YOUR_CLIENT_SECRET’
redirect_uri = ‘YOUR_REDIRECT_URI’
token = OAuth2Token(client_id, client_secret)
config = Configuration(oauth2_token=token)
api_client = ApiClient(config)
identity_api = IdentityApi(api_client)
accounting_api = AccountingApi(api_client)
token.set_access_token(‘YOUR_ACCESS_TOKEN’)
def fetch_invoices(tenant_id):
api_client.set_tenant_id(tenant_id)
invoices = accounting_api.get_invoices()
return invoices
tenant_id = ‘YOUR_TENANT_ID’
invoices = fetch_invoices(tenant_id)
import csv
with open(‘invoices.csv’, mode=’w’) as file:
writer = csv.writer(file)
writer.writerow([‘InvoiceID’, ‘Date’, ‘DueDate’, ‘Total’])
for invoice in invoices.invoices:
writer.writerow([invoice.invoice_id, invoice.date, invoice.due_date, invoice.total])
Pros and Cons
Pros
- Saves Time: Once you set it up, the process runs by itself, saving you from doing it manually.
- Handles Large Data: It’s great for exporting large amounts of data or for regular updates without extra work.
Cons
- Needs Programming Skills: You need to know how to write code, which might be tough if you’re not familiar with it.
- Setup is Tricky: Getting everything set up can be complicated and take some time
Streamline Your Xero Reporting Today
Exporting data from Xero doesn’t have to be a time-consuming chore. By leveraging the power of Coefficient, you can automate your data exports, ensure accuracy, and focus on what really matters: analyzing your financial data to drive business growth.
While manual exports and Xero’s native features have their place, they simply can’t match the efficiency and insights provided by a dedicated tool like Coefficient. With real-time data syncing, customizable exports, and seamless integration with Excel and Google Sheets, Coefficient is the clear choice for finance professionals who want to stay ahead of the curve.
Ready to revolutionize your Xero reporting process? Try Coefficient today and experience the power of automated, real-time financial data at your fingertips.


