Read the following guide for a comprehensive overview of how to export data from Zendesk.
Manual Zendesk data exports can eat up your team’s productivity, slow down your workflows, and leave room for errors.
But exporting data from Zendesk doesn’t need to be tedious and time-consuming. You can speed up the process with the methods contained in this blog.
Here are the most popular ways to export data from Zendesk, including how to automate the process to save resources.
Exporting Zendesk Data: Top 3 Methods
Method 1: Coefficient
If you want to export data from Zendesk into Google Sheets, Coefficient is the best tool for the task.
Coefficient allows you to connect Zendesk to Google Sheets in a single click, and start exporting data instantly.
The Coefficient app also performs automatic data updates, so the Zendesk data in your spreadsheet is always up-to-date.
And with Coefficient, you can automatically export data from other business systems into Google Sheets, including HubSpot, Salesforce, Snowflake, Looker, Tableau, and more.
Step 1: Install the Coefficient Google Sheets Add-On
First, install Coefficient by opening a new Google spreadsheet and clicking Extensions on the top menu.
Then select Add-ons > Get add-ons.

The Google Workspace Marketplace will appear in a pop-up window. Search for ‘Coefficient’ and select the app from the list.
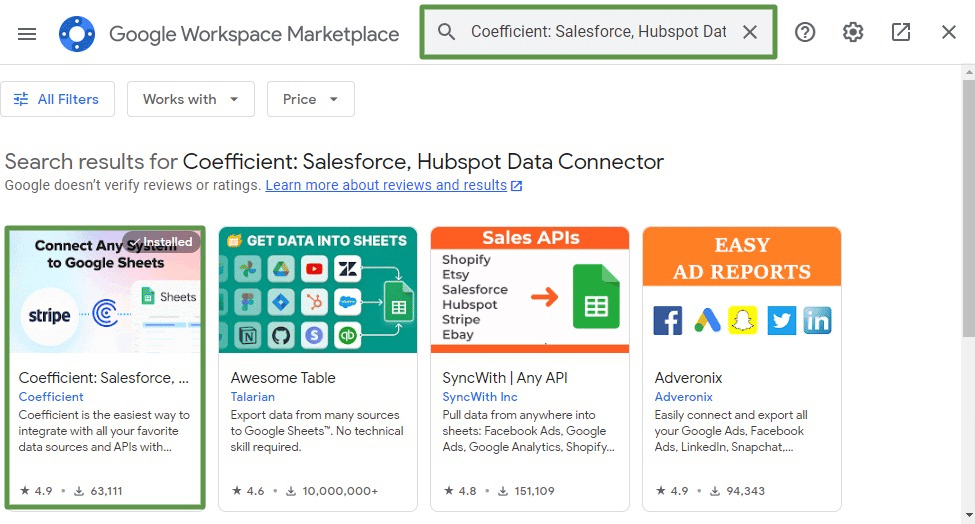
Follow the prompts. Link your Google account and authorize the required permissions to install Coefficient.
Once Coefficient is installed, navigate to the Extensions menu tab on your Google spreadsheet and launch the app.
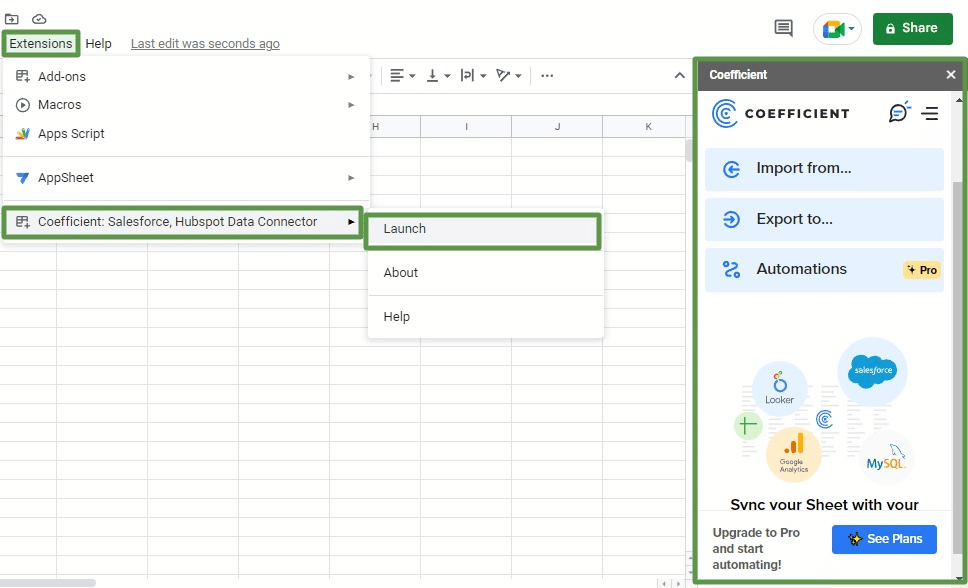
The Coefficient sidebar will appear on the right hand side of your screen.
Step 2: Connect Google Sheets to Zendesk
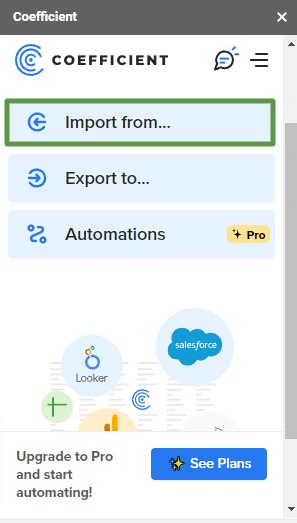
Click the Import from… option on the Coefficient sidebar.
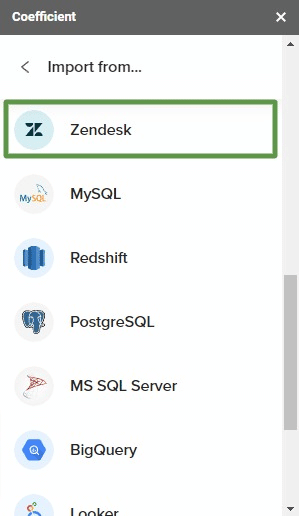
Select Zendesk as your data source.
Log in to your Zendesk account. Copy the URL and paste it into the designated field in the Coefficient sidebar. Then click Authorize.
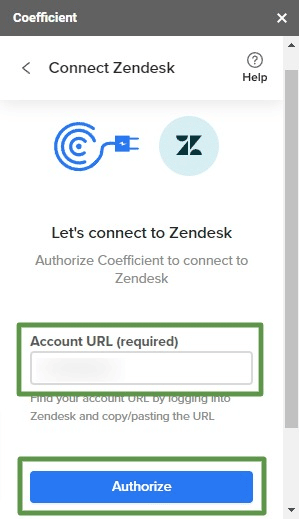
Coefficient will send you to Zendesk to authorize the connection. Then you will reenter Sheets.
Now, with Coefficient, you can export your Zendesk data directly into Google Sheets.
Step 3: Export Your Zendesk Data
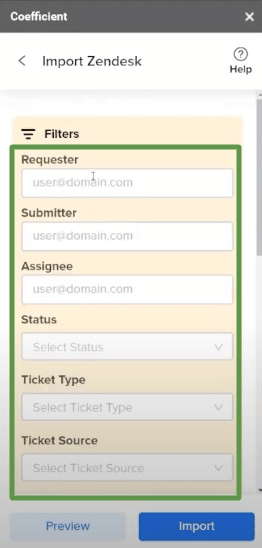
Specify the Zendesk data you want to export. Select Start from Scratch or Saved Views.
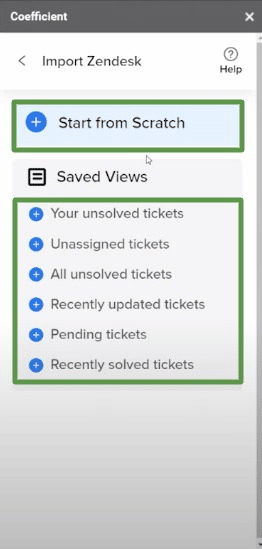
If you click Start from Scratch, you can export your Zendesk data based on custom filters. The Saved Views option uses preset filters.
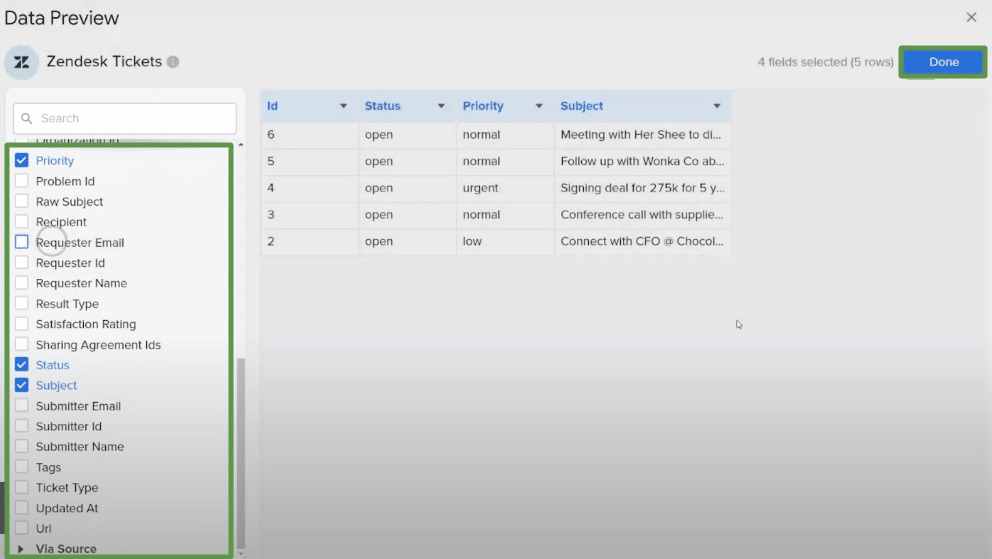
You can also edit the fields using the data previewer. Click the boxes beside each field to include it in your data export. Then click Done.
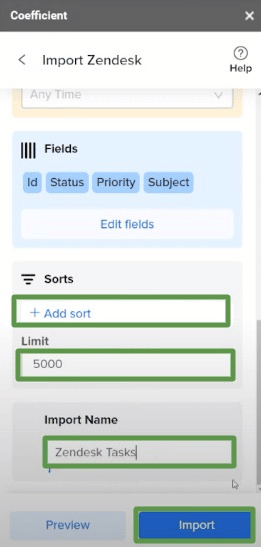
Name your data export. You can refine your data export by including additional limits. Click the Import button to push the data into Google Sheets.
Your Zendesk data export will auto-populate in Google Sheets instantly.

Step 4: Set an auto-refresh schedule
Let Coefficient automatically update your data for you. Set your Zendesk data to auto-refresh on an hourly, daily, or weekly schedule.
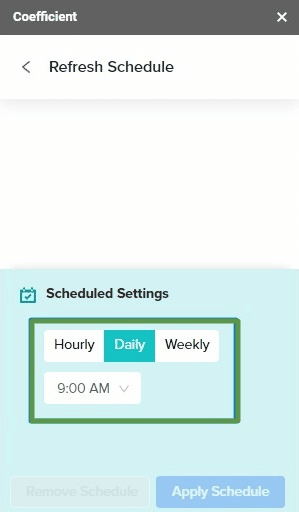
This will automate your Zendesk data exports to Google Sheets on a consistent schedule. Now you can say goodbye to manual Zendesk exports once and for all.
Method 2: Manual Export to CSV
Zendesk provides native options to export data to JSON, CSV, or XML files. Consider the following considerations before manually exporting data from Zendesk.
- You must be an admin to export tickets, including ticket data
- JSON and CSV exports are unavailable in sandbox accounts
- You can’t run multiple exports for the same data type simultaneously, such as users, organizations, and tickets
- The export process can take several minutes to hours, depending on your account’s ticket activity and the requested date range
You must also enable the data export option beforehand, since Zendesk doesn’t automatically activate this feature to protect your data. You might, in some cases, need to contact Zendesk Customer Care to unlock the feature.
If you want to disable exports, go to your Admin center, click Account in the side panel, select Tools, then Reports.
Click the Disable exports option and OK to confirm.
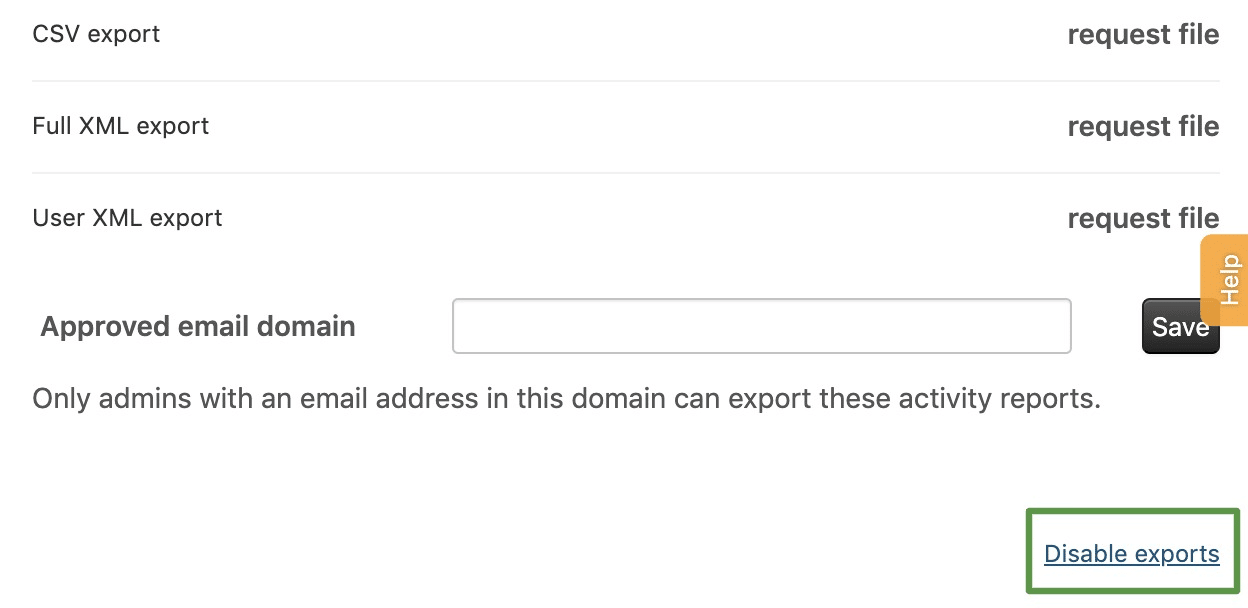
Once you activate the data export option, you can start exporting data to a downloadable CSV, JSON, or XML format.
Exporting data to an XML file will give you a downloadable ZIP file (ZIP32), while a CSV and JSON export results in a ZIP64 file.
To start your Zendesk export, go to the Admin Center and click Account on the sidebar. Select Tools and then Reports.
Click on the Export tab to show the data export options. Next, choose CSV as your export option by clicking Request file.
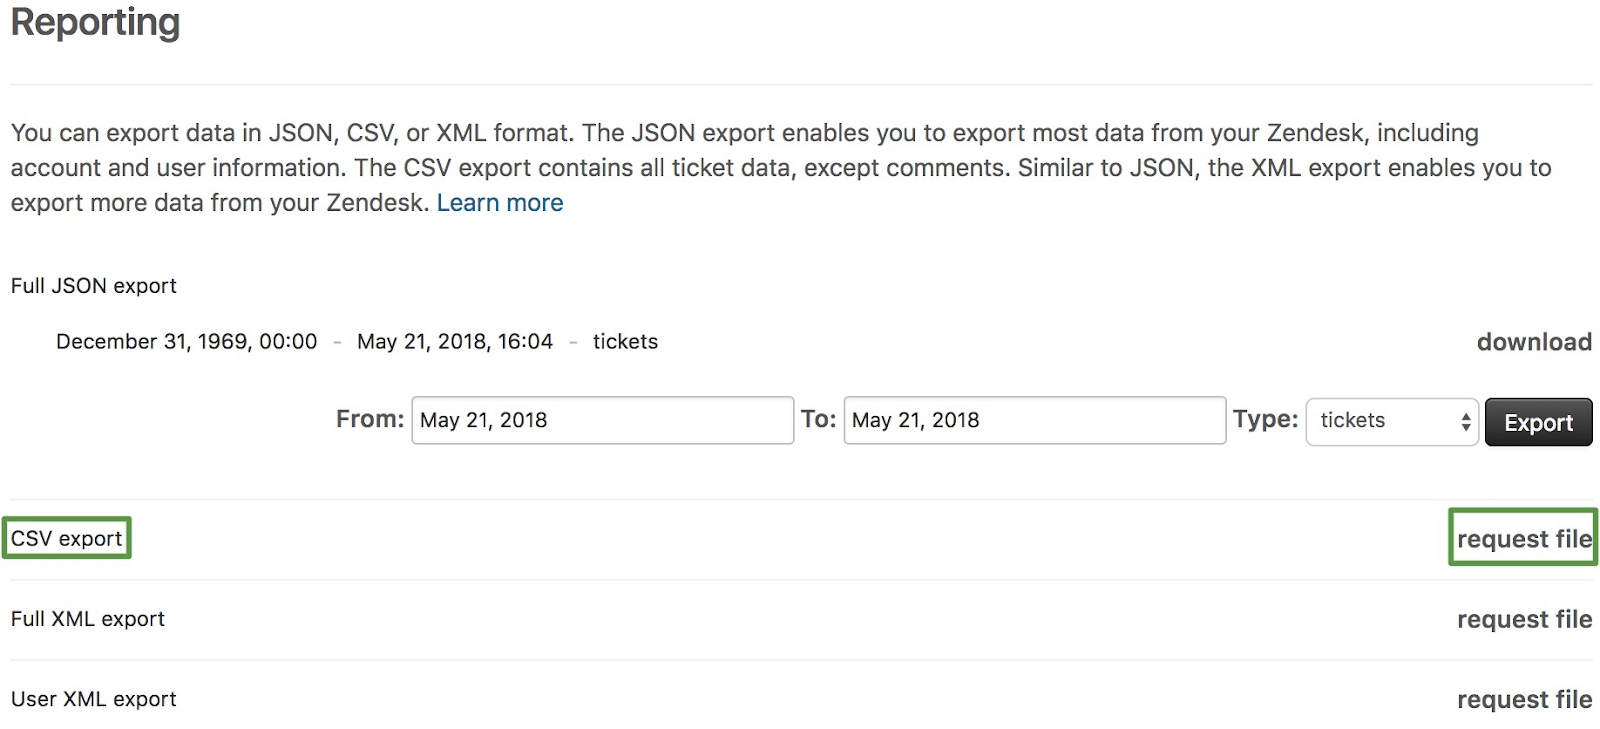
A background job will start running, and you’ll receive a notification through email when your export is complete.
Click the link within the notification email from Zendesk to download the zip file containing your export data. Download links are valid for at least three days.
If you didn’t receive the email notification, click on latest on the far right side of CSV export to download the newest export.
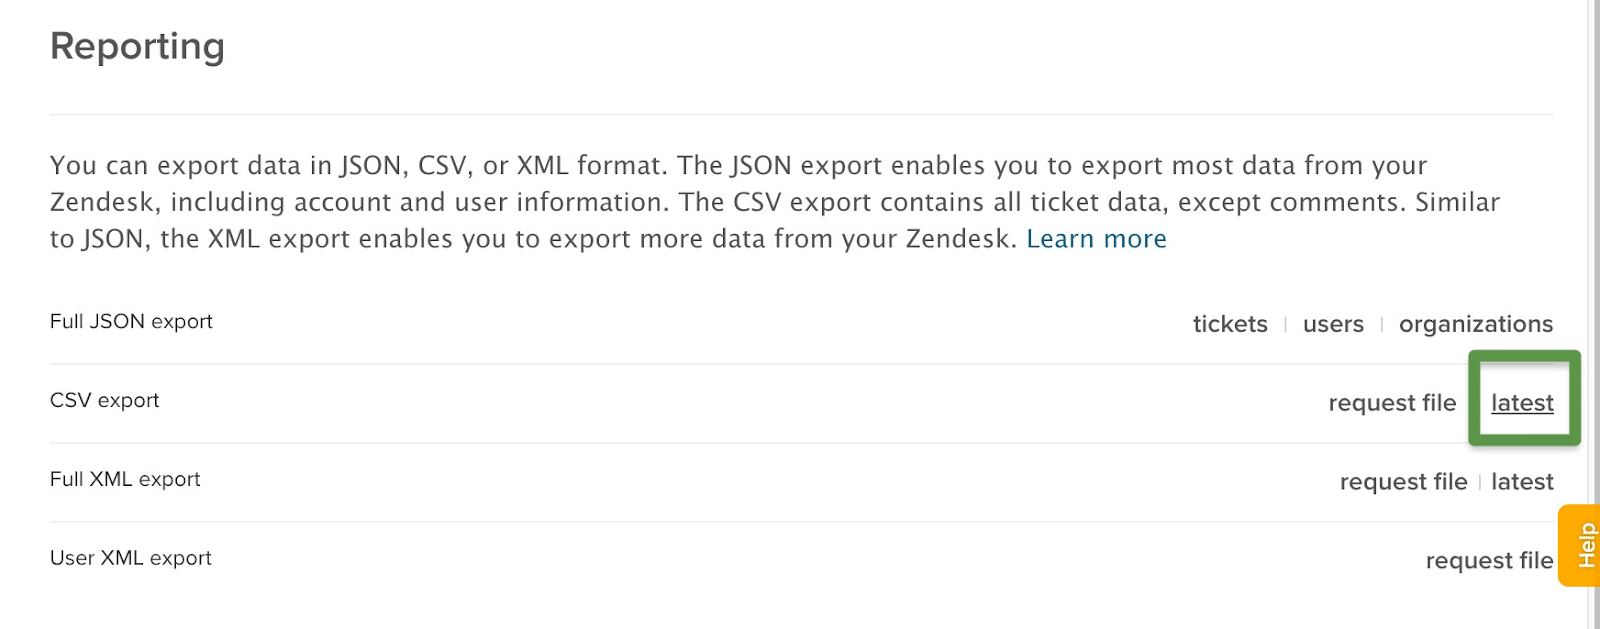
Here are some important things to remember when exporting CSV files in Zendesk:
- CSV exports do not include ticket comments, deleted tickets, and ticket descriptions
- The CSV export converts all time and date values to the account’s default time zone during the export time
- The dates shown in the CSV file might not match Explore or JSON export dates
- If the amount of data from a ticket exceeds 1 MB, not all of it will be included in the CSV file
The built-in exporting feature in Zendesk also has the following limitations:
- Only enterprise agents and administrators can access data for their domain
- Users need to contact Zendesk support to enable the data export option
- The native export option is only available for higher subscription plans, such as Enterprise or Professional
While exporting to CSV format in Zendesk doesn’t require downloading, installing, and learning to use third-party tools, the process is completely manual.
Method 3: Export Data from Zendesk Sell
If you use Zendesk Sell, you can export data about your leads, tasks, contacts, important documents, and more.

Stop exporting data manually. Sync data from your business systems into Google Sheets or Excel with Coefficient and set it on a refresh schedule.

While Zendesk only allows administrators to export data, you can authorize other users to export data with Zendesk Sell.
The steps below outline how to export data and grant permissions for other users to do the same.
- Click on the Settings icon and select data > export option
- Select All users from the drop-down list to enable the smart list export
- Save your settings
After finishing this step, go to the data you want to export from Zendesk by creating a smart list, as seen in the image below.
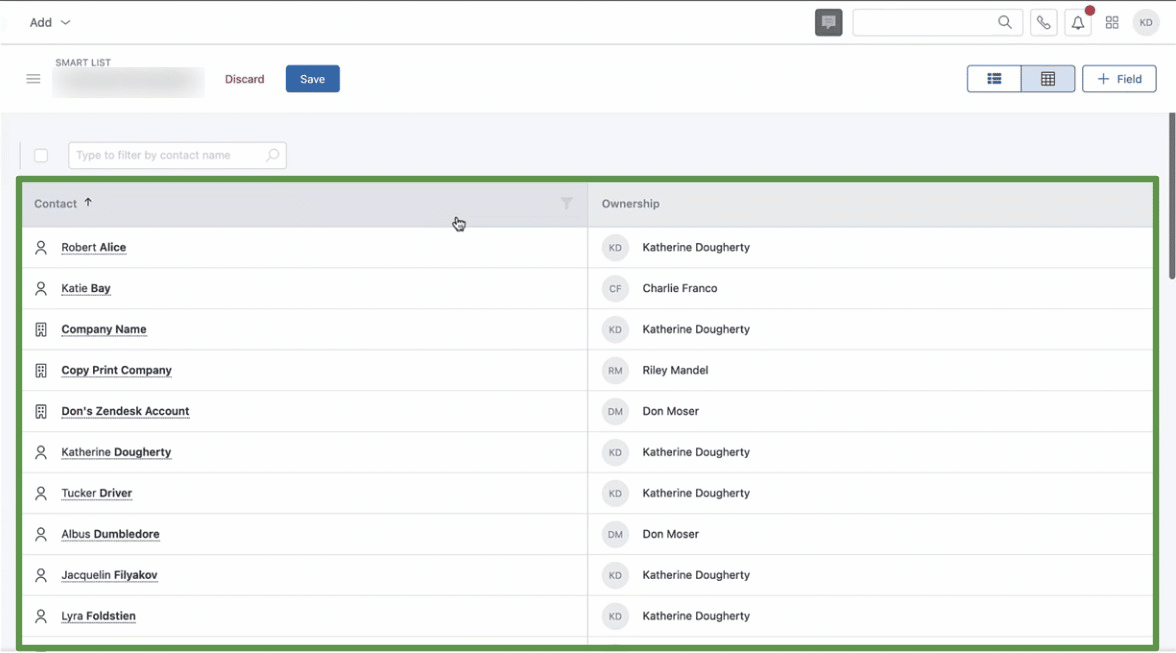
You can add filters and fields to refine your data before exporting it.
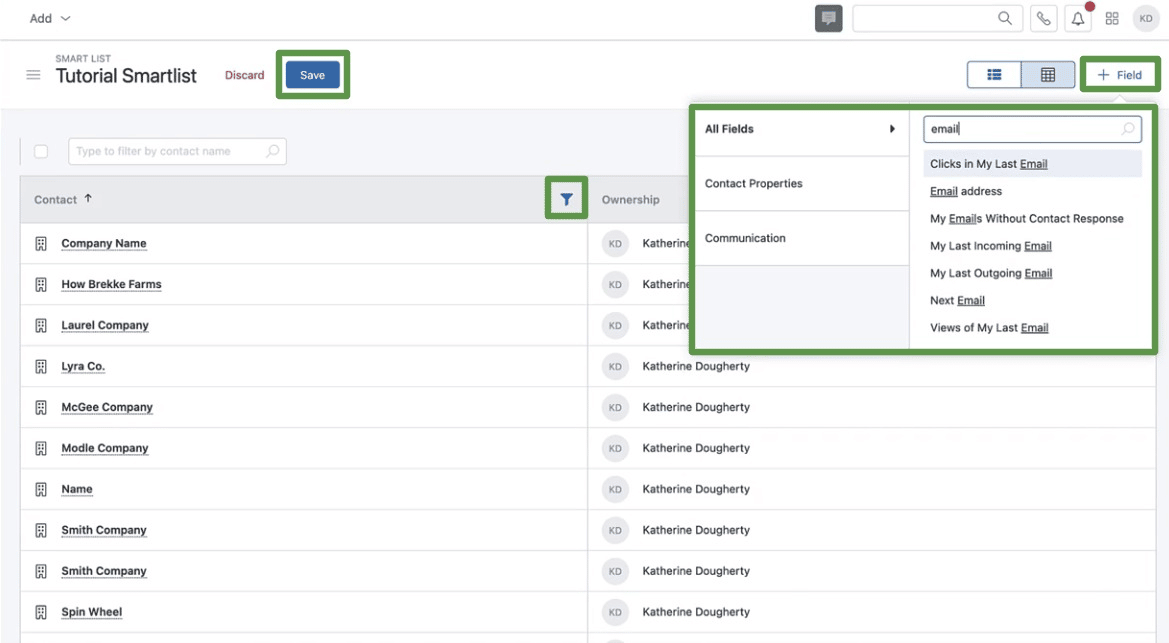
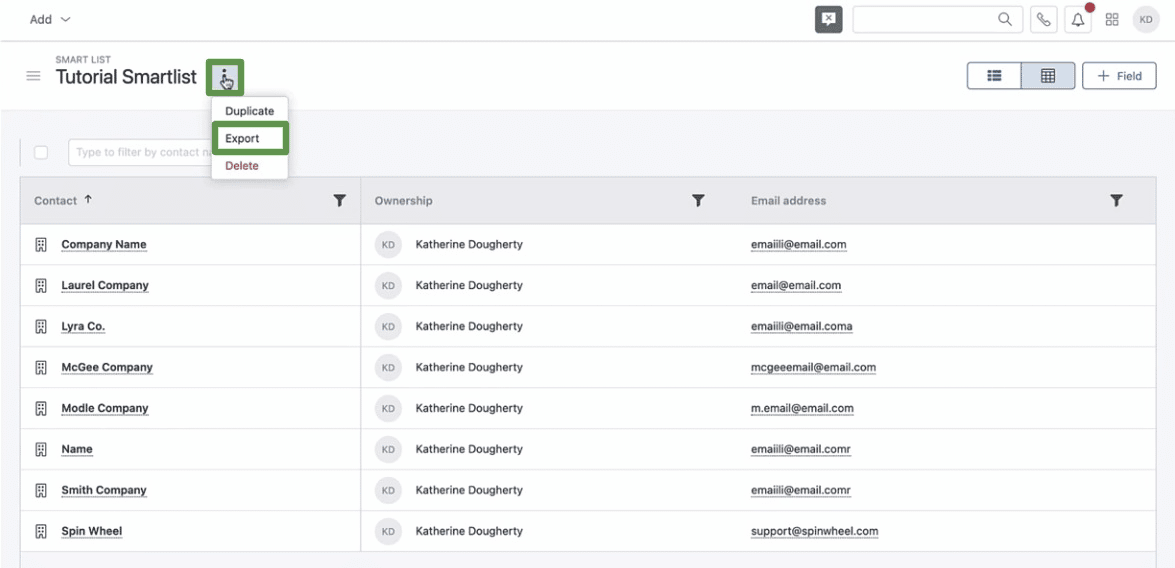
Click Save when you’re done. Select the vertical dots icon beside your smart list title and click Export.
Go to Settings by clicking the gear icon on the left sidebar. Then choose Export.
Find the title of the smart list you want to export. Then click Download.
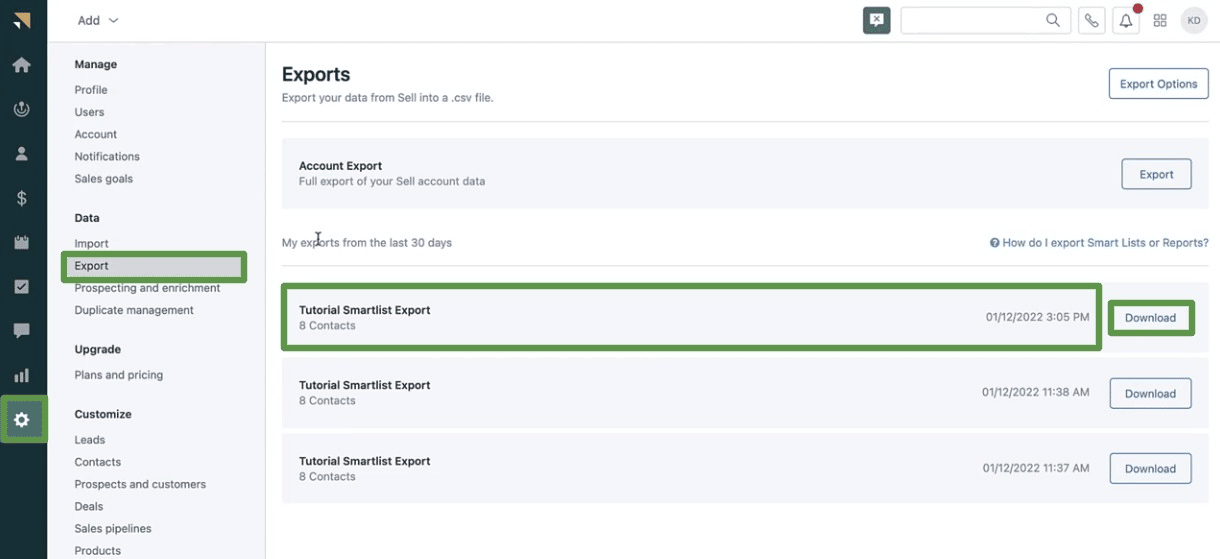
When the process is done, you’ll get an email notification with the zip file containing your data in CSV format. The link is valid for 24 hours.
While importing data from Zendesk Sell is relatively straightforward, the process is still relatively time-consuming and laborious.
Additional Method: Using Zendesk API and Python
If you have a working knowledge of coding and APIs, you can easily extract Zendesk data using the platform’s RESTful APIs.
Access the Zendesk API by writing a basic Python script or using a GET command to retrieve the data.
Start by installing and running Python on your system. Use the lines of code below to install the requests library.
pip3 install requests
The code can help simplify the HTTP requests. Next, access the Zendesk APIs using Python by defining the URL for your sub-domain using the syntax below.
url = ‘https://your_subdomain.zendesk.com/api/v2/groups.json
Change the sub-domain parameter to your domain name. Then create an HTTP request using the GET method of the requests library, as shown below.
response = requests.get(url, auth=(user, pwd))
The Zendesk API returns the data in JSON format. Now store this data in a Python dictionary like this.
data = response.json()
The dictionary results in the following output:
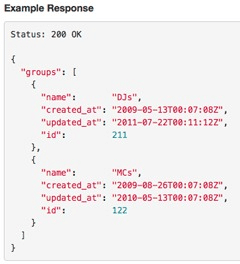
Use the Python script below to extract data using the Zendesk API.
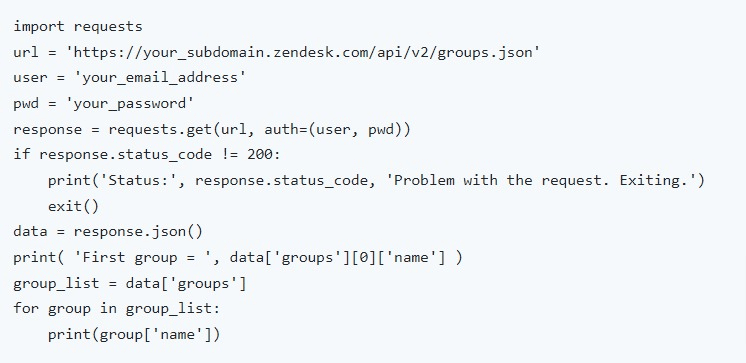
Replace the parameters, such as user, URL, pwd, and others, with your URL and credentials. You can also use the API token instead of your username and password to extract data.
Click on the admin option on the sidebar and select API from channels. Copy your API token and change the user and password fields using the following:
user = ’email_address’ + ‘/token’
pwd = ‘api_token’
The final step is to use a third-party solution to convert your JSON file into CSV format, such as these online tools.
Export Zendesk Data: What Method Is Best for Your Team?
While there are many ways to manually export data from Zendesk, only Coefficient can easily automate the entire process. Try Coefficient for free to automate exporting data from Zendesk into Google Sheets now!
