
Connecting your SaaS tools like ClickUp to spreadsheets offers numerous benefits for data analysis, reporting, and manipulation. By exporting ClickUp data to Excel, you can gain deeper insights into your projects, combine information from multiple sources, and leverage Excel’s powerful features to make data-driven decisions.
In this blog post, we’ll explore three methods for exporting ClickUp data to Excel:
- Using Coefficient for automated syncing
- Manually exporting CSV files from ClickUp
- Setting up an automated integration with Integromat
We’ll dive into the pros and cons of each approach and provide step-by-step tutorials so you can choose the best method for your needs.
Method 1: Coefficient
Coefficient is a no-code platform that enables automated data syncing between ClickUp and Excel. With its user-friendly interface, you can set up customized data flows without any coding knowledge.
Pros and Cons
Pros:
- No-code setup, suitable for users of all technical levels
- Customizable field mapping to control what data is synced
- Real-time, two-way syncing keeps data up-to-date
- Affordable pricing plans for teams and businesses
Cons:
- Some advanced features, such as scheduled automations, are only available on paid plans. However, Coefficient’s pricing is still very competitive compared to other solutions.
Step-by-Step Tutorial
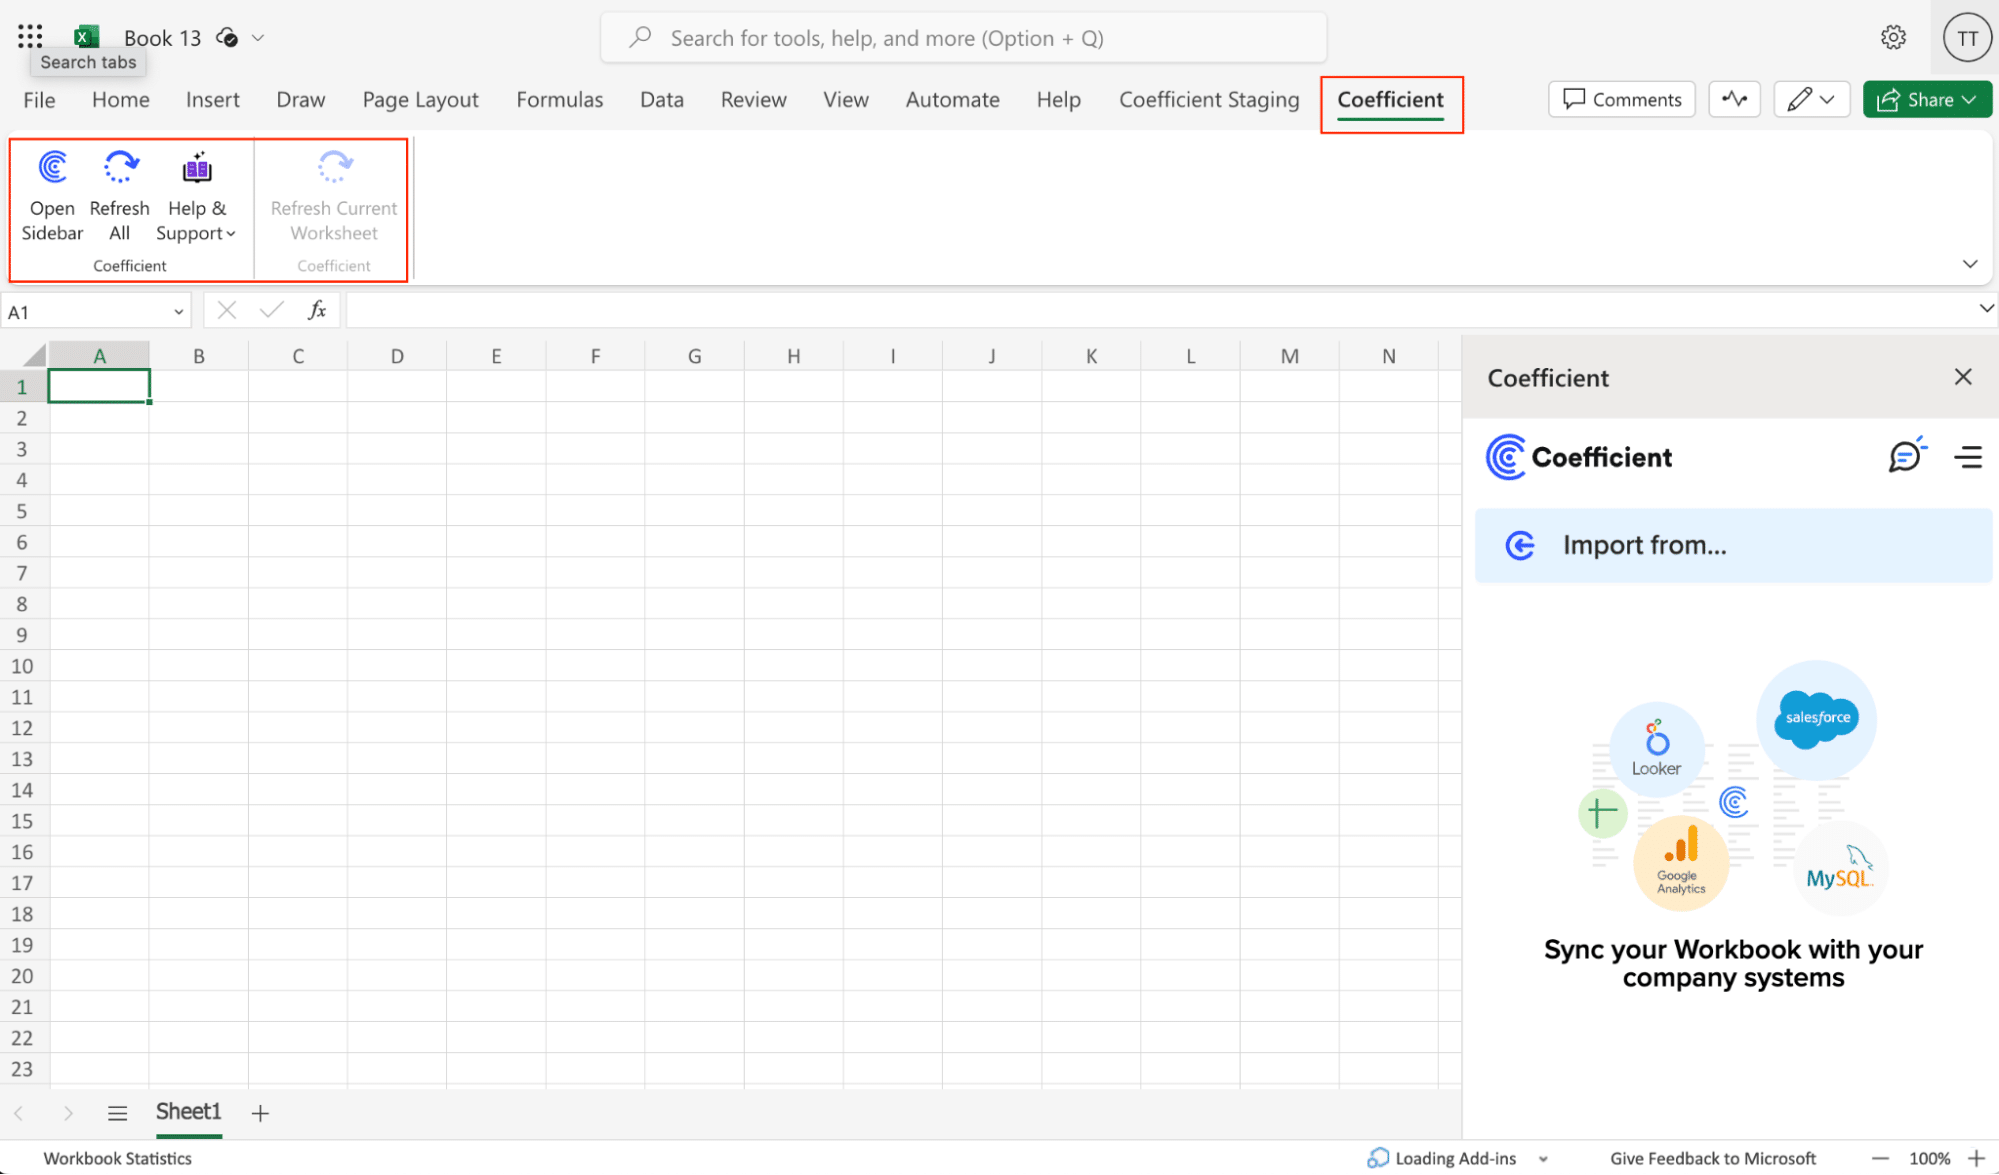
Step 1. Install Coefficient
- Before we get started, you’ll need to install Coefficient in Excel. Don’t worry, it’s a fast and straightforward process that you only need to do once.
- Open Excel from your desktop or in Office Online. Click ‘File’ > ‘Get Add-ins’ > ‘More Add-Ins.’
- Type “Coefficient” in the search bar and click ‘Add.’
- Follow the prompts in the pop-up to complete the installation.
- Once finished, you will see a “Coefficient” tab in the top navigation bar. Click ‘Open Sidebar’ to launch Coefficient.
Step 2. Connect ClickUp as Your Data Source
Choose ClickUp from the ‘Import from..’ menu in Coefficient.
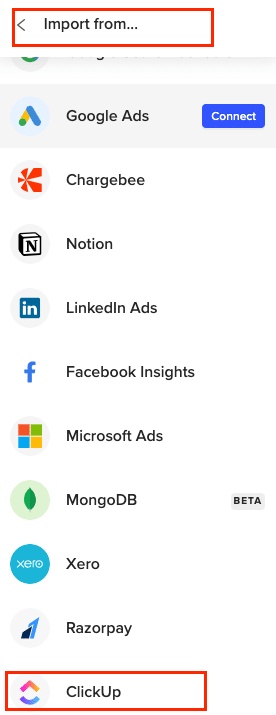
Select your existing ClickUp workspace to establish the connection.

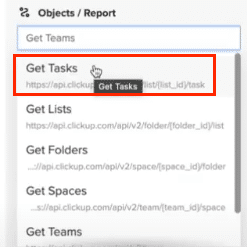
Step 3. Select the Desired Object
Pick the object you want to import data from, such as ‘Tasks,’ to fetch data from a specific list in ClickUp.
Step 4. Provide Mandatory Parameters
Input the required parameters, like the List ID of the ClickUp list you want to fetch tasks from. Find the List ID in ClickUp and paste it into the designated field in Coefficient.

Step 5. Review and Import the Data
Choose the specific fields you want to import from the left-hand side of the Import Preview menu.

Coefficient will display the retrieved data from ClickUp, allowing you to choose the specific fields you want to export. Make your selections an click ‘Import’ when finished.
Method 2: Manual CSV Export
ClickUp allows you to export task data in CSV format, which can then be opened and analyzed in Excel. This method provides a quick way to get a snapshot of your ClickUp data into a spreadsheet.
However, keep in mind that you’ll need to manually repeat the export process each time you want to update the data in Excel.
Pros and Cons
Pros:
- User-friendly and accessible to all ClickUp users.
- Quick and easy to perform.
- Suitable for most users’ needs.
Cons:
- Limited customization options.
- May not be suitable for advanced data manipulation or automation.
Step-by-Step Tutorial
- Log in to ClickUp: Open ClickUp and log in with your credentials.
- Go to the Space or Folder: Navigate to the Space, Folder, or List you want to export data from.
- Click on the Ellipsis (•••) Menu: Find this on the right side of the page or at the top of your task list.
- Select “Export”: Choose the export option. ClickUp offers options like exporting to CSV.
- Choose Export Options: Select the appropriate options (e.g., Task, Subtask, List, etc.).
- Download the File: Once the export is complete, download the CSV file.
- Open in Excel: Open the CSV file in Microsoft Excel. You can save it as an Excel file (.xlsx) if needed.
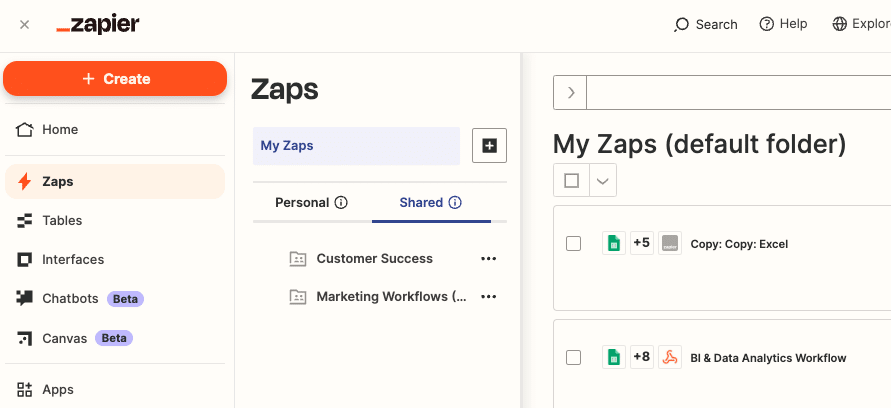
Method 3: Zapier
Zapier is a popular automation tool that allows you to connect ClickUp with Excel, enabling automated data export. With Zapier, you can set up a “Zap” that triggers whenever new data is added to ClickUp and automatically sends that data to an Excel spreadsheet.
Pros and Cons
Pros:

Stop exporting data manually. Sync data from your business systems into Google Sheets or Excel with Coefficient and set it on a refresh schedule.

- Automates the data export process, saving time and effort.
- Keeps your Excel data up to date with ClickUp in real-time.
- Allows for customization of the exported data fields.
Cons:
- Requires a Zapier account and some setup.
- May have limitations based on your Zapier plan.
Step-by-Step Tutorial
Step 1. Set up a Zapier Account: If you don’t have one already, sign up for a Zapier account at zapier.com.
Step 2. Create a New Zap: Click on “+ Create” in your Zapier dashboard.
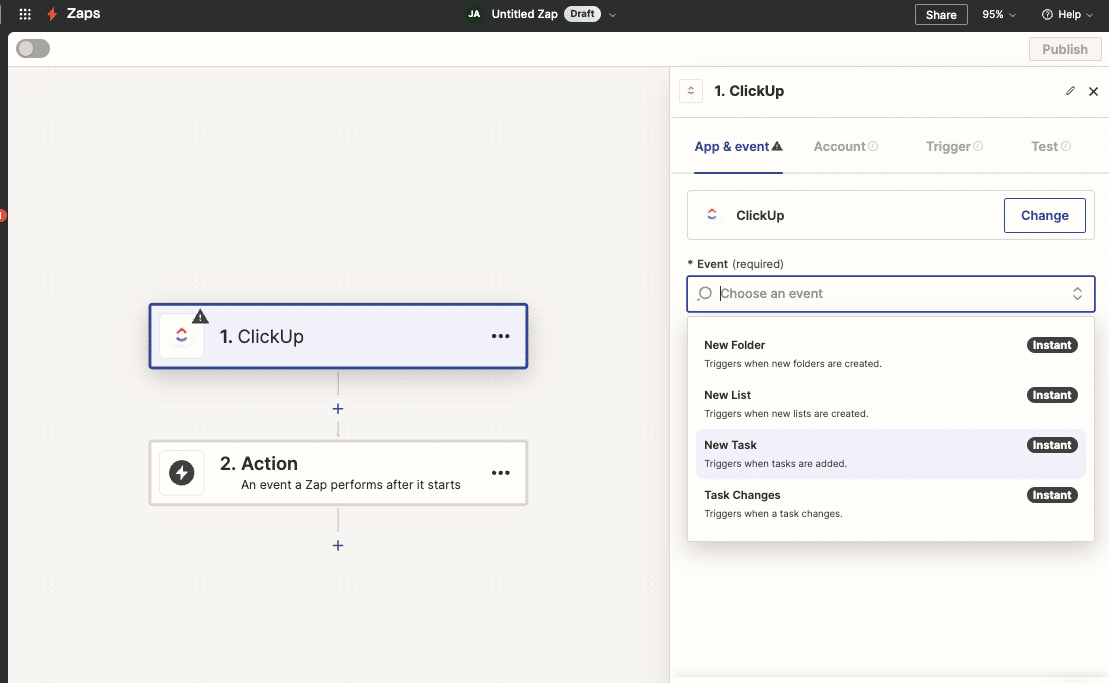
Step 2. Choose ClickUp as the Trigger App: Search for “ClickUp” and select it as the trigger app. Choose the specific trigger event, such as “New Task” or “New List”.
Step 3. Connect Your ClickUp Account: Follow the prompts to connect your ClickUp account to Zapier.
Step 4. Set up the Trigger: Customize the trigger settings, such as specifying the ClickUp Workspace, Space, Folder, or List you want to export data from.
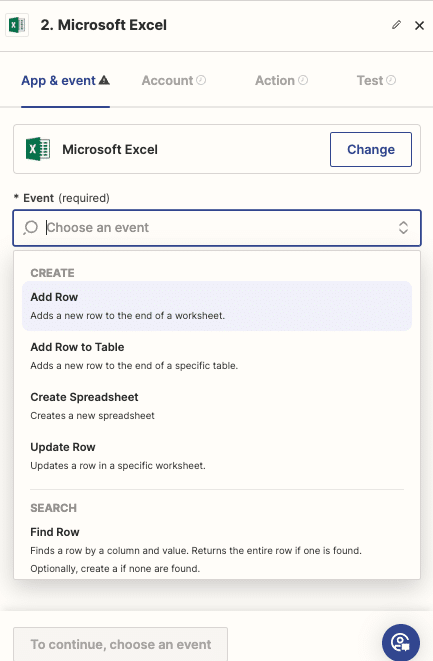
Step 5. Choose Excel as the Action App: Search for “Excel” and select it as the action app. Choose the specific action event, such as Add Row”.
Step 6. Connect Your Excel Account: Follow the prompts to connect your Excel account (e.g., OneDrive, Google Sheets) to Zapier.
Step 7. Set up the Action: Map the ClickUp data fields to the corresponding columns in your Excel spreadsheet. Customize the spreadsheet settings as needed.
Step 8. Test and Activate the Zap: Test your Zap to ensure it’s working properly. If everything looks good, activate the Zap.
With the Zap active, whenever new data is added to ClickUp based on your trigger settings, it will automatically be exported to your designated Excel spreadsheet.
Seamlessly Export ClickUp Data to Excel
In this post, we’ve covered three powerful methods for exporting ClickUp data to Excel: using Coefficient for no-code automation, manual CSV exports, and custom integrations with Integromat. Each approach has its own advantages and use cases:
By connecting ClickUp and Excel, you can supercharge your reporting, data analysis, and overall productivity. We encourage you to explore these methods and find the one that best fits your team’s needs.
Ready to experience the power of automated ClickUp to Excel syncing? Try Coefficient for free and start building your custom integration in minutes.


