Power Automate and Excel integration allows users to automate data processing, calculations, and reporting tasks. This tutorial guides you through creating efficient workflows.
Creating Your First Power Automate Flow with Excel
Set Up a New Flow
Power Automate enables you to create automated workflows with Excel. Here’s how to get started:
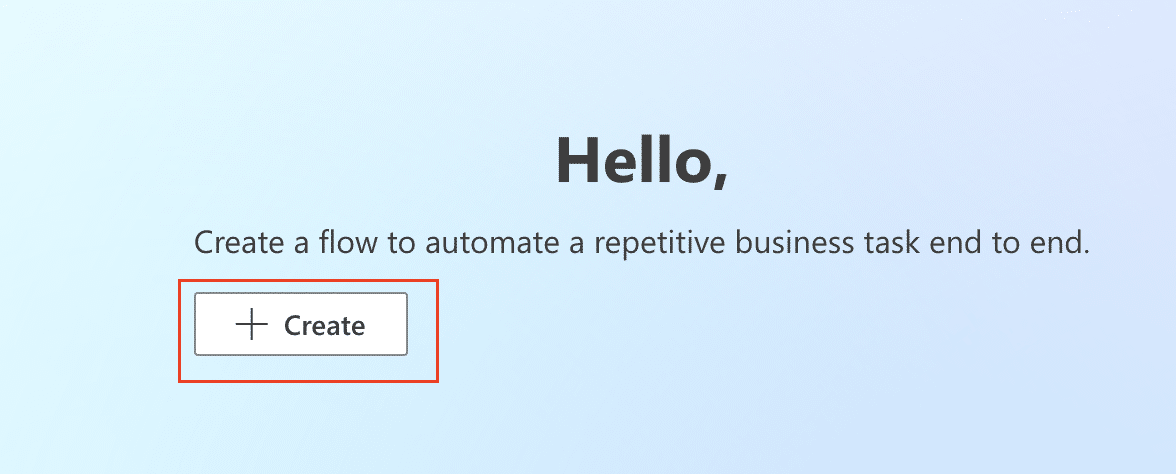
Step 1. Open Power Automate and select “Create a flow”
- Log in to your Power Automate account.
- On the main dashboard, locate and click the “Create a flow” button.
Step 2. Choose “Automated cloud flow”
- In the flow creation menu, select the “Automated cloud flow” option.
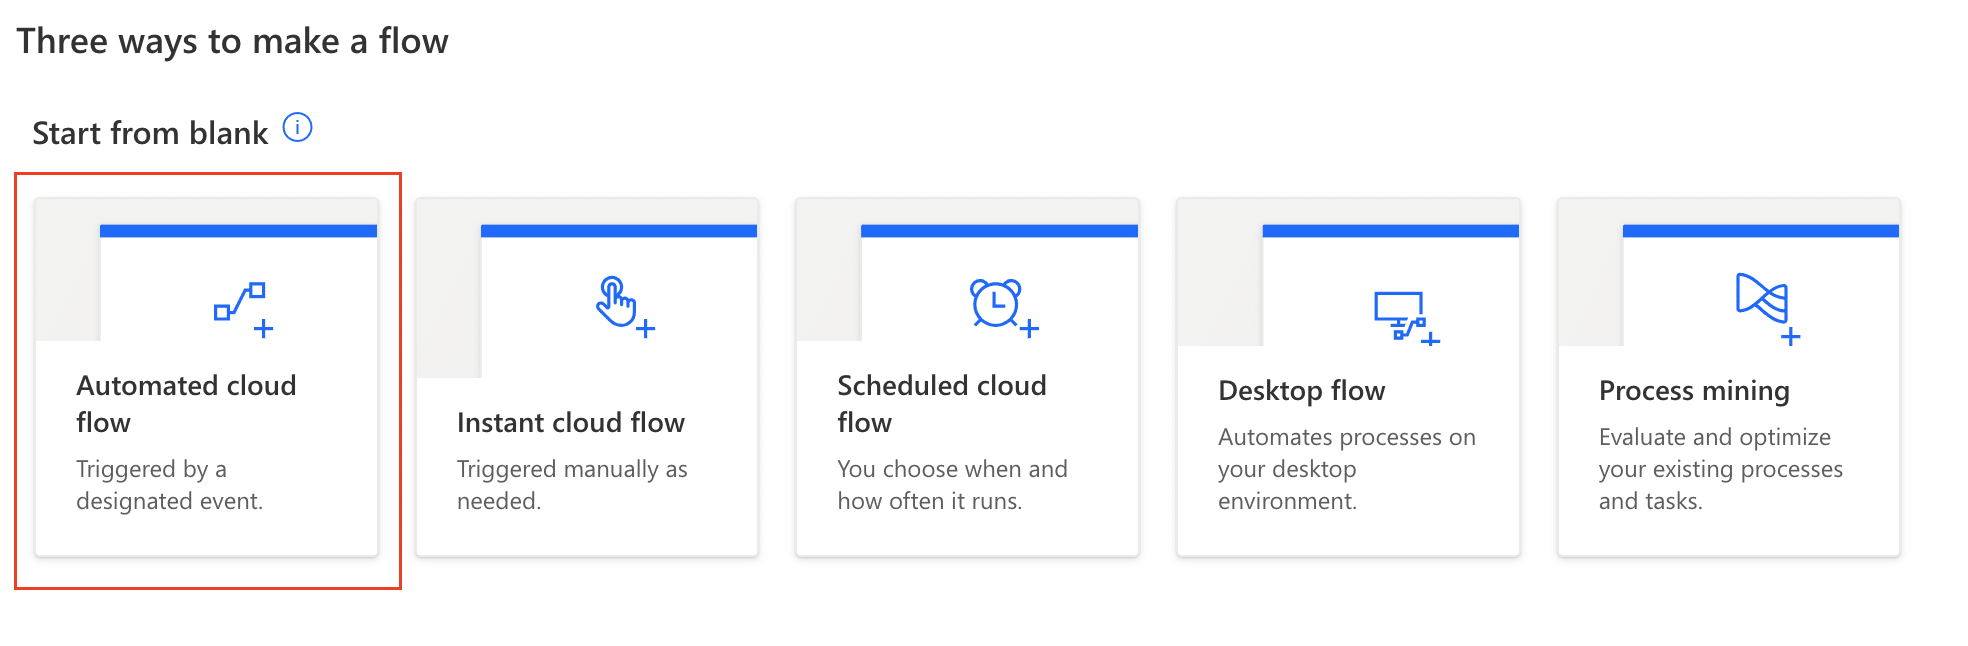
- This allows you to create a flow that runs automatically based on a trigger.
Step 3. Select Excel as the trigger
- In the trigger selection screen, search for “Excel” in the connector list.

- Choose the appropriate Excel trigger for your workflow needs.
Configure Excel Trigger
Properly configuring your Excel trigger ensures your flow responds to the right events:
Step 1. Select your Excel file and worksheet
- Click on the Excel trigger action to expand its options.
- Choose the OneDrive or SharePoint location where your Excel file is stored.
- Select the specific Excel file you want to use as a trigger.
- Pick the worksheet within that file that will initiate the flow.
Step 2. Define trigger conditions
- Specify the condition that will start your flow, such as “When a new row is added“.
- You can also set up more complex conditions using the “Edit” option in the trigger settings.
Add Excel Actions
After setting up the trigger, you’ll want to add actions that work with your Excel data:
Step 1. Use “Get row” action to retrieve data
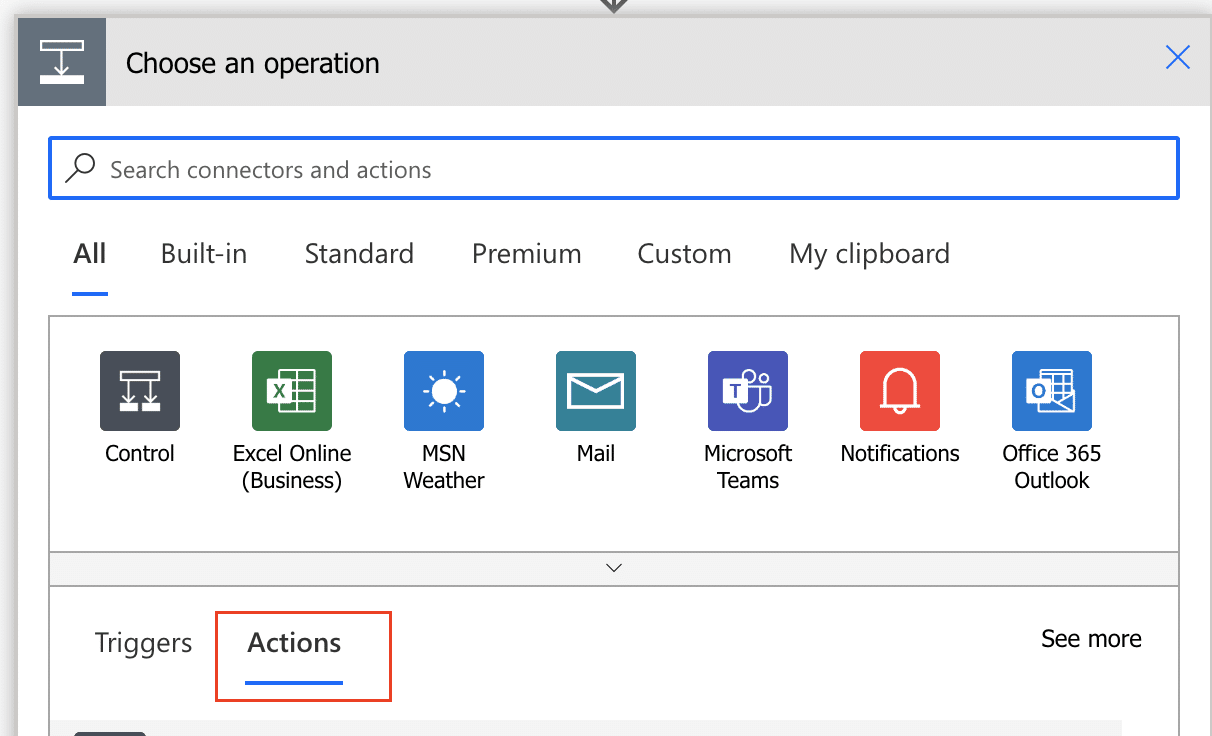
- Click “New step” to add an action.

- Search for “Excel” and select “Get a row” from the available actions.
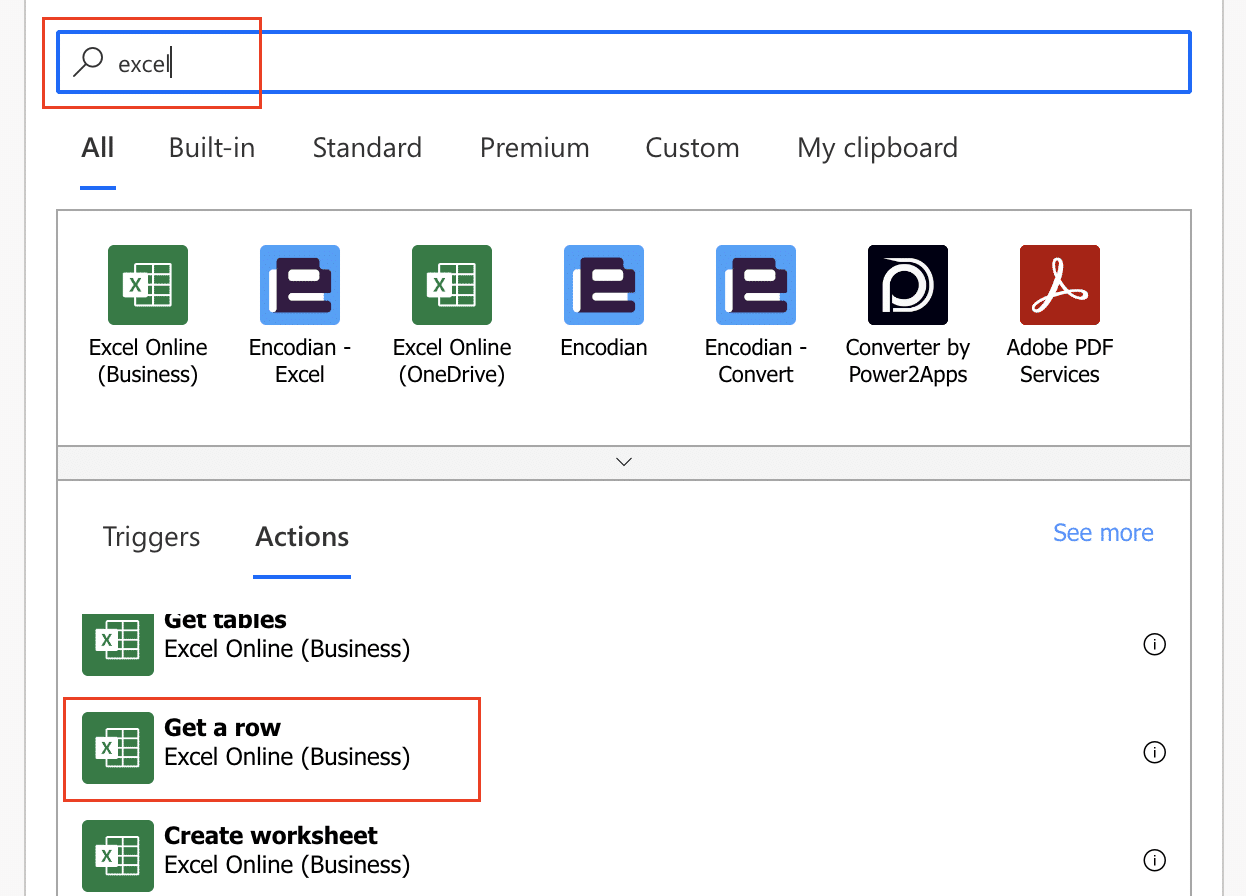
- Configure the action to retrieve the specific row that triggered the flow.
Step 2. Implement “Add a row into a table” action
- Add another step and search for the “Add a row into a table” Excel action.
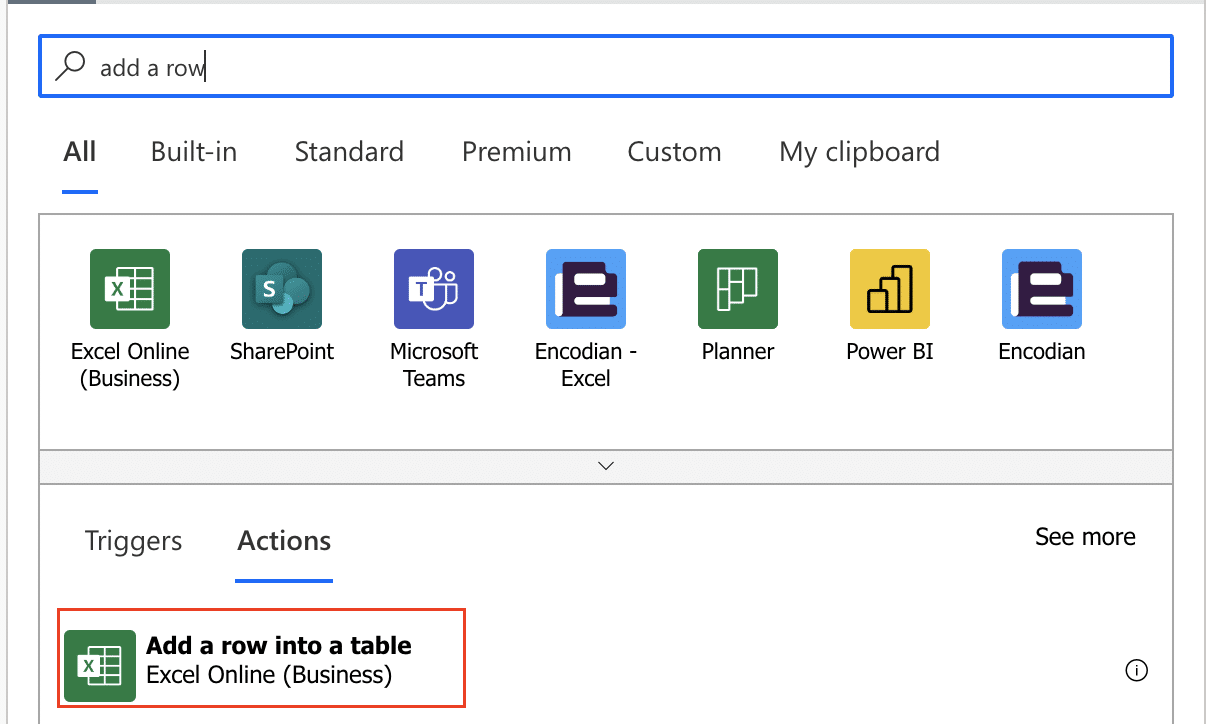
- Select the destination Excel file and worksheet.
- Map the data from your trigger or previous steps to the appropriate columns in your table.
Step 3. Explore “Update a row” for data modification
- If you need to modify existing data, add the “Update a row” action.
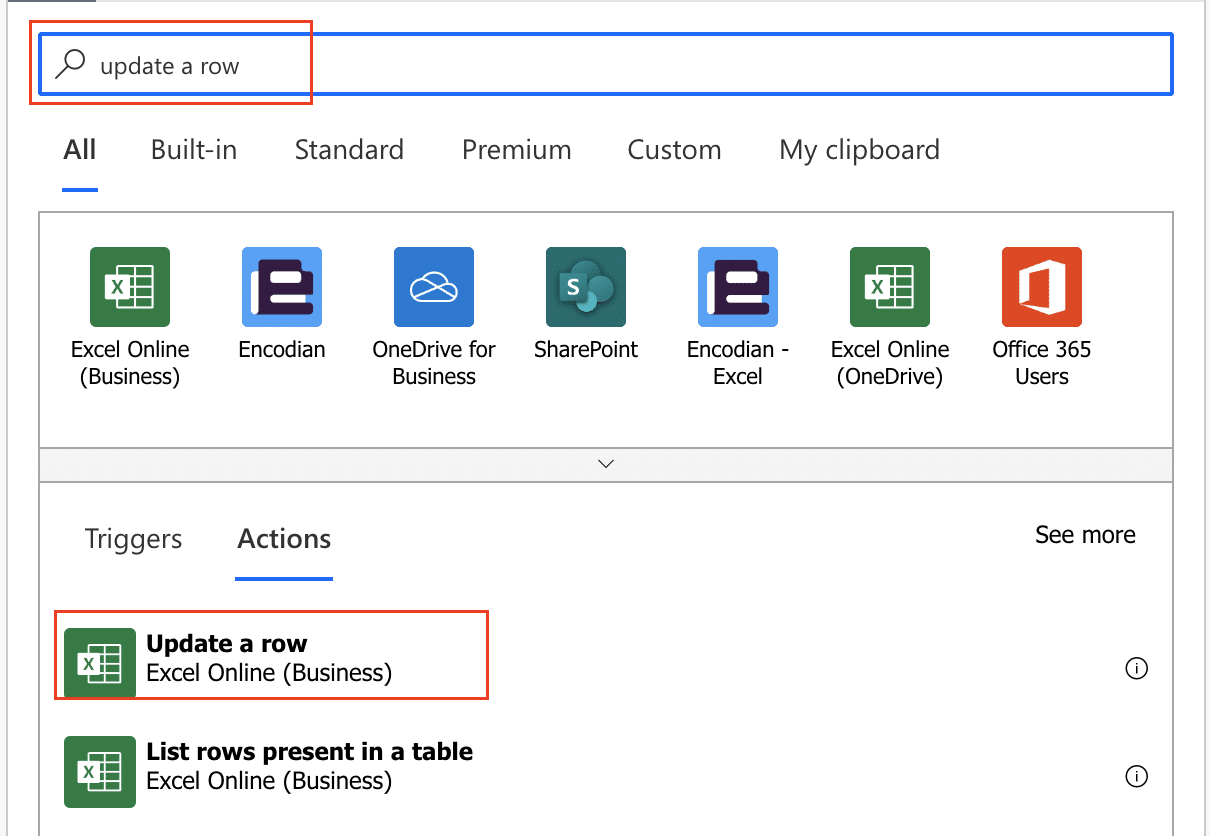
- Configure it to locate the specific row you want to update.
- Map the new data to the appropriate columns, using dynamic content from previous steps if needed.
Extracting Data from Excel Using Power Automate
Set Up Data Extraction Flow
Extracting data from Excel can automate reporting and analysis tasks:
Step 1. Create a new flow with Excel as the data source
- Start a new automated flow.

- Choose a trigger that suits your extraction needs, such as a scheduled trigger or a manual trigger.

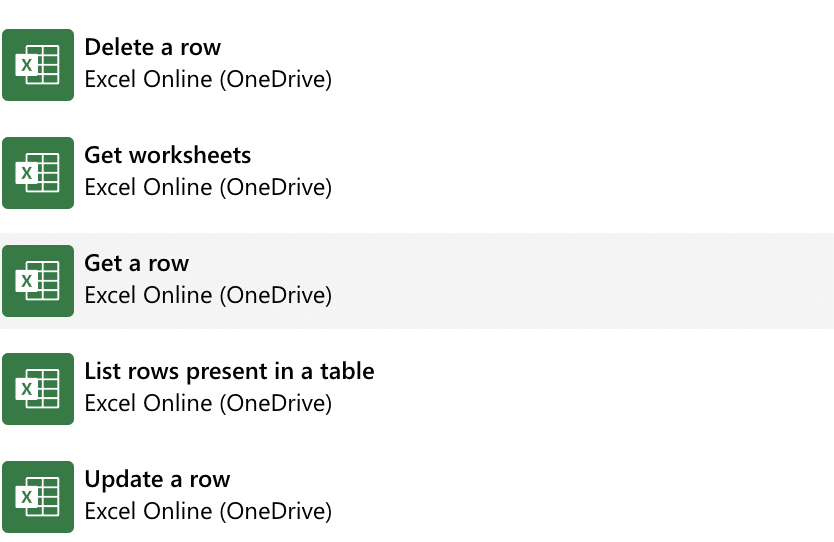
Step 2. Configure “List rows present in a table” action
- Add the “List rows present in a table” Excel action.
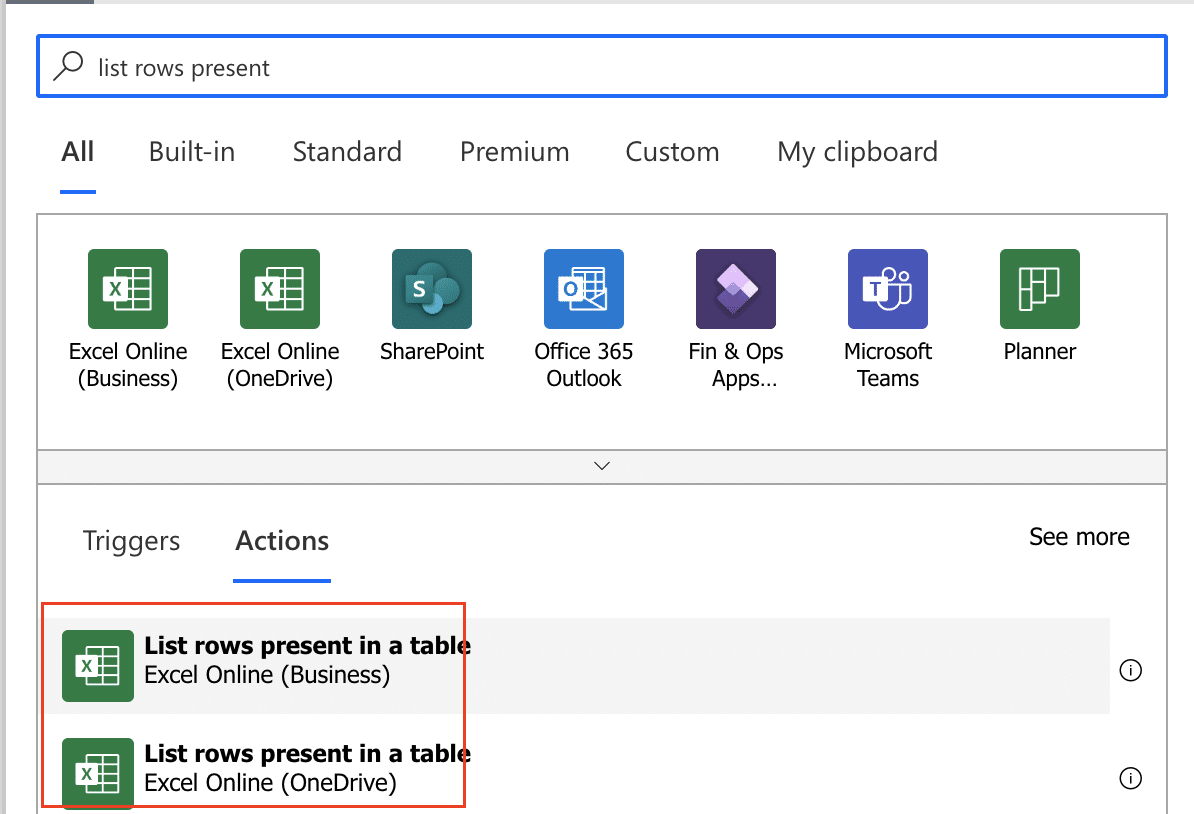
- Select your source Excel file and worksheet.
- Specify the table or range you want to extract data from.
Step 3. Define filtering criteria for specific data retrieval
- Use the “Filter Query” option in the “List rows present in a table” action.
- Enter an OData filter query to retrieve only the data you need.
- For example, to get rows where the “Status” column is “Complete“, use: Status eq ‘Complete’
Process Extracted Data
Once you’ve extracted the data, you can process it within your flow:
Step 1. Use “Apply to each” action for bulk processing
- Add an “Apply to each” action after your data extraction step.
- Select the output from your “List rows” action as the input for this loop.
Step 2. Implement data transformation steps
- Within the “Apply to each” loop, add actions to transform your data.
- Use “Compose” actions to format dates or numbers.
- Implement conditional actions to handle different data scenarios.
Step 3. Store processed data in variables for further use
- Add “Initialize variable” actions before your loop to create variables.
- Use “Set variable” actions within your loop to store processed data.
- These variables can then be used in subsequent steps of your flow.
Automating Excel Calculations with Power Automate
Create a Calculation Flow
Power Automate can perform calculations on your Excel data:
Step 1. Set up a flow triggered by Excel file changes
- Create a new flow with a trigger that responds to changes in your Excel file.
- You can use the “When a row is added, modified or deleted” Excel trigger.
Step 2. Use “Get row” to retrieve input data
- Add a “Get row” action to fetch the specific row that was changed.

- Make sure to select all the columns you need for your calculations.
Step 3. Implement calculation logic using expressions
- Add a “Compose” action to perform your calculations.

- Use Power Automate expressions to create your calculation logic.
- For example, to add two numbers: add(outputs(‘Get_row’)?[‘Column1’], outputs(‘Get_row’)?[‘Column2’])
Update Excel with Calculated Results
After performing calculations, you’ll want to write the results back to Excel:
Step 1. Use “Update a row” action to write results back to Excel
- Add an “Update a row” Excel action.

- Configure it to update the same row you retrieved earlier.
- Map your calculated results to the appropriate columns.
Step 2. Configure error handling for calculation failures
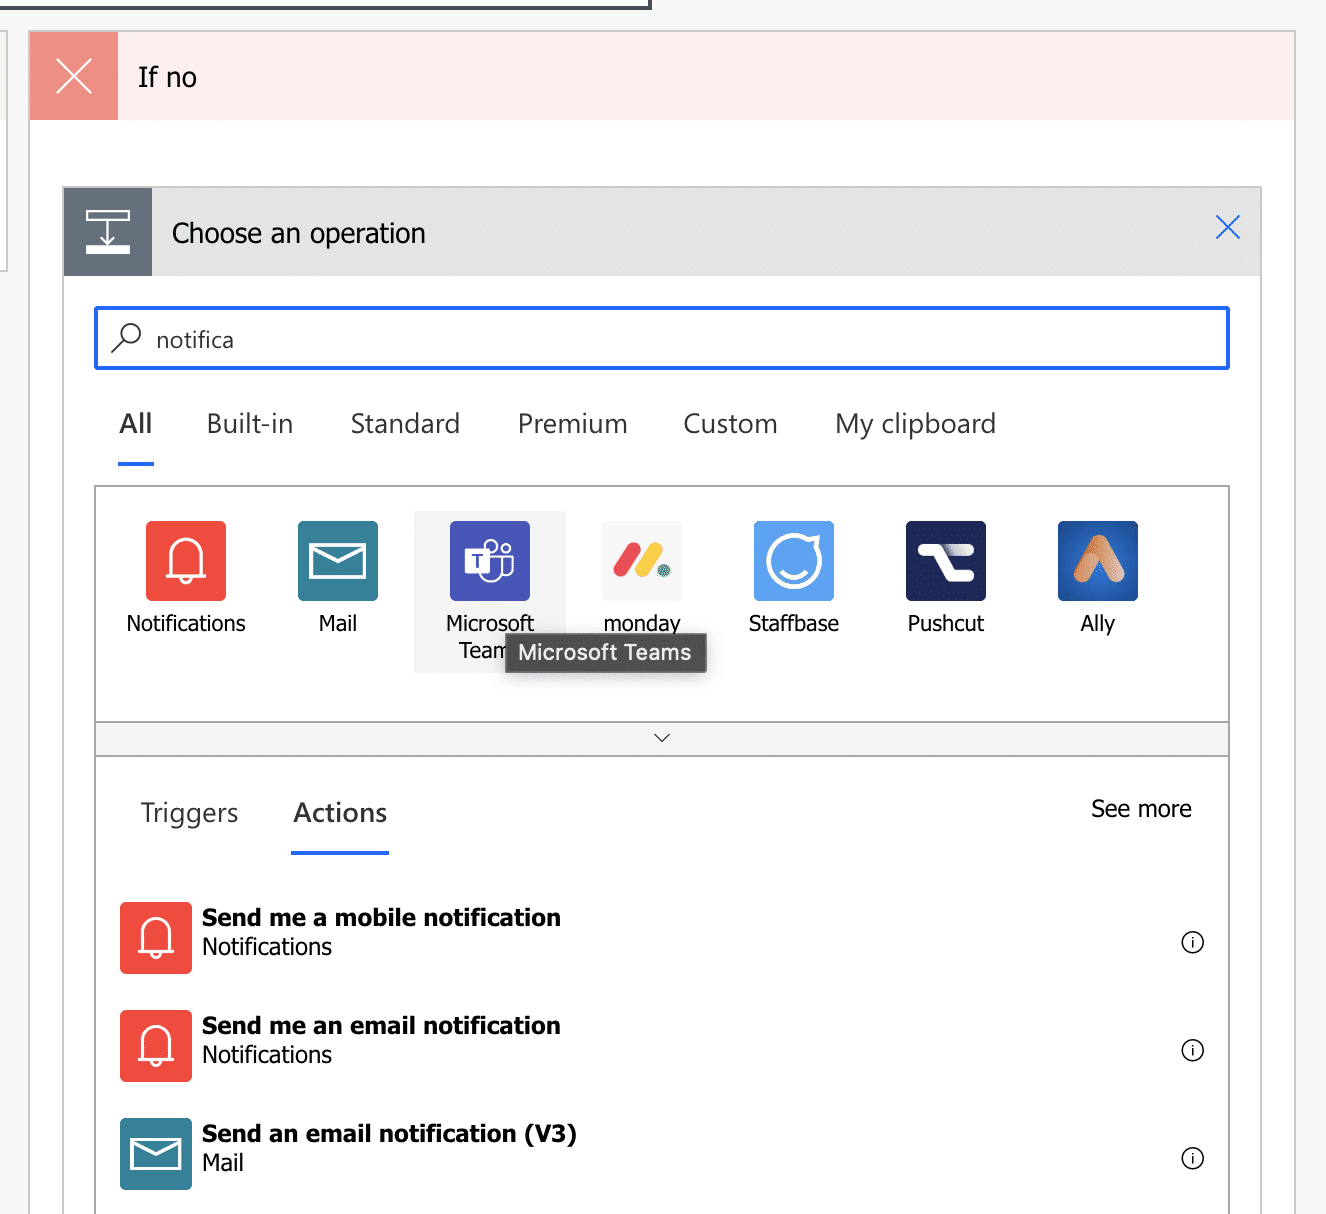
- Add a “Condition” action to check if your calculation was successful.
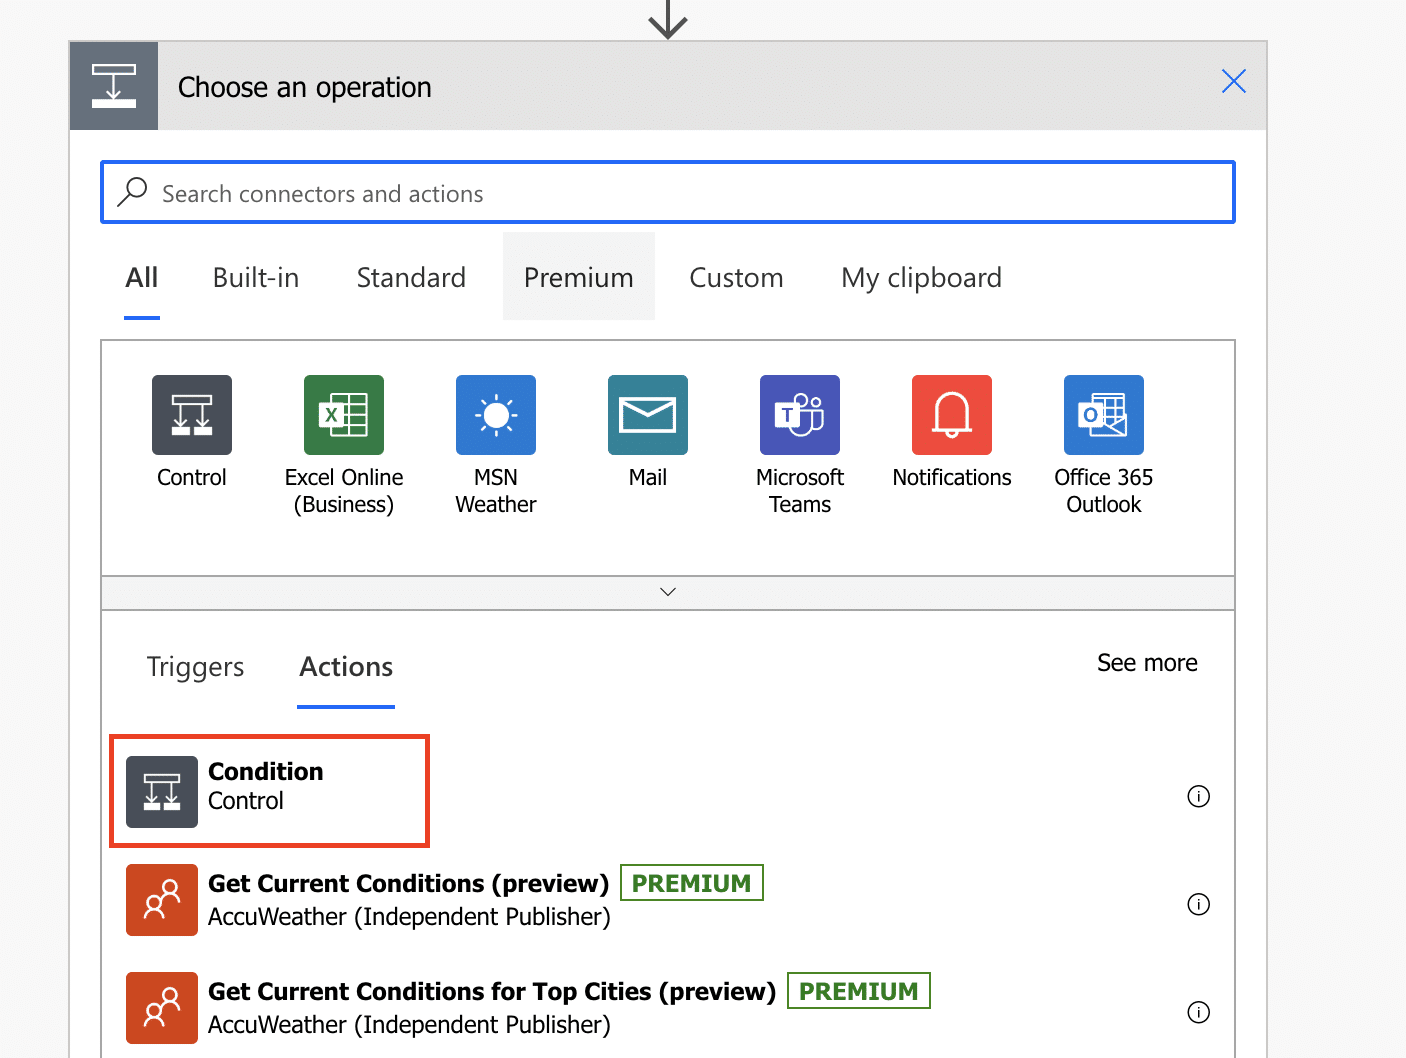
- In the “If no” branch, add actions to handle errors, such as sending a notification.
Step 3. Test the flow with sample data
- Save your flow and use the “Test” button to run it with sample data.
- Check your Excel file to ensure the calculations are correct and properly updated.
Can You Use Power Automate for Excel Formulas?
Implementing Excel Functions in Power Automate
While Power Automate isn’t a direct replacement for Excel formulas, you can replicate many Excel functions:
Step 1. Explore built-in Excel function actions

Stop exporting data manually. Sync data from your business systems into Google Sheets or Excel with Coefficient and set it on a refresh schedule.
Get Started
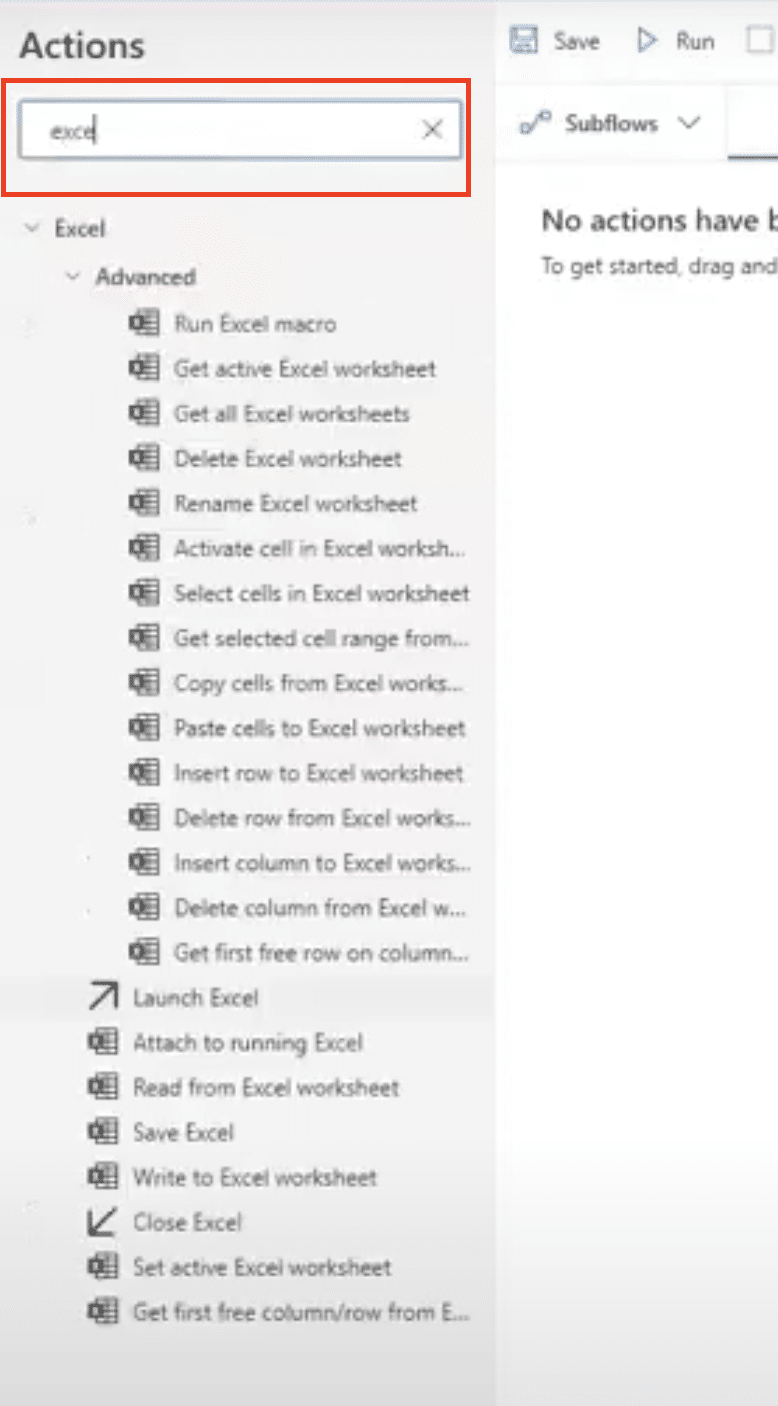
- Power Automate offers some Excel functions as built-in actions.
- Search for “Excel” in the action list to find available Excel functions.
Step 2. Use expressions to mimic complex Excel formulas
- For functions not available as actions, use Power Automate expressions.
- Many Excel functions have equivalent Power Automate functions.
- Example: VLOOKUP can be mimicked using a combination of “Filter array” and “Select” actions.
Step 3. Combine multiple actions for advanced calculations
- For complex formulas, break them down into multiple steps.
- Use variables to store intermediate results.
- Chain actions together to build up your calculation logic.
Limitations and Workarounds
Understanding the limitations of Power Automate with Excel formulas is crucial:
Step 1. Discuss functions not directly available in Power Automate
- Some Excel-specific functions like OFFSET or INDIRECT don’t have direct equivalents.
- For these, you may need to rethink your approach or use alternative methods.
Step 2. Provide alternative approaches using Power Automate actions
- Instead of OFFSET, use a combination of “List rows” and “Select” actions.
- Replace INDIRECT with more explicit data retrieval methods.
Step 3. Suggest when to use Excel-based calculations vs. Power Automate
- Use Excel for complex, interdependent calculations across multiple cells.
- Opt for Power Automate when automating calculations as part of a larger workflow.
- Consider performance implications for large datasets.
Integrating Excel with Other Apps Through Power Automate
Connect Excel to SharePoint
Syncing Excel data with SharePoint can improve collaboration and data accessibility:
Step 1. Set up a flow to sync Excel data with SharePoint lists
- Create a new flow triggered by changes in your Excel file.
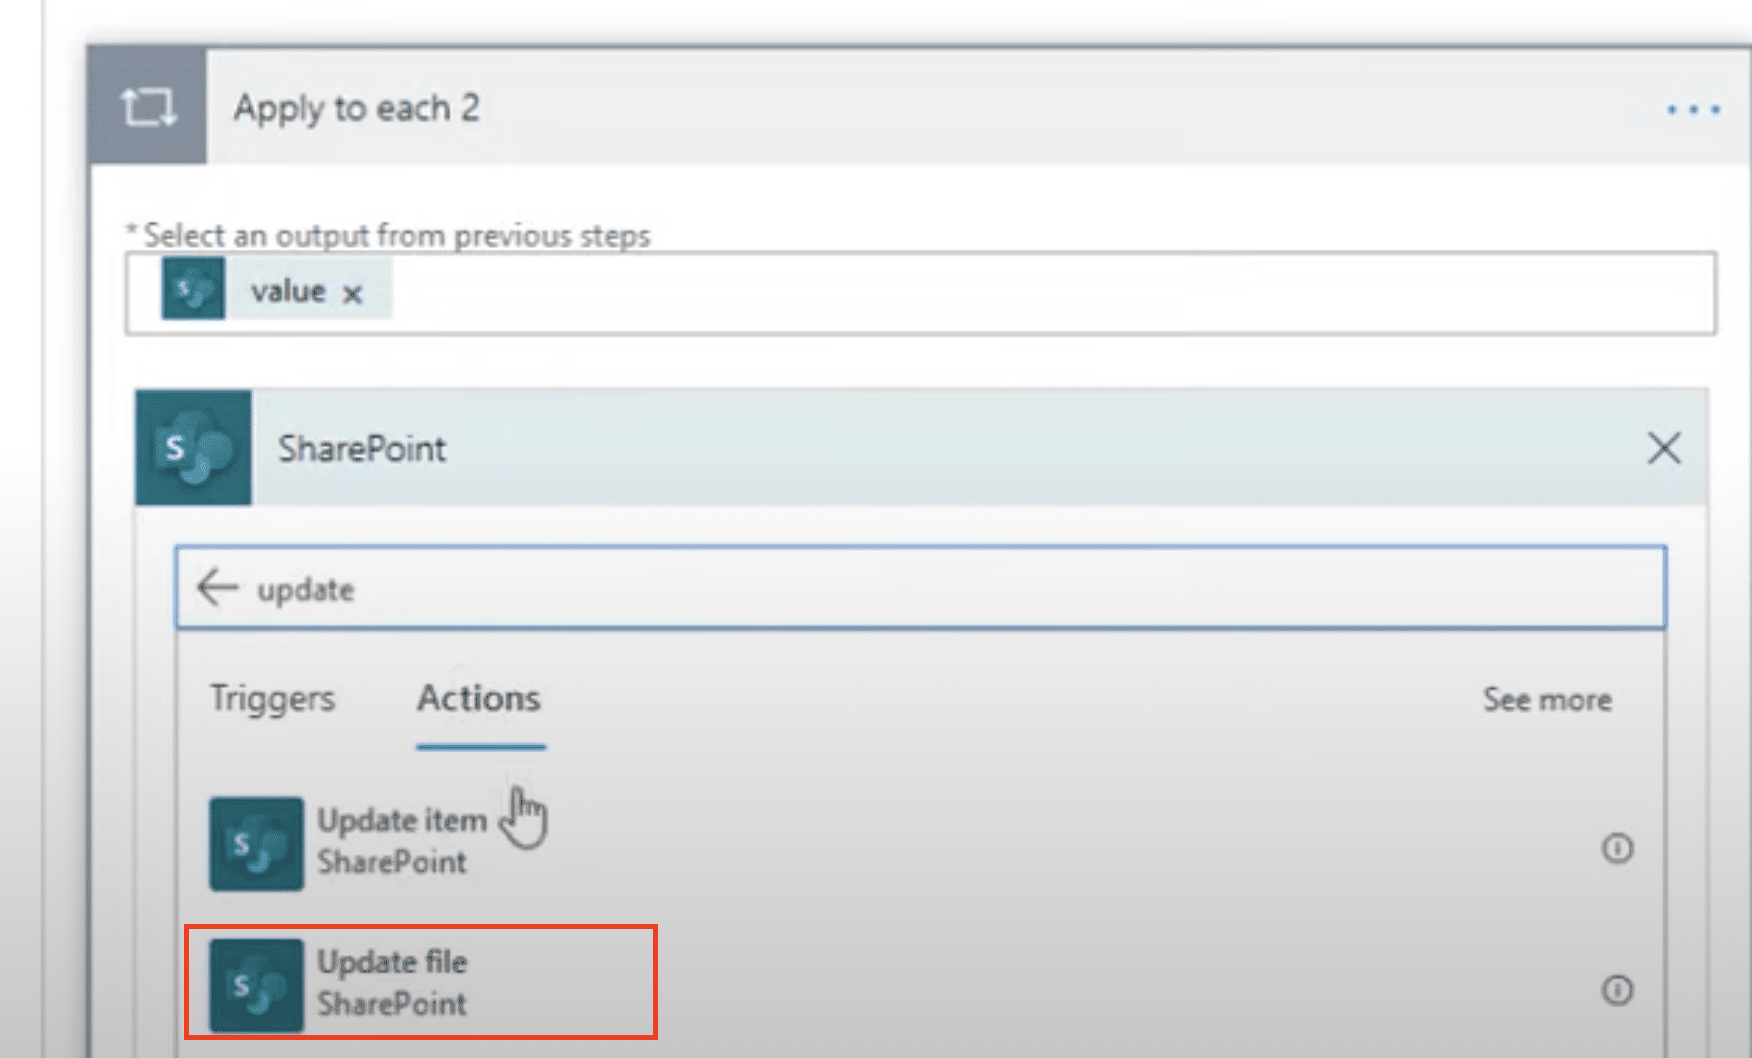
- Add a “Get rows” action to retrieve the Excel data.

- Use a “Create item” or “Update item” SharePoint action to sync the data.
Step 2. Configure bidirectional data flow between Excel and SharePoint
- Create a separate flow triggered by SharePoint list changes.
- Use Excel actions to update the corresponding Excel file.
- Implement checks to prevent infinite loops of updates.
Step 3. Implement error handling and conflict resolution
- Add conditions to check for data conflicts.
- Use “Send an email” actions to notify users of sync issues.
- Implement retry logic for failed sync attempts.
Link Excel to Microsoft Teams
Integrating Excel with Teams can enhance team communication and data sharing:
Step 1. Create a flow to post Excel updates to Teams channels
- Set up a flow triggered by significant Excel changes.
- Use the “Post a message” Teams action to share updates.
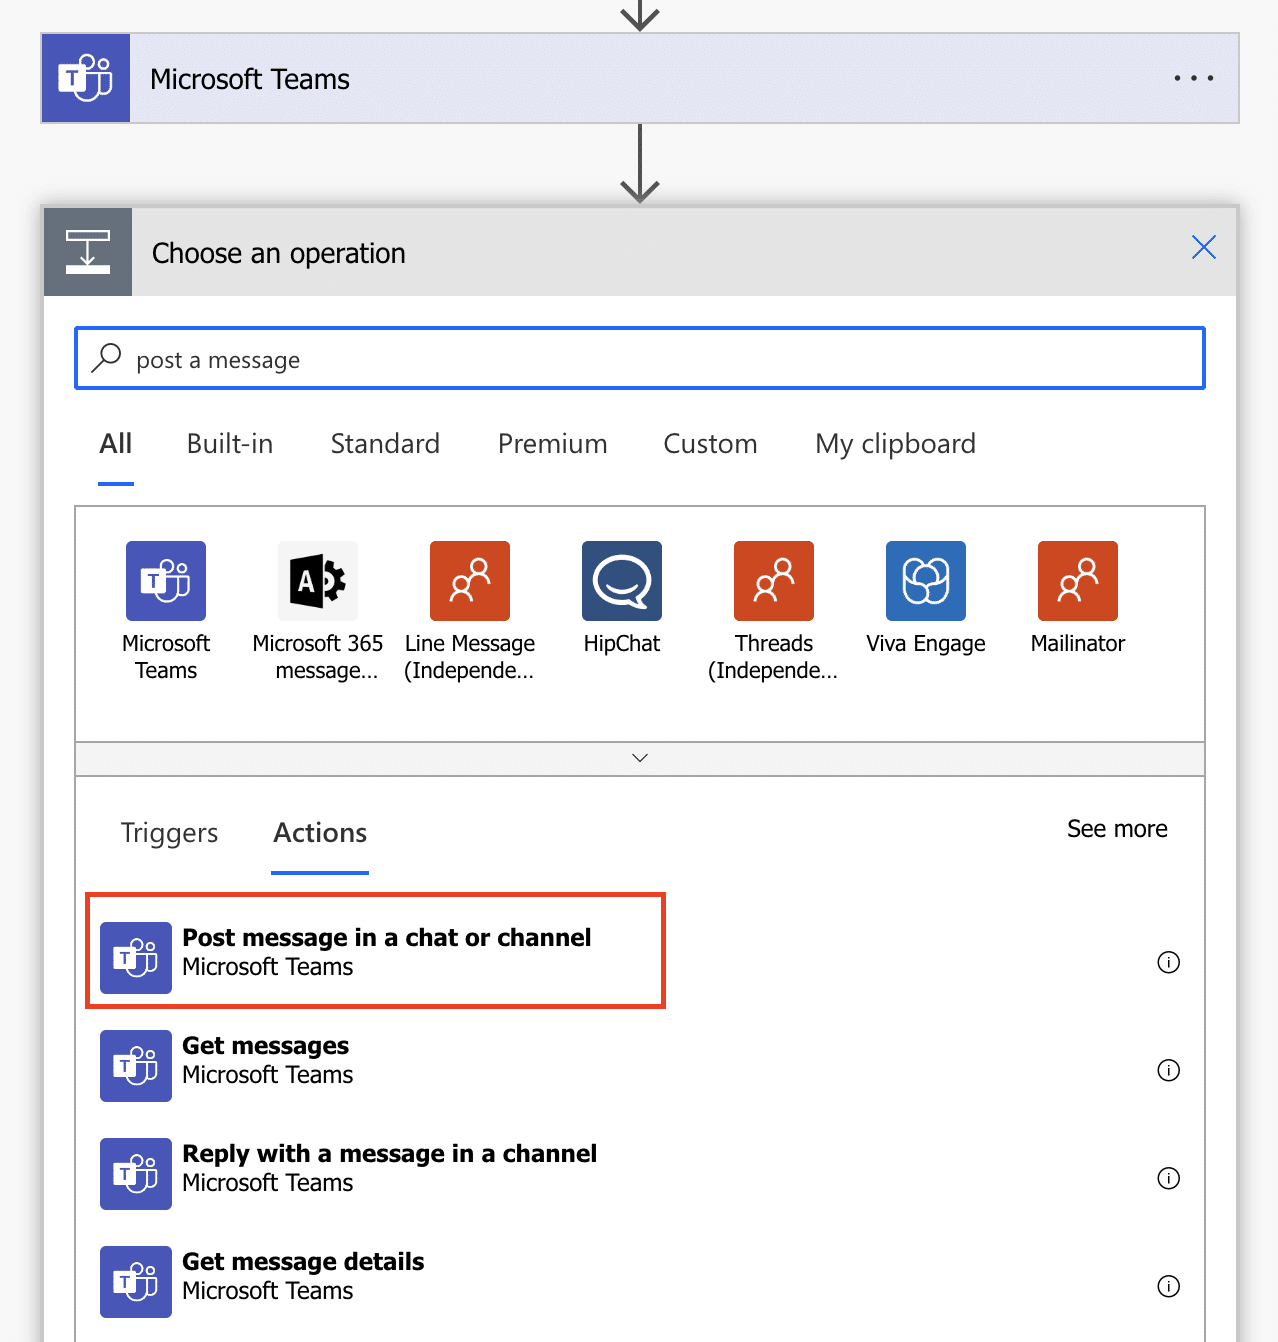
- Format the message to clearly present the Excel data.
Step 2. Set up automated Excel report sharing in Teams
- Create a scheduled flow to generate Excel reports.
- Use Excel actions to refresh data and create a report.
- Add a Teams action to post the report to a specific channel.
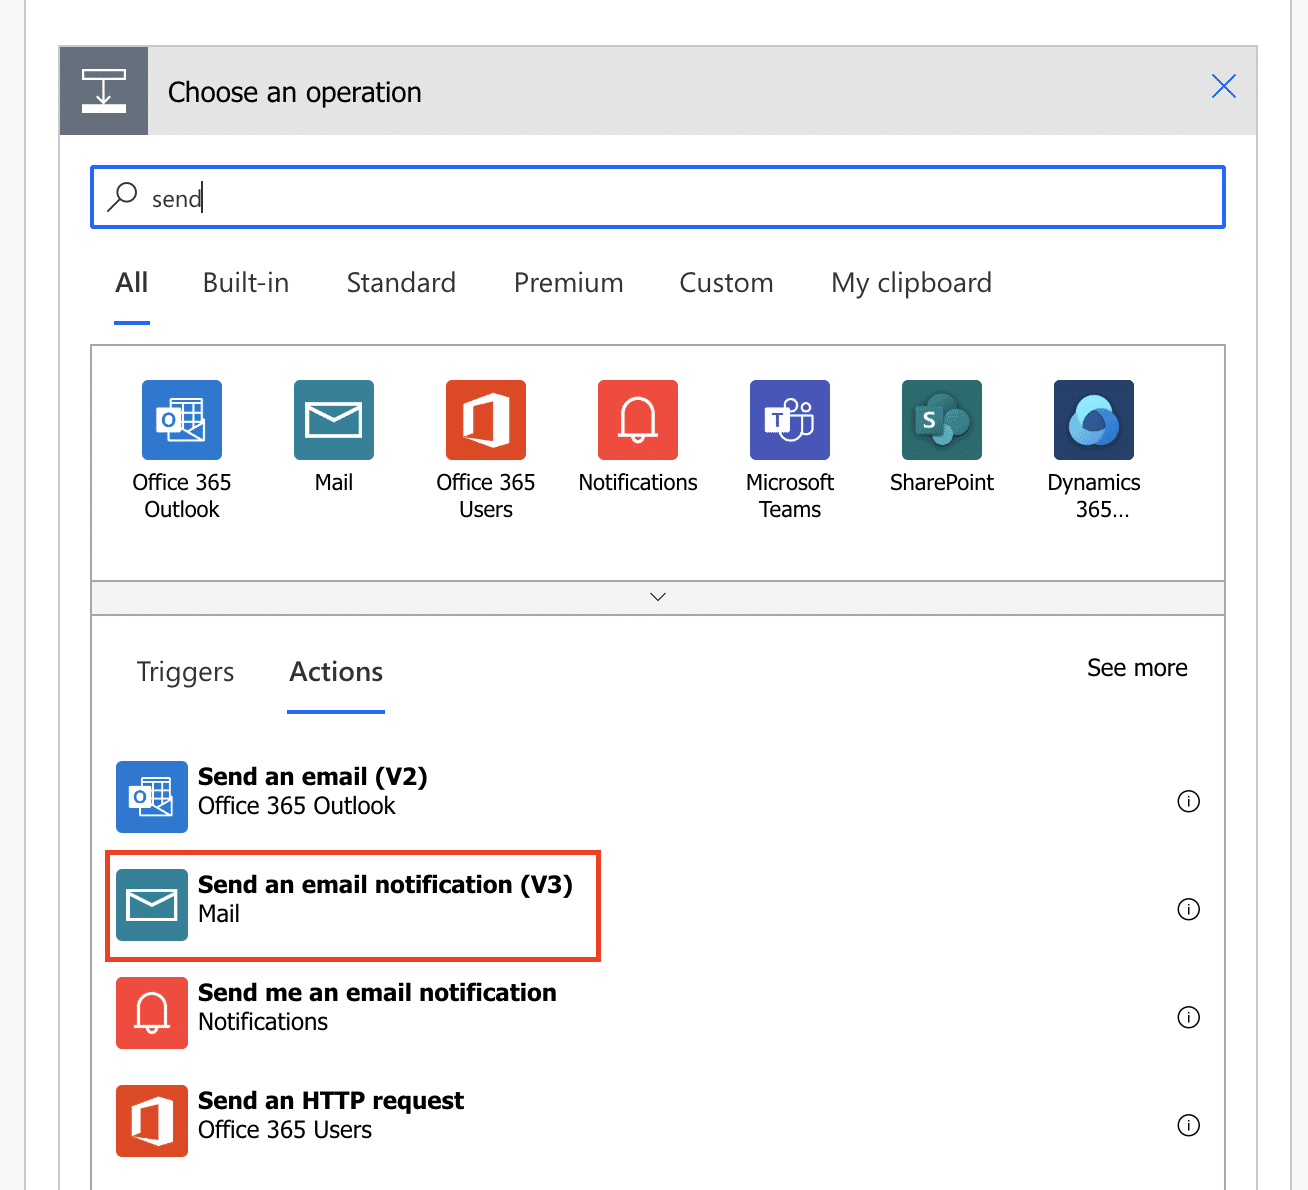
Step 3. Implement user notifications for critical Excel data changes
- Add conditions to your Excel-triggered flow to identify critical changes.
- Use the “Post adaptive card” Teams action for interactive notifications.
- Include actionable buttons in the card for users to respond or view details.
Optimizing Power Automate Excel Workflows
Performance Considerations
Optimizing your flows ensures they run efficiently, especially with large datasets:
Step 1. Discuss row limits and pagination for large datasets
- Be aware of the 5,000 row limit for single Excel actions.
- For larger datasets, implement pagination using “Skip” and “Top” parameters.
- Use loops to process data in manageable chunks.
Step 2. Implement batch processing for improved efficiency
- Group similar operations together to reduce the number of Excel API calls.
- Use “Create multiple rows” instead of multiple “Create row” actions.
- Consolidate data updates into fewer, larger operations.
Step 3. Use concurrent branches for parallel execution
- Identify independent parts of your workflow that can run simultaneously.
- Use parallel branches to execute these parts concurrently.
- Be mindful of API limits and potential race conditions.
Error Handling and Logging
Robust error handling and logging are crucial for maintaining reliable workflows:
Step 1. Set up comprehensive error tracking
- Add “Try-Catch” actions around critical steps in your flow.
- Use “Create item” actions to log errors in a SharePoint list or database.
- Include relevant context information in your error logs.
Step 2. Implement retry logic for transient failures
- Add “Retry” settings to actions that might face temporary issues.
- Use exponential back-off for retries to avoid overwhelming services.
- Set appropriate retry counts and intervals based on the action’s nature.
Step 3. Create a logging system for workflow monitoring
- Set up a central logging solution, such as a dedicated Excel file or database.
- Log key events, not just errors, to track workflow progress.
- Include timestamps, action names, and relevant data in your logs.
Elevate Your Excel Automation
Power Automate offers powerful capabilities for Excel automation, from data extraction to complex calculations and app integrations. Experiment with these techniques to create efficient, reliable workflows that save time and reduce errors.
Ready to take your Excel automation to the next level? Get started with Coefficient to seamlessly sync live data from 50+ business systems into your spreadsheets and automate your reporting workflows. Start your journey with Coefficient today.


