Excel data validation helps prevent errors and maintain data quality in your spreadsheets. This tutorial shows you how to set up validation rules, create drop-down lists, and build custom controls that keep your data accurate and consistent.
How to Add Data Validation to Excel Cells
Let’s start with the basic steps to add validation to your spreadsheet:
- Select your target cells
- Click and drag to highlight the cells where you want to add validation
- Use Ctrl+Click to select multiple non-adjacent cells
- Select entire columns by clicking the column header
- Open Data Validation
- Click the “Data” tab in the Excel ribbon

-
- Select “Data Validation” from the Data Tools group

-
- A dialog box will appear with three tabs: Settings, Input Message, and Error Alert

- Choose validation criteria
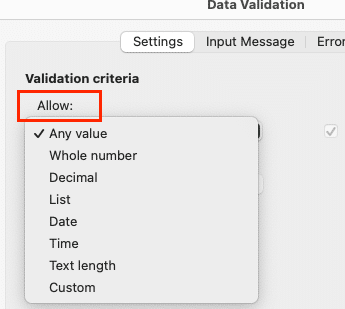
- In the Settings tab, use the “Allow” dropdown to select your validation type
-
- Options include: Whole Number, Decimal, List, Date, Time, Text Length, Custom
- Test your rules
- Enter test values that should pass and fail
- Verify error messages appear as expected
- Check that valid entries are accepted
Creating Drop-down Lists in Excel
Drop-down lists help users select from predefined options. Here’s how to create them:
Create your source data
Copy
– Type your list items in a single column
– Give the range a named range (optional)
- – Keep source data on a separate sheet for organization
- Set up the validation
- Select your target cell(s)
- Choose “List” from the Allow dropdown

-
- In Source, either:

-
-
- Enter items directly with commas: “Yes,No,Maybe”
- Reference cells: =Sheet2!A1:A10
- Use a named range: =OptionsList
-
- Customize the display
-
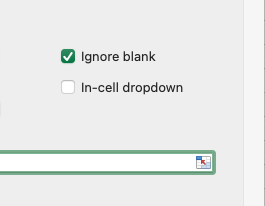
- Clear “In-cell dropdown” to remove the arrow
- Enable “Ignore blank” if empty cells are acceptable
- Sort source data to control list order
Setting Up Number and Date Restrictions
Control what numbers and dates users can enter:
Number Validation Examples:
|
Type |
Minimum |
Maximum |
Example Use |
|---|---|---|---|
|
Whole Number |
1 |
100 |
Product quantity |
|
Decimal |
0.00 |
1.00 |
Percentage values |
|
Greater than |
0 |
– |
Positive values only 
Try the Free Spreadsheet Extension Over 500,000 Pros Are Raving About
Stop exporting data manually. Sync data from your business systems into Google Sheets or Excel with Coefficient and set it on a refresh schedule. Get Started |
Date Validation Settings:
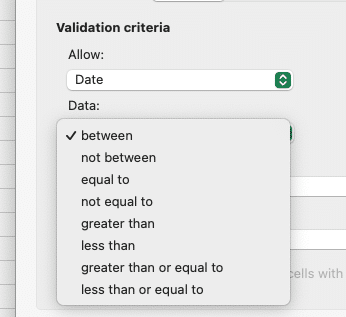
- Select “Date” from Allow dropdown

- Choose your comparison:
-
- Between
- Greater than
- Less than
- Equal to
- Enter dates directly or reference cells

- Use formulas like =TODAY() for dynamic ranges
Building Custom Validation Rules
Create advanced validation with custom formulas:
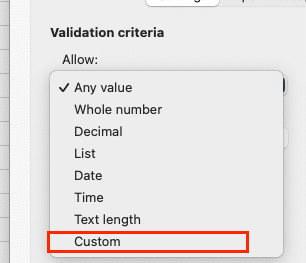
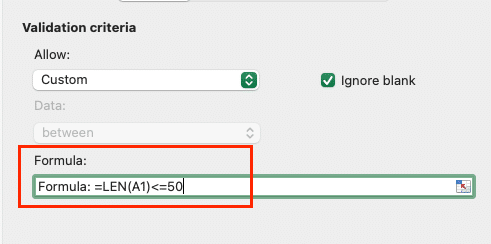
Text Length Example:
Copy
Formula: =LEN(A1)<=50
Purpose: Limit text to 50 characters
Conditional Rules:
Copy
Formula: =AND(A1>=0,MOD(A1,5)=0)
Purpose: Allow only positive numbers divisible by 5

Next Steps
Now you can create validation rules that maintain data quality and guide users to enter correct values. Start with simple validation and build up to more complex rules as needed.
Ready to take your Excel data management further? Try Coefficient to connect your spreadsheets directly to your business systems and maintain real-time data accuracy automatically.

