Need to connect Xero to HubSpot? You’re in the right place.
By linking Xero and HubSpot, you’ll sync financial data with customer information, enabling faster invoicing and more accurate sales forecasts.
This guide covers three proven methods to integrate these platforms, from simple native connections to powerful custom solutions. We’ll walk you through each option, helping you choose the best fit for your needs.
Let’s dive in!
Advantages of Connecting Xero to HubSpot
Before we dive into the how-to, let’s explore why integrating Xero with HubSpot is essential for your business:
- Accelerated Invoice-to-Cash Cycle: Reduce days sales outstanding by personalizing payment reminders based on customer data. Get paid faster, improving cash flow and financial stability.
- More Accurate Revenue Forecasting: Create precise revenue projections by combining financial data with sales pipeline information. Make confident decisions on investments and communicate financial outlook more effectively.
- Streamlined Financial Reporting: Eliminate hours of manual data entry and reconciliation each week. Gain a comprehensive view of business performance by blending financial metrics with customer acquisition costs and lifetime value data.
Top 3 Methods to Connect Xero to HubSpot
Let’s explore the three best ways to integrate Xero with HubSpot, each catering to different needs and levels of complexity:
let’s create a 2×3 table for the “Best For” section:
| Solution | Best For |
| Coefficient | Non-technical users who want to sync Xero financial data with HubSpot CRM data in spreadsheets for custom reporting and analysis. |
| Native Integration | Small to medium-sized businesses looking for a straightforward, out-of-the-box solution to connect Xero and HubSpot without extensive customization. |
| Zapier | Users who need to automate specific workflows between Xero and HubSpot, such as creating contacts in HubSpot when new invoices are added in Xero. |
#1 Coefficient: The Powerful Data Integration Solution
Coefficient syncs live data from various business systems, like Xero, directly into Excel and Google Sheets. For Xero users, this means you can build real-time financial reports, automate data updates, and streamline your accounting workflows without leaving your spreadsheet.
Step-by-step walkthrough:
Step 1. Install Coefficient for your spreadsheet of choice
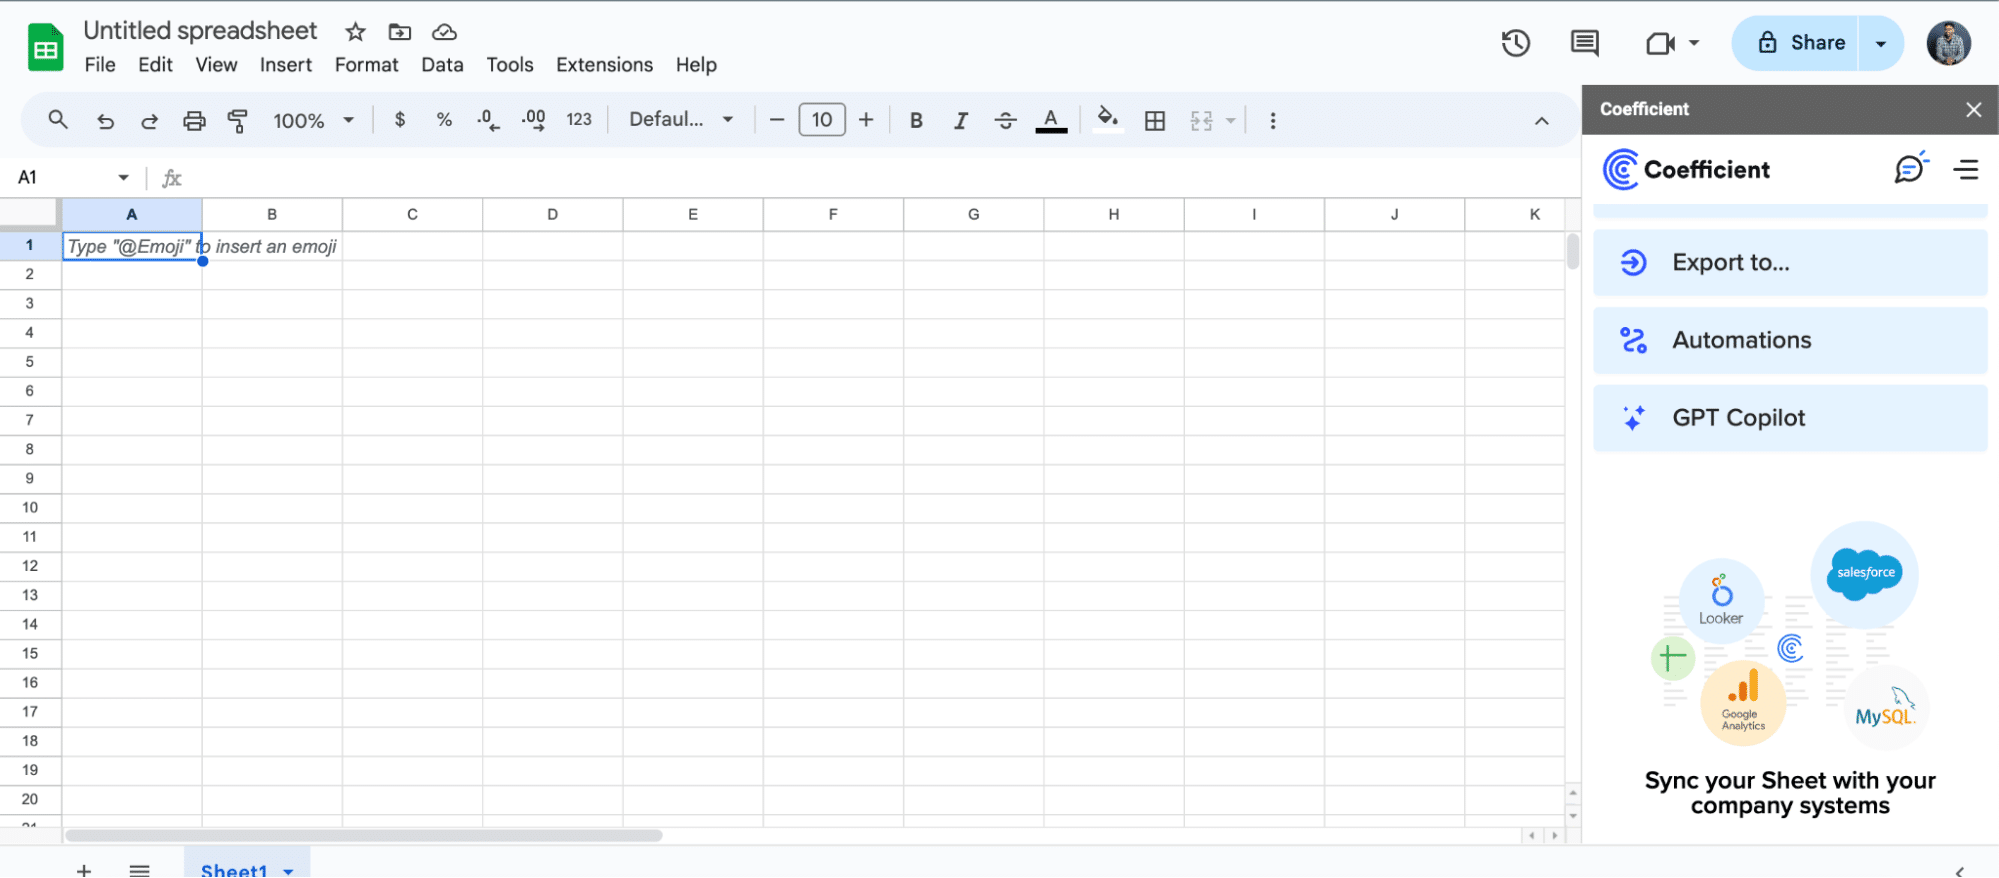
For Google Sheets
- Open a new or existing Google Sheet, navigate to the Extensions tab, and select Add-ons > Get add-ons.
- In the Google Workspace Marketplace, search for “Coefficient.”
- Follow the prompts to grant necessary permissions.
- Launch Coefficient from Extensions > Coefficient > Launch.
- Coefficient will open on the right-hand side of your spreadsheet.
For Microsoft Excel
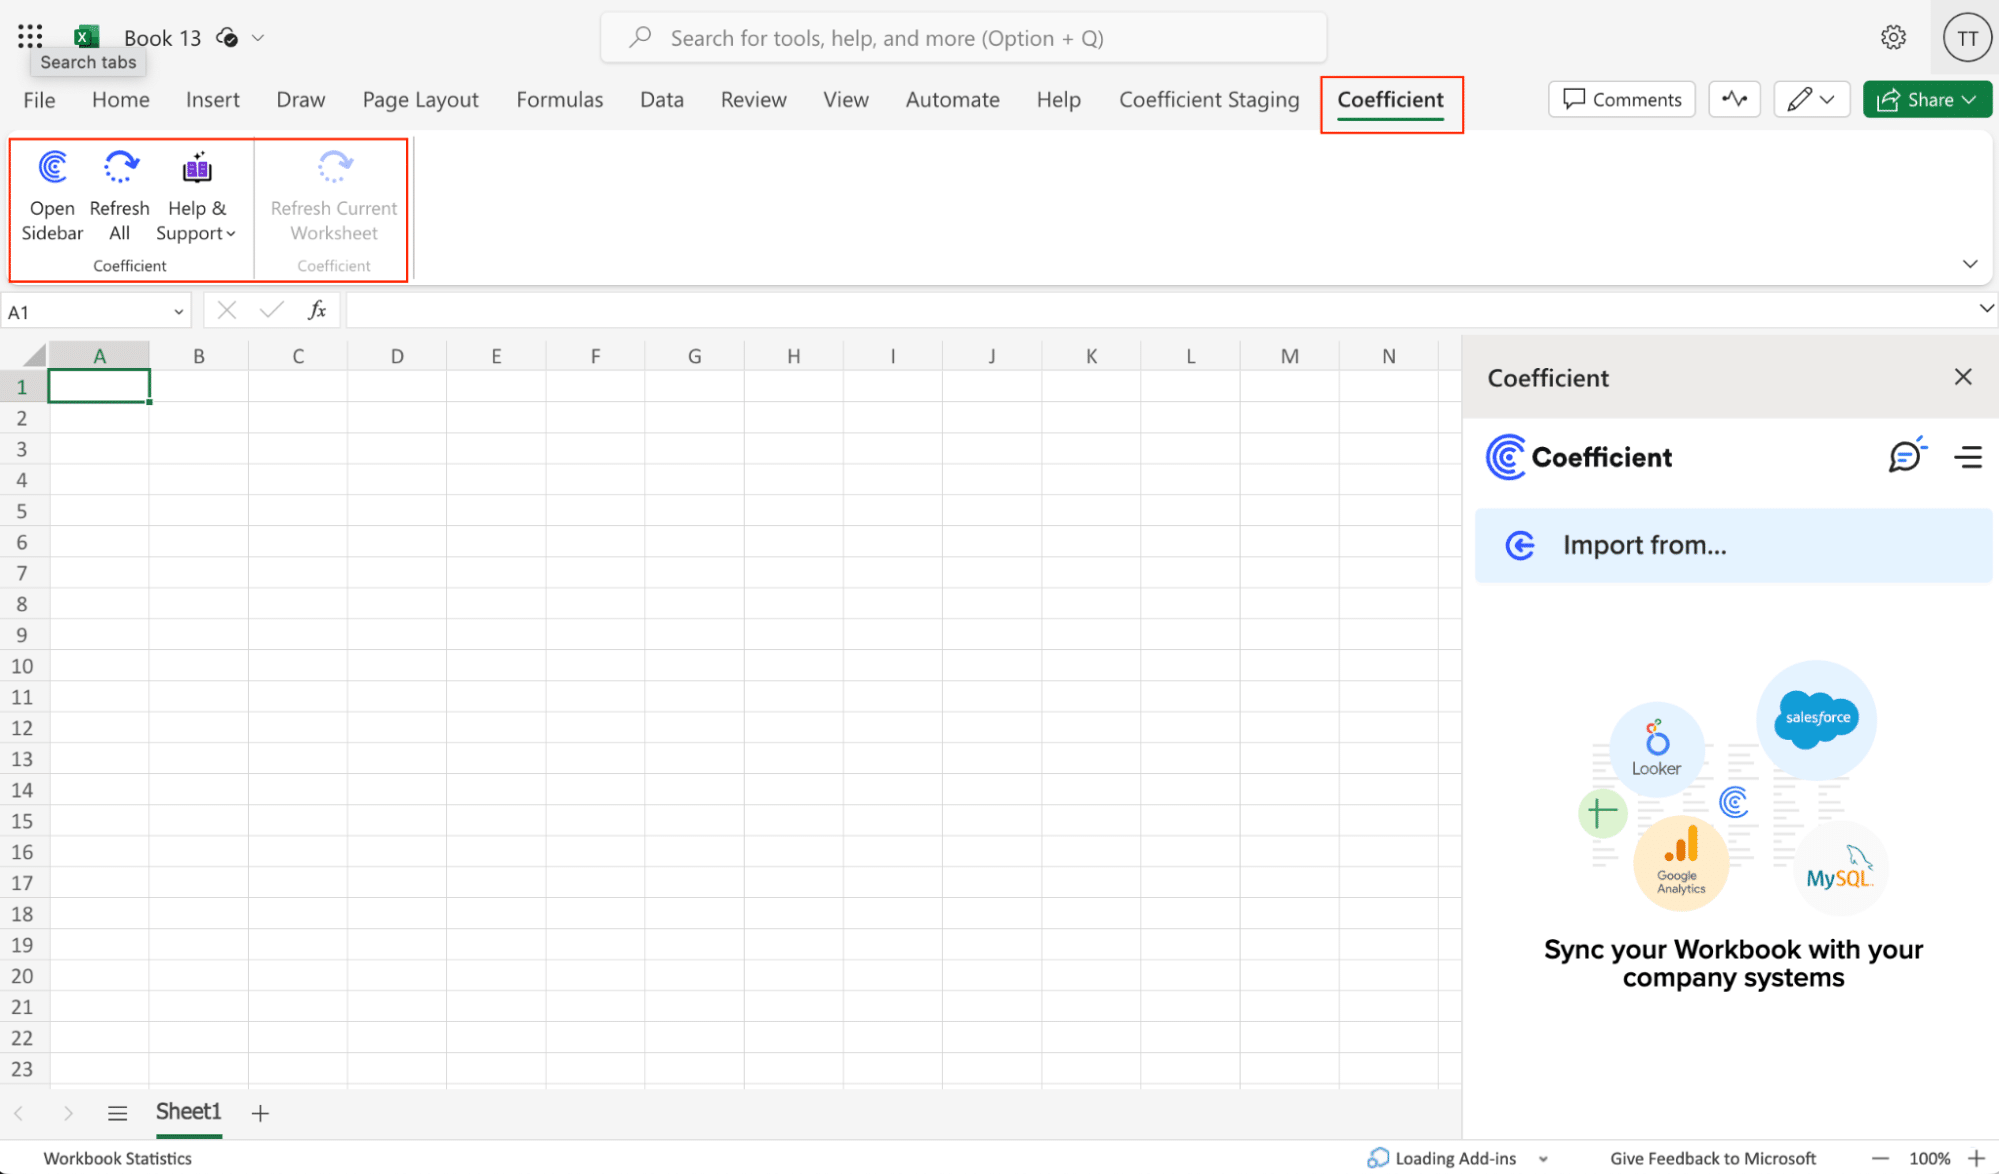
- Open Excel from your desktop or in Office Online. Click ‘File’ > ‘Get Add-ins’ > ‘More Add-Ins.’
- Type “Coefficient” in the search bar and click ‘Add.’
- Follow the prompts in the pop-up to complete the installation.
- Once finished, you will see a “Coefficient” tab in the top navigation bar. Click ‘Open Sidebar’ to launch Coefficient.
Step 2. Import Xero Data into Your Spreadsheet
In the Coefficient sidebar, click ‘Import From.’ Select “Xero” from the list of available data sources.
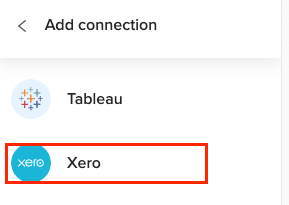
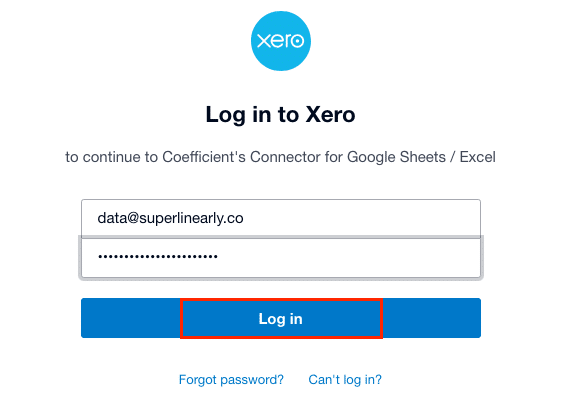
Enter your Xero demo credentials and click ‘Login.’
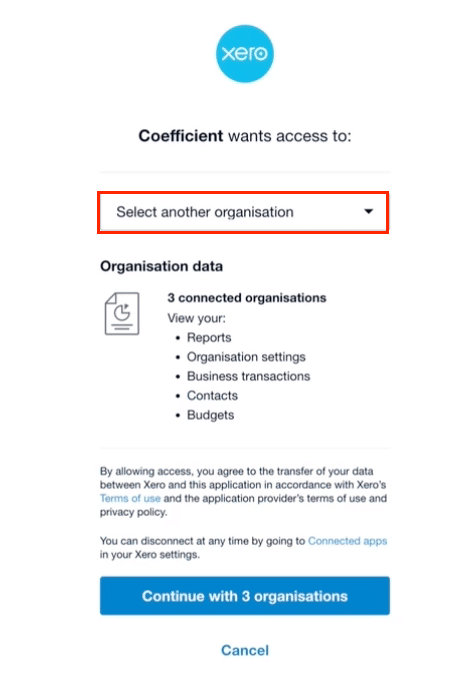
Select one or more of the available organizations to connect to Coefficient. Click “Continue” to proceed with the selected organization(s).
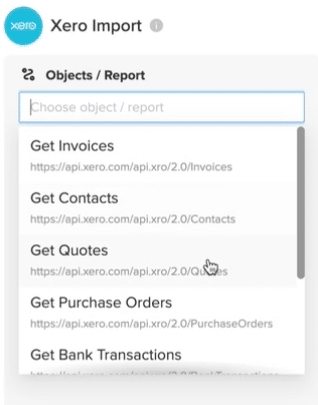
Choose an endpoint from the available options, such as Invoices, Contacts, or Users.
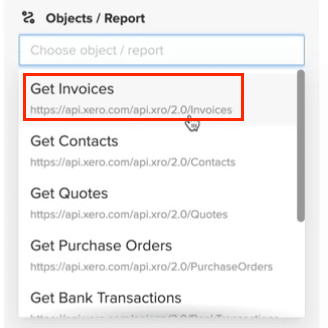
For this example, select “Get Invoices” to fetch invoice data from Xero.
Enter the Tenant ID (organization ID) for the selected Xero organization.
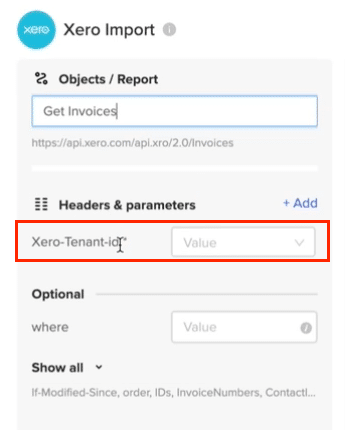
Optionally, select additional fields to include in the data import.

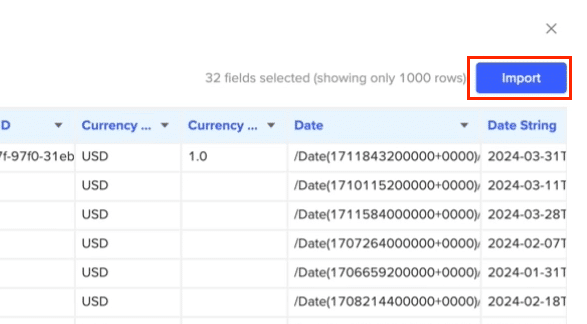
Click “Import” to fetch the invoice data into your spreadsheet.
Step 3. Export Data from Your Spreadsheet to HubSpot
Before starting, make sure you’ve connected to HubSpot.
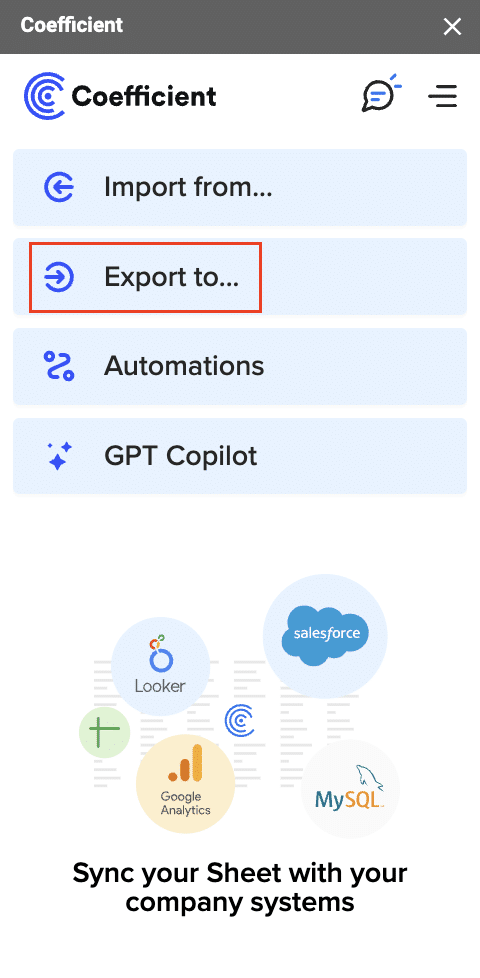
Then, navigate to Coefficient’s menu >Click “Export to…”
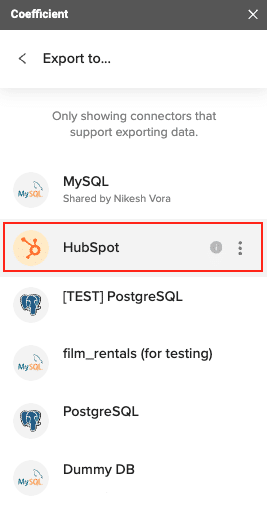
Select HubSpot.
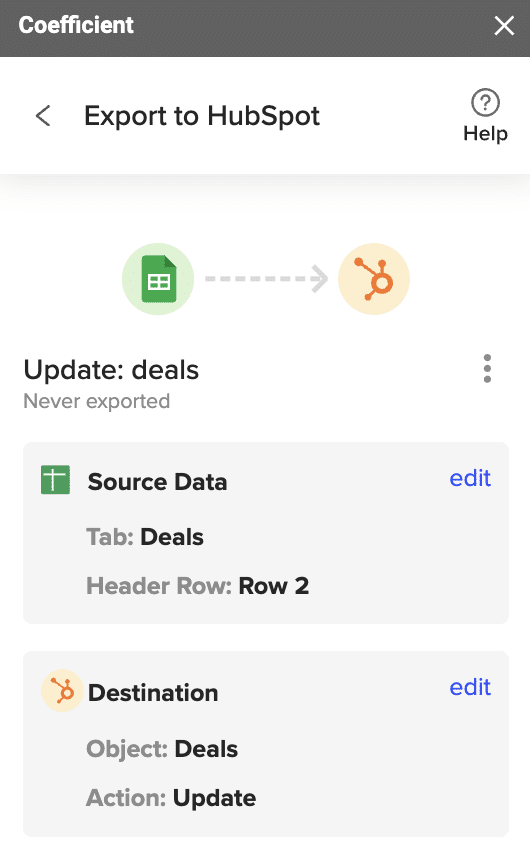
Select the tab and header row in your spreadsheet. The header row should contain the HubSpot field headers.
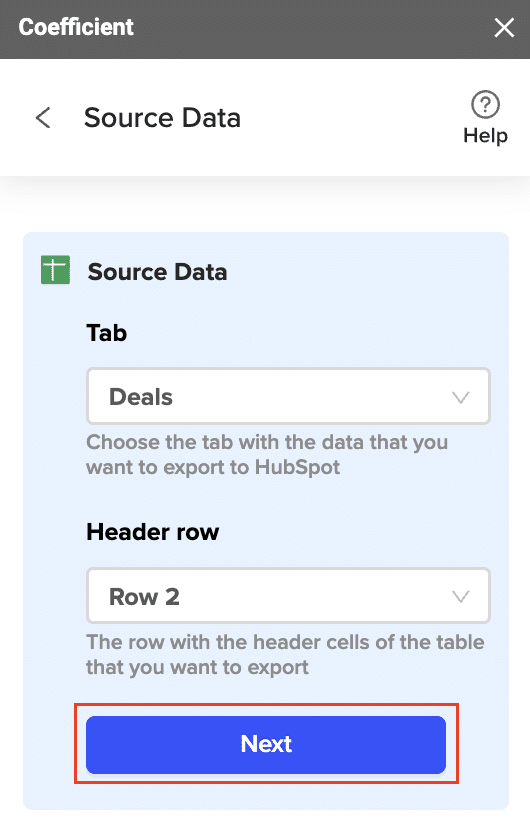
Choose the HubSpot property you are exporting the data to.
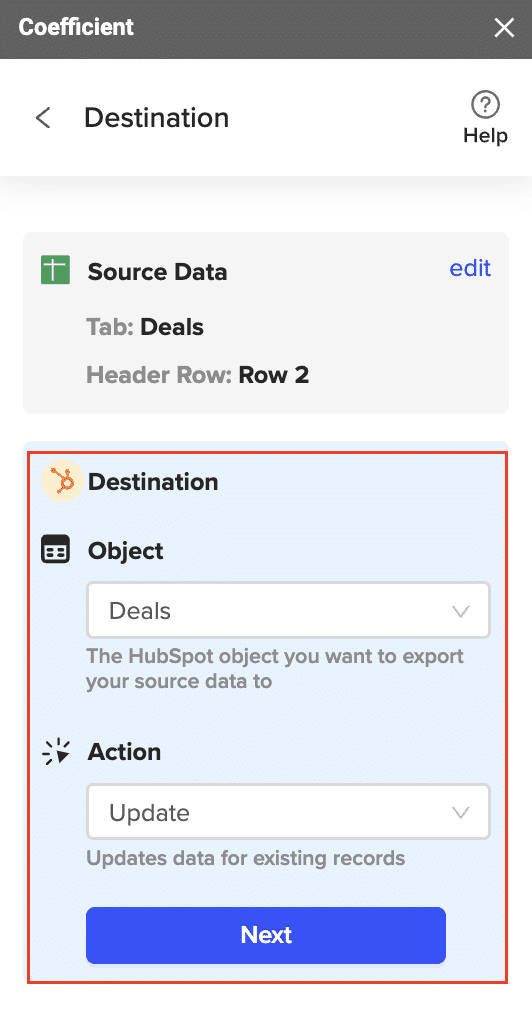
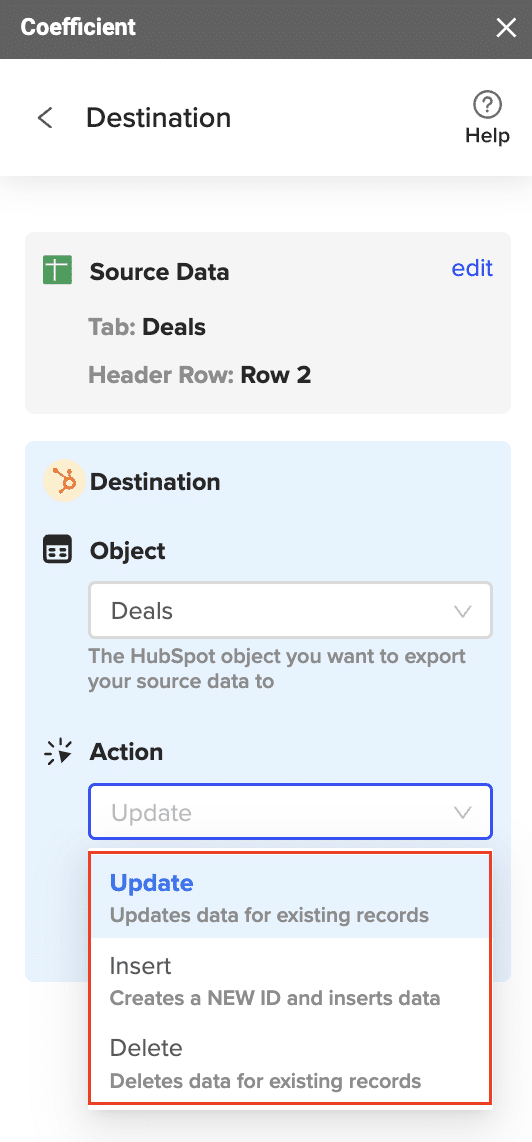
Then, select the action you want to perform (Update, Insert, or Delete).
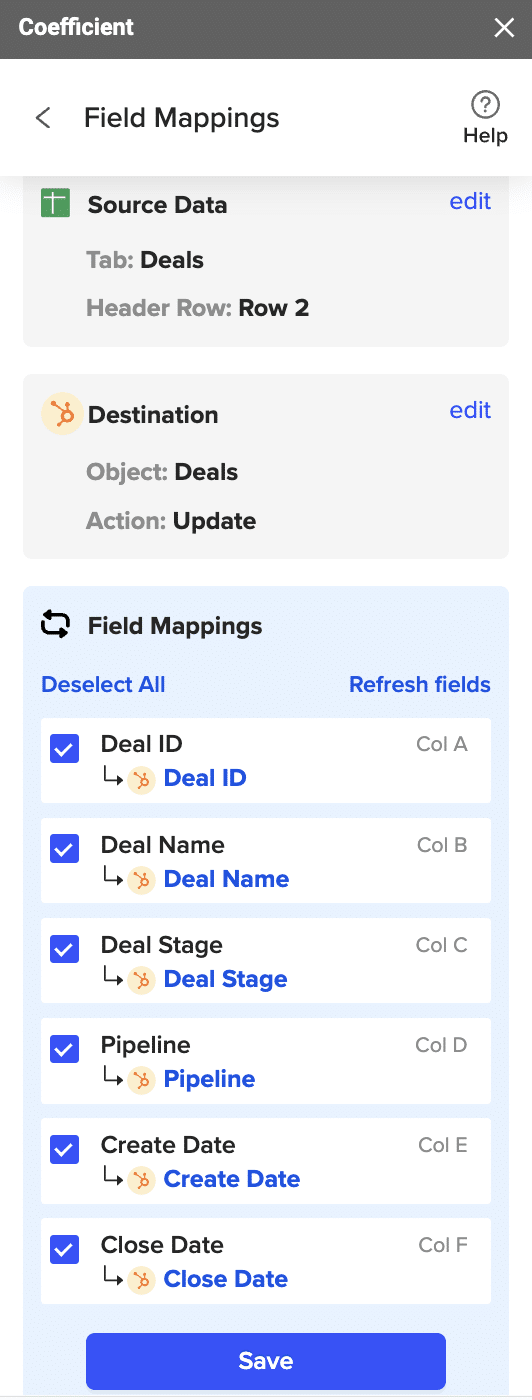
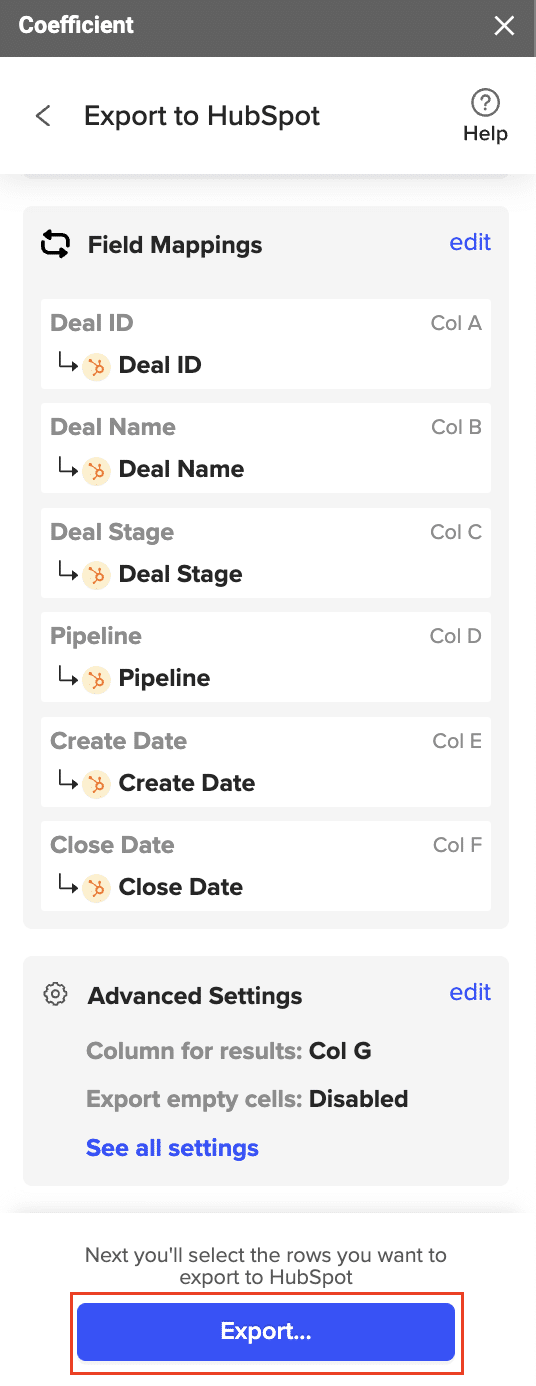
Map the fields in your spreadsheet to the corresponding HubSpot fields. If your data came from a HubSpot import using Coefficient, the fields will be automatically mapped. Otherwise, you will need to map them manually.
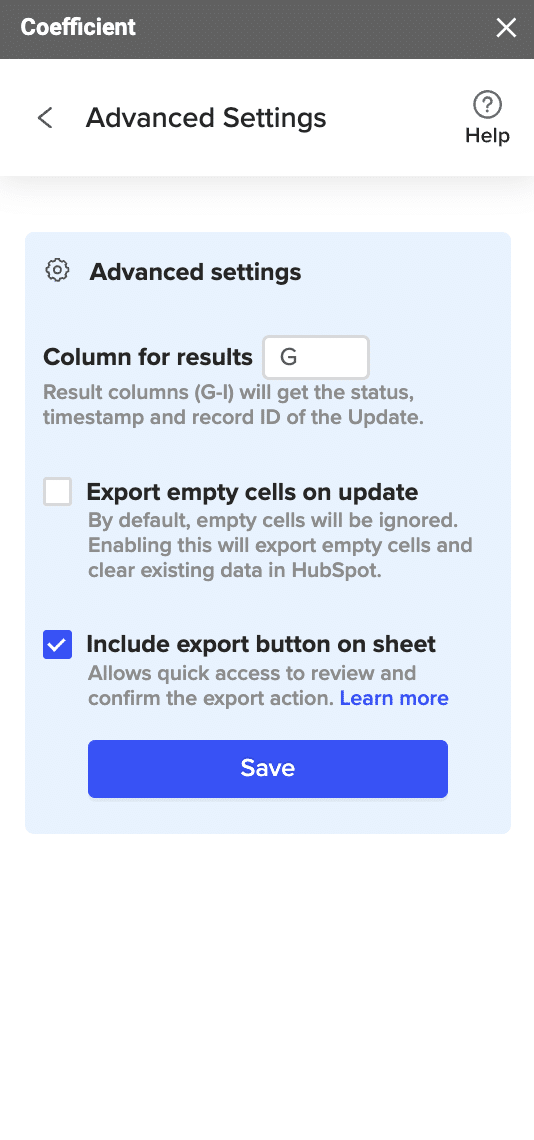
Configure any advanced settings such as the column for results. Coefficient will write back information to your spreadsheet related to the update, including the HubSpot record ID, status of the export, and timestamp.
Review your settings and click “Export”.
Select the rows in your sheet that you want to export to HubSpot. You can update a single row or all rows in your sheet.
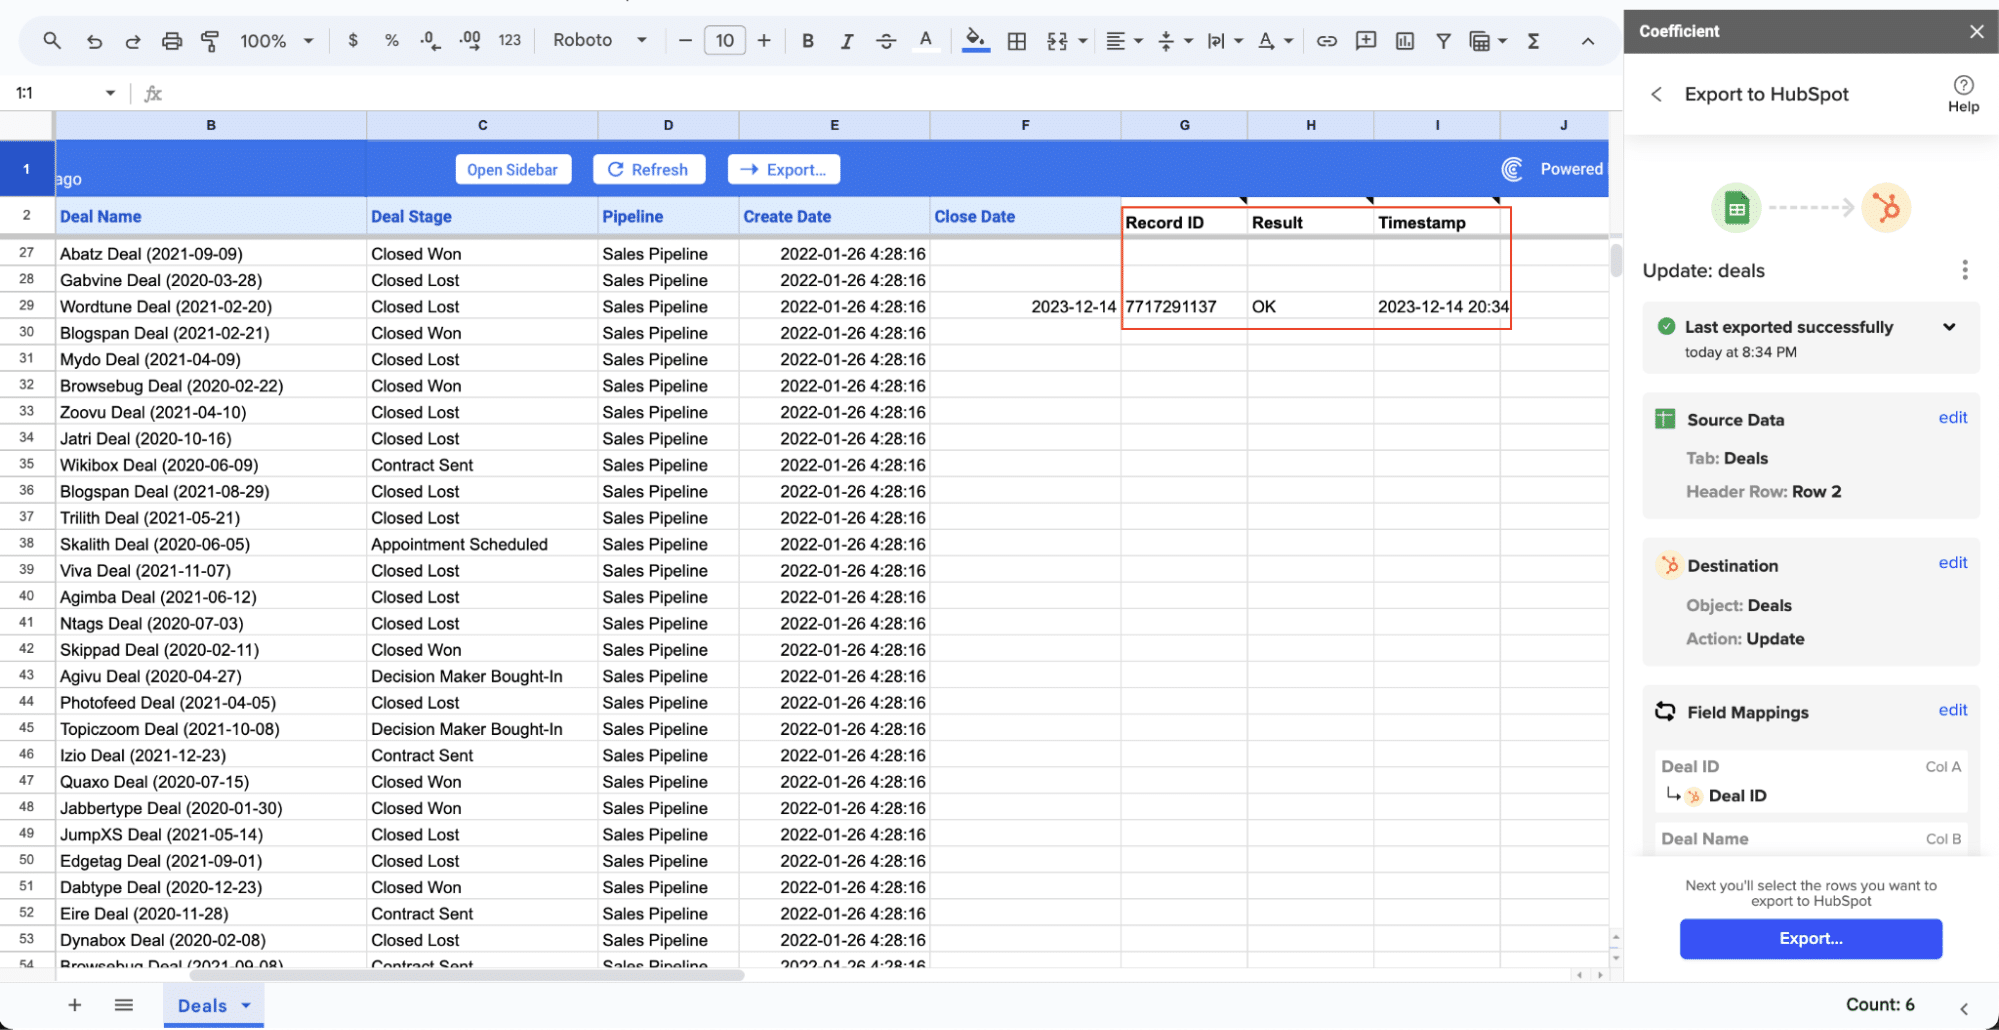
Coefficient will confirm the rows that have been updated in your HubSpot instance. The records will have the record ID, result status, and timestamp of the update.
Pros and Cons of Coefficeint
- Pros:
- Consolidate financial data from multiple systems into Excel and Google Sheets
- Create real-time dashboards for cash flow monitoring and forecasting
- Automate financial reporting and data refreshes, reducing manual work
- Cons:
- Some advanced features, such as scheduled automations, are only available on paid plans. However, Coefficient’s pricing is still very competitive compared to other solutions.
#2 Native HubSpot-Xero Integration

For those looking for a straightforward, basic integration, the native HubSpot-Xero integration is a good starting point.
Step-by-step guide to setting up the native integration:
- Log in to your HubSpot account and navigate to the App Marketplace.
- Search for “Xero” and select the official Xero integration.
- Click “Install app” and follow the prompts to connect your Xero account.
- Grant the necessary permissions for data sharing between HubSpot and Xero.
- Configure the basic sync settings for contacts and invoices.
Pros:
- Easy setup process
- Basic functionality included at no additional cost
- Official support from both HubSpot and Xero
Cons:
- Limited customization options
- Basic data syncing only, lacking advanced features
#3 Zapier for Custom Xero-HubSpot Workflows

Zapier is an excellent option for creating custom automation workflows between Xero and HubSpot.
Steps to create Zaps for Xero and HubSpot integration:
- Sign up for a Zapier account at zapier.com.
- Create a new Zap and select Xero as the trigger app.
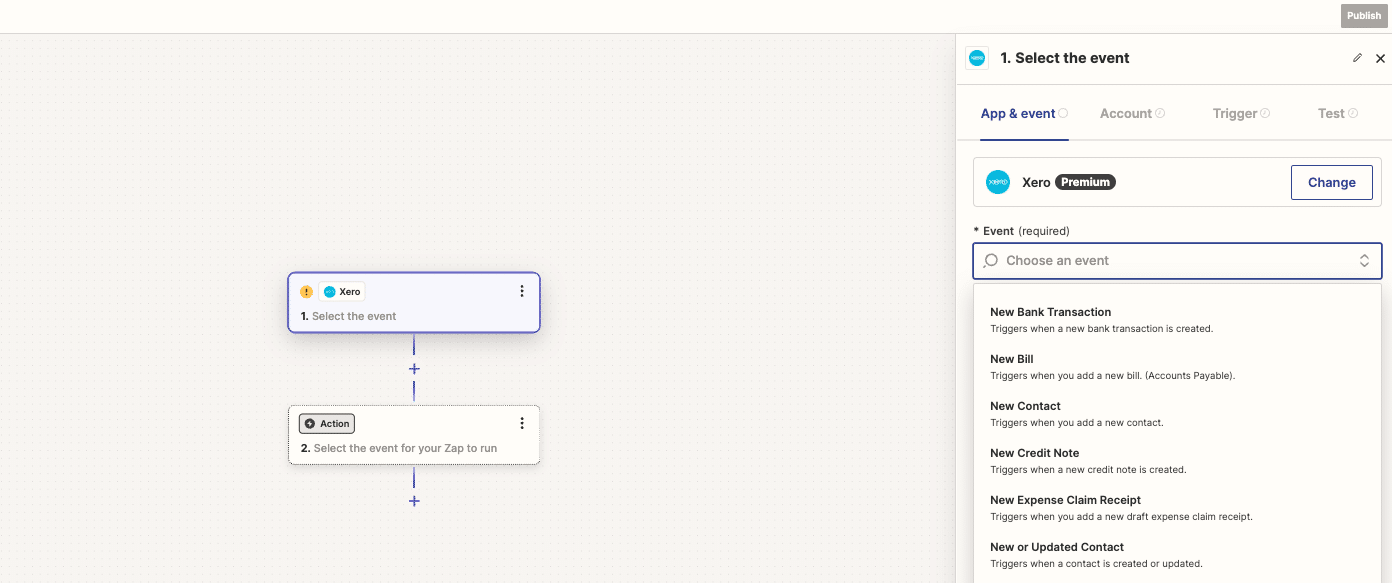
- Choose a trigger event (e.g., “New Invoice Created”).
- Connect your Xero account to Zapier.
- Select HubSpot as the action app and choose an action (e.g., “Create or Update Contact”).
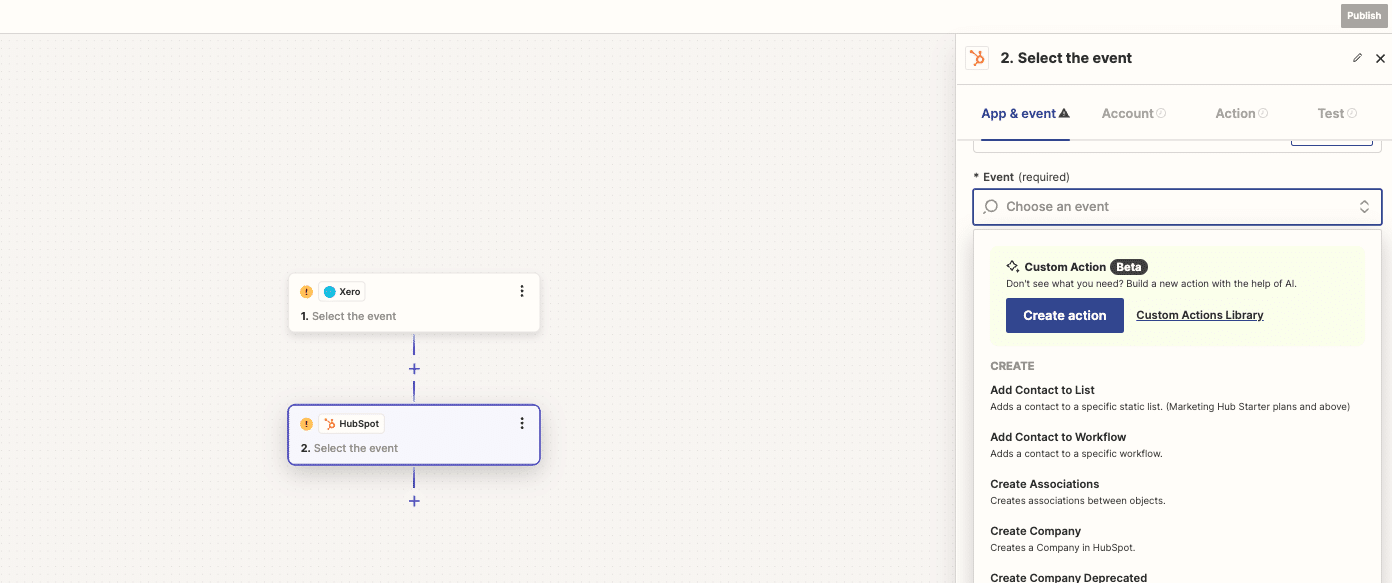
- Connect your HubSpot account to Zapier.
- Map the fields between Xero and HubSpot.
- Test your Zap and activate it.
Pros:
- Highly customizable automation options
- Wide range of possible integrations beyond just Xero and HubSpot
- No coding required for basic automations
Cons:
- Automations can break for complex workflows
- Xero is only available for premium plans
Xero to HubSpot? Do it in Seconds with Coefficient
Connecting Xero to HubSpot is a powerful way to streamline your revenue operations, improve forecasting accuracy, and gain a comprehensive view of your customers. While the native integration and Zapier offer viable options for basic needs, Coefficient stands out as the superior choice for revenue operations professionals seeking advanced data integration, analysis, and reporting capabilities.
By choosing the right integration method and following best practices, you can unlock the full potential of your financial and customer data, driving growth and efficiency across your organization.
Ready to take your Xero-HubSpot integration to the next level? Try Coefficient today and experience the power of advanced data integration for your revenue operations.


