Google Ads is a key player in digital marketing, offering insights that can significantly impact your strategies.
The challenge often comes in transferring this wealth of data into Excel for deeper analysis. This guide walks you through three straightforward methods.
Why Google Ads to Microsoft Excel
Linking Google Ads with Excel lets you dive deep into your data. It enables advanced analysis with custom formulas and lets you craft reports tailored to your needs.
From monitoring campaigns to understanding ROI and spotting trends, moving data to Excel transforms numbers into strategies.
How to Google Ads to Microsoft Excel: 3 Methods
Method 1| Coefficient: No-Code, Fully Automated
Coefficient is the fastest, easiest way to export Google Ads data to Excel for technical and non-technical users alike.
Coefficient’s no-code interface makes it easy for anyone to safely get the data they need into their Connected Spreadsheet in a few clicks. This is particularly useful for Excel for Web users who do not have access to Power Query.
To install Coefficient, open Excel from your desktop or in Office Online.
Click ‘File’ > ‘Get Add-ins’ > ‘More Add-Ins.’
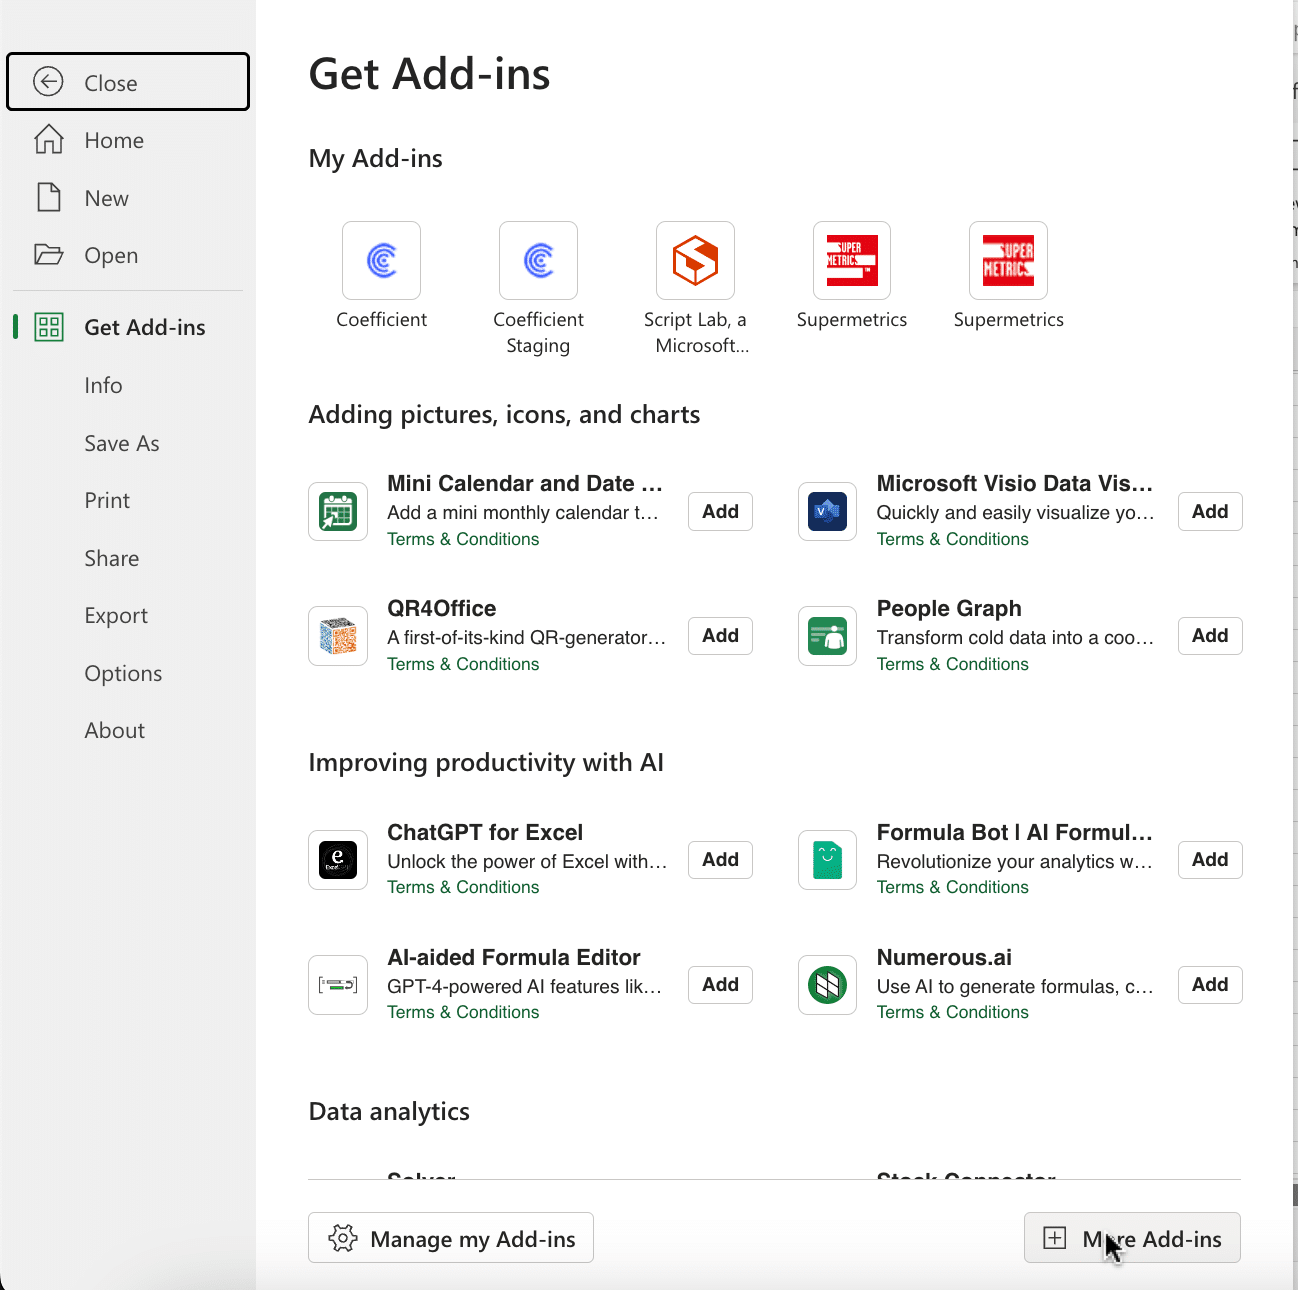
Type “Coefficient” in the search bar and click ‘Add.’
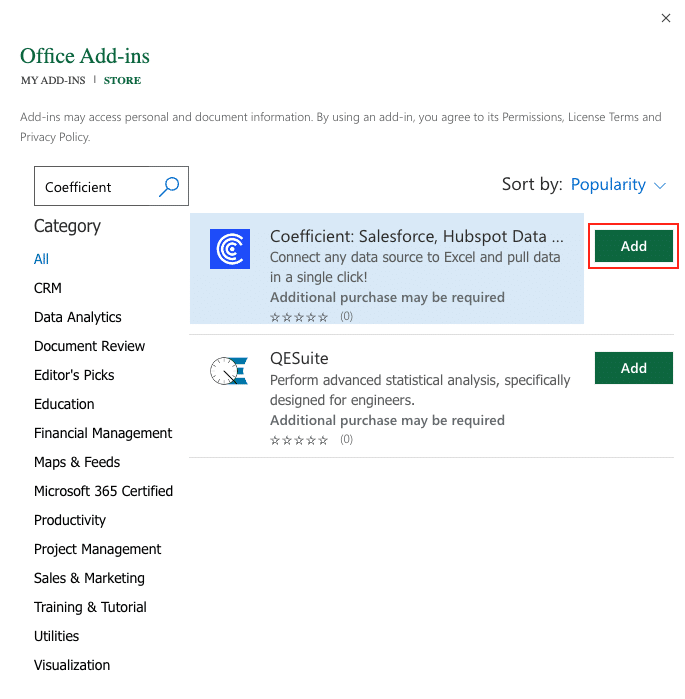
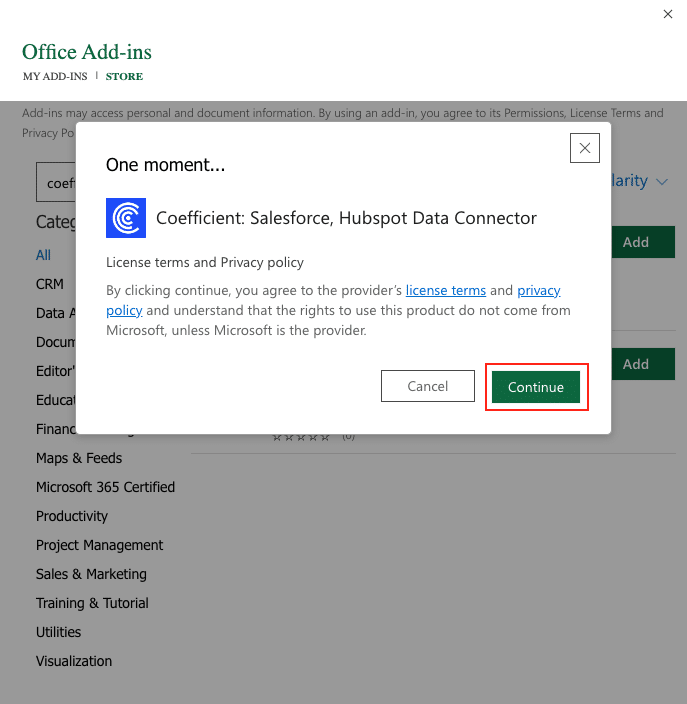
A pop-up will open up. Follow the prompts to complete the installation.
Once finished, you will see a “Coefficient” tab at the top navigation bar.
Click ‘Open Sidebar’ to launch Coefficient.
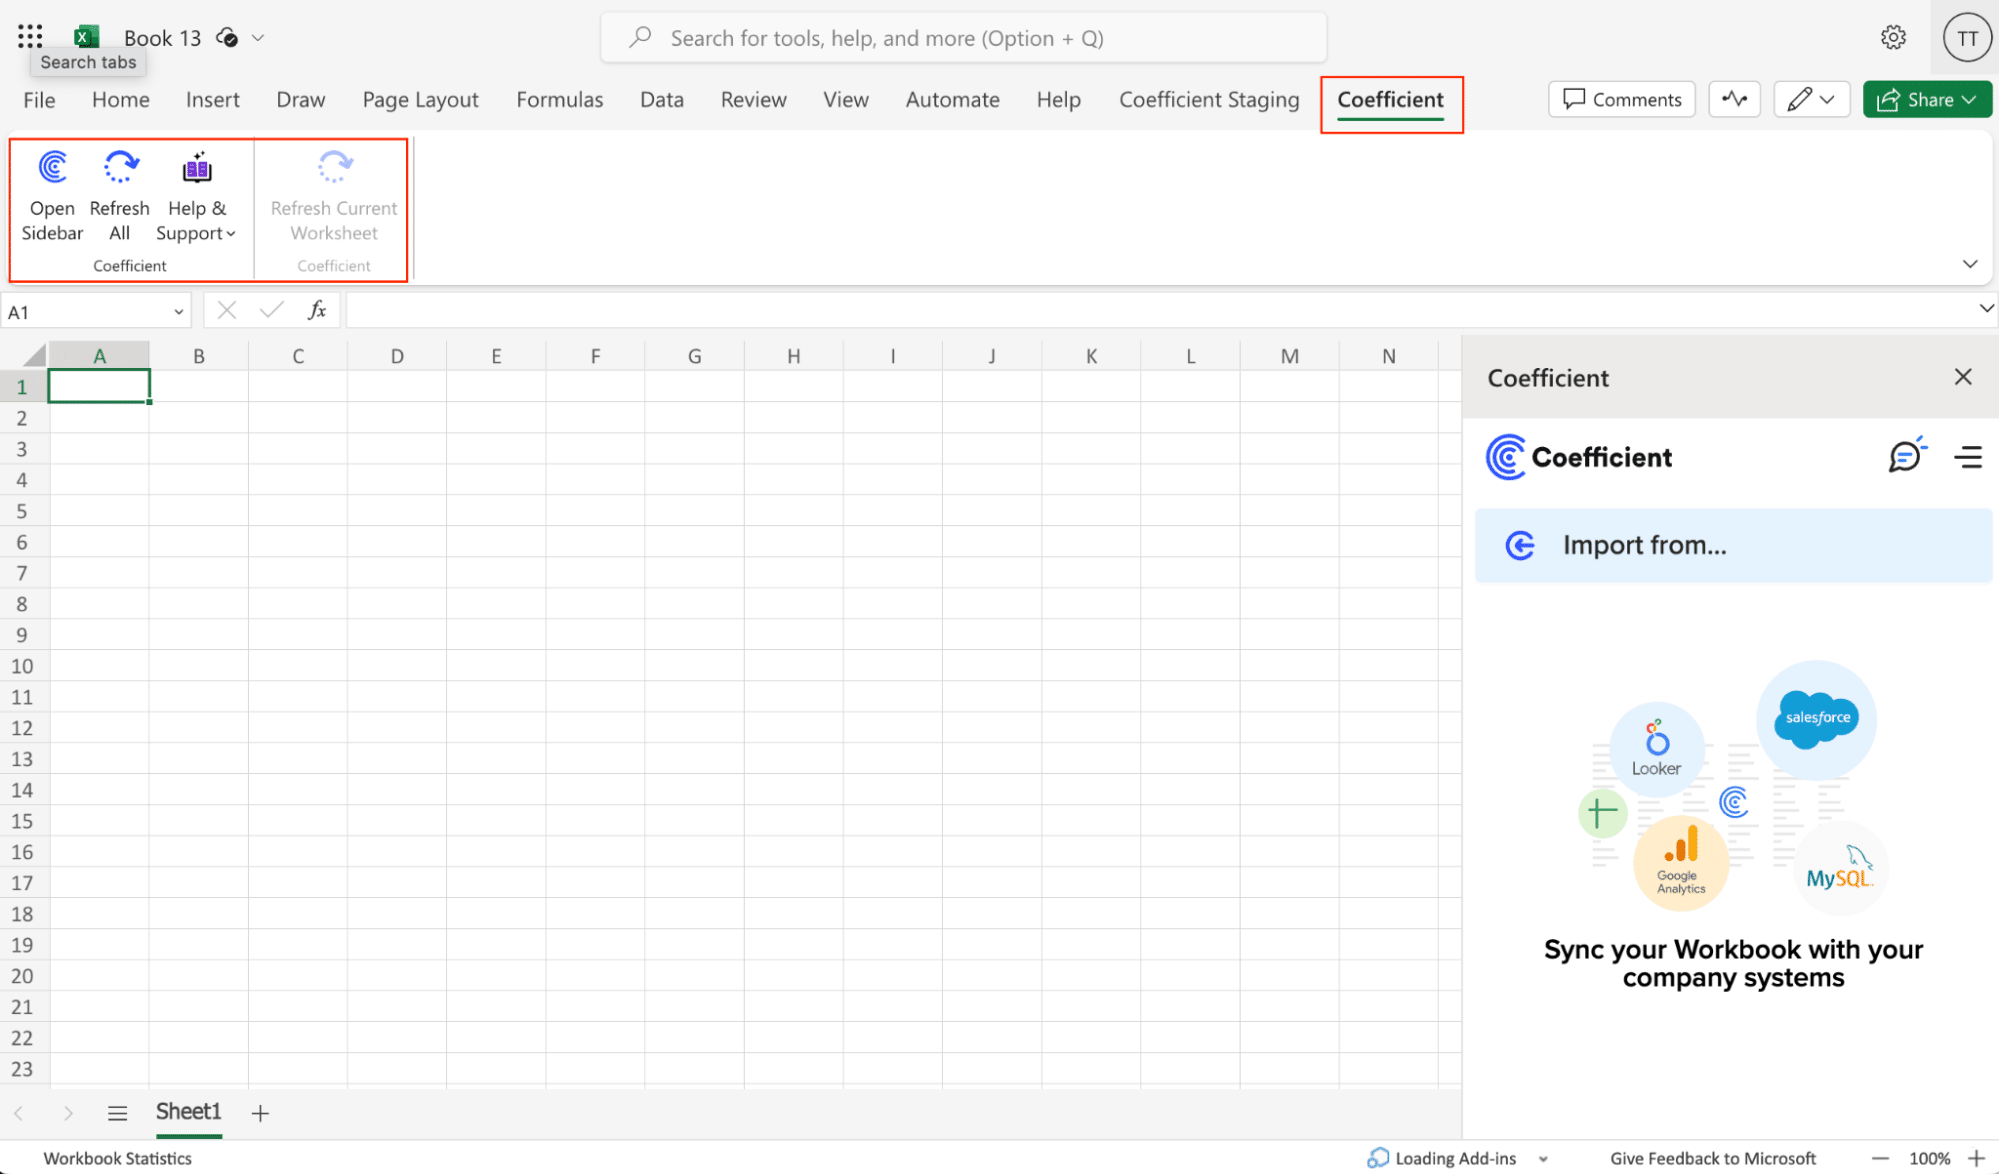
Select ‘Import from…’
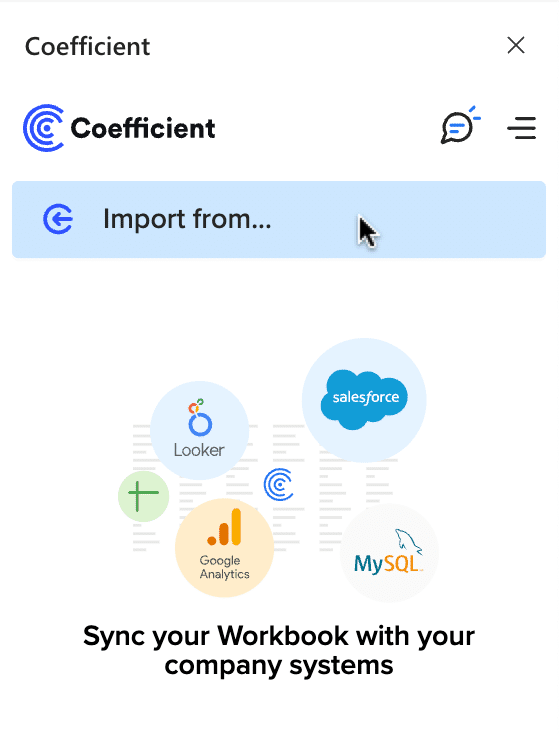
Scroll down until you find Google Ads and click ‘Connect.’
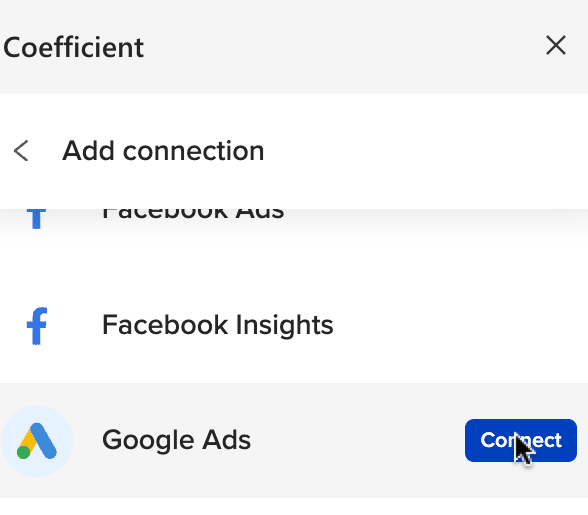
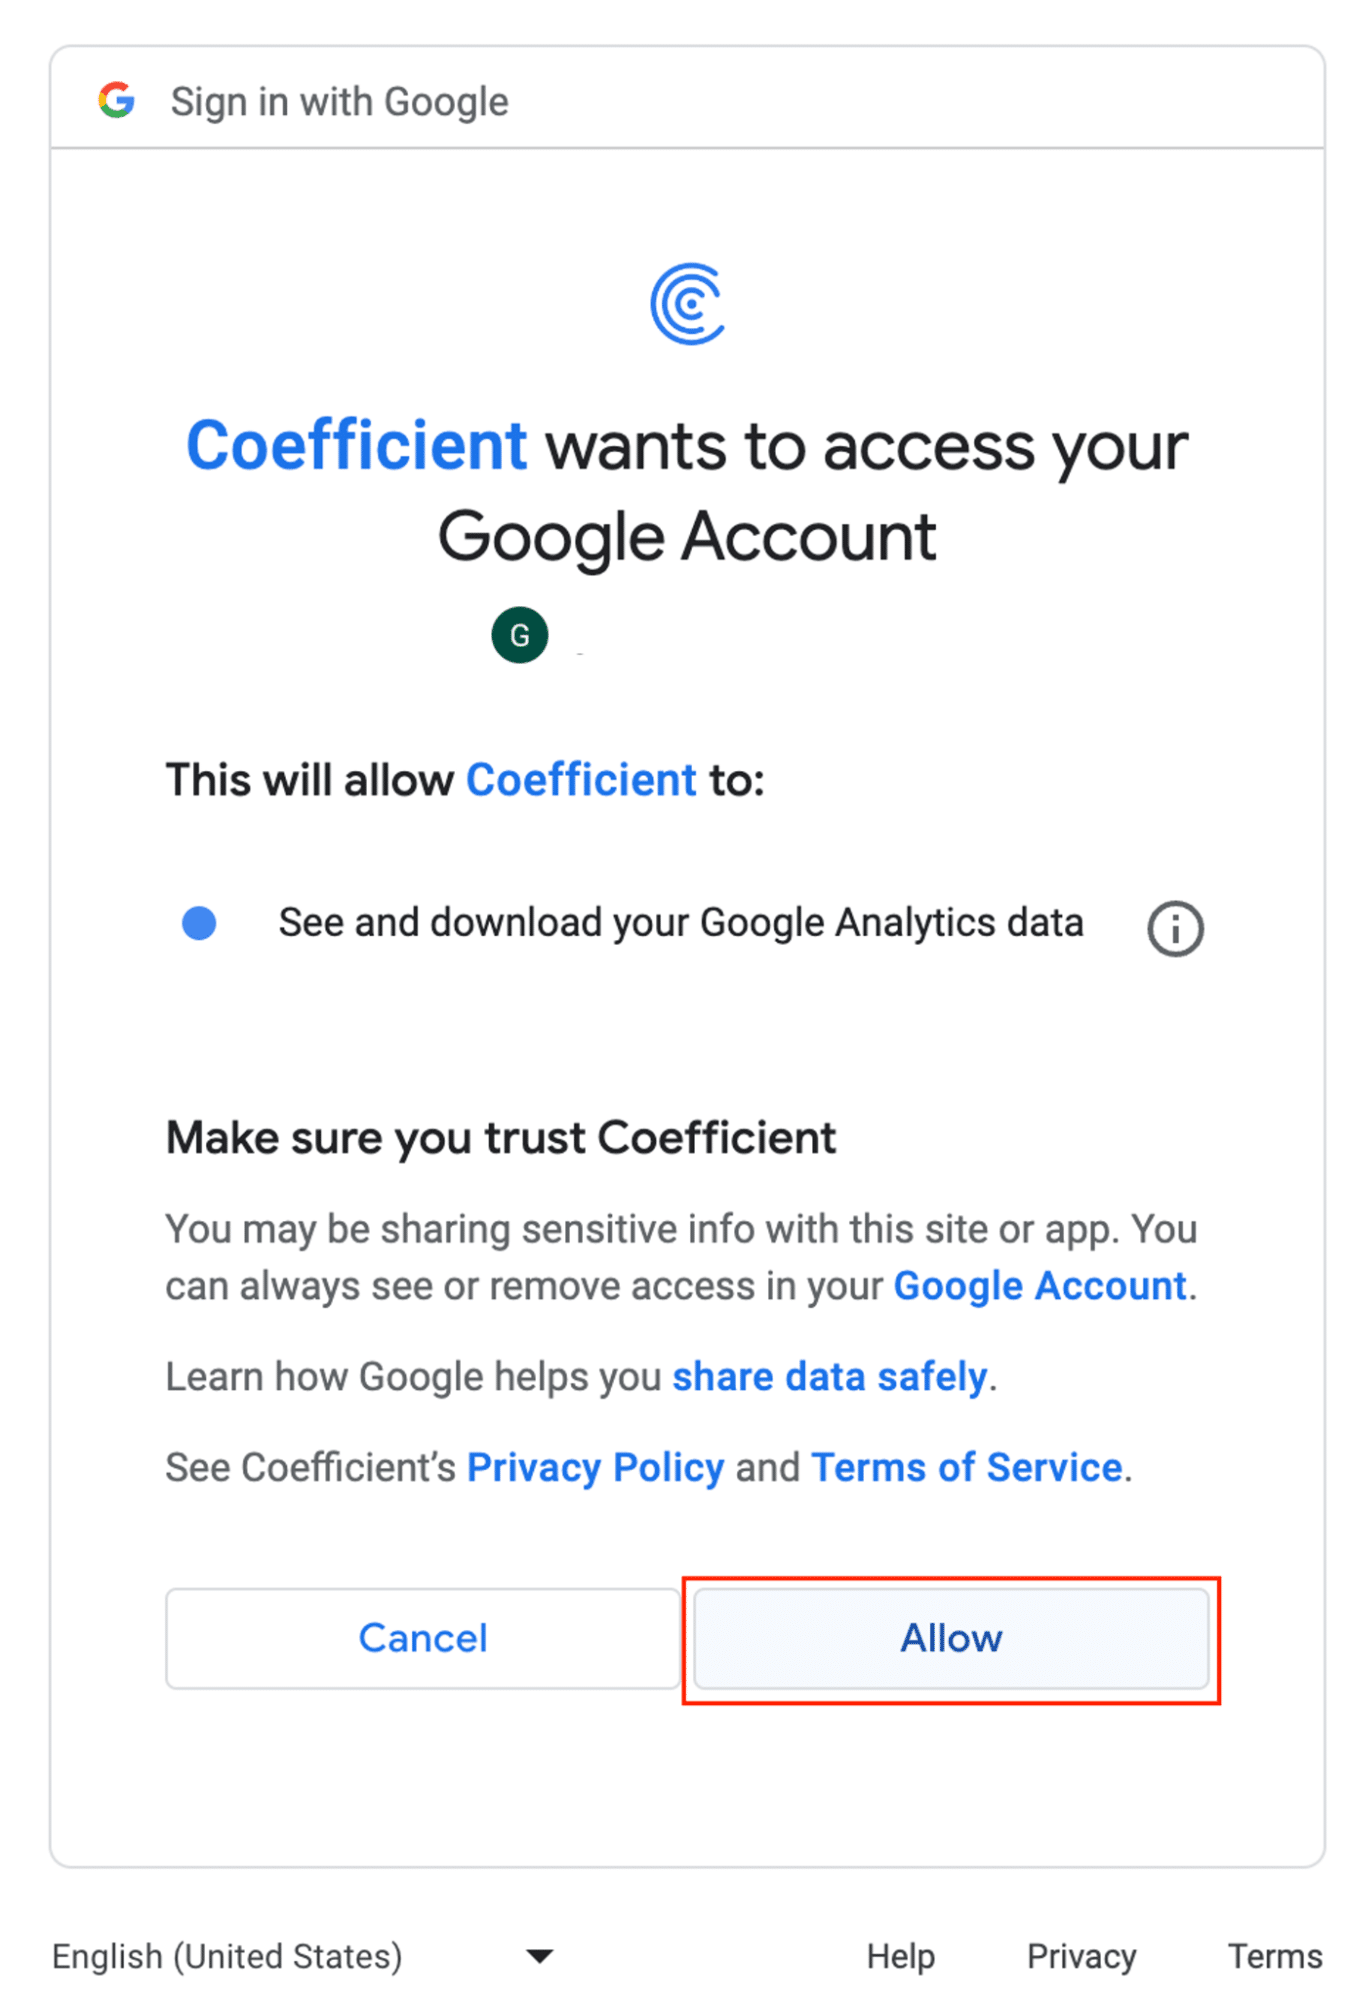
Follow the prompts to authorize Coefficient to your Google Ads account.

Select the email address associated with your Google Ads account.
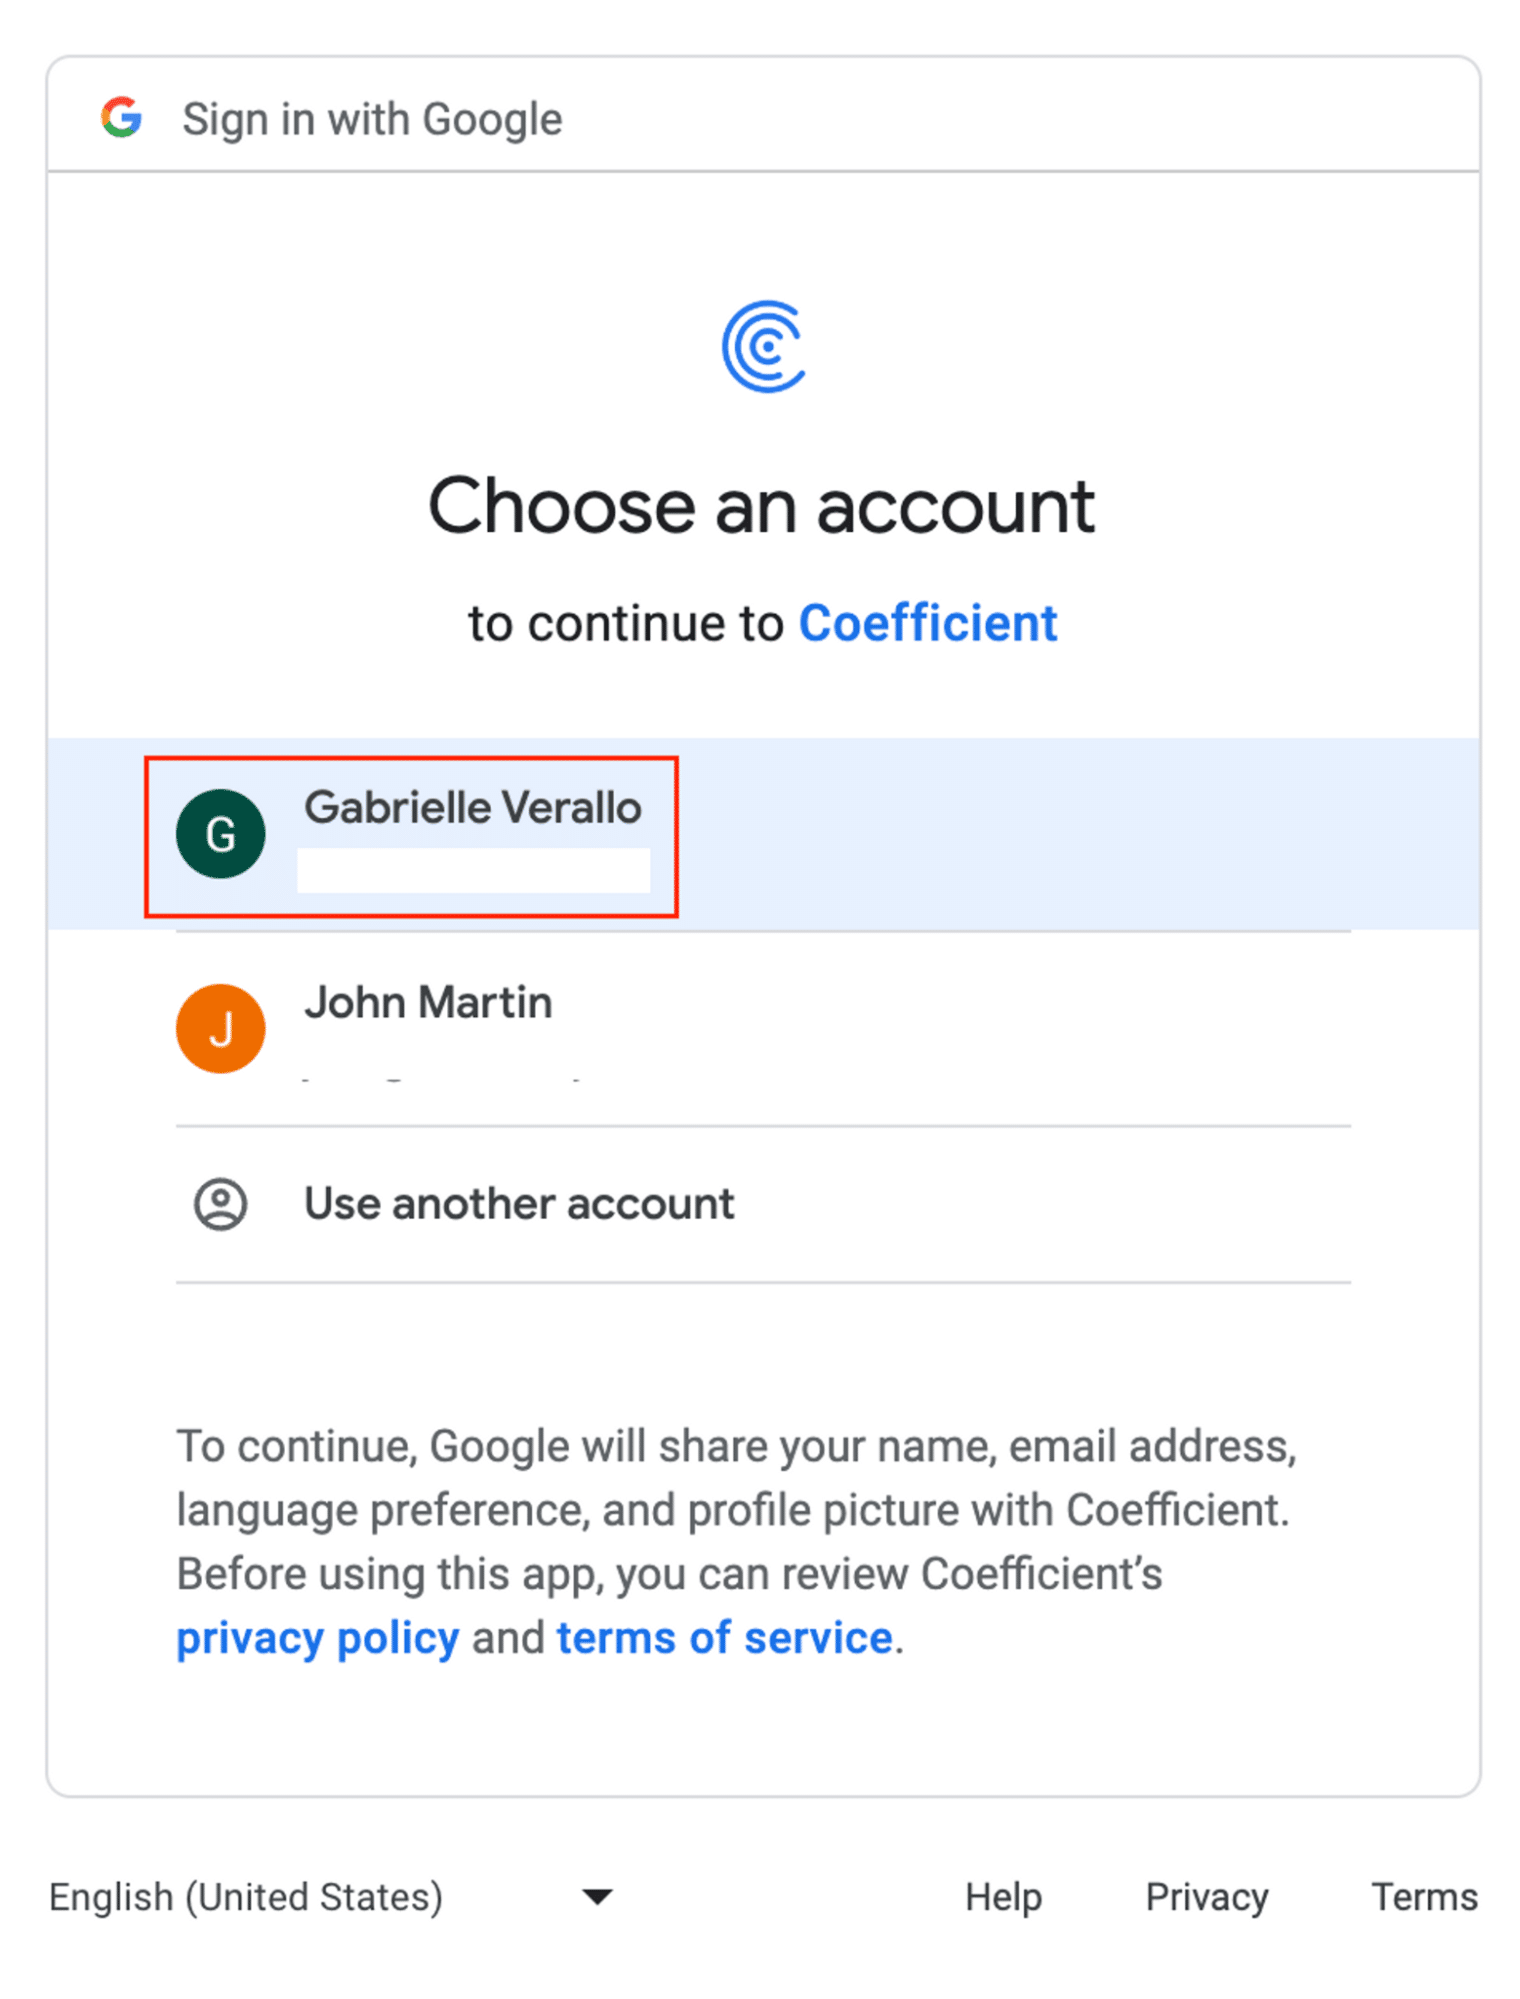
Click ‘Allow’ to finish the authorization process.
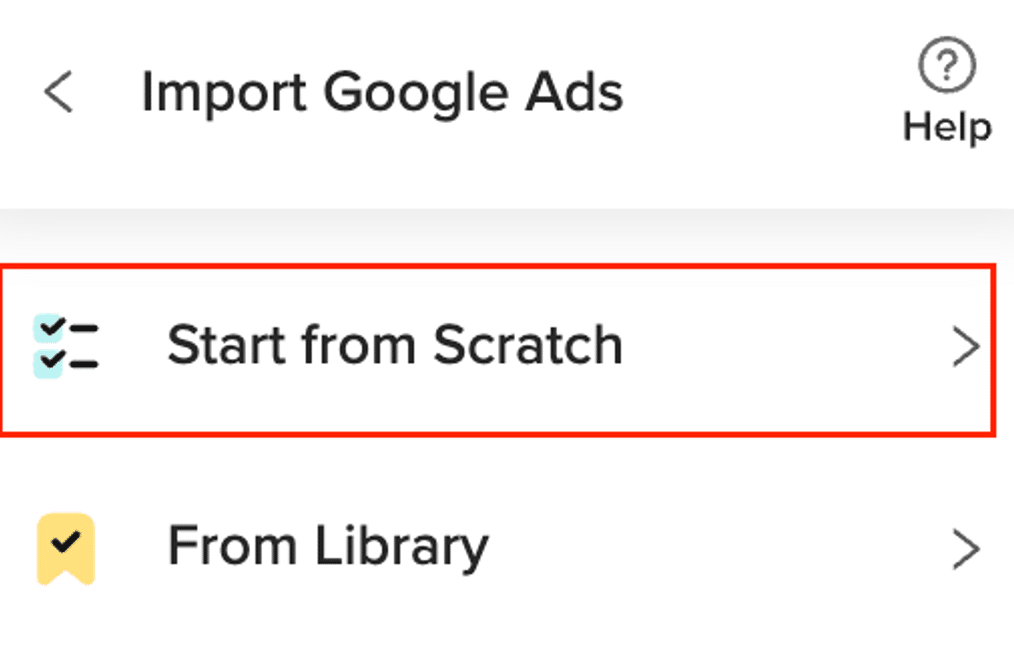
Return to Google Ads from Coefficient’s menu > ’Import From…’ > ‘Start from Scratch.’
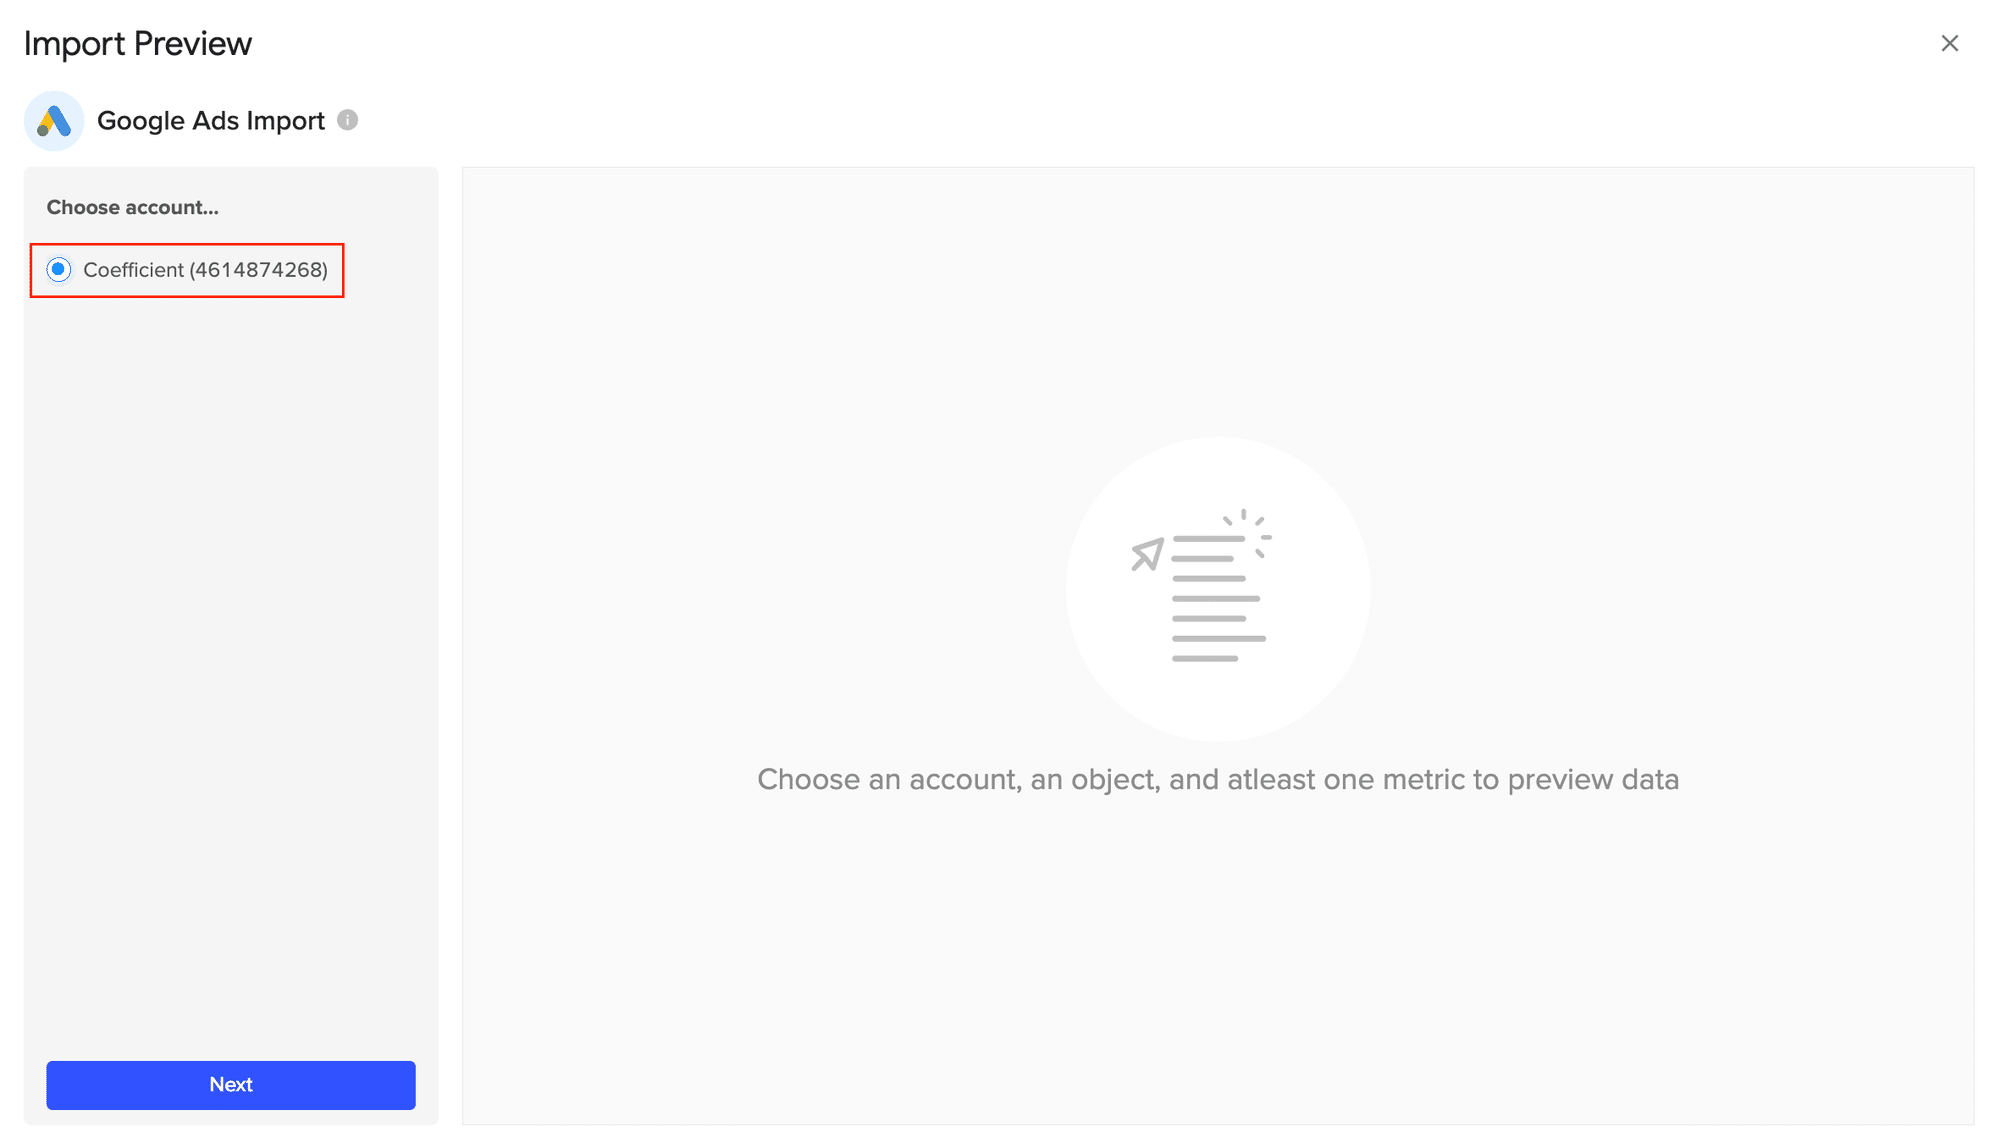
Select your Google Ads account from the “Import Preview” window.
Click ‘Next’ to continue.
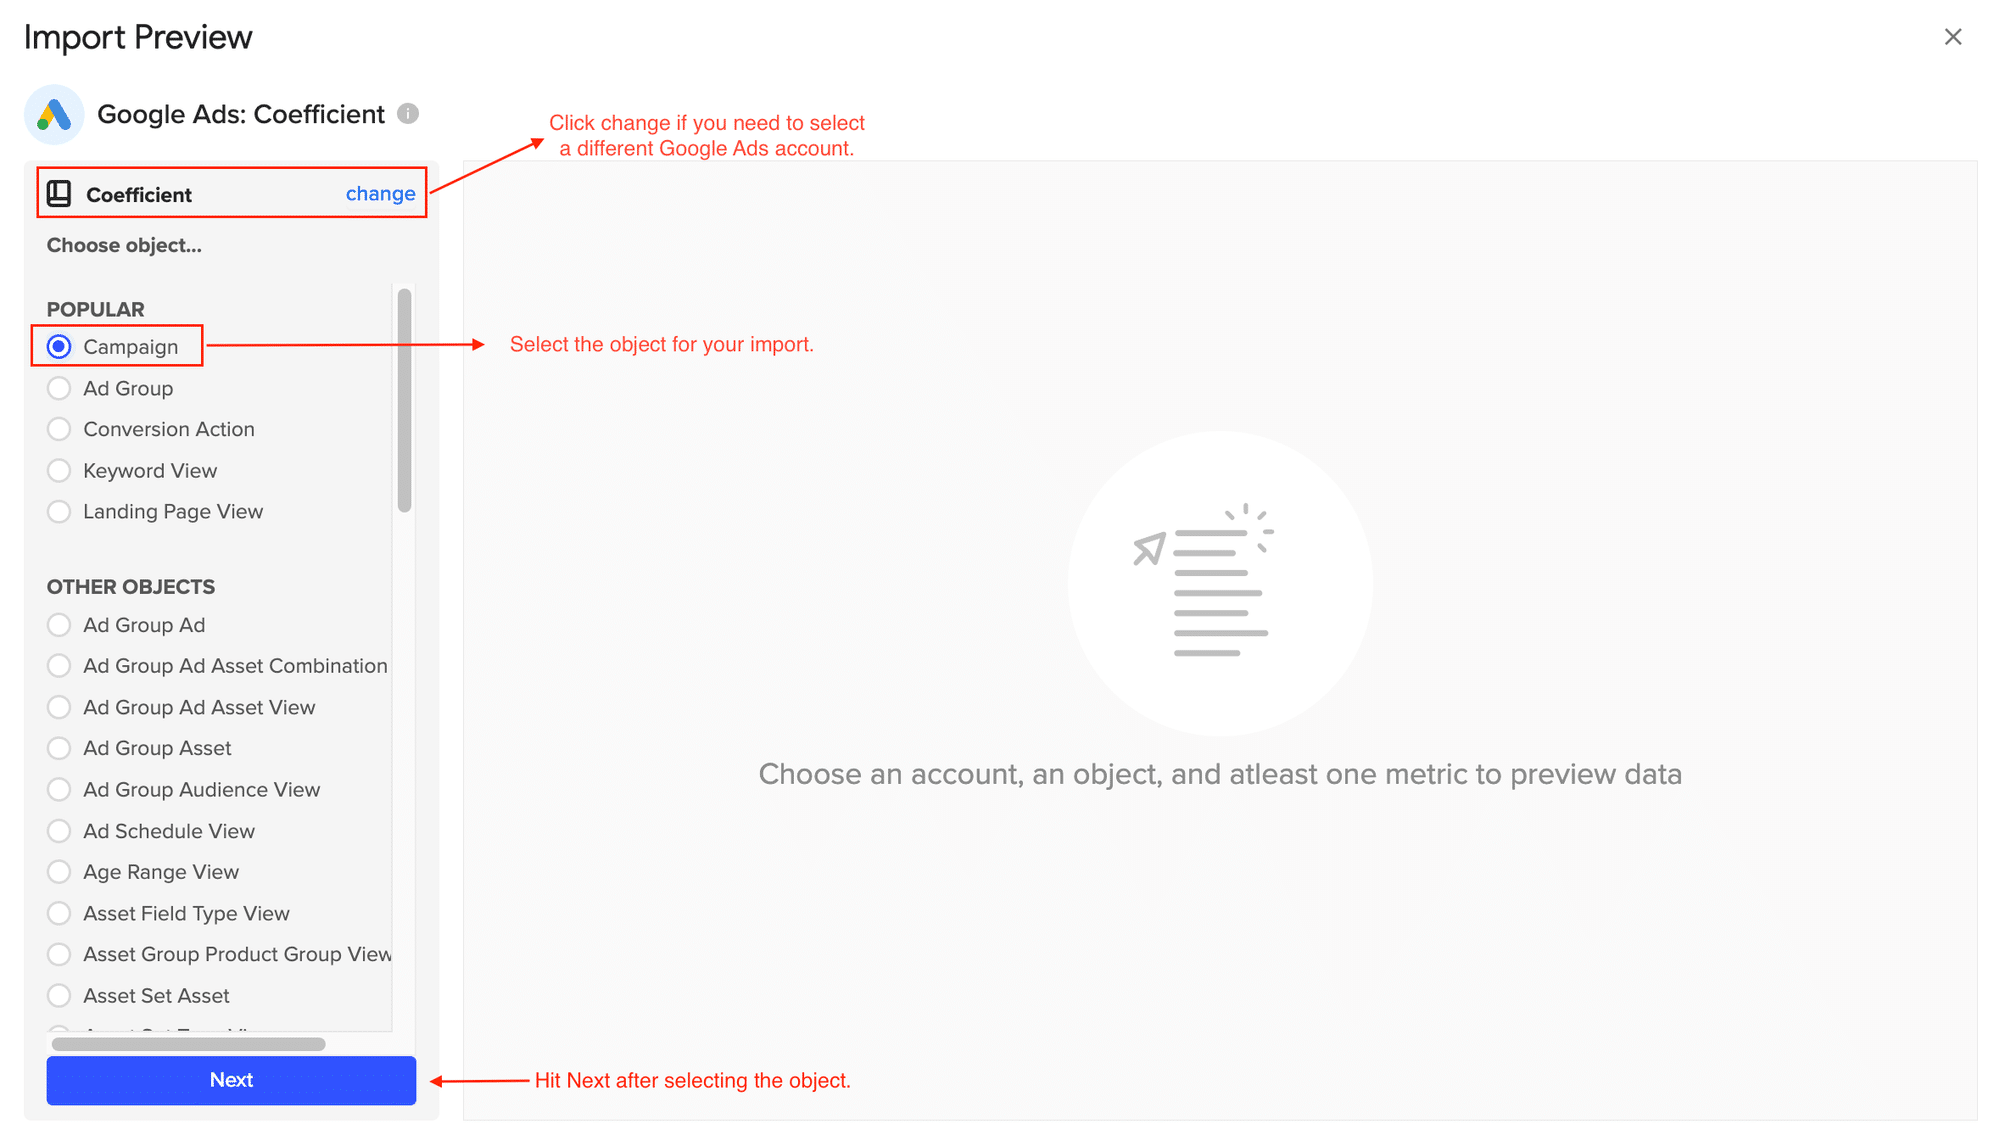
Select an object from those listed (e.g., ”Campaign”).
Popular objects are displayed at the top, but you can scroll down to find other objects to pull from.
Customize your import by adding filters, and row limits as needed.
Click the ‘Refresh Preview’ option to update the sample data based on what customizations are added.
Click ‘Import’ to import your Google Ads data to Microsoft Excel.
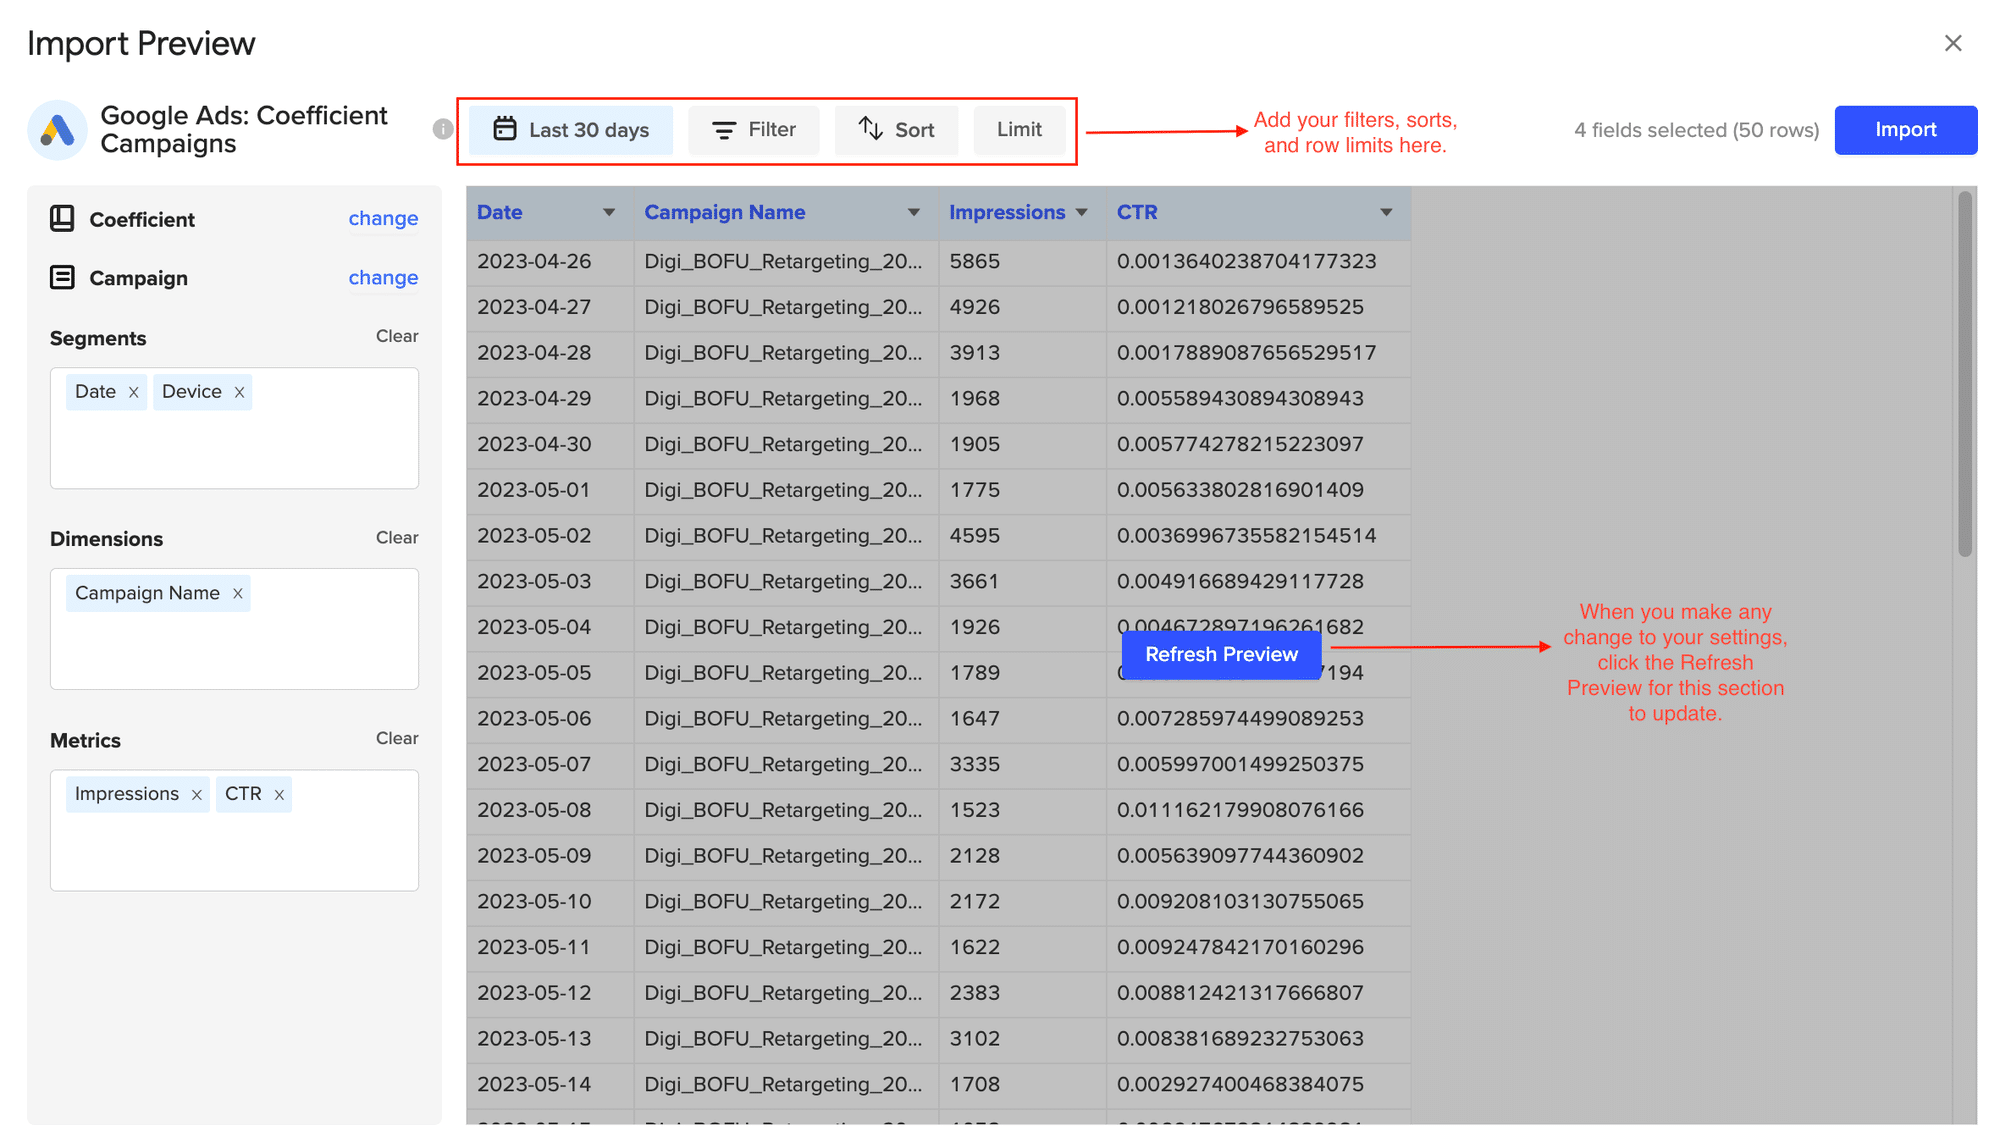
Congratulations on your first Google Ads import with Coefficient!

You can also set up automatic data updates to schedule data syncs between Google Ads and Excel. Choose whether to run daily, hourly, or weekly automatic data updates.
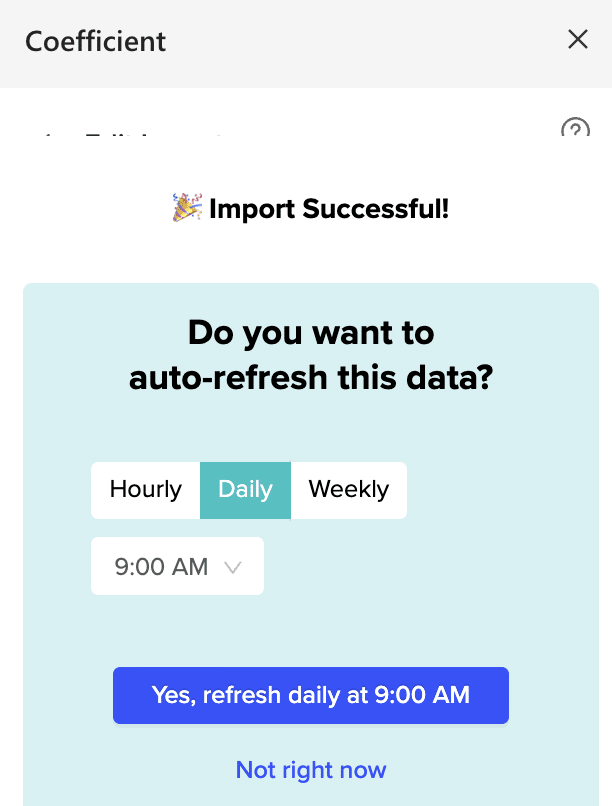
With automatic data updates, your Google Ads data is always up-to-date in your spreadsheet. That means you can build live dashboards and reports on top of the data without performing cumbersome manual updates.
- Pros:
- Fully automated and no-code solution.
- Real-time data refreshes and live pivot tables.
- Direct integration with Excel and Google Sheets.
- Cons: The only downside to Coefficient is that any scheduled automations are not free forever. However, pricing plans are affordable.
Method 2| Manual Export from Google Ads
Log into Google Ads and navigate to ‘Reports.’

Select the report type you want to export and select the data you want. You can customize your report by:

Stop exporting data manually. Sync data from your business systems into Google Sheets or Excel with Coefficient and set it on a refresh schedule.

- Date Range: Select the timeframe for which you wish to analyze data. This could range from the last 7 days to custom date ranges.
- Metrics and Columns: Add or remove columns in your report to include metrics relevant to your analysis. Consider including metrics like clicks, impressions, CTR (click-through rate), conversion rate, cost, and many more based on your objectives.
- Filters: Apply filters to narrow down your data. For instance, you might want to see performance data for specific campaigns, ad groups, or keywords.
Once your report is customized to your liking, locate the download icon and select ‘Excel CSV’ as your format.
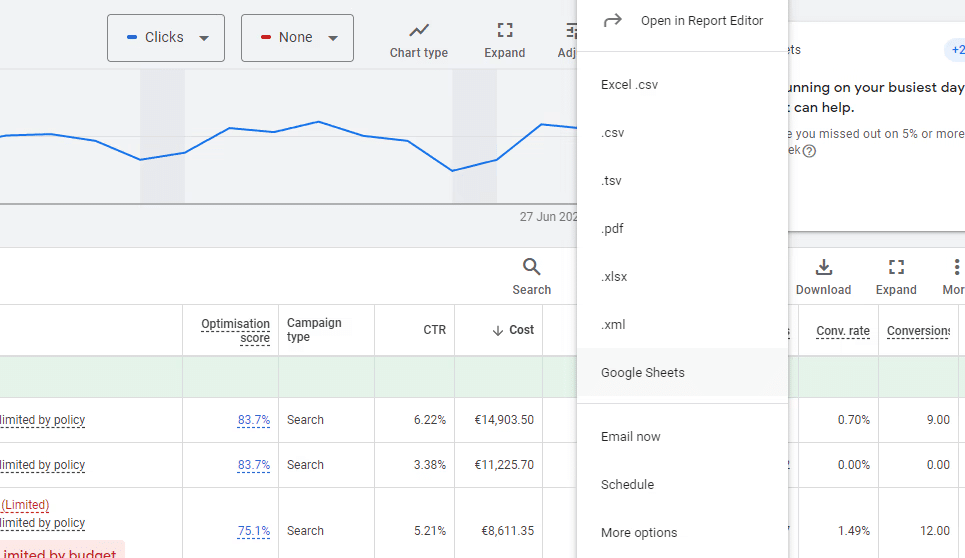
Your report will download automatically, ready for you to open in Microsoft Excel.
Pros and Cons:
Pros:
- A straightforward way to get your Google Ads data into Excel
Cons:
- Repetitive and time-consuming for ongoing analysis
- Limited by Google Ads interface capabilities
- Exported data is stale
Method 3| Zapier
Zapier Integration Zapier is a web-based service that allows you to create automated workflows between different apps, including Google Ads and Excel.
Here’s a step-by-step guide on how to set it up:
Log into your Zapier account. Click ‘+ Create’ > ‘New Zap.’

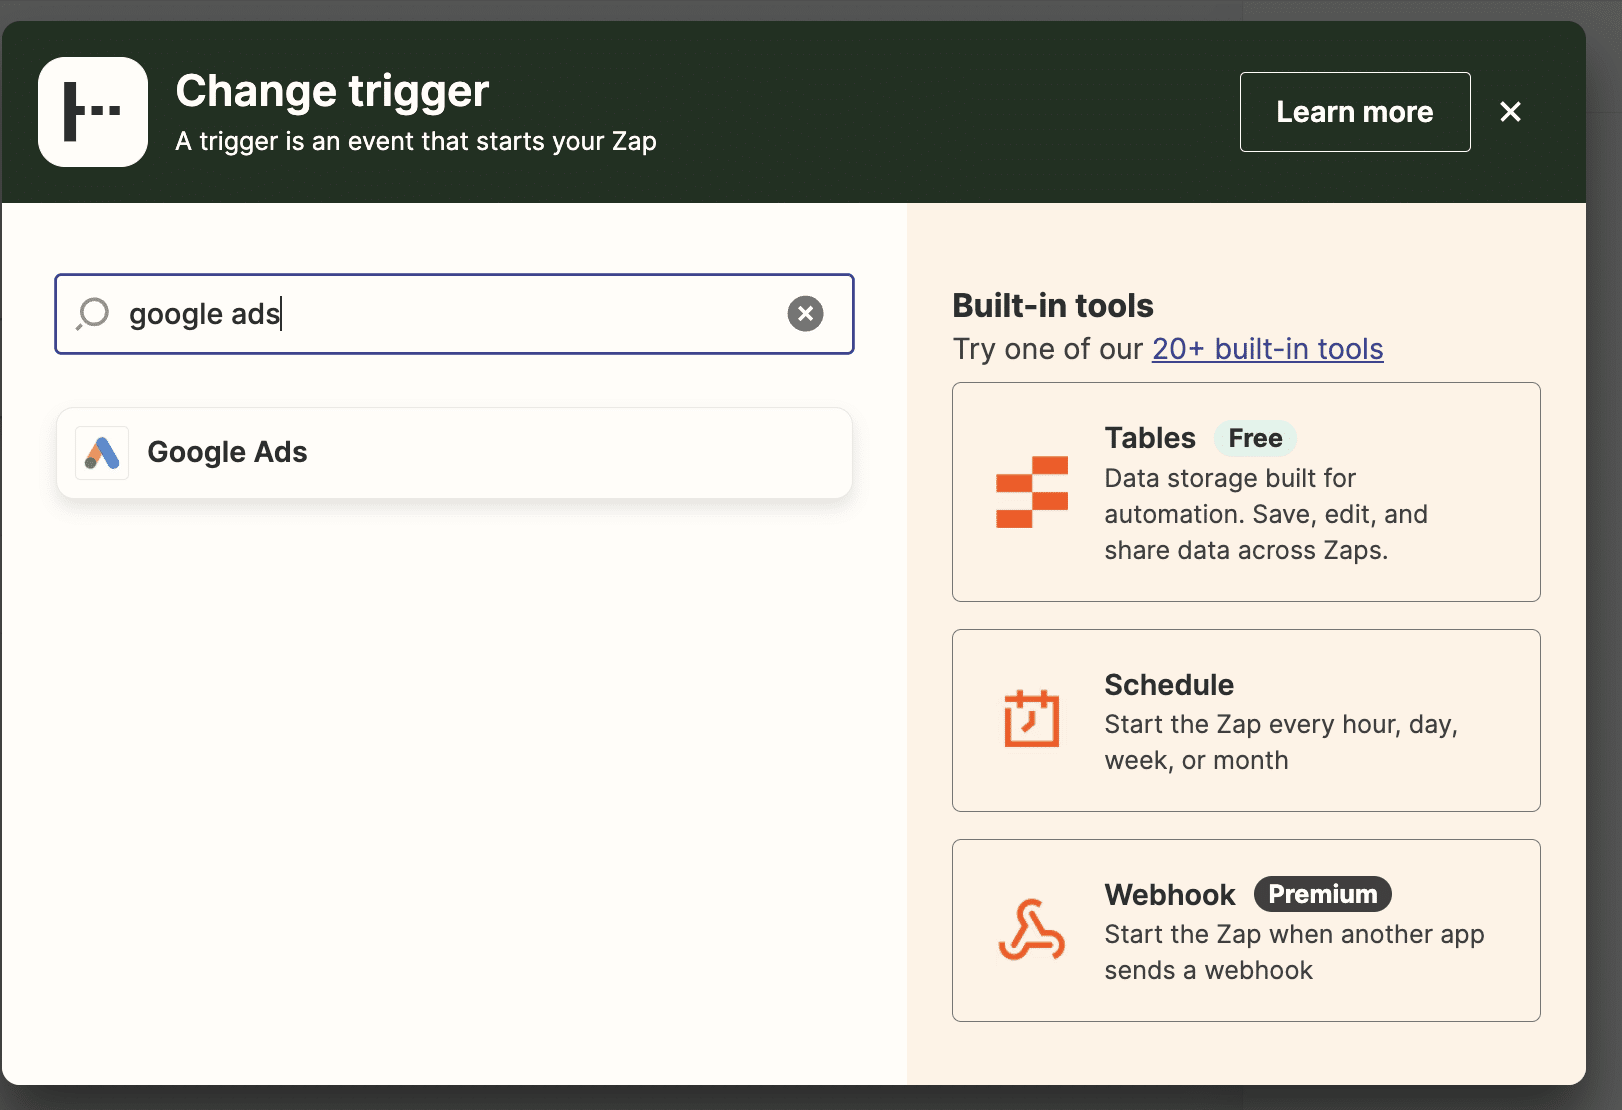
Choose Google Ads as your trigger app and select the event that will trigger the workflow (e.g., New Report). Follow the prompts to connect your Google Ads account to Zapier.
Connect your Google Ads account to Zapier by providing your API key, following the steps above.
Choose Microsoft Excel Online as your action app.
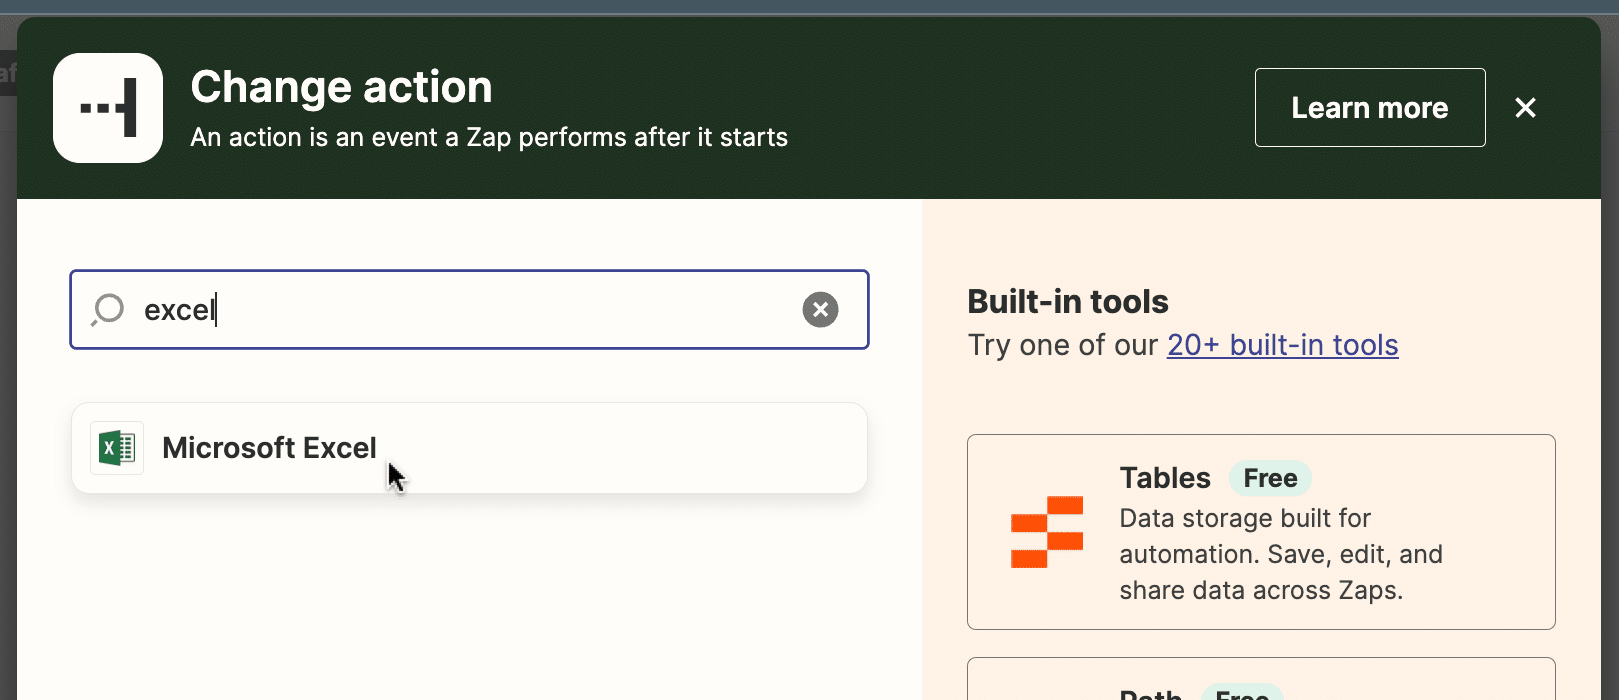
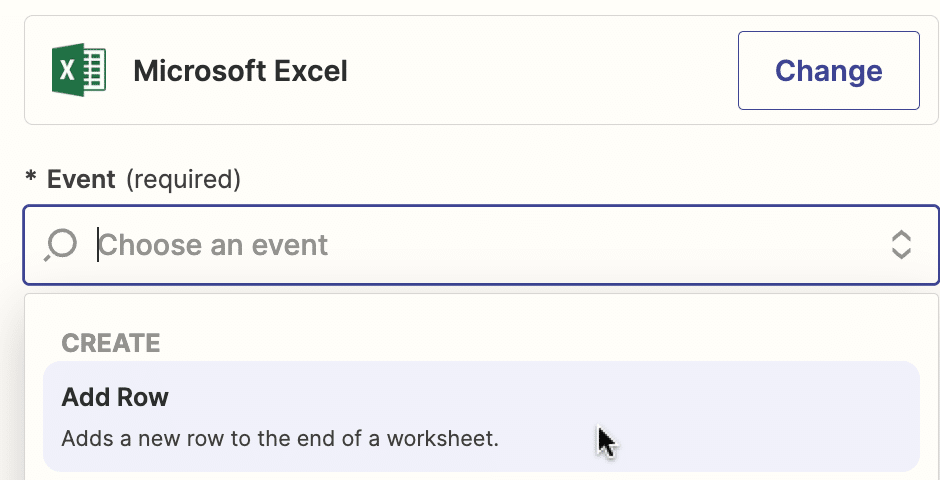
Select “Create Spreadsheet Row” as the action event.
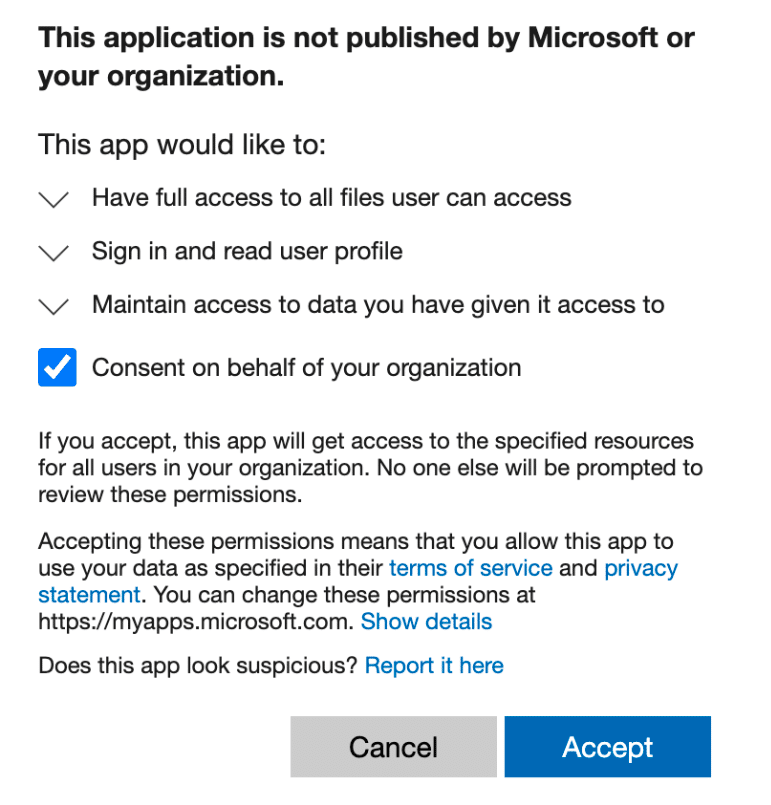
Follow the prompts to connect your Microsoft account.
From here:
- Map the data fields from Microsoft Ads to the corresponding columns in your Excel spreadsheet.
- Test your Zap to ensure it’s working correctly.
- Turn on your Zap, and it will automatically add new Microsoft Ads data to your Excel spreadsheet as it comes in.
Pros:
- Automates data transfer between Google Ads and Excel
- No coding required
- Flexible trigger options (daily, weekly, monthly)
Cons:
- Requires a Zapier subscription for more advanced features and higher volume of tasks
- May have some limitations in terms of customization compared to the API method
- Dependent on Zapier’s platform stability and performance
Empower Your Data Analysis with Google Ads to Microsoft Excel
Exporting Google Ads to Microsoft Excel significantly enhances your marketing analysis and decision-making.
While the manual method offers simplicity and Zapier provides automation, Coefficient stands out as the ultimate solution for ease and efficiency.
