Connecting your Razorpay account with Salesforce can be a game-changer for streamlining payment processing and customer relationship management. In this post, we’ll explore the key benefits of integrating these platforms and walk through three methods to make it happen, including no-code solutions and more customizable automation tools.
Advantages of Connecting Razorpay to Salesforce
Integrating Razorpay and Salesforce offers several compelling benefits:
- Predictive Sales Forecasting By combining payment history from Razorpay with sales pipeline data in Salesforce, you can build more accurate predictive models for sales forecasting. This integration allows you to factor in actual payment behaviors, reducing the gap between forecasted and realized revenue.
- Automated Dunning Process Leverage the integration to create an automated dunning process. When Razorpay flags a failed payment, it can trigger a workflow in Salesforce to notify the account manager, schedule follow-up tasks, and send personalized reminders based on the customer’s history and value.
- Dynamic Lead Scoring Incorporate payment data from Razorpay into your salesforce lead scoring model. By considering factors like payment frequency, transaction size, and payment method preferences, you can more accurately prioritize leads and tailor your sales approach.
Connecting Razorpay to Salesforce: 3 Methods
There are a few key methods to connect Razorpay and Salesforce, each with their own advantages. Here’s a quick comparison:
| Solution | Best For |
| Coefficient | Finance teams in small to medium-sized businesses who need to quickly analyze Razorpay data alongside Salesforce metrics. Ideal for organizations where analysts frequently work in spreadsheets and need to create custom reports without SQL knowledge. |
| Zapier | Marketing and sales teams in businesses with diverse software ecosystems beyond just Razorpay and Salesforce. Best for companies that need to create multi-step workflows involving additional apps (e.g., triggering a Slack notification for high-value transactions or updating a Google Sheet for reconciliation). |
| Dataloader.io | Enterprise-level organizations or those dealing with high volumes of transaction data. Optimal for IT teams or data administrators who need to perform regular bulk updates or complex data migrations between Razorpay and Salesforce. |
How to Connect Razorpay to Salesforce: Step-by-Step Guides
Method 1: Coefficient – No-Code and User-Friendly
Coefficient provides a simple way to connect your business data sources to spreadsheets without any coding required. It’s an ideal solution for both non-technical users and data pros who want to quickly integrate systems.
Key features of Coefficient include:
- Simple, no-code setup
- Automatic data syncing
- Affordable pricing plans
Pros:
- Easy to use for non-technical teams
- Automatic data updates keep everything in sync
- Plans for every budget
Cons:
- Scheduling automated exports requires a paid plan
How to Connect Razorpay to Salesforce with Coefficient
Here’s how to use Coefficient to connect Razorpay to Salesforce:
Step 1: Install the Coefficient
For Google Sheets
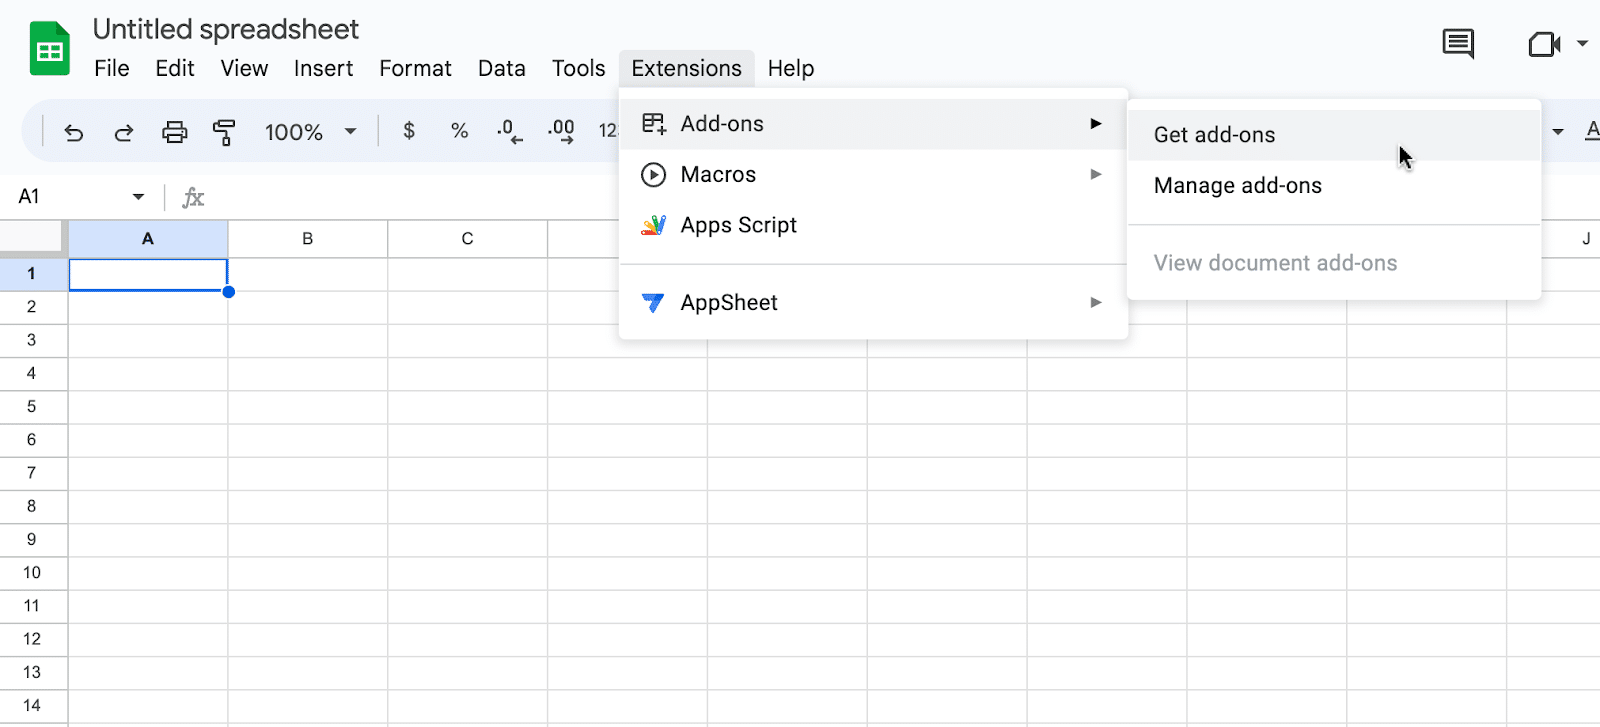
Open a new or existing Google Sheet, navigate to the Extensions tab, and select Add-ons > Get add-ons.
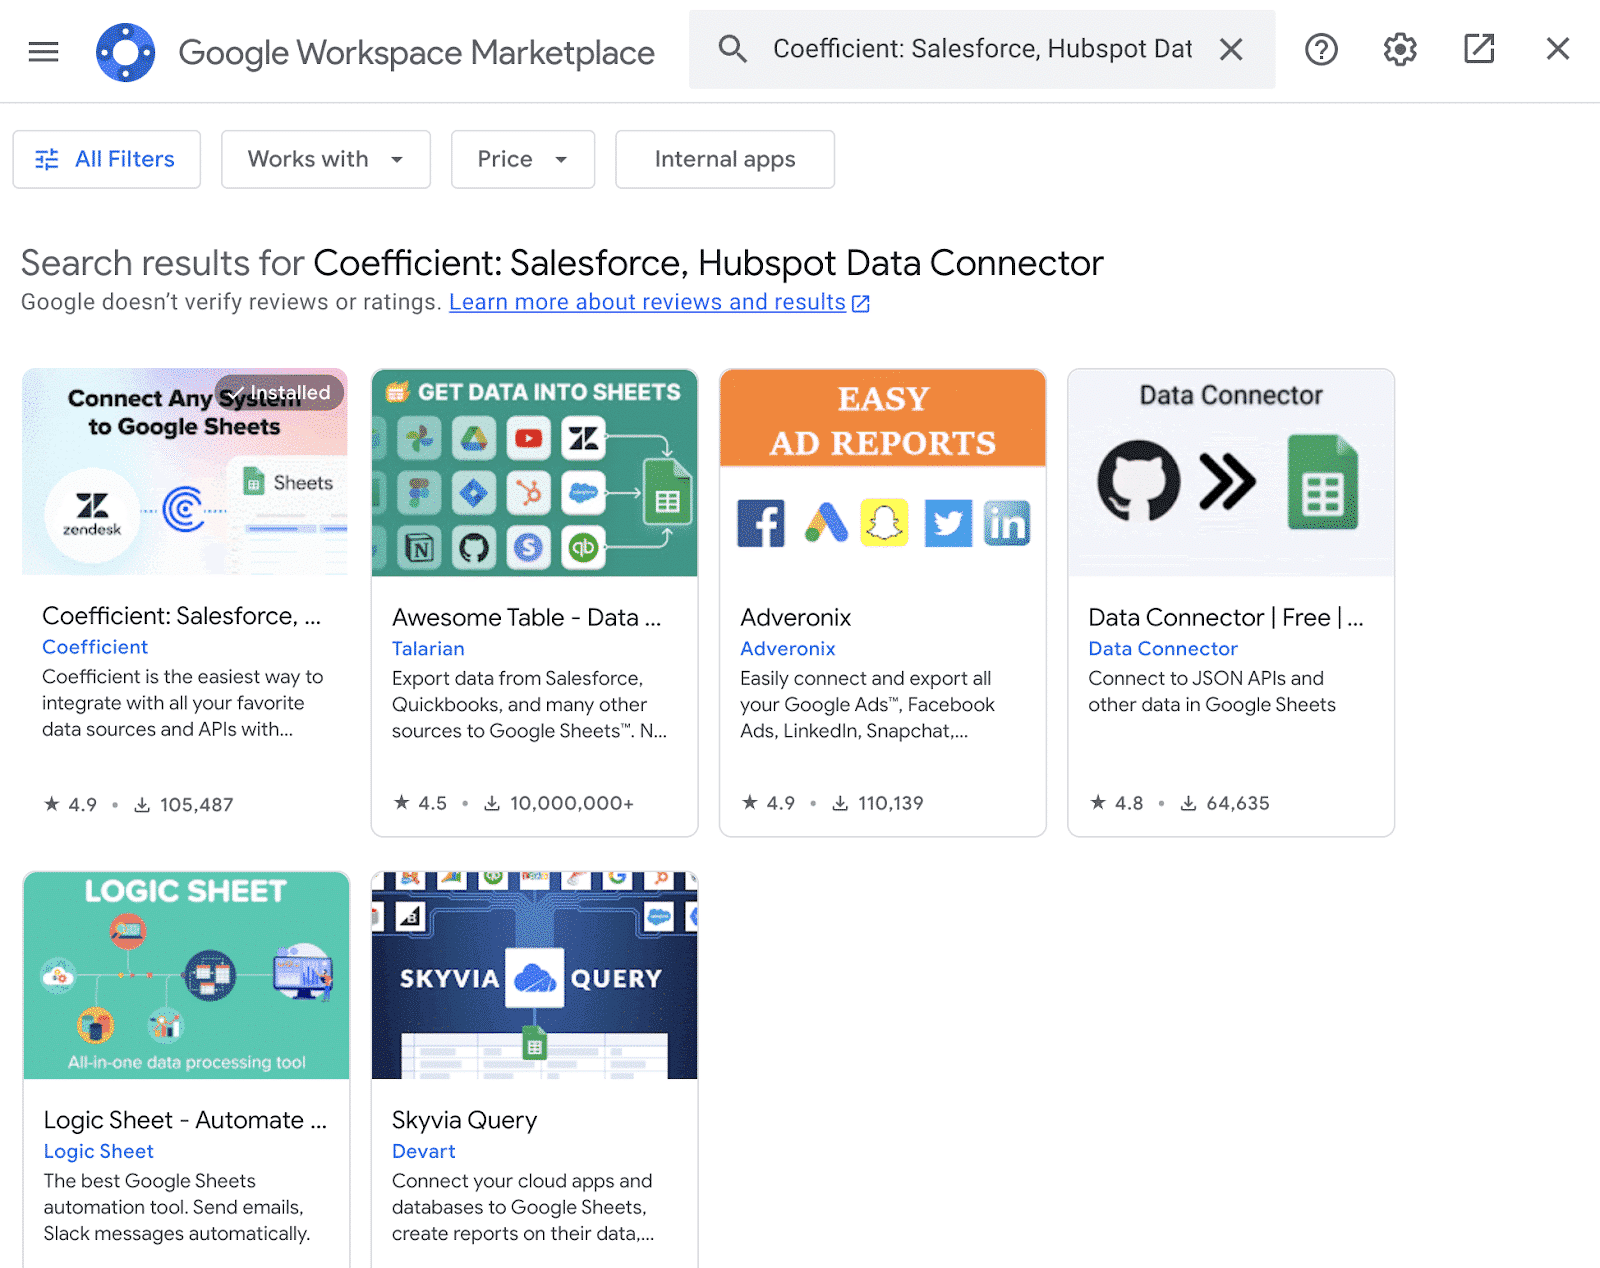
In the Google Workspace Marketplace, search for “Coefficient.”
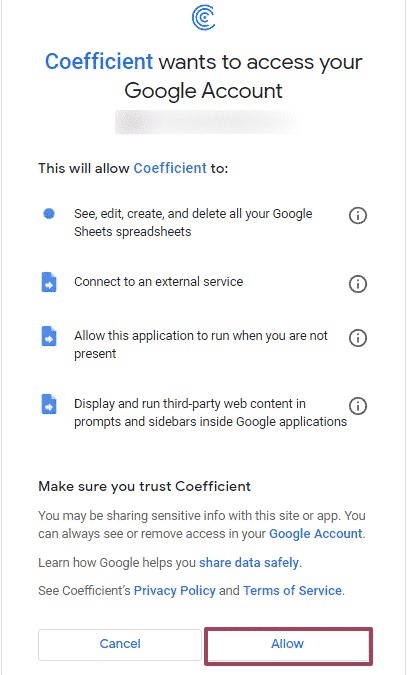
Follow the prompts to grant necessary permissions.
Launch Coefficient from Extensions > Coefficient > Launch.
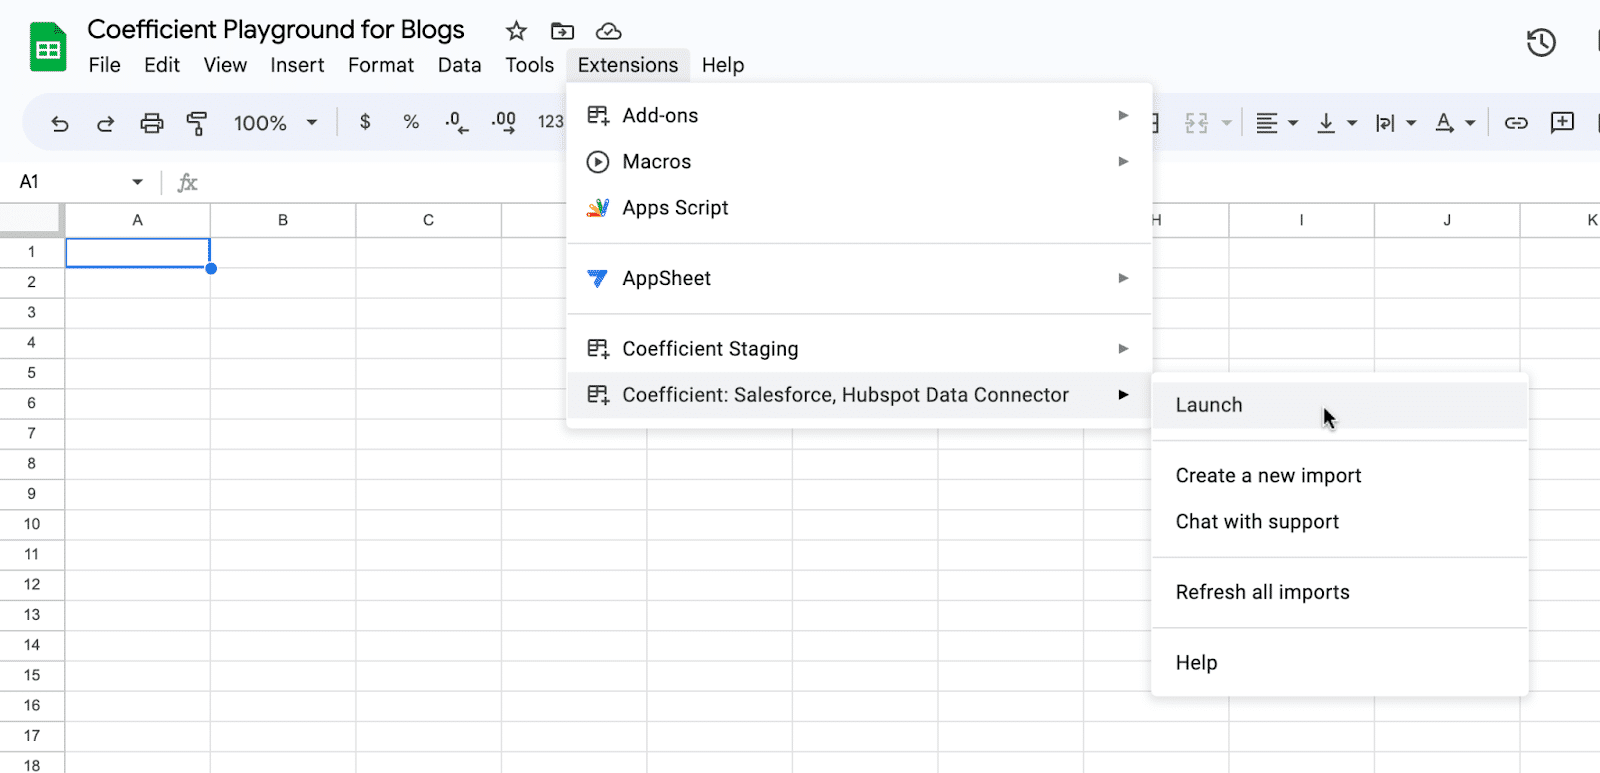
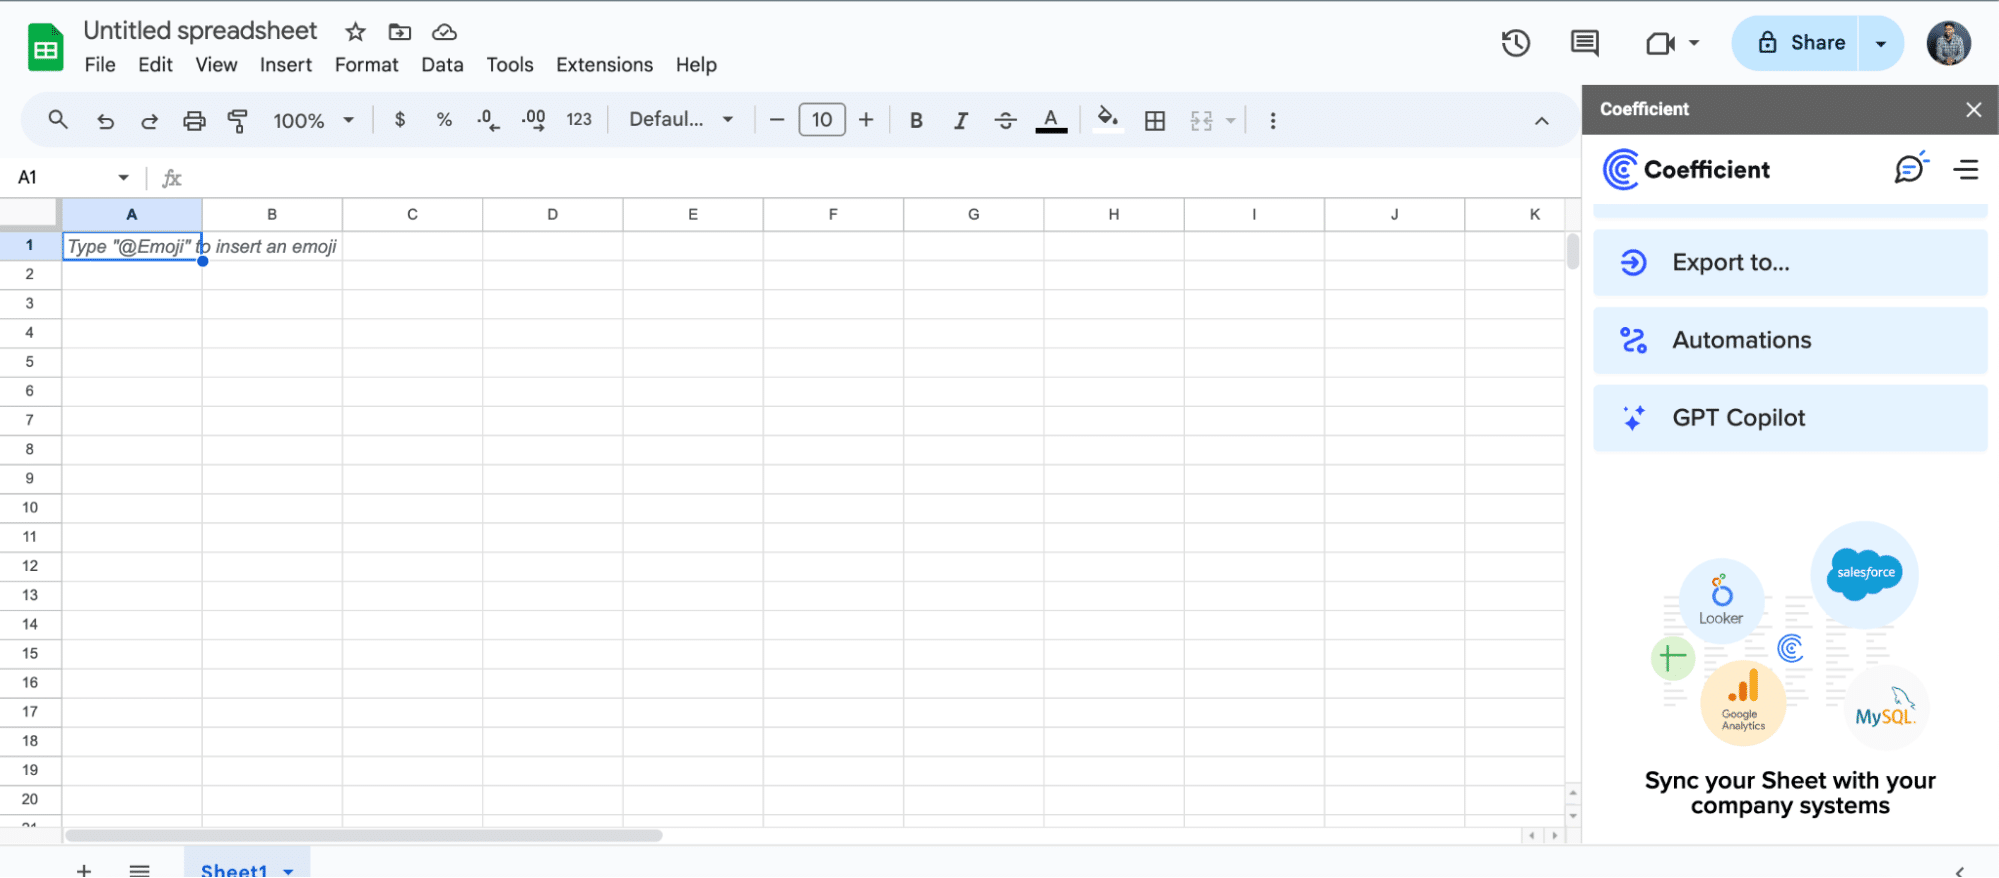
Coefficient will open on the right-hand side of your spreadsheet.
For Microsoft Excel
Open Excel from your desktop or in Office Online. Click ‘File’ > ‘Get Add-ins’ > ‘More Add-Ins.’
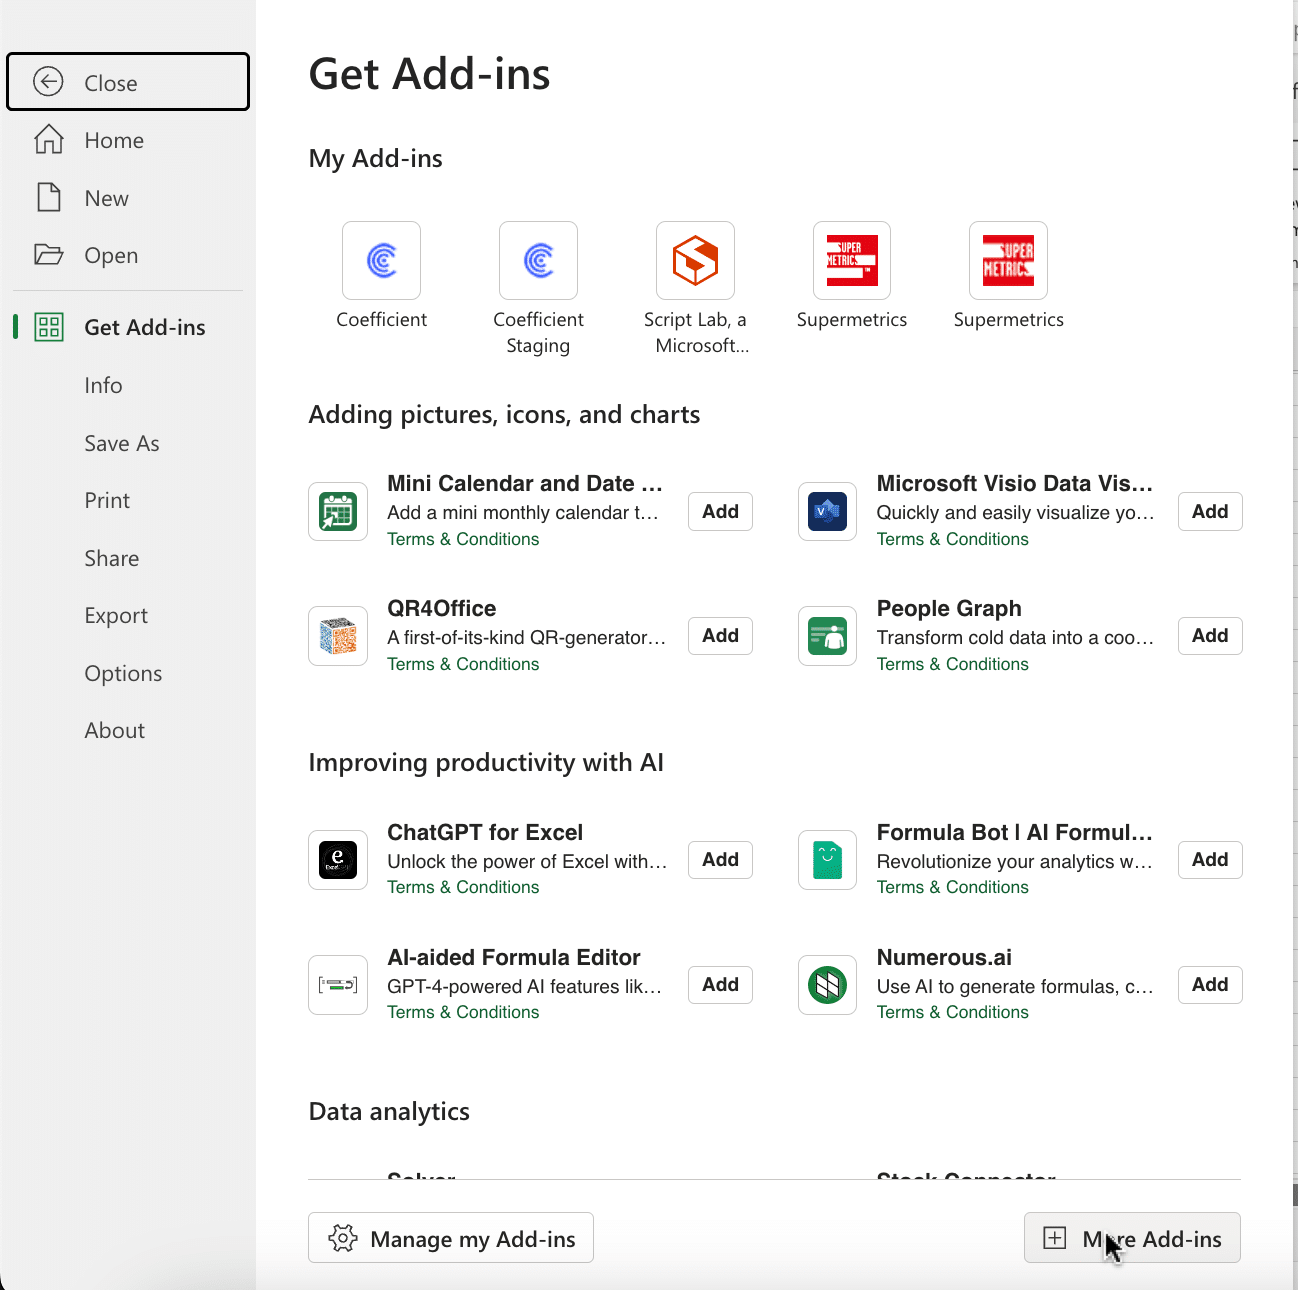
Type “Coefficient” in the search bar and click ‘Add.’

Follow the prompts in the pop-up to complete the installation.
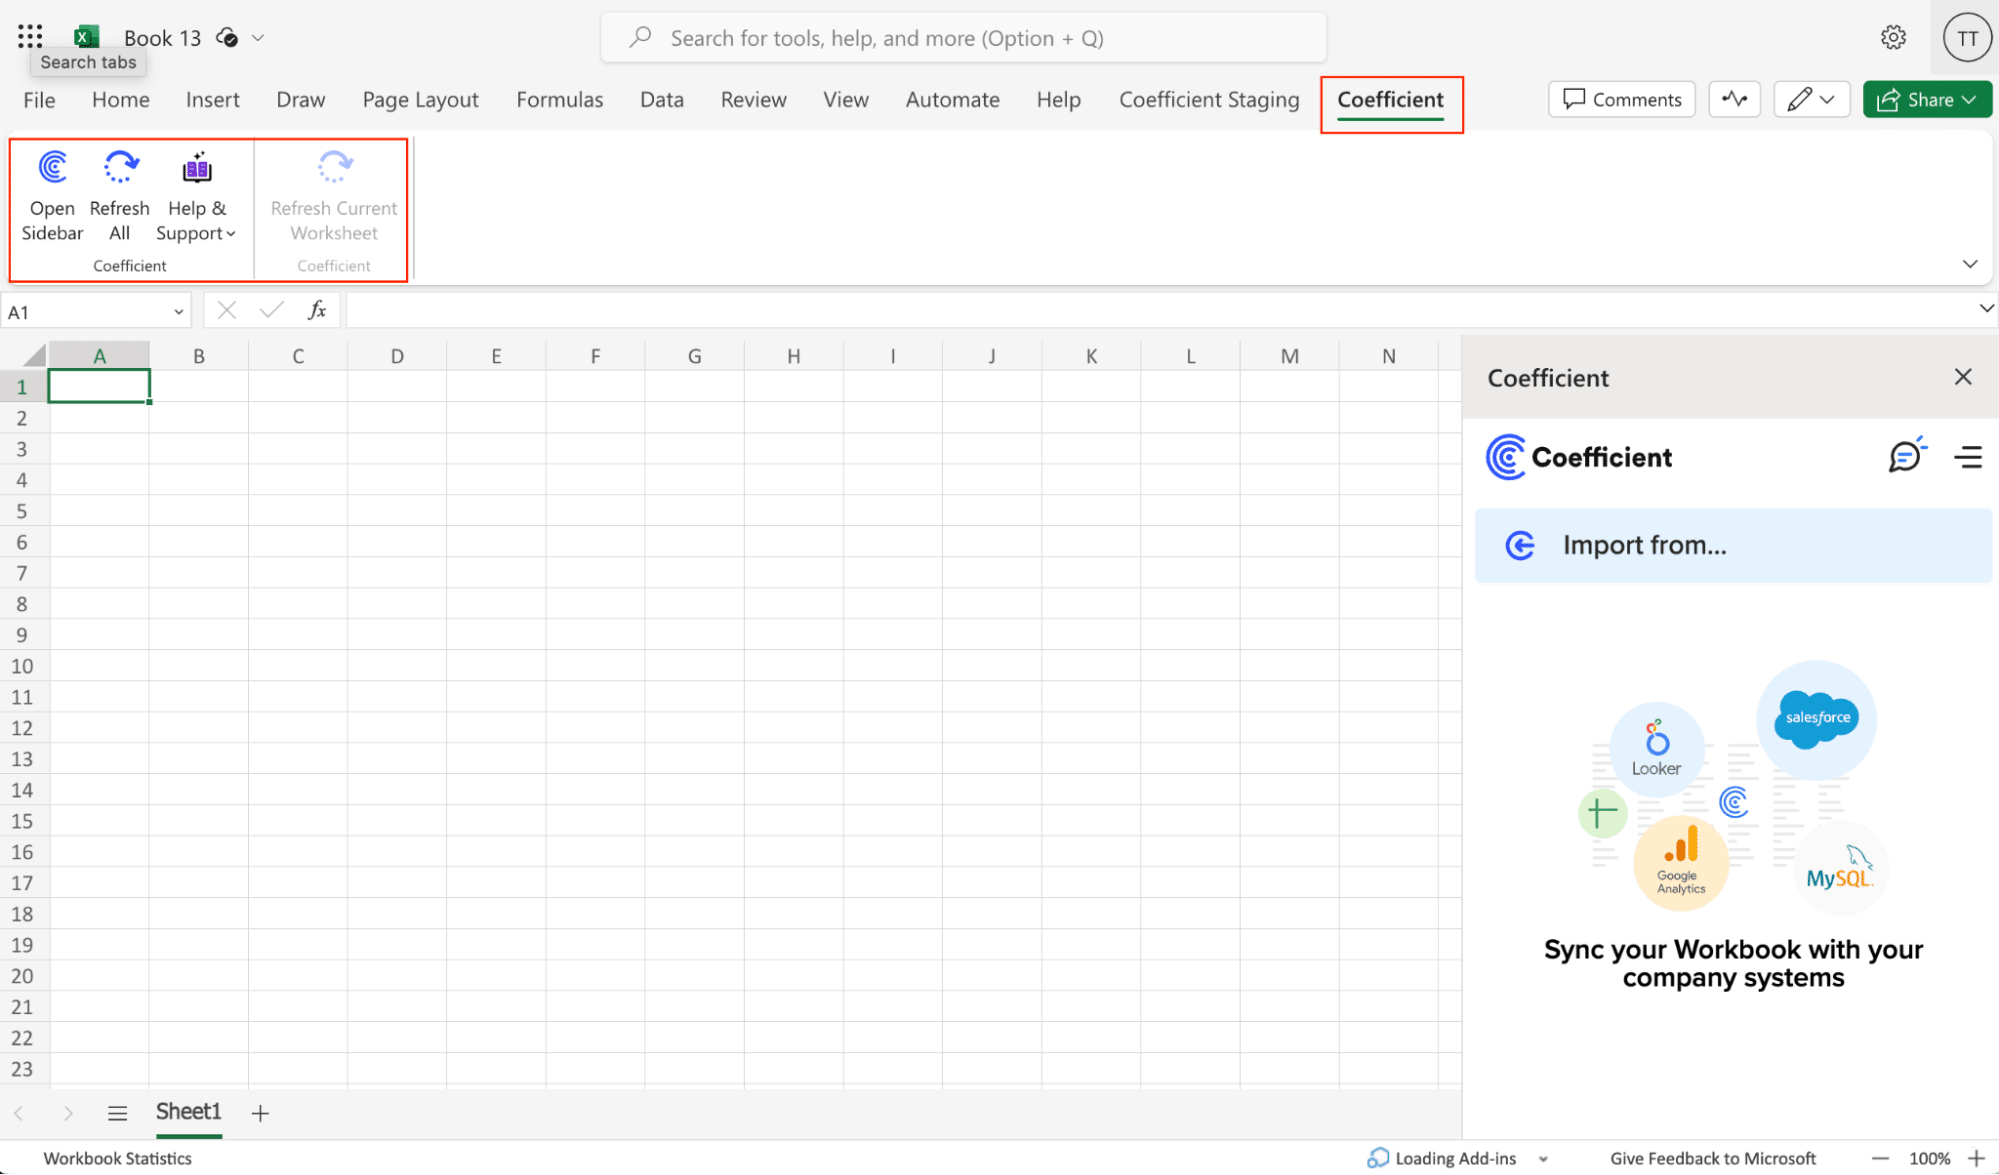
Once finished, you will see a “Coefficient” tab in the top navigation bar. Click ‘Open Sidebar’ to launch Coefficient.
Step 2: Import Data from Razorpay
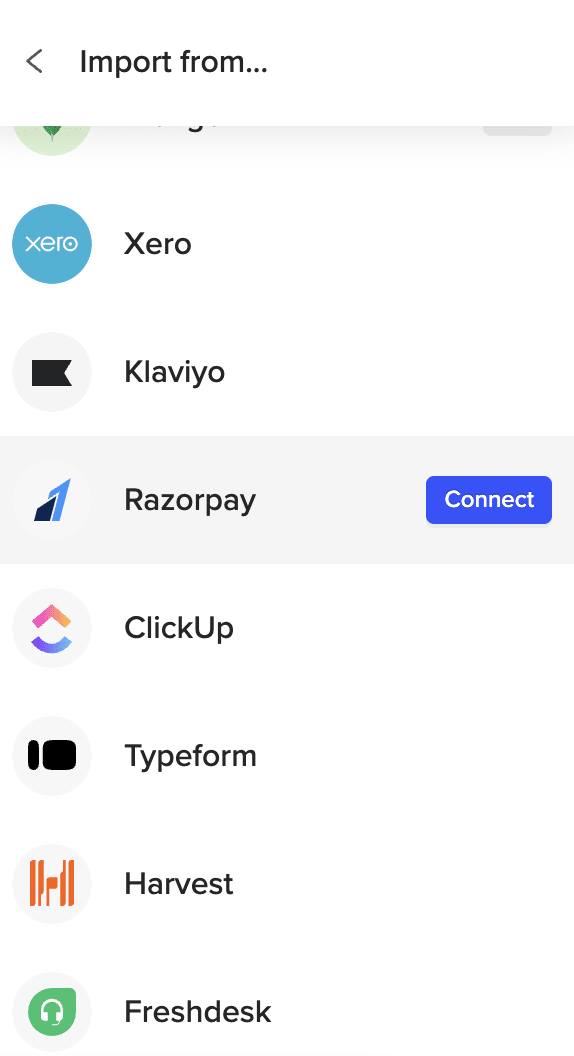
Navigate to the Coefficient sidebar.
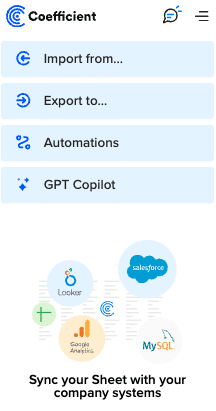
Click on “Import from” and proceed to select “Razorpay” from the dropdown.
To continue with authentication, you’ll need to acquire an API key from Razorpay.
Open a separate tab and log into your Razorpay account.
Navigate to the left-hand menu and select “Accounts and Settings.”
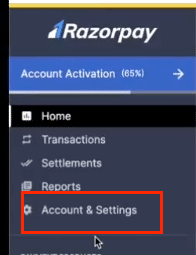
Click “API Keys” in the Website and app settings box.
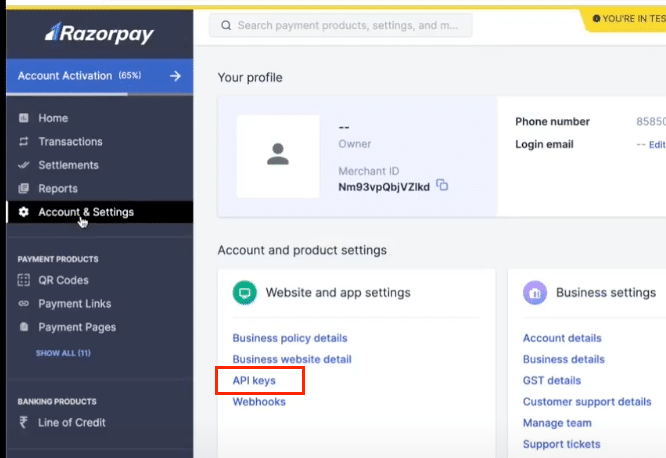
Copy your API Key ID and Key Secret and head back to your spreadsheet.
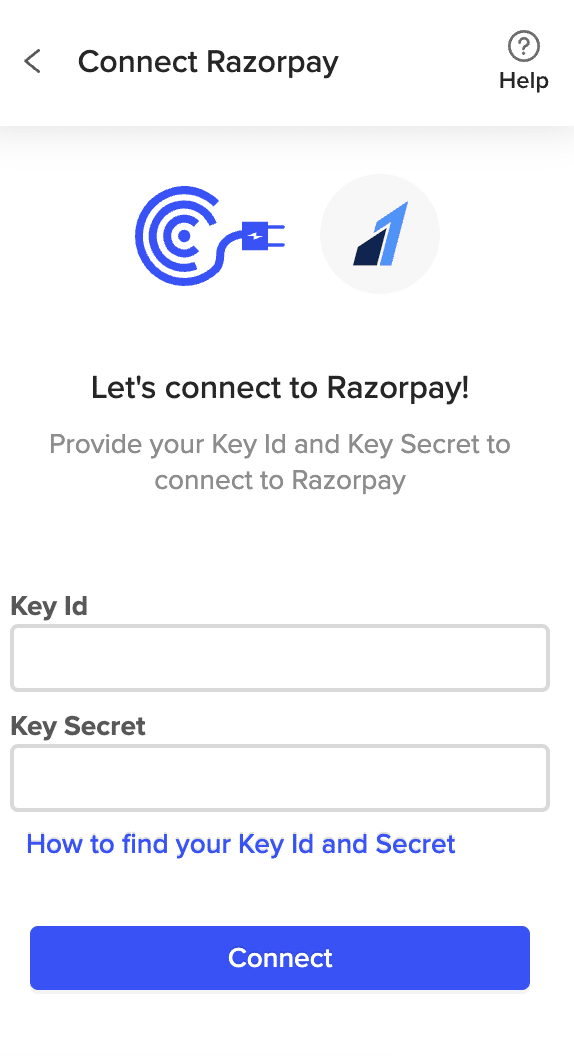
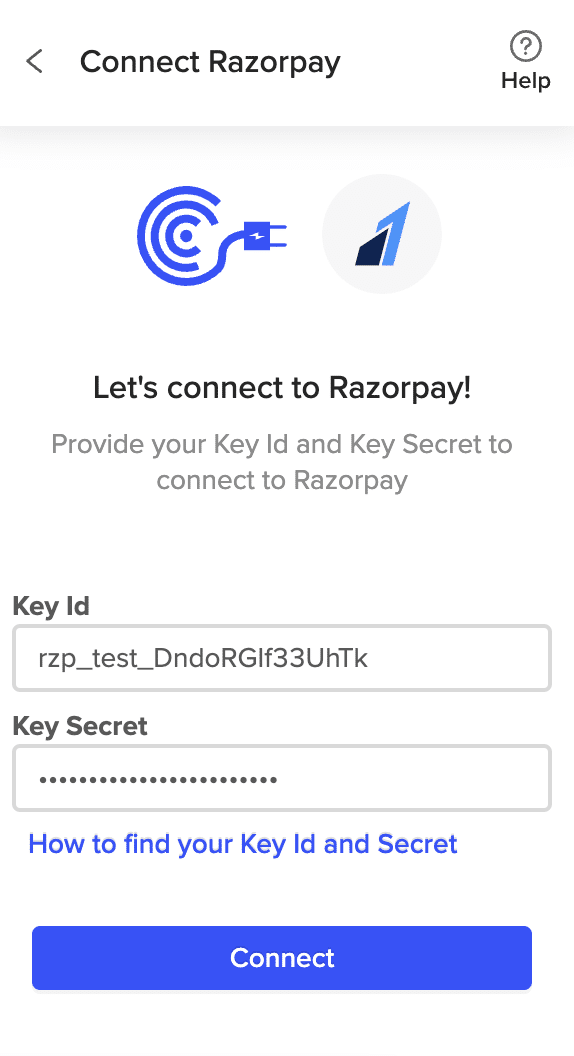
Paste your Key ID and Key Secret into the Coefficeint and click “Connect.”
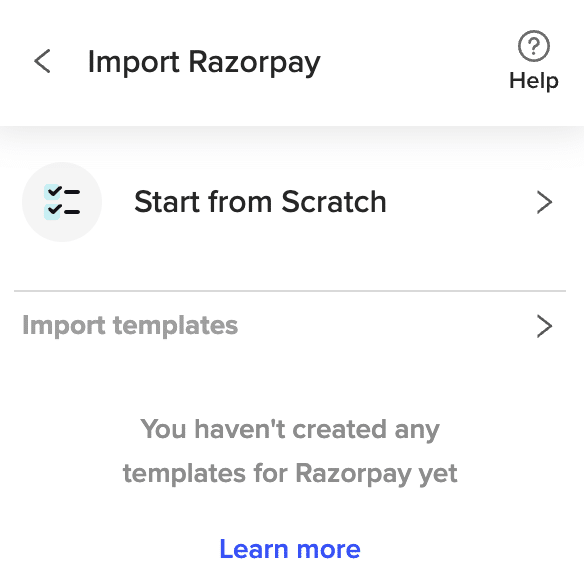
Click “Start from Scratch” to open the Import Preview window.
Scroll through the available objects and reports in Coefficient’s no-code Import Preview menu. Options include Customers, Payments, Orders, Settlements, and more!
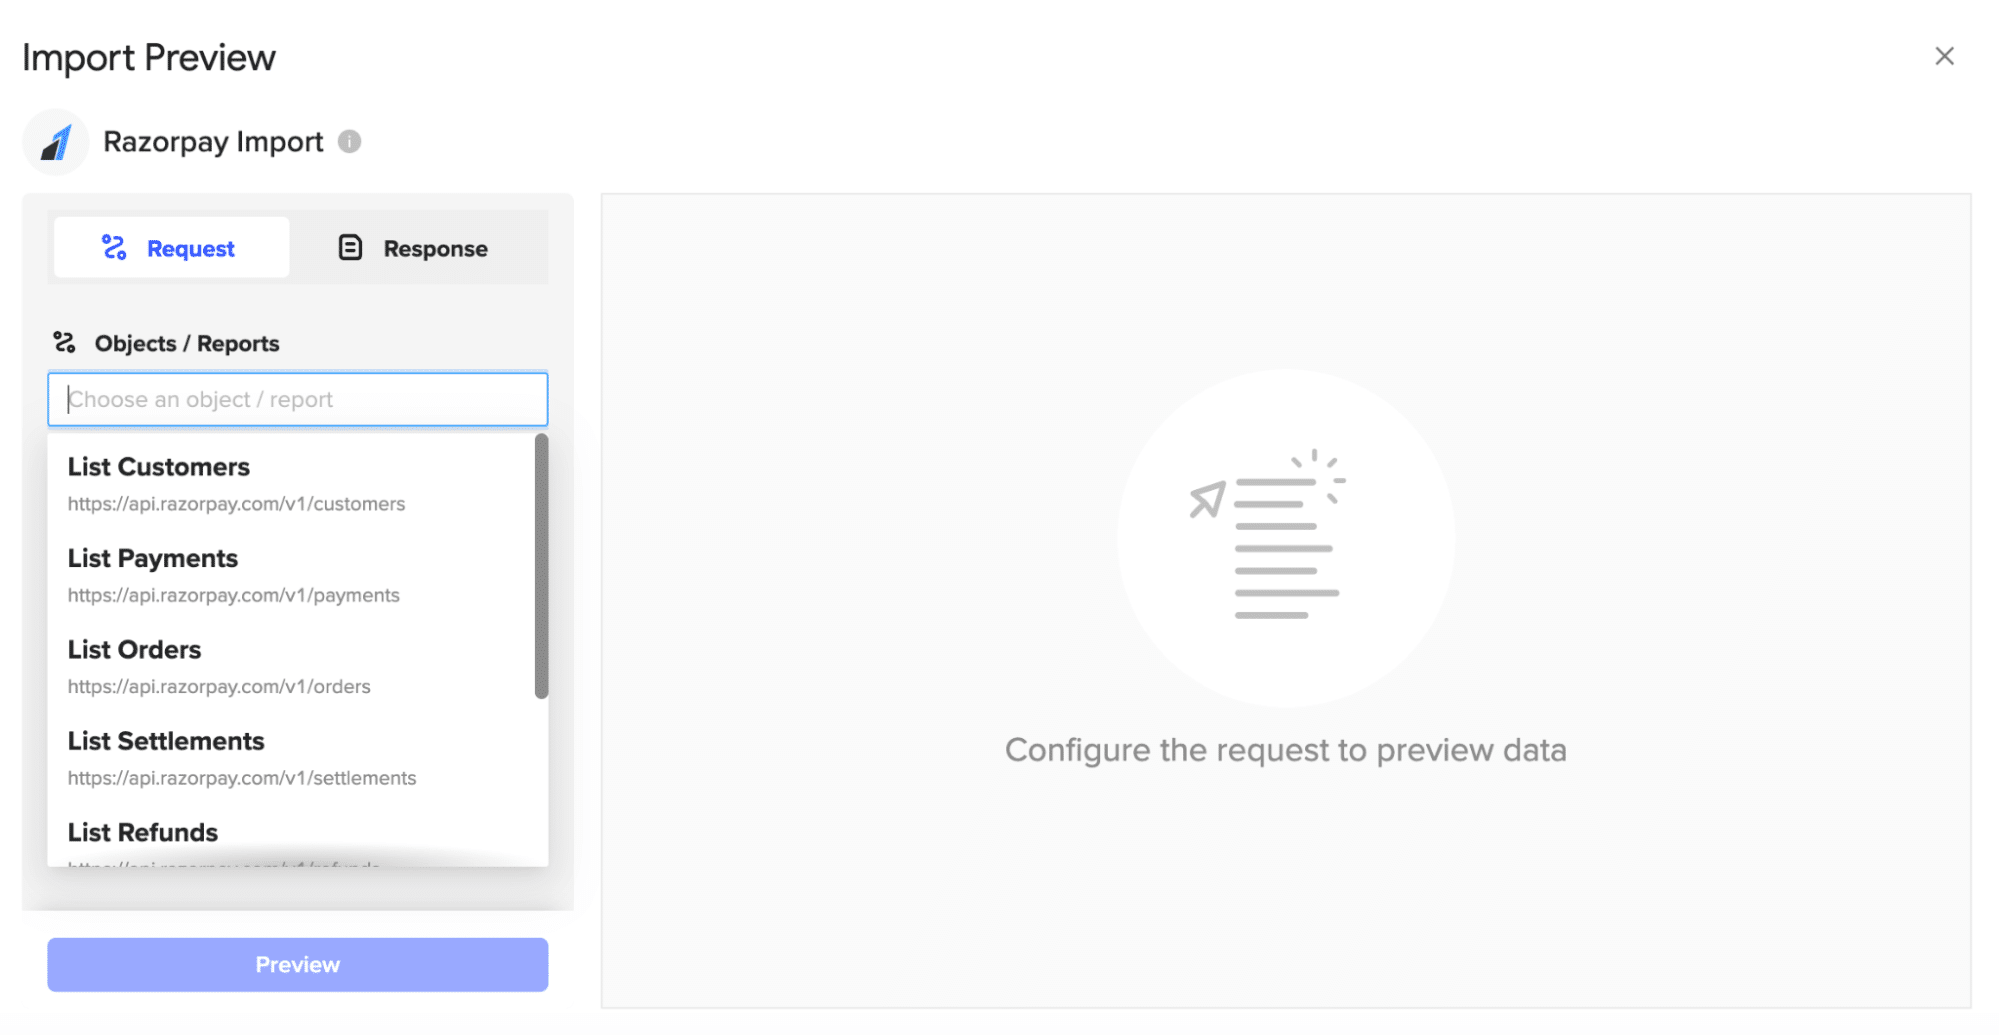
In this example, select “Customers” and click the “Preview” button to continue.
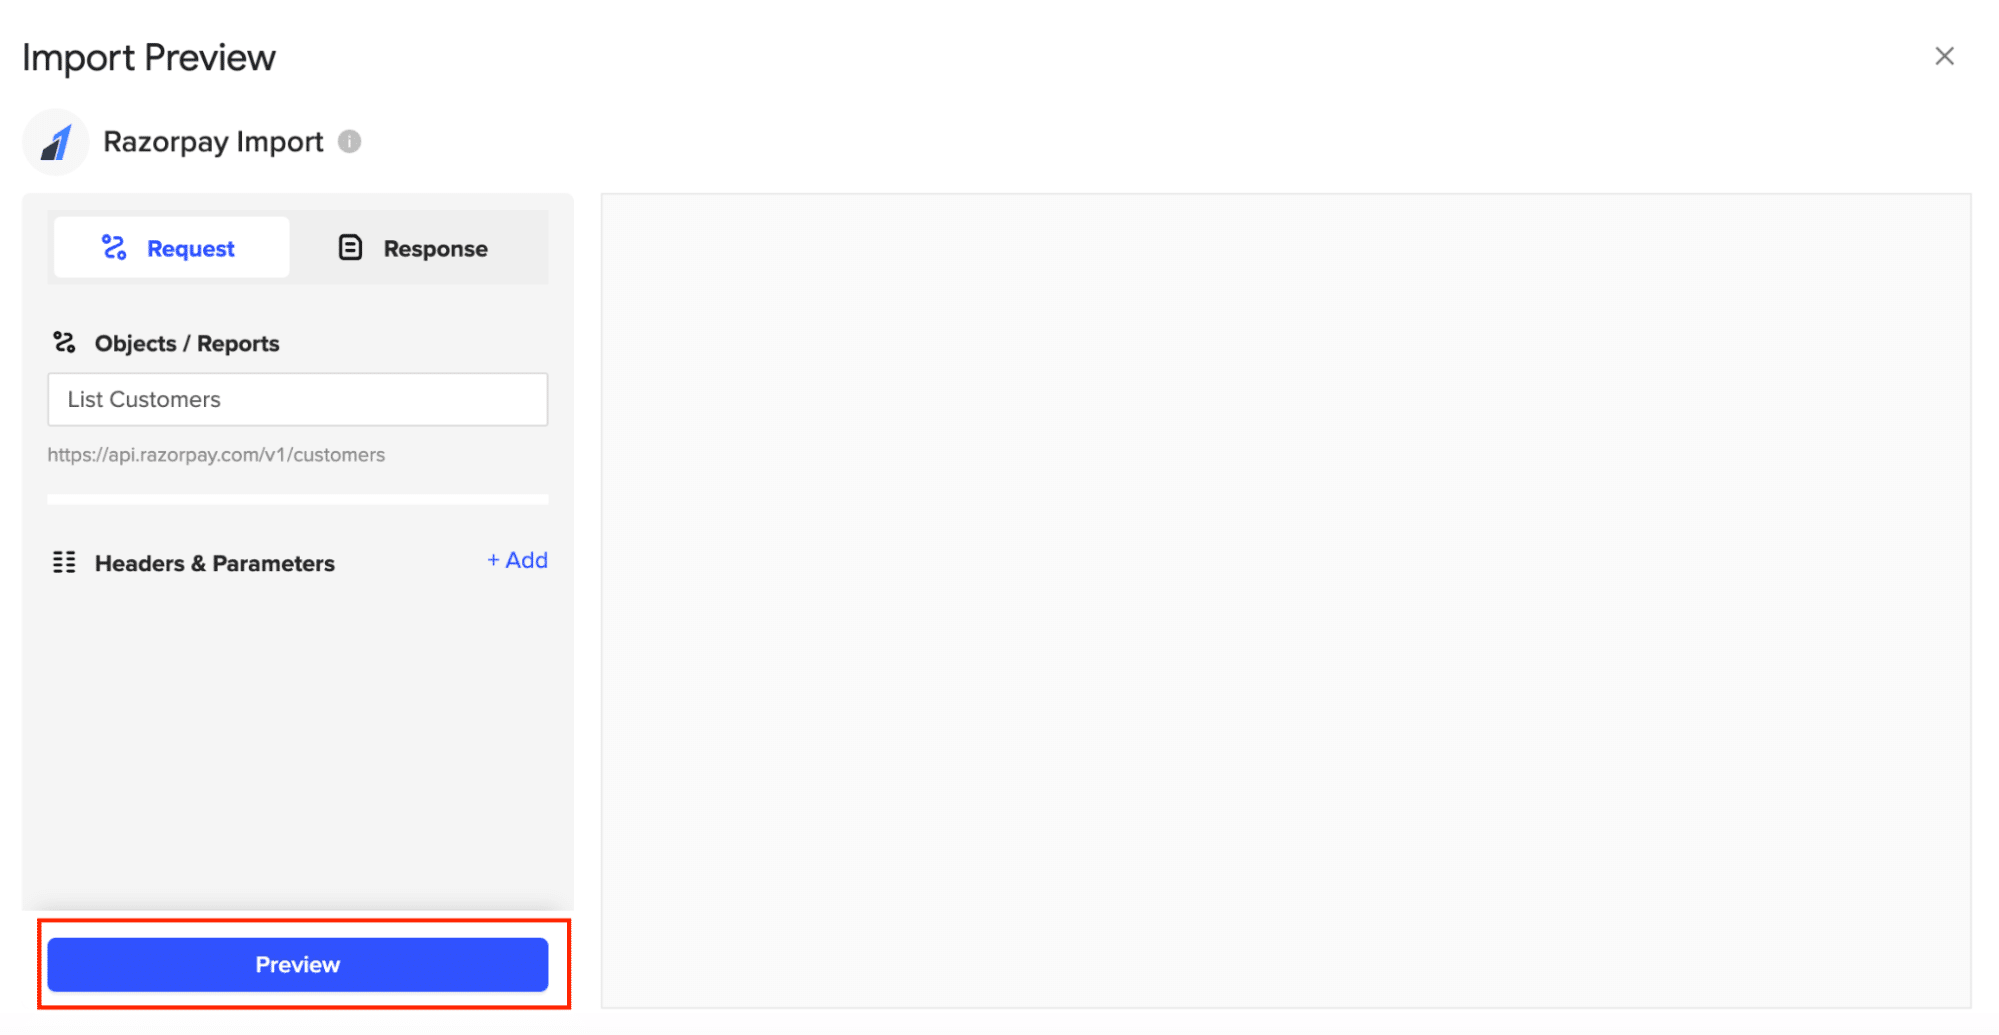
Customize your import by toggling on the fields on the left-hand side of your menu.

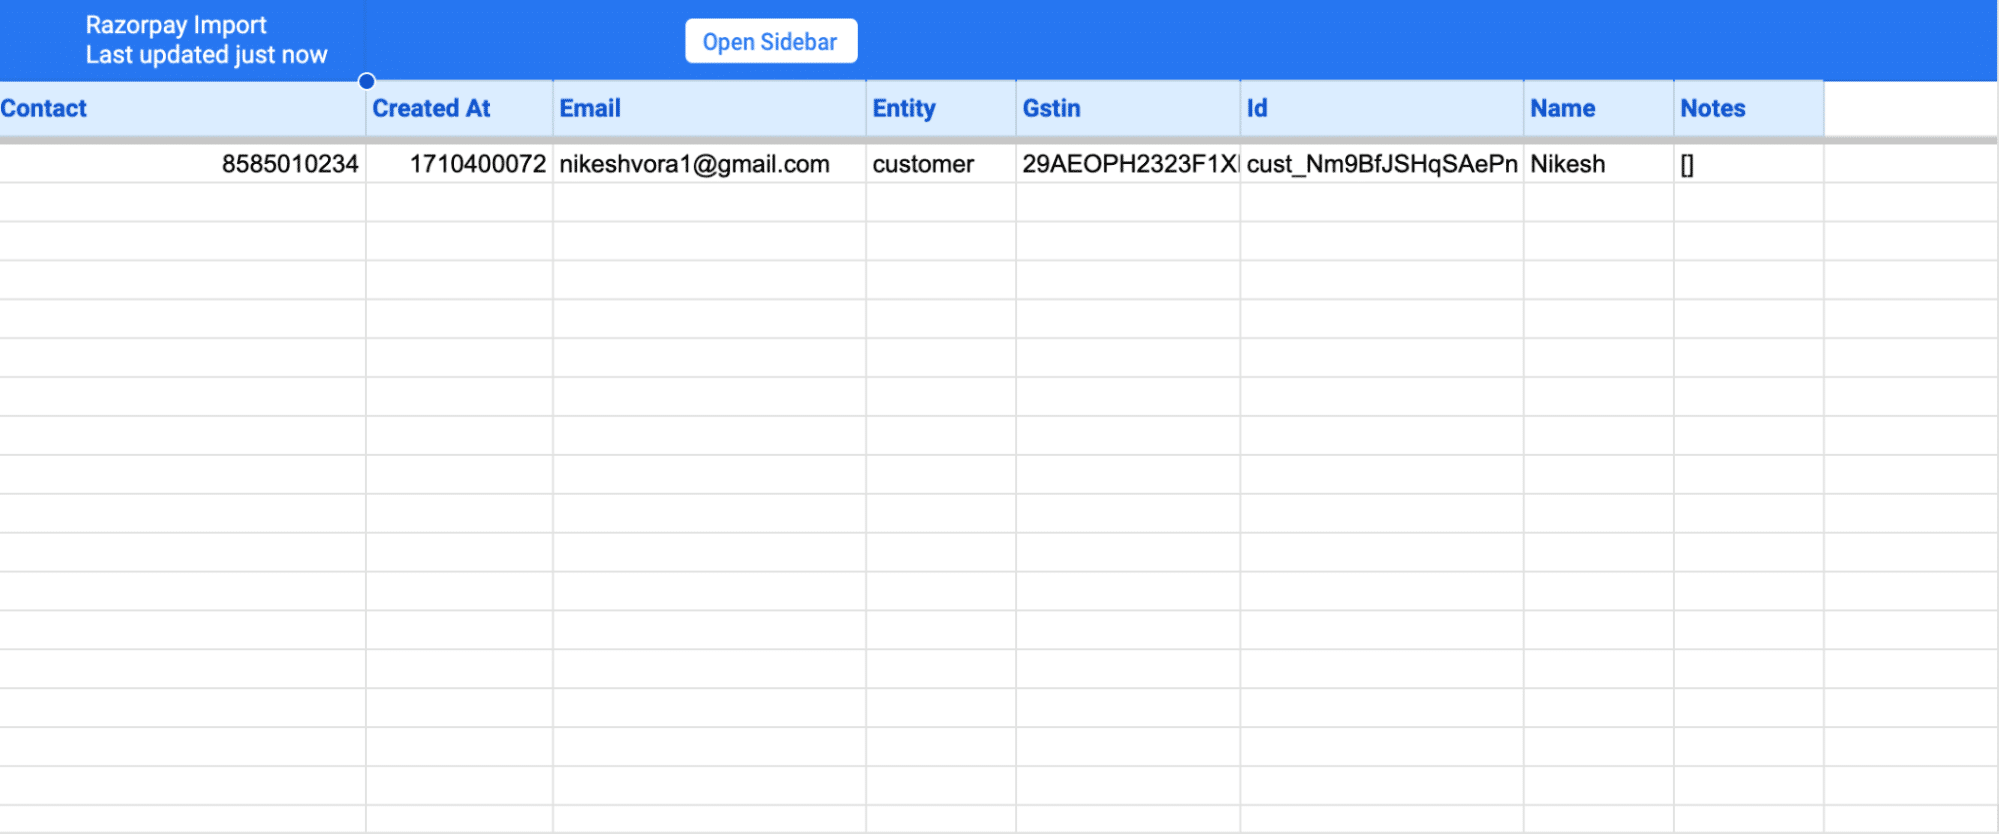
When finished, click “Import.” In a few seconds, your Razorpay data will populate your spreadsheet!
Step 3. Export Data from Your Spreadsheet to Salesforce
Before starting, make sure you’ve connected to Salesforce.
https://www.youtube.com/watch?v=B5qUY5zs-vc
Then, navigate to Coefficient’s menu. Click “Export to…”
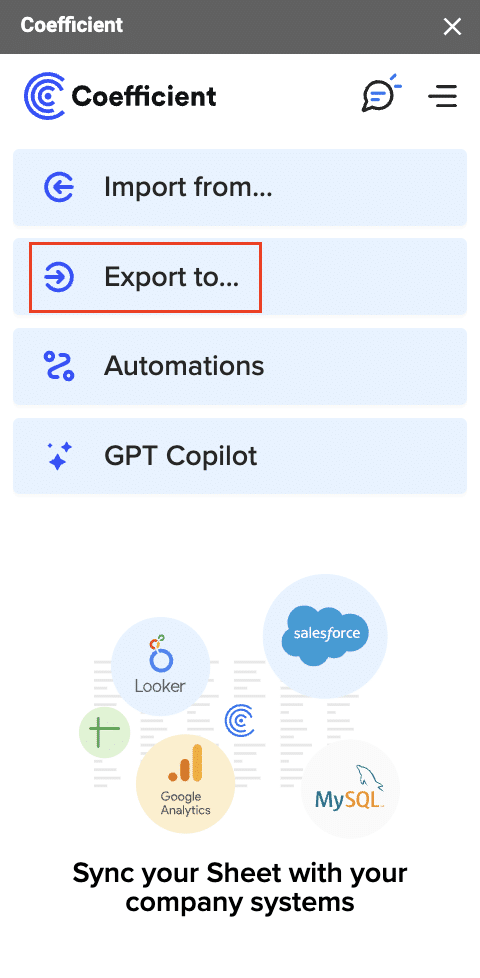
Choose Salesforce from the list of available data sources.

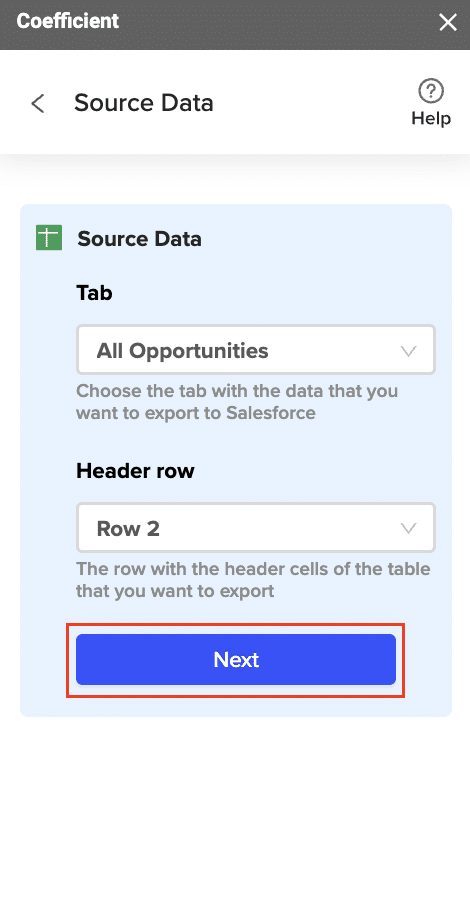
Select the tab and header rows in your spreadsheet that contain the data you want to export.
Define your tab and header row.
Note: Coefficient will automatically map the fields for you if the data in the sheet came from an import from Salesforce using Coefficient.
Next, select the Salesforce Object you want to export data to, e.g., “Opportunity”, “Contacts”, etc.
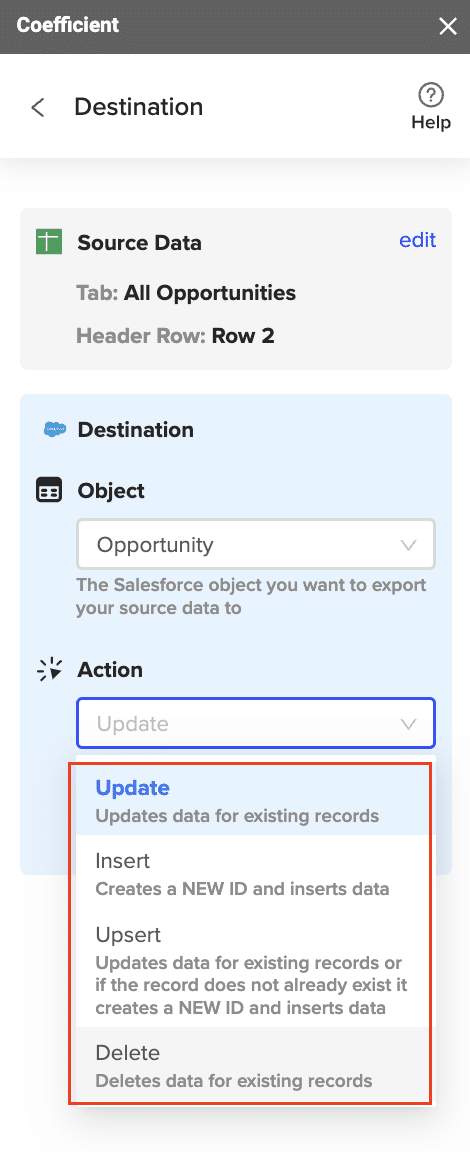
Then, select the type of action you want to perform—Update, Insert, Upsert, or Delete.
Step 5: Map Fields
Map the fields from your spreadsheet to the corresponding Salesforce fields.
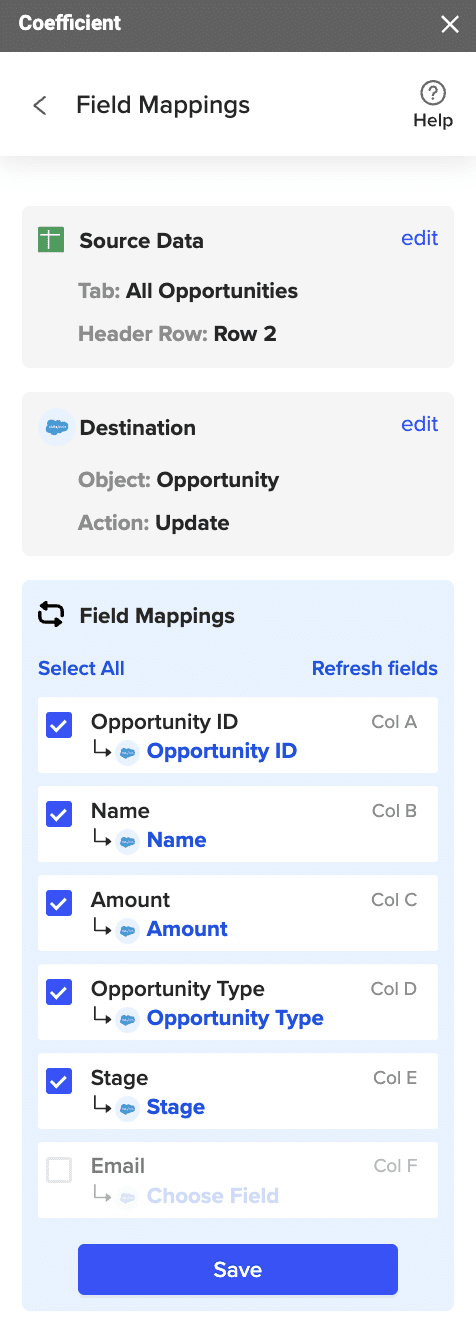
Note: If you imported data from Salesforce into your spreadsheet previously, Coefficient will auto-detect and map these fields.
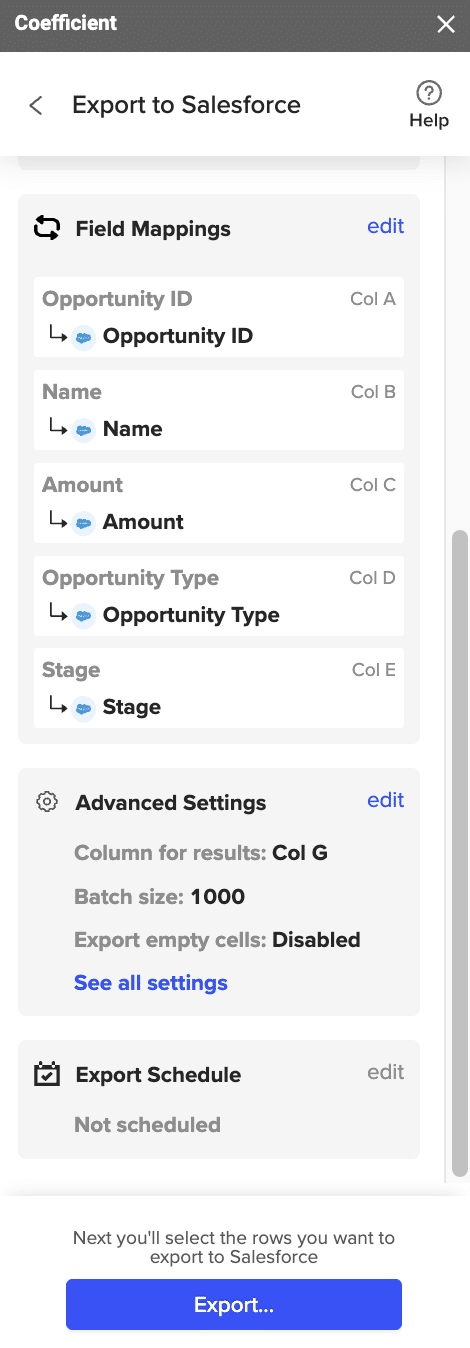
(Optional) Specify additional settings such as batch size, whether to export empty cells on an update, and the column for results.

Note: Batch size is capped at 10,000 rows due to Salesforce API limitations.
Step 7: Select Rows to Export
Confirm your settings and click “Export”.
Then, highlight the rows you want to update or export. You can choose to export all rows or specific rows.
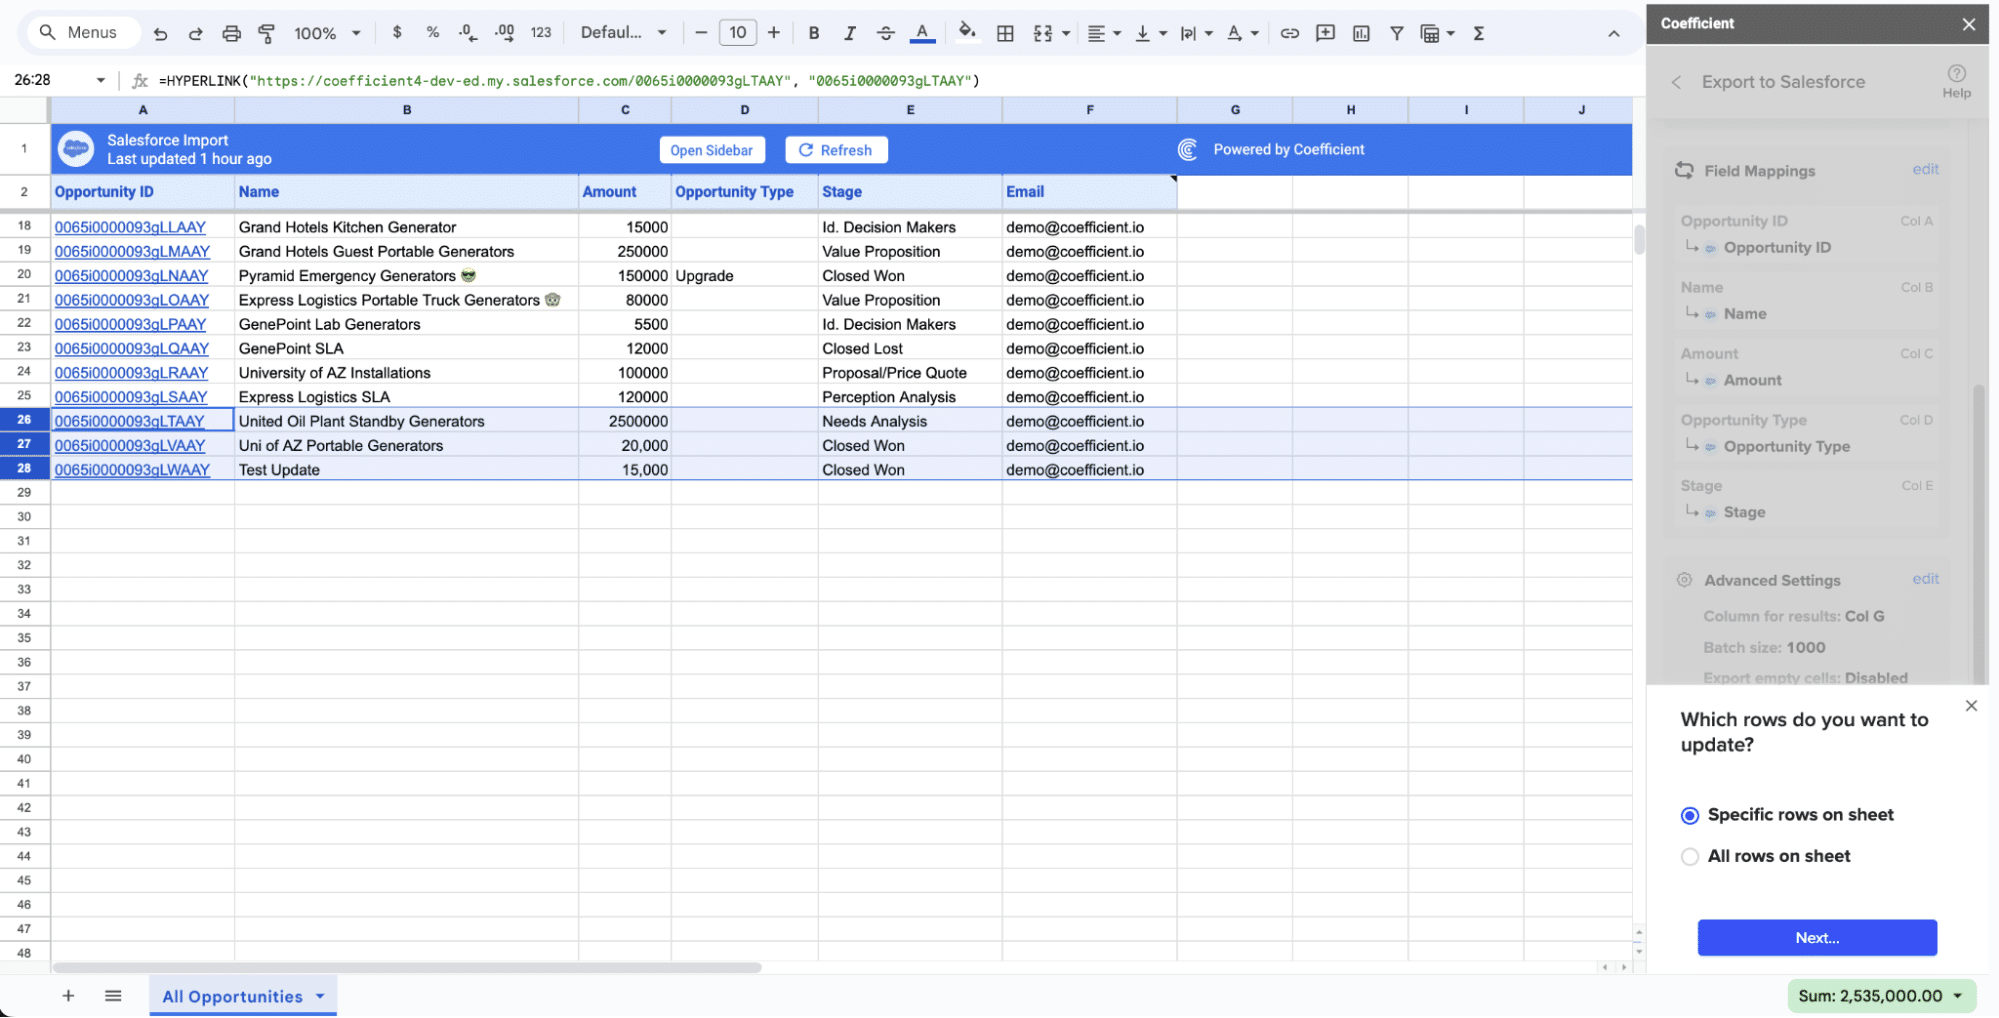
After you’re finished, review your settings and click “Export.”
Follow the prompts to confirm your changes.
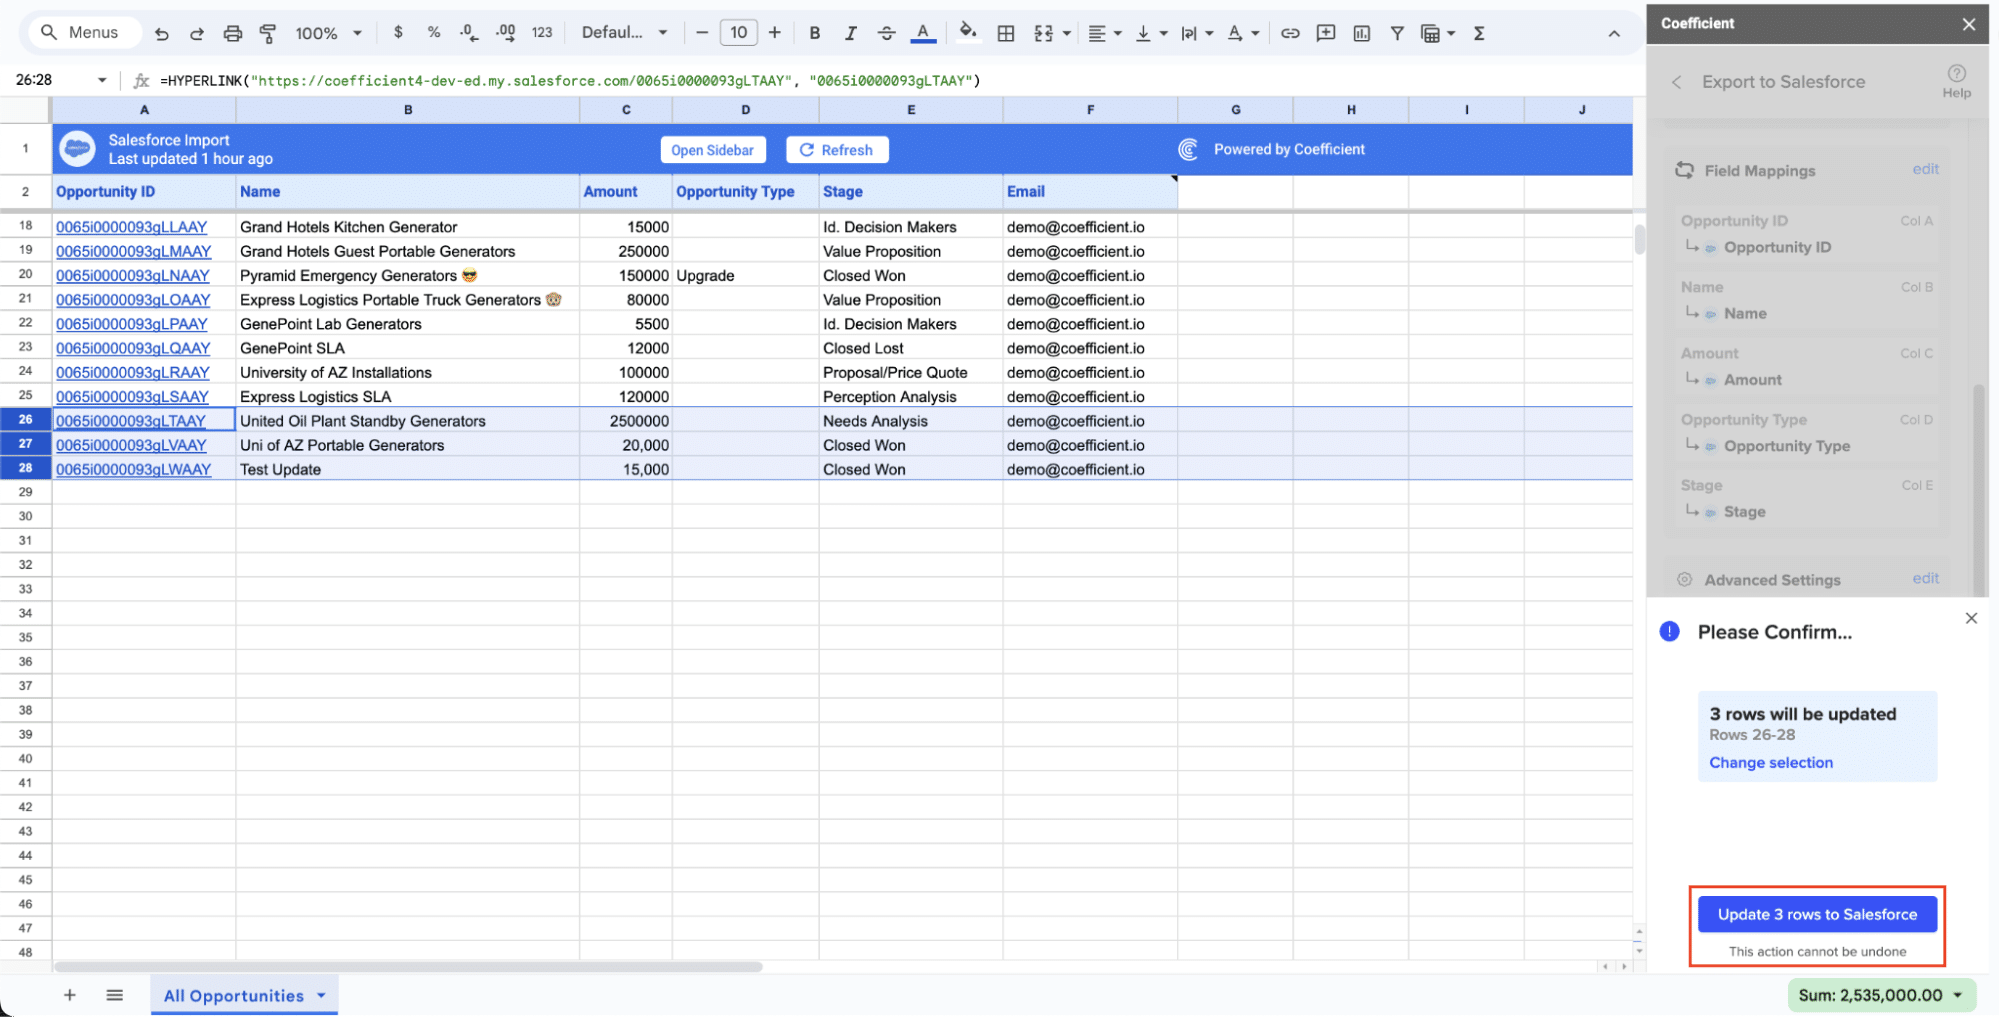
In a few seconds, data from your spreadsheet will push to Salesforce.
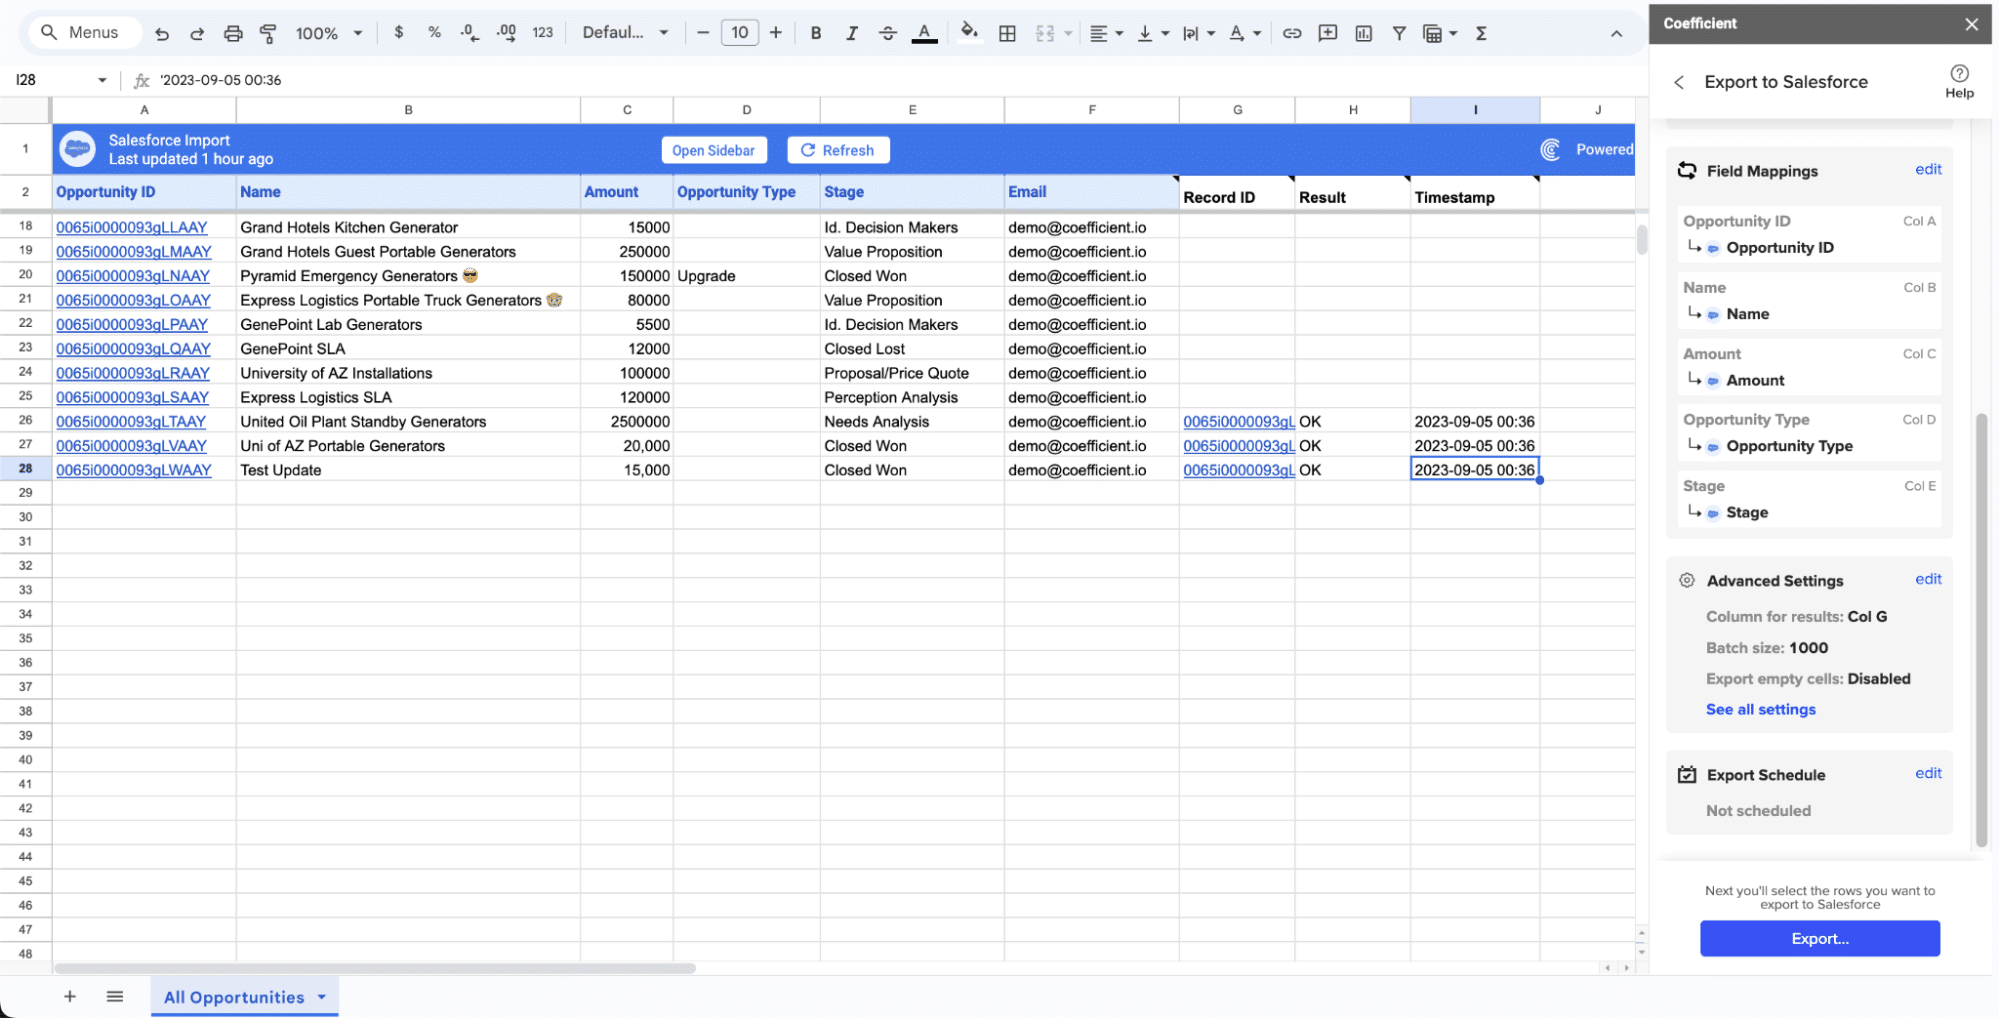
Your spreadsheet will display updated records, along with their export status and the date/time stamp of the update.
Method 2: Zapier – Codeless Automation
Zapier is a popular no-code platform for building automated workflows between web apps. It supports integrations with over 2,000 apps, including Razorpay and Salesforce.
Features of Zapier
- Simple, guided interface for building “Zaps”: Zapier provides an easy-to-use interface that guides users through creating automated workflows, known as Zaps.
- Highly customizable, multi-step Zaps: Users can create complex workflows that involve multiple steps and conditions, tailoring automations to their specific needs.
- No coding skills needed: Zapier’s platform is designed for users with no technical background, making it accessible for anyone to set up integrations.
Pros and Cons
Pros:
- Intuitive setup process for creating automations: Users can easily build and customize workflows with Zapier’s user-friendly interface.
- Flexibility to build workflows tailored to your exact needs: Zapier supports a wide range of triggers and actions, allowing for detailed and specific automations.
- Wide range of supported app integrations: With over 2,000 supported apps, Zapier can integrate with almost any tool you use.
Cons:
- Costs can add up if you have many complex automations: While Zapier offers free plans, extensive use and advanced features can quickly become expensive.
- Limited to the triggers and actions provided by Zapier: Users are confined to the predefined triggers and actions available in Zapier’s library, which may not cover all needs.
How to Connect Razorpay to Salesforce with Zapier
Step 1. Log in to your Zapier account:
Go to Zapier and log in. If you don’t have an account, sign up for one.
Step 2. Create a new Zap:
Click “Make a Zap” at the top right corner of the dashboard.
Step 3. Set Razorpay as the trigger app:
Search for and select Razorpay as your trigger app.

Stop exporting data manually. Sync data from your business systems into Google Sheets or Excel with Coefficient and set it on a refresh schedule.
Get Started
Choose the trigger event (e.g., “New Payment”).
Step 4. Connect your Razorpay account:
Follow the prompts to connect your Razorpay account to Zapier.
Test the connection to ensure it works correctly.
Step 5. Set Salesforce as the action app:
Search for and select Salesforce as your action app.
Choose the action event (e.g., “Create Record” or “Update Record”).
Step 6. Connect your Salesforce account:
Follow the prompts to connect your Salesforce account to Zapier.
Test the connection to ensure it works correctly.
Step 7. Map the data fields between Razorpay and Salesforce:
Zapier will guide you through mapping fields from Razorpay to the corresponding fields in Salesforce (e.g., map Razorpay payment amount to Salesforce Opportunity Amount).
Step 8. Test your Zap:
Run a test to make sure your Zap works as expected. Zapier will show you the test results.
Step 9. Turn on your Zap:
Once you’re satisfied with the setup, turn on your Zap to start automating the data flow between Razorpay and Salesforce.
Method 3: Dataloader.io – Bulk Data Transfers
For organizations dealing with high volumes of data, Dataloader.io is a powerful solution. It enables you to efficiently load large datasets between systems and schedule regular data syncs.
Features of Dataloader.io
- Excels at transferring big data: Dataloader.io is optimized for handling large datasets, making it ideal for bulk data operations.
- Simple, intuitive interface: The platform is designed to be user-friendly, allowing users to configure data loads without extensive technical knowledge.
- Supports scheduled data loads: Users can set up automated schedules for regular data imports and exports, ensuring that data stays up-to-date.
Pros and Cons
Pros:
- Handles large data volumes with ease: Efficiently manages extensive datasets without performance issues.
- Allows scheduling data imports/exports: Automates regular data transfers to keep your Salesforce data current.
- Straightforward to configure: User-friendly setup process simplifies the configuration of data loads.
Cons:
- Minimal options for transforming data: Limited capabilities for data transformation during transfer may require additional manual steps.
- Complex data tasks may require manual preparation: Some data tasks may necessitate manual preparation or cleaning before transfer.
Step-by-Step Guide to Connecting Razorpay to Salesforce with Dataloader.io
Step 1. Sign up for a Dataloader.io account:
Go to Dataloader.io and sign up for an account. Log in once your account is created.
Step 2. Create a new task:
Click “New Task” and select “Import” to create a new data import task.
Step 3. Connect to Razorpay:
Select Razorpay as the data source.
Enter your Razorpay API credentials to authenticate the connection.
Step 4. Select the data to import:
Choose the Razorpay data objects you want to import, such as payments, refunds, or orders.
Step 5. Schedule the task:
Set up a schedule if you want the task to run automatically at regular intervals (e.g., daily, weekly).
Step 6. Connect to Salesforce:
Select Salesforce as the destination for your data.
Enter your Salesforce credentials to authenticate the connection.
Step 7. Map the Razorpay fields to Salesforce fields:
Manually map each field from Razorpay to the corresponding field in Salesforce (e.g., map Razorpay payment ID to Salesforce Opportunity ID).
Step 8. Run the import:
Review your settings and mappings to ensure everything is correct.
Click “Run” to start the data import process.
Step 9. Monitor the task:
Use the Dataloader.io dashboard to monitor the progress of your task.
Check for any errors or discrepancies and make adjustments as necessary.
Connect Razorpay to Salesforce: No Code Required
Integrating your Razorpay and Salesforce accounts can drive major efficiency gains and uncover valuable insights for your business. By understanding the key benefits and exploring methods like Coefficient, Zapier, and Dataloader.io, you can find the best solution for your needs.
The no-code tools make it easy to implement your integration and start reaping the rewards, no matter your technical skills. Give one of these methods a try and see the impact it can have on your payment processing and customer data management.
Ready to get started? Try Coefficient for free and begin connecting Razorpay to Salesforce in minutes, with no code required.


