Using XLOOKUP across live HubSpot and Snowflake data in Google Sheets for CRM updates

Coefficient uniquely enables native spreadsheet functions like XLOOKUP on live external data sources. You can combine HubSpot and Snowflake data seamlessly using familiar formulas before updating your CRM.

This approach leverages the power of spreadsheet functions on real-time data, something impossible with traditional static exports.

Combine live data sources with XLOOKUP using Coefficient

The key advantage is applying familiar Excel functions to live, refreshing data. Your XLOOKUP formulas automatically recalculate when either data source updates, maintaining accuracy without manual intervention.

How to make it work

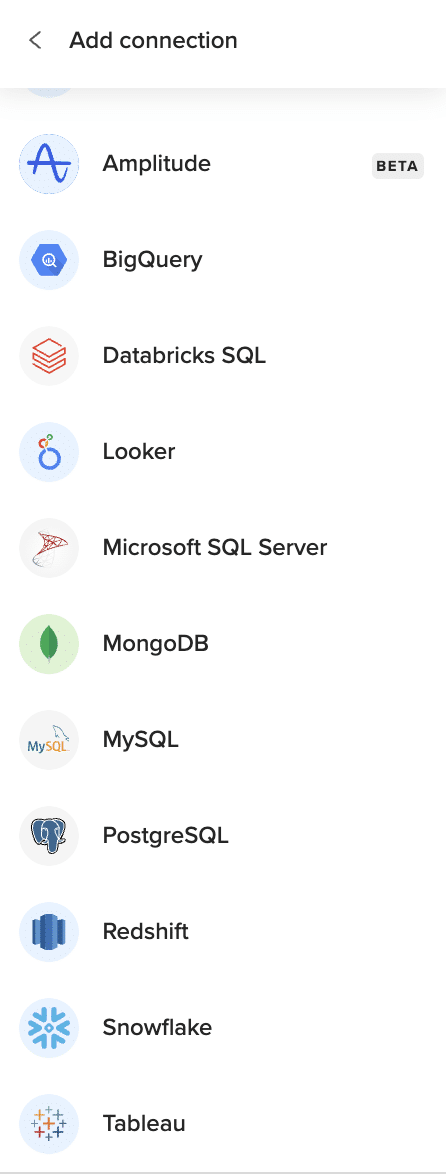
Step 1. Set up live data sources in separate tabs.

Import HubSpot contacts in one tab with columns like Email, Contact ID, and current properties. Import Snowflake app usage data in another tab with user_email, login_count, last_active, and feature_usage_score. Both connections refresh automatically on your chosen schedule.

Step 2. Create XLOOKUP formulas for data enrichment.

Use formulas like =XLOOKUP(A2, ‘Snowflake Data’!A:A, ‘Snowflake Data’!D:D, “No Usage Data”) to match HubSpot contact emails with Snowflake usage scores. The formula searches the Snowflake sheet for matching emails and returns the corresponding feature usage score.

Step 3. Build advanced lookup patterns.

Create multiple property lookups with =XLOOKUP(A2, ‘Snowflake Data’!A:A, ‘Snowflake Data’!B:E) to return entire rows of usage data. Use conditional enrichment like =IF(XLOOKUP(A2,’Snowflake Data’!A:A,’Snowflake Data’!C:C,0)>30, “Active”, “Inactive”) to create calculated properties based on usage thresholds.

Step 4. Enable automated formula management.

Turn on Coefficient’s Formula Auto Fill Down feature so new contacts automatically get XLOOKUP formulas applied. Formulas recalculate when either data source refreshes, eliminating manual formula copying and ensuring consistent enrichment logic.

Step 5. Export enriched data to HubSpot.

Select your enriched columns with XLOOKUP results and use Coefficient’s Export to HubSpot feature. Map calculated columns to HubSpot properties, review changes, and execute updates with one click.

Apply familiar formulas to live external data

XLOOKUP on live data combines the familiarity of spreadsheet functions with the power of real-time external connections. Your enrichment logic stays current automatically as both data sources refresh. Start using advanced formulas on live data today.

What is the best way to auto-refresh Google Sheets reports from Snowflake data daily without breaking existing formulas

Daily manual exports from Snowflake to Google Sheets create a frustrating cycle of broken formulas and “REF!” errors. Every time new data arrives, your carefully crafted calculations get destroyed.

Here’s how to set up automated daily refreshes that preserve all your custom formulas, formatting, and calculations while keeping your data current.

Schedule automated Snowflake refreshes with formula preservation using Coefficient

Coefficient provides automated data refresh scheduling with Formula Auto Fill Down technology that specifically addresses broken spreadsheets when new data arrives. You can set daily refreshes at specific times while ensuring formulas in adjacent columns automatically extend to new rows.

The platform’s unique approach preserves existing calculations, maintains custom formatting and conditional rules, and requires no manual intervention to fix broken references. This eliminates the daily manual export/import cycle and prevents common “REF!” errors when data ranges change.

How to make it work

Step 1. Connect to Snowflake and import your data.

Use Coefficient’s direct Snowflake connector to build your query using the AI SQL Builder or select from existing views. Import the data to your desired sheet location.

Step 2. Add formulas in columns immediately to the right of imported data.

Place your custom calculations, running totals, or conditional formulas in the columns adjacent to your Snowflake data. This positioning is crucial for the auto-fill functionality to work properly.

Step 3. Enable Formula Auto Fill Down in advanced settings.

Turn on the “Auto Fill Down” feature in your import’s advanced settings. This ensures formulas automatically extend to new rows during each refresh without manual intervention.

Step 4. Schedule your daily refresh.

Set your refresh to run daily at specific times like 9:00 AM before morning meetings. You can also configure Slack or email alerts when refreshes complete, all based on your timezone.

Step 5. Set up dynamic filtering for flexible reporting.

Use dynamic filters that reference cell values for flexible reporting without editing import settings. This allows for multiple import management from a single interface.

Build reliable automated reporting workflows

This approach transforms static, manually-updated reports into live, automated dashboards that business users can trust for real-time decision making. You get true “set it and forget it” reporting automation without the fear of breaking carefully crafted spreadsheet formulas.

Ready to eliminate manual data exports and preserve your spreadsheet logic? Start building automated Snowflake reports with Coefficient today.

How to Import Tables Data from Snowflake into Google Sheets

Accessing your Snowflake Tables data directly in Google Sheets is essential for flexible analysis, custom reporting, and sharing insights with your team.

Instead of manual exports, you can set up a live connection that keeps your spreadsheet updated automatically.

This guide shows you how to import your Snowflake Tables data into Google Sheets using Coefficient.

TLDR

  • Step 1:

    Step 1. Install Coefficient from the Google Workspace Marketplace and connect to your Snowflake account.

  • Step 2:

    Step 2. Select Import from… and choose Snowflake, then select the Tables object.

  • Step 3:

    Step 3. Configure your import settings and pull the data into your Google Sheet.

  • Step 4:

    Step 4. Set up auto-refresh to keep your Tables data updated automatically on your preferred schedule.

Coefficient sidebar menu with import, export, automations, and AI Sheet Assistant options.

Step 1: Install and Connect Coefficient

First, you need to get Coefficient for Google Sheets.

  • Open Google Sheets.
  • Go to Extensions > Add-ons > Get add-ons.
  • Search for “Coefficient” and install it from the Google Workspace Marketplace.

Once installed, open the Coefficient add-on from Extensions > Coefficient > Launch.

In the Coefficient sidebar, click “Import from…” and find Snowflake in the list of connectors. You’ll be guided to connect your Snowflake account securely.

List of data and BI connectors including BigQuery, Snowflake, Tableau, and more.

Step 2: Import Snowflake Tables Data

After connecting, you’ll see options for importing data from Snowflake.

  • Select the “Tables” object from the available options.
  • Choose the specific tables you want to import.
  • You can apply filters, select specific columns, and preview the data before importing.
  • Click “Import” to pull the data into your active Google Sheet tab.
Auto-refresh options for imported data with daily, hourly, and weekly scheduling.

Step 3: Set Up Auto-Refresh (Optional)

To keep your Snowflake Tables data current, set up an automatic refresh schedule.

  • In the Coefficient sidebar, find your imported data.
  • Click the “Refresh” button or the three-dot menu next to your import.
  • Select “Schedule Refresh”.
  • Choose your desired frequency (e.g., daily, hourly, weekly) and time.

Coefficient will now automatically update your sheet with the latest data from Snowflake based on your schedule.

Available Snowflake Objects

  • Columns
  • SQL

How to Import Columns Data from Snowflake into Google Sheets

Accessing your Snowflake Columns data directly in Google Sheets is essential for flexible analysis, custom reporting, and sharing insights with your team.

Instead of manual exports, you can set up a live connection that keeps your spreadsheet updated automatically.

This guide shows you how to import your Snowflake Columns data into Google Sheets using Coefficient.

TLDR

  • Step 1:

    Step 1. Install Coefficient from the Google Workspace Marketplace and connect to your Snowflake account.

  • Step 2:

    Step 2. Select Import from… and choose Snowflake, then select the Columns object.

  • Step 3:

    Step 3. Configure your import settings and pull the data into your Google Sheet.

  • Step 4:

    Step 4. Set up auto-refresh to keep your Columns data updated automatically on your preferred schedule.

Coefficient sidebar menu with import, export, automations, and AI Sheet Assistant options.

Step 1: Install and Connect Coefficient

First, you need to get Coefficient for Google Sheets.

  • Open Google Sheets.
  • Go to Extensions > Add-ons > Get add-ons.
  • Search for “Coefficient” and install it from the Google Workspace Marketplace.

Once installed, open the Coefficient add-on from Extensions > Coefficient > Launch.

In the Coefficient sidebar, click “Import from…” and find Snowflake in the list of connectors. You’ll be guided to connect your Snowflake account securely.

List of data and BI connectors including BigQuery, Snowflake, Tableau, and more.

Step 2: Import Snowflake Columns Data

After connecting, you’ll see options for importing data from Snowflake.

  • Select the “Columns” object from the available options.
  • Choose the specific columns you want to import.
  • You can apply filters, select specific columns, and preview the data before importing.
  • Click “Import” to pull the data into your active Google Sheet tab.
Auto-refresh options for imported data with daily, hourly, and weekly scheduling.

Step 3: Set Up Auto-Refresh (Optional)

To keep your Snowflake Columns data current, set up an automatic refresh schedule.

In the Coefficient sidebar, find your imported data.

  • Click the “Refresh” button or the three-dot menu next to your import.
  • Select “Schedule Refresh”.
  • Choose your desired frequency (e.g., daily, hourly, weekly) and time.

Coefficient will now automatically update your sheet with the latest data from Snowflake based on your schedule.

Available Snowflake Objects

  • Columns
  • SQL

How to Import SQL Data from Snowflake into Google Sheets

Accessing your Snowflake SQL query results directly in Google Sheets is essential for flexible analysis, custom reporting, and sharing insights with your team.

Instead of manual exports, you can set up a live connection that keeps your spreadsheet updated automatically.

This guide shows you how to import your Snowflake SQL data into Google Sheets using Coefficient.

TLDR

  • Step 1:

    Step 1. Install Coefficient from the Google Workspace Marketplace and connect to your Snowflake account.

  • Step 2:

    Step 2. Select Import from… and choose Snowflake, then select the SQL object.

  • Step 3:

    Step 3. Enter your SQL query, configure settings, and pull the data into your Google Sheet.

  • Step 4:

    Step 4. Set up auto-refresh to keep your SQL query results updated automatically on your preferred schedule.

Coefficient sidebar menu with import, export, automations, and AI Sheet Assistant options.

Step 1: Install and Connect Coefficient

First, you need to get Coefficient for Google Sheets.

  • Open Google Sheets.
  • Go to Extensions > Add-ons > Get add-ons.
  • Search for “Coefficient” and install it from the Google Workspace Marketplace.

Once installed, open the Coefficient add-on from Extensions > Coefficient > Launch.

In the Coefficient sidebar, click “Import from…” and find Snowflake in the list of connectors. You’ll be guided to connect your Snowflake account securely.

List of data and BI connectors including BigQuery, Snowflake, Tableau, and more.

Step 2: Import Snowflake SQL Data

After connecting, you’ll see options for importing data from Snowflake.

  • Select the “SQL” object from the available options.
  • Enter your custom SQL query in the provided editor.
  • You can apply filters, select specific columns, and preview the data before importing.
  • Click “Import” to pull the query results into your active Google Sheet tab.
Auto-refresh options for imported data with daily, hourly, and weekly scheduling.

Step 3: Set Up Auto-Refresh (Optional)

To keep your Snowflake SQL query results current, set up an automatic refresh schedule.

In the Coefficient sidebar, find your imported data.

  • Click the “Refresh” button or the three-dot menu next to your import.
  • Select “Schedule Refresh”.
  • Choose your desired frequency (e.g., daily, hourly, weekly) and time.

Coefficient will now automatically update your sheet with the latest data from Snowflake based on your schedule.

Available Snowflake Objects

  • Columns
  • SQL

How to Import Columns Data from Snowflake into Excel

Getting your Snowflake Columns data into Excel helps you understand your database schema and data structures. Coefficient connects Snowflake directly to your spreadsheet.

This guide walks you through importing your Snowflake Columns data into Excel using Coefficient.

TLDR

  • Step 1:

    Step 1. Install Coefficient for Excel and connect your Snowflake account.

  • Step 2:

    Step 2. Choose Import from… and select the Columns object.

  • Step 3:

    Step 3. Apply any necessary filters and import the data to your sheet.

  • Step 4:

    Step 4. Set up an auto-refresh schedule to keep the data current.

Step-by-step guide

Follow these steps to bring your Snowflake Columns data into Excel.

Step 1: Install and Connect Coefficient

To start, install the Coefficient add-in in Excel. Go to the Insert tab, click “Get Add-ins,” search for Coefficient, and install it from the store.

Open the Coefficient add-in from the Home tab. Select Snowflake when prompted to connect a data source.

Log in to your Snowflake account and authorize Coefficient to access your data.

Coefficient sidebar menu with import, export, automations, and AI Sheet Assistant options.

Step 2: Import Columns Data

With Snowflake connected, click “Import from…” in the Coefficient sidebar.

Select Snowflake, then choose “Columns” from the list of objects to import.

You can select specific column fields or filter the data as needed before clicking “Import” to bring it into your Excel sheet.

List of data and BI connectors including BigQuery, Snowflake, Tableau, and more.

Step 3: Set Up Auto-Refresh (Optional)

Keep your Columns data in Excel automatically updated by setting up auto-refresh. Find the auto-refresh settings in the Coefficient sidebar after importing.

Schedule refreshes hourly, daily, or weekly. Your Excel sheet will then automatically sync with the latest column information from Snowflake.

Auto-refresh options for imported data with daily, hourly, and weekly scheduling.

Available Snowflake Objects

  • Columns
  • SQL

How to Import SQL Data from Snowflake into Excel

Importing data from Snowflake using SQL queries into Excel gives you flexibility for custom reports. Coefficient makes running SQL and getting results into your spreadsheet easy.

This guide shows you how to import your Snowflake SQL data into Excel using Coefficient.

TLDR

  • Step 1:

    Step 1. Install Coefficient for Excel and connect to your Snowflake account.

  • Step 2:

    Step 2. Select Import from… and choose the SQL option.

  • Step 3:

    Step 3. Write or paste your SQL query and import the results into your Excel sheet.

  • Step 4:

    Step 4. Set up auto-refresh to keep your query results automatically updated.

Step-by-step guide

Here is how to get your Snowflake SQL data into Excel.

Step 1: Install and Connect Coefficient

First, install the Coefficient add-in. In Excel, go to the Insert tab, click “Get Add-ins,” search for Coefficient, and install it from the store.

Open the Coefficient add-in from the Home tab. When asked to connect a data source, select Snowflake.

Log in to your Snowflake account and grant Coefficient access to your data.

Coefficient sidebar menu with import, export, automations, and AI Sheet Assistant options.

Step 2: Import SQL Data

With Snowflake connected, click “Import from…” in the Coefficient sidebar.

Select Snowflake as your source. Then, choose “SQL” from the list of available import options.

Write or paste your SQL query into the Coefficient interface. Configure any options needed, then click “Import” to add the query results to your Excel sheet.

List of data and BI connectors including BigQuery, Snowflake, Tableau, and more.

Step 3: Set Up Auto-Refresh (Optional)

Keep your SQL query results in Excel automatically updated. After importing, find the auto-refresh options in the Coefficient sidebar.

Schedule refreshes hourly, daily, or weekly. Your Excel sheet will then sync automatically by re-running your SQL query in Snowflake.

Auto-refresh options for imported data with daily, hourly, and weekly scheduling.

Available Snowflake Objects

  • Columns
  • SQL

How to Import Tables Data from Snowflake into Excel

Accessing your Snowflake Tables data in Excel allows for straightforward data analysis without complex tools. Coefficient connects Snowflake directly to your spreadsheet.

This guide shows you how to import your Snowflake Tables data into Excel using Coefficient.

TLDR

  • Step 1:

    Step 1. Install Coefficient for Excel and connect to your Snowflake account.

  • Step 2:

    Step 2. Select Import from… and choose the Tables object.

  • Step 3:

    Step 3. Configure filters or select fields as needed and import into your Excel sheet.

  • Step 4:

    Step 4. Set up auto-refresh to keep your table data automatically updated.

Step-by-step guide

Follow these steps to bring your Snowflake Tables data into Excel.

Step 1: Install and Connect Coefficient

First, install Coefficient for Excel. Go to the Insert tab, click “Get Add-ins,” search for Coefficient, and install it from the store.

Open the Coefficient add-in from the Home tab. Select Snowflake when prompted to connect a data source.

Log in to your Snowflake account and authorize Coefficient to access your data.

Coefficient sidebar menu with import, export, automations, and AI Sheet Assistant options.

Step 2: Import Tables Data

With Snowflake connected, click “Import from…” in the Coefficient sidebar.

Select Snowflake as your source. Then, choose “Tables” from the list of available objects to import.

You can refine the data by selecting specific fields or applying filters before clicking “Import” to add it to your Excel sheet.

List of data and BI connectors including BigQuery, Snowflake, Tableau, and more.

Step 3: Set Up Auto-Refresh (Optional)

Keep your Tables data in Excel automatically updated. After importing, find the auto-refresh options in the Coefficient sidebar.

Schedule refreshes hourly, daily, or weekly. Your Excel sheet will then sync automatically with the latest table information from Snowflake.

Auto-refresh options for imported data with daily, hourly, and weekly scheduling.

Available Snowflake Objects

  • Columns
  • SQL