Importing Docs data from ClickUp into Google Sheets helps teams track document usage and manage content more efficiently. Coefficient creates a seamless connection that keeps your docs data fresh and actionable.
This guide will show you how to import your ClickUp Docs data into Google Sheets quickly and efficiently.
TLDR
-
Step 1:
Step 1. Open Google Sheets > Extensions > Add-ons > Get add-ons > Install Coefficient from Google Workspace Marketplace.
-
Step 2:
Step 2. Connect your ClickUp account and select the Docs object to import.
-
Step 3:
Step 3. (Optional) Enable auto-refresh to keep your docs data updated automatically.
Step-by-Step Guide to Import ClickUp Docs Data
Step 1: Install and Connect Coefficient
Begin by installing the Coefficient add-on for Google Sheets and connecting to your ClickUp account:
- Open your Google Sheet
- Click on Extensions > Add-ons > Get add-ons
- Search for “Coefficient” and install from Google Workspace Marketplace
- Once installed, open the Coefficient sidebar by clicking Extensions > Coefficient > Launch
- In the sidebar, click “Import Data”

Step 2: Select ClickUp and Import Docs Data
Next, select ClickUp from the available connectors and import your Docs data:
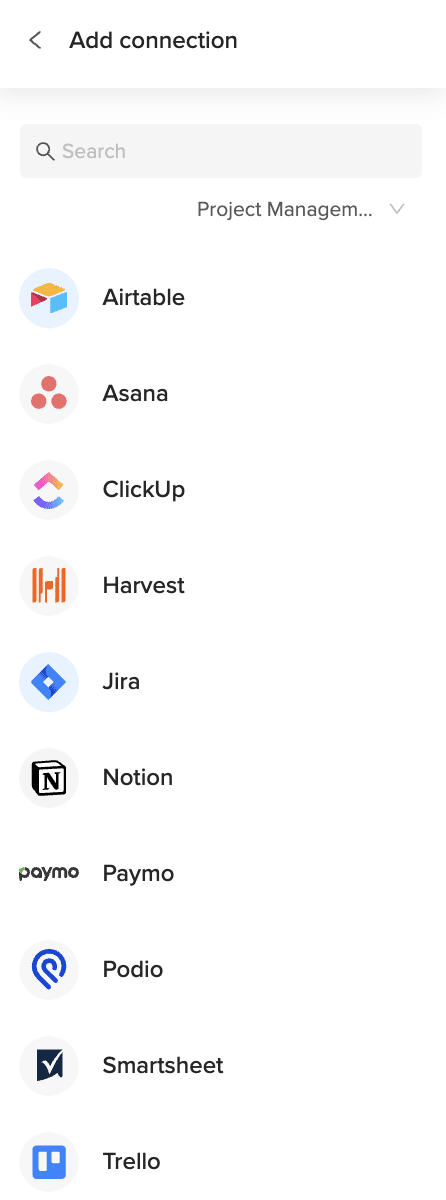
- In the Import section, look for ClickUp under “Project Management” integrations
- Click on ClickUp and authorize the connection
- Select “Docs” from the list of available objects
- Choose the docs fields you want to import (like title, status, author, last edited, etc.)
- Apply any filters if needed (such as specific folders or spaces)
- Click “Import” to bring the docs data into your spreadsheet
Step 3: Set Up Auto-Refresh (Optional)
Keep your ClickUp Docs data up to date by setting up automatic refreshes:
- After importing your data, click on the Coefficient menu in your sheet
- Select the imported ClickUp docs data
- Click on “Refresh settings”
- Choose your preferred schedule (hourly, daily, or weekly)
- Confirm your settings to enable auto-refresh

Available ClickUp Objects
- Authorization
- Attachments
- Comments
- Custom Task Types
- Custom Fields
- Docs
- Folders
- Goals
- Guests
- Lists
- Members
- Roles
How to Import Custom Fields Data from ClickUp into Google Sheets
Importing Custom Fields data from ClickUp into Google Sheets helps teams track field configurations and ensure data consistency across projects. Coefficient creates a seamless connection that keeps your custom fields data fresh and accessible.
This guide will show you how to import your ClickUp Custom Fields data into Google Sheets quickly and efficiently.
TLDR
-
Step 1:
Step 1. Open Google Sheets > Extensions > Add-ons > Get add-ons > Install Coefficient from Google Workspace Marketplace.
-
Step 2:
Step 2. Connect your ClickUp account and select the Custom Fields object to import.
-
Step 3:
Step 3. (Optional) Enable auto-refresh to keep your custom fields data updated automatically.
Step-by-Step Guide to Import ClickUp Custom Fields Data
Step 1: Install and Connect Coefficient
Begin by installing the Coefficient add-on for Google Sheets and connecting to your ClickUp account:
- Open your Google Sheet
- Click on Extensions > Add-ons > Get add-ons
- Search for “Coefficient” and install from Google Workspace Marketplace
- Once installed, open the Coefficient sidebar by clicking Extensions > Coefficient > Launch
- In the sidebar, click “Import Data”
Step 2: Select ClickUp and Import Custom Fields Data
Next, select ClickUp from the available connectors and import your Custom Fields data:
- In the Import section, look for ClickUp under “Project Management” integrations
- Click on ClickUp and authorize the connection
- Select “Custom Fields” from the list of available objects
- Choose the custom field properties you want to import (like name, type, options, etc.)
- Apply any filters if needed (such as specific spaces or lists)
- Click “Import” to bring the custom fields data into your spreadsheet
Step 3: Set Up Auto-Refresh (Optional)
Keep your ClickUp Custom Fields data up to date by setting up automatic refreshes:
- After importing your data, click on the Coefficient menu in your sheet
- Select the imported ClickUp custom fields data
- Click on “Refresh settings”
- Choose your preferred schedule (hourly, daily, or weekly)
- Confirm your settings to enable auto-refresh
Available ClickUp Objects
- Authorization
- Attachments
- Comments
- Custom Task Types
- Custom Fields
- Docs
- Folders
- Goals
- Guests
- Lists
- Members
- Roles
How to Import Comments Data from ClickUp into Google Sheets
Importing Comments data from ClickUp into Google Sheets helps teams track communication patterns and analyze feedback across tasks. Coefficient creates a seamless connection that keeps your comments data fresh and accessible.
This guide will show you how to import your ClickUp Comments data into Google Sheets quickly and efficiently.
TLDR
-
Step 1:
Step 1. Open Google Sheets > Extensions > Add-ons > Get add-ons > Install Coefficient from Google Workspace Marketplace.
-
Step 2:
Step 2. Connect your ClickUp account and select the Comments object to import.
-
Step 3:
Step 3. (Optional) Enable auto-refresh to keep your comments data updated automatically.
Step-by-Step Guide to Import ClickUp Comments Data
Step 1: Install and Connect Coefficient
Begin by installing the Coefficient add-on for Google Sheets and connecting to your ClickUp account:
- Open your Google Sheet
- Click on Extensions > Add-ons > Get add-ons
- Search for “Coefficient” and install from Google Workspace Marketplace
- Once installed, open the Coefficient sidebar by clicking Extensions > Coefficient > Launch
- In the sidebar, click “Import Data”
Step 2: Select ClickUp and Import Comments Data
Next, select ClickUp from the available connectors and import your Comments data:
- In the Import section, look for ClickUp under “Project Management” integrations
- Click on ClickUp and authorize the connection
- Select “Comments” from the list of available objects
- Choose the comment fields you want to import (like text, task, user, created date, etc.)
- Apply any filters if needed (such as specific tasks or date ranges)
- Click “Import” to bring the comments data into your spreadsheet
Step 3: Set Up Auto-Refresh (Optional)
Keep your ClickUp Comments data up to date by setting up automatic refreshes:
- After importing your data, click on the Coefficient menu in your sheet
- Select the imported ClickUp comments data
- Click on “Refresh settings”
- Choose your preferred schedule (hourly, daily, or weekly)
- Confirm your settings to enable auto-refresh
Available ClickUp Objects
- Authorization
- Attachments
- Comments
- Custom Task Types
- Custom Fields
- Docs
- Folders
- Goals
- Guests
- Lists
- Members
- Roles
How to Import Views Data from ClickUp into Google Sheets
Importing Views data from ClickUp into Google Sheets helps teams track visualization preferences and manage workflow configurations. Coefficient creates a seamless connection that keeps your views data fresh and accessible.
This guide will show you how to import your ClickUp Views data into Google Sheets quickly and efficiently.
TLDR
-
Step 1:
Step 1. Open Google Sheets > Extensions > Add-ons > Get add-ons > Install Coefficient from Google Workspace Marketplace.
-
Step 2:
Step 2. Connect your ClickUp account and select the Views object to import.
-
Step 3:
Step 3. (Optional) Enable auto-refresh to keep your views data updated automatically.
Step-by-Step Guide to Import ClickUp Views Data
Step 1: Install and Connect Coefficient
Begin by installing the Coefficient add-on for Google Sheets and connecting to your ClickUp account:
- Open your Google Sheet
- Click on Extensions > Add-ons > Get add-ons
- Search for “Coefficient” and install from Google Workspace Marketplace
- Once installed, open the Coefficient sidebar by clicking Extensions > Coefficient > Launch
- In the sidebar, click “Import Data”
Step 2: Select ClickUp and Import Views Data
Next, select ClickUp from the available connectors and import your Views data:
- In the Import section, look for ClickUp under “Project Management” integrations
- Click on ClickUp and authorize the connection
- Select “Views” from the list of available objects
- Choose the view fields you want to import (like name, type, list, filters, etc.)
- Apply any filters if needed (such as specific lists or view types)
- Click “Import” to bring the views data into your spreadsheet
Step 3: Set Up Auto-Refresh (Optional)
Keep your ClickUp Views data up to date by setting up automatic refreshes:
- After importing your data, click on the Coefficient menu in your sheet
- Select the imported ClickUp views data
- Click on “Refresh settings”
- Choose your preferred schedule (hourly, daily, or weekly)
- Confirm your settings to enable auto-refresh
Available ClickUp Objects
- Authorization
- Attachments
- Comments
- Custom Task Types
- Custom Fields
- Docs
- Folders
- Goals
- Guests
- Lists
- Members
- Roles
How to Import Workspaces Data from ClickUp into Google Sheets
Importing Workspaces data from ClickUp into Google Sheets helps administrators track organizational structure and manage workspace settings. Coefficient creates a seamless connection that keeps your workspaces data fresh and accessible.
This guide will show you how to import your ClickUp Workspaces data into Google Sheets quickly and efficiently.
TLDR
-
Step 1:
Step 1. Open Google Sheets > Extensions > Add-ons > Get add-ons > Install Coefficient from Google Workspace Marketplace.
-
Step 2:
Step 2. Connect your ClickUp account and select the Workspaces object to import.
-
Step 3:
Step 3. (Optional) Enable auto-refresh to keep your workspaces data updated automatically.
Step-by-Step Guide to Import ClickUp Workspaces Data
Step 1: Install and Connect Coefficient
Begin by installing the Coefficient add-on for Google Sheets and connecting to your ClickUp account:
- Open your Google Sheet
- Click on Extensions > Add-ons > Get add-ons
- Search for “Coefficient” and install from Google Workspace Marketplace
- Once installed, open the Coefficient sidebar by clicking Extensions > Coefficient > Launch
- In the sidebar, click “Import Data”
Step 2: Select ClickUp and Import Workspaces Data
Next, select ClickUp from the available connectors and import your Workspaces data:
- In the Import section, look for ClickUp under “Project Management” integrations
- Click on ClickUp and authorize the connection
- Select “Workspaces” from the list of available objects
- Choose the workspace fields you want to import (like name, members, settings, etc.)
- Apply any filters if needed
- Click “Import” to bring the workspaces data into your spreadsheet
Step 3: Set Up Auto-Refresh (Optional)
Keep your ClickUp Workspaces data up to date by setting up automatic refreshes:
- After importing your data, click on the Coefficient menu in your sheet
- Select the imported ClickUp workspaces data
- Click on “Refresh settings”
- Choose your preferred schedule (hourly, daily, or weekly)
- Confirm your settings to enable auto-refresh
Available ClickUp Objects
- Authorization
- Attachments
- Comments
- Custom Task Types
- Custom Fields
- Docs
- Folders
- Goals
- Guests
- Lists
- Members
- Roles
How to Import Users Data from ClickUp into Google Sheets
Importing Users data from ClickUp into Google Sheets helps teams track membership, monitor permissions, and analyze user activity patterns. Coefficient creates a seamless connection that keeps your user data fresh and accessible.
This guide will show you how to import your ClickUp Users data into Google Sheets quickly and efficiently.
TLDR
-
Step 1:
Step 1. Open Google Sheets > Extensions > Add-ons > Get add-ons > Install Coefficient from Google Workspace Marketplace.
-
Step 2:
Step 2. Connect your ClickUp account and select the Users object to import.
-
Step 3:
Step 3. (Optional) Enable auto-refresh to keep your users data updated automatically.
Step-by-Step Guide to Import ClickUp Users Data
Step 1: Install and Connect Coefficient
Begin by installing the Coefficient add-on for Google Sheets and connecting to your ClickUp account:
- Open your Google Sheet
- Click on Extensions > Add-ons > Get add-ons
- Search for “Coefficient” and install from Google Workspace Marketplace
- Once installed, open the Coefficient sidebar by clicking Extensions > Coefficient > Launch
- In the sidebar, click “Import Data”
Step 2: Select ClickUp and Import Users Data
Next, select ClickUp from the available connectors and import your Users data:
- In the Import section, look for ClickUp under “Project Management” integrations
- Click on ClickUp and authorize the connection
- Select “Users” from the list of available objects
- Choose the user fields you want to import (like username, email, role, workspaces, etc.)
- Apply any filters if needed
- Click “Import” to bring the users data into your spreadsheet
Step 3: Set Up Auto-Refresh (Optional)
Keep your ClickUp Users data up to date by setting up automatic refreshes:
- After importing your data, click on the Coefficient menu in your sheet
- Select the imported ClickUp users data
- Click on “Refresh settings”
- Choose your preferred schedule (hourly, daily, or weekly)
- Confirm your settings to enable auto-refresh
Available ClickUp Objects
- Authorization
- Attachments
- Comments
- Custom Task Types
- Custom Fields
- Docs
- Folders
- Goals
- Guests
- Lists
- Members
- Roles
How to Import Workspaces Data from ClickUp into Google Sheets
Importing Workspaces data from ClickUp into Google Sheets helps administrators track organizational structure and manage workspace settings. Coefficient creates a seamless connection that keeps your workspaces data fresh and accessible.
This guide will show you how to import your ClickUp Workspaces data into Google Sheets quickly and efficiently.
TLDR
-
Step 1:
Step 1. Open Google Sheets > Extensions > Add-ons > Get add-ons > Install Coefficient from Google Workspace Marketplace.
-
Step 2:
Step 2. Connect your ClickUp account and select the Workspaces object to import.
-
Step 3:
Step 3. (Optional) Enable auto-refresh to keep your workspaces data updated automatically.
Step-by-Step Guide to Import ClickUp Workspaces Data
Step 1: Install and Connect Coefficient
Begin by installing the Coefficient add-on for Google Sheets and connecting to your ClickUp account:
- Open your Google Sheet
- Click on Extensions > Add-ons > Get add-ons
- Search for “Coefficient” and install from Google Workspace Marketplace
- Once installed, open the Coefficient sidebar by clicking Extensions > Coefficient > Launch
- In the sidebar, click “Import Data”
Step 2: Select ClickUp and Import Workspaces Data
Next, select ClickUp from the available connectors and import your Workspaces data:
- In the Import section, look for ClickUp under “Project Management” integrations
- Click on ClickUp and authorize the connection
- Select “Workspaces” from the list of available objects
- Choose the workspace fields you want to import (like name, members, settings, etc.)
- Apply any filters if needed
- Click “Import” to bring the workspaces data into your spreadsheet
Step 3: Set Up Auto-Refresh (Optional)
Keep your ClickUp Workspaces data up to date by setting up automatic refreshes:
- After importing your data, click on the Coefficient menu in your sheet
- Select the imported ClickUp workspaces data
- Click on “Refresh settings”
- Choose your preferred schedule (hourly, daily, or weekly)
- Confirm your settings to enable auto-refresh
Available ClickUp Objects
- Authorization
- Attachments
- Comments
- Custom Task Types
- Custom Fields
- Docs
- Folders
- Goals
- Guests
- Lists
- Members
- Roles
How to Import Views Data from ClickUp into Google Sheets
Importing Views data from ClickUp into Google Sheets helps teams track visualization preferences and manage workflow configurations. Coefficient creates a seamless connection that keeps your views data fresh and accessible.
This guide will show you how to import your ClickUp Views data into Google Sheets quickly and efficiently.
TLDR
-
Step 1:
Step 1. Open Google Sheets > Extensions > Add-ons > Get add-ons > Install Coefficient from Google Workspace Marketplace.
-
Step 2:
Step 2. Connect your ClickUp account and select the Views object to import.
-
Step 3:
Step 3. (Optional) Enable auto-refresh to keep your views data updated automatically.
Step-by-Step Guide to Import ClickUp Views Data
Step 1: Install and Connect Coefficient
Begin by installing the Coefficient add-on for Google Sheets and connecting to your ClickUp account:
- Open your Google Sheet
- Click on Extensions > Add-ons > Get add-ons
- Search for “Coefficient” and install from Google Workspace Marketplace
- Once installed, open the Coefficient sidebar by clicking Extensions > Coefficient > Launch
- In the sidebar, click “Import Data”
Step 2: Select ClickUp and Import Views Data
Next, select ClickUp from the available connectors and import your Views data:
- In the Import section, look for ClickUp under “Project Management” integrations
- Click on ClickUp and authorize the connection
- Select “Views” from the list of available objects
- Choose the view fields you want to import (like name, type, list, filters, etc.)
- Apply any filters if needed (such as specific lists or view types)
- Click “Import” to bring the views data into your spreadsheet
Step 3: Set Up Auto-Refresh (Optional)
Keep your ClickUp Views data up to date by setting up automatic refreshes:
- After importing your data, click on the Coefficient menu in your sheet
- Select the imported ClickUp views data
- Click on “Refresh settings”
- Choose your preferred schedule (hourly, daily, or weekly)
- Confirm your settings to enable auto-refresh
Available ClickUp Objects
- Authorization
- Attachments
- Comments
- Custom Task Types
- Custom Fields
- Docs
- Folders
- Goals
- Guests
- Lists
- Members
- Roles
How to Import Users Data from ClickUp into Google Sheets
Importing Users data from ClickUp into Google Sheets helps teams track membership, monitor permissions, and analyze user activity patterns. Coefficient creates a seamless connection that keeps your user data fresh and accessible.
This guide will show you how to import your ClickUp Users data into Google Sheets quickly and efficiently.
TLDR
-
Step 1:
Step 1. Open Google Sheets > Extensions > Add-ons > Get add-ons > Install Coefficient from Google Workspace Marketplace.
-
Step 2:
Step 2. Connect your ClickUp account and select the Users object to import.
-
Step 3:
Step 3. (Optional) Enable auto-refresh to keep your users data updated automatically.
Step-by-Step Guide to Import ClickUp Users Data
Step 1: Install and Connect Coefficient
Begin by installing the Coefficient add-on for Google Sheets and connecting to your ClickUp account:
- Open your Google Sheet
- Click on Extensions > Add-ons > Get add-ons
- Search for “Coefficient” and install from Google Workspace Marketplace
- Once installed, open the Coefficient sidebar by clicking Extensions > Coefficient > Launch
- In the sidebar, click “Import Data”
Step 2: Select ClickUp and Import Users Data
Next, select ClickUp from the available connectors and import your Users data:
- In the Import section, look for ClickUp under “Project Management” integrations
- Click on ClickUp and authorize the connection
- Select “Users” from the list of available objects
- Choose the user fields you want to import (like username, email, role, workspaces, etc.)
- Apply any filters if needed
- Click “Import” to bring the users data into your spreadsheet
Step 3: Set Up Auto-Refresh (Optional)
Keep your ClickUp Users data up to date by setting up automatic refreshes:
- After importing your data, click on the Coefficient menu in your sheet
- Select the imported ClickUp users data
- Click on “Refresh settings”
- Choose your preferred schedule (hourly, daily, or weekly)
- Confirm your settings to enable auto-refresh
Available ClickUp Objects
- Authorization
- Attachments
- Comments
- Custom Task Types
- Custom Fields
- Docs
- Folders
- Goals
- Guests
- Lists
- Members
- Roles
How to Import User Groups Data from ClickUp into Google Sheets
Importing User Groups data from ClickUp into Google Sheets helps administrators track team structures and manage permission sets. Coefficient creates a seamless connection that keeps your user groups data fresh and accessible.
This guide will show you how to import your ClickUp User Groups data into Google Sheets quickly and efficiently.
TLDR
-
Step 1:
Step 1. Open Google Sheets > Extensions > Add-ons > Get add-ons > Install Coefficient from Google Workspace Marketplace.
-
Step 2:
Step 2. Connect your ClickUp account and select the User Groups object to import.
-
Step 3:
Step 3. (Optional) Enable auto-refresh to keep your user groups data updated automatically.
Step-by-Step Guide to Import ClickUp User Groups Data
Step 1: Install and Connect Coefficient
Begin by installing the Coefficient add-on for Google Sheets and connecting to your ClickUp account:
- Open your Google Sheet
- Click on Extensions > Add-ons > Get add-ons
- Search for “Coefficient” and install from Google Workspace Marketplace
- Once installed, open the Coefficient sidebar by clicking Extensions > Coefficient > Launch
- In the sidebar, click “Import Data”
Step 2: Select ClickUp and Import User Groups Data
Next, select ClickUp from the available connectors and import your User Groups data:
- In the Import section, look for ClickUp under “Project Management” integrations
- Click on ClickUp and authorize the connection
- Select “User Groups” from the list of available objects
- Choose the group fields you want to import (like name, members, permissions, etc.)
- Apply any filters if needed
- Click “Import” to bring the user groups data into your spreadsheet
Step 3: Set Up Auto-Refresh (Optional)
Keep your ClickUp User Groups data up to date by setting up automatic refreshes:
- After importing your data, click on the Coefficient menu in your sheet
- Select the imported ClickUp user groups data
- Click on “Refresh settings”
- Choose your preferred schedule (hourly, daily, or weekly)
- Confirm your settings to enable auto-refresh
Available ClickUp Objects
- Authorization
- Attachments
- Comments
- Custom Task Types
- Custom Fields
- Docs
- Folders
- Goals
- Guests
- Lists
- Members
- Roles