Are you looking to connect your HubSpot CRM data with SQL Server for advanced analytics and reporting? You’re in the right place. This guide will walk you through three proven methods to integrate these platforms, helping you choose the best solution based on your technical skills and business needs.
Why Connect HubSpot to SQL Server?
Before we dive into the “how,” let’s quickly cover the “why.” Connecting HubSpot to SQL Server offers several key advantages:
- Enhanced Data Analysis: By combining HubSpot’s customer interaction data with SQL Server’s powerful querying capabilities, you can uncover deeper business insights and create more comprehensive reports.
- Automated Data Warehousing: Maintain an up-to-date backup of your HubSpot data in SQL Server, improving data governance and enabling historical analysis.
- Cross-Platform Data Accessibility: Allow your teams to access and analyze HubSpot data using familiar SQL tools and business intelligence platforms.
Now that we understand the benefits, let’s explore the top three methods to connect HubSpot to SQL Server.
Top 3 Methods to Connect HubSpot to SQL Server
| Solution | Best For |
| Coefficient | Non-technical teams needing a spreadsheet-based solution for easy HubSpot data import into SQL Server with real-time syncing capabilities |
| Skyvia | Organizations requiring a dedicated integration platform with no-code options for direct HubSpot to SQL Server connections |
| MS SQL Server Replicator | Enterprise users needing native integration capabilities with advanced customization options |
Let’s break down each method in detail.
1. Coefficient : The No-Code Solution for Your Spreadsheet

Coefficient provides a user-friendly approach that uses spreadsheets as an intermediate layer between HubSpot and SQL Server. This method allows for data transformation and cleaning before pushing to SQL Server, making it ideal for business users without extensive technical knowledge.
Step-by-Step Guide:
Step 1. Install Coefficient
For Google Sheets
- Open a new or existing Google Sheet, navigate to the Extensions tab, and select Add-ons > Get add-ons.
- In the Google Workspace Marketplace, search for “Coefficient.”
- Follow the prompts to grant necessary permissions.
- Launch Coefficient from Extensions > Coefficient > Launch.
- Coefficient will open on the right-hand side of your spreadsheet.

For Microsoft Excel
- Open Excel from your desktop or in Office Online. Click ‘File’ > ‘Get Add-ins’ > ‘More Add-Ins.’
- Type “Coefficient” in the search bar and click ‘Add.’
- Follow the prompts in the pop-up to complete the installation.
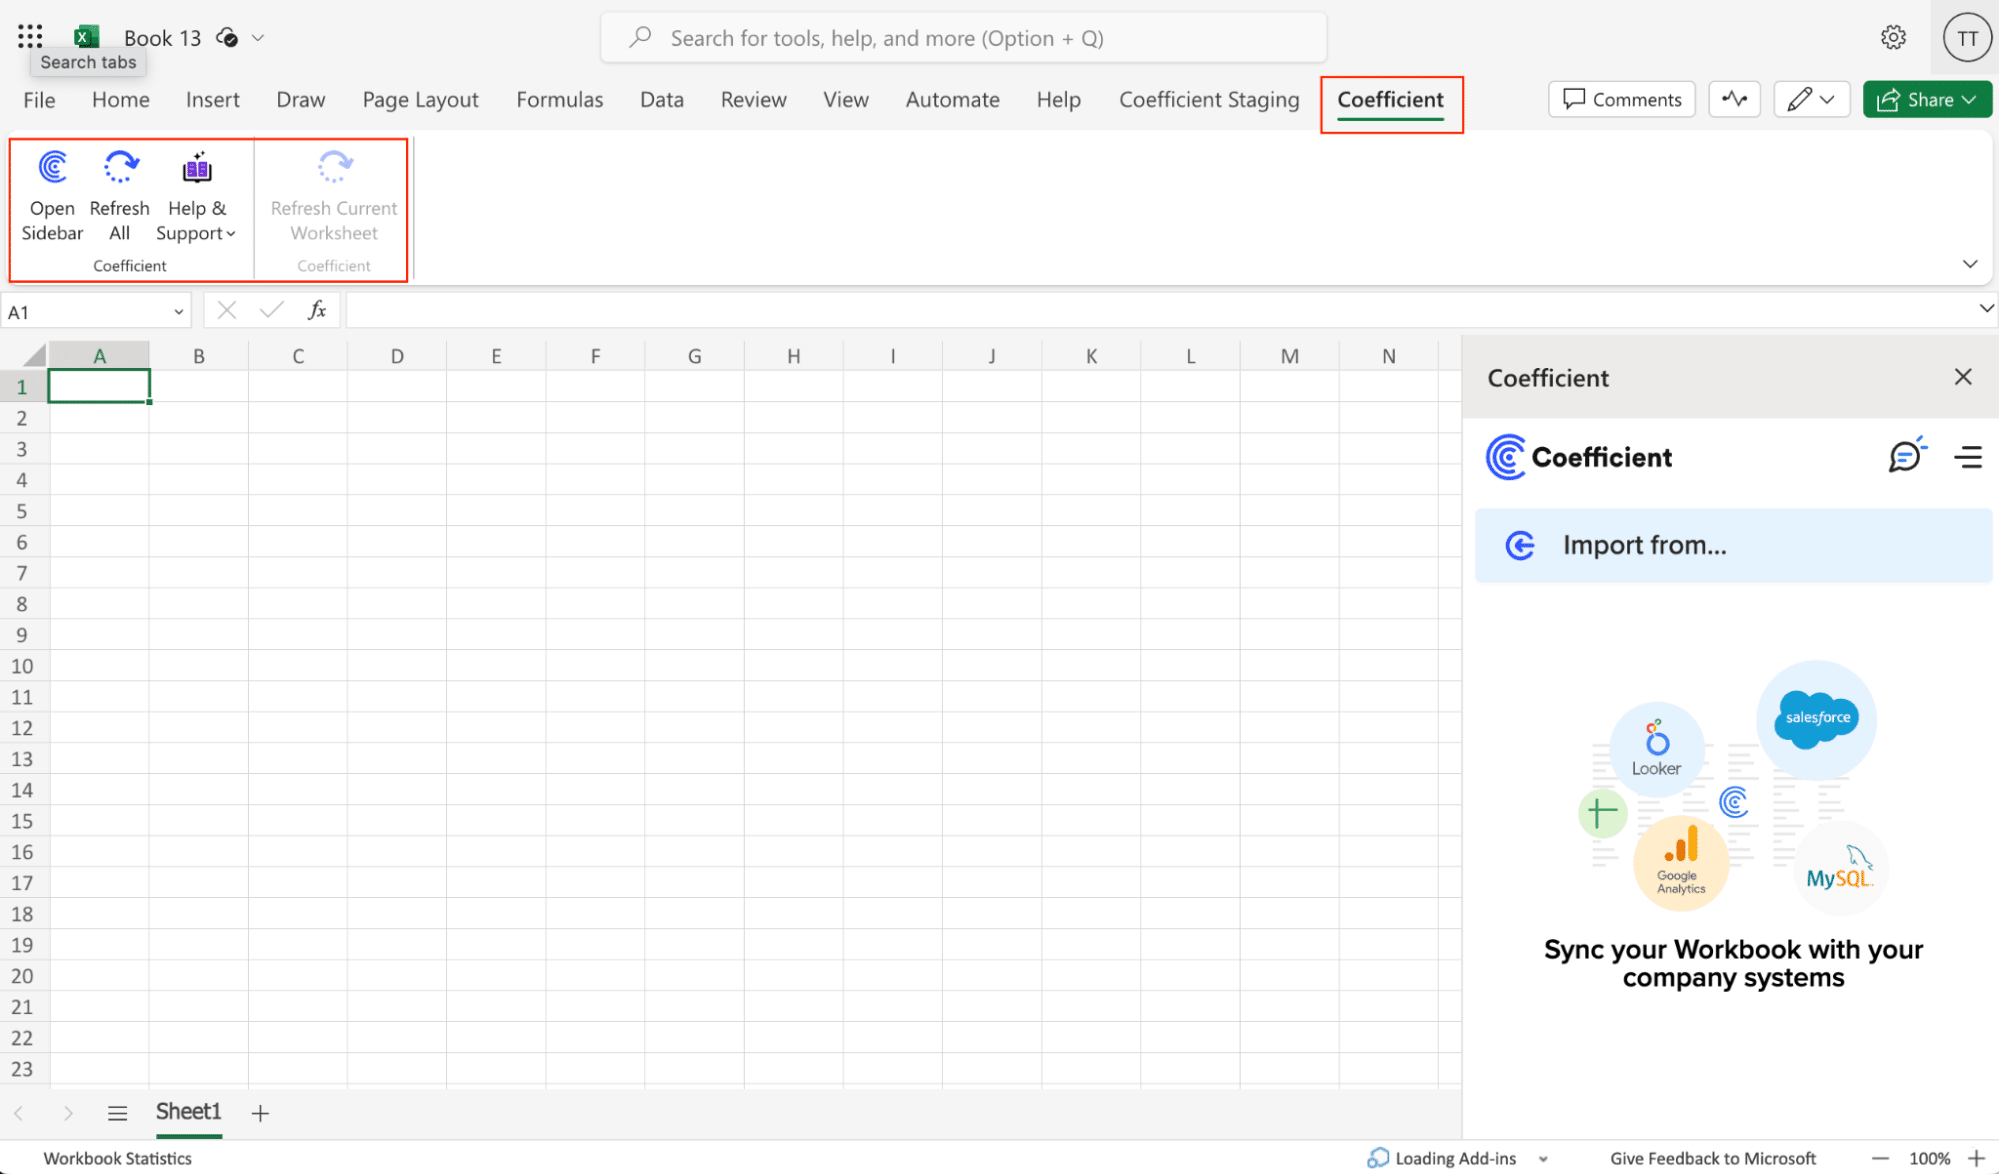
- Once finished, you will see a “Coefficient” tab in the top navigation bar. Click ‘Open Sidebar’ to launch Coefficient.
Step 2. Connect and Import Data from HubSpot
- Launch Coefficient in Google Sheets or Excel.
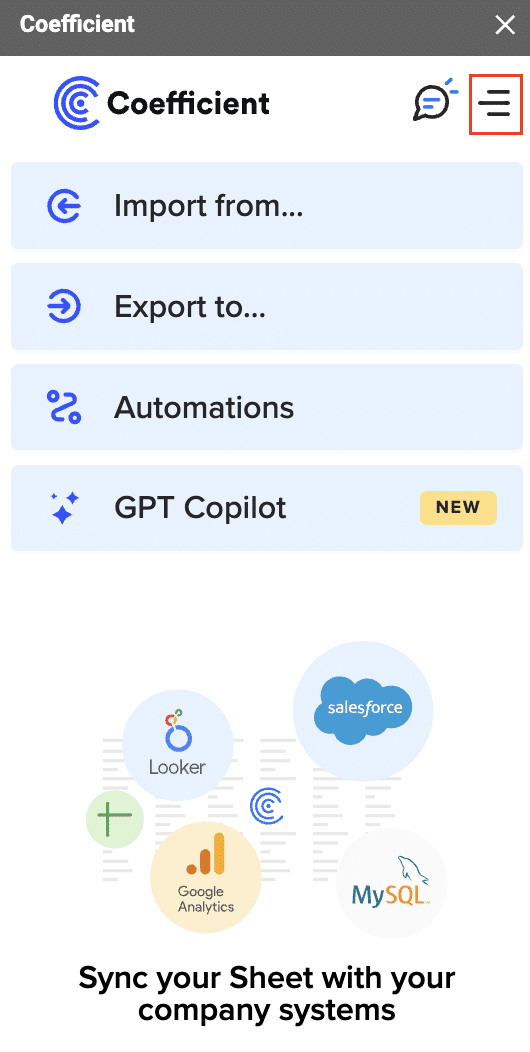
- Navigate to the Coefficient sidebar, click on the Menu, choose HubSpot and authorize access.

- After authorization, select From Objects & Fields.
- Import data from HubSpot by selecting the objects and fields needed.
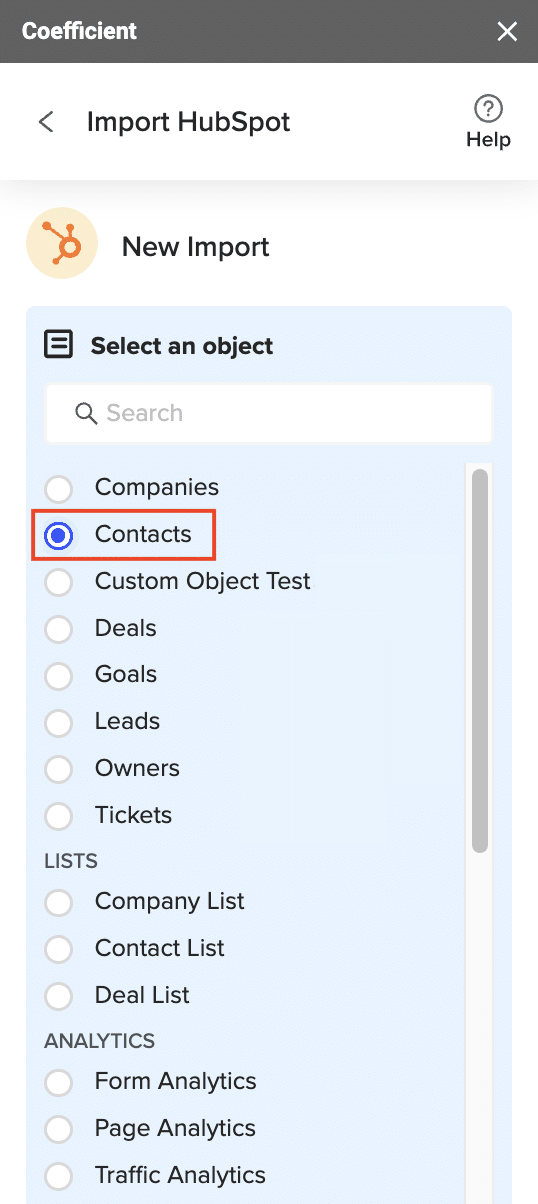
When finished, click ‘Run’ to import the data to your spreadsheet.

Step 3. Export Data from Your Spreadsheet to MS SQL
Before starting, make sure you’ve connected to MS SQL.
Then, navigate to Coefficient’s menu >Click “Export to…”

Select MS SQL.
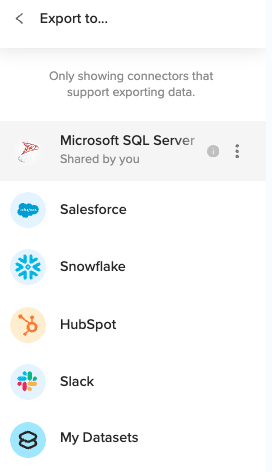
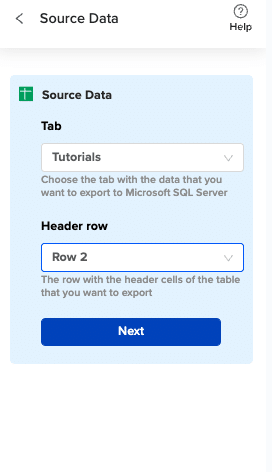
Choose the tab in your workbook that contains the data you want to export and specify the header row that contains the database field headers.
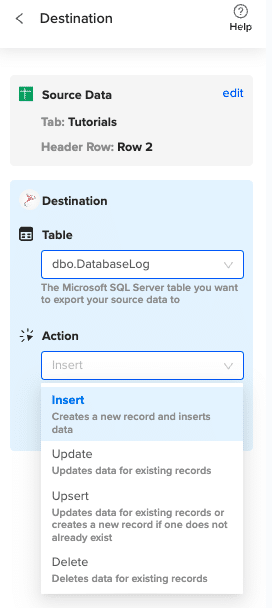
Specify the table in your database where you want to insert the data and choose the appropriate action (Insert, Update, Delete).
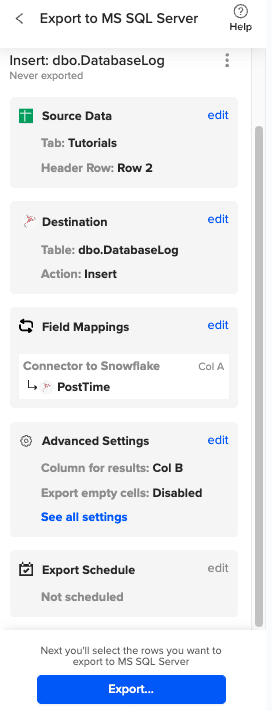
Complete the field mappings for the export. Then, confirm your settings and click “Export” to proceed.
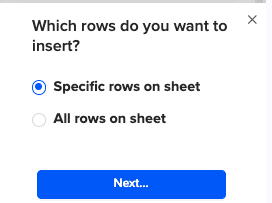
Then, highlight the specific rows in your sheet that you want to export, or choose to export all rows.
Review your settings and follow the prompts to push your data back to MS SQL.
Pros:
- No coding required
- Familiar spreadsheet interface
- Real-time data syncing
- Automated scheduling options
Cons:
- Requires a spreadsheet as an intermediate step
- Limited to spreadsheet row limitations
For more details on connecting SQL Server to Google Sheets, check out our guide on Microsoft SQL Server to Google Sheets.
2. Skyvia: The Dedicated Integration Platform

Skyvia offers a dedicated integration platform for connecting HubSpot to SQL Server directly, with both simple and advanced configuration options.
Step-by-Step Guide:
Let’s walk through setting up your HubSpot to SQL Server integration using Skyvia:
- Create a Skyvia Account First, let’s set up your Skyvia environment:
- Visit skyvia.com and click “Start Free Trial”
- Register using your business email
- Select “Integration” from the product options
- After verification, you’ll be taken to your dashboard
- Click “New Integration” to begin
- Configure HubSpot Connection Now let’s connect your HubSpot account:
- In the Skyvia dashboard, select “Connections” → “New Connection”
- Choose “HubSpot” from the connector list
- Click “Connect with HubSpot”
- In the authorization window, log in to your HubSpot account
Grant necessary permissions:
{
“required_scopes”: [
“contacts”,
“companies”,
“deals”,
“tickets”,
“e-commerce”
]
- }
- Test the connection using Skyvia’s connection tester
- Save your connection with a recognizable name (e.g., “HubSpot-Production”)
- Set up SQL Server Connection Configure your destination database:
- Create another new connection, selecting “Microsoft SQL Server”
Enter your SQL Server details:
Server: your-server.database.windows.net
Database: your_hubspot_data
Authentication: SQL Server Authentication
Username: your_username
Password: your_password
- Port: 1433
Configure advanced settings:
Connection Timeout: 30 seconds
Command Timeout: 300 seconds
Encrypt Connection: Yes
- Trust Server Certificate: Yes
- Test the connection to ensure it’s working
- Save this connection as “SQLServer-Destination”
- Define Data Mapping Create your data synchronization rules:
— Example target table structure
CREATE TABLE dbo.hubspot_contacts (
contact_id INT PRIMARY KEY,
email VARCHAR(255),
firstname VARCHAR(100),
lastname VARCHAR(100),
company VARCHAR(255),
last_modified DATETIME,
created_date DATETIME,
lifecycle_stage VARCHAR(50),
lead_source VARCHAR(100)
);
In Skyvia’s mapping interface:
- Select “New Integration Package”
- Choose source (HubSpot) and target (SQL Server) connections
- For each object type (Contacts, Companies, Deals):
- Create a new task
- Select source object (e.g., “Contacts”)
- Choose target table
Map fields:
HubSpot Field : SQL Server Column
vid : contact_id
email : email
firstname : firstname
lastname : lastname
company : company
hs_lastmodifieddate : last_modified
createdate : created_date
lifecyclestage : lifecycle_stage
- leadsource : lead_source
Set up field transformations where needed:
// Example: Standardize date format
function transformDate(date) {
return new Date(date).toISOString();
}
// Example: Standardize company names
function transformCompany(company) {
return company ? company.trim().toUpperCase() : null;
- }
- Schedule Synchronization Set up your sync schedule:
- Click “Schedule” in your integration package
Configure sync settings:
Sync Frequency:
Type: Incremental
Schedule: Every 6 hours
Start Time: 00:00 UTC
Days: Monday-Sunday
Error Handling:
Retry Attempts: 3
Retry Interval: 5 minutes
Error Notification: Email
Monitoring:
Log Level: Detailed
Success Notifications: Yes
Failure Notifications: Yes
- Set up email notifications for sync status
- Enable real-time monitoring dashboard
Pros:
- Direct integration
- Visual mapping interface
- Comprehensive scheduling options
Cons:
- Paid solution
- Requires separate platform subscription
3. MS SQL Server Replicator: The Native Integration
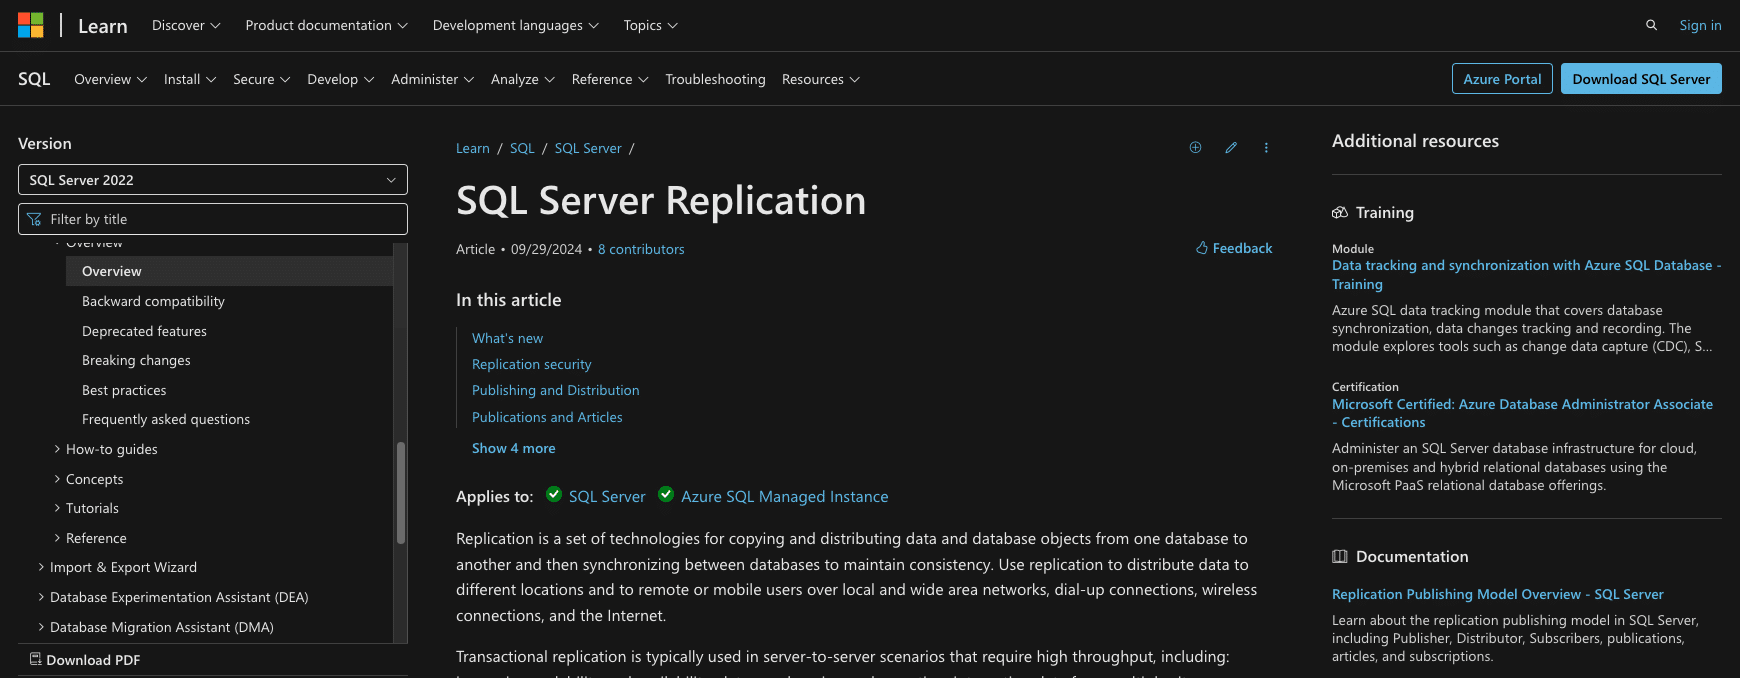
The official HubSpot integration for SQL Server provides native support for data replication between the two platforms.
Step-by-Step Guide:
Let’s set up the native HubSpot integration:
- Install MS SQL Server Replicator First, prepare your environment:
- Download the MS SQL Server Replicator from HubSpot’s website
- Run the installer as administrator
Configure installation settings:
# Installation path
C:Program FilesHubSpotSQLReplicator
# Service configuration
Service Name: HubSpotSQLReplicator
Start Type: Automatic
- Log On As: Local System Account
- Configure HubSpot API Credentials Set up your API access:
- Log into your HubSpot developer account
Create a private app:
App Name: SQL Server Replicator
Scopes Required:
– crm.objects.contacts.read
– crm.objects.companies.read
– crm.objects.deals.read
- – crm.schemas.custom.read
Copy your API key and enter it in the Replicator configuration:
{
“api_key”: “your-api-key”,
“rate_limit”: 100,
“batch_size”: 250
- }
- Select Data Objects for Replication Configure what data to sync:
- Open the Replicator Configuration Manager
Select target database:
— Create necessary tables
CREATE TABLE [dbo].[HubSpot_Contacts] (

Stop exporting data manually. Sync data from your business systems into Google Sheets or Excel with Coefficient and set it on a refresh schedule.
Get Started
[Id] [int] PRIMARY KEY,
[Properties] [nvarchar](max),
[Associations] [nvarchar](max),
[SyncDate] [datetime2](7)
);
- — Repeat for Companies, Deals, etc.
Choose objects to replicate:
Objects:
Contacts:
Enabled: true
Properties:
– firstname
– lastname
– company
– lifecyclestage
Companies:
Enabled: true
Properties:
– name
– domain
– industry
Deals:
Enabled: true
Properties:
– dealname
– amount
- – closedate
- Set up Replication Schedule Configure your sync timing:
Schedule:
Initial Sync:
Mode: Full
Batch Size: 1000
Rate Limit: 100/minute
Incremental Sync:
Frequency: 15 minutes
Change Detection: Modified Date
Lookback Window: 24 hours
- Monitor Sync Status Set up monitoring:
— Create monitoring view
CREATE VIEW dbo.vw_HubSpot_Sync_Status AS
SELECT
ObjectType,
LastSyncDate,
RecordsProcessed,
ErrorCount,
SyncDuration
FROM dbo.HubSpot_Sync_Log
WHERE SyncDate >= DATEADD(day, -7, GETDATE());
— Create alert procedure
CREATE PROCEDURE dbo.sp_Alert_FailedSync
AS
BEGIN
DECLARE @ErrorMessage NVARCHAR(MAX)
SELECT @ErrorMessage = ‘Sync failed for ‘ + ObjectType
FROM dbo.HubSpot_Sync_Log
WHERE ErrorCount > 0
AND SyncDate >= DATEADD(hour, -1, GETDATE());
IF @ErrorMessage IS NOT NULL
EXEC msdb.dbo.sp_send_dbmail
@profile_name = ‘Notifications’,
@recipients = ‘[email protected]’,
@subject = ‘HubSpot Sync Failed’,
@body = @ErrorMessage;
END;
Pros:
- Native integration
- Direct support from HubSpot
- Enterprise-grade security
Cons:
- Technical setup required
- Limited customization options
Connect HubSpot to SQL Server with Coefficient
Connecting HubSpot to SQL Server opens up new possibilities for data analysis and reporting. Whether you opt for the user-friendly Coefficient solution, the dedicated Skyvia platform, or the native MS SQL Server Replicator, you now have the knowledge to choose the best method for your needs.
Ready to start syncing your HubSpot data to SQL Server? For a user-friendly experience with powerful automation capabilities, we recommend trying Coefficient’s spreadsheet-based solution. Get started now and take your data analysis to the next level.
Frequently Asked Questions
Can you use SQL in HubSpot?
While HubSpot doesn’t directly support SQL queries, using Coefficient you can easily export HubSpot data to SQL Server and then run any SQL queries you need.
How do I pull data from HubSpot to SQL Server?
The easiest method is using Coefficient’s spreadsheet integration, which allows you to import HubSpot data and push it to SQL Server without any coding required.
How often can I sync HubSpot data to SQL Server?
With Coefficient, you can set up automatic syncs as frequently as every 15 minutes, ensuring your SQL Server database always has the most recent HubSpot data.

