Webflow and Salesforce are powerful platforms that can supercharge your business when connected. Webflow enables you to design and launch professional websites without coding, while Salesforce provides best-in-class customer relationship management (CRM) capabilities.
By integrating these tools, you can seamlessly capture leads from your Webflow site and nurture them in Salesforce, streamlining your marketing and sales efforts. This comprehensive guide will walk you through the benefits of connecting Webflow to Salesforce and show you step-by-step how to set up the integration using Coefficient, Zapier, and MuleSoft.
The Advantages of Connecting Webflow to Salesforce
- Predictive Lead Scoring: Combine Webflow interaction data (e.g., time on page, content engagement) with Salesforce lead information to create a dynamic lead scoring model. This allows sales teams to prioritize high-potential leads based on both explicit form submissions and implicit behavioral signals, increasing conversion rates and sales efficiency.
- Personalized Content Recommendations: Leverage Webflow browsing history and Salesforce customer data to power an AI-driven content recommendation engine. By understanding a prospect’s interests and pain points from their website interactions, you can automatically suggest relevant case studies, whitepapers, or product pages within Salesforce, enabling sales reps to have more targeted and valuable conversations.
- Automated Customer Health Scoring: Sync website engagement metrics from Webflow (e.g., frequency of logins, feature usage) with customer data in Salesforce to create an automated health scoring system. This allows customer success teams to proactively identify at-risk accounts and take timely action to improve retention and reduce churn.
Connect Webflow to Salesforce: 3 Methods
| Solution | Best For |
| Coefficient | Marketing analysts in small to medium-sized businesses who need to combine Webflow data with other marketing metrics before pushing to Salesforce. Ideal for organizations that rely heavily on spreadsheets for data analysis and reporting. |
| Zapier | Growth-stage companies with diverse software ecosystems beyond just Webflow and Salesforce. Best for marketing and sales operations teams that need to create multi-step workflows involving additional apps (e.g., triggering email campaigns based on specific Webflow interactions or updating project management tools). |
| MuleSoft | Global enterprises or organizations with complex, multi-system architectures. Optimal for IT teams and data engineers who need to build scalable, bi-directional integrations between Webflow, Salesforce, and other enterprise systems. |
How to Connect Webflow to Salesforce
Method 1: Coefficient
Coefficient offers a simple, no-code solution for connecting Webflow to Salesforce through Google Sheets or Microsoft Excel, making it an excellent choice for teams comfortable with spreadsheet interfaces.
Key Features:
- Bi-directional data sync between with Salesforce and spreadsheets
- Scheduled automatic data updates
- Integration with multiple business systems
- User-friendly interface designed for non-technical users
Pros and Cons:
Pros:
- Simple, no-code setup that doesn’t require technical expertise
- Automatic data updates to keep your information synchronized
- Affordable pricing plans suitable for businesses of various sizes
- Familiar spreadsheet interface reduces the learning curve
- Ability to manipulate and clean data using spreadsheet functions
Cons:
- Scheduled automations not free forever (but affordable pricing available)
How to Connect Webflow to Salesforce Using Coefficient
Step 1: Install the Coefficient
For Google Sheets
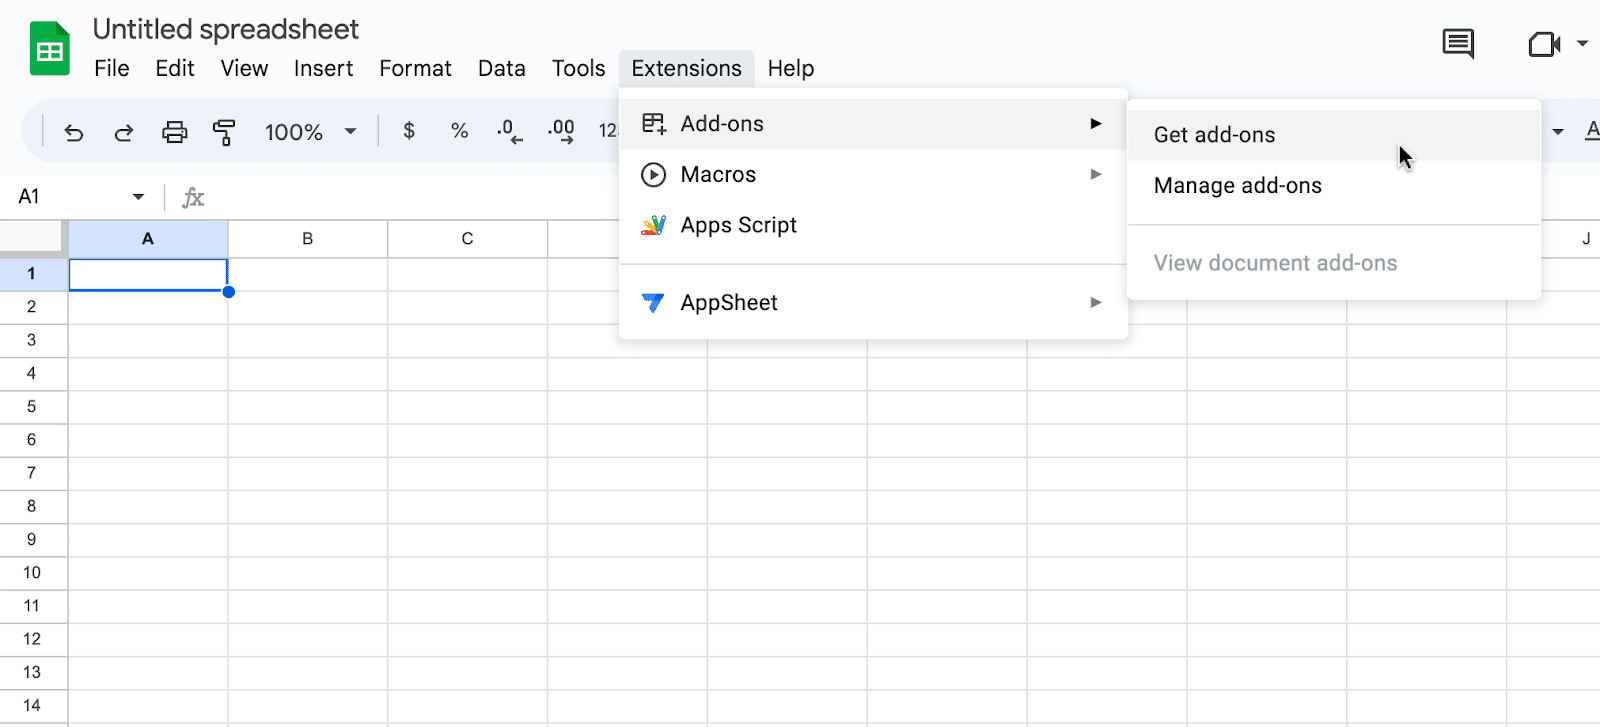
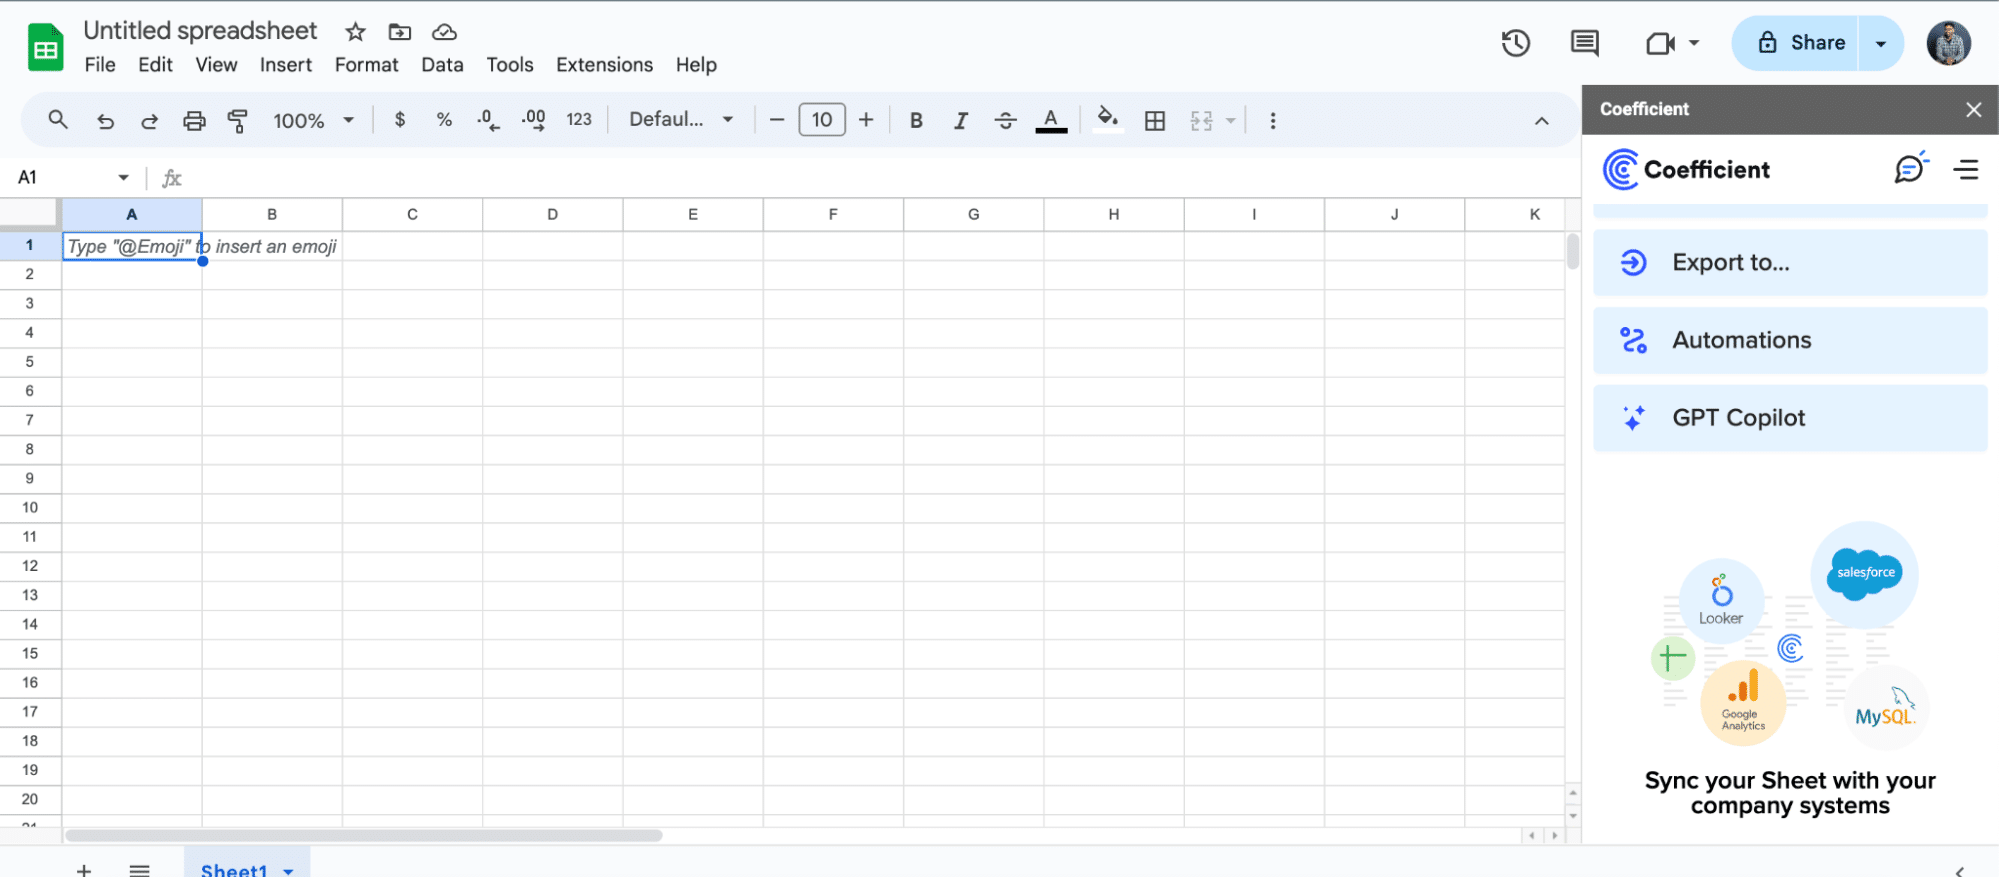
Open a new or existing Google Sheet, navigate to the Extensions tab, and select Add-ons > Get add-ons.
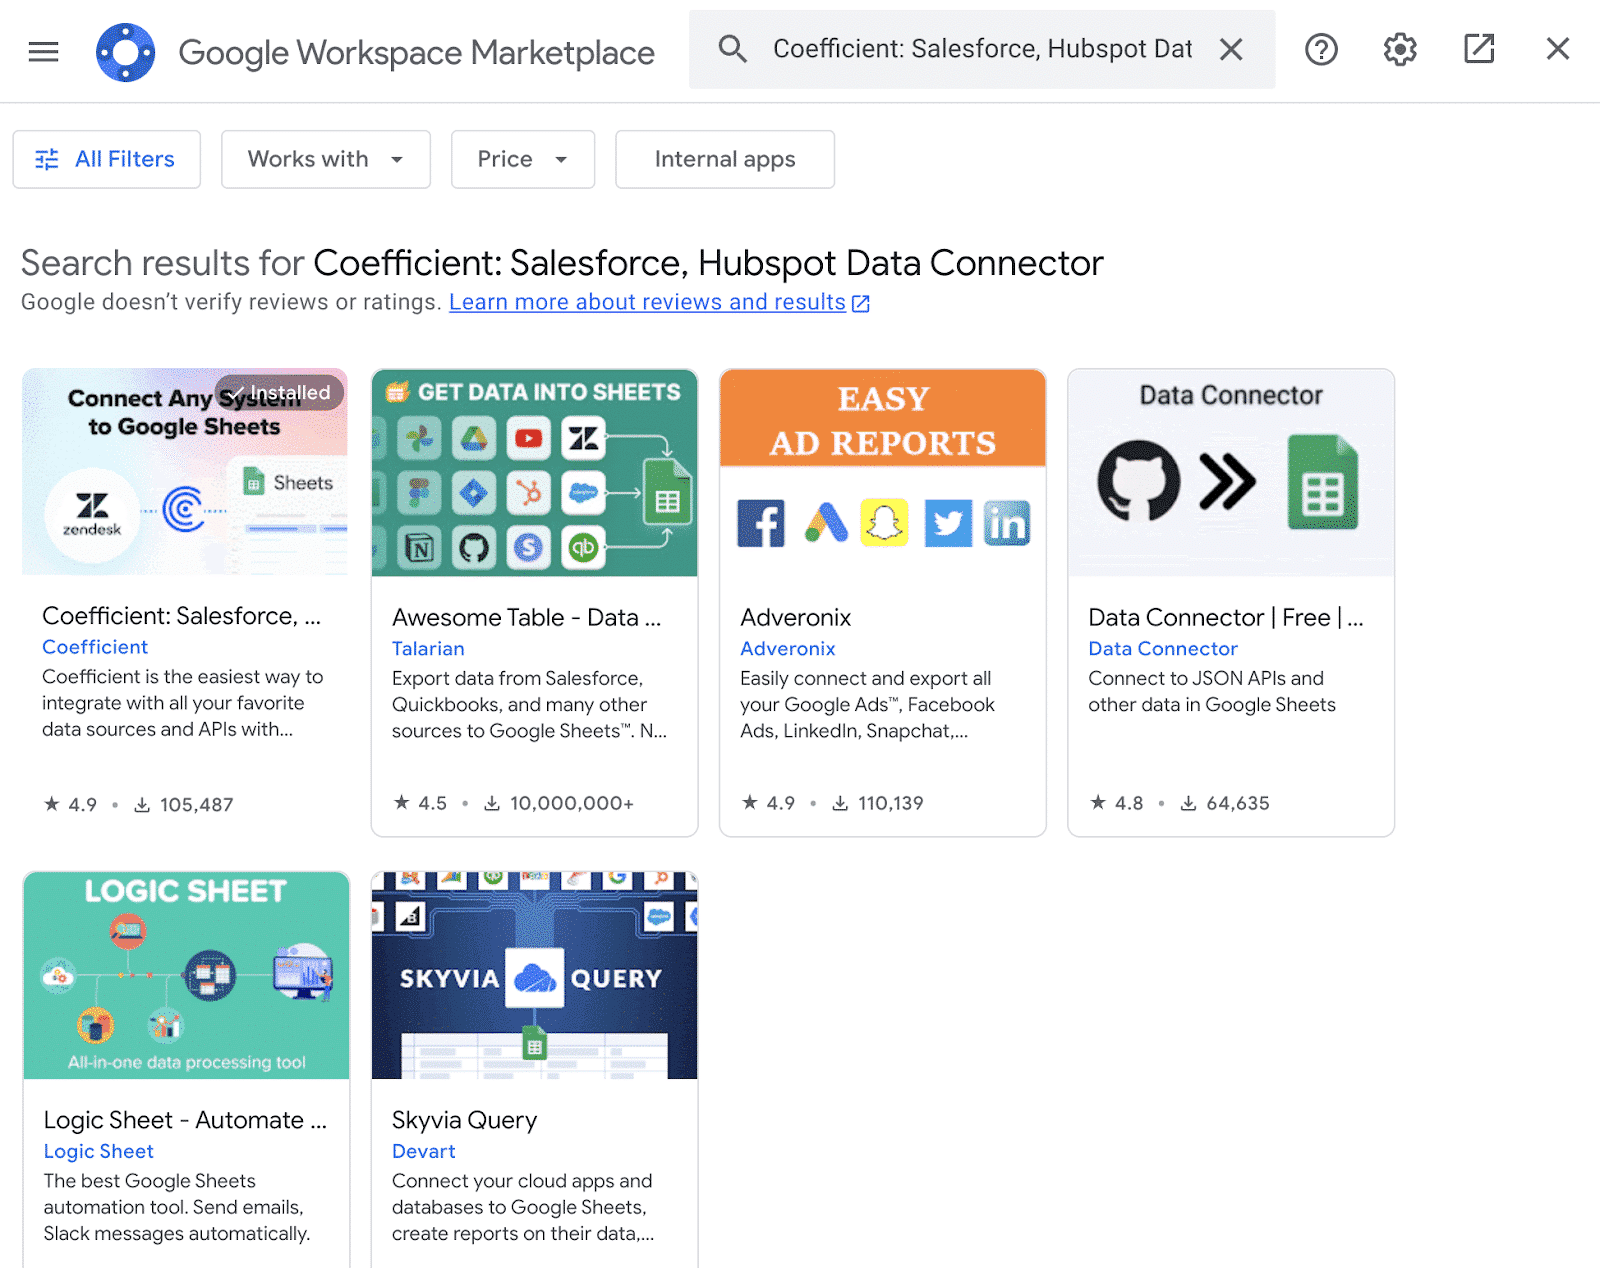
In the Google Workspace Marketplace, search for “Coefficient.”
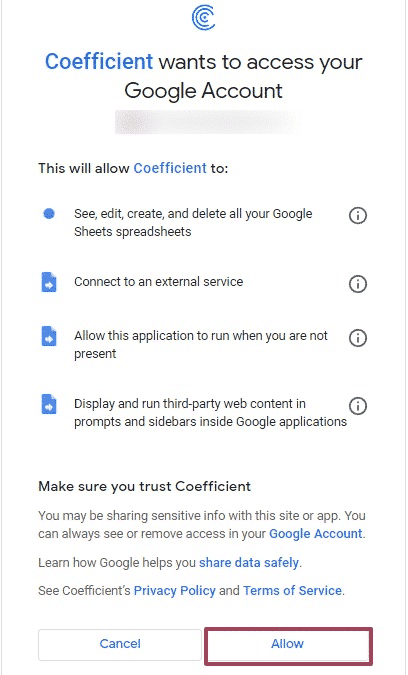
Follow the prompts to grant necessary permissions.
Launch Coefficient from Extensions > Coefficient > Launch.

Coefficient will open on the right-hand side of your spreadsheet.
For Microsoft Excel
Open Excel from your desktop or in Office Online. Click ‘File’ > ‘Get Add-ins’ > ‘More Add-Ins.’

Type “Coefficient” in the search bar and click ‘Add.’

Follow the prompts in the pop-up to complete the installation.
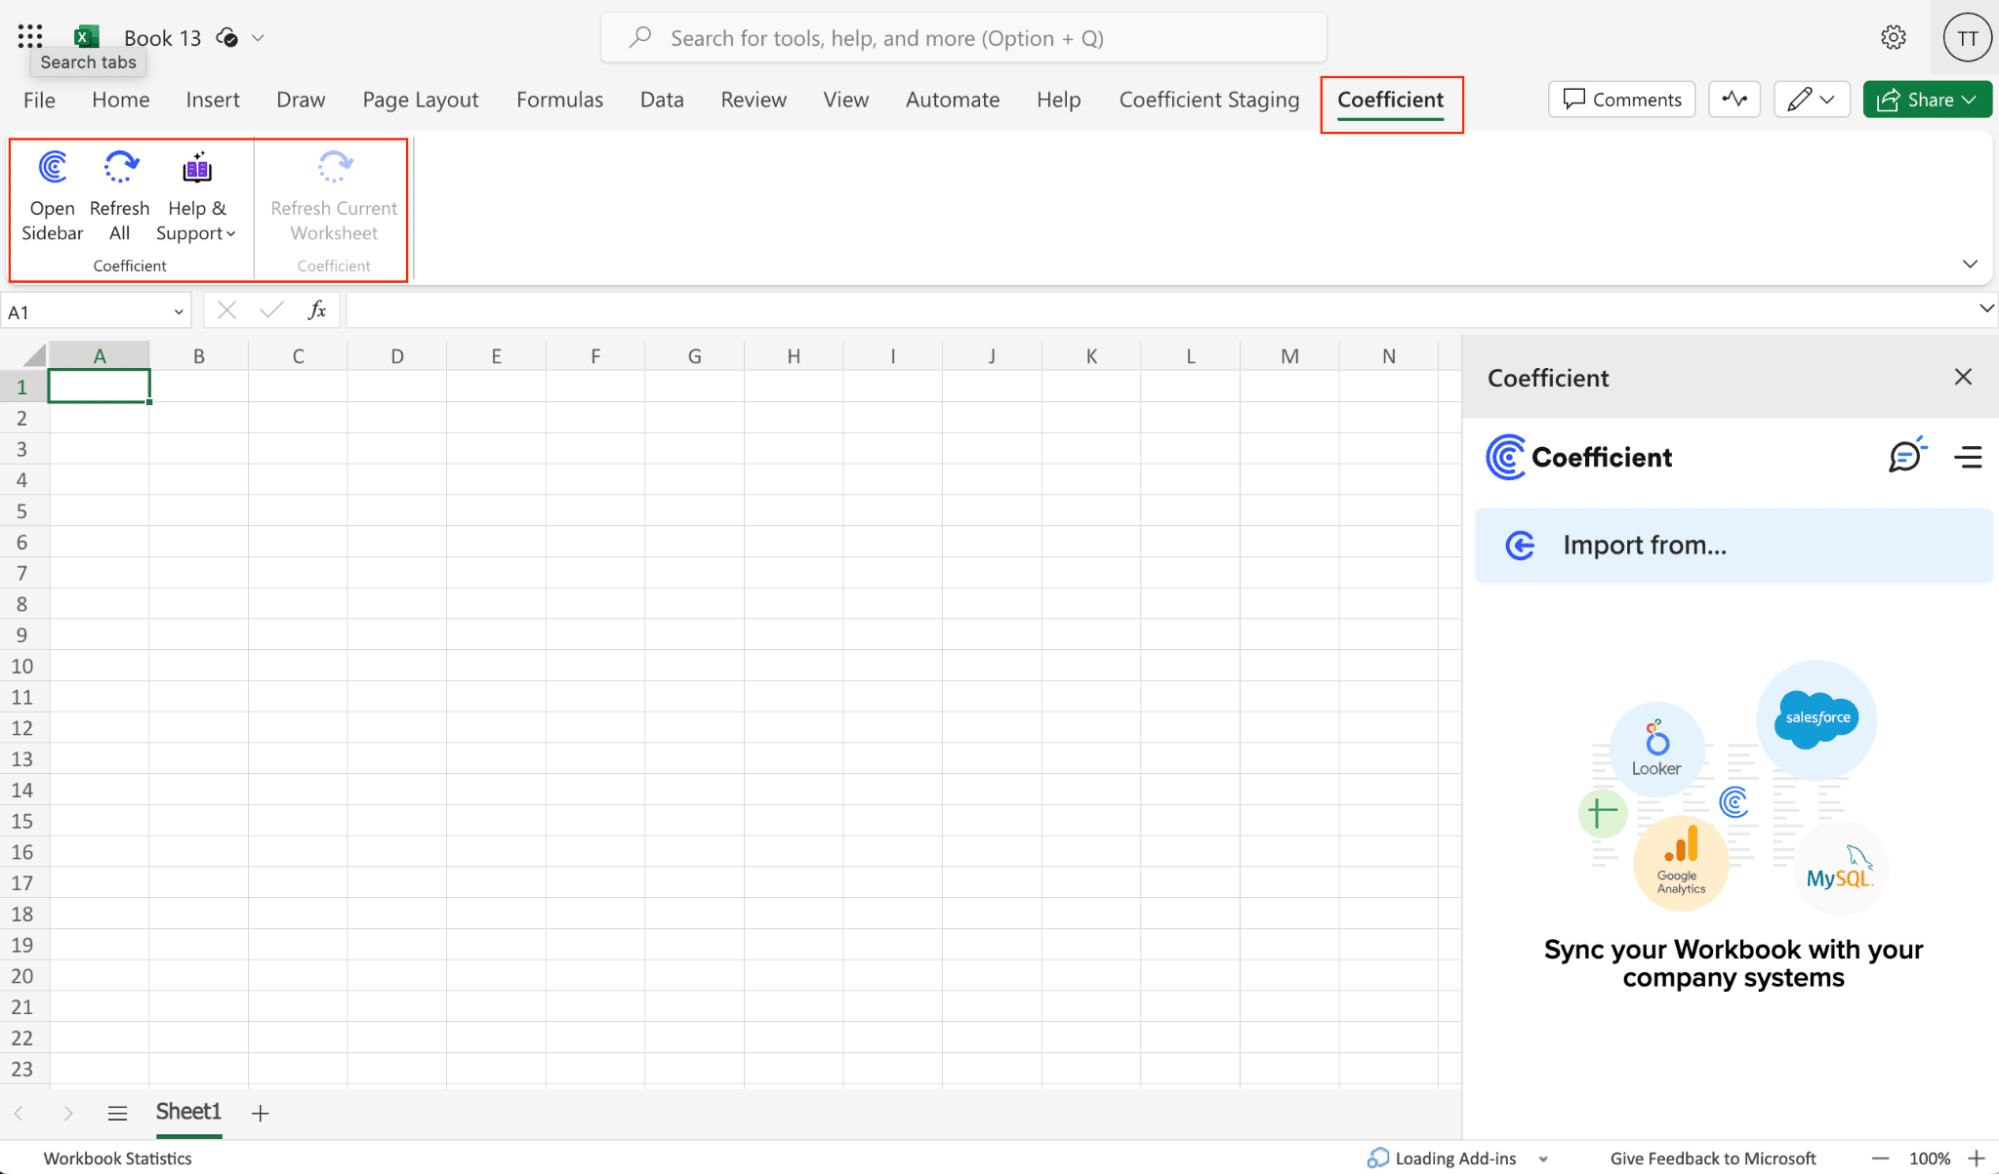
Once finished, you will see a “Coefficient” tab in the top navigation bar. Click ‘Open Sidebar’ to launch Coefficient.
Step 2. Import Data from Webflow to Your Spreadsheet
With Coefficient installed, you’re now ready to import your Webflow data into Excel. Let’s walk through the process step by step:
In the Coefficient sidebar, select “Import From.” Next to “Connected Sources”, click the blue “+” button.
Scroll through the list of available data sources and select “Webflow.”

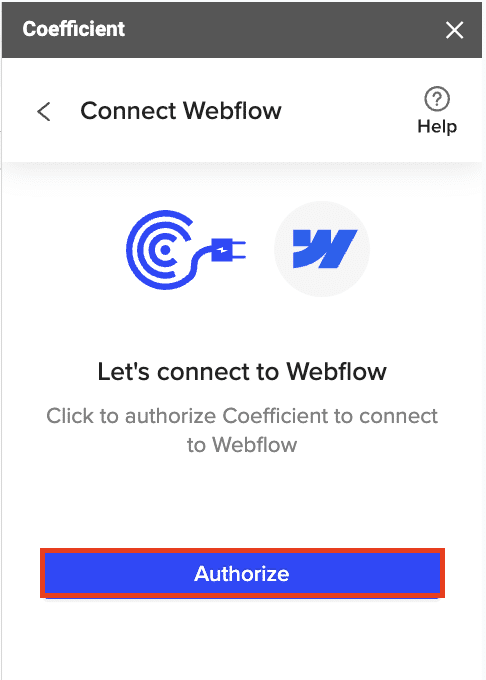
Follow the prompts to initiate the authorization process.
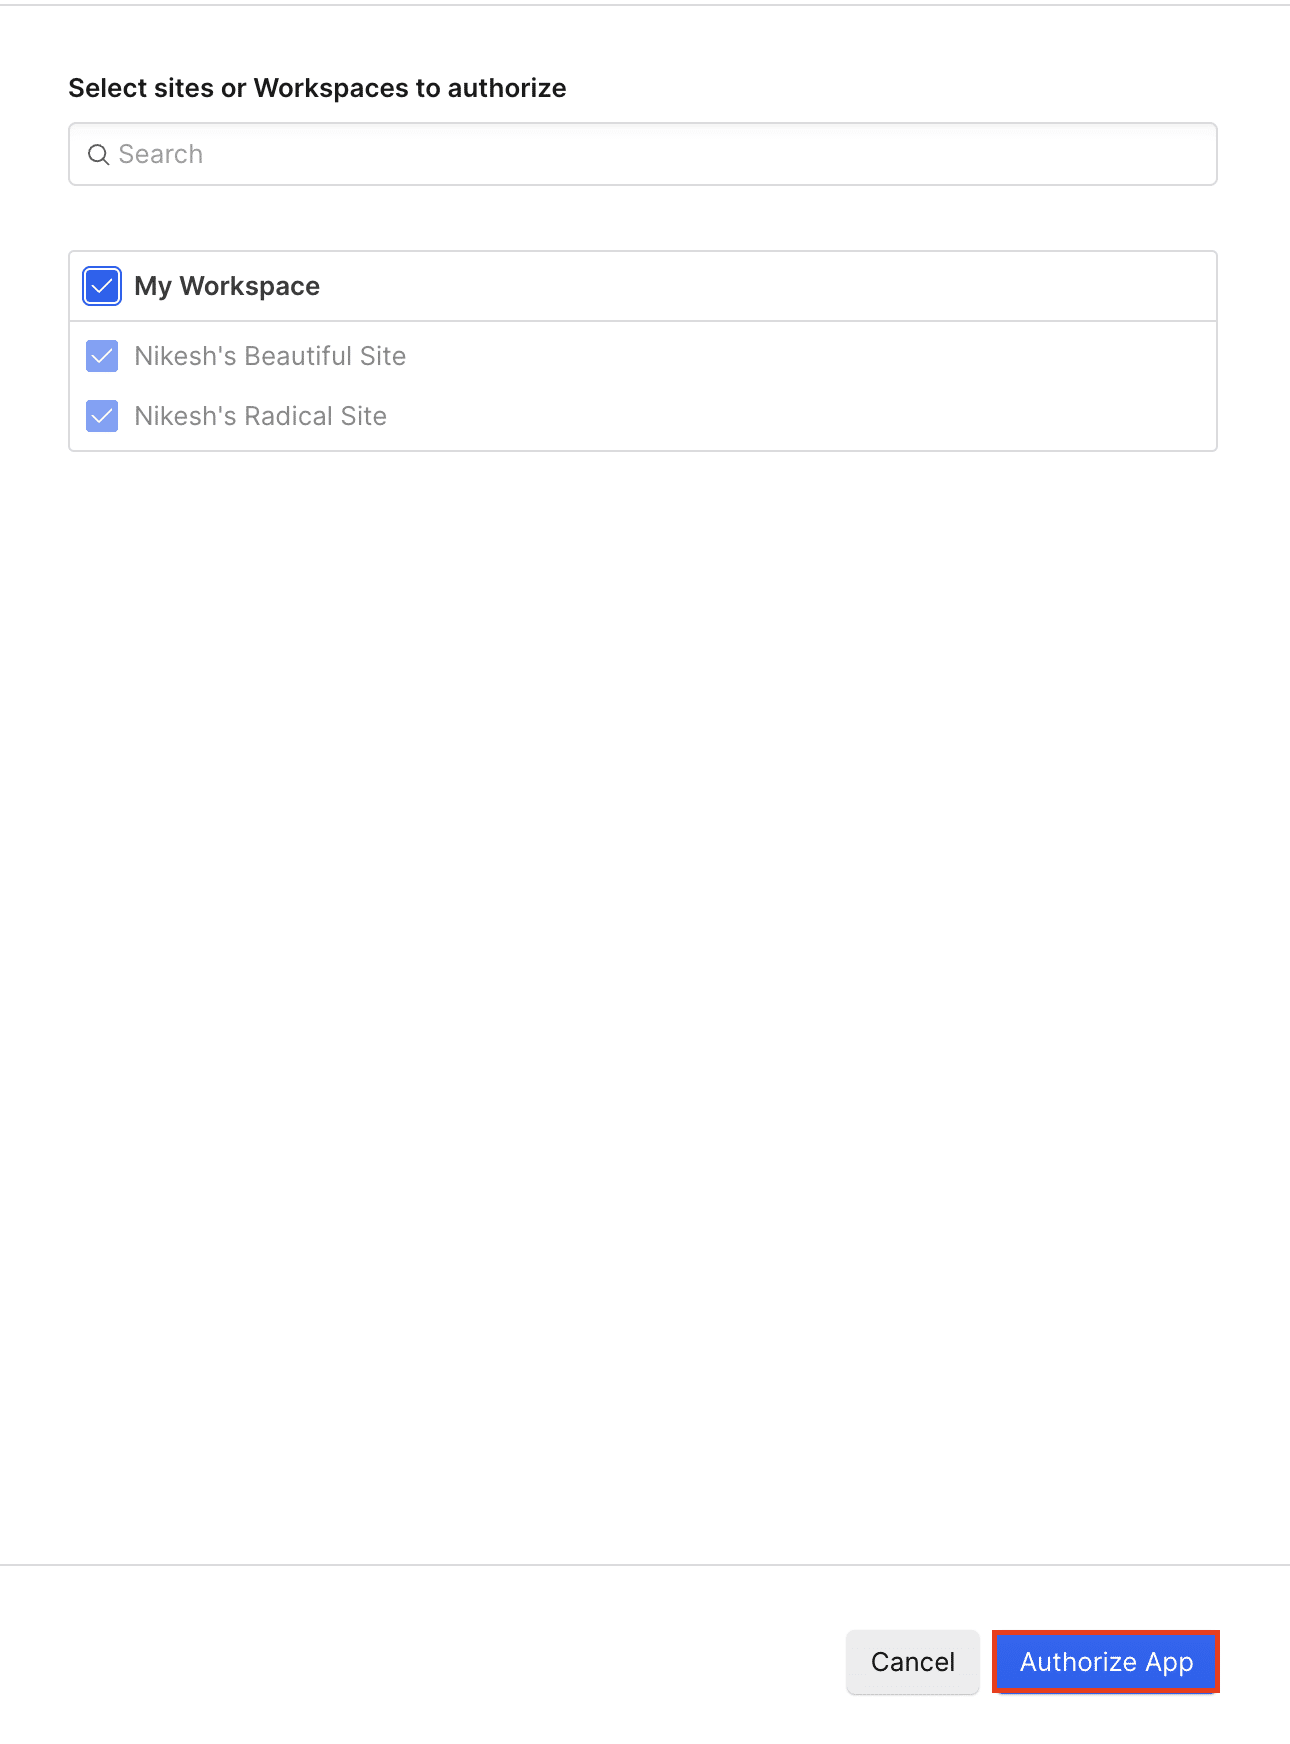
In the new tab that opens, select the sites or workspaces you want to authorize by checking the corresponding boxes.
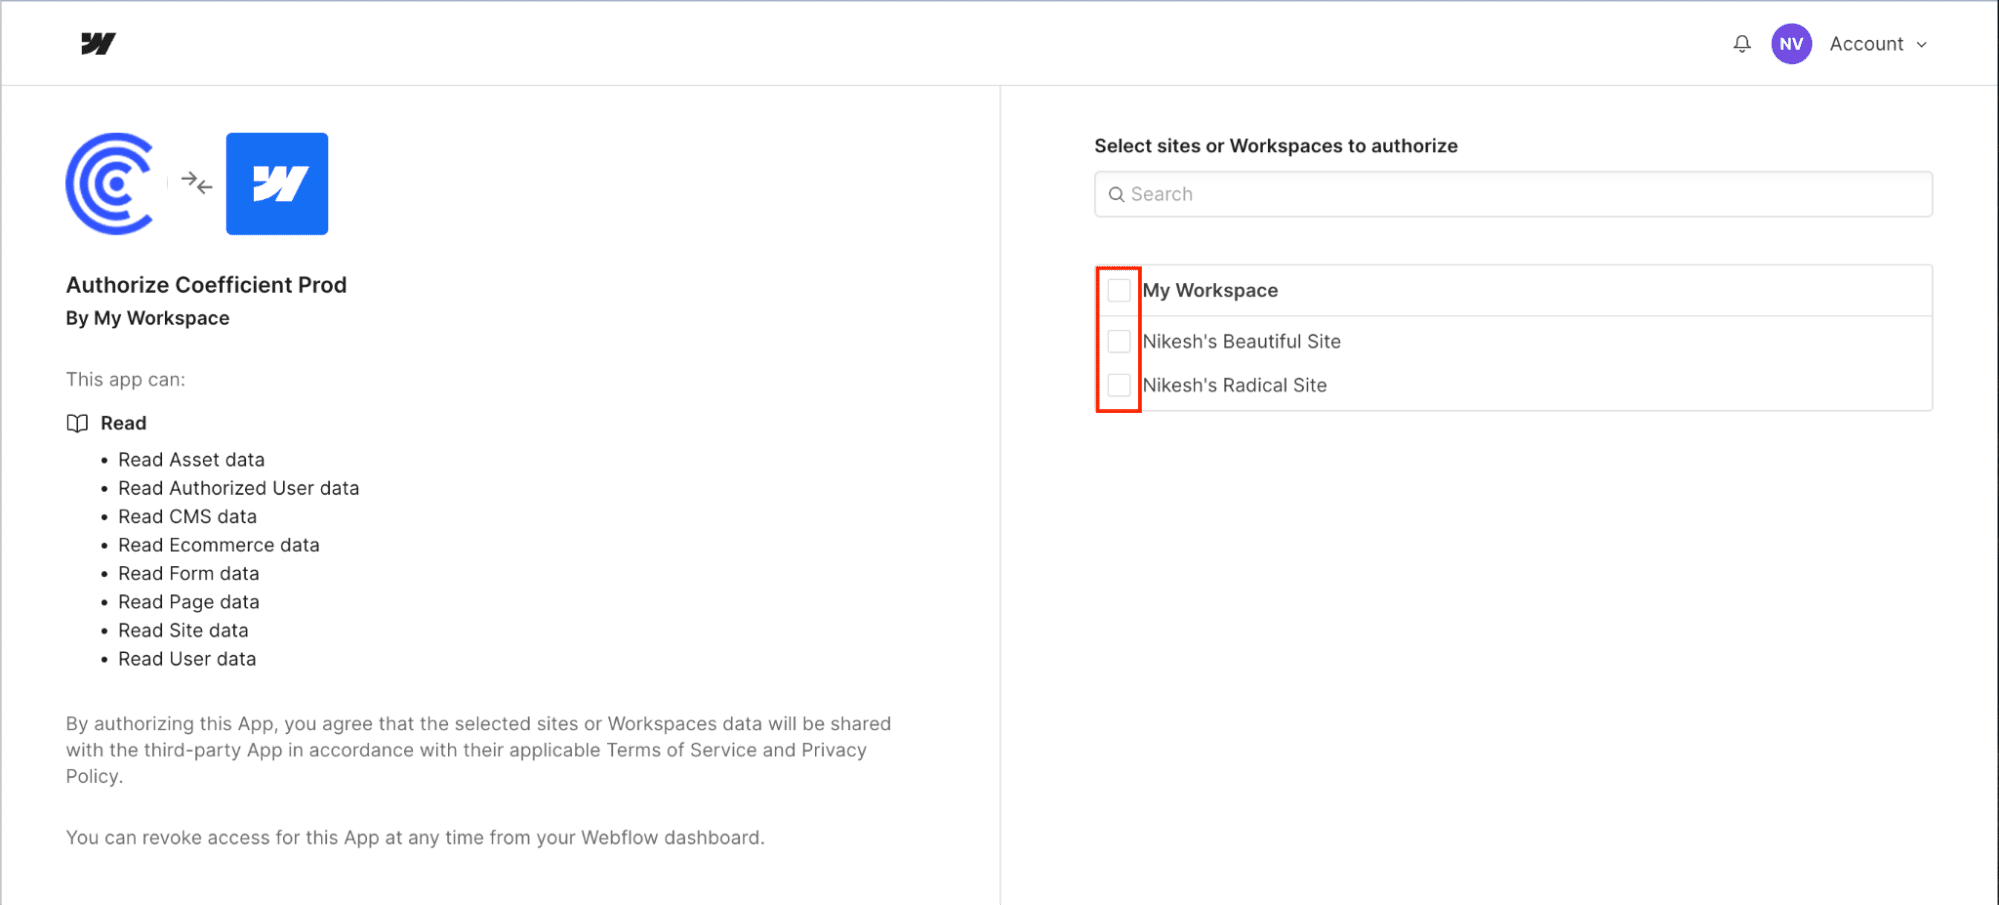
Click “Authorize App” in the bottom right corner to grant Coefficient access to your selected Webflow sites and workspaces.
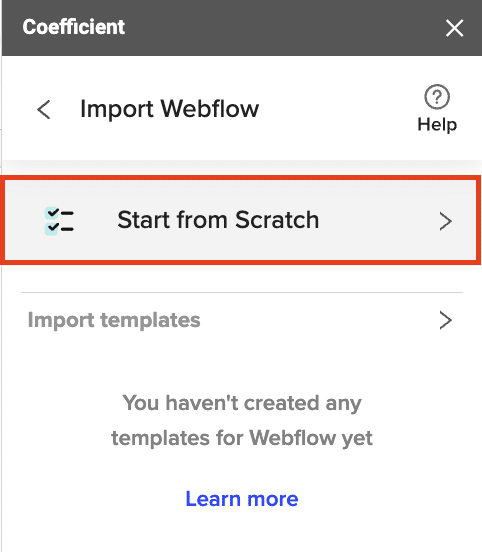
After authorizing the app, select “Start from scratch” to open the import preview.
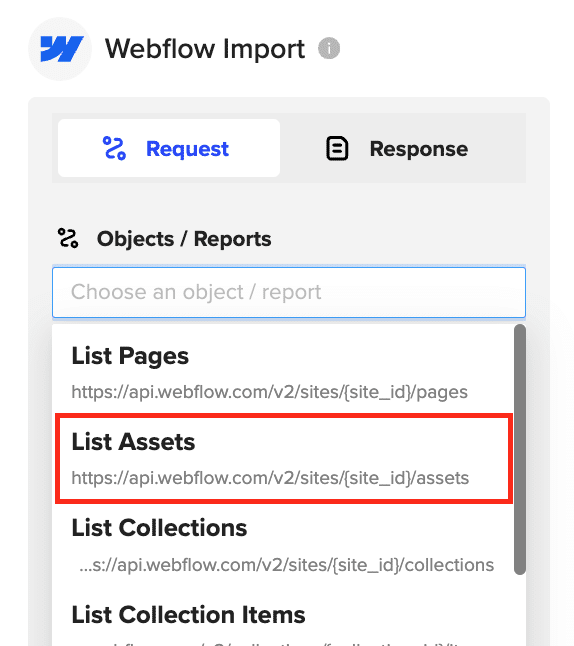
Explore the various objects and reports available for import, such as website data, marketing assets, orders, and more.
For this example, let’s select the “Assets” import.
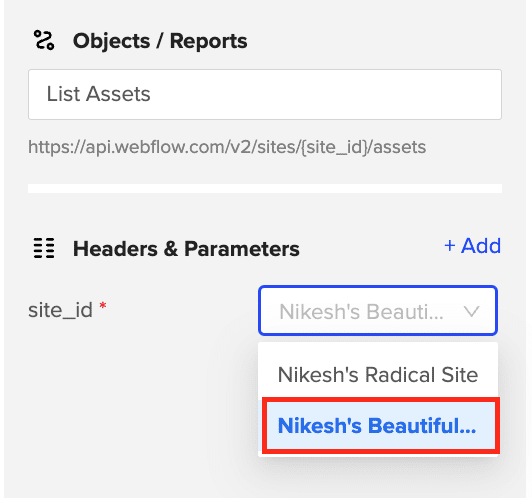
Choose the desired site ID from the dropdown menu.
Click “Preview” to see the available data fields.
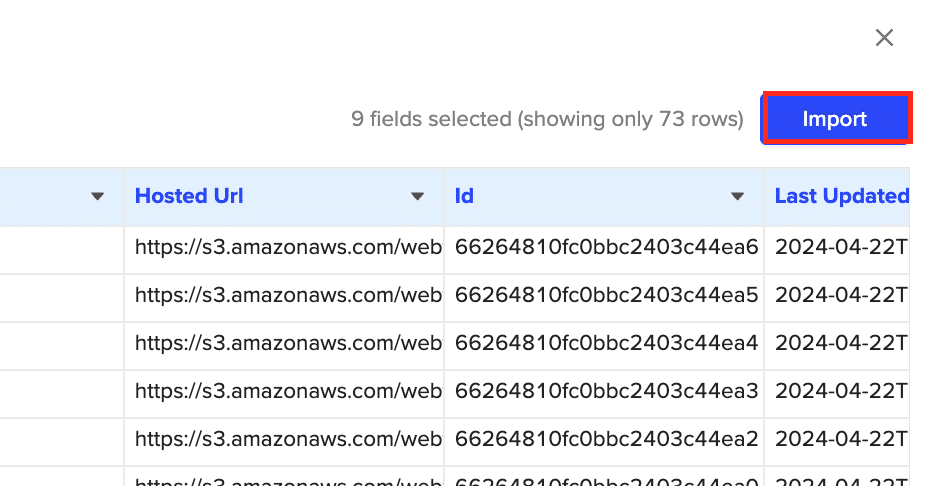
Select the specific data fields you want to include in your import by checking or unchecking the corresponding boxes.
Once you’re satisfied with your field selection and order, click “Import” to fetch the data into your Excel spreadsheet.
Step 3. Export Data from Your Spreadsheet to Salesforce
Before starting, make sure you’ve connected to Salesforce.
https://www.youtube.com/watch?v=B5qUY5zs-vc
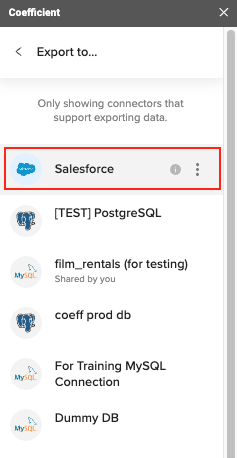
Then, navigate to Coefficient’s menu. Click “Export to…”

Choose Salesforce from the list of available data sources.
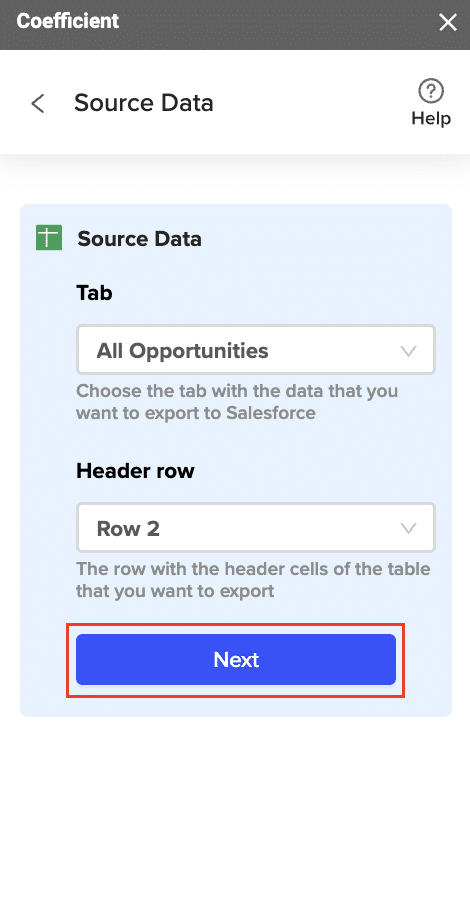
Select the tab and header rows in your spreadsheet that contain the data you want to export.
Define your tab and header row.
Note: Coefficient will automatically map the fields for you if the data in the sheet came from an import from Salesforce using Coefficient.
Next, select the Salesforce Object you want to export data to, e.g., “Opportunity”, “Contacts”, etc.

Then, select the type of action you want to perform—Update, Insert, Upsert, or Delete.
Step 5: Map Fields
Map the fields from your spreadsheet to the corresponding Salesforce fields.

Stop exporting data manually. Sync data from your business systems into Google Sheets or Excel with Coefficient and set it on a refresh schedule.
Get Started
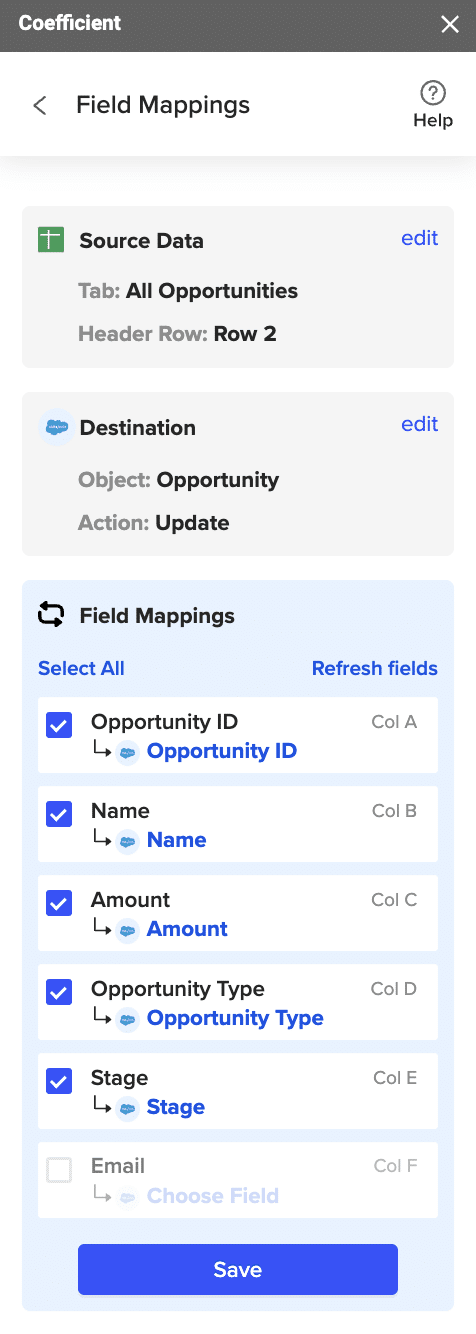
Note: If you imported data from Salesforce into your spreadsheet previously, Coefficient will auto-detect and map these fields.
(Optional) Specify additional settings such as batch size, whether to export empty cells on an update, and the column for results.

Note: Batch size is capped at 10,000 rows due to Salesforce API limitations.
Step 7: Select Rows to Export
Confirm your settings and click “Export”.

Then, highlight the rows you want to update or export. You can choose to export all rows or specific rows.
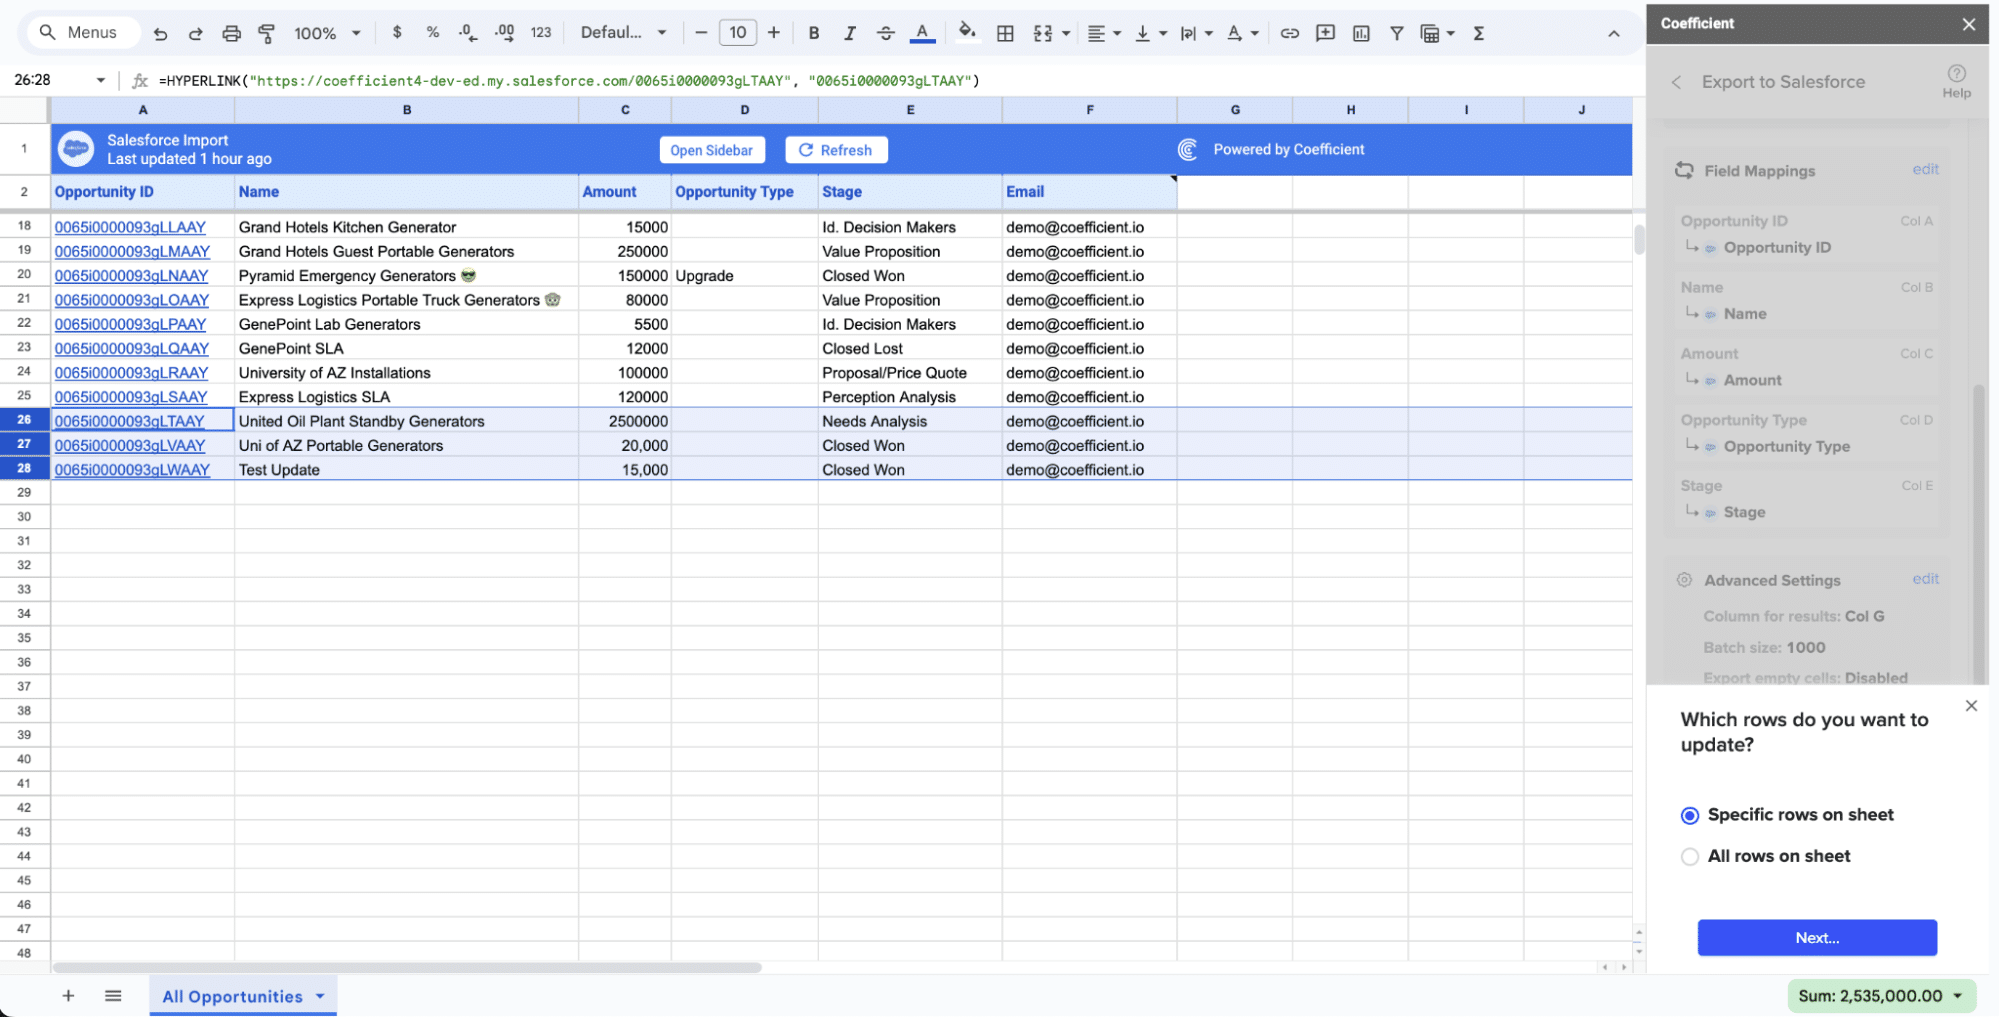
After you’re finished, review your settings and click “Export.”
Follow the prompts to confirm your changes.
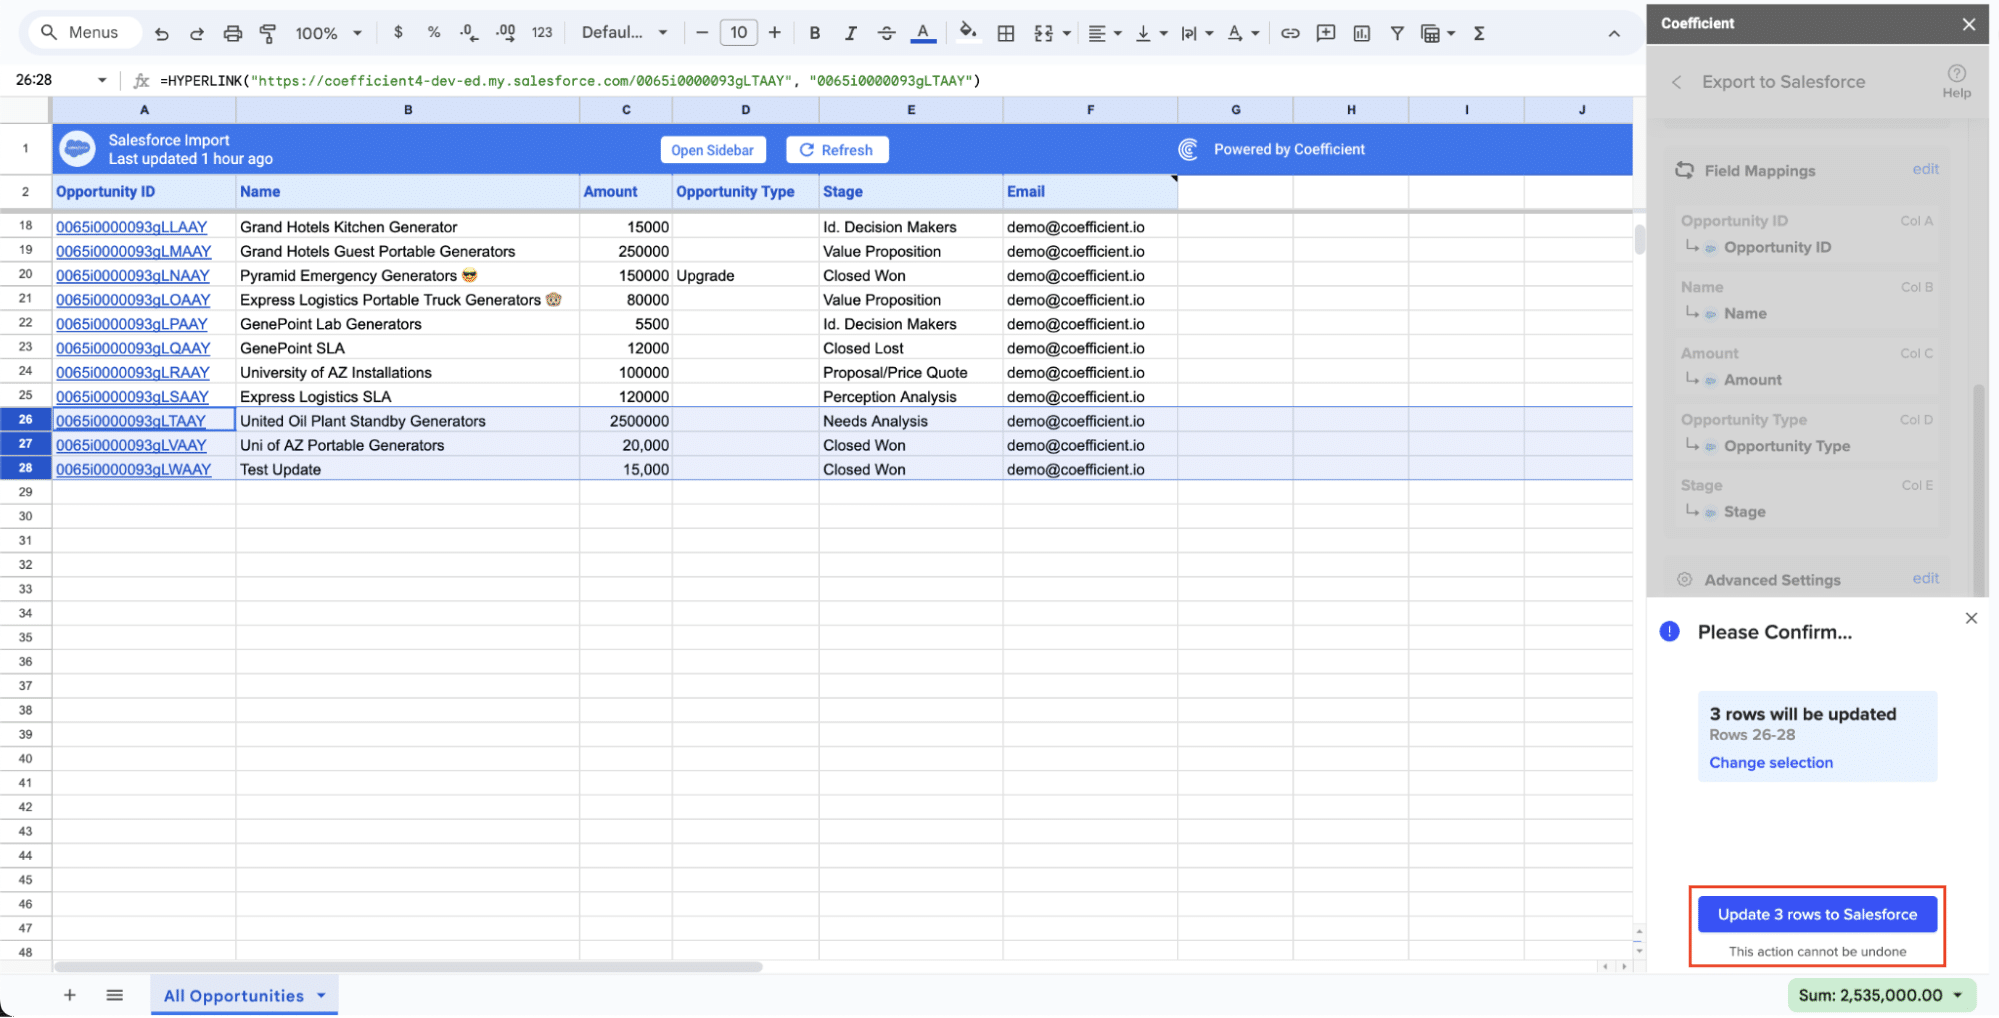
In a few seconds, data from your spreadsheet will push to Salesforce.

Your spreadsheet will display updated records, along with their export status and the date/time stamp of the update.
Method 2: Zapier

Zapier is a popular no-code automation platform that enables you to create “Zaps”, or automated workflows, between web apps. With its user-friendly interface and wide range of supported integrations, Zapier is a great choice for non-technical users looking to quickly connect Webflow and Salesforce.
Pros
- No coding required: Zapier’s intuitive interface walks you through setting up your integration step-by-step, no technical skills needed.
- Flexible field mapping: Easily map Webflow form fields to their corresponding Salesforce fields using Zapier’s drag-and-drop editor.
- Supports multiple actions: Chain together multiple actions in a single Zap, such as creating a lead in Salesforce and then sending a follow-up email.
Cons
- Limited data volume: Zapier’s free plan only includes 100 tasks per month, which can be quickly exhausted if you have a high volume of form submissions. Paid plans offer more capacity but can become costly.
- Potential for data latency: Zaps do not run instantly, meaning there may be a short delay between when a form is submitted on Webflow and when the corresponding record is created in Salesforce.
How to Connect Webflow to Salesforce with Zapier
To set up the Webflow-Salesforce integration using Zapier, follow these steps:
From your Zapier Dashboard, click “+ Create” > “New Zap” to begin creating a new automation.

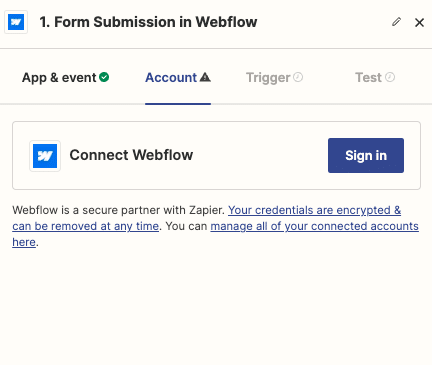
Select Webflow as your trigger app and choose the “New Form Submission” event.

Authenticate your Webflow account in Zapier by providing your login credentials. Then, select the specific form you want to integrate with Salesforce.
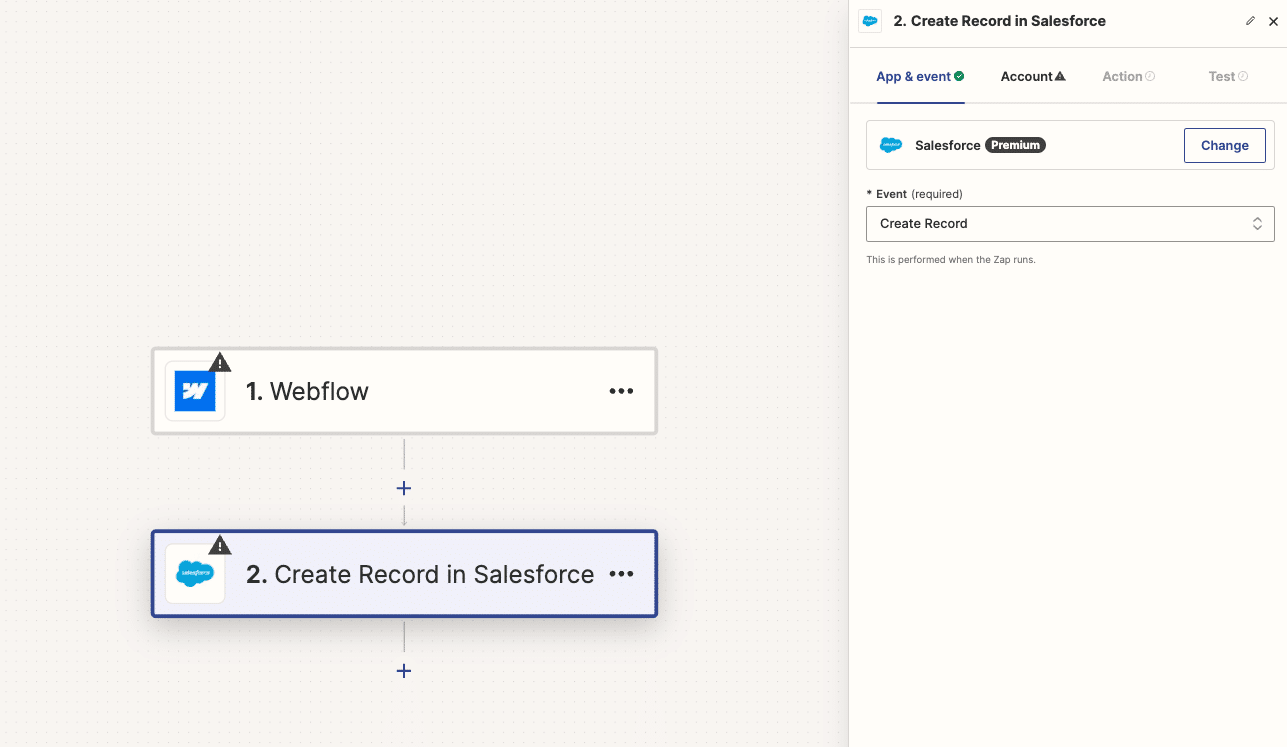
Choose Salesforce as your action app and select “Create Record” as the action event. Specify the object type you want to create, such as Lead or Contact.
Match up your Webflow form fields with the corresponding Salesforce fields. Use Zapier’s dropdown menus to select the appropriate fields from each app.
Send a test submission through your Webflow form to confirm the Zap is working as expected. If the record is successfully created in Salesforce, turn on your Zap. New submissions will now automatically flow from Webflow to Salesforce.
Method 3: MuleSoft

MuleSoft is an enterprise-grade integration platform that enables API-led connectivity between systems. Its robust features and ability to handle complex data architectures make it well-suited for larger organizations looking to establish real-time, bi-directional sync between Webflow and Salesforce.
Pros
- Powerful data orchestration: MuleSoft’s drag-and-drop interface allows you to easily design intricate data flows across multiple systems, transforming and enriching information along the way.
- Real-time sync: Changes made in either Webflow or Salesforce can be instantly reflected in the other system, ensuring data consistency across platforms.
- Enterprise-grade security: MuleSoft provides advanced security features, such as encryption and role-based access control, to protect your sensitive customer data.
Cons
- Higher complexity: Implementing a MuleSoft integration requires a deeper understanding of APIs and data architecture, which may necessitate dedicated technical resources.
- Steeper learning curve: MuleSoft’s powerful capabilities come with a more significant learning curve compared to no-code tools like Zapier or Automate.io.
- Cost: MuleSoft’s enterprise-level features and support come at a premium price point, which may be cost-prohibitive for smaller businesses.
How to Connect Webflow to Salesforce with MuleSoft
Follow these steps to connect Webflow and Salesforce using MuleSoft:
- Create a new Mule project: In Anypoint Studio, MuleSoft’s IDE, create a new Mule project. Drag the Webflow and Salesforce connectors into the canvas.
- Configure the Webflow connector: Set up the connection to your Webflow account by providing your API key. Then, configure the connector to listen for new form submission events.
- Configure the Salesforce connector: Authenticate your connection to Salesforce and configure the connector to create a new lead or update an existing contact when a form is submitted in Webflow.
- Map fields using DataWeave: Use MuleSoft’s DataWeave language to map fields from the Webflow form submission to the corresponding fields in Salesforce. Add any necessary data transformations, such as formatting phone numbers or splitting names.
- Deploy and monitor: After testing your integration, deploy it to a server environment. Use MuleSoft’s monitoring tools to ensure your data is flowing as expected between Webflow and Salesforce.
Connect Webflow to Salesforce: No Code Required
Connecting Webflow to Salesforce is a game-changer for businesses looking to optimize their lead generation and customer management efforts. By automating the flow of customer data between these two powerful platforms, you can improve the efficiency and effectiveness of your marketing and sales processes.
By weighing the pros and cons of each method and following the step-by-step instructions provided, you can successfully set up the Webflow-Salesforce integration that’s right for your business.
However, there’s one more option worth mentioning for those looking for a code-free, hassle-free solution. Coefficient is a no-code integration platform that makes it easy to sync data between your existing systems and automate workflows. With Coefficient, you can effortlessly integrate Webflow and Salesforce in just a few clicks and start streamlining your lead management processes today.
Don’t let disconnected data hold your business back any longer. Try Coefficient for free!

