

Install Coefficient add-on and access Extensions > Coefficient > Launch
Create automation by selecting trigger type (data changes, new rows, or daily screenshots)
Set frequency and choose email as notification method with recipient addresses
Automating email sending from Google Sheets can save you time, improve accuracy, and streamline your tasks.
In this blog post, we’ll explore three methods for automating email sending: using Coefficient, Zapier, and Google Apps Script. You’ll learn step-by-step how to set up each method and discover the pros and cons of each approach.
Why Automate Email Sending from Google Sheets?
- Save time by eliminating manual email-sending tasks
- Ensure accuracy and consistency in your email communications
- Streamline your workflow by integrating Google Sheets with your email-sending process
- Potential use cases: sending reports, notifications, or personalized emails
Method 1: Using Coefficient to Automate Email Sending
Coefficient is a powerful tool that enhances Google Sheets with advanced features and capabilities, making it easier to automate analytics and reporting workflows.
One of its key features is the ability to set up automated email notifications based on changes or updates in your Google Sheets data. Let’s walk through how it works!
Note: This tutorial assumes that you have already installed Coefficient. It only takes a second if you haven’t. Watch this video for more details!
Step 1: Setting up Automations
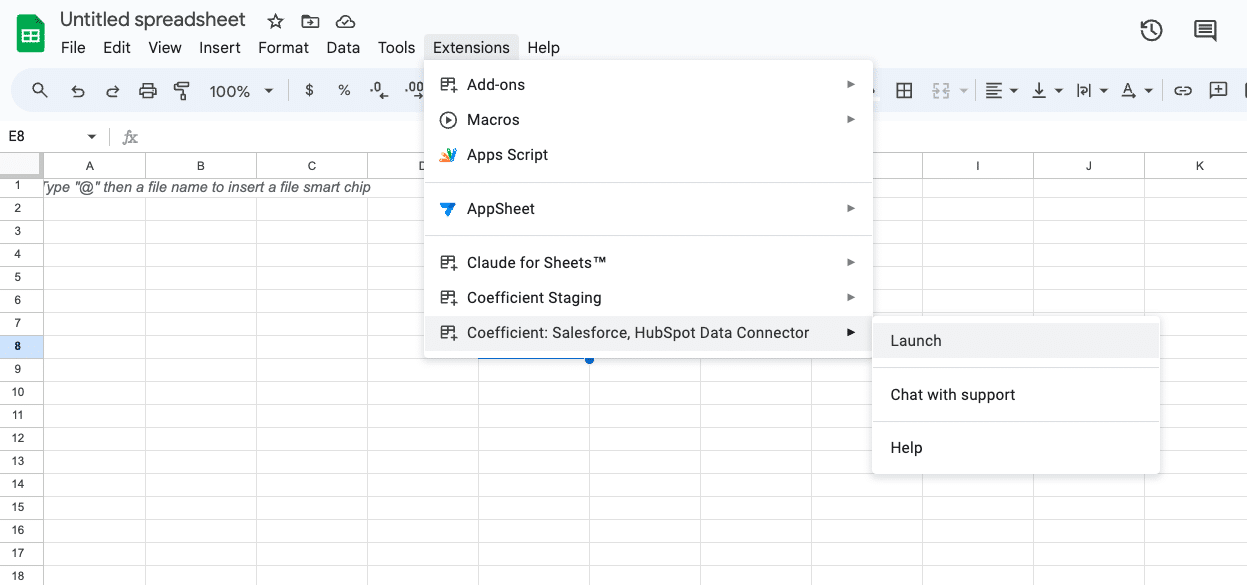
Open Google Sheets and head to the top navigation bar.
Click “Extensions” > “Coefficient” > “Launch.”
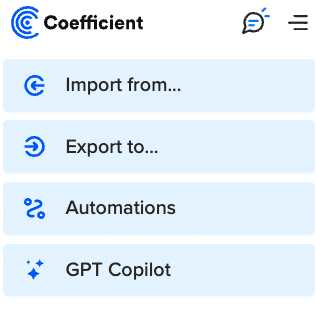
Select “Automations” from the menu.
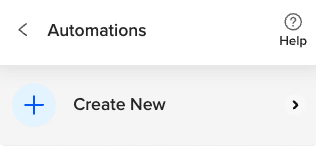
Then, click “Create new.”
Choose one of the three Automation types:
- “Daily/weekly Screenshot”: Select the range within your sheet for this screenshot.
- “When data changes”: Designate the range and whether you want to be alerted on every change or only if it satisfies a condition.
- “When a new row is added”: Designate if you want to be notified when a new ID or if a new row is added to (the bottom) your sheet.
Set the “Frequency” (how often you want to be notified): “As soon as it happens” or “Daily Digest”.
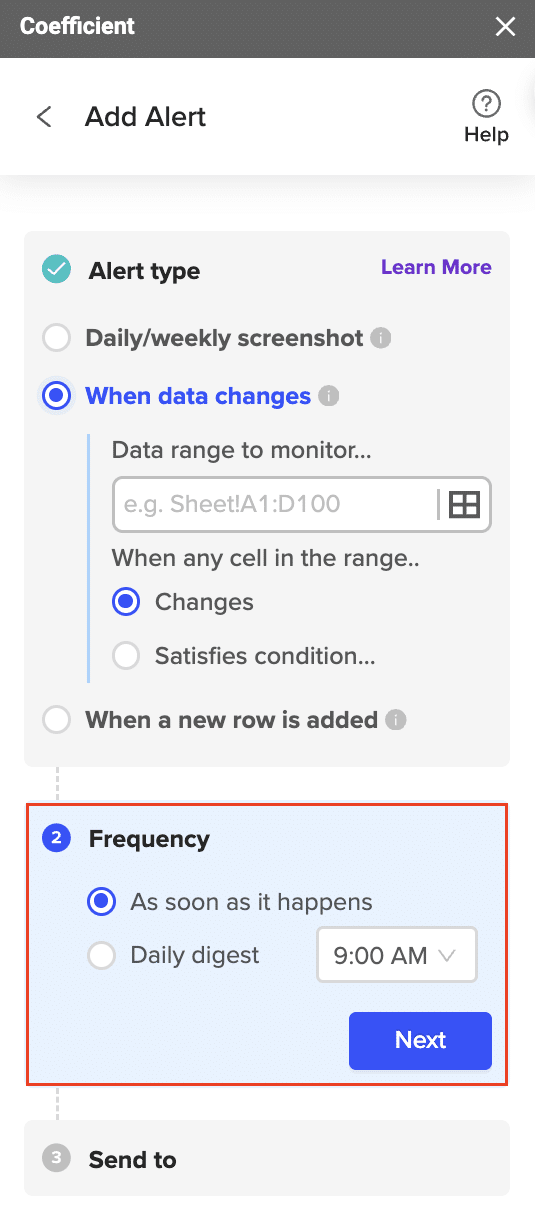
Select “Send to” and choose Email.

Step 2. Configuring Email Notifications
Enter the email address(es) that should receive this Automation. Make sure to give your Automation a descriptive name.
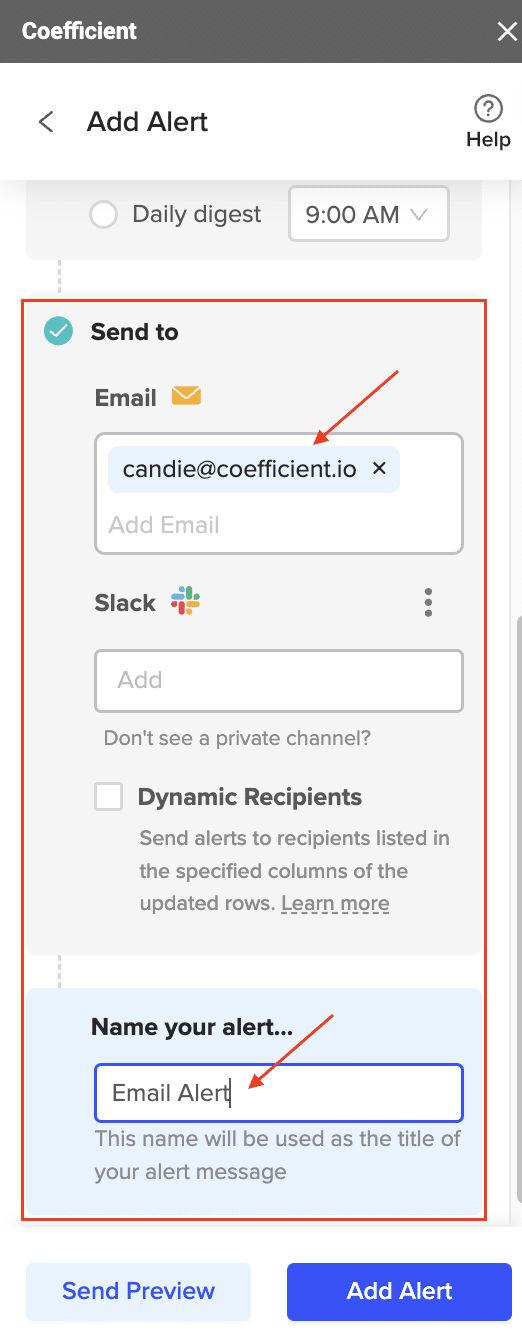
Automations sent to email will be triggered when the specified conditions are met (or when you “Send Preview”). The emails will come from “[email protected]“.
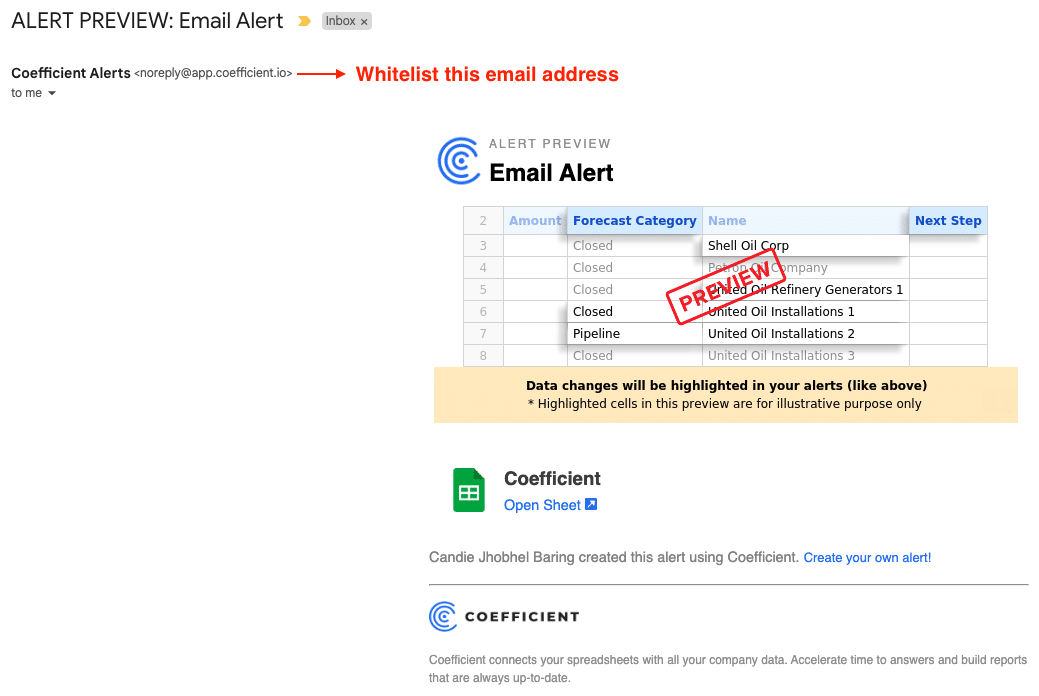
Note: If you don’t see an Automation email in your inbox, check your Spam/Junk folder – you may need to whitelist the email address.
Pros:
- Easy to set up and use, no coding required
- Seamlessly integrates with your existing Google Sheets workflow
- Supports dynamic email content based on your Google Sheets data
- Offers a “Send Preview” feature for testing your automations
Cons:
- Requires a Coefficient subscription (free trial available)
Method 2: Using Zapier to Automate Email Sending
Zapier is a web-based automation tool that connects Google Sheets with Gmail, allowing you to automate email sending.
Step 1: Create a new Zap and choose Google Sheets as the trigger app
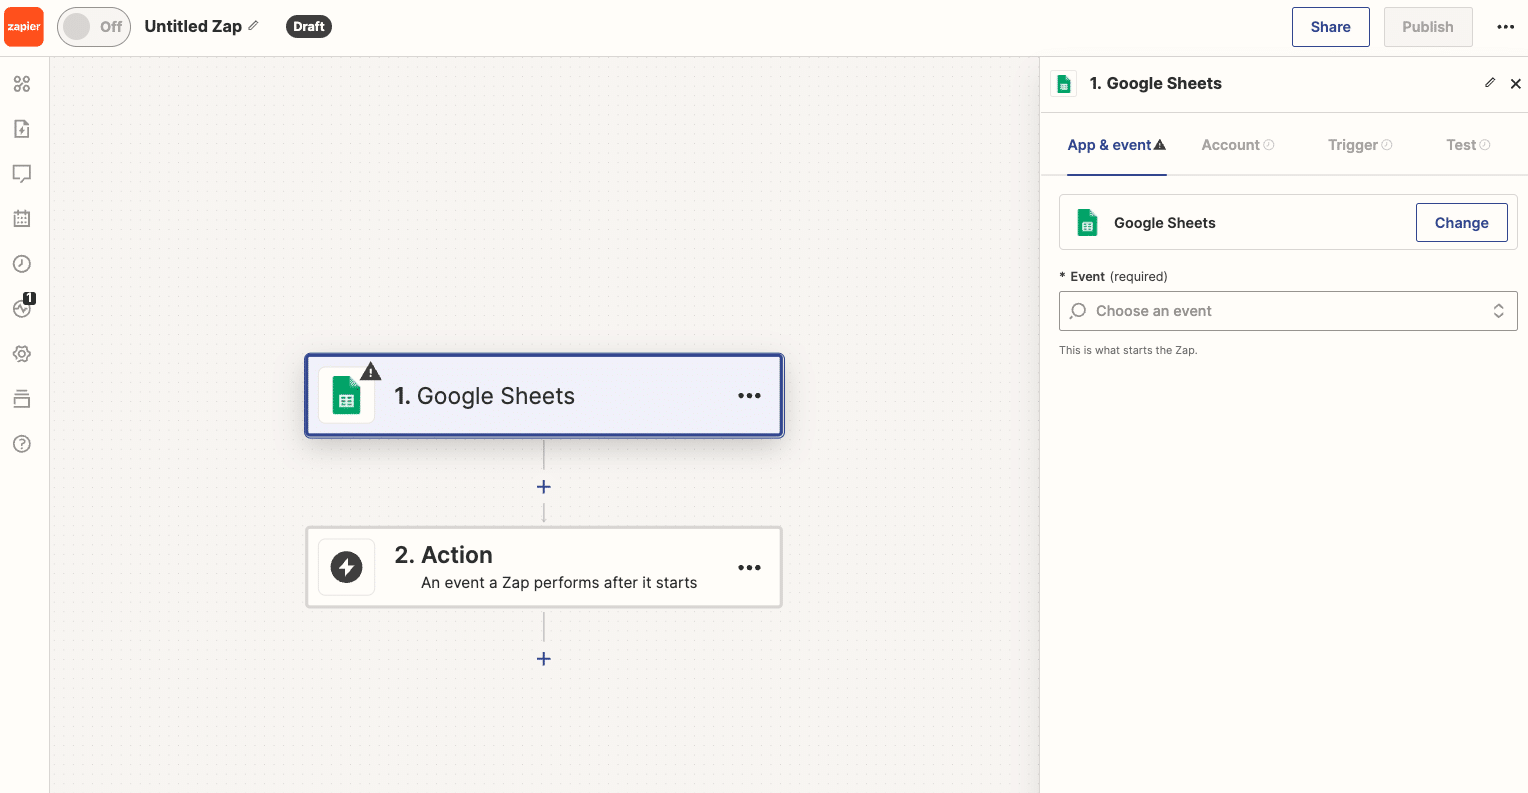
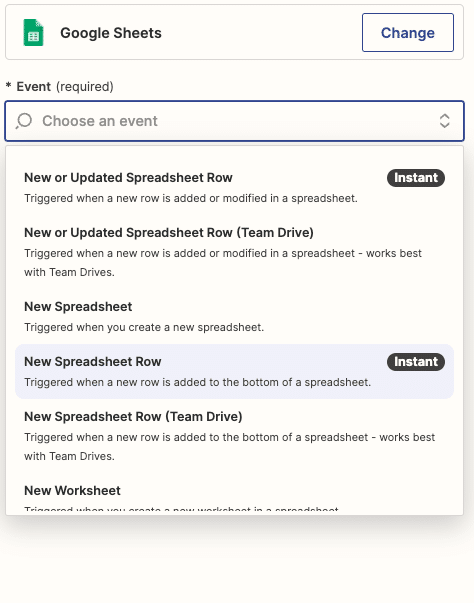
Step 2: Set up the Google Sheets trigger (e.g., when a new row is added)
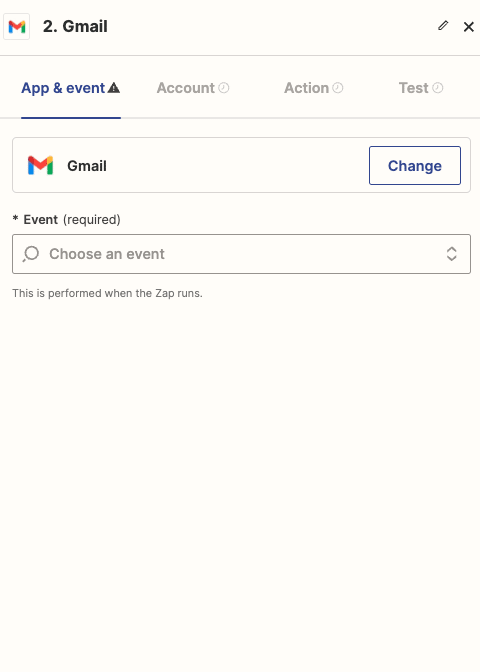
Step 3: Choose Gmail as the action app
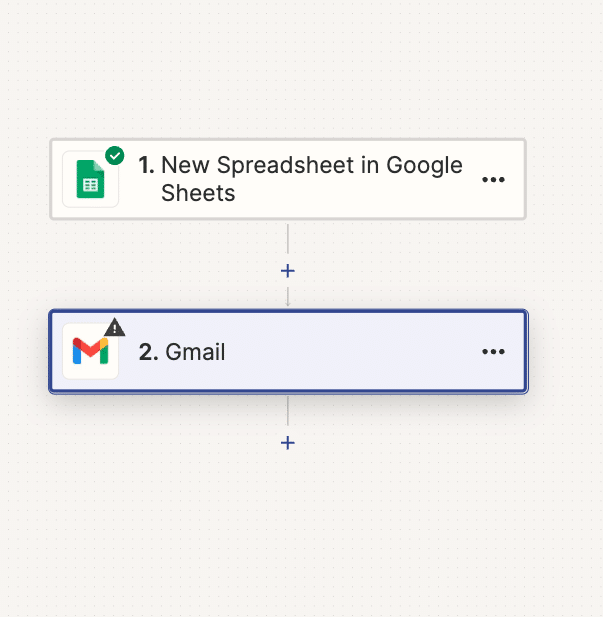
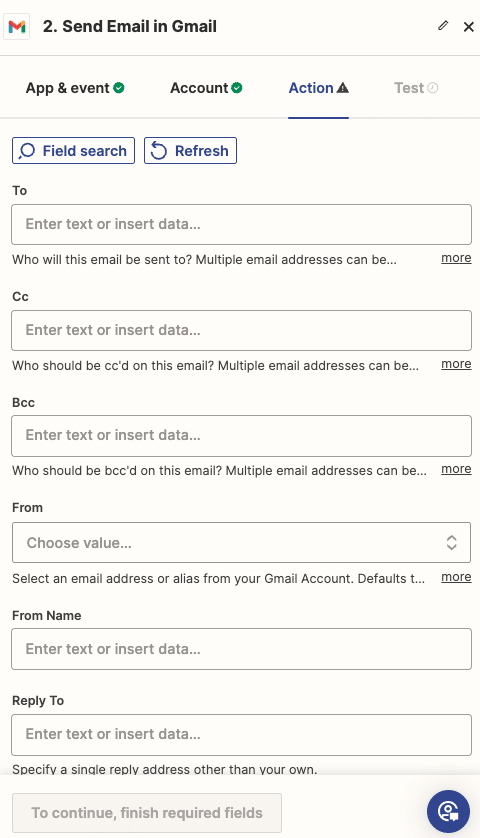
Step 4: Set up the Gmail action (e.g., send an email)
Step 5: Customize your email content and recipient list
Step 6: Test and activate your Zap
Pros:
- User-friendly interface, no coding required
- Connects Google Sheets with multiple email providers (e.g., Gmail, Outlook)
- Offers a wide range of automation triggers and actions
Cons:
- Limited customization options compared to Google Apps Script
- Requires a Zapier subscription for more advanced features
Method 3: Using Google Apps Script to Automate Email Sending
Google Apps Script is a scripting language based on JavaScript that allows you to extend the functionality of Google Sheets and automate tasks like email sending.
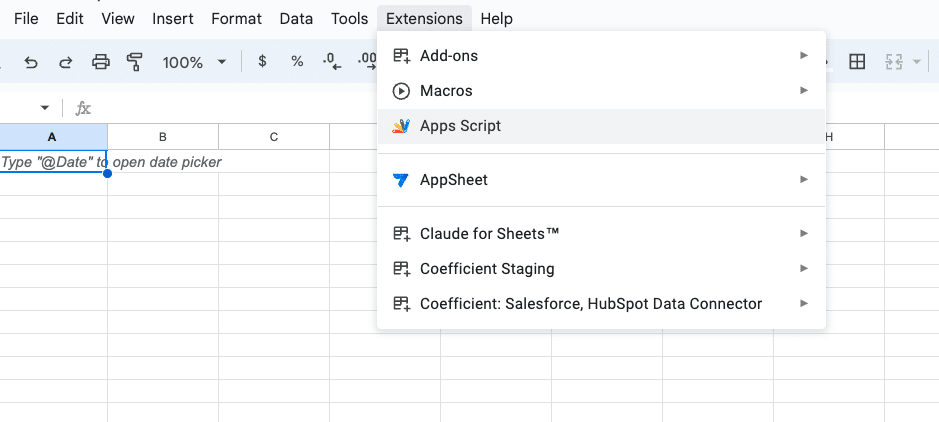
Step 1: Open your Google Sheet and navigate to the script editor
Step 2: Write the script for sending emails
Copy and paste the following sample code into your script:
function sendAutomaticEmails() {
// Get the active sheet
var sheet = SpreadsheetApp.getActiveSheet();
// Get the data range

Supercharge your spreadsheets with GPT-powered AI tools for building formulas, charts, pivots, SQL and more. Simple prompts for automatic generation.

var dataRange = sheet.getDataRange();
var data = dataRange.getValues();
// Loop through each row
for (var i = 1; i < data.length; i++) {
var row = data[i];
var emailAddress = row[0];
var subject = “Your Subject Line”;
var message = “Your email message goes here. You can include data from the sheet, like: ” + row[1];
// Send the email
MailApp.sendEmail(emailAddress, subject, message);
}
}
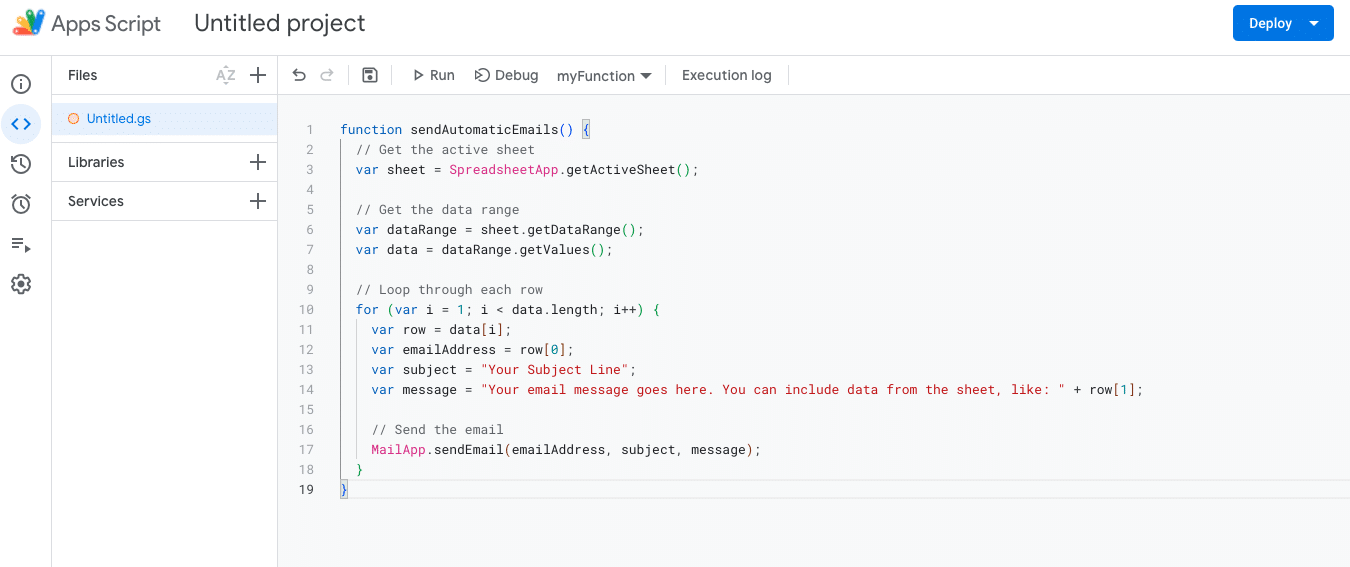
Note: This script assumes that your email addresses are in the first column (column A) of your sheet, and any additional data you want to include in the email is in the second column (column B).
Customize the subject and message variables to fit your specific needs.
Step 3: Customize your email content and recipient list
Modify the script to include your desired email subject line and message. You can incorporate data from your Google Sheet by referencing the appropriate row and column numbers.
To specify the recipient list, you can either:
- Include email addresses directly in the script
- Reference a column in your Google Sheet that contains the email addresses
Step 4: Set up a trigger to run the script automatically
To automate the email notifications, you need to set up a trigger that runs the script at a specified time or interval. Click on “Edit” in the menu bar, then “Current project’s triggers”.
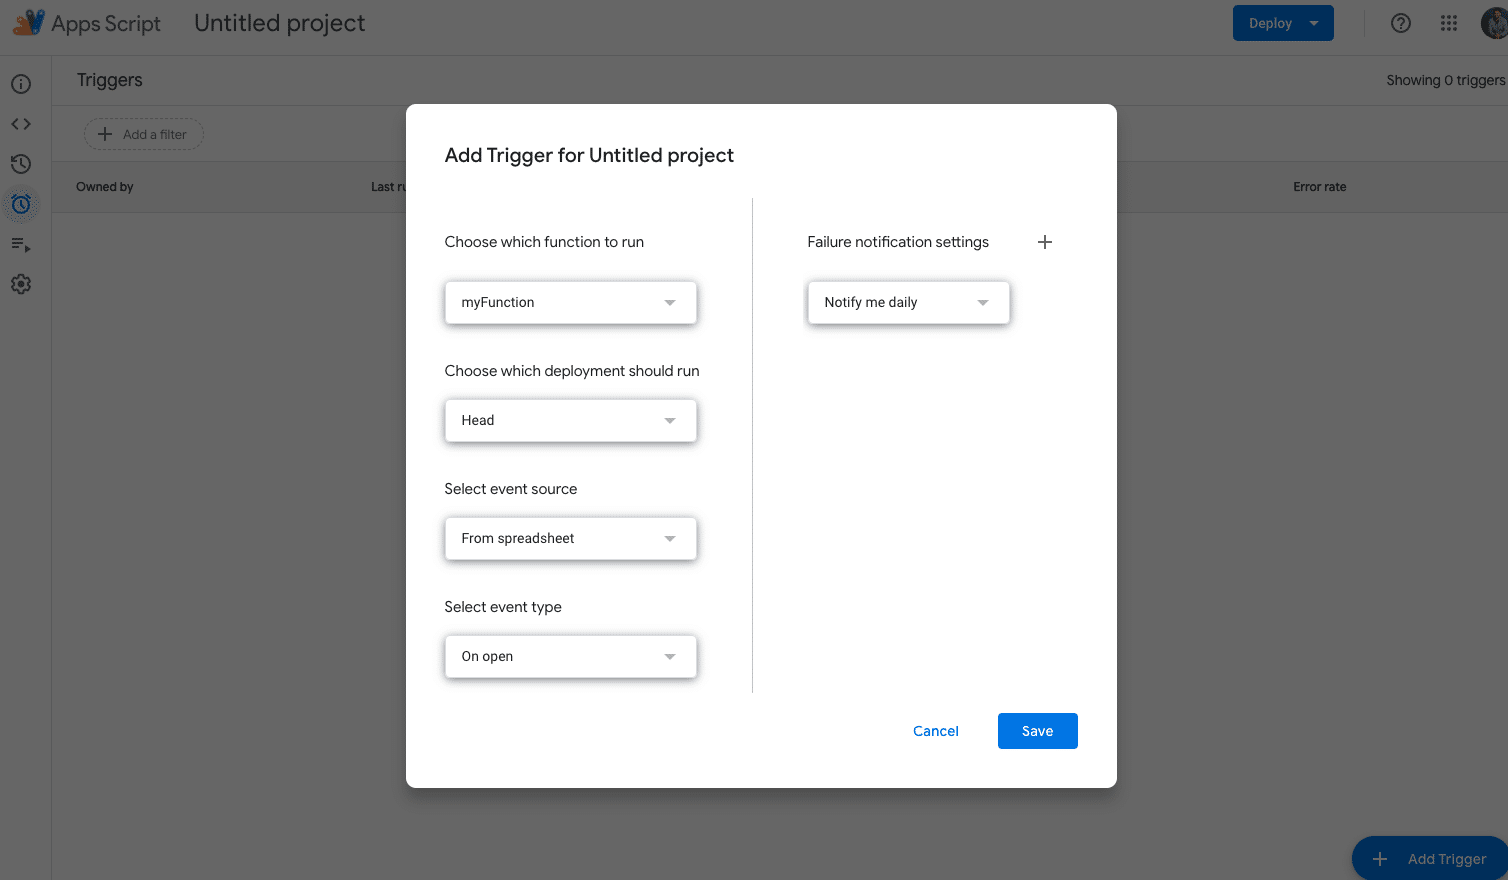
Click on “Add Trigger” and configure the settings to run the script as often as needed.
Pros:
- Highly customizable, allows for complex automation scenarios
- Free to use (included with your Google account)
- Integrates seamlessly with other Google services (e.g., Gmail, Google Forms)
Cons:
- Requires basic coding knowledge (JavaScript)
- Can be time-consuming to set up and maintain
Automating Email Sends: Advanced Tips and Features
Here are some advanced tips and features to enhance your automatic email notifications:
- Scheduling emails: Set up triggers to run the script at specific times or intervals, such as daily, weekly, or monthly.
- Conditional emails: Use if-else statements in your script to send emails based on cell values or conditions.
- HTML formatting: Customize the appearance of your emails by including HTML tags in the message variable.
- Attachments: Attach files or charts from your Google Sheet to the email using the MailApp.sendEmail() function’s advanced parameters.
Streamline Your Email Automation with Google Sheets and Coefficient
Automating email sending from Google Sheets can greatly improve your productivity and efficiency. By optimizing your email content and deliverability, you can ensure that your automated emails achieve their desired impact.
Ready to take your Google Sheets automation to the next level? Try Coefficient for free and discover how it can help you automate email sending and other tasks with ease.


