While Smartsheet excels at streamlining workflows and boosting productivity, there are times when you may need to export your data to Microsoft Excel for further analysis, reporting, or sharing with stakeholders.
In this comprehensive guide, we’ll explore three methods for exporting Smartsheet data to Excel: using Coefficient for automated syncing, manual CSV exports, and setting up workflows with Zapier.
Why Export Smartsheet Data to Excel
- Advanced Analytics: Dive deep into your data with Excel’s powerful formulas and pivot tables for detailed insights.
- Dynamic Reports: Create compelling reports and dashboards using Excel’s charting and templates.
- Enhanced Collaboration: Share and work on data in Excel, facilitating teamwork and offline editing.
Method 1: Coefficient
Coefficient is a no-code platform that enables real-time, automated data syncing between various tools, including Smartsheet and Excel. With Coefficient, you can set up a continuous export of Smartsheet data to Excel without manual effort.
Pros and Cons
Pros:
- No-code setup process
- Real-time, automated data syncing
- Supports multiple data sources beyond just Smartsheet
Cons:
- Some advanced features, such as scheduled automations, are only available on paid plans. However, Coefficient’s pricing is still very competitive compared to other solutions.
Step-by-Step Tutorial
Step 1. Install Coefficient
- Open Excel from your desktop or in Office Online. Click ‘File’ > ‘Get Add-ins’ > ‘More Add-Ins.’
- Type “Coefficient” in the search bar and click ‘Add.’
- Follow the prompts in the pop-up to complete the installation.
- Once finished, you will see a “Coefficient” tab in the top navigation bar. Click ‘Open Sidebar’ to launch Coefficient.
Coefficient will open on the right-hand side of your workbook.
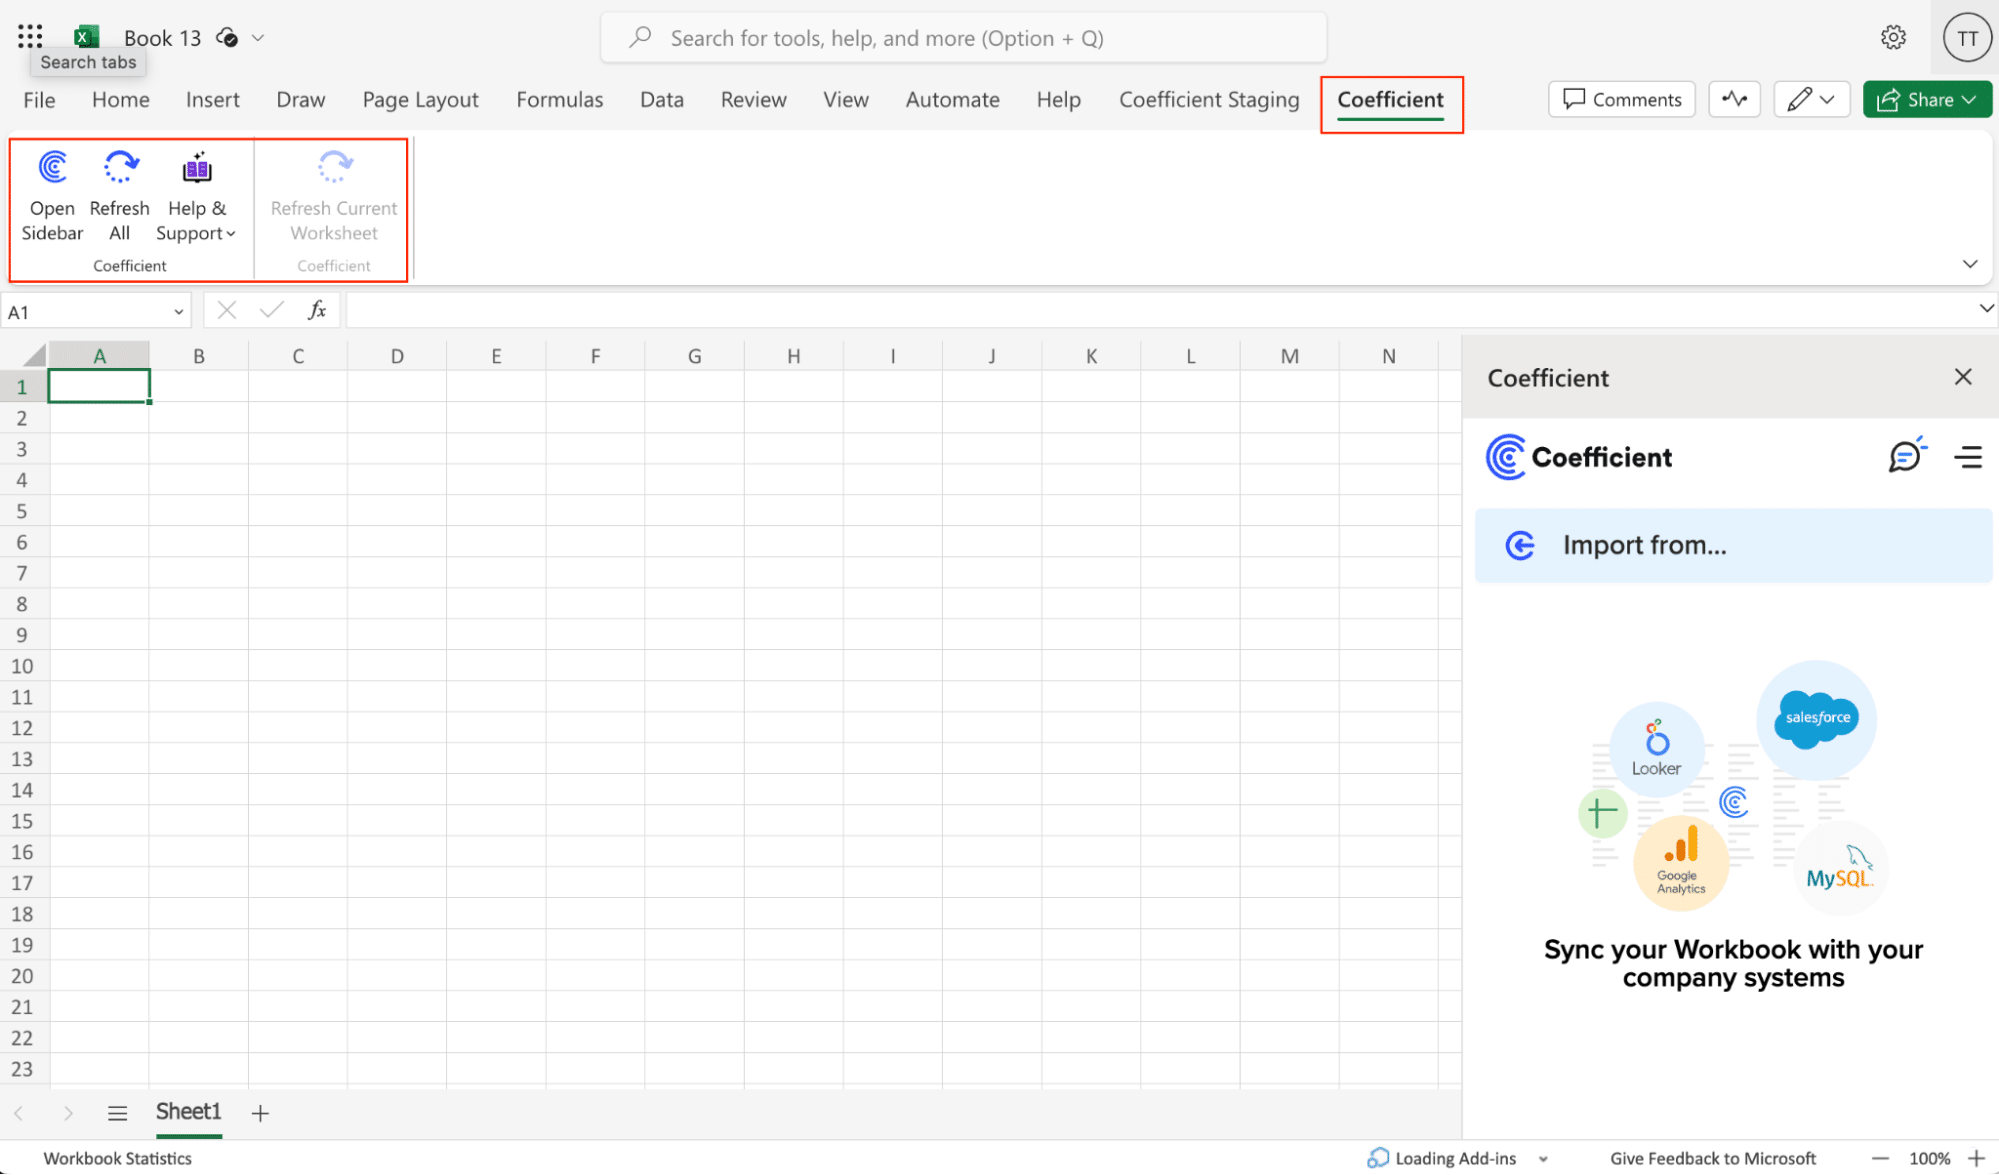
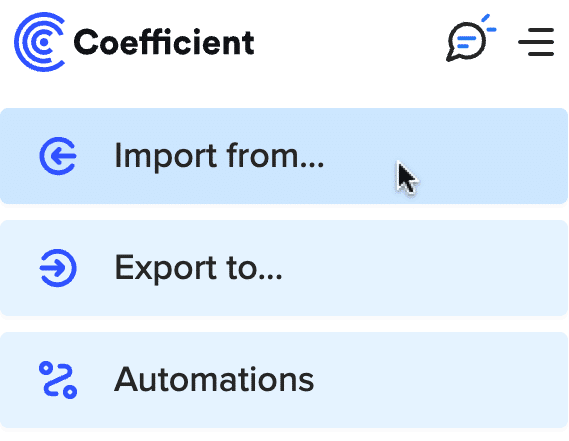
Click ‘Import from…’ from the Coefficient menu.
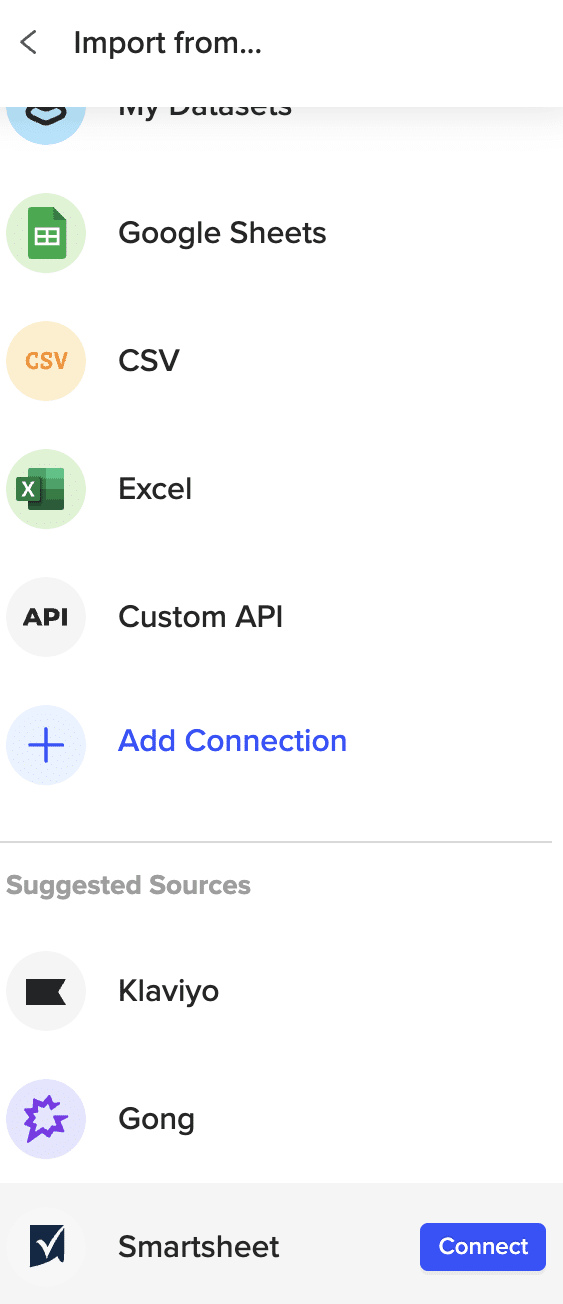
Navigate down the menu to find Smartsheet. Click ‘Connect.’
Click ‘Authorize’ to grant Coefficient access to Smartsheet.

Select ‘Allow’ and log in to your Smartsheet account when prompted.
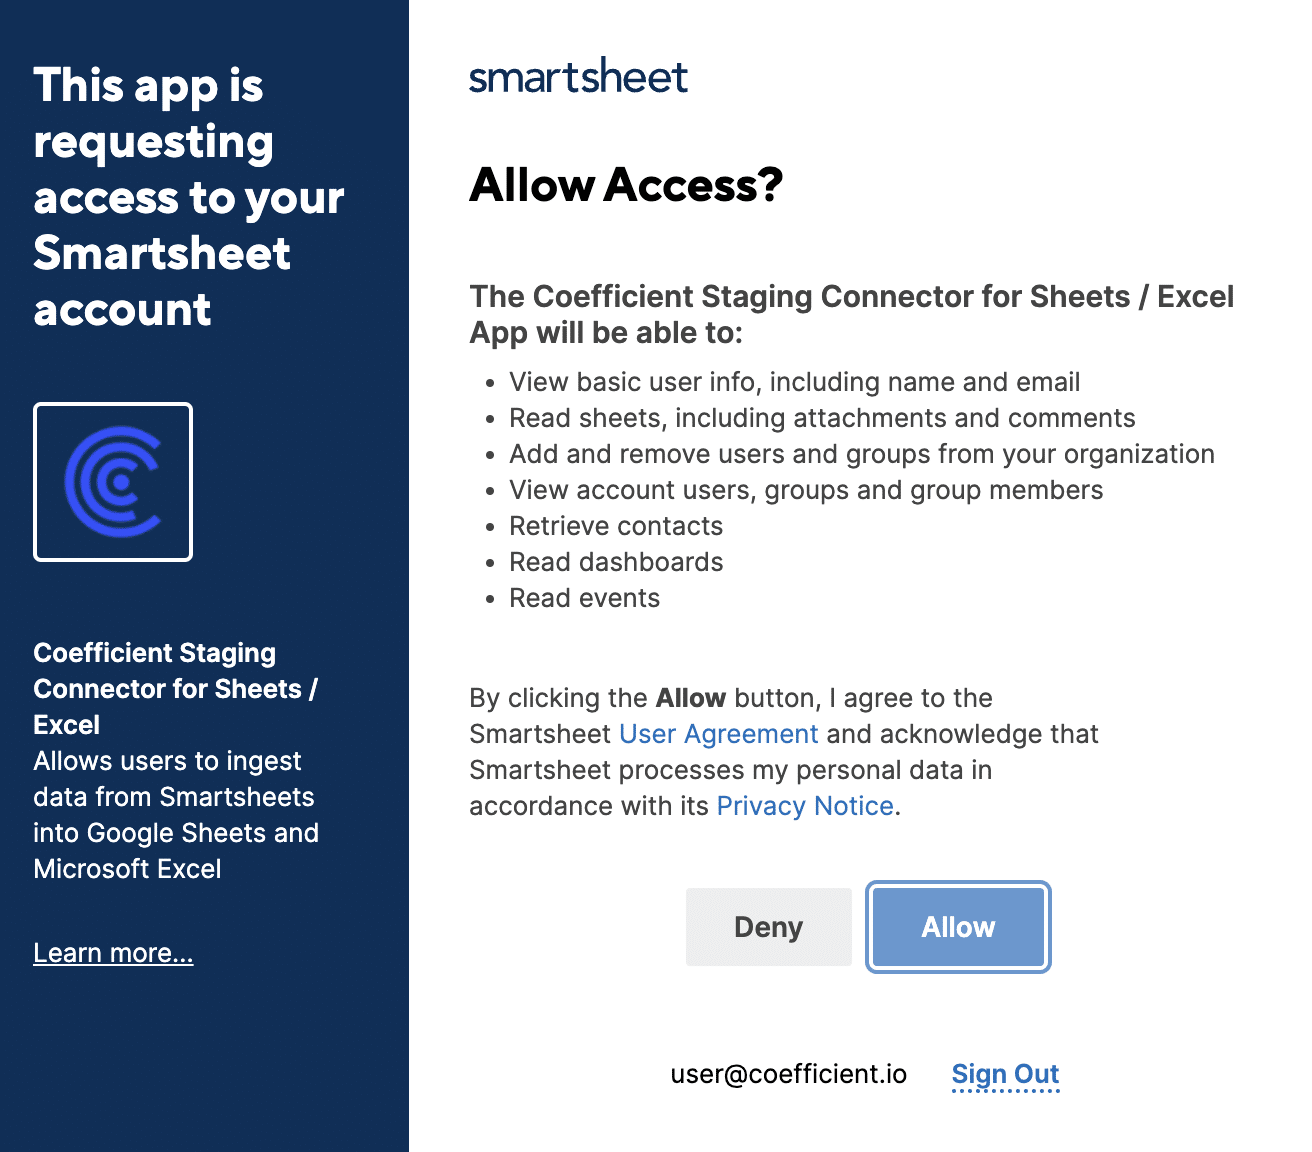
Select ‘Start from Scratch’ after connecting Coefficient to Smartsheet.

Review the list of available objects you can import into Coefficient in the Preview menu.
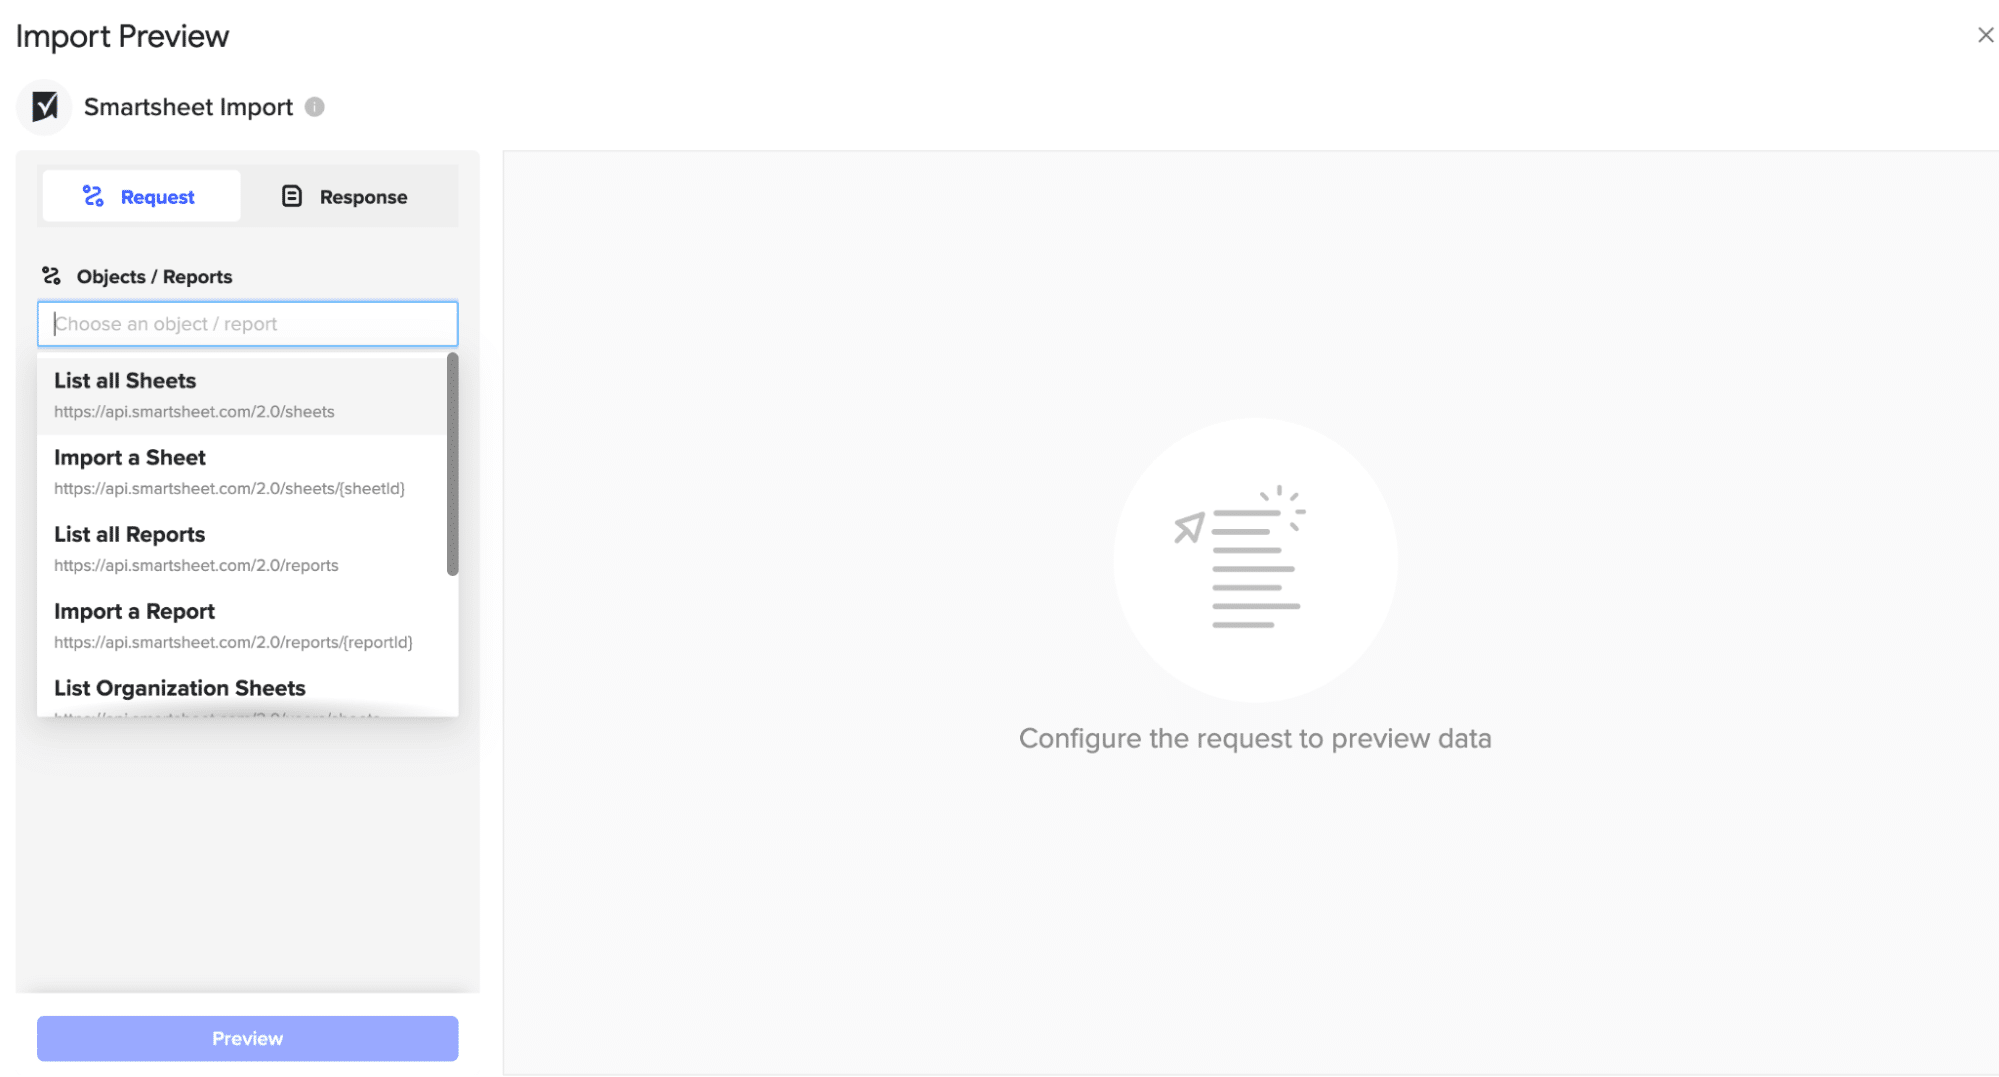
To Import Data from a Sheet:
Select ‘Import a Sheet.’
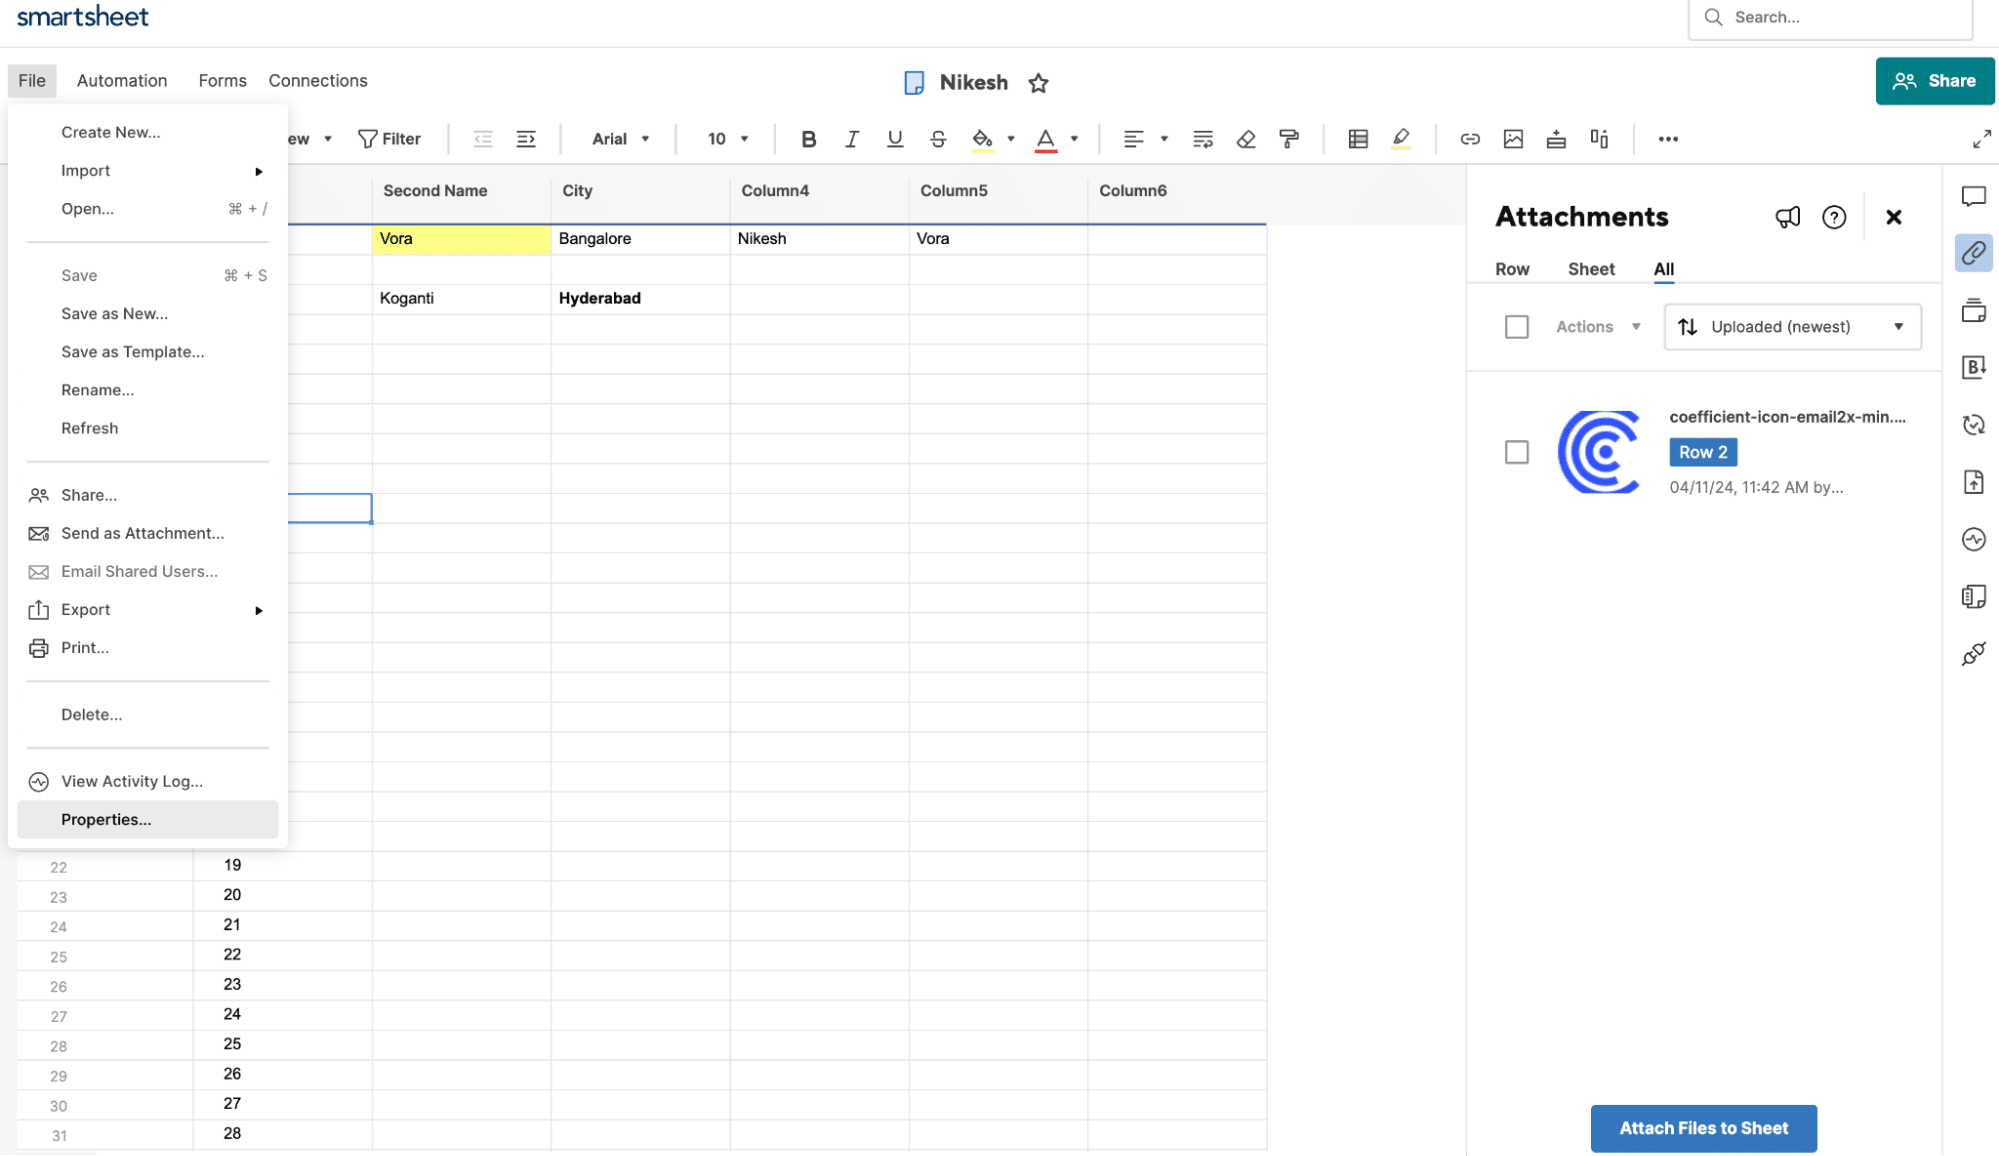
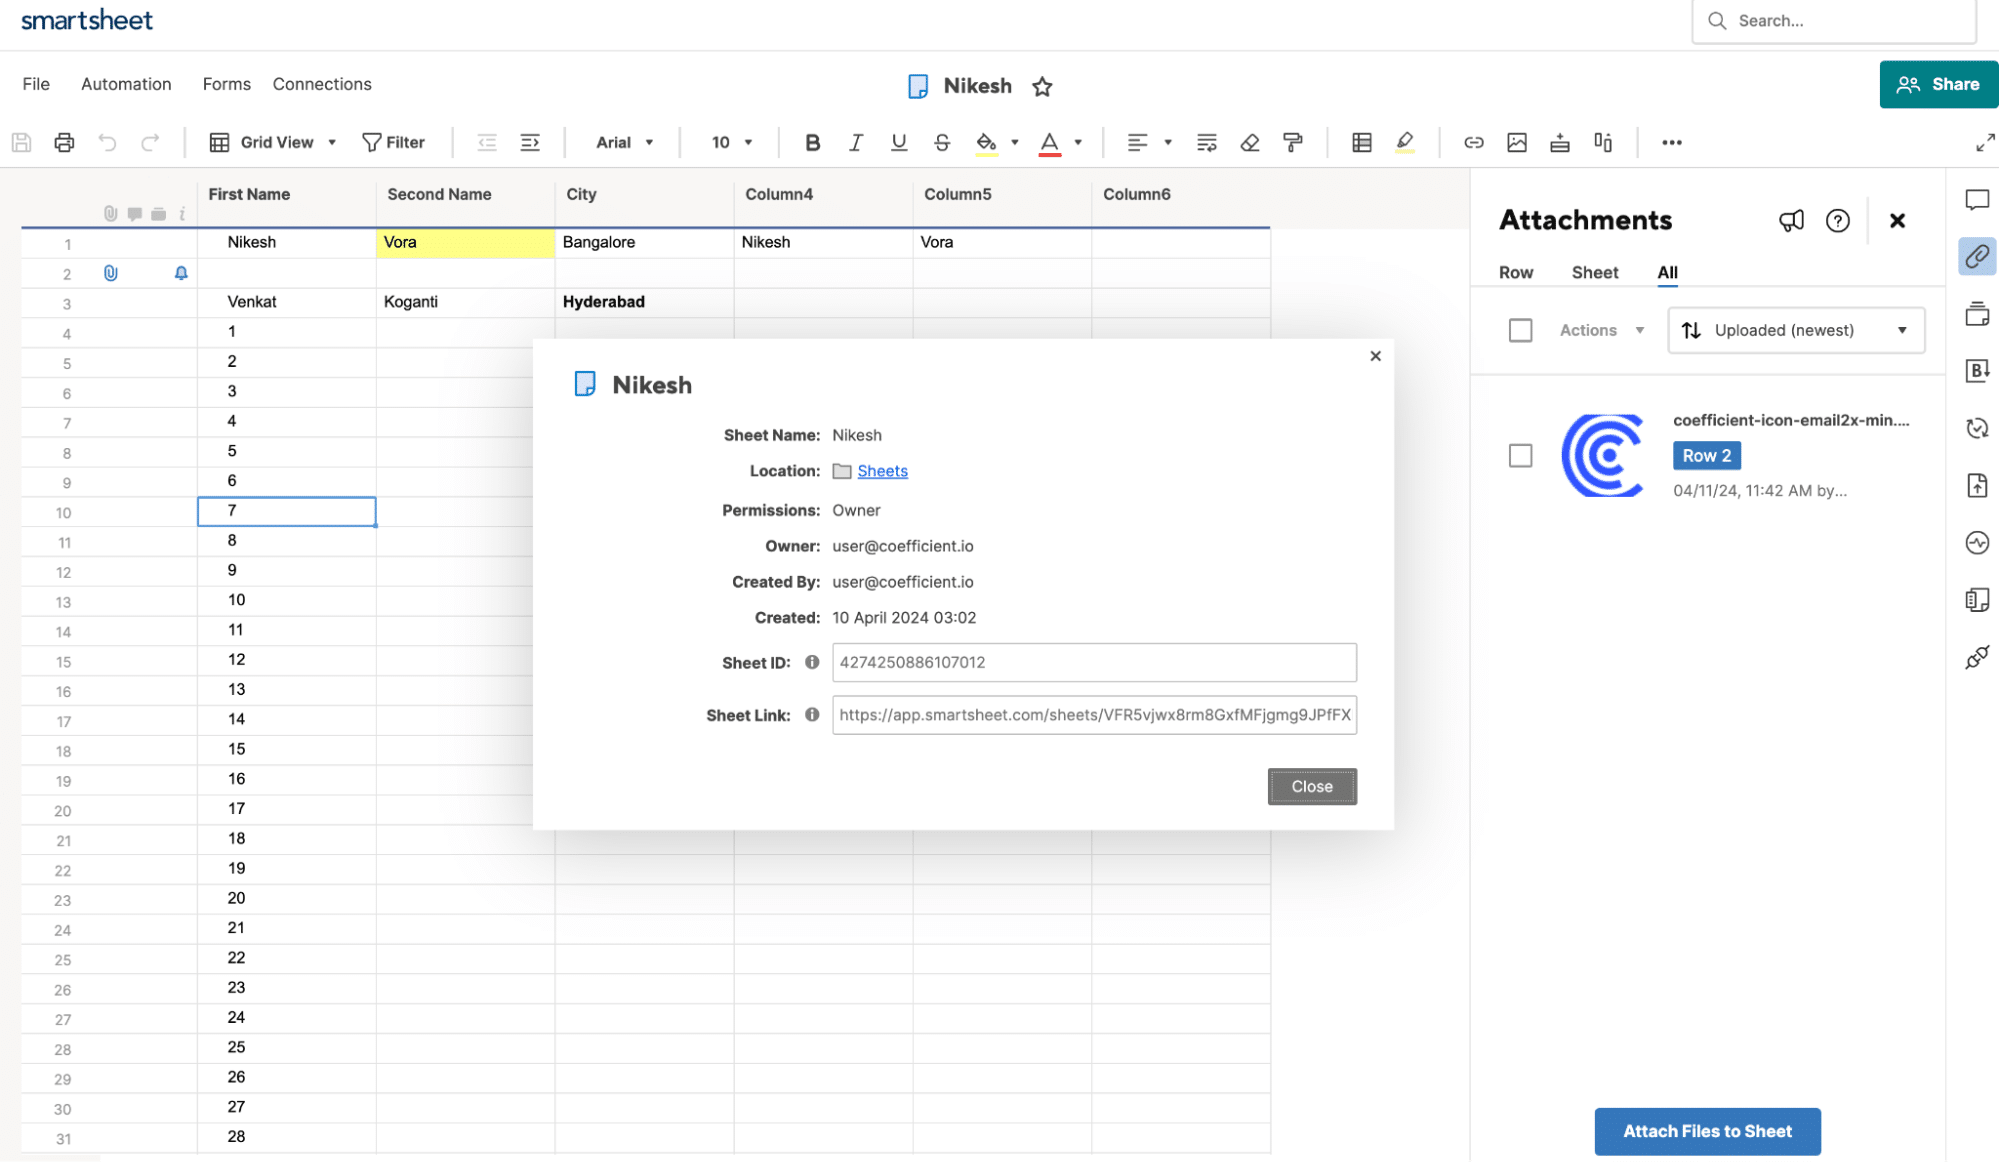
Note: You’ll need the Sheet ID of the sheet you wish to import to continue.
Navigate to the desired sheet in Smartsheet. Go to ‘File’ > ‘Properties.’
Copy the Sheet ID.
Paste the copied Sheet ID into the required field in Coefficient.
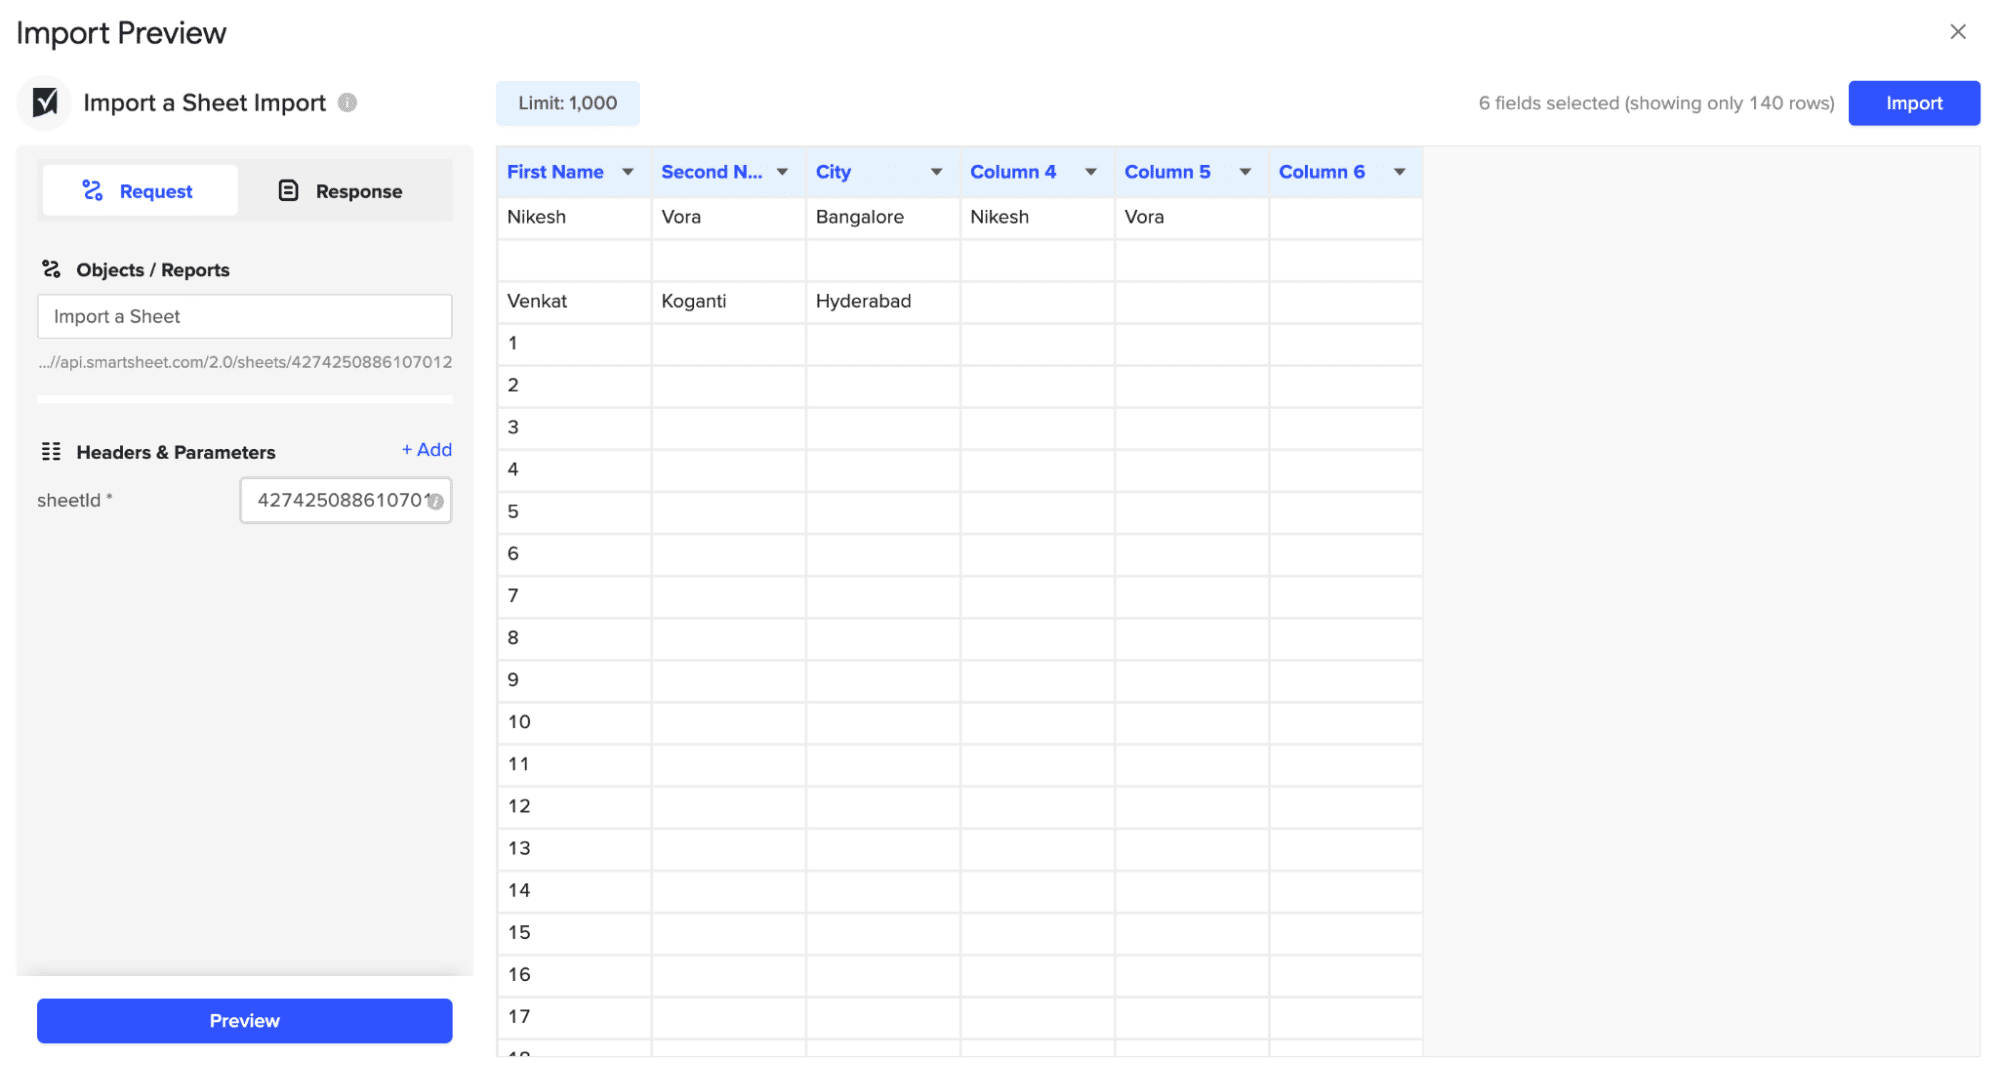
Click ‘Import’ to fetch the Smartsheet data into your Excel workbook.
Method 2: Direct CSV Export
Smartsheet offers a built-in feature that allows you to manually export sheet data as an Excel file. This method is ideal for quick one-time exports, sharing data with external stakeholders, or creating an Excel backup of your Smartsheet data.
Pros and Cons
Pros
- Easy to use, requiring no additional tools or setup
- Ideal for one-time exports or sharing data with external parties
Cons
- Manual process that can be time-consuming for regular exports
- Limited to exporting one sheet at a time
Step-by-Step Tutorial
- Open the Smartsheet project and navigate to the sheet you want to export
- Click on the “File” menu and select “Export” > “Microsoft Excel”
- Choose your desired export options (e.g., sheet summary, attachments, discussions)
- Click “Export” to download the Excel file
- Open the exported Excel file to access your Smartsheet data
Method 3: Zapier
Zapier is a popular automation tool that allows you to connect Smartsheet with Excel, enabling automated data export. With Zapier, you can set up a “Zap” that triggers whenever new data is added to Smartsheet and automatically sends that data to an Excel spreadsheet.

Stop exporting data manually. Sync data from your business systems into Google Sheets or Excel with Coefficient and set it on a refresh schedule.

This method is ideal for keeping your Excel data in sync with Smartsheet without manual intervention.
Pros and Cons
Pros:
- Highly customizable workflows
- Supports a wide range of app integrations
- Ideal for complex, event-driven automations
Cons:
- Requires setting up a Zap, which may have a learning curve
- Limited by Zapier’s pricing tiers, which restrict the number of tasks and Zaps
Step-by-Step Tutorial
Step 1. Set up a Zapier Account: If you don’t have one already, sign up for a Zapier account at zapier.com.
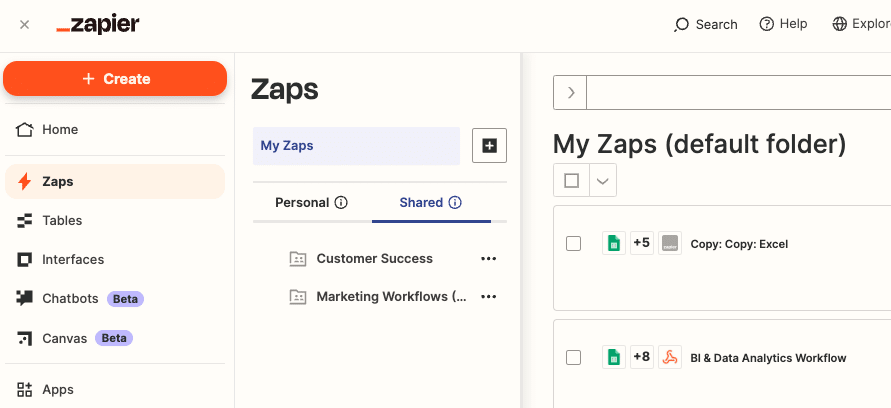
Step 2. Create a New Zap: Click on “+ Create” in your Zapier dashboard.
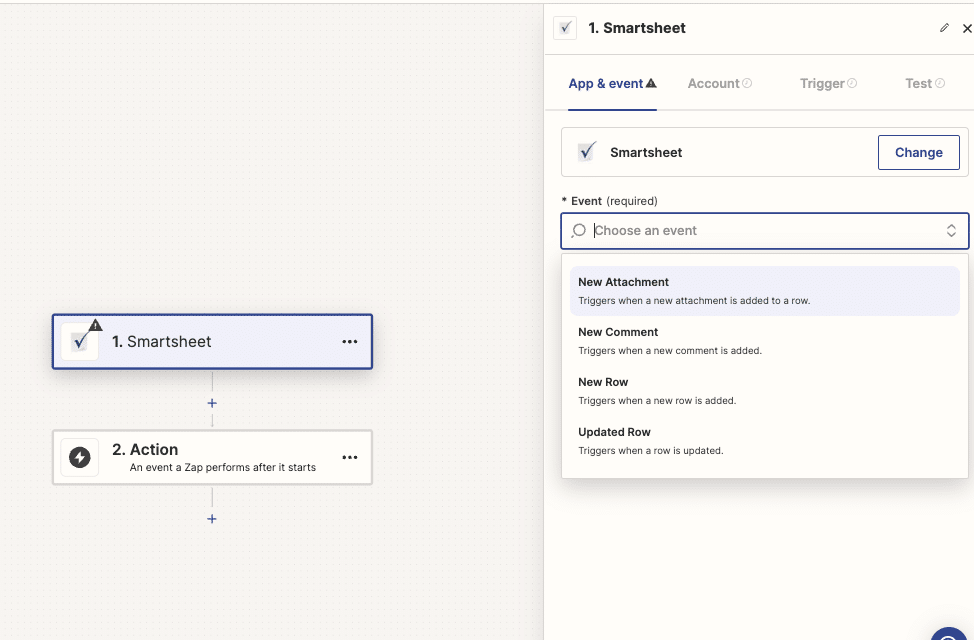
Step 3. Choose Smartsheet as the Trigger App: Search for “Smartsheet” and select it as the trigger app. Choose the specific trigger event, such as “New Attachment.”
Step 4. Connect Your Smartsheet Account: Follow the prompts to connect your Smartsheet account to Zapier.
Step 5. Set up the Trigger: Customize the trigger settings, such as specifying the Smartsheet and Sheet you want to export data from.
Step 6. Choose Excel the Action App: Search for “Excel” and select it as the action app. Choose the specific action event, such as “Add Spreadsheet Row”.
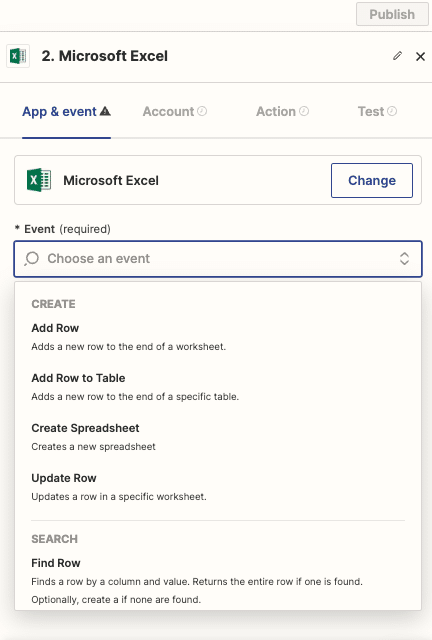
Step 7. Connect Your Account: Follow the prompts to connect your account to Zapier.
Step 8. Set up the Action: Map the Smartsheet data fields to the corresponding columns in your Excel spreadsheet. Customize the spreadsheet settings as needed.
Step 9. Test and Activate the Zap: Test your Zap to ensure it’s working properly. If everything looks good, activate the Zap.
Seamlessly Export Smartsheet Data to Excel
In this post, we’ve covered three powerful methods for exporting Smartsheet data to Excel: using Smartsheet’s built-in export feature, manual CSV exports, and automated exports with Zapier.
Each approach has its own advantages and use cases, but if you’re looking for a quick, easy-to-use solution, Coefficient is worth considering. By leveraging Coefficient to connect Smartsheet and Excel, you can supercharge your reporting, data analysis, and overall productivity.
Try Coefficient today and nd start exporting your data to Excel in minutes!
