Excel’s Track Changes feature lets you monitor modifications in spreadsheets. This guide shows you how to enable and use it effectively.
How to Enable Track Changes in Excel
Access the Track Changes Feature
Step 1. Open the Review tab in Excel’s ribbon.
- Look for the “Review” tab at the top of your Excel window.

- Click on it to reveal various review-related options.
Step 2. Find the Track Changes button.
- Scan the ribbon for the “Track Changes” button.

- Note: In newer Excel versions, this button might not be immediately visible.
Step 3. Add Track Changes to Quick Access Toolbar if not visible.
- Click the small arrow at the end of the Quick Access Toolbar.
- Select “More Commands” from the dropdown menu.
- In the “Choose commands from” dropdown, select “All Commands.”
- Scroll down and find “Track Changes (Legacy).”
- Click “Add” to move it to the right column.
- Click “OK” to save your changes.
Turn on Track Changes
Step 1. Click the Track Changes button.
- Locate the Track Changes button you’ve just added to the Quick Access Toolbar.
- Click on it to reveal a dropdown menu.
Step 2. Select “Highlight Changes” from the dropdown menu.
- This will open the Highlight Changes dialog box.
Step 3. Check the “Track changes while editing” box.
- This enables the Track Changes feature for your current workbook.

Step 4. Choose when to track changes.
- You’ll see options like “Since I last saved,” “Since date,” or “Not yet reviewed.”
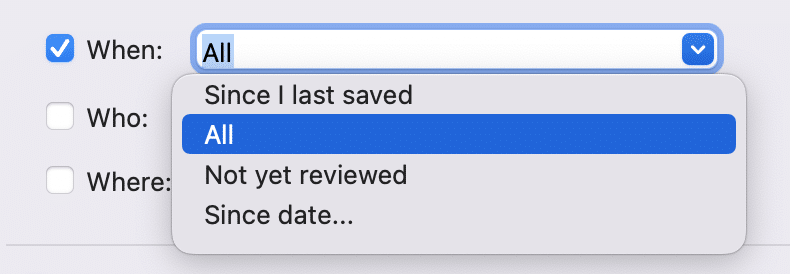
- Select the most appropriate option for your needs.
- If you choose “Since date,” enter the specific date you want to start tracking from.

Step 5. Specify which cells or ranges to track (if applicable).
- By default, changes are tracked in the entire workbook.
- To limit tracking to specific areas, enter cell references or named ranges in the “Where” box.

Step 6. Click OK to confirm settings.
- This applies your chosen Track Changes settings to the workbook.
Using Track Changes in Excel
Review and Accept/Reject Changes
Step 1. Open the shared workbook with tracked changes.
- Ensure you have the necessary permissions to review changes.
Step 2. Go to the Review tab and click “Accept/Reject Changes.”
- This opens a dialog box showing all tracked changes.
Step 3. Navigate through changes using “Next” and “Previous” buttons.
- Review each change individually.
- The affected cell will be highlighted, and the change details will be displayed.
Step 4. Choose to accept or reject each change.
- Click “Accept” to keep the change or “Reject” to revert it.

- You can also use “Accept All” or “Reject All” for bulk actions, but use these cautiously.
Step 5. (Optional) Accept all changes at once.
- If you’re confident in all changes, you can use the “Accept All” button.
- Be cautious with this option, as it applies to all tracked changes without individual review.
Customize Change Highlighting
Step 1. Access the Highlight Changes dialog box.
- Go to the Review tab and click “Track Changes” > “Highlight Changes.”

Step 2. Adjust appearance of tracked changes.
- Click on “Options” in the Highlight Changes dialog box.
- Choose cell border colors for insertions, deletions, and moves.
- Select text colors for changed cells.
Step 3. Set filters to view changes by specific users or date ranges.
- In the Highlight Changes dialog, use the “When” and “Who” dropdowns.

- This helps focus on changes made by particular team members or during specific time periods.
Step 4. Apply custom formatting to identify different types of changes.
- Use conditional formatting rules to highlight specific types of changes.
- For example, you could make all cell value increases appear with a green background.
Collaborative Editing with Track Changes
Share Workbooks with Track Changes Enabled
Step 1. Save workbook to a shared location.
- Use cloud services like OneDrive or SharePoint for easy sharing.
- Ensure the location is accessible to all intended collaborators.
Step 2. Invite collaborators to edit the shared workbook.
- Use Excel’s built-in sharing features or your cloud service’s sharing options.
- Send invitations via email or generate shareable links.
Step 3. Ensure all users have necessary permissions to track changes.
- Check that collaborators have “Edit” permissions, not just “View.”

- Communicate the importance of keeping Track Changes enabled.
Step 4. Communicate change tracking expectations to team members.

Stop exporting data manually. Sync data from your business systems into Google Sheets or Excel with Coefficient and set it on a refresh schedule.
Get Started
- Establish guidelines for using comments, resolving changes, and maintaining version control.
- Consider creating a brief document outlining your team’s Track Changes protocol.
Merge Changes from Multiple Users
Step 1. Open the shared workbook as the primary editor.
- Ensure you have the most up-to-date version of the workbook.
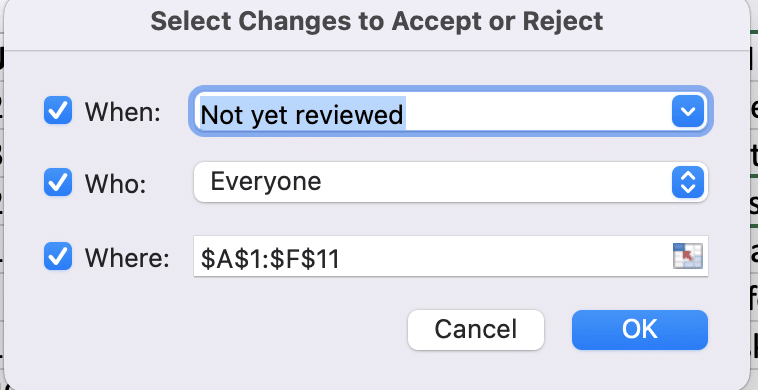
Step 2. Review changes from all collaborators in one view.
- Go to Review > Accept/Reject Changes to see a consolidated list of all modifications.
Step 3. Use conflict resolution tools to handle overlapping edits.
- If multiple users edited the same cell, Excel will prompt you to choose which change to keep.
- Review conflicting changes carefully, considering the intent behind each modification.
Step 4. Consolidate final version after accepting/rejecting all changes.
- Once you’ve reviewed all changes, save the workbook as a new, clean version.
- Consider turning off Track Changes for this final version if no further reviews are needed.
Track Changes Alternatives in Modern Excel
Version History and AutoSave
Step 1. Enable AutoSave for automatic version tracking.
- Ensure your workbook is saved to OneDrive or SharePoint.
- Look for the AutoSave toggle in the top-left corner of Excel and turn it on.
Step 2. Access Version History to view and restore previous versions.
- Click File > Info > Version History.
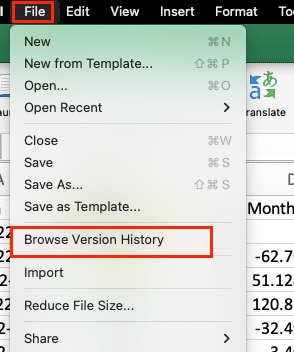
- You’ll see a list of previous versions with timestamps.
Step 3. Compare different versions side-by-side.
- Select a version from the list and click “Open version.”

- This opens the old version in a new window for easy comparison.
Step 4. Revert to earlier versions if needed.
- In the Version History pane, click “Restore” next to the desired version.
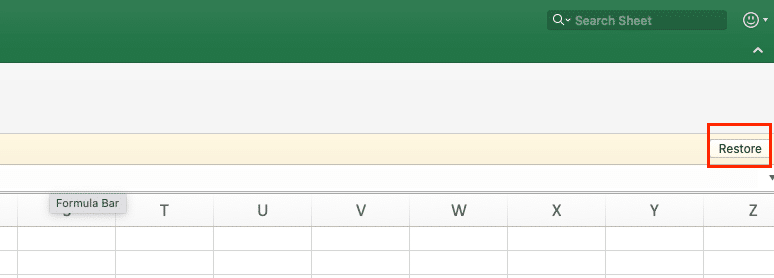
- Excel will create a new version based on the restored content.
Comments and Threaded Conversations
Step 1. Use comments to suggest changes without altering content.
- Select the cell or range you want to comment on.
- Go to Review > New Comment or use the shortcut Shift + F2.
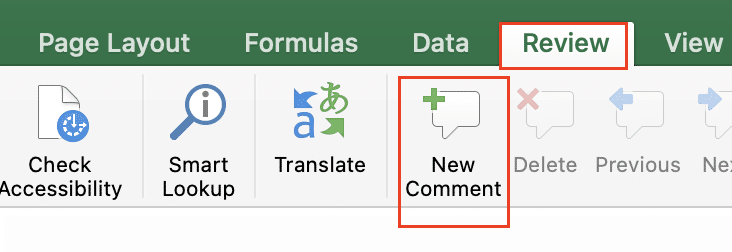
- Type your suggestion or question in the comment box.
Step 2. Start threaded conversations for collaborative discussions.
- Reply to existing comments by clicking the comment and selecting “Reply.”
- This creates a conversation thread, keeping related discussions organized.
Step 3. Assign action items to specific team members.
- In your comment, use “@” followed by a team member’s name to assign tasks.
- Excel will notify the mentioned user about the assigned action item.
Step 4. Resolve comments once changes are implemented.
- After addressing a comment, click the “Resolve” button in the comment thread.
- This marks the discussion as complete but keeps the history for future reference.
Enhancing Excel Collaboration
By mastering track changes and related features, you can improve collaboration and maintain clear records of spreadsheet modifications. Start using these techniques in your Excel projects today.
Ready to take your Excel collaboration to the next level? Try Coefficient to seamlessly sync live data from 50+ business systems into your spreadsheets. Get started with Coefficient and transform how you work with data in Excel.

