
Maintaining clean and organized data is crucial for effective analysis and decision-making. One common challenge in Excel is dealing with duplicate entries, which can skew your results and make it difficult to extract meaningful insights. In this comprehensive guide, we’ll walk you through the step-by-step process of removing duplicates in Excel, ensuring your data is accurate and ready for further analysis.
Remove Duplicates in Excel: The Basics
Duplicate data can arise for various reasons, such as manual data entry errors, data merging, or data imports from multiple sources. Removing these duplicates is essential to maintain the integrity of your spreadsheet and ensure you’re working with clean, reliable information.
The good news is that Excel provides a built-in feature to help you identify and remove duplicate entries with ease. By using this feature, you can quickly and efficiently eliminate redundant data, freeing up space and improving the overall quality of your spreadsheet.
Step-by-Step Guide: Removing Excel Duplicates
To remove duplicates in Excel, follow these simple steps:
- Select the range of cells containing the data: Highlight the entire range of cells where you want to remove duplicates. This can be a single column or a larger dataset.

- Go to the Data tab: In the Excel ribbon, locate the Data tab.

- Click the “Remove Duplicates” button: In the Data Tools group, click on the “Remove Duplicates” button.

- Specify the columns to check for duplicates: A dialog box will appear, allowing you to select the columns you want Excel to check for duplicate values. By default, all columns are selected, but you can deselect any columns you don’t want to include in the duplicate check.

- Click “OK”: Once you’ve selected the appropriate columns, click the “OK” button to initiate the duplicate removal process.

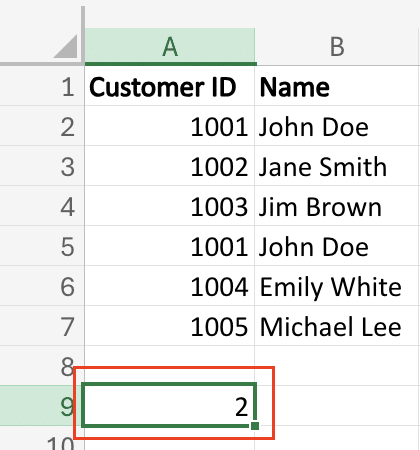
- Review the results: Excel will now remove any duplicate rows from your selected range, leaving only the unique entries. You can review the updated data to ensure the duplicates have been successfully removed.

Advanced Techniques: Removing Duplicates with Formulas
While the built-in “Remove Duplicates” feature in Excel is a powerful tool, there are times when you may need to use more advanced techniques to identify and eliminate duplicates in your data. One such method is leveraging Excel formulas to detect and remove duplicate entries.
The COUNTIF function is particularly useful for this purpose. By using COUNTIF to count the number of occurrences of each value in a range, you can quickly identify which values appear more than once. Here’s an example:
- Select the column or range of data you want to analyze for duplicates.

- In a new column, use the formula =COUNTIF(range, A2), where range is the selected column or range, and A1 is the cell reference of the current row.

- This will return the count of how many times the value in the current row appears in the entire range.
- You can then filter or sort the data to easily identify and remove any rows with a count greater than 1, as these represent duplicate values.
Another helpful formula is UNIQUE, which returns a list of unique values from a given range. By combining UNIQUE with other functions like FILTER, you can create a new sheet or column containing only the unique values, effectively removing duplicates.
How to Remove Duplicates in Excel Based on One Column
Removing duplicates based on a single column is a common task in Excel. Here’s a step-by-step guide:
- Select the column or range of data you want to de-duplicate.

- Go to the Data tab and click the Remove Duplicates button

- In the “Remove Duplicates” dialog box, ensure that the correct column is selected, then click OK.

- Excel will remove any duplicate rows, keeping only the unique values in the selected column.
This method is quick and straightforward, but it’s important to note that it will remove the entire row, not just the duplicate value in the selected column. If you only want to remove duplicates based on a single column while preserving the rest of the data, you can use the advanced filter or a formula-based approach.
Removing Duplicates Without Deleting Data
Sometimes, you may want to identify and highlight duplicate values without actually deleting the data. This can be useful when you need to review the duplicates or make decisions about which records to keep. Here are a few methods to achieve this:
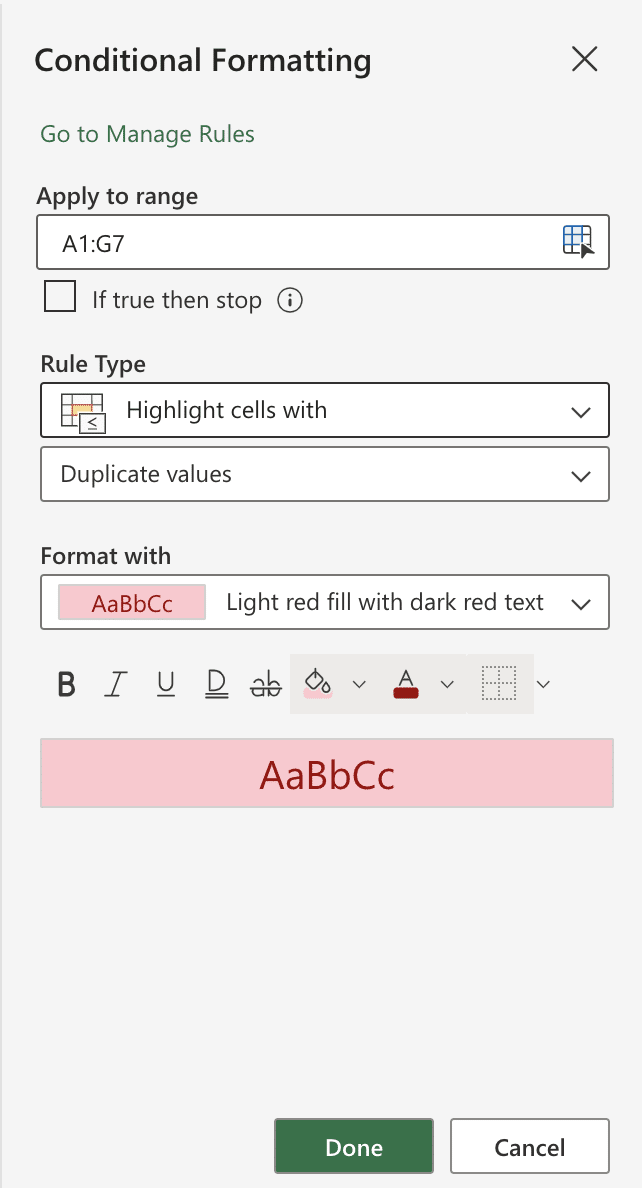
Conditional Formatting
- Select the range of data you want to analyze.
- Go to the Home tab and click the Conditional Formatting dropdown.

- Choose “Highlight Cell Rules” > “Duplicate Values”.

- This will highlight any duplicate values in the selected range, making them easy to identify.
Advanced Filters
- Select the range of data you want to analyze.

- Go to the Data tab and click the Advanced button in the Sort & Filter group
 .
.

Stop exporting data manually. Sync data from your business systems into Google Sheets or Excel with Coefficient and set it on a refresh schedule.
Get Started
- In the “Advanced Filter” dialog box, check the “Unique records only” option.

- This will create a new range or sheet containing only the unique values from your original data.
These methods allow you to work with your data without permanently deleting any information, giving you more flexibility in your data management process.
Video Tutorial
Excel Shortcuts for Removing Duplicates
Excel offers several keyboard shortcuts and quick methods to streamline the process of removing duplicates:
- Ctrl + Shift + L: Quickly apply a filter to the selected range, making it easy to identify and remove duplicates.
- Alt + D + U: Open the “Remove Duplicates” dialog box directly from the keyboard.
- F5 > Special > Unique: Use the “Go To Special” feature to quickly select all unique values in a range.
- Ctrl + ‘ (apostrophe): Duplicate the value from the cell above the current cell, which can be useful for filling in missing data.
Download our Excel Deduplication Cheat Sheet to have these shortcuts and more at your fingertips.
Best Practices and Expert Tips for Data Deduplication in Excel
When removing duplicates in Excel, it’s important to follow best practices to maintain data integrity and ensure accurate results. Here are some expert tips to keep in mind:
- Understand your data: Familiarize yourself with the structure and content of your data before attempting to remove duplicates. This will help you identify the most appropriate methods and avoid unintended consequences.
- Back up your data: Always make a backup of your original data before performing any deduplication operations. This will allow you to revert to the original if needed.
- Consider case sensitivity: By default, Excel’s “Remove Duplicates” feature is case-sensitive. If you need to treat “John” and “john” as the same value, use a formula-based approach or adjust your data beforehand.
- Handle blank cells: Decide how you want to handle blank cells in your data. You may want to treat them as unique values or exclude them from the deduplication process.
- Complement with other tools: While Excel’s built-in features and formulas are powerful, consider using complementary tools like Power Query or third-party add-ins to streamline the deduplication process, especially for large or complex datasets.
Remove Duplicates Across Data Sources
Excel’s duplicate removal tools work well for single sheets. But cleaning data across multiple sources or live databases can be challenging.
Coefficient links Excel to your data in Salesforce, Google Sheets, and more. Deduplicate live data automatically.


