Excel temporary views let you create personalized data displays without affecting others. In this blog, you’ll learn how to use this feature for better teamwork in spreadsheets.
How to Create a Temporary View in Excel
Open Your Excel Workbook and Select a Sheet
Step 1. Launch Excel and open your workbook.
- Double-click the Excel icon on your desktop or search for it in your Start menu.
- Click “File” > “Open” and select your desired workbook.
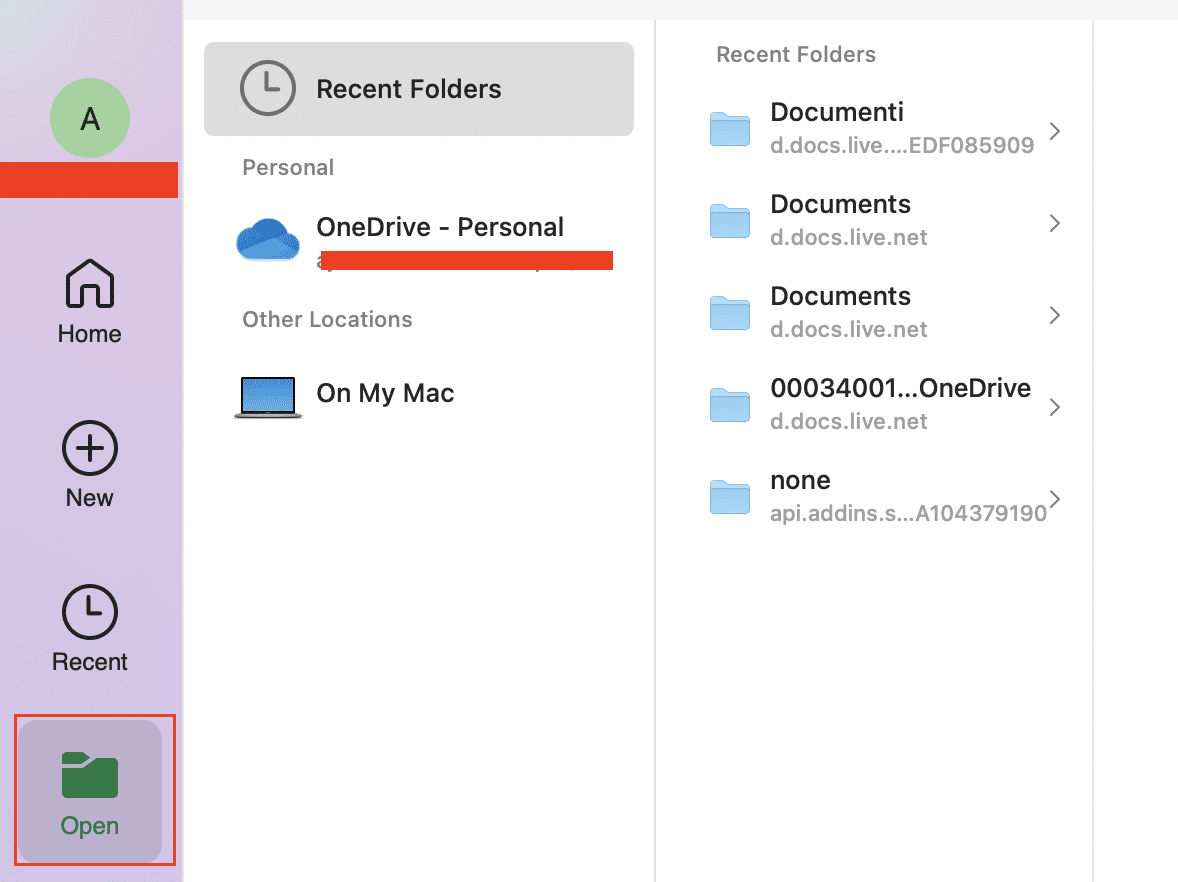
Step 2. Select the sheet for your temporary view.
- Click on the sheet tab at the bottom of the Excel window.
- Ensure you’re using Excel 2024 or later for full temporary view functionality.
Access the Sheet View Feature
Step 1. Navigate to the “View” tab.
- Look for the “View” tab in the Excel ribbon at the top of the window.

- Click on it to reveal view-related options.
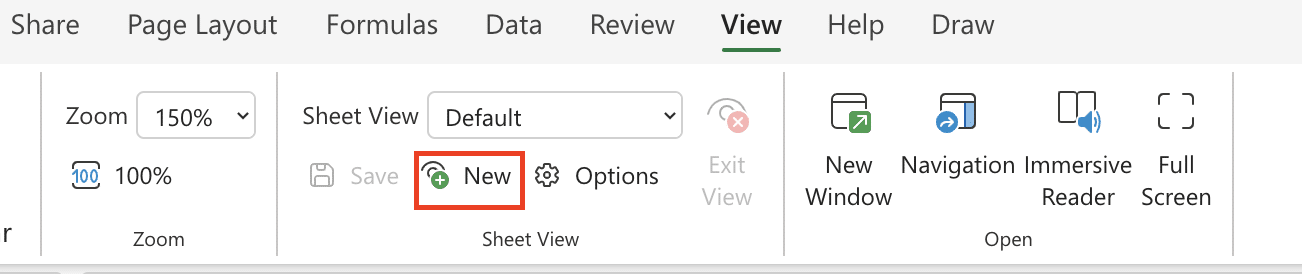
Step 2. Locate the “Sheet View” section.
- Find “Sheet View” on the left side of the View ribbon.

- This section contains all temporary view controls.
Step 3. Create a new sheet view.
- Click the “New” button in the Sheet View section.

- Excel will enter Sheet View mode, indicated by a green outline around your sheet.
Apply Your Desired Filters and Sorting
Step 1. Use Excel’s filtering tools.
- Click the filter button in column headers to reveal filter options.
- Select or deselect values to show only relevant data.
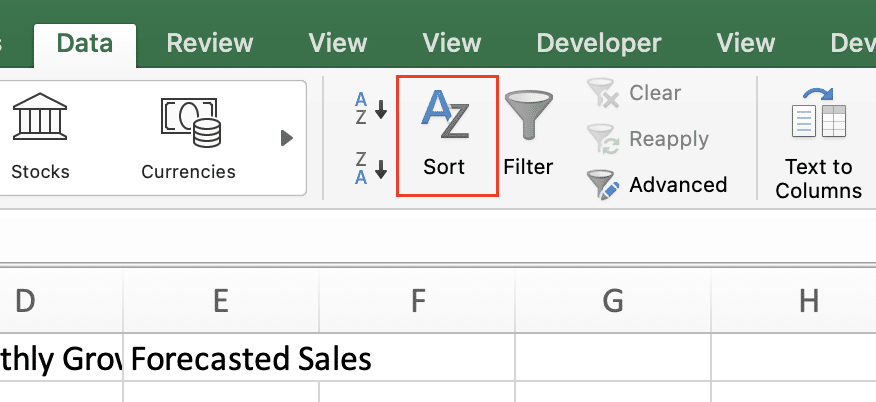
Step 2. Apply sorting to your data.
- Click a column header and use the “Sort A to Z” or “Sort Z to A” buttons.

- For more complex sorting, use the “Sort” button in the “Data” tab.
Step 3. Customize your view further.
- Hide or unhide rows and columns as needed.
- Adjust column widths or row heights for better data presentation.
Work with Your Temporary View
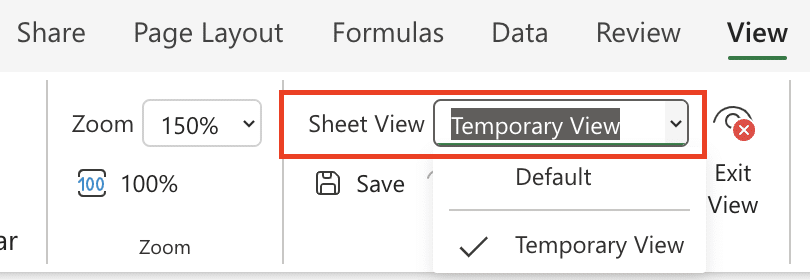
Step 1. Observe the “Temporary View” label.
- Notice that Excel automatically names your new view “Temporary View.”

- This label appears in the Sheet View dropdown menu.
Step 2. Make changes within your view.
- Add formulas, format cells, or enter new data as needed.
- Remember, these changes are only visible to you in this temporary view.
Step 3. Understand the isolation of your changes.
- Your modifications won’t affect other users or the base sheet.
- This allows for safe data exploration and analysis.
Managing Excel Temporary Views
How Do I Turn Off Temporary Views in Excel?
Step 1. Locate the “Sheet View” group in the view tab of the excel ribbon.
- Return to the “View” tab in the Excel ribbon.
- Find the “Sheet View” section on the left side.

Step 2. Exit the temporary view.
- Click the “Exit” button in the Sheet View group.

- Alternatively, use the keyboard shortcut Alt + W + H.
Step 3. Confirm your return to the default view.
- The green outline around your sheet will disappear.
- All filters, sorts, and changes specific to the temporary view will be removed.
Saving a Temporary View for Future Use
Step 1. Access the Sheet View menu.
- Click on “Temporary View” in the Sheet View dropdown.
- This reveals additional options for managing your view.
Step 2. Save your current view.
- Choose “Save” Sheet View options from the dropdown menu.
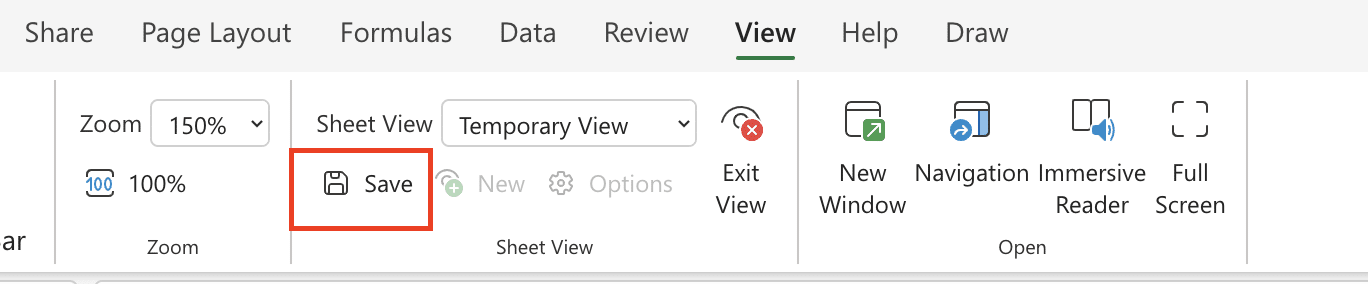
- Enter a descriptive name for your view in the dialog box.
Step 3. Access saved views.
- Use the Sheet View dropdown menu to see your saved views.
- Click on a saved view name to switch to that specific data presentation.
Switching Between Different Sheet Views
Step 1. Use the Sheet View dropdown.
- Click the dropdown arrow in the Sheet View section of the View tab.
- This displays all available views for the current sheet.
Step 2. Select your desired view.
- Choose from your saved views or the default sheet view.
- Excel will immediately apply the selected view to your sheet.
Step 3. Create new temporary views as needed.
- Click “New” in the Sheet View dropdown to start a fresh temporary view.
- This allows you to quickly create multiple data presentations.
Advanced Uses of Excel Temporary Views
Collaborating with Multiple Users
Step 1. Understand individual view isolation.
- Each user can create and use their own temporary views.
- These views don’t interfere with other users’ work on the same sheet.
Step 2. Communicate about different views.
- Use clear naming conventions for saved views.
- Document the purpose and filters applied in each view for team reference.
Step 3. Implement version control best practices.
- Agree on a system for merging insights from different views.
- Consider using comments or a separate log to track changes made in temporary views.
Automating Temporary Views with VBA
Step 1. Access the Visual Basic Editor.
- Press Alt + F11 to open the VBA editor in Excel.
- Create a new module for your sheet view automation code.

Step 2. Write basic VBA code for sheet views.

Stop exporting data manually. Sync data from your business systems into Google Sheets or Excel with Coefficient and set it on a refresh schedule.
Get Started
- Use the following structure to manipulate sheet views:
vba
Copy
Sub CreateTemporaryView()
ActiveSheet.SheetViews.Add.Name = “AutomatedView”
With ActiveSheet.SheetViews(“AutomatedView”)
‘ Add your view customization code here
.AutoFilter.ApplyFilter
End With
End Sub
Step 3. Customize your automated view.
- Add code to apply specific filters, sorts, or formatting.
- Example: Filtering a date column for the current month:
vba
Copy
.AutoFilter.Filters(1).Criteria1 = “>=” & DateSerial(Year(Date), Month(Date), 1)
.AutoFilter.Filters(1).Criteria2 = “<” & DateSerial(Year(Date), Month(Date) + 1, 1)
.AutoFilter.Filters(1).Operator = xlAnd
What is Temporary View in Excel?
Excel’s Sheet View feature, often called temporary view, allows users to create customized displays of data without altering the underlying sheet or affecting other users’ views. This feature differs from regular filters and sorts in several key ways:
- Isolation: Changes made in a temporary view are only visible to the creator.
- Non-destructive: The original data and layout remain untouched.
- Multiple views: Users can create and switch between various data presentations quickly.
Temporary views offer significant benefits in collaborative environments:
- Personalized analysis without disrupting others
- Reduced risk of accidental data modification
- Improved focus on relevant data subsets
- Enhanced flexibility in data exploration
Comparing Temporary Views to Other Excel Features
Temporary Views vs. Freezing Panes
While both features aid in data navigation, they serve different purposes:
- Scope: Temporary views affect the entire sheet, while frozen panes only lock specific rows or columns.
- Visibility: Frozen panes are visible to all users, but temporary views are user-specific.
- Data manipulation: Temporary views allow for filtering and sorting, while frozen panes only affect scrolling behavior.
Temporary Views and Data Validation
Temporary views complement Excel’s data validation tools:
- Testing: Use temporary views to test different data scenarios without affecting validation rules.
- Visibility: Create views that highlight cells with specific validation criteria.
- Analysis: Combine temporary views with data validation to quickly identify and focus on valid or invalid entries.
Temporary Views and Data Protection
Excel’s temporary views interact with built-in data protection features:
- Non-interference: Temporary views respect cell and sheet protection settings.
- Selective access: Create views that show only unprotected cells for specific users.
- Change tracking: Use temporary views to review changes without affecting protected data.
Excel Temporary Views in Action: Wrap-up
Temporary views in Excel offer a powerful way to customize data presentation without affecting others or the underlying data. By mastering this feature, you can:
- Analyze data more efficiently
- Collaborate seamlessly with team members
- Reduce the risk of accidental data modification
- Create multiple perspectives on your data quickly
Start experimenting with temporary views in your own Excel projects to experience these benefits firsthand.
Ready to take your data analysis and collaboration to the next level? Coefficient integrates seamlessly with Excel, allowing you to sync live data from multiple sources directly into your spreadsheets. Get started with Coefficient today and transform how you work with data in Excel.
<meta_description>
<title>Master Excel Temporary Views: Boost Your Spreadsheet Game in Minutes!</title> <description>Learn to create, manage, and optimize Excel temporary views. Enhance collaboration, streamline analysis, and take control of your spreadsheets with our expert guide.</description> </meta_description>


