In today’s data-driven business environment, protecting sensitive information in Excel spreadsheets has become crucial. Whether you’re handling financial data, personal information, or proprietary business metrics, Excel’s built-in encryption features provide robust security options. This comprehensive guide will walk you through various methods to encrypt and protect your Excel data, from basic password protection to advanced cell-level security.
How to Encrypt an Entire Excel File
Encrypting your entire Excel workbook ensures that unauthorized users cannot access any of its contents without the correct password.
Step-by-Step File Encryption Process:
- Open your Excel workbook
- Click “File” in the top menu
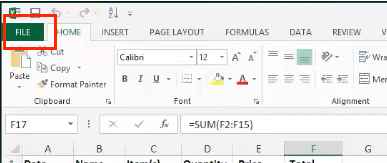
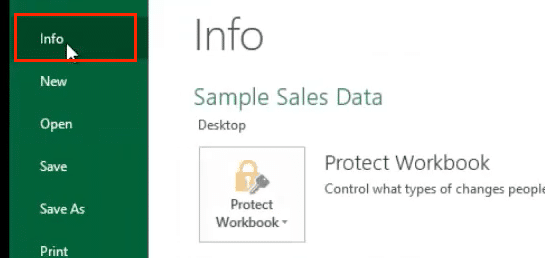
- Select “Info“

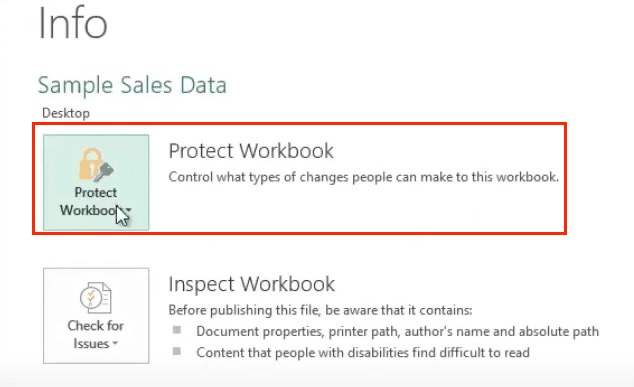
- Click “Protect Workbook“

- Choose “Encrypt with Password“

- Enter a strong password (minimum 8 characters, including uppercase, lowercase, numbers, and special characters)
- Confirm your password
- Save the workbook
Best Practice: Create a password that combines random words with numbers and special characters. For example:
Copy
Weak: Password123
Strong: Blue$Horse92!Running
Testing Your Encryption:
- Close the encrypted workbook
- Attempt to reopen it
- Verify that the password prompt appears
- Enter the password to confirm access
Setting Different Password Types
Excel offers multiple layers of protection to control how users interact with your workbook.
Read-Only Protection:
- Click “File” > “Info“
- Select “Protect Workbook“
- Choose “Mark as Final”
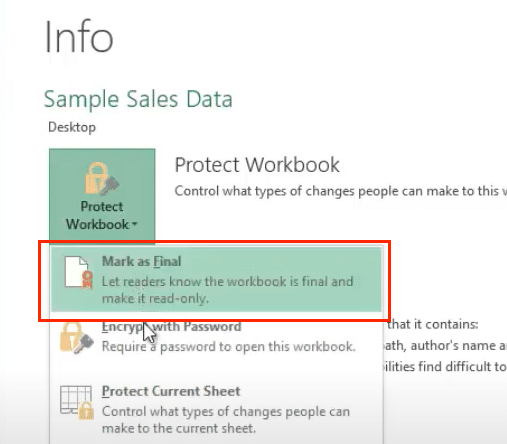
- Optional: Add a password for read-only access
Modification Restrictions:
Table: Protection Options
|
Protection Type |
Purpose |
Access Level |
|---|---|---|
|
Structure |
Prevents sheet reorganization |
Medium |
|
Windows |
Locks window arrangement |
Low |
|
Content |
Restricts cell modifications |
High |
Encrypting Specific Cells and Ranges
For granular control, Excel allows you to protect individual cells or ranges while leaving others accessible.
Cell Protection Process:
- Select the cells you want to protect
- Right-click and choose “Format Cells“
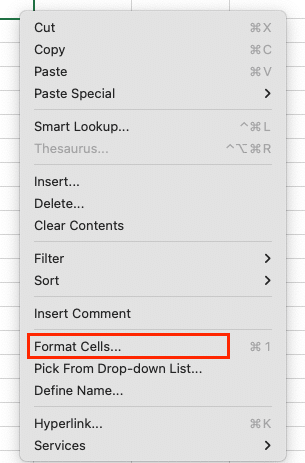
- Navigate to the “Protection” tab
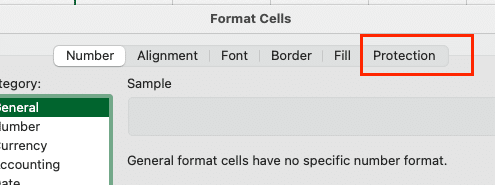
- Check “Locked” and/or “Hidden“

- Click “OK“
- Go to “Review” > “Protect Sheet“
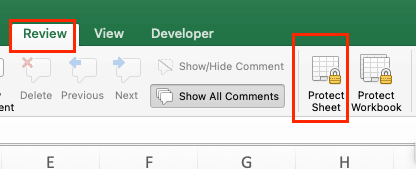

Stop exporting data manually. Sync data from your business systems into Google Sheets or Excel with Coefficient and set it on a refresh schedule.
Get Started
- Set a password
- Choose protection options
Example Protection Settings:
Table: Cell Protection Options
|
Feature |
When to Use |
Example Scenario |
|---|---|---|
|
Lock Cells |
Prevent formula changes |
Financial calculations |
|
Hide Formulas |
Protect intellectual property |
Custom algorithms |
|
Format Only |
Allow data entry but maintain styling |
Data entry forms |
Excel Encryption Technical Details
Excel uses AES-256 bit encryption, the same standard used by many financial institutions. This provides enterprise-grade security for your sensitive data.
Security Specifications:
- Encryption Algorithm: AES-256
- Key Length: 256 bits
- Password Hash: SHA512
- Iteration Count: 100,000
Managing Excel File Access
Implement these strategies for controlled file sharing and collaboration:
Shared Access Setup:
- Click “Review” > “Share Workbook“

- Enable tracking changes
- Set user permissions:
- Allow changes by multiple users
- Track change history
- Set review period
Change Tracking:
- Navigate to “Review” > “Track Changes“
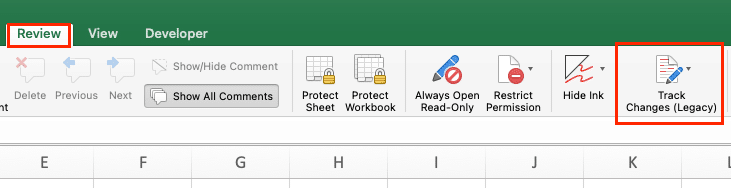
- Choose “Highlight Changes“
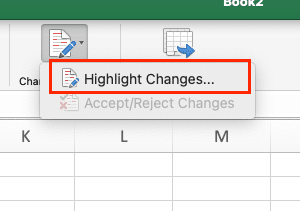
- Set tracking options:
- When: All changes
- Who: Everyone
- Where: Entire workbook
Next Steps
Need to streamline your data security while maintaining real-time access to business metrics? Try Coefficient to securely sync and manage your data across multiple platforms while maintaining enterprise-grade security standards.


