Table of Contents
![]()
- 1. Snowflake Data Integration Tools That Won’t Blow Your Budget
- 2. 7 Best Snowflake Data Visualization Tools in 2026 (With Pricing)
- 3. Datameer Pricing 2026: What It Actually Costs (And What They Don’t Tell You)
- 4. Snowflake Intelligence Cost: What You Actually Pay in 2026
- 5. Bridging the Last Mile: How Coefficient Brings Live Snowflake Data to Your Spreadsheets
- 6. Top 5 Snowflake Reporting Tools for 2026
- 7. Snowflake Partners with Coefficient to Solve the Last Mile of the Modern Data Stack
- 8. 5 Best Snowflake ETL Tools for 2026 [w/ Feature Comparison Table]
- 9. How to Migrate Data from SQL Server to Snowflake
- 10. How to Connect Snowflake to Power BI
- 11. How to Connect BigQuery to Snowflake? Top 3 Methods
- 12. Connect Google Ads to Snowflake – Step-by-Step Guide
- 13. How to Connect Mailchimp to Snowflake? Top 3 Methods
- 14. How to Connect Freshdesk to Snowflake
- 15. How to Connect Klaviyo to Snowflake
- 16. How to Migrate from Redshift to Snowflake: A Comprehensive Guide
- 17. How to Connect Razorpay to Snowflake
- 18. How to Connect Chargebee to Snowflake?
- 19. How to Connect MongoDB to Snowflake? Top 3 Methods
- 20. How to Migrate from BigQuery to Snowflake
- 21. How to Connect Outreach to Snowflake
- 22. How to Connect Zoho CRM to Snowflake
- 23. How to integrate Shopify to Snowflake? 3 Simple ways explained

Connecting Shopify to Snowflake can transform how your business manages data.
In this blog, we will explore three methods to make this connection, highlighting the pros and cons of each and providing detailed step-by-step guides.
Advantages of Connecting Shopify to Snowflake
- Unify sales data: Combine Shopify sales data with other business data in Snowflake for a comprehensive view of your business performance.
- Enhance analytics capabilities: Leverage Snowflake’s powerful analytics features to gain deeper insights into your e-commerce data.
- Streamline data management: Automate data transfer from Shopify to Snowflake, reducing manual effort and ensuring data consistency.
Connect Shopify to Snowflake: 3 Methods
Connecting Shopify and Snowflake is crucial for e-commerce businesses looking to gain valuable insights from their data. With a range of solutions catering to different company sizes and technical requirements, integrating these two platforms has never been easier.
|
Solution |
Ideal Application |
|
Coefficient |
No-code solution for e-commerce teams who want to analyze Shopify data in Snowflake without relying on technical resources. |
|
Fivetran |
Automated data pipeline for medium to large e-commerce companies that need to continuously sync large volumes of Shopify data with Snowflake. |
|
Stitch |
Affordable and easy-to-set-up solution for small to medium-sized businesses that need to replic |
How to Connect Shopify to Snowflake
Method 1: Coefficient – No-Code, User-Friendly
Coefficient connects your spreadsheet to all your business data without a single line of code. It provides a user-friendly interface and automatic data updates, making it a reliable option for both technical and non-technical users.
Pros:
- Simple, no-code setup.
- Automatic data updates.
- Affordable pricing plans.
Cons:
- Scheduled automations are not free forever, but pricing plans are affordable.
Step-by-step tutorial
Step 1. Install Coefficient
For Google Sheets
Open a new or existing Google Sheet, navigate to the Extensions tab, and select Add-ons > Get add-ons.

In the Google Workspace Marketplace, search for “Coefficient.”
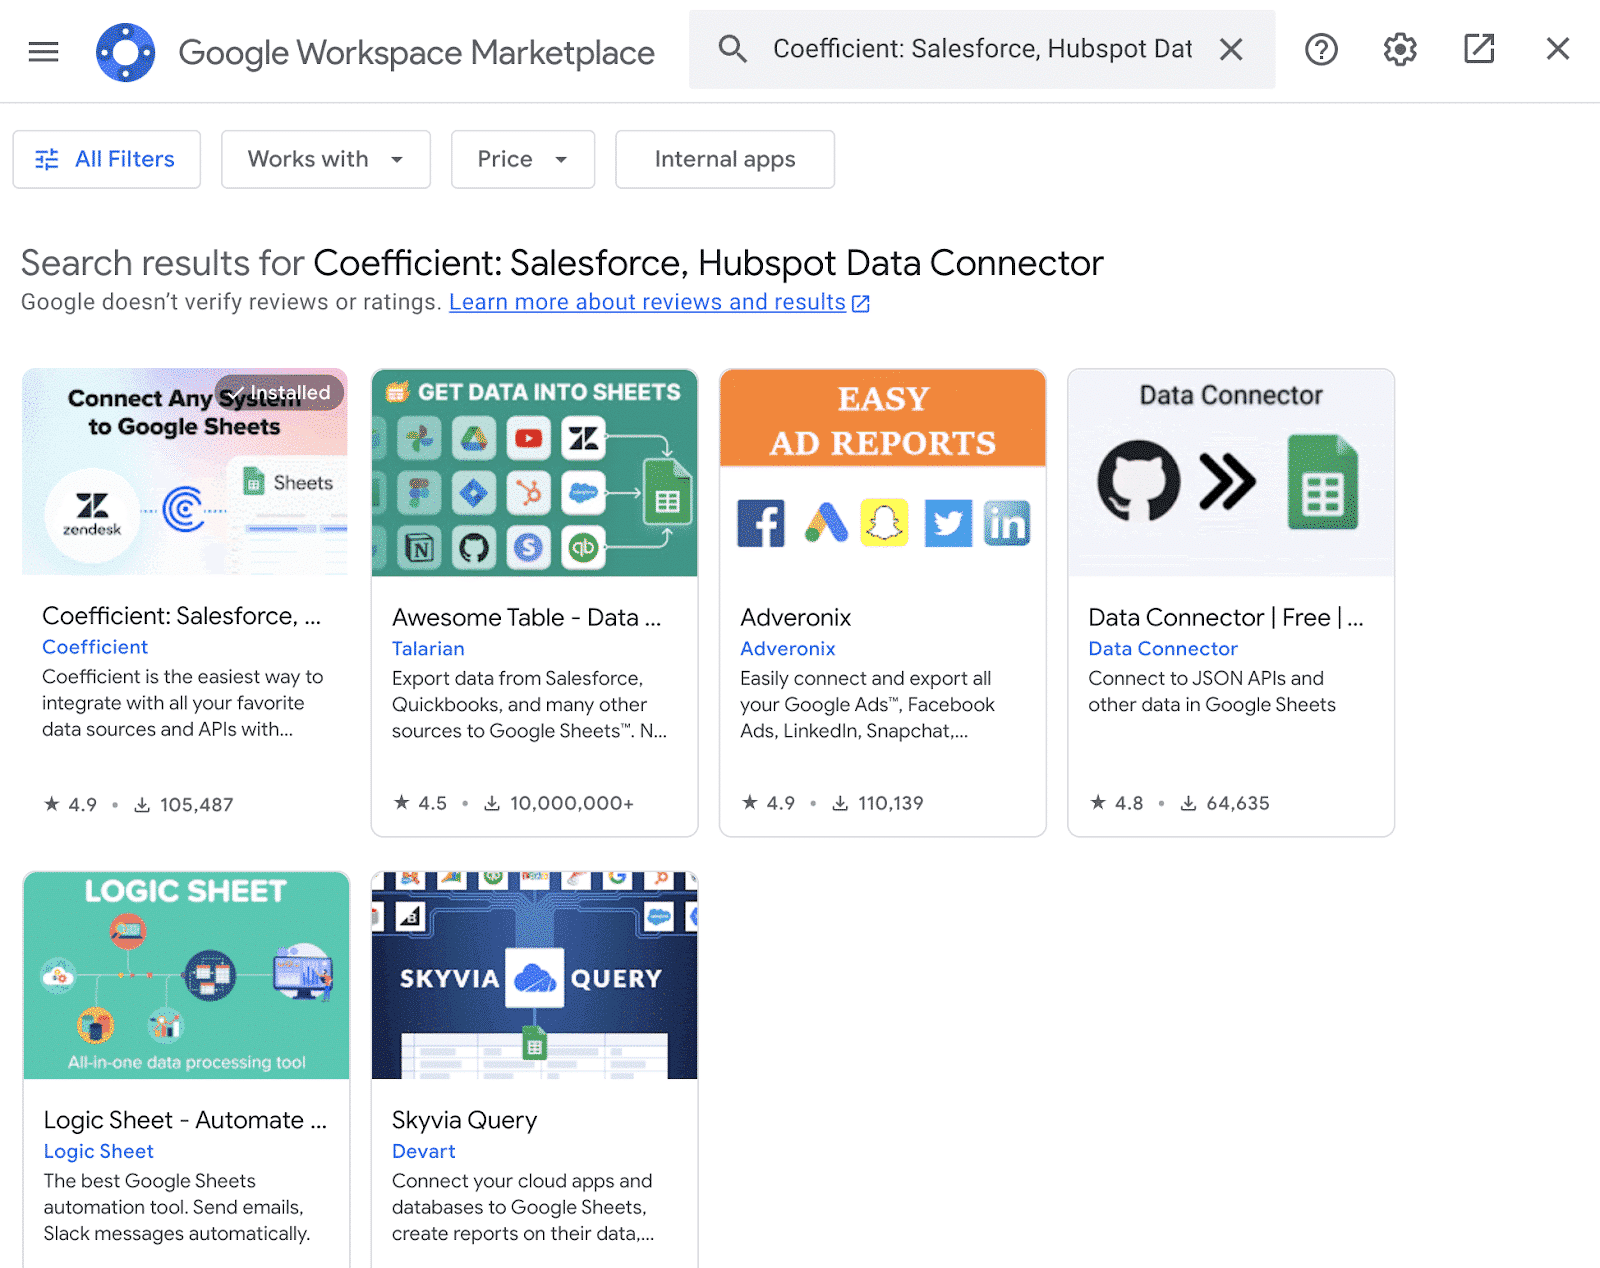
Follow the prompts to grant necessary permissions.

Launch Coefficient from Extensions > Coefficient > Launch.
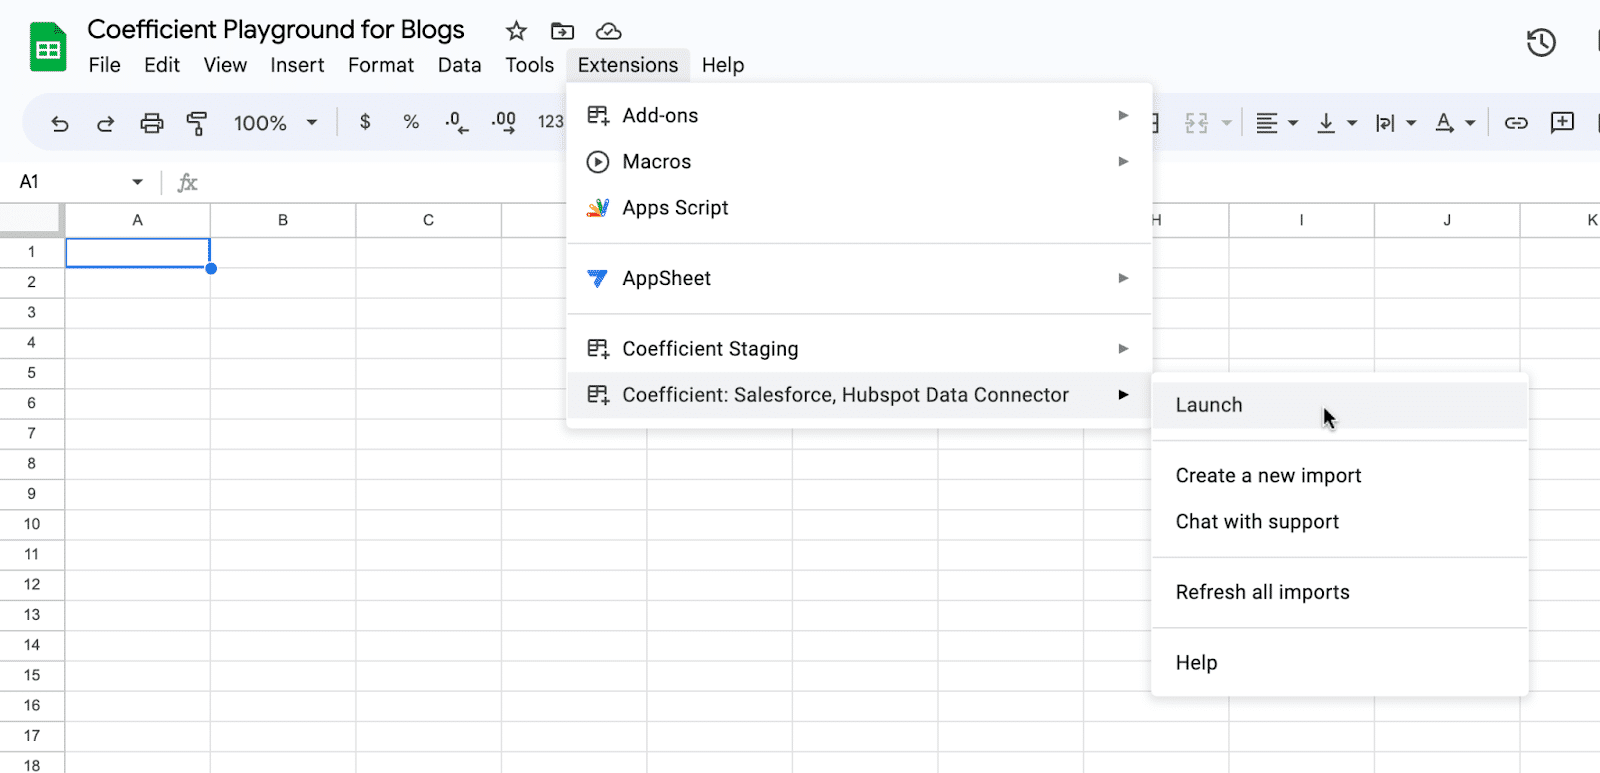
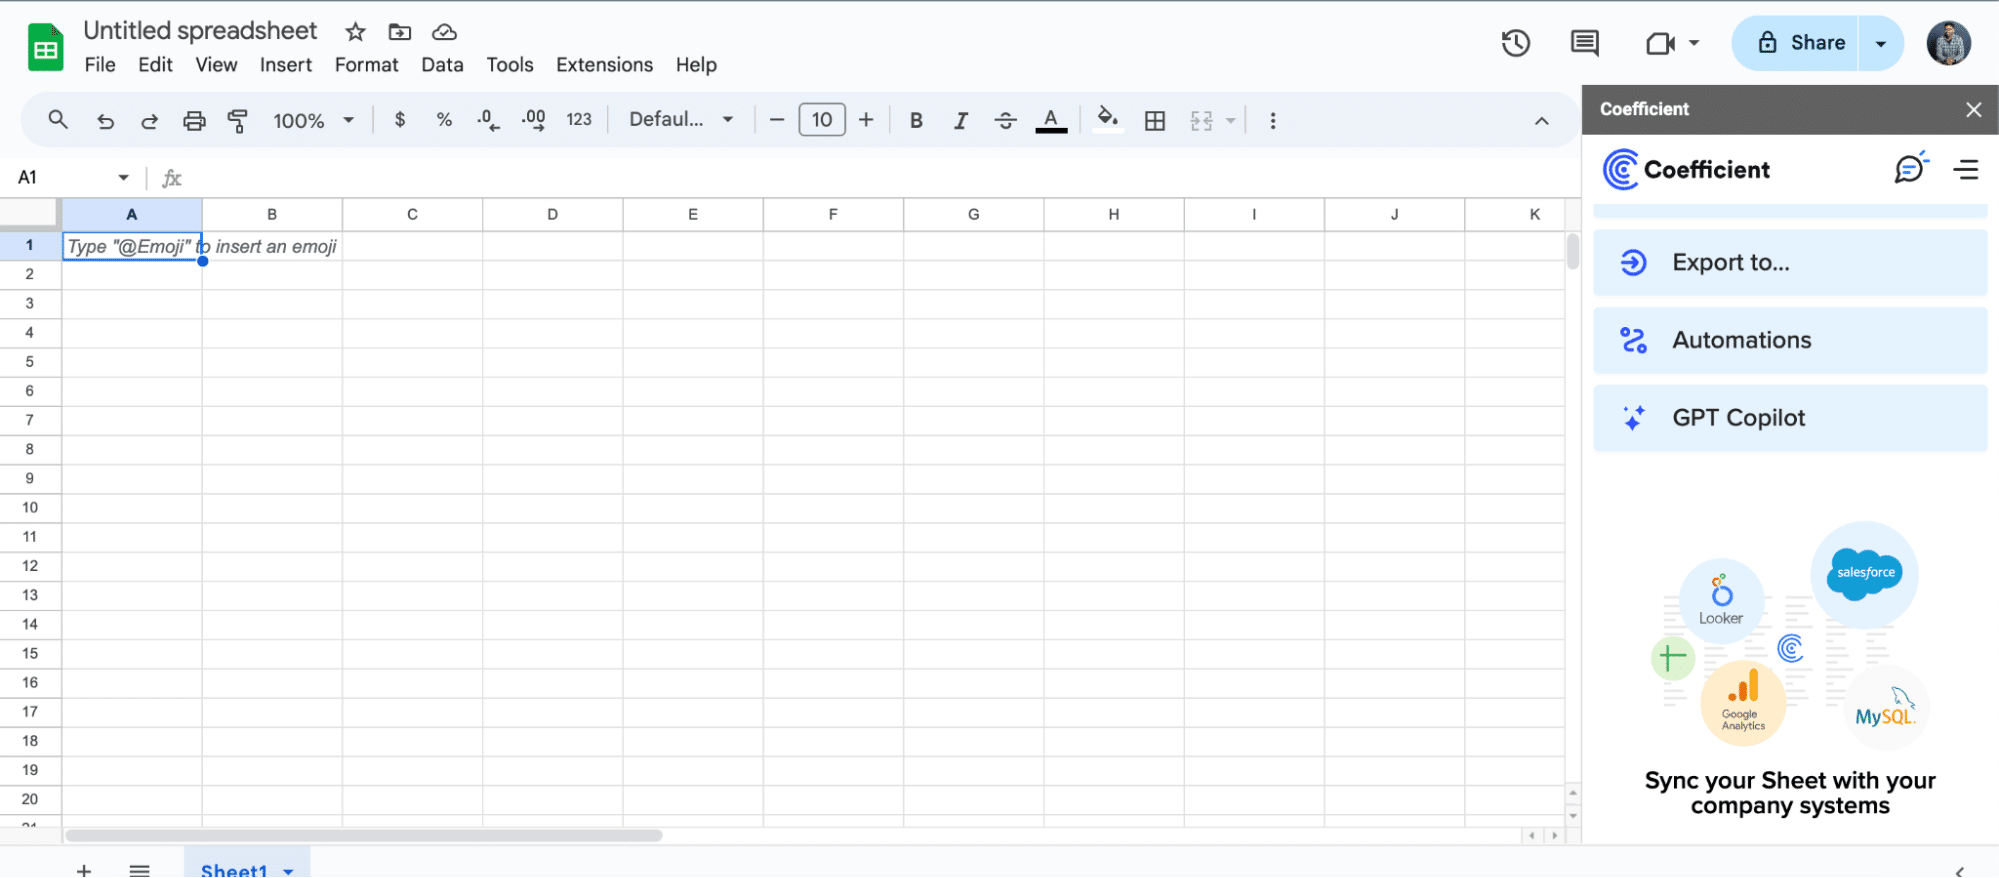
Coefficient will open on the right-hand side of your spreadsheet.
For Microsoft Excel
Open Excel from your desktop or in Office Online. Click ‘File’ > ‘Get Add-ins’ > ‘More Add-Ins.’

Type “Coefficient” in the search bar and click ‘Add.’

Follow the prompts in the pop-up to complete the installation.
Once finished, you will see a “Coefficient” tab in the top navigation bar. Click ‘Open Sidebar’ to launch Coefficient.
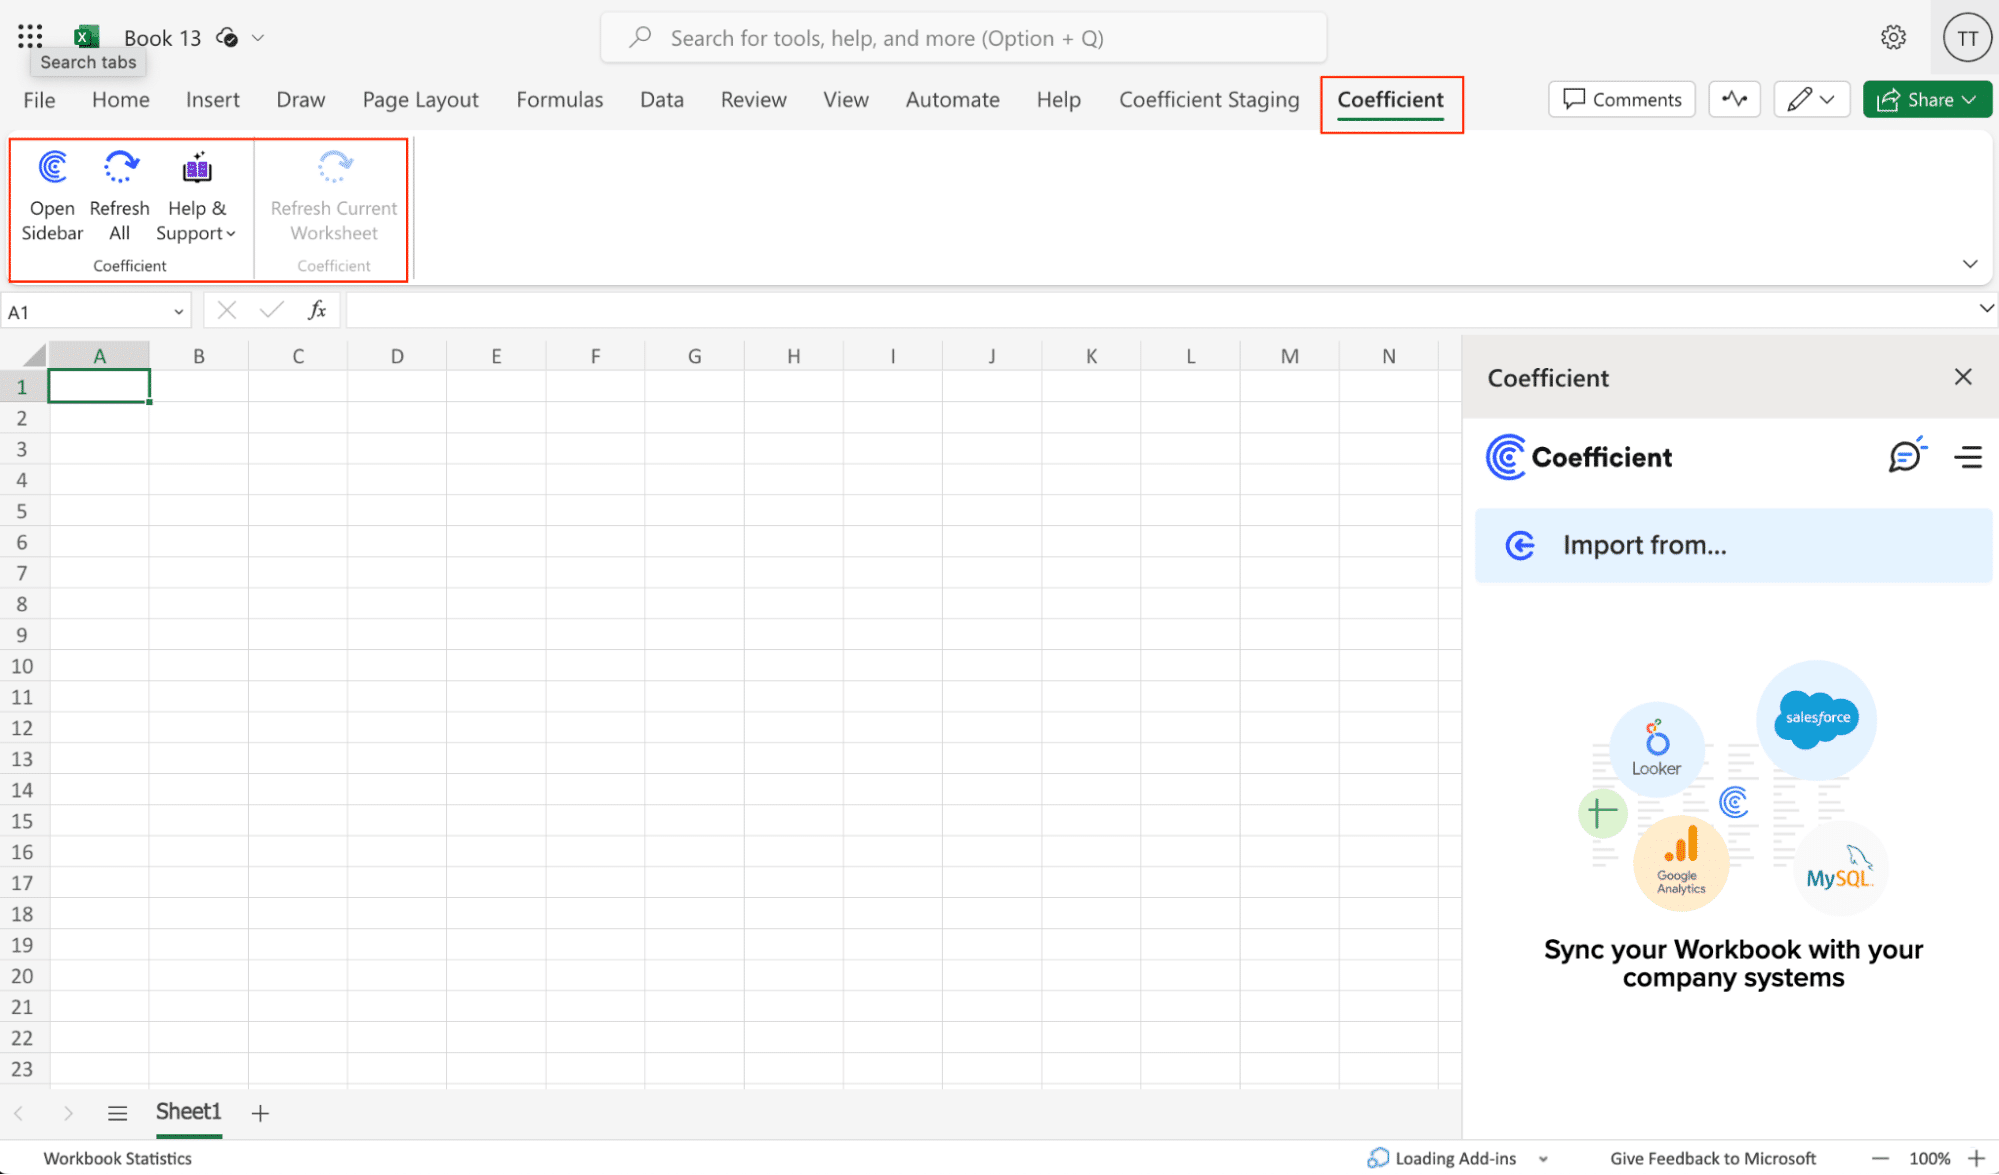
Step 2. Import Data from Shopify into Your Spreadsheet
Select ‘Import from…’

Scroll down until you see Shopify and click ‘Connect.’
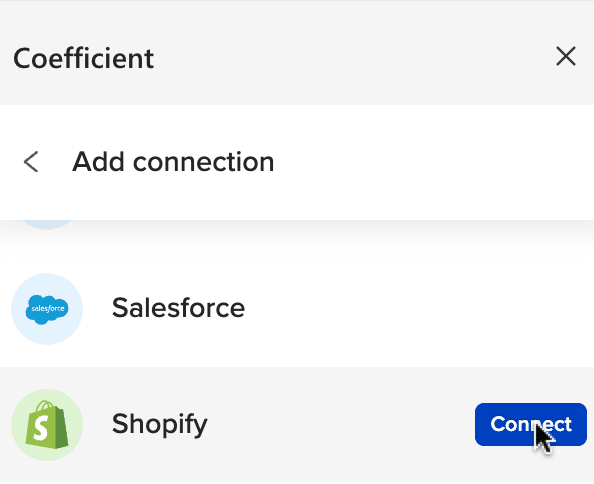
Follow the prompts to authorize Coefficient to access your Shopify account.
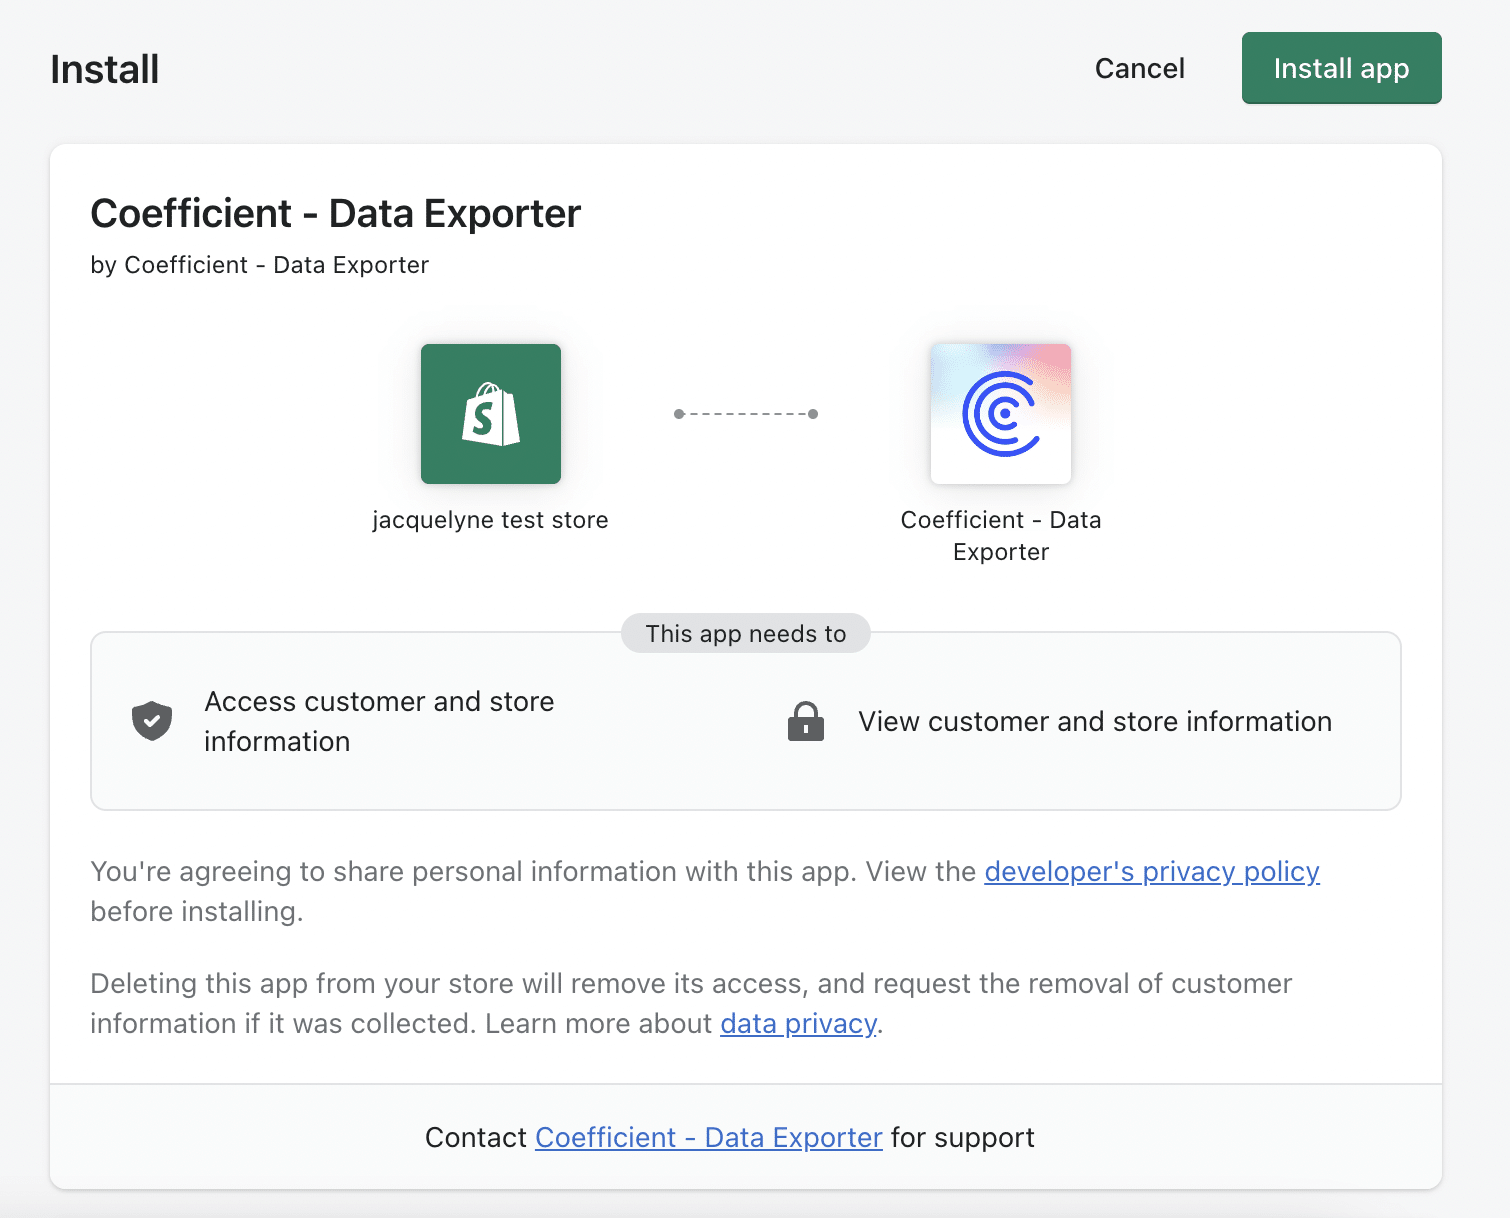
Enter your “Shopify Store Name” and click ‘Authorize.’
You will be taken to this screen in your Shopify instance. Click the ‘Install app’ button to proceed.
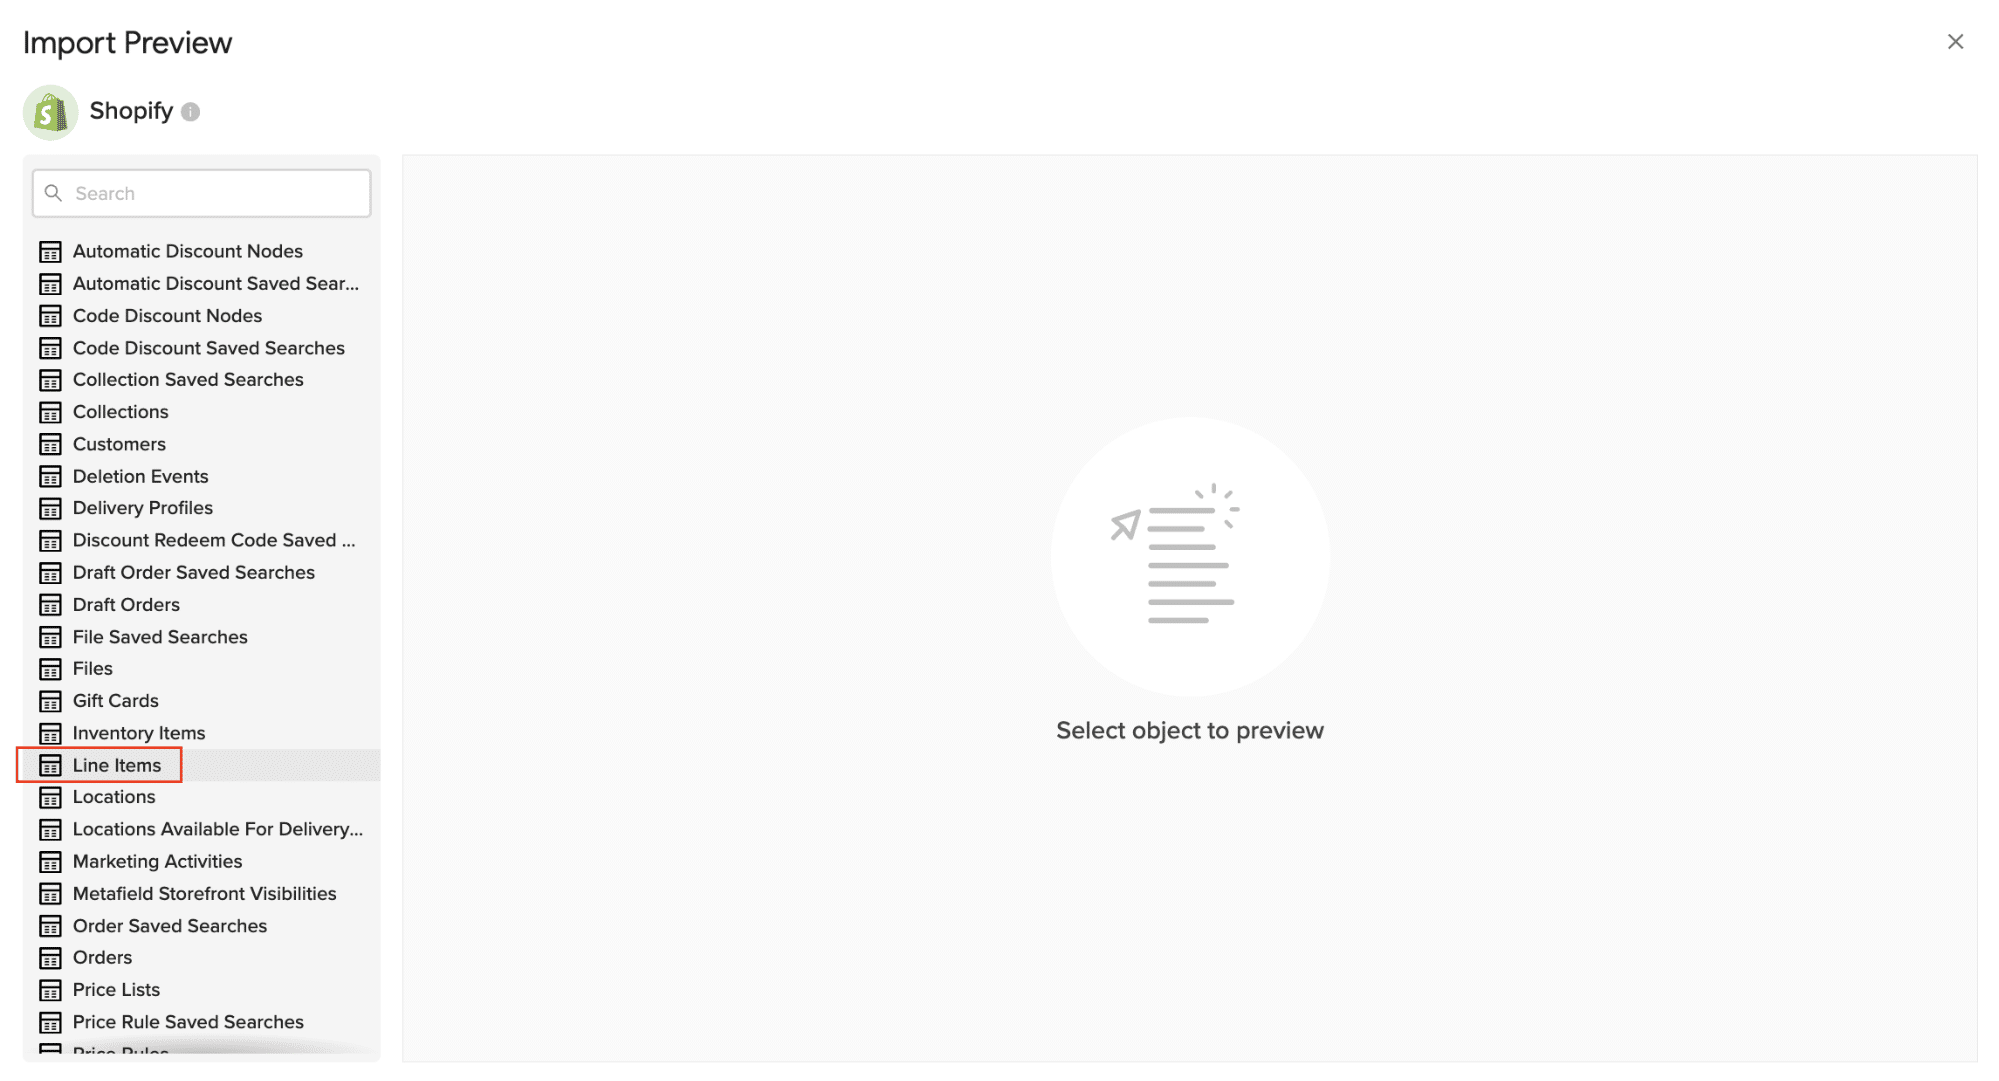
After connecting, return to Shopify from the Coefficient menu ‘Import From…’ > ‘Shopify’ > ‘From Objects & Fields.’

Select the Shopify object you would like to import your data from (eg. Line Items).
Select the desired fields for your import.

Customize your import by adding filter(s). Click ‘Import’ when you’re finished.
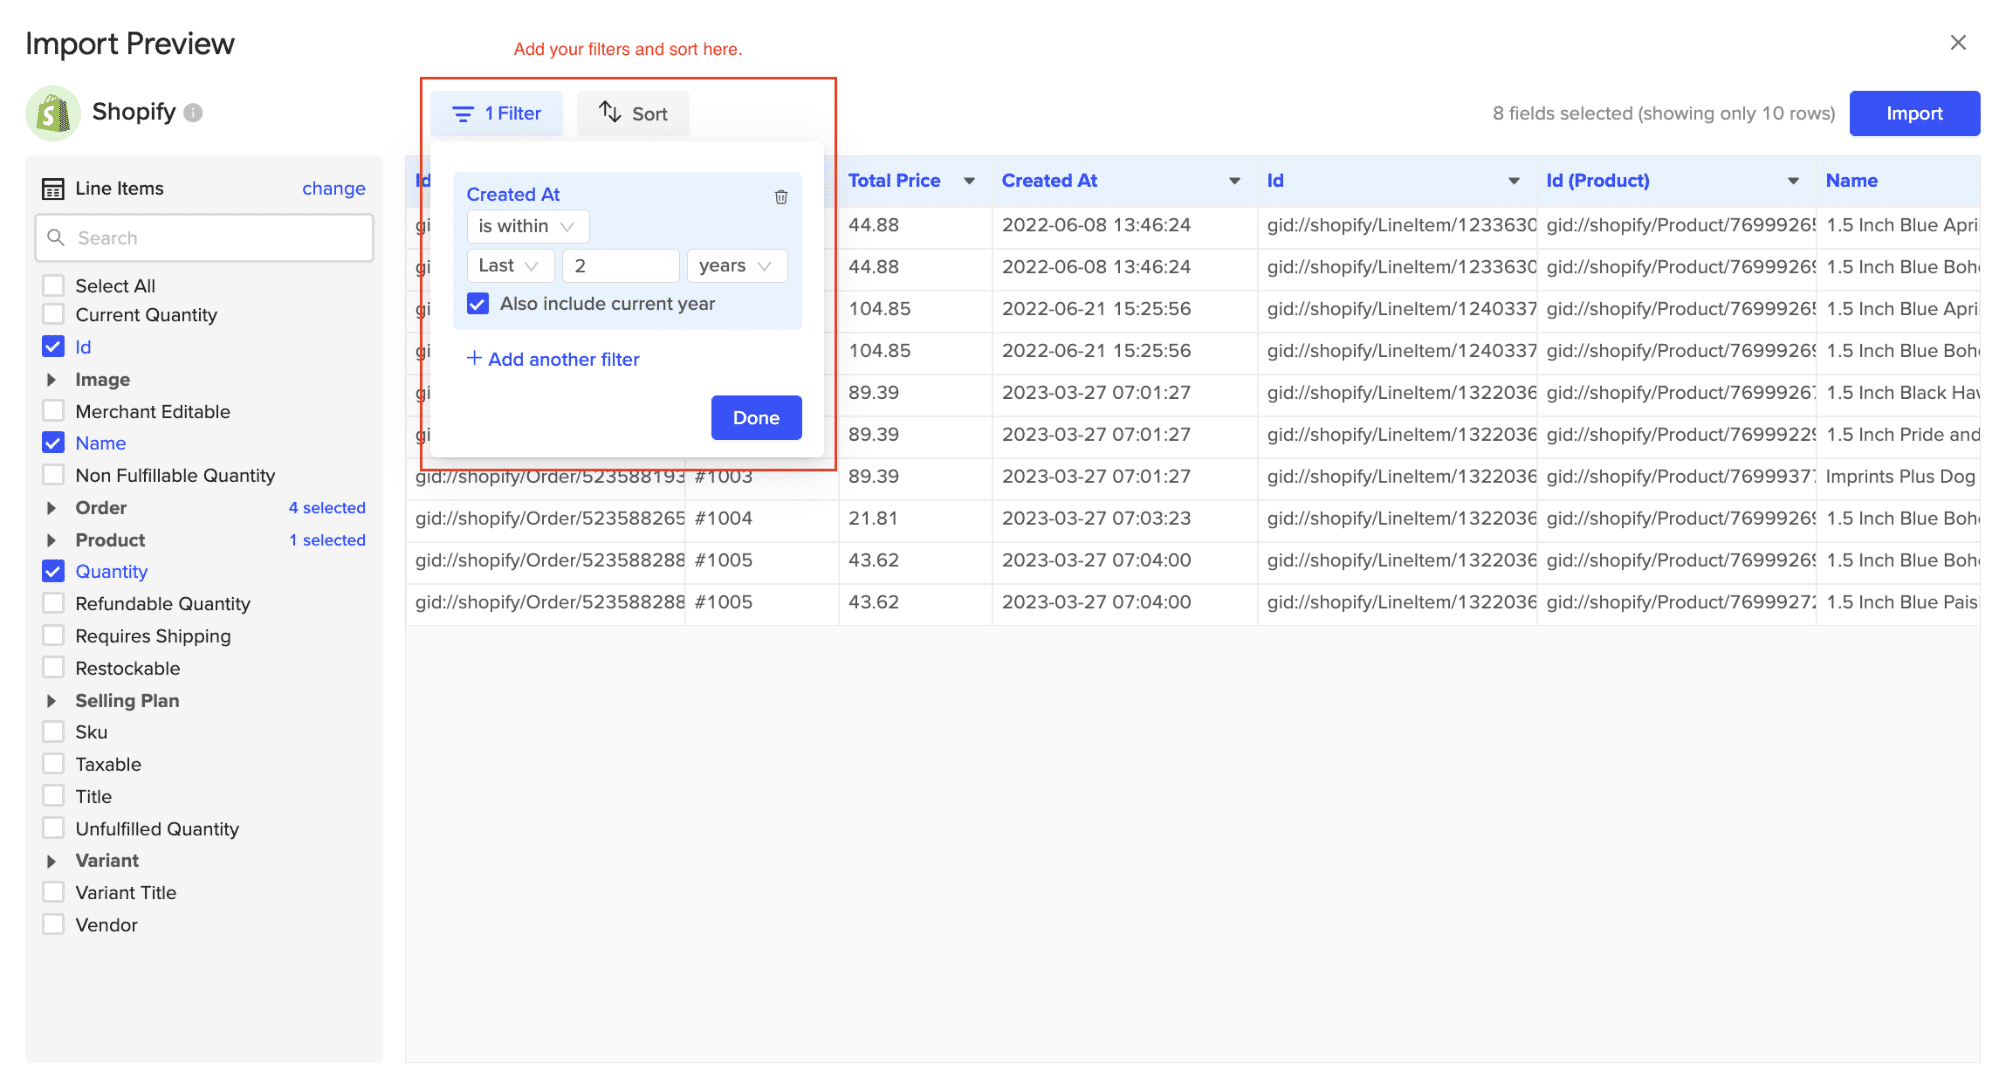
Your Shopify data will automatically populate your Excel spreadsheet in a few seconds!

Step 3. Export Data from Your Spreadsheet to Snowflake
Before starting, make sure you’ve connected to Snowflake.
Then, select “Export to…” from the menu.
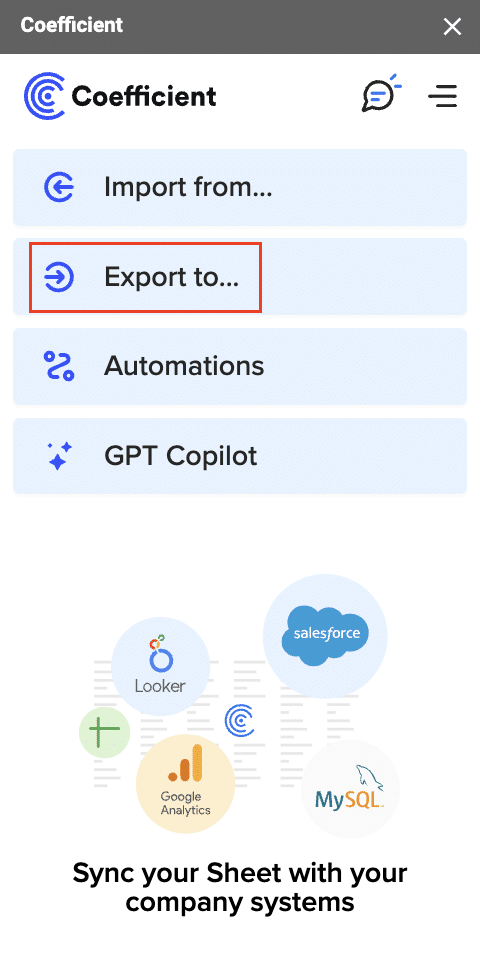
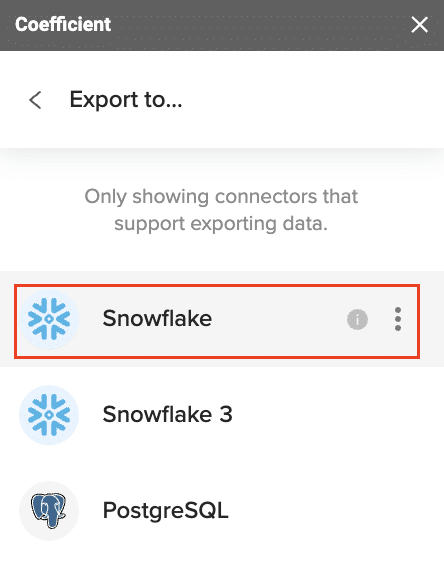
Choose Snowflake from the list of available data sources.
Select the tab and header rows in your spreadsheet that contains the data you want to export.
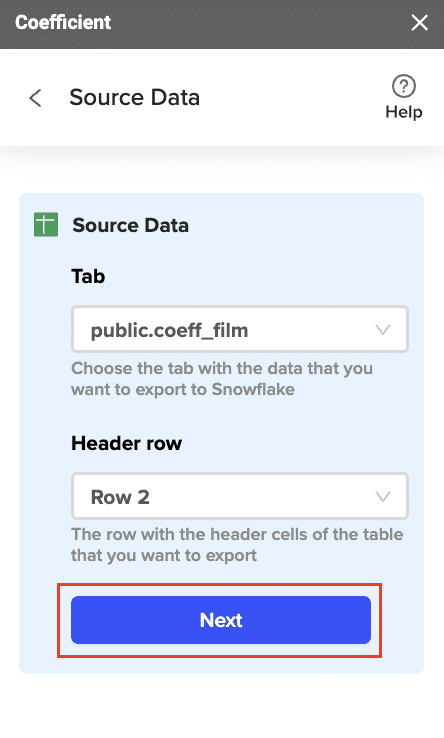
Click “Next” to continue.
Select the table in your Snowflake database that you want to update. Then, select the type of action you want to perform—Update, Insert, Upsert, or Delete.

Map the fields from your spreadsheet to the corresponding Snowflake fields.
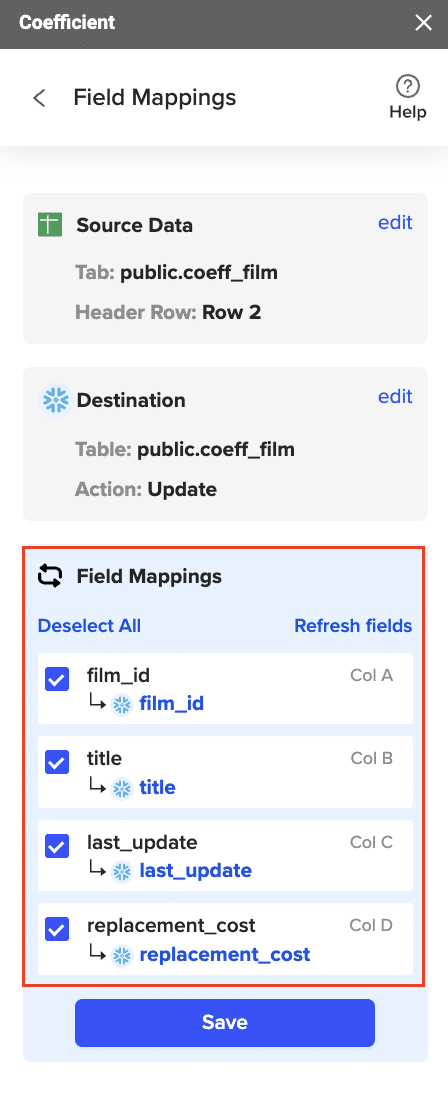
Note: Primary Keys (ID fields) are required for Update and Delete actions. For Insert actions, the Primary Key field can be set to auto populate if it’s configured in Snowflake.
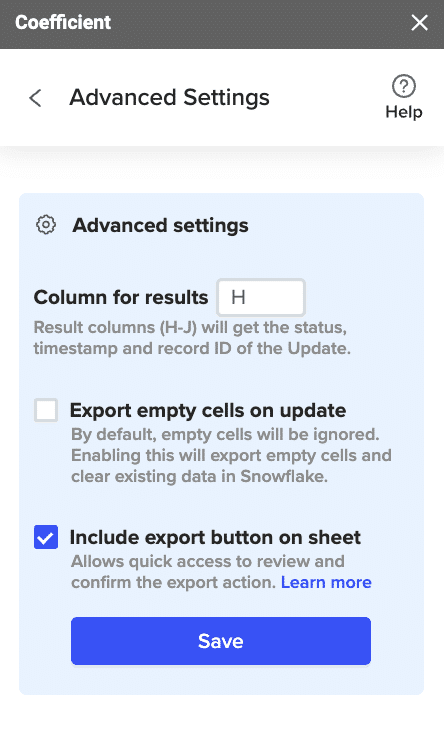
(Optional) Specify additional settings such as batch size, whether to export empty cells on an update, and the column for results.
Confirm your settings.
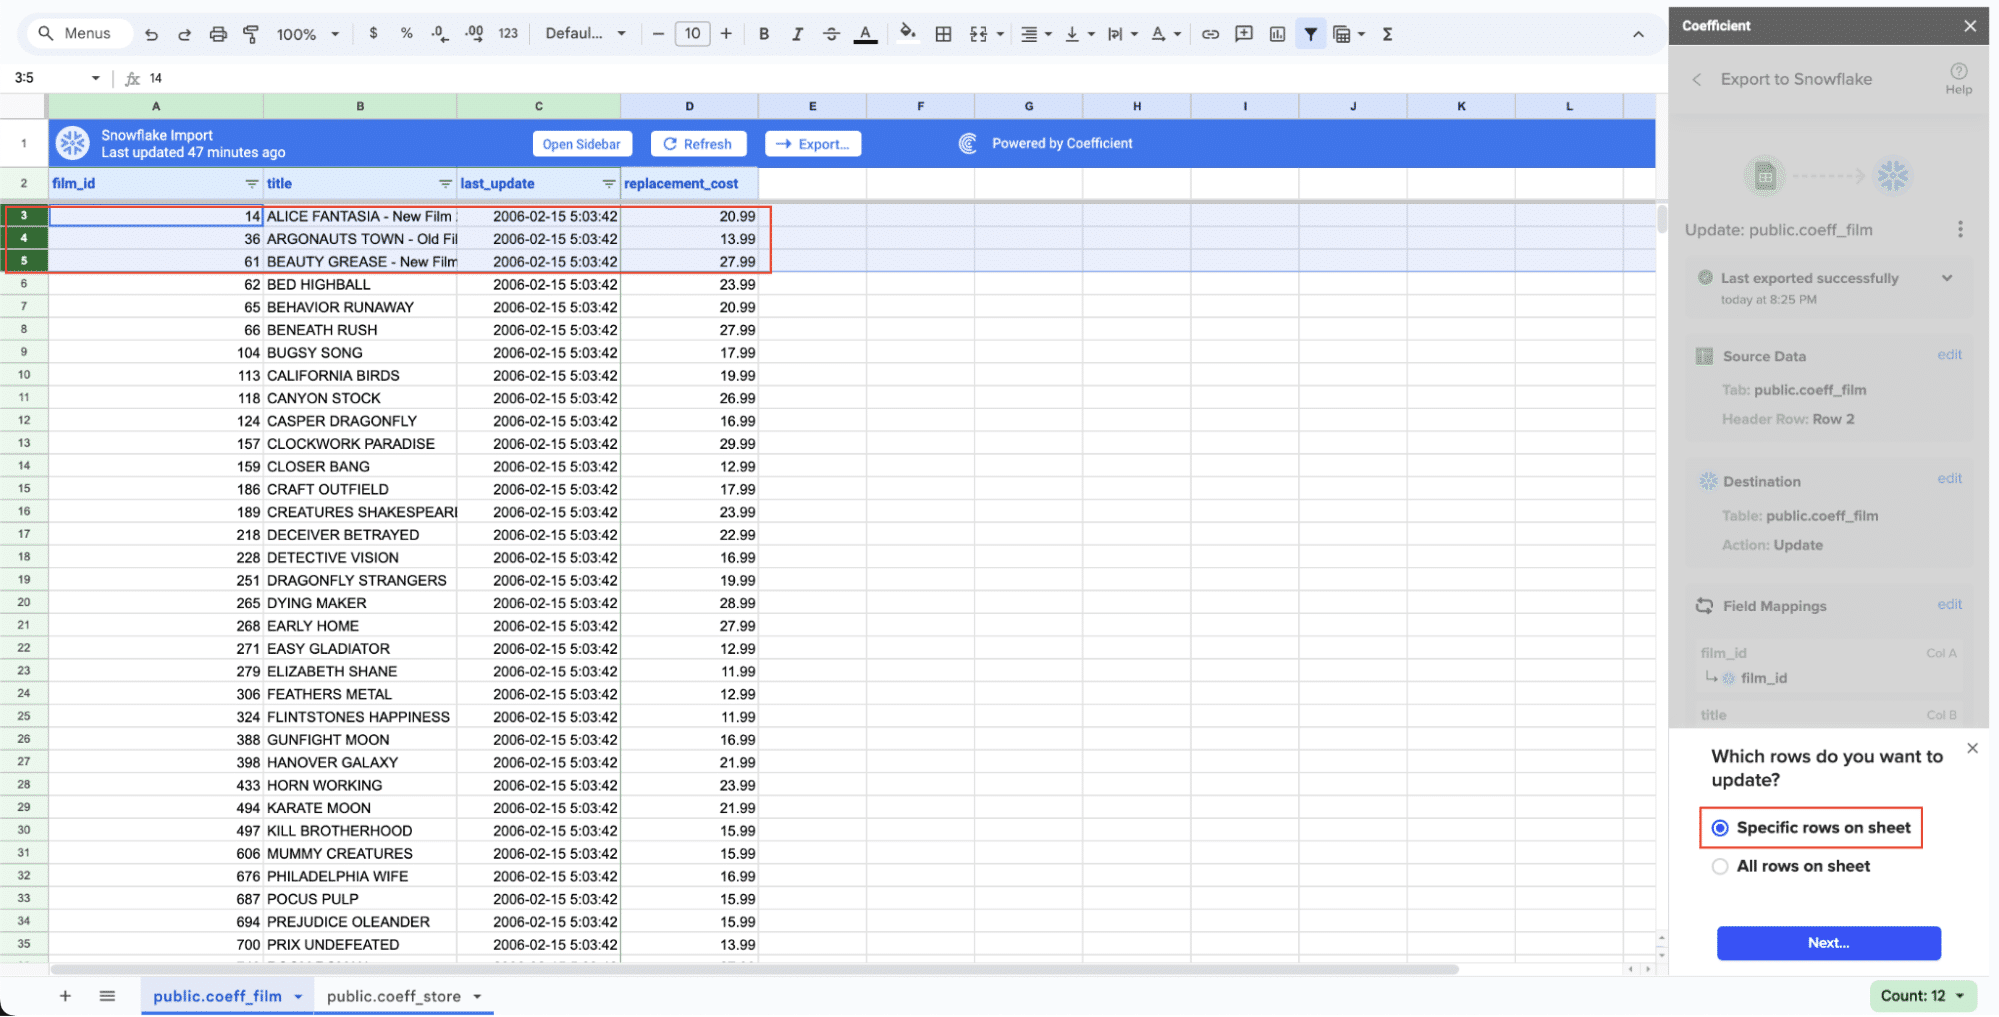
Then, highlight the rows you want to update or export. You can choose to export all rows or specific rows.
After you’re finished, review your settings and click “Export.”
Follow the prompts to confirm your changes.
In a few seconds, data from your spreadsheet will be pushed to Salesforce.
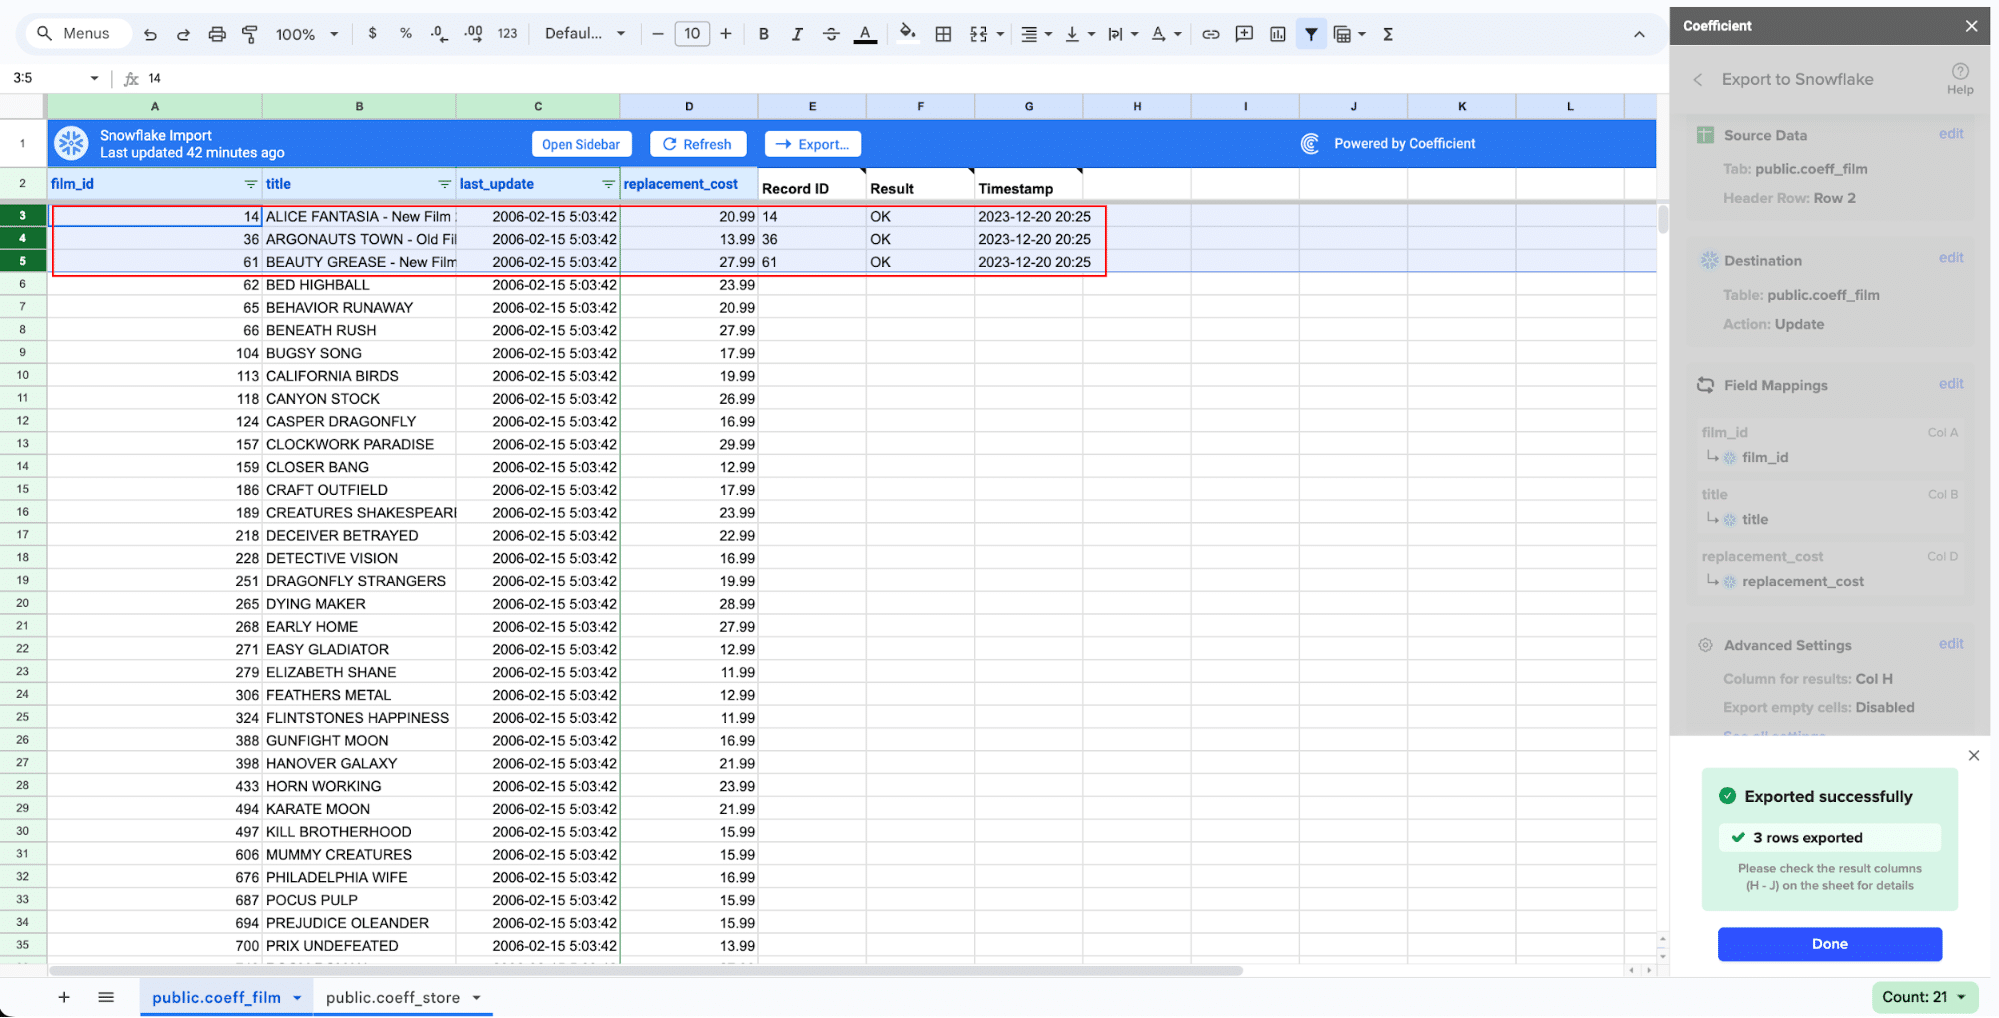
Coefficient will then update the records in Snowflake, displaying the status, record ID, and timestamp of the updates in your spreadsheet.
Method 2: Fivetran
Fivetran offers automated data pipelines that connect Shopify to Snowflake with minimal configuration.
Pros:
- Automated pipelines with standardized schemas.
- Access to all your data in SQL.
- Allows users to add new data sources.
Cons:
- No option to use/deploy services on-premise.
- Documentation could be better.
- Pricing can be tricky.
Step-by-Step Walkthrough
1. Setting Up Your Fivetran Account
Sign up for Fivetran and set up your account:
- Visit the Fivetran website and sign up for an account.
- Follow the email verification process to activate your account.
- Log in to your new Fivetran account.
Authenticate with your Shopify account:
- In the Fivetran dashboard, click on “Add Connector.”
- Select “Shopify” from the list of available connectors.
- Enter your Shopify store credentials and grant Fivetran the necessary permissions to access your data.
2. Configure Data Pipeline
Follow the setup wizard to create a pipeline:
- After authentication, you’ll be directed to the setup wizard.
- Choose the specific Shopify data you want to sync (e.g., orders, customers, products).
- Select Snowflake as your destination.
Map Shopify data fields to Snowflake tables:
- Fivetran will auto-map Shopify data fields to Snowflake tables based on their standardized schema.
- Review the mappings and make adjustments if necessary to fit your specific data structure needs.
3. Monitoring and Managing Your Pipeline
Use the Fivetran dashboard to monitor data flow:
- Access the Fivetran dashboard to view your data pipeline’s status.
- Monitor real-time data flow and sync frequency.
Schedule data updates and manage data loads:
- Set up a sync schedule to determine how often data is updated from Shopify to Snowflake.
- Use the dashboard to manage and troubleshoot data loads.
Method 3: Stitch
Stitch is another excellent option for non-technical users looking to connect Shopify to Snowflake.
Pros:
- Easy to set up by non-technical teams.
- Scheduling feature for data loads.
- Allows users to add new data sources.
Cons:
- Limited data transformation options.
- Handling large datasets can be tricky.
- No option to use/deploy services on-premise.
Step-by-Step Walkthrough
1. Setting Up Your Stitch Account
Sign up for Stitch and configure your account:
- Go to the Stitch website and create an account.
- Complete the account setup process, including email verification.
- Log in to the Stitch dashboard.
Authenticate with your Shopify account:
- In the Stitch dashboard, click on “Add Integration.”
- Select “Shopify” from the list of integrations.
- Provide your Shopify store credentials and authorize Stitch to access your data.
2. Create a Data Pipeline
Follow the prompts to set up a pipeline:
- After authentication, the setup wizard will guide you through the process.
- Choose the Shopify data entities you want to sync, such as orders, products, and customers.
- Select Snowflake as your data destination.
Map Shopify data to Snowflake tables:
- Stitch will automatically map the Shopify data fields to Snowflake tables.
- Review the mappings to ensure they meet your requirements and make adjustments if necessary.
3. Schedule Data Loads
Use the scheduling feature to automate data loads:
- In the Stitch dashboard, navigate to the pipeline settings.
- Set up a schedule for data loads to occur at regular intervals (e.g., hourly, daily).
Monitor data flow and ensure data integrity:
- Use the dashboard to monitor the status of your data loads.
- Check for any errors or inconsistencies in the data and address them as needed.
Conclusion
Connecting Shopify to Snowflake can significantly enhance your data operations and decision-making processes. Different methods, like Coefficient, Fivetran, and Stitch, offer various advantages and can cater to different needs.
If you want a quick, easy solution, consider Coefficient. Try it for free today to learn more!