Getting your Contacts data from Freshdesk into Google Sheets is key for analysis and reporting. Coefficient makes this simple, connecting your data live.
This guide shows you how to import your Freshdesk Contacts data directly into Google Sheets.
TLDR
-
Step 1:
Step 1. Install Coefficient from the Google Sheets marketplace and connect your Freshdesk account.
-
Step 2:
Step 2. Select Import from… and choose the Contacts object.
-
Step 3:
Step 3. Configure your import settings and pull the data into your sheet.
-
Step 4:
Step 4. Set up auto-refresh to keep your Contacts data updated automatically.
Step-by-Step Guide to Importing Contacts Data
Follow these steps to connect Freshdesk to Google Sheets and import your Contacts data.
Step 1: Install Coefficient and Connect Freshdesk
First, you need to add Coefficient to your spreadsheet program.
- Open Google Sheets.
- Go to Extensions > Add-ons > Get add-ons.
- Search for “Coefficient” and install it from the Google Workspace Marketplace.
- Once installed, open the Coefficient add-on from the Extensions menu.
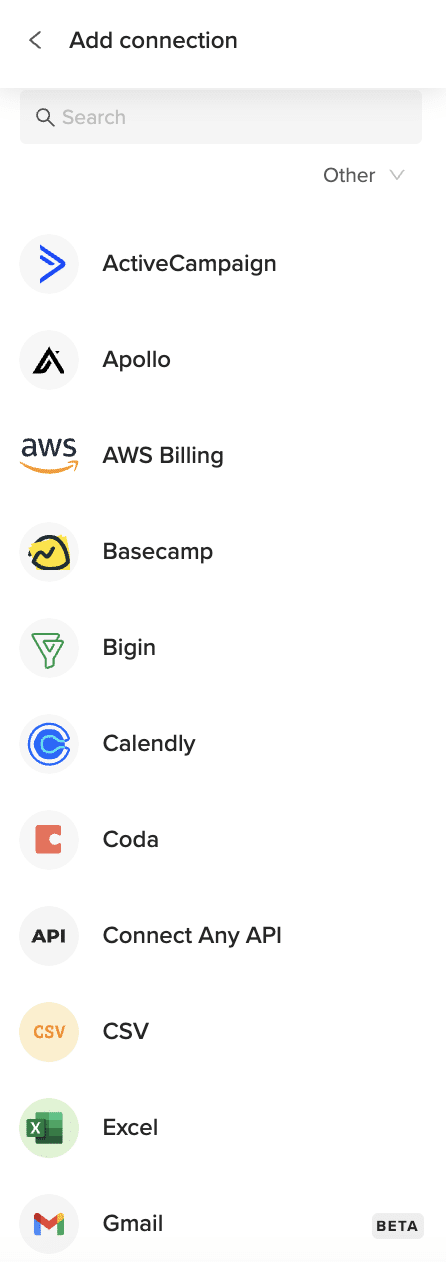
- Click “Import from…” in the Coefficient sidebar.
- Find and select the Freshdesk connector from the list.
- You’ll be prompted to log in and authorize Coefficient to access your Freshdesk account.

Step 2: Select and Import Contacts Data
Now that you’re connected, choose the data you want to import.
- In the Coefficient sidebar, choose the option to import data (usually labeled “Import from…” or similar).
- Since Freshdesk uses objects, select the option to import Objects.
- Find and select the “Contacts” object from the list of available objects.
- Coefficient will show you the fields available for the Contacts object. Select the columns you need.
- You can apply filters or sort the data if needed before importing.
- Click the “Import” button to pull the Contacts data into your Google Sheets.
Step 3: (Optional) Set Up Auto-Refresh
Keep your Contacts data current without manual effort.
- After your data is imported, look for the auto-refresh options in the Coefficient sidebar or menu associated with your import.
- You can set your data to refresh hourly, daily, or weekly.
- Choose the schedule that best fits your needs.
- Coefficient will automatically update the data in your sheet on the chosen schedule.

Available Freshdesk Objects
- Ticket Fields
- Contacts
- Companies
- Agents
- Groups
- Roles
- Time Entries
- Conversations
- Forum Categories
- Forums
- Topics
- Posts
How to Import Tickets Data from Freshdesk into Excel
Getting your Freshdesk Tickets data into Excel helps you analyze support performance and collaborate effectively. Coefficient makes this process seamless and automatic.
Instead of manually exporting data that quickly becomes outdated, you can create a live connection that automatically refreshes.
In this guide, you’ll learn exactly how to import your Freshdesk Tickets data into Excel efficiently.
TLDR
-
Step 1:
Step 1. Install Coefficient from the Office Add-ins store and connect to your Freshdesk account.
-
Step 2:
Step 2. Select Import from… and choose the Tickets object.
-
Step 3:
Step 3. Configure any filters or columns you need and import the data to your Excel sheet.
-
Step 4:
Step 4. Set up auto-refresh to keep your data updated automatically on your preferred schedule.
Step-by-Step Guide to Importing Freshdesk Tickets Data
Here’s how to connect Freshdesk to Excel and pull in your Tickets data.
Step 1: Install Coefficient and Connect Freshdesk
First, you need to add Coefficient to your Excel application.
- Open Excel.
- Go to the Insert tab.
- Click “”Get Add-ins””.
- Search for “”Coefficient”” and install it from the Office Add-ins store.
Once installed, open the Coefficient add-in from the Insert tab or the Home tab (depending on your Excel version). You’ll be prompted to connect to your data sources. Select Freshdesk and follow the prompts to authorize Coefficient to access your Freshdesk account.
Step 2: Import Tickets Data
With Coefficient connected, you can now pull your Tickets data.
- In the Coefficient sidebar, click “”Import from…””.
- Select Freshdesk from your list of connected sources.
- Choose “”Objects”” as the data type.
- Select “”Tickets”” from the list of available objects.
-
- Choose the specific columns (fields) you want to import.
- Apply filters to narrow down the data (e.g., by status, agent, date, etc.).
- Sort the data if needed.
- Click “”Import””.
Your Freshdesk Tickets data will load directly into your Excel sheet.
Step 3: Set Up Auto-Refresh (Optional)
To keep your Tickets data in Excel always current, set up an auto-refresh schedule.
- In the Coefficient sidebar, find your newly created Freshdesk import.
- Click the “”Refresh”” button options (the clock icon).
- Select “”Set up auto-refresh””.
- Choose your desired frequency (e.g., daily, hourly, weekly) and time.
- Click “”Save””.
Coefficient will now automatically update your Tickets data in the background according to your schedule.
Available Freshdesk Objects
- Ticket Fields
- Contacts
- Companies
- Agents
- Groups
- Roles
- Time Entries
- Conversations
- Forum Categories
- Forums
- Topics
- Posts
How to Import Time Entries Data from Freshdesk into Excel
Getting your Freshdesk Time Entries data into Excel helps you analyze time spent on tickets and collaborate effectively. Coefficient makes this process seamless and automatic.
Instead of manually exporting data that quickly becomes outdated, you can create a live connection that automatically refreshes.
In this guide, you’ll learn exactly how to import your Freshdesk Time Entries data into Excel efficiently.
TLDR
-
Step 1:
Step 1. Install Coefficient from the Office Add-ins store and connect to your Freshdesk account.
-
Step 2:
Step 2. Select Import from… and choose the Time Entries object.
-
Step 3:
Step 3. Configure any filters or columns you need and import the data to your Excel sheet.
-
Step 4:
Step 4. Set up auto-refresh to keep your data updated automatically on your preferred schedule.
Step-by-Step Guide to Importing Freshdesk Time Entries Data
Here’s how to connect Freshdesk to Excel and pull in your Time Entries data.
Step 1: Install Coefficient and Connect Freshdesk
First, you need to add Coefficient to your Excel application.
- Open Excel.
- Go to the Insert tab.
- Click “”Get Add-ins””.
- Search for “”Coefficient”” and install it from the Office Add-ins store.
Once installed, open the Coefficient add-in from the Insert tab or the Home tab (depending on your Excel version). You’ll be prompted to connect to your data sources. Select Freshdesk and follow the prompts to authorize Coefficient to access your Freshdesk account.
Step 2: Import Time Entries Data
With Coefficient connected, you can now pull your Time Entries data.
- In the Coefficient sidebar, click “”Import from…””.
- Select Freshdesk from your list of connected sources.
- Choose “”Objects”” as the data type.
- Select “”Time Entries”” from the list of available objects.
-
- Choose the specific columns (fields) you want to import.
- Apply filters to narrow down the data (e.g., by agent, ticket, date range, etc.).
- Sort the data if needed.
- Click “”Import””.
Your Freshdesk Time Entries data will load directly into your Excel sheet.
Step 3: Set Up Auto-Refresh (Optional)
To keep your Time Entries data in Excel always current, set up an auto-refresh schedule.
- In the Coefficient sidebar, find your newly created Freshdesk import.
- Click the “”Refresh”” button options (the clock icon).
- Select “”Set up auto-refresh””.
- Choose your desired frequency (e.g., daily, hourly, weekly) and time.
- Click “”Save””.
Coefficient will now automatically update your Time Entries data in the background according to your schedule.
Available Freshdesk Objects
- Ticket Fields
- Contacts
- Companies
- Agents
- Groups
- Roles
- Time Entries
- Conversations
- Forum Categories
- Forums
- Topics
- Posts
How to Import Ticket Fields Data from Freshdesk into Excel
Getting your Freshdesk Ticket Fields data into Excel helps you analyze form structure and collaborate effectively. Coefficient makes this process seamless and automatic.
Instead of manually exporting data that quickly becomes outdated, you can create a live connection that automatically refreshes.
In this guide, you’ll learn exactly how to import your Freshdesk Ticket Fields data into Excel efficiently.
TLDR
-
Step 1:
Step 1. Install Coefficient from the Office Add-ins store and connect to your Freshdesk account.
-
Step 2:
Step 2. Select Import from… and choose the Ticket Fields object.
-
Step 3:
Step 3. Configure any filters or columns you need and import the data to your Excel sheet.
-
Step 4:
Step 4. Set up auto-refresh to keep your data updated automatically on your preferred schedule.
Step-by-Step Guide to Importing Freshdesk Ticket Fields Data
Here’s how to connect Freshdesk to Excel and pull in your Ticket Fields data.
Step 1: Install Coefficient and Connect Freshdesk
First, you need to add Coefficient to your Excel application.
- Open Excel.
- Go to the Insert tab.
- Click “”Get Add-ins””.
- Search for “”Coefficient”” and install it from the Office Add-ins store.
Once installed, open the Coefficient add-in from the Insert tab or the Home tab (depending on your Excel version). You’ll be prompted to connect to your data sources. Select Freshdesk and follow the prompts to authorize Coefficient to access your Freshdesk account.
Step 2: Import Ticket Fields Data
With Coefficient connected, you can now pull your Ticket Fields data.
- In the Coefficient sidebar, click “”Import from…””.
- Select Freshdesk from your list of connected sources.
- Choose “”Objects”” as the data type.
- Select “”Ticket Fields”” from the list of available objects.
-
- Choose the specific columns (fields) you want to import.
- Apply filters to narrow down the data if needed.
- Sort the data if needed.
- Click “”Import””.
Your Freshdesk Ticket Fields data will load directly into your Excel sheet.
Step 3: Set Up Auto-Refresh (Optional)
To keep your Ticket Fields data in Excel always current, set up an auto-refresh schedule.
- In the Coefficient sidebar, find your newly created Freshdesk import.
- Click the “”Refresh”” button options (the clock icon).
- Select “”Set up auto-refresh””.
- Choose your desired frequency (e.g., daily, hourly, weekly) and time.
- Click “”Save””.
Coefficient will now automatically update your Ticket Fields data in the background according to your schedule.
Available Freshdesk Objects
- Ticket Fields
- Contacts
- Companies
- Agents
- Groups
- Roles
- Time Entries
- Conversations
- Forum Categories
- Forums
- Topics
- Posts
How to Import Solution Folders Data from Freshdesk into Excel
Getting your Freshdesk Solution Folders data into Excel helps you analyze your knowledge base organization and collaborate effectively. Coefficient makes this process seamless and automatic.
Instead of manually exporting data that quickly becomes outdated, you can create a live connection that automatically refreshes.
In this guide, you’ll learn exactly how to import your Freshdesk Solution Folders data into Excel efficiently.
TLDR
-
Step 1:
Step 1. Install Coefficient from the Office Add-ins store and connect to your Freshdesk account.
-
Step 2:
Step 2. Select Import from… and choose the Solution Folders object.
-
Step 3:
Step 3. Configure any filters or columns you need and import the data to your Excel sheet.
-
Step 4:
Step 4. Set up auto-refresh to keep your data updated automatically on your preferred schedule.
Step-by-Step Guide to Importing Freshdesk Solution Folders Data
Here’s how to connect Freshdesk to Excel and pull in your Solution Folders data.
Step 1: Install Coefficient and Connect Freshdesk
First, you need to add Coefficient to your Excel application.
- Open Excel.
- Go to the Insert tab.
- Click “”Get Add-ins””.
- Search for “”Coefficient”” and install it from the Office Add-ins store.
Once installed, open the Coefficient add-in from the Insert tab or the Home tab (depending on your Excel version). You’ll be prompted to connect to your data sources. Select Freshdesk and follow the prompts to authorize Coefficient to access your Freshdesk account.
Step 2: Import Solution Folders Data
With Coefficient connected, you can now pull your Solution Folders data.
- In the Coefficient sidebar, click “”Import from…””.
- Select Freshdesk from your list of connected sources.
- Choose “”Objects”” as the data type.
- Select “”Solution Folders”” from the list of available objects.
-
- Choose the specific columns (fields) you want to import.
- Apply filters to narrow down the data (e.g., by category, visibility, etc.).
- Sort the data if needed.
- Click “”Import””.
Your Freshdesk Solution Folders data will load directly into your Excel sheet.
Step 3: Set Up Auto-Refresh (Optional)
To keep your Solution Folders data in Excel always current, set up an auto-refresh schedule.
- In the Coefficient sidebar, find your newly created Freshdesk import.
- Click the “”Refresh”” button options (the clock icon).
- Select “”Set up auto-refresh””.
- Choose your desired frequency (e.g., daily, hourly, weekly) and time.
- Click “”Save””.
Coefficient will now automatically update your Solution Folders data in the background according to your schedule.
Available Freshdesk Objects
- Ticket Fields
- Contacts
- Companies
- Agents
- Groups
- Roles
- Time Entries
- Conversations
- Forum Categories
- Forums
- Topics
- Posts
How to Import Solution Articles Data from Freshdesk into Excel
Getting your Freshdesk Solution Articles data into Excel helps you analyze knowledge base content and collaborate effectively. Coefficient makes this process seamless and automatic.
Instead of manually exporting data that quickly becomes outdated, you can create a live connection that automatically refreshes.
In this guide, you’ll learn exactly how to import your Freshdesk Solution Articles data into Excel efficiently.
TLDR
-
Step 1:
Step 1. Install Coefficient from the Office Add-ins store and connect to your Freshdesk account.
-
Step 2:
Step 2. Select Import from… and choose the Solution Articles object.
-
Step 3:
Step 3. Configure any filters or columns you need and import the data to your Excel sheet.
-
Step 4:
Step 4. Set up auto-refresh to keep your data updated automatically on your preferred schedule.
Step-by-Step Guide to Importing Freshdesk Solution Articles Data
Here’s how to connect Freshdesk to Excel and pull in your Solution Articles data.
Step 1: Install Coefficient and Connect Freshdesk
First, you need to add Coefficient to your Excel application.
- Open Excel.
- Go to the Insert tab.
- Click “”Get Add-ins””.
- Search for “”Coefficient”” and install it from the Office Add-ins store.
Once installed, open the Coefficient add-in from the Insert tab or the Home tab (depending on your Excel version). You’ll be prompted to connect to your data sources. Select Freshdesk and follow the prompts to authorize Coefficient to access your Freshdesk account.
Step 2: Import Solution Articles Data
With Coefficient connected, you can now pull your Solution Articles data.
- In the Coefficient sidebar, click “”Import from…””.
- Select Freshdesk from your list of connected sources.
- Choose “”Objects”” as the data type.
- Select “”Solution Articles”” from the list of available objects.
-
- Choose the specific columns (fields) you want to import.
- Apply filters to narrow down the data (e.g., by folder, category, status, etc.).
- Sort the data if needed.
- Click “”Import””.
Your Freshdesk Solution Articles data will load directly into your Excel sheet.
Step 3: Set Up Auto-Refresh (Optional)
To keep your Solution Articles data in Excel always current, set up an auto-refresh schedule.
- In the Coefficient sidebar, find your newly created Freshdesk import.
- Click the “”Refresh”” button options (the clock icon).
- Select “”Set up auto-refresh””.
- Choose your desired frequency (e.g., daily, hourly, weekly) and time.
- Click “”Save””.
Coefficient will now automatically update your Solution Articles data in the background according to your schedule.
Available Freshdesk Objects
- Ticket Fields
- Contacts
- Companies
- Agents
- Groups
- Roles
- Time Entries
- Conversations
- Forum Categories
- Forums
- Topics
- Posts
How to Import Roles Data from Freshdesk into Excel
Getting your Freshdesk Roles data into Excel helps you analyze permission structures and collaborate effectively. Coefficient makes this process seamless and automatic.
Instead of manually exporting data that quickly becomes outdated, you can create a live connection that automatically refreshes.
In this guide, you’ll learn exactly how to import your Freshdesk Roles data into Excel efficiently.
TLDR
-
Step 1:
Step 1. Install Coefficient from the Office Add-ins store and connect to your Freshdesk account.
-
Step 2:
Step 2. Select Import from… and choose the Roles object.
-
Step 3:
Step 3. Configure any filters or columns you need and import the data to your Excel sheet.
-
Step 4:
Step 4. Set up auto-refresh to keep your data updated automatically on your preferred schedule.
Step-by-Step Guide to Importing Freshdesk Roles Data
Here’s how to connect Freshdesk to Excel and pull in your Roles data.
Step 1: Install Coefficient and Connect Freshdesk
First, you need to add Coefficient to your Excel application.
- Open Excel.
- Go to the Insert tab.
- Click “”Get Add-ins””.
- Search for “”Coefficient”” and install it from the Office Add-ins store.
Once installed, open the Coefficient add-in from the Insert tab or the Home tab (depending on your Excel version). You’ll be prompted to connect to your data sources. Select Freshdesk and follow the prompts to authorize Coefficient to access your Freshdesk account.
Step 2: Import Roles Data
With Coefficient connected, you can now pull your Roles data.
- In the Coefficient sidebar, click “”Import from…””.
- Select Freshdesk from your list of connected sources.
- Choose “”Objects”” as the data type.
- Select “”Roles”” from the list of available objects.
-
- Choose the specific columns (fields) you want to import.
- Apply filters to narrow down the data if needed.
- Sort the data if needed.
- Click “”Import””.
Your Freshdesk Roles data will load directly into your Excel sheet.
Step 3: Set Up Auto-Refresh (Optional)
To keep your Roles data in Excel always current, set up an auto-refresh schedule.
- In the Coefficient sidebar, find your newly created Freshdesk import.
- Click the “”Refresh”” button options (the clock icon).
- Select “”Set up auto-refresh””.
- Choose your desired frequency (e.g., daily, hourly, weekly) and time.
- Click “”Save””.
Coefficient will now automatically update your Roles data in the background according to your schedule.
Available Freshdesk Objects
- Ticket Fields
- Contacts
- Companies
- Agents
- Groups
- Roles
- Time Entries
- Conversations
- Forum Categories
- Forums
- Topics
- Posts
How to Import Forums Data from Freshdesk into Excel
Getting your Freshdesk Forums data into Excel helps you manage community forums and collaborate effectively. Coefficient makes this process seamless and automatic.
Instead of manually exporting data that quickly becomes outdated, you can create a live connection that automatically refreshes.
In this guide, you’ll learn exactly how to import your Freshdesk Forums data into Excel efficiently.
TLDR
-
Step 1:
Step 1. Install Coefficient from the Office Add-ins store and connect to your Freshdesk account.
-
Step 2:
Step 2. Select Import from… and choose the Forums object.
-
Step 3:
Step 3. Configure any filters or columns you need and import the data to your Excel sheet.
-
Step 4:
Step 4. Set up auto-refresh to keep your data updated automatically on your preferred schedule.
Step-by-Step Guide to Importing Freshdesk Forums Data
Here’s how to connect Freshdesk to Excel and pull in your Forums data.
Step 1: Install Coefficient and Connect Freshdesk
First, you need to add Coefficient to your Excel application.
- Open Excel.
- Go to the Insert tab.
- Click “”Get Add-ins””.
- Search for “”Coefficient”” and install it from the Office Add-ins store.
Once installed, open the Coefficient add-in from the Insert tab or the Home tab (depending on your Excel version). You’ll be prompted to connect to your data sources. Select Freshdesk and follow the prompts to authorize Coefficient to access your Freshdesk account.
Step 2: Import Forums Data
With Coefficient connected, you can now pull your Forums data.
- In the Coefficient sidebar, click “”Import from…””.
- Select Freshdesk from your list of connected sources.
- Choose “”Objects”” as the data type.
- Select “”Forums”” from the list of available objects.
-
- Choose the specific columns (fields) you want to import.
- Apply filters to narrow down the data (e.g., by category, status, etc.).
- Sort the data if needed.
- Click “”Import””.
Your Freshdesk Forums data will load directly into your Excel sheet.
Step 3: Set Up Auto-Refresh (Optional)
To keep your Forums data in Excel always current, set up an auto-refresh schedule.
- In the Coefficient sidebar, find your newly created Freshdesk import.
- Click the “”Refresh”” button options (the clock icon).
- Select “”Set up auto-refresh””.
- Choose your desired frequency (e.g., daily, hourly, weekly) and time.
- Click “”Save””.
Coefficient will now automatically update your Forums data in the background according to your schedule.
Available Freshdesk Objects
- Ticket Fields
- Contacts
- Companies
- Agents
- Groups
- Roles
- Time Entries
- Conversations
- Forum Categories
- Forums
- Topics
- Posts
How to Import Contacts Data from Freshdesk into Excel
Getting your Freshdesk Contacts data into Excel helps you manage customer information and collaborate effectively. Coefficient makes this process seamless and automatic.
Instead of manually exporting data that quickly becomes outdated, you can create a live connection that automatically refreshes.
In this guide, you’ll learn exactly how to import your Freshdesk Contacts data into Excel efficiently.
TLDR
-
Step 1:
Step 1. Install Coefficient from the Office Add-ins store and connect to your Freshdesk account.
-
Step 2:
Step 2. Select Import from… and choose the Contacts object.
-
Step 3:
Step 3. Configure any filters or columns you need and import the data to your Excel sheet.
-
Step 4:
Step 4. Set up auto-refresh to keep your data updated automatically on your preferred schedule.
Step-by-Step Guide to Importing Freshdesk Contacts Data
Here’s how to connect Freshdesk to Excel and pull in your Contacts data.
Step 1: Install Coefficient and Connect Freshdesk
First, you need to add Coefficient to your Excel application.
- Open Excel.
- Go to the Insert tab.
- Click “”Get Add-ins””.
- Search for “”Coefficient”” and install it from the Office Add-ins store.
Once installed, open the Coefficient add-in from the Insert tab or the Home tab (depending on your Excel version). You’ll be prompted to connect to your data sources. Select Freshdesk and follow the prompts to authorize Coefficient to access your Freshdesk account.
Step 2: Import Contacts Data
With Coefficient connected, you can now pull your Contacts data.
- In the Coefficient sidebar, click “”Import from…””.
- Select Freshdesk from your list of connected sources.
- Choose “”Objects”” as the data type.
- Select “”Contacts”” from the list of available objects.
-
- Choose the specific columns (fields) you want to import.
- Apply filters to narrow down the data (e.g., by company, status, etc.).
- Sort the data if needed.
- Click “”Import””.
Your Freshdesk Contacts data will load directly into your Excel sheet.
Step 3: Set Up Auto-Refresh (Optional)
To keep your Contacts data in Excel always current, set up an auto-refresh schedule.
- In the Coefficient sidebar, find your newly created Freshdesk import.
- Click the “”Refresh”” button options (the clock icon).
- Select “”Set up auto-refresh””.
- Choose your desired frequency (e.g., daily, hourly, weekly) and time.
- Click “”Save””.
Coefficient will now automatically update your Contacts data in the background according to your schedule.
Available Freshdesk Objects
- Ticket Fields
- Contacts
- Companies
- Agents
- Groups
- Roles
- Time Entries
- Conversations
- Forum Categories
- Forums
- Topics
- Posts
How to Import Contacts Data from Freshdesk into Excel
Getting your Freshdesk Contacts data into Excel helps you manage customer information and collaborate effectively. Coefficient makes this process seamless and automatic.
Instead of manually exporting data that quickly becomes outdated, you can create a live connection that automatically refreshes.
In this guide, you’ll learn exactly how to import your Freshdesk Contacts data into Excel efficiently.
TLDR
-
Step 1:
Step 1. Install Coefficient from the Office Add-ins store and connect to your Freshdesk account.
-
Step 2:
Step 2. Select Import from… and choose the Contacts object.
-
Step 3:
Step 3. Configure any filters or columns you need and import the data to your Excel sheet.
-
Step 4:
Step 4. Set up auto-refresh to keep your data updated automatically on your preferred schedule.
Step-by-Step Guide to Importing Freshdesk Contacts Data
Here’s how to connect Freshdesk to Excel and pull in your Contacts data.
Step 1: Install Coefficient and Connect Freshdesk
First, you need to add Coefficient to your Excel application.
- Open Excel.
- Go to the Insert tab.
- Click “”Get Add-ins””.
- Search for “”Coefficient”” and install it from the Office Add-ins store.
Once installed, open the Coefficient add-in from the Insert tab or the Home tab (depending on your Excel version). You’ll be prompted to connect to your data sources. Select Freshdesk and follow the prompts to authorize Coefficient to access your Freshdesk account.
Step 2: Import Contacts Data
With Coefficient connected, you can now pull your Contacts data.
- In the Coefficient sidebar, click “”Import from…””.
- Select Freshdesk from your list of connected sources.
- Choose “”Objects”” as the data type.
- Select “”Contacts”” from the list of available objects.
-
- Choose the specific columns (fields) you want to import.
- Apply filters to narrow down the data (e.g., by company, status, etc.).
- Sort the data if needed.
- Click “”Import””.
Your Freshdesk Contacts data will load directly into your Excel sheet.
Step 3: Set Up Auto-Refresh (Optional)
To keep your Contacts data in Excel always current, set up an auto-refresh schedule.
- In the Coefficient sidebar, find your newly created Freshdesk import.
- Click the “”Refresh”” button options (the clock icon).
- Select “”Set up auto-refresh””.
- Choose your desired frequency (e.g., daily, hourly, weekly) and time.
- Click “”Save””.
Coefficient will now automatically update your Contacts data in the background according to your schedule.
Available Freshdesk Objects
- Ticket Fields
- Contacts
- Companies
- Agents
- Groups
- Roles
- Time Entries
- Conversations
- Forum Categories
- Forums
- Topics
- Posts