Read the following guide to learn how to export data from Looker easily and efficiently.
Looker is a leading BI tool that allows teams to create dynamic, interactive dashboards to solve business problems and explore large datasets stored in cloud data warehouses and other databases. The company was acquired by Google in 2019, and is now a part of the Google Cloud Platform.
However, while Looker offers intuitive and collaborative tools that let multiple users work on the same dashboard, SalesOps teams that receive Looker dashboards often need access to the underlying data. This allows them to activate the data in their modeling within the interface they prefer: spreadsheets.
To do this, business users usually need to convert Looker data into a CSV file and manually copy and paste everything into a spreadsheet. The entire process is time-consuming, laborious, and error-prone. It’s also nearly unworkable when dealing with thousands of rows and columns of data.
But that doesn’t have to be the case. The following guide will demonstrate the best ways to automate Looker data exports, along with other popular methods that business users leverage to get Looker data into their spreadsheets.
Why Extract Data from Looker?
SalesOps managers can enhance their analysis by leveraging Looker data. Oftentimes, Looker data is already transformed by SQL, and offers access to KPIs that are blended from multiple systems. SalesOps managers can make use of this robust, BI-enriched data in their forecasting and other data models.
However, most SalesOps managers do not have the SQL programming experience needed to navigate Looker. Furthermore, the data products associated with Looker, typically dashboards and reports, do not offer easy access to underlying data.
In order to harness the underlying data, SalesOps managers often extract the data in a CSV file format. But this process is highly manual and requires SalesOps managers to copy-and-paste the data directly into spreadsheets. This process slows down sales efforts and leads to data errors.
SalesOps managers need a way to automate Looker data exports into spreadsheet platforms such as Google Sheets. Read on to learn how SalesOps managers achieve this with Coefficient.
Top Methods to Extract Data from Looker
Here are some of the most popular methods for exporting data from Looker into Google Sheets, broken down into step-by-step walkthroughs.
Method 1: Coefficient
Coefficient provides the fastest and simplest method for exporting Looker data into your spreadsheet for immediate use.
Coefficient’s one-click connector lets you extract data from Looker and import the data into Google Sheets in seconds.
The solution also allows you to configure automatic data updates to sync real-time Looker data with your Google spreadsheet.
The process, from installation, to data exporting, to auto-refresh scheduling, takes less than two minutes.
Now, without further ado, here’s how to connect Looker to Google Sheets with Coefficient.
Start by navigating to the Extensions tab on the top menu of Google Sheets. Click Add-ons from the drop-down, then Get-add-ons on the sub-menu.
Type in “Coefficient” in the Google Workspace Marketplace’s search box. Select the Coefficient add-on from the results. Then click Install and go through the prompts to finish installing the app.

You’ll get a prompt confirming that the app has been installed. Launch Coefficient by going back to Extensions on the Google Sheets menu.
The Coefficient add-on runs as a side panel on the right-hand side of the Google Sheets interface.
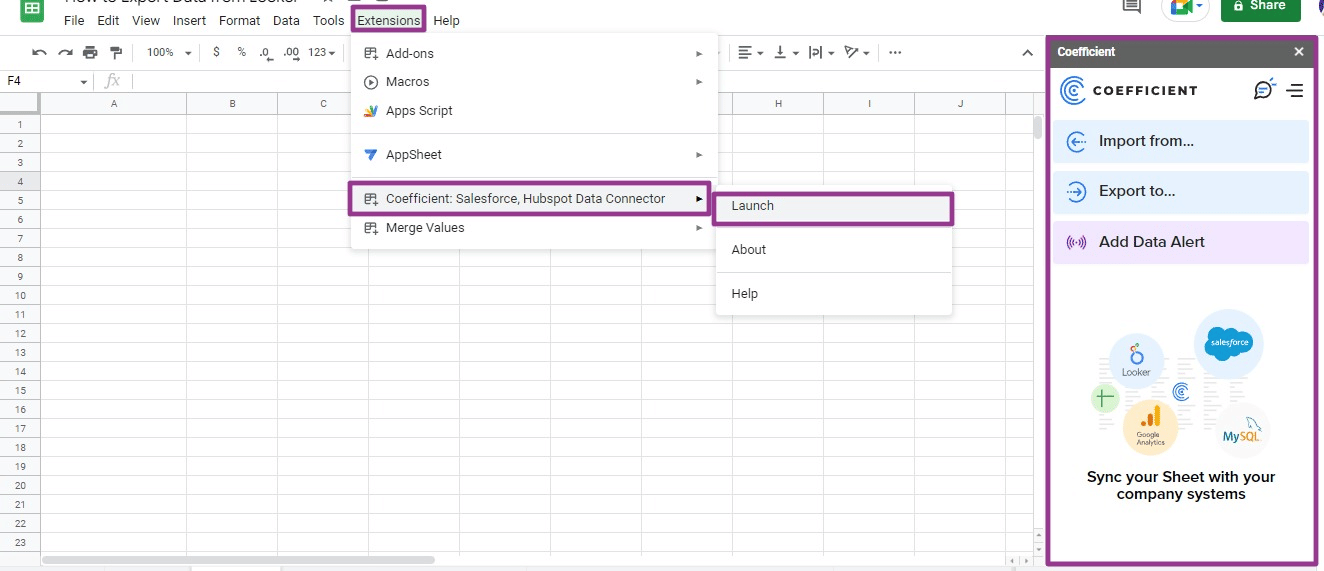
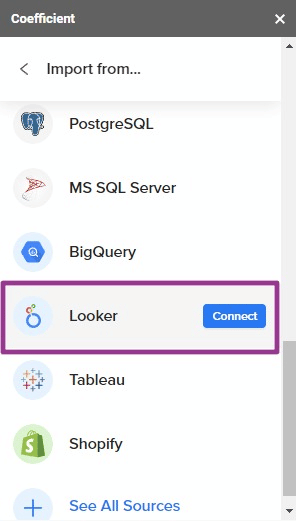
Select Import from… on the Coefficient sidebar and select Looker from the list of data sources.
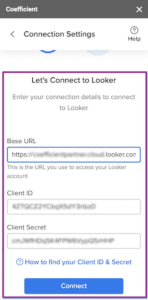
Enter the URL you use to access your Looker account in the first field. You can find this URL by copying your organization’s Looker login page web address.
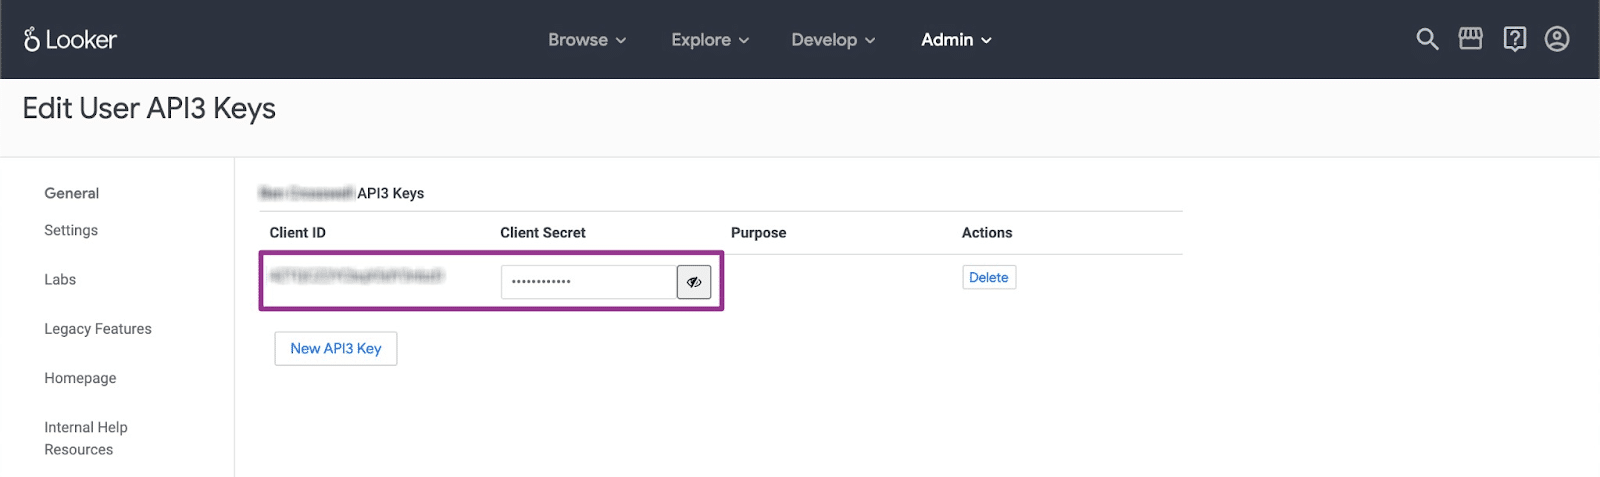
The Client ID and Client Secret appear in the admin panel of Looker. You might need to request those rights from your Looker admin.
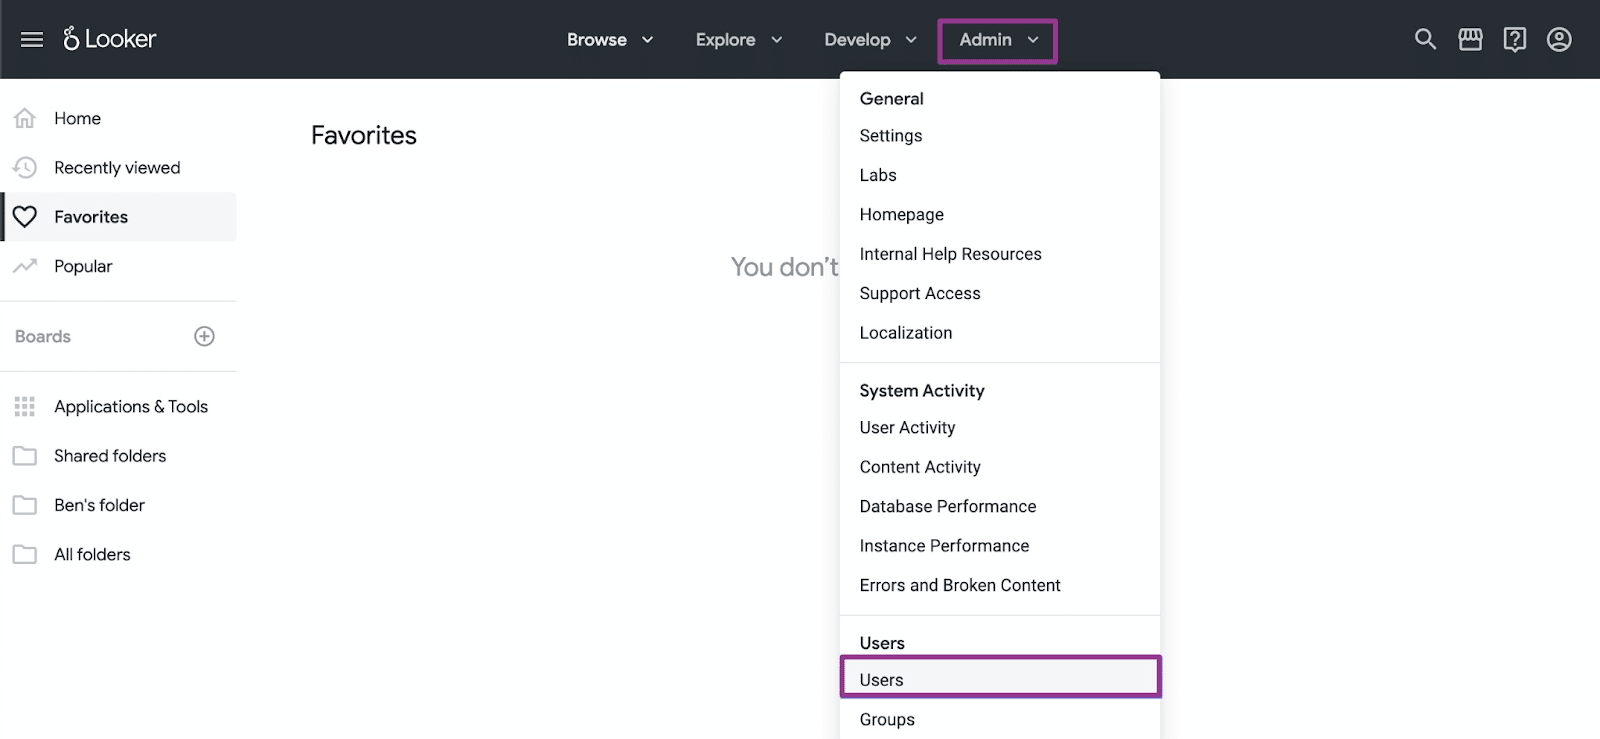
In Looker, navigate to the Admin section and click Users from the dropdown list.
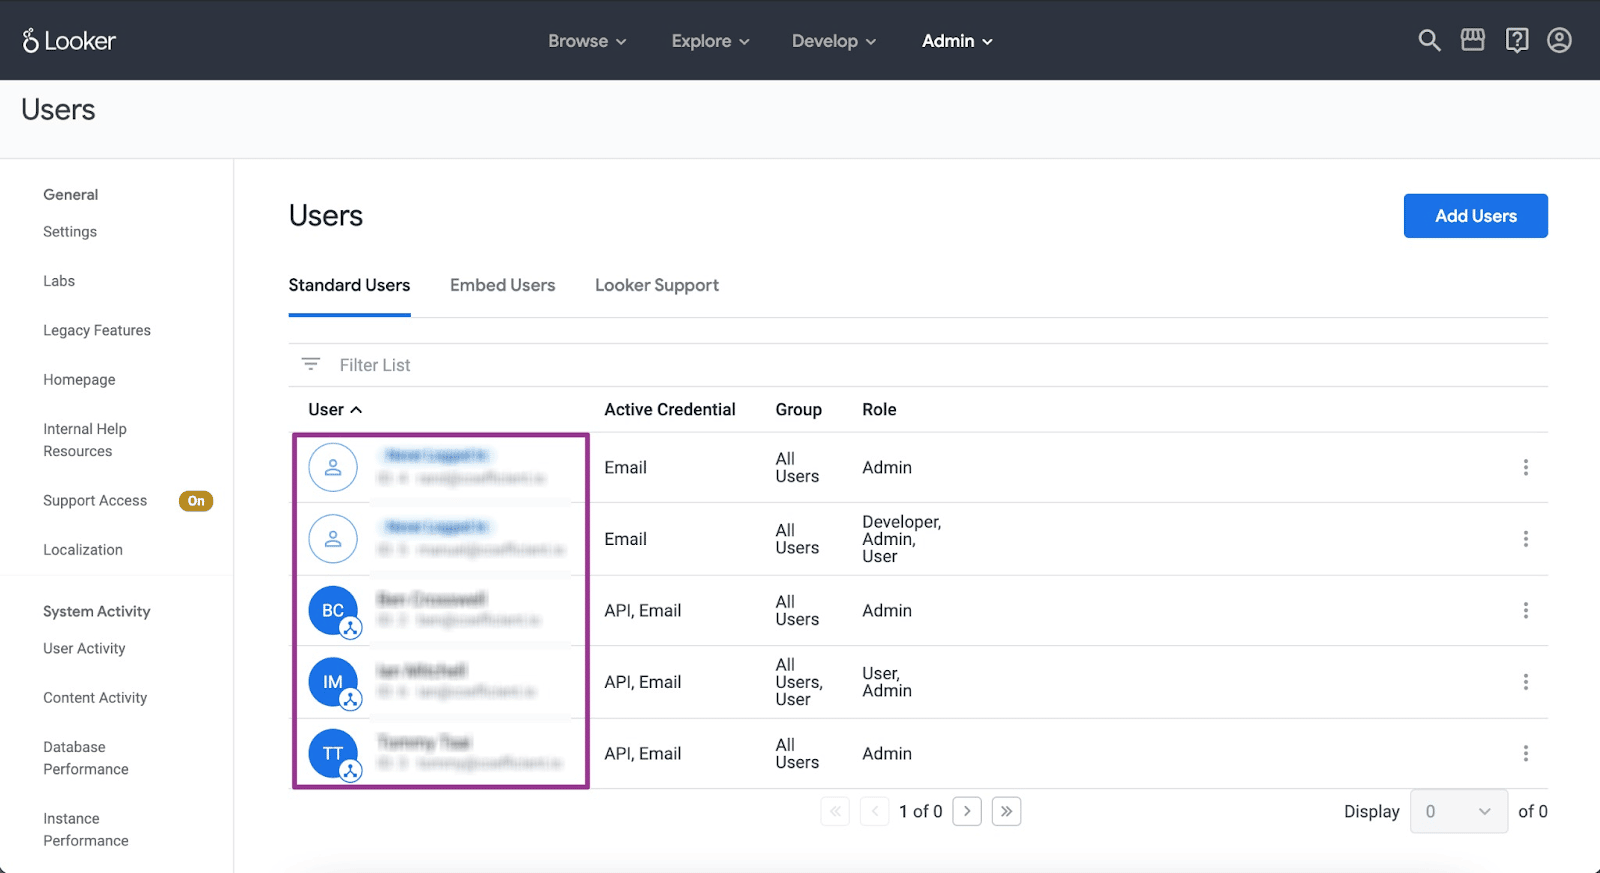
Select the appropriate Looker user.
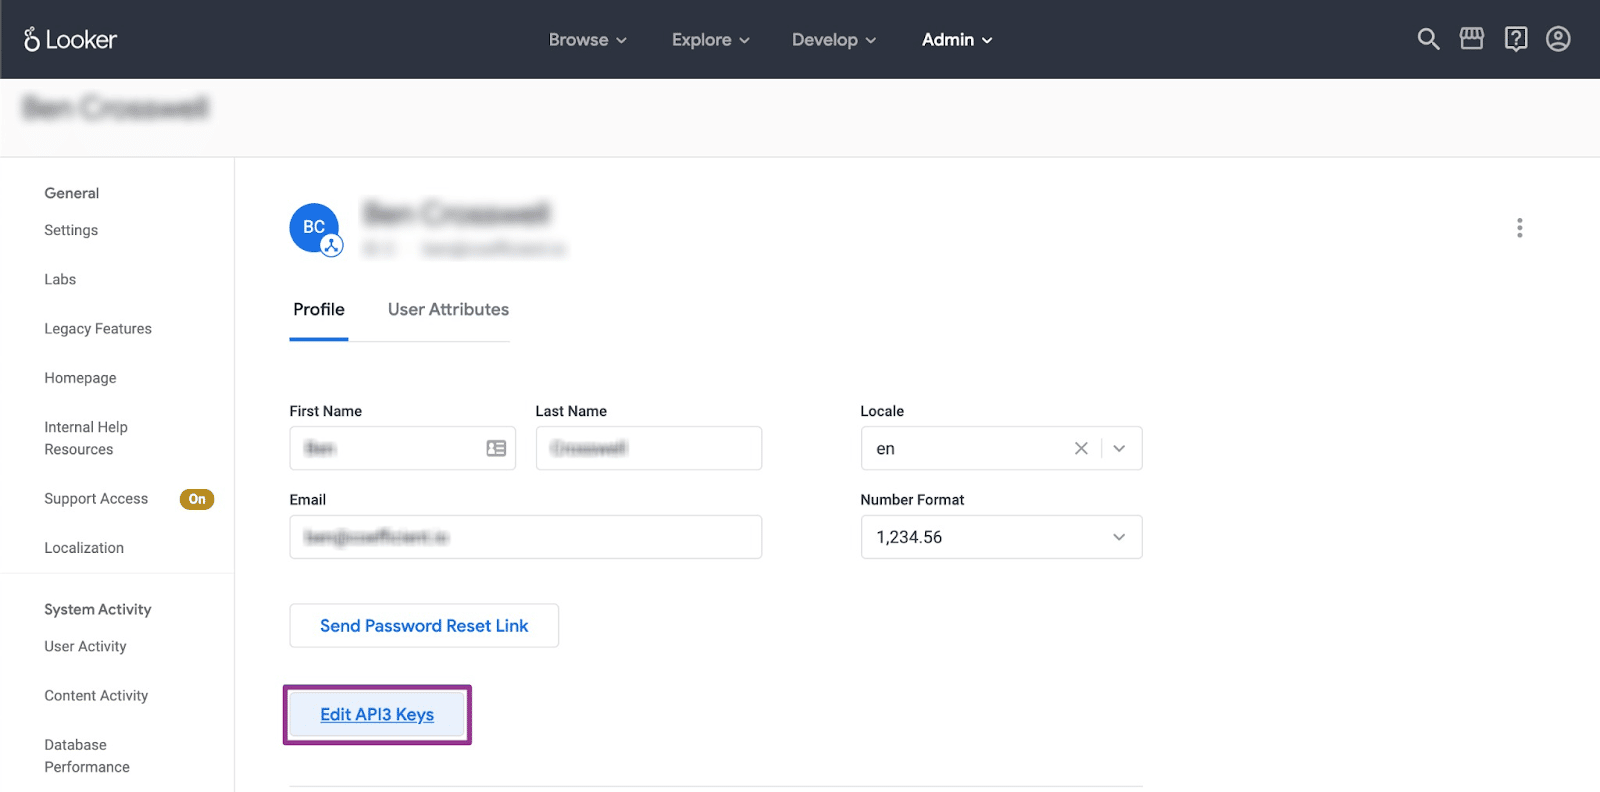
Click Edit API3 Keys at the bottom of the user detail page.
Then copy the Client ID and Client Secret details. Paste them on the required fields in Coefficient’s side panel menu on Google Sheets.
You’ll see a popup window that contains your available dashboards’ folder structure. This includes a navigation and search bar to help you find everything easily.
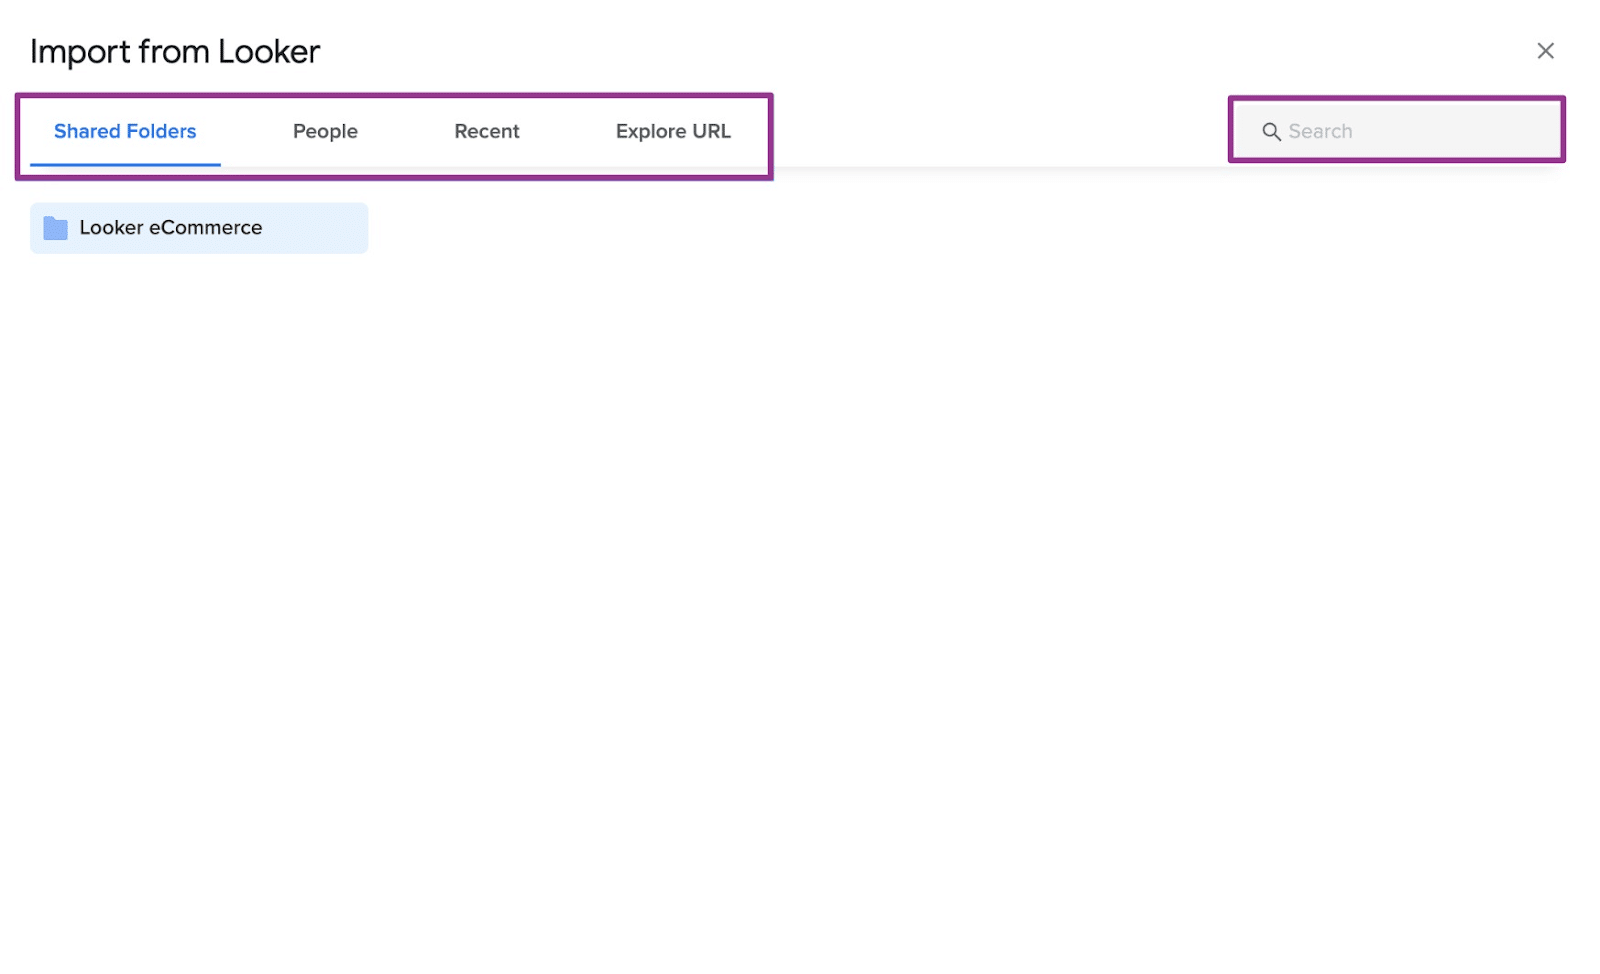
Now select the dashboard you want to pull into Google Sheets. Click the Import button when you’re done.
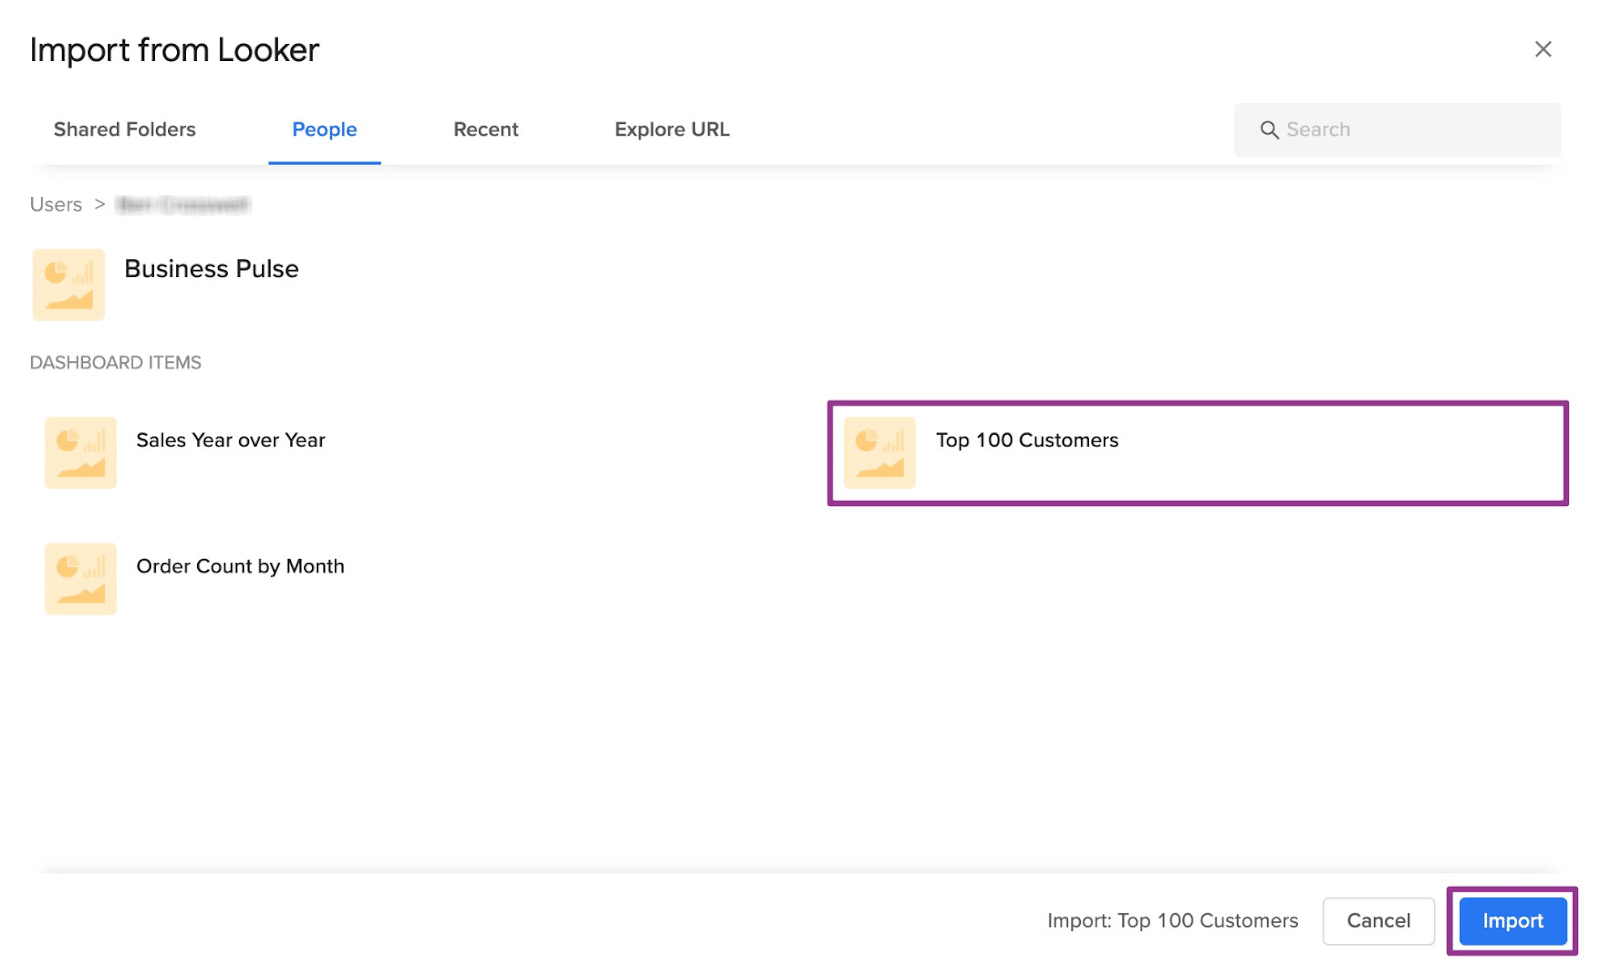
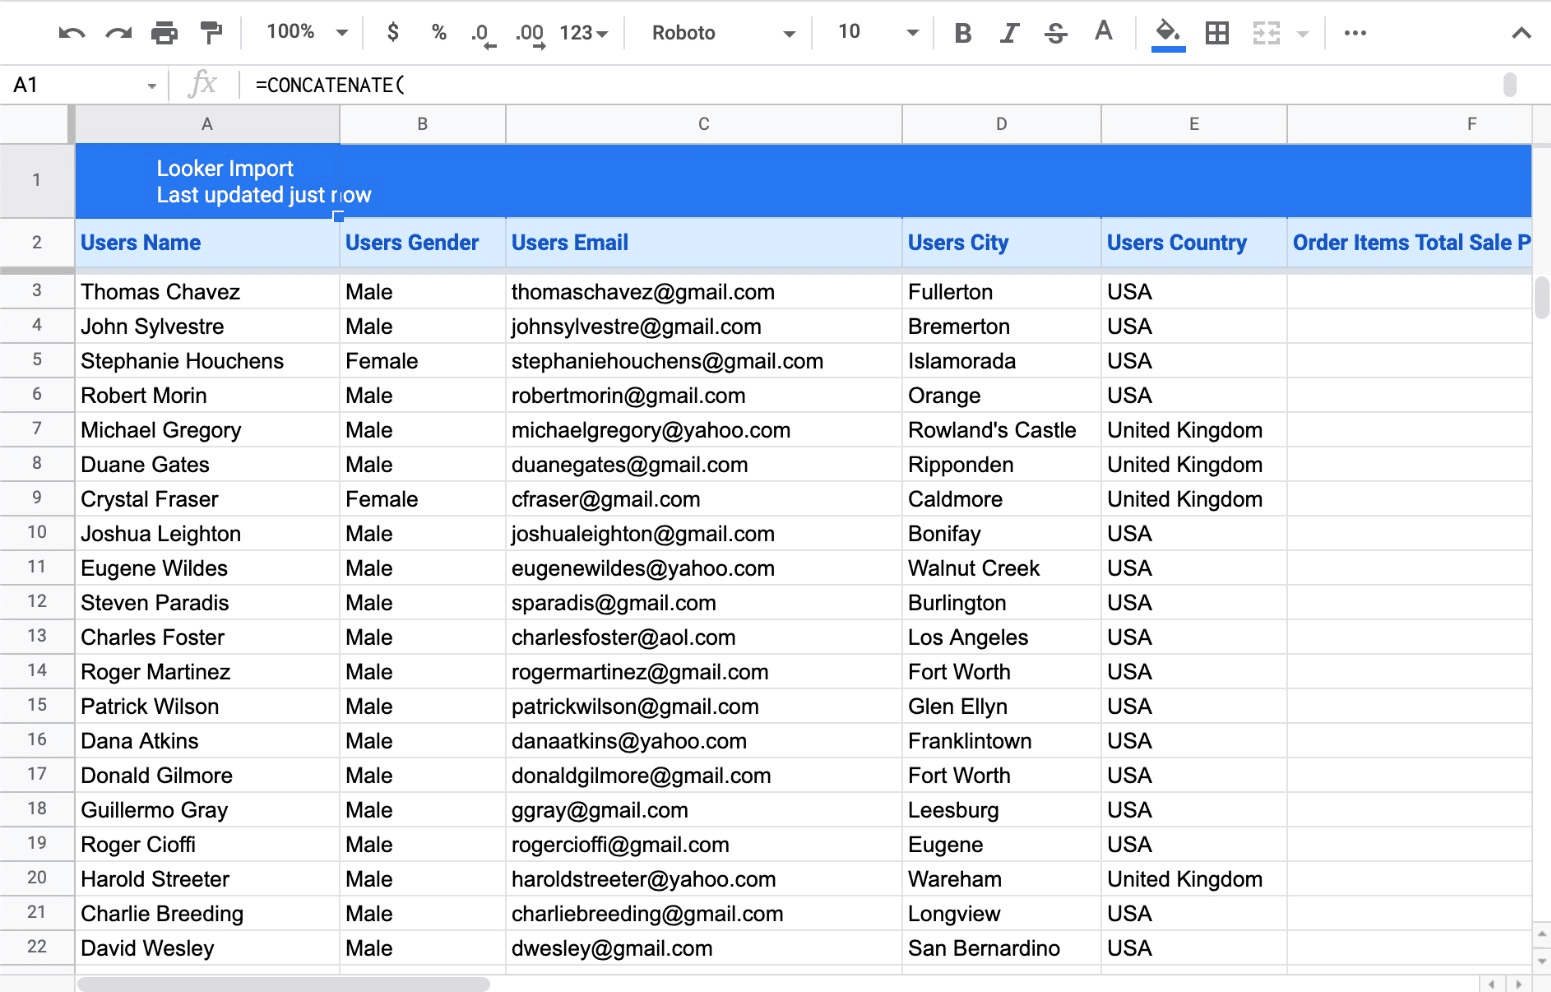
Coefficient will pull your Looker data into Google Sheets instantly.
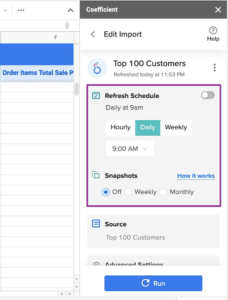
You can also set up automatic data updates to schedule data syncs between Looker and Google Sheets. Choose whether to run daily, hourly, or weekly automatic data updates.
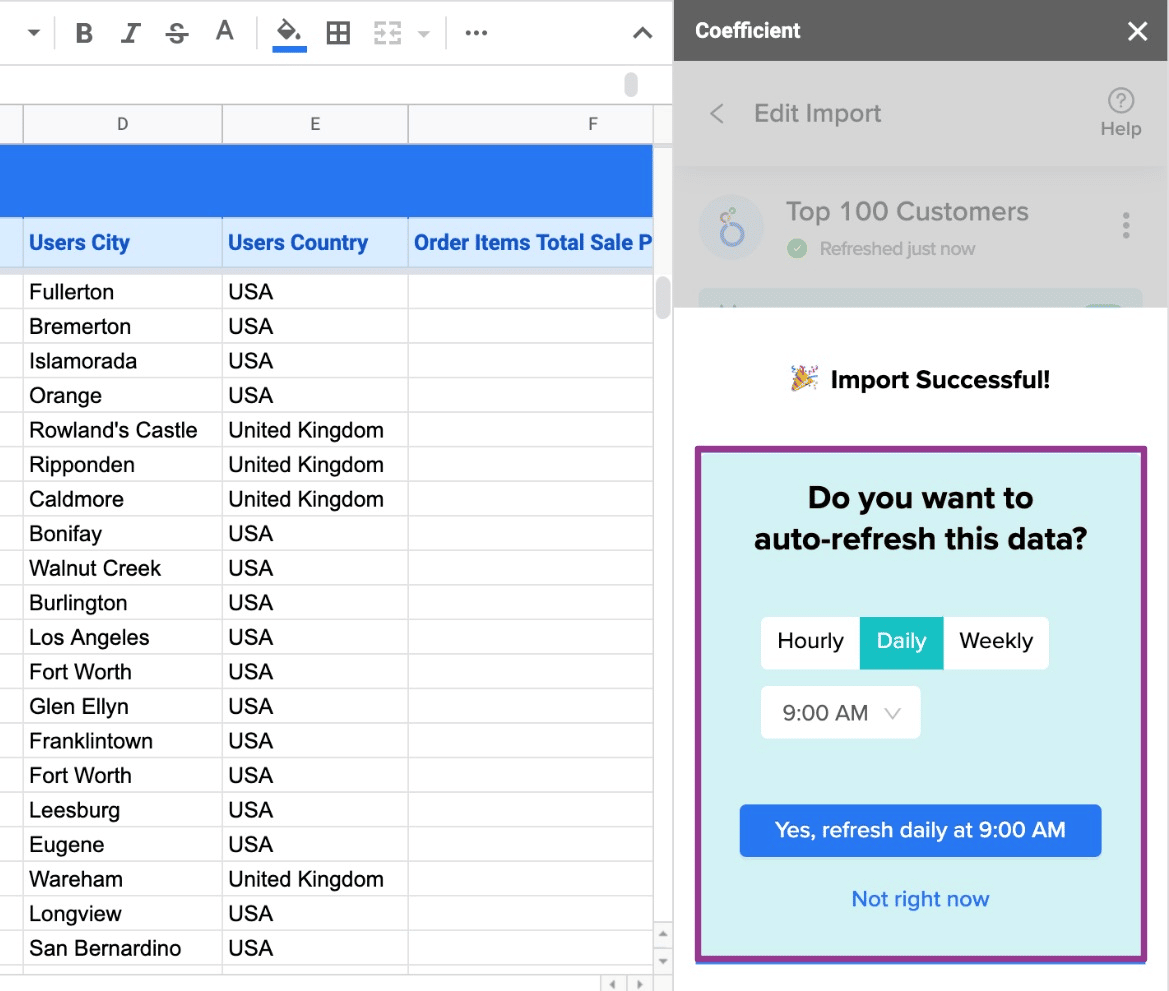
With automatic data updates, your Looker data is always up-to-date in your spreadsheet. That means you can build live dashboards and reports on top of the data without performing cumbersome manual updates.
Coefficient is easy to use for all business users, simplifying pulling and syncing Looker data to Google Sheets.
Method 2: Download Data from a Look or Explore as a CSV file
You can extract data from Looker by downloading it as a CSV file. There are several different ways to do this.
Note: You need the download_without_limit or download_with_limit permission from a Looker admin to download content.
The Looker data download process depends on what part of Looker you’re using. You can download data from a Look or an Explore, dashboard, legacy dashboard, or a merged results query.
Exporting Data from a Look or an Explore
Here’s how to export data from a Look or an Explore.
Download the data by clicking the gear menu icon (upper right) on an Explore or Look page.
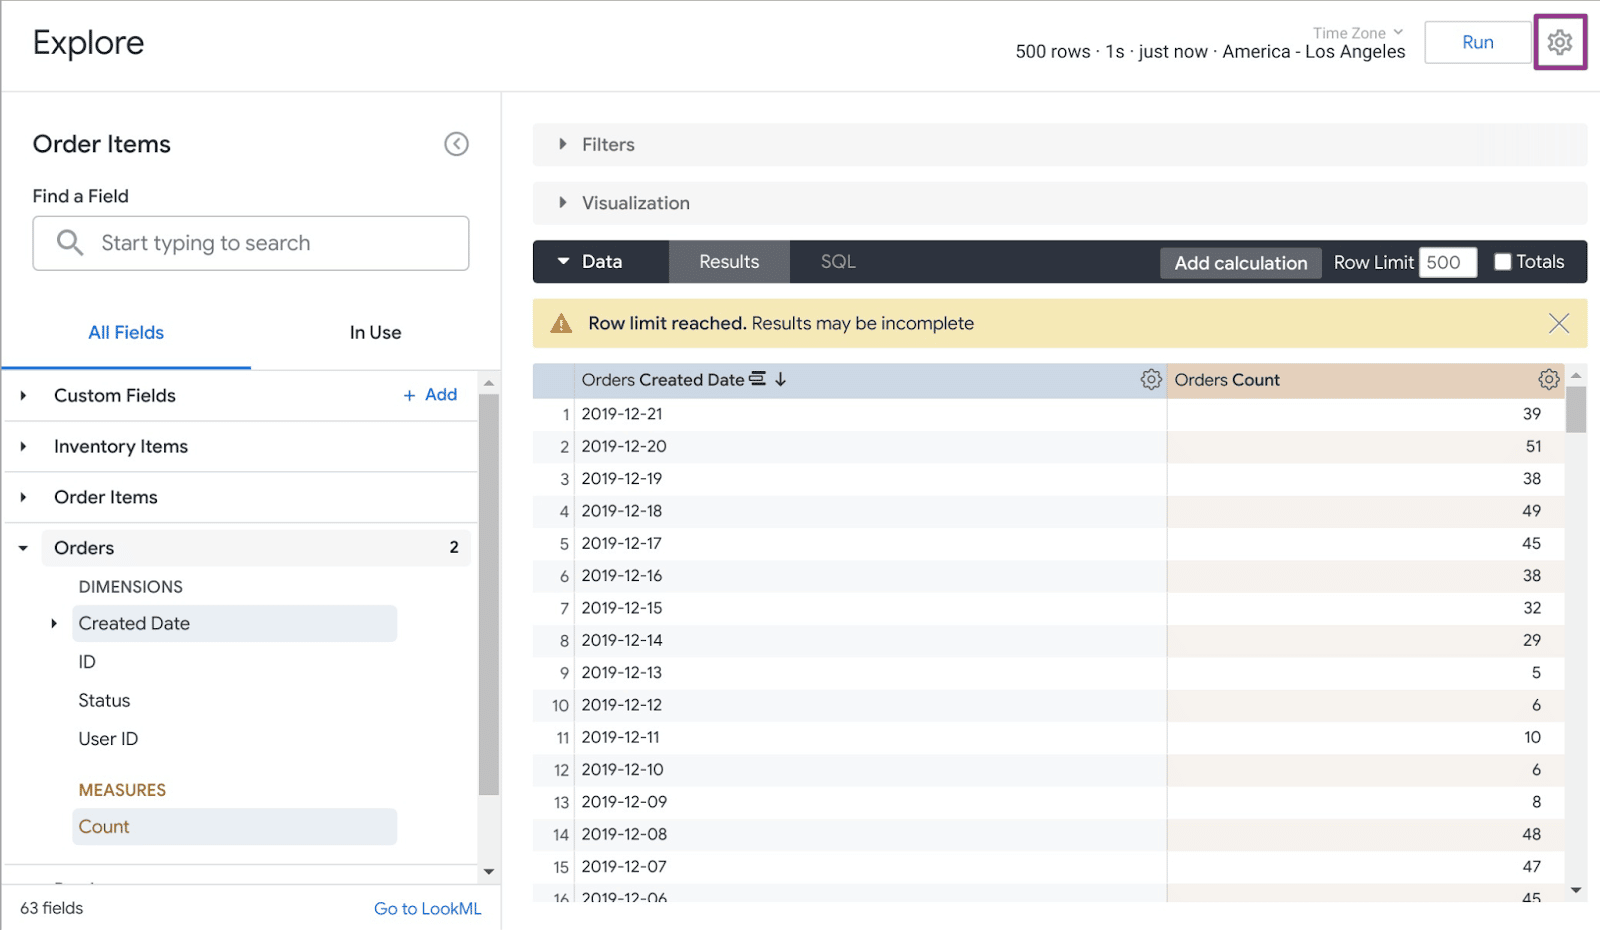
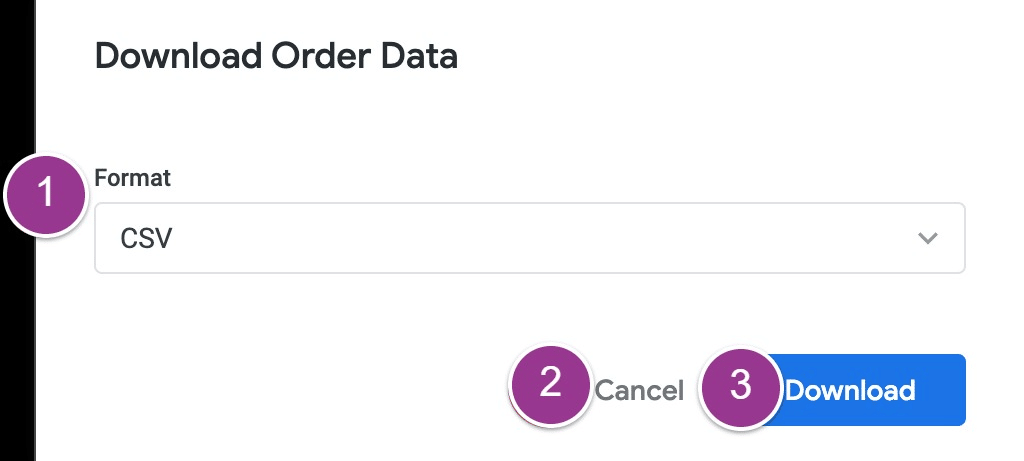
Click Download to open the Download window. Then name and format your download.
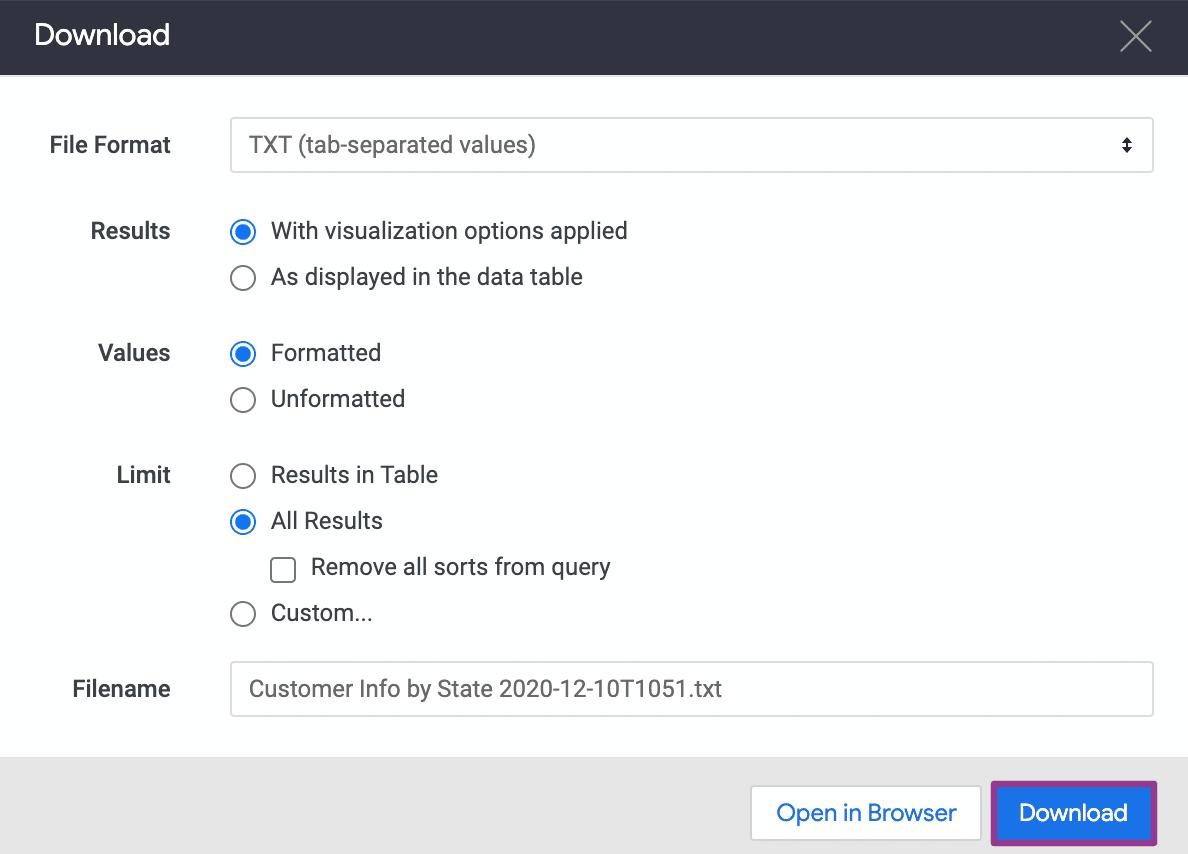
The following is a quick rundown of each field in the Download window:
- File Format. Looker lets you download data from Explores and Looks in TXT, JSON, Markdown, HTML, Excel spreadsheet, PNG (visualization image), and CSV file formats. SalesOps managers often download CSV files to copy-and-paste the data into their spreadsheets.
- Results. Select whether you want visualization or data table settings to apply to your data download.
- Limits. Choose how much data you want to download. You can specify a custom number of rows to extract. The row limit is 5,000 rows for users with download_with_limit permissions and 100,00 rows for other users.
- Filename. Use the pre-populated filename or create one for your download. Looker automatically appends the corresponding file extension.
After setting your preferences, click Open in Browser to view your download in-browser or Download to save the CSV file.
Extracting Data from a Merged Results Query
You can save your merged results queries to a dashboard and download it in PDF format or as a collection of CSV files.
However, you can’t download the data from only a single tile based on a merged results query. Instead, you’ll need to download the entire dashboard.
This option, in other words, doesn’t give you much flexibility to download only the Looker data you need.
Extracting Data from a Looker Dashboard
To download dashboards that use the new dashboard experience, click the three-dot menu and select Dashboard.
You will see the dialog box that allows you to choose PDF or CSV as your download file format.
Looker lets you download all your dashboard’s query tiles as a zipped collection of CSV files, excluding text tiles.
Here’s how you can do it:
- Choose CSV from the Format menu
- Select Download to start downloading your zipped CSV file
Options for formatting your download, such as choosing results and setting custom row limits, are unavailable with this method.
The row limits correlate to the row limits of the tiles. Looker generates the zipped files via UTF-8 encoding.
Garbled file names can occur because of Looker’s UTF-8 encoding. When this happens, Looker recommends using a file extractor that supports UTF-8.

Stop exporting data manually. Sync data from your business systems into Google Sheets or Excel with Coefficient and set it on a refresh schedule.

Extract Data from Dashboard Tiles
You can’t download data from dashboard tiles based on merged results queries.
However, data from merged results tiles are included when downloading a dashboard as a CSV collection or PDF file.
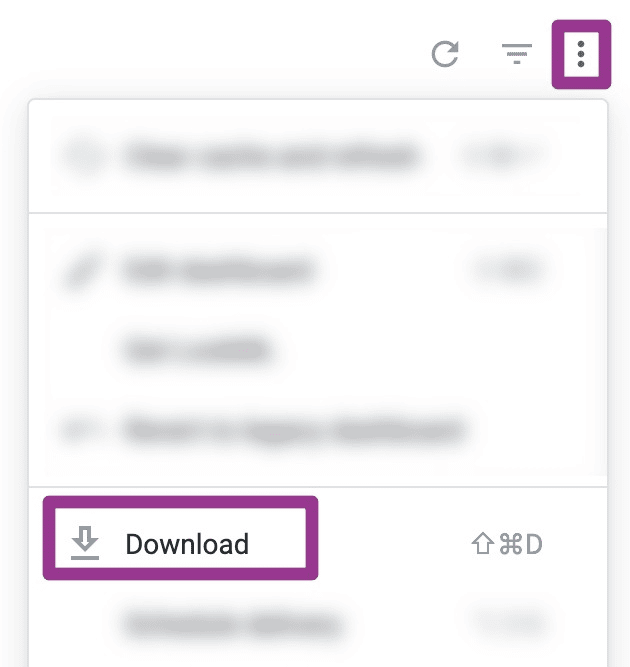
Click the three-dot menu icon on the tile to download data from a dashboard tile. Then select Download.

You’ll see a dialog box with options similar to a Look, an Explore, or a legacy dashboard tile download. You can expand the Advanced data options menu to view other download options.
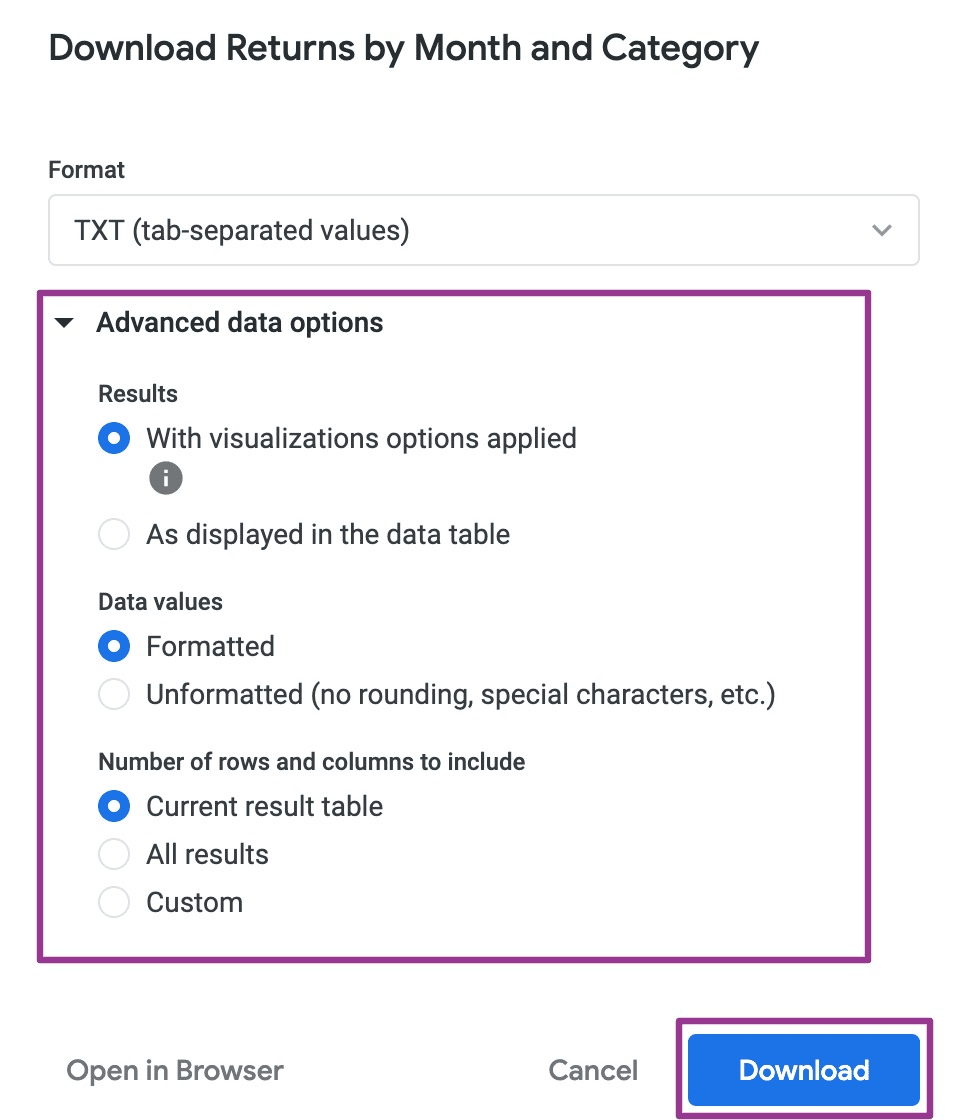
Select CSV as your download file format. Then click Download after setting your download preferences.
Extracting a Legacy Dashboard as CSV files
Click the gear icon at the upper right corner of the dashboard you want to download.
Select Download as CSVs to start downloading CSVs from a legacy dashboard.
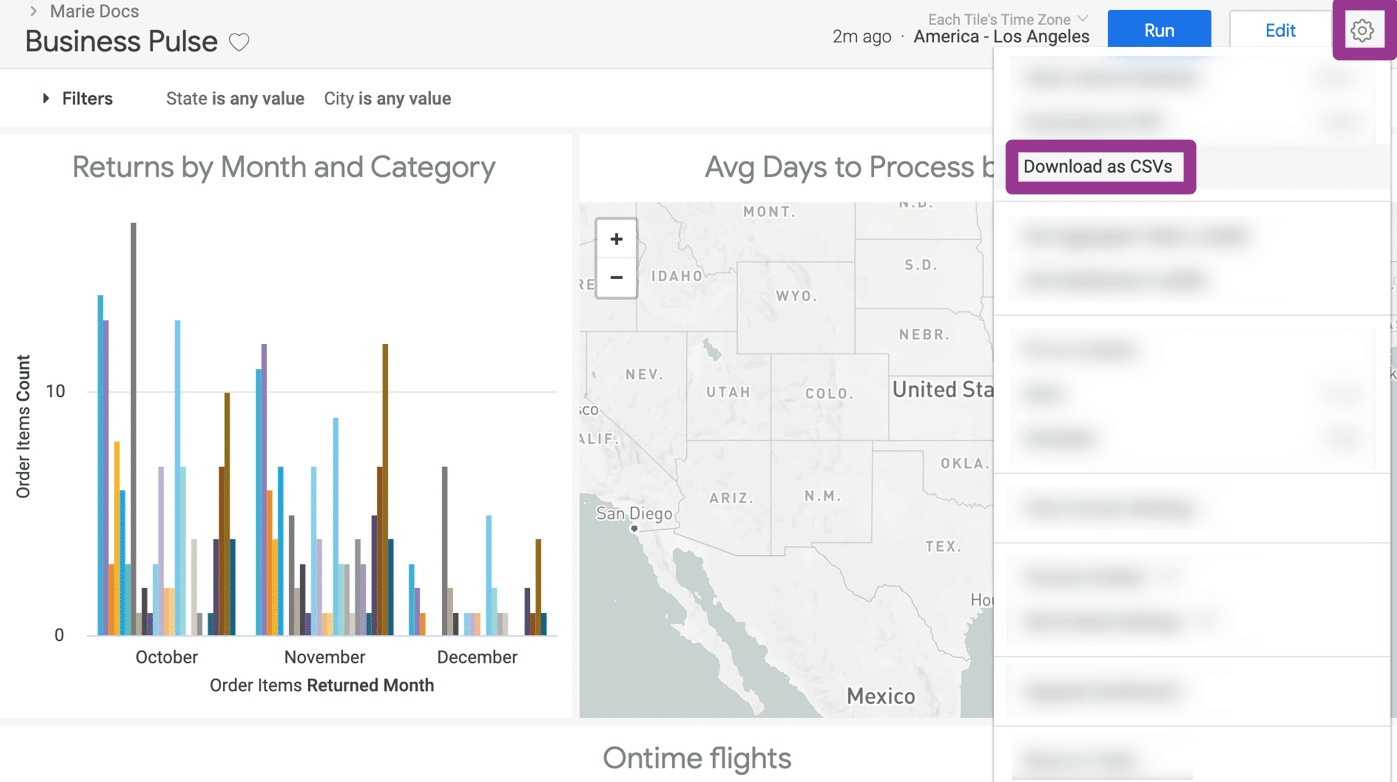
The zipped file contains a separate CSV file for each of your dashboard tiles, including the formatted data used to build the tile in the dashboard.

Exporting Looker data can involve multiple steps, depending on where you pull the data from and the specific data you want to extract.
Each method takes a bit of a learning curve. But the main downside, with all of these methods, is that you cannot automate them and seamlessly incorporate them in your workflows.
Method 3: Looker Action for Google Sheets
Looker offers a secure and OAuth-based action that allows you to send CSVs directly from Looker to Google Sheets.
The action is integrated with Looker via the Looker Action Hub. Here’s how to use it.
First, Looker admins must enable the Google Sheets action with these steps:
- Navigate to the Admin panel in Looker. Then go to the Actions page under Platform.
- Scroll through the list of Action Hub actions. Then click the Enable button for Google Sheets.
- Switch on Enabled for the Google Sheets action page and click Save.
Now Looker admins and users with send_to_integration permissions can send and schedule Explores or Looks in CSV format to Google Sheets.
Follow the steps below to send your Looker data to Google Sheets.
Create a delivery within the Looker asset by opening the legacy Scheduler.
Then click the gear menu icon on the upper right-hand of the screen. Select Send for one-time deliveries and Schedule for recurring deliveries.
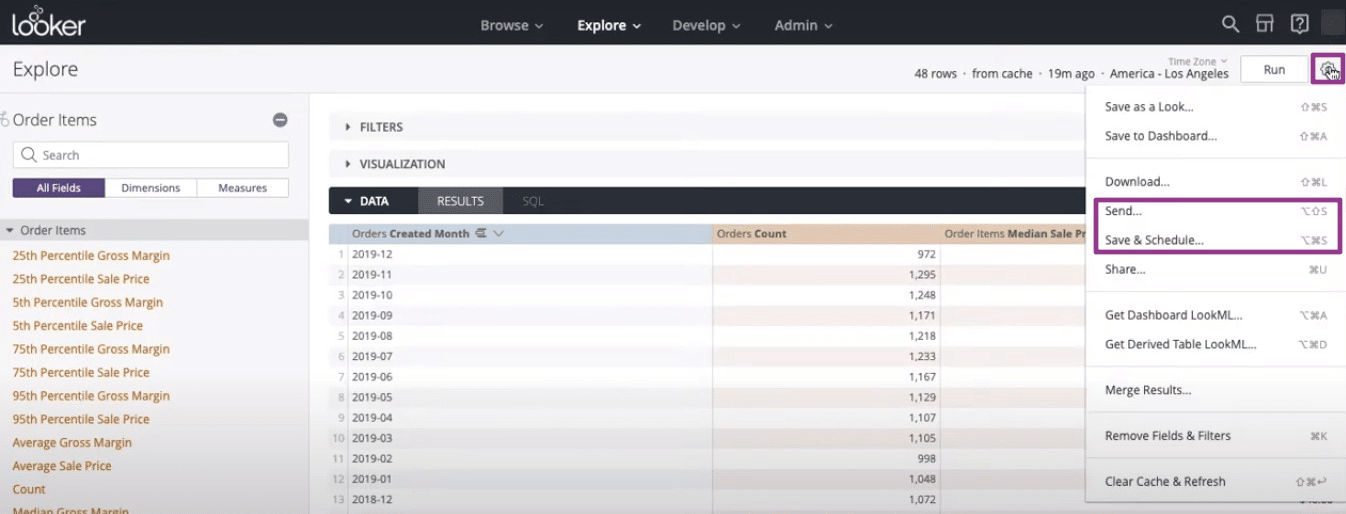
Select Google Sheets as the delivery destination under Where should this data go?
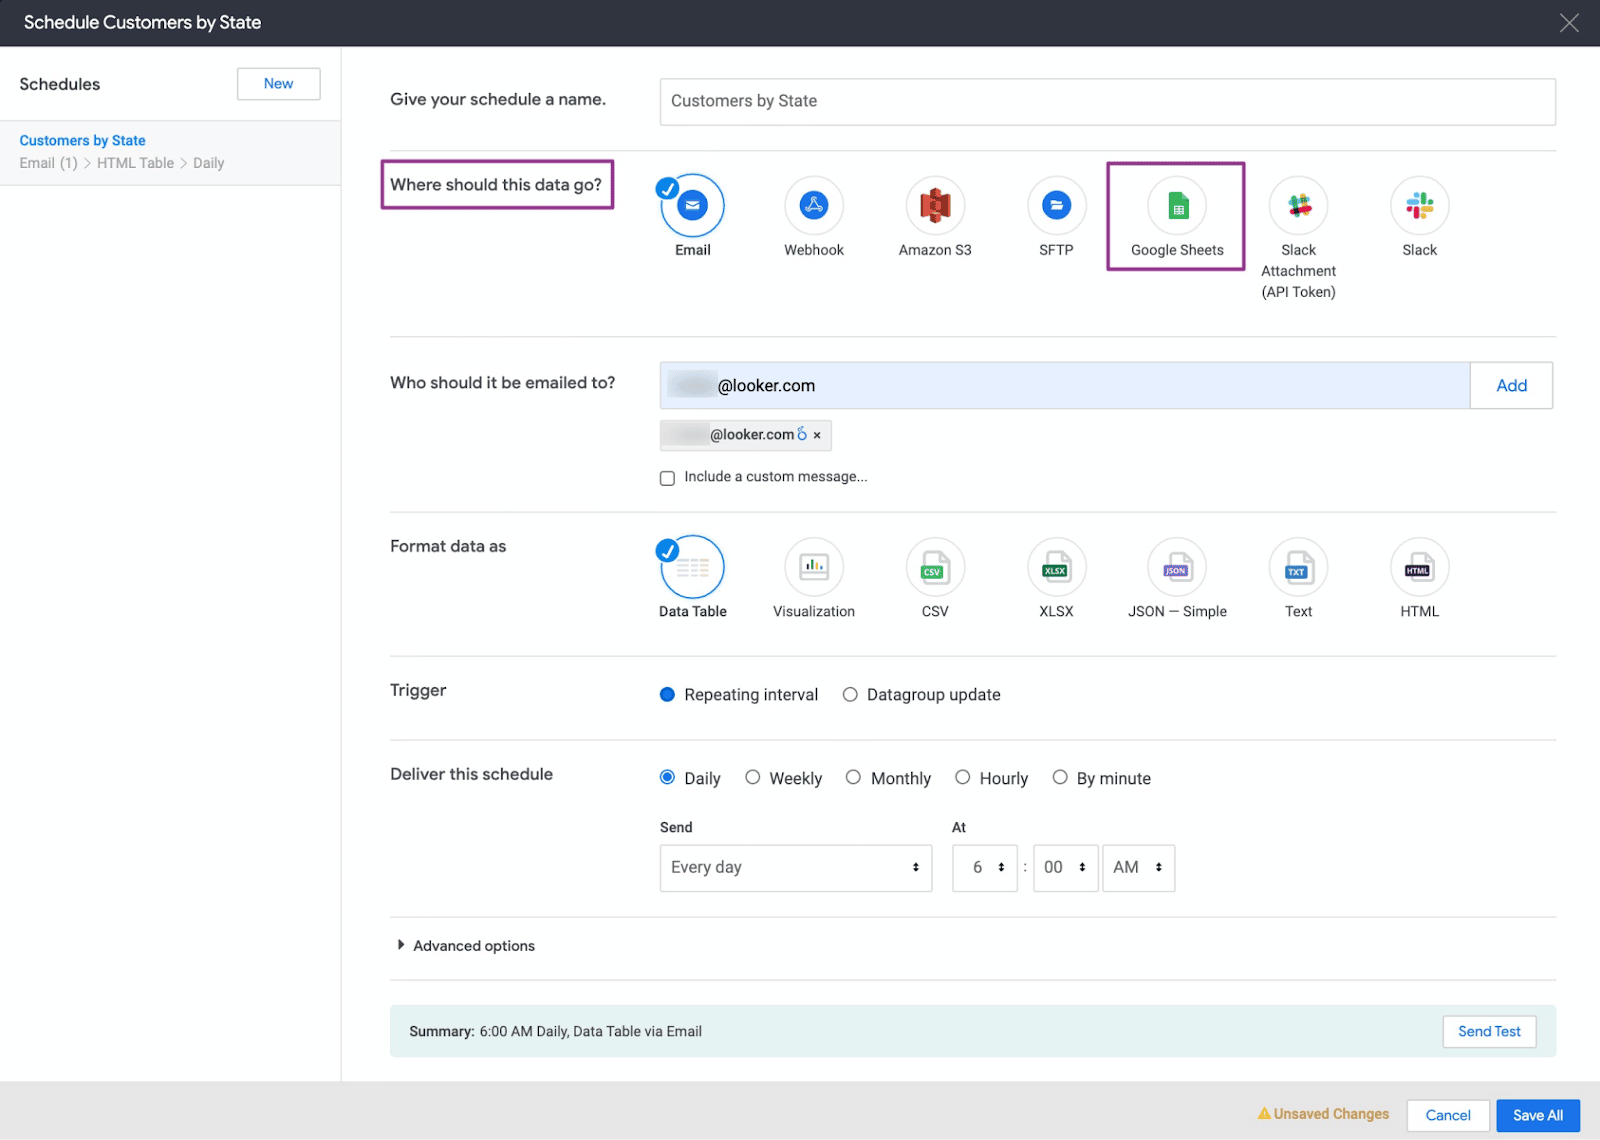
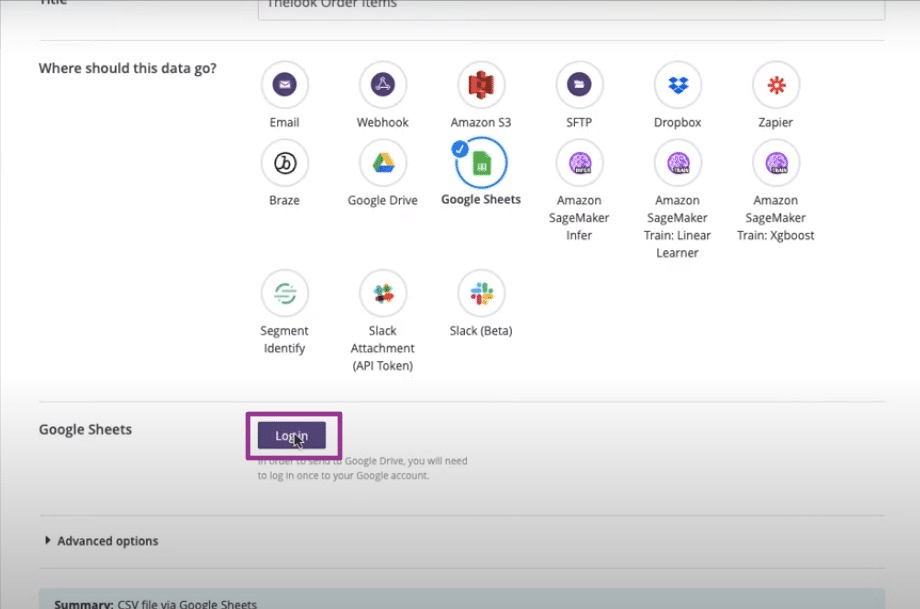
You’ll need to authenticate with your Google credentials.
Select your Google account and click Allow to connect your Google OAuth credentials to your Looker account.
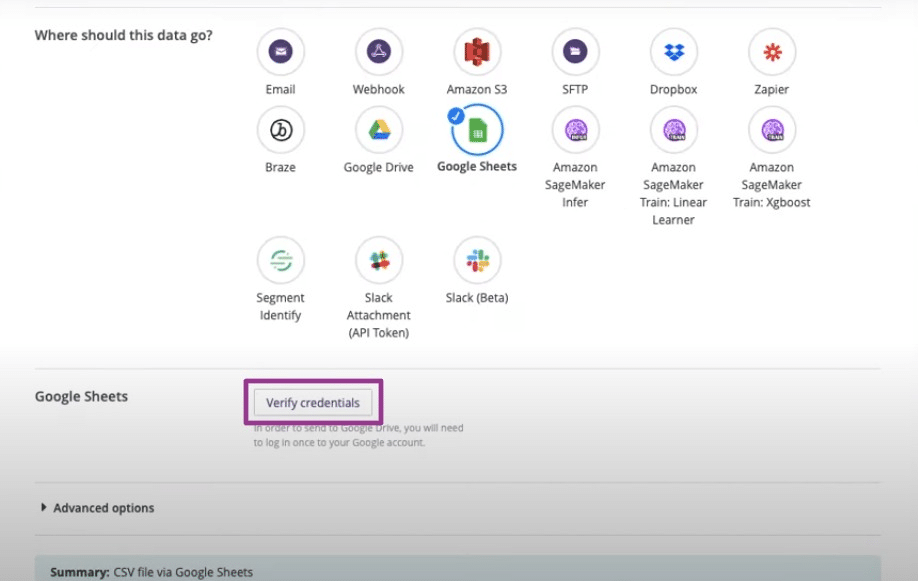
Note: You’re only allowed to connect one set of Google OAuth credentials.
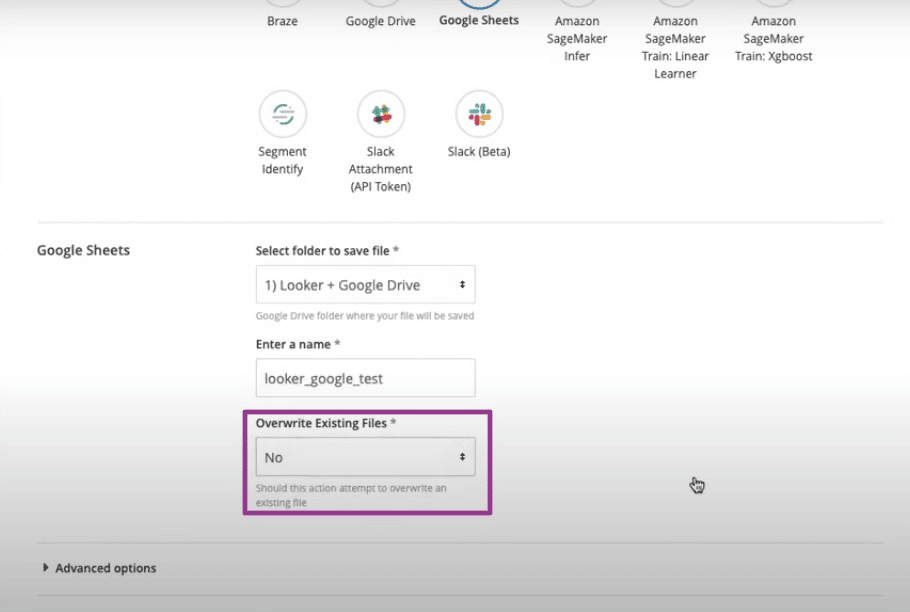
Click Verify credentials. Select the Google Drive and folder where you want to save your CSV file.
Specify your Google Sheet file’s name in the Enter a name field.

Click Yes or No in the Overwrite Existing Files dropdown.
Choosing Yes will load your data within your existing Google sheet’s first tab. Selecting No will generate a new sheet for each data export.
You can apply Advanced options for CSVs, including customizing the format and limit.
Click Schedule or Send when you’re done. Then refresh your Google Drive folder. Click to open the file you specified. You should see your Looker data in Google Sheets.
While this Looker data export method offers basic automation, its limitations can cause your data deliveries to fail routinely.
Export Looker Data Painlessly with Coefficient
Most SalesOps managers export data from Looker by manually downloading CSV files and copy-and-pasting the data into spreadsheets. But this inefficient process is too time-consuming for fast-moving sales teams.
That’s where Coefficient comes in.
Coefficient enables SalesOps managers to import Looker data into Google Sheets in a single click. The add-on makes your Looker data export process quick and easy with a one-click data connector.
Try Coefficient for free now to experience the convenience of instant Looker data in your Google spreadsheet.


